Ever looked at your favorite chair and thought it could use a little refresh? Maybe it’s seen better days or just doesn’t fit your style anymore. Sewing a slipcover can be a fun and rewarding project that not only revives your chair but also adds a personal touch to your space.
Key Takeaways
- Purpose and Benefits: Slipcovers refresh chairs, protecting them from stains and wear while allowing easy style changes, making them both cost-effective and customizable.
- Types of Slipcovers: Choose from fitted, loose, semi-fitted, two-piece, or seasonal slipcovers based on the desired look and characteristics of the chair.
- Essential Materials: Gather durable fabric, measuring tools, fabric scissors, a sewing machine, pins, thread, and an iron to prepare for the sewing process.
- Accurate Measurements: Measure the chair thoroughly, including seat width, depth, height, and arm dimensions, ensuring precise fabric requirements and a perfect fit.
- Cutting and Sewing Techniques: Use patterns for accuracy, cutting fabric with sharp scissors, and employ basic sewing stitches like running, backstitch, and slip stitch for durability.
- Fitting and Securing: Drape the slipcover over the chair, adjust for a snug fit, and secure it with non-slip underlay, stitches, or ties to prevent shifting during use.
Understanding Slipcovers
Sewing a slipcover is a great way to breathe new life into an old chair. Understanding the purpose and variations of slipcovers can help you choose the best option for your project.
Benefits of Slipcovers
- Protection: Slipcovers shield your chair from stains, wear, and tear.
- Versatility: Change the look of your space quickly by swapping out slipcovers for different seasons or occasions.
- Cost-Effective: Revitalize your chair without the expense of buying new furniture.
- Customization: Choose fabrics, colors, and patterns that reflect your style and personality.
- Ease of Cleaning: Most slipcovers can be removed and washed, making maintenance a breeze.
- Fitted Slipcovers: Custom-made for a snug fit, offering a tailored look. Best for chairs with specific shapes.
- Loose Slipcovers: These provide a casual appearance, draping over furniture easily. They’re easier to make and adjust.
- Semi-Fitted Slipcovers: Combine elements of both fitted and loose styles, providing some structure while remaining comfortable.
- Two-Piece Slipcovers: Include separate covers for the seat and back, allowing for easy adjustments and a versatile look.
- Seasonal Slipcovers: Designed for specific times of the year, like holidays or summer, offering a fun way to celebrate each season.
Materials Needed
To sew a slipcover for your chair, gather the following essential materials. Each item contributes to creating a well-fitted and stylish cover.
Recommended Products

【Heavy Duty Sewing Kit】- This comprehensive sewing kit includes 32 leather sewing needles, 10 leather sewing threads (30 m/color), a needle bottle, an awl, a tape measure, scissors, and a sewing thimble.

Perfect Heavy Duty Sewing Kit: This fully-packed sewing kit contains all the necessary tools to sew for most of your sewing needs. You will get: 25* Hand Sewing Needles, 12* Upholstery Thread, 1* Inch Ruler, 1* Scissors, 1* Thimble, 3* Awl Tool, 2* Seam Ripper, 1* Threader.

Complete Upholstery Repair Kit: The sewing kit includes 8 colors of sewing thread, 32 pcs needles, 2 pcs awls, 2 pcs seam rippers, thimble, ruler, needle threader, needle bottle, scissors and storage bag, the leather repair kit contains all the basic sewing necessities, you can use them to sew easily
Fabric Selection
Choose a durable fabric suitable for upholstery. Consider cotton, linen, or polyester blends for their longevity and ease of cleaning. Measure your chair to determine how much fabric you need. A typical chair might require 5 to 7 yards of fabric, but this can vary. For those desiring unique patterns, check for fabric with a repeat pattern to ensure alignment.
Tools Required
Gather the following tools for a smooth sewing process:
- Measuring Tape: Measure your chair’s dimensions accurately.
- Fabric Scissors: Cut fabric without fraying the edges.
- Sewing Machine: A reliable machine makes stitching easier and faster.
- Pins: Secure fabric pieces before sewing for better alignment.
- Thread: Use a color that complements your chosen fabric.
- Iron: Press fabric before sewing to eliminate wrinkles and ensure a neat look.
Having these materials and tools on hand sets you up for a successful slipcover project.
Measuring the Chair
Measuring your chair accurately is essential for creating a slipcover that fits well and looks great. Follow these steps to ensure precise measurements.
Recommended Products

Measuring range: 0 to 60 inches and 0 to 150 centimeters. There is a centimeter scale on the back, which is accurately printed in inches and centimeters. Both sides can be measured according to your requirements. You can put one in your pocket or backpack without taking up too much space

2 Pack Soft Fashion Measuring Tape Set. Double sided, 60 inch / 150 cm, portable,durable tape measure. Small and light pocket size measuring tape.
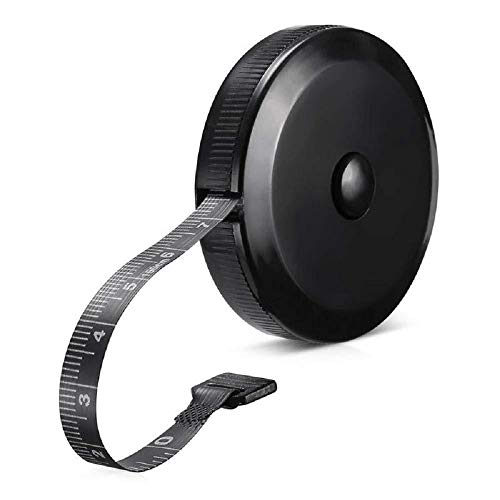
Package Include:1 Pack Soft Retractable Black Dual Sided Tape Measure Body Measuring Tape Set, Dual sided, 150cm/60inch in length, large and clear markings in both Inches and CM for easier reading, Retractable black measuring tape size 2 x 2 x 0.5 inches, weight 0.02 KG/0.7 OZ
Measuring Techniques
- Use a Measuring Tape: A flexible measuring tape makes it easier to navigate curves and corners.
- Record Measurements: Keep a notebook handy to jot down each measurement as you go. This avoids confusion later.
- Double-Check: Measure each area twice to confirm accuracy. A wrong measurement can lead to fabric waste.
- Seat Width: Measure across the widest part of the seat.
- Seat Depth: Measure from the front of the seat to the back.
- Back Height: Measure from the seat to the top of the backrest.
- Arm Height: If your chair has arms, measure from the seat to the top of the arm.
- Arm Width: Measure the width of each arm separately, if applicable.
- Overall Height: Measure from the floor to the highest point of the chair.
Taking these measurements ensures you gather all the necessary dimensions for the fabric. Using them, you can accurately calculate the amount of material required for your slipcover project. If your chair has any unique features, like cushions or unusual shapes, measure those areas as well to ensure a perfect fit.
Cutting the Fabric
Cutting fabric accurately is a key step in creating a slipcover that fits well. You’ll need to pay attention to patterns and templates while employing effective cutting techniques.
Patterns and Templates
Using patterns or templates simplifies the cutting process. You can make your own pattern by tracing the chair’s dimensions onto large paper. Start by marking all critical measurements, including width, depth, and height.
Choose a fabric that complements your design. Lay the chair’s pattern pieces on the fabric, ensuring you follow the grainline. This helps maintain the fabric’s strength. If working with multiple pieces, double-check the layout to maximize fabric usage. You might also consider buying pre-made slipcover patterns available at fabric stores.
Cutting Tips and Techniques
Cutting fabric requires precision. Start with these techniques:
- Use Sharp Scissors: Always employ fabric scissors for clean edges. Dull scissors can fray the fabric.
- Pin the Pattern: Secure your pattern to the fabric with pins. This keeps everything in place while you cut.
- Cut Along the Edge: Follow the pattern’s edge closely. This ensures each piece aligns perfectly when you sew them together.
- Cut One Layer at a Time: For bulky fabrics, cut one layer at a time. This minimizes errors and helps maintain accuracy.
- Leave Seam Allowance: Add an extra inch around each piece for seam allowance. This extra fabric ensures you can adjust the seams if necessary.
By following these steps, you’ll prepare your fabric correctly, setting a solid foundation for sewing your slipcover.
Sewing the Slipcover
Sewing a slipcover requires attention to detail and a few essential sewing techniques. Begin with mastering basic sewing stitches and assembling the slipcover for a polished finish.
Recommended Products

Sewing pattern packet comes with sewing templates, fabric recommendations, pattern pieces, sizing guides, and instructions for (6) chair slipcovers
Designed with targeted lumbar support for better sewing posture

Durability for Long Lasting Use: this set includes a grayish white woven patio chair replacement fabric, enough to make 2 chairs to help you upgrade your outdoor space; Made from 100% vinyl coated polyester, it is fade resistant, waterproof, and highly breathable, ensuring your furniture stays looking new for years to come
Basic Sewing Stitches
Basic hand stitches include the running stitch, backstitch, and slip stitch.
- Running Stitch: Ideal for joining fabric pieces together. It involves inserting the needle through the fabric in a straight line.
- Backstitch: Provides strong seams. You create this by sewing backward and then forward, building a solid foundation.
- Slip Stitch: Perfect for hemmed edges and making seams invisible. It’s easy to learn and gives a neat finish.
Using these stitches effectively can enhance the durability and appearance of your slipcover. Practice on scrap fabric if you’re unfamiliar with these stitches.
Assembling the Slipcover
Assembling the slipcover starts with laying out the cut fabric pieces on a flat surface. Follow these steps for a smooth process:
- Pin the Pieces Together: Align the fabric sections according to the shape of the chair. Use pins to secure them in place.
- Sew the Seams: Start sewing the pinned edges using a sewing machine. Use a straight stitch for long seams and a zigzag stitch to finish raw edges.
- Press the Seams: Use an iron to press open the seams. This gives your slipcover a professional look.
- Fit the Slipcover: Drape the assembled slipcover over the chair to ensure a good fit. Make adjustments as needed, trimming excess fabric if necessary.
- Finish Edges: Hem the bottom edges or add any desired embellishments, like piping or buttons, to complete your slipcover.
By following these steps, you’ll create a slipcover that not only fits well but also enhances the style of your chair.
Fitting the Slipcover
Fitting the slipcover accurately ensures it looks polished and serves its purpose effectively. This process includes adjusting for a perfect fit and securing the slipcover in place.
Adjusting for a Perfect Fit
To achieve a snug fit, start by draping the slipcover over your chair. Tuck and smooth the fabric around the chair’s contours, ensuring it sits evenly on all sides. Pay close attention to corners and curves, using your hands to press the fabric into place.
Next, use fabric clips or safety pins to hold the slipcover temporarily while you assess the fit. If any areas remain loose, trim excess fabric carefully. Remember, it’s easier to remove more fabric than to add it back. After adjustments, try the cover on once more to ensure it fits comfortably and securely.
Securing the Slipcover
Securing the slipcover prevents it from shifting during use. Use several techniques for this step. First, consider adding a non-slip underlay. Cut the underlay to fit between the slipcover and chair; this creates grip and stability.
Second, stitch the slipcover in place at strategic points, such as along the back or underneath the seat cushion. These stitches keep the cover in position while maintaining a clean look. Use a slip stitch or basting stitch for a discreet finish.
Lastly, consider adding ties or Velcro strips at the corners or sides to anchor the slipcover. This method provides extra security and allows for easy removal during cleaning.
Conclusion
Sewing a slipcover for your chair can truly transform its look and feel. You’ll not only protect your furniture but also add a personal touch that reflects your style. Remember to take your time with measurements and sewing techniques to ensure a perfect fit.
Once you’ve completed your project you’ll be amazed at how a simple slipcover can breathe new life into your favorite chair. Plus you’ll have the satisfaction of knowing you did it yourself. So gather your materials and get started on this fun and rewarding journey. Happy sewing!
Frequently Asked Questions
What is a slipcover, and why should I make one?
A slipcover is a removable protective cover for furniture, like chairs. Making a slipcover allows you to refresh your favorite chair without buying new furniture. It protects against stains, offers versatility, and can be customized to match your decor.
What materials do I need to sew a slipcover?
To sew a slipcover, you’ll need durable fabric (cotton, linen, polyester blends), measuring tape, fabric scissors, a sewing machine, pins, thread, and an iron. A typical project requires about 5 to 7 yards of fabric.
How do I measure my chair for a slipcover?
To measure your chair, focus on key dimensions: the seat width, seat depth, height of the back, and armrest measurements if applicable. Accurate measurements are crucial for a perfect fit, ensuring the slipcover looks polished.
What types of slipcovers are available?
Slipcovers come in several types: fitted, loose, semi-fitted, two-piece, and seasonal options. Each type caters to different styles and practical needs, allowing you to choose what best fits your chair and decor.
What sewing techniques should I know for making a slipcover?
Basic sewing techniques useful for making a slipcover include the running stitch, backstitch, and slip stitch. These stitches enhance the durability and appearance of your slipcover, ensuring it lasts and looks finished.
How do I fit the slipcover properly on my chair?
To fit the slipcover accurately, drape it over the chair, tucking and smoothing the fabric. Use fabric clips or safety pins to secure it temporarily, and trim any excess material for a snug fit before trying it on again.
How can I secure the slipcover to prevent it from shifting?
To secure a slipcover, you can add a non-slip underlay, stitch it in place at key points, or use ties or Velcro strips for added security. These methods help keep your slipcover in place during use.