

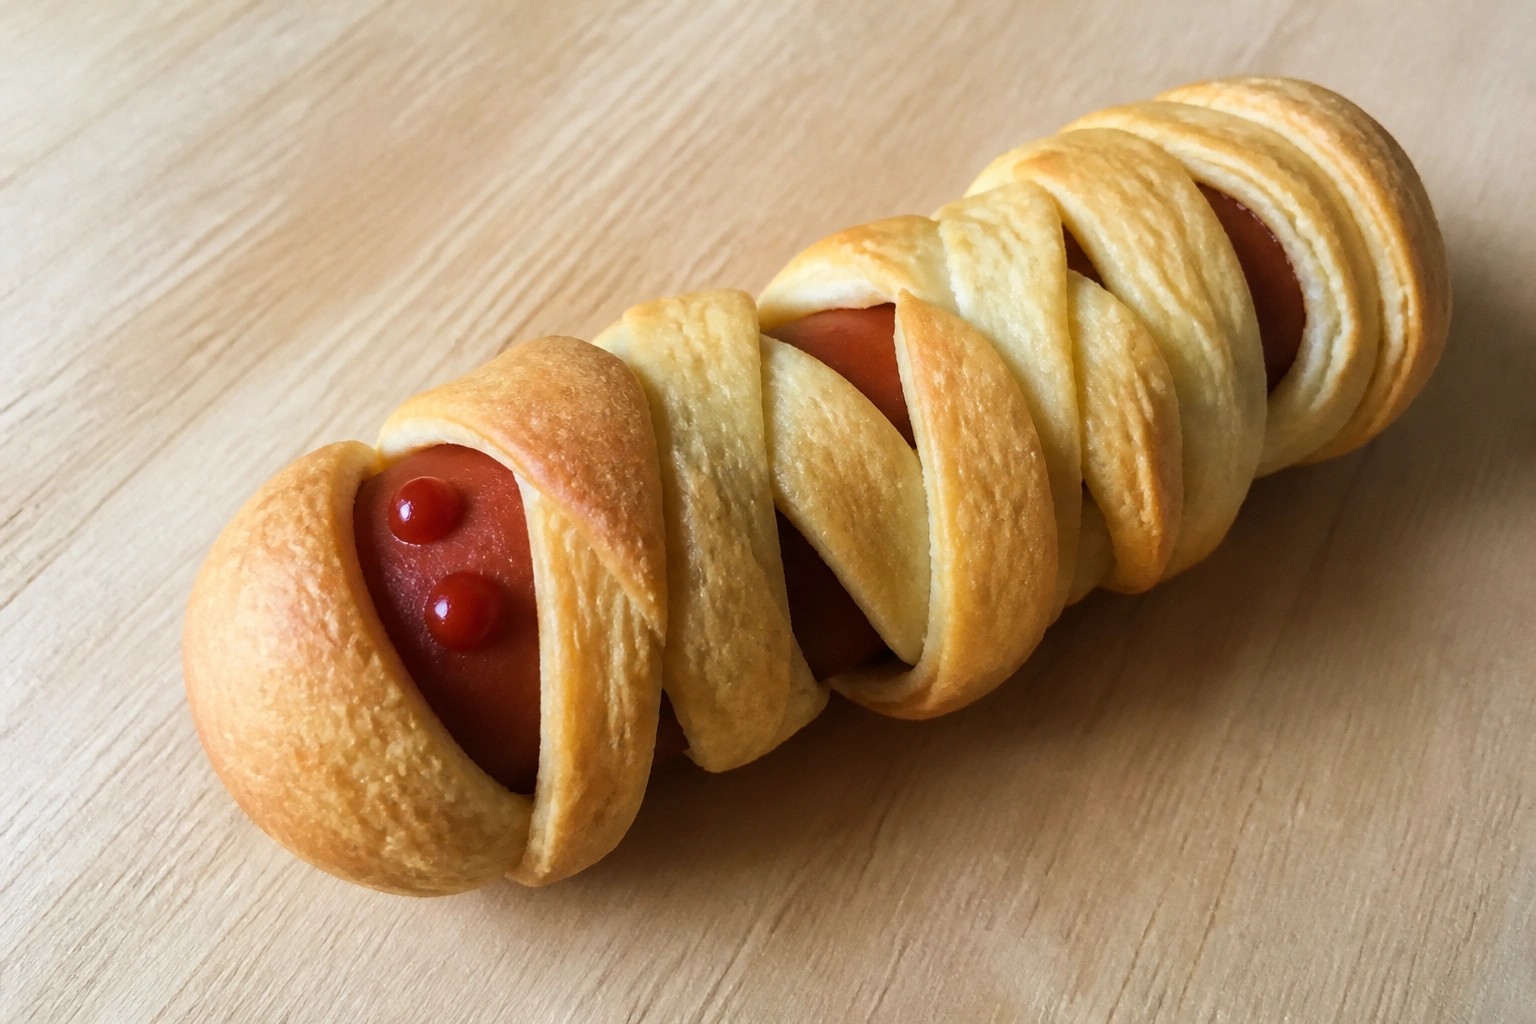
Halloween is a busy time and snacks need to be quick to put together. I gathered these recipes because they use basic ingredients and do not take long to make. Kids can help with the simple steps in most of them. You will find 15 ideas that work for school parties or an evening at home. Pick the ones that fit what you already have in the pantry.
Helpful Tips Before You Start
These steps keep the process simple while letting kids join in the fun.
Get Kids Involved Early
Let them pick toppings or press cookie cutters into dough. Small tasks build excitement before the snacks reach the table.
Check for Allergies First
Ask parents about nut or dairy issues ahead of time. Prepare one or two plain versions so every child can grab something.
Cut Everything Bite Sized
Shape sandwiches, fruit, and cheese into small pieces kids can pop in one bite. This matches the quick gobble up style of the snacks.
Set Up a Decorating Station
Place sprinkles, icing, and candy in small bowls within reach. Kids stay focused when supplies sit right in front of them.
Ghostly White Chocolate Strawberries
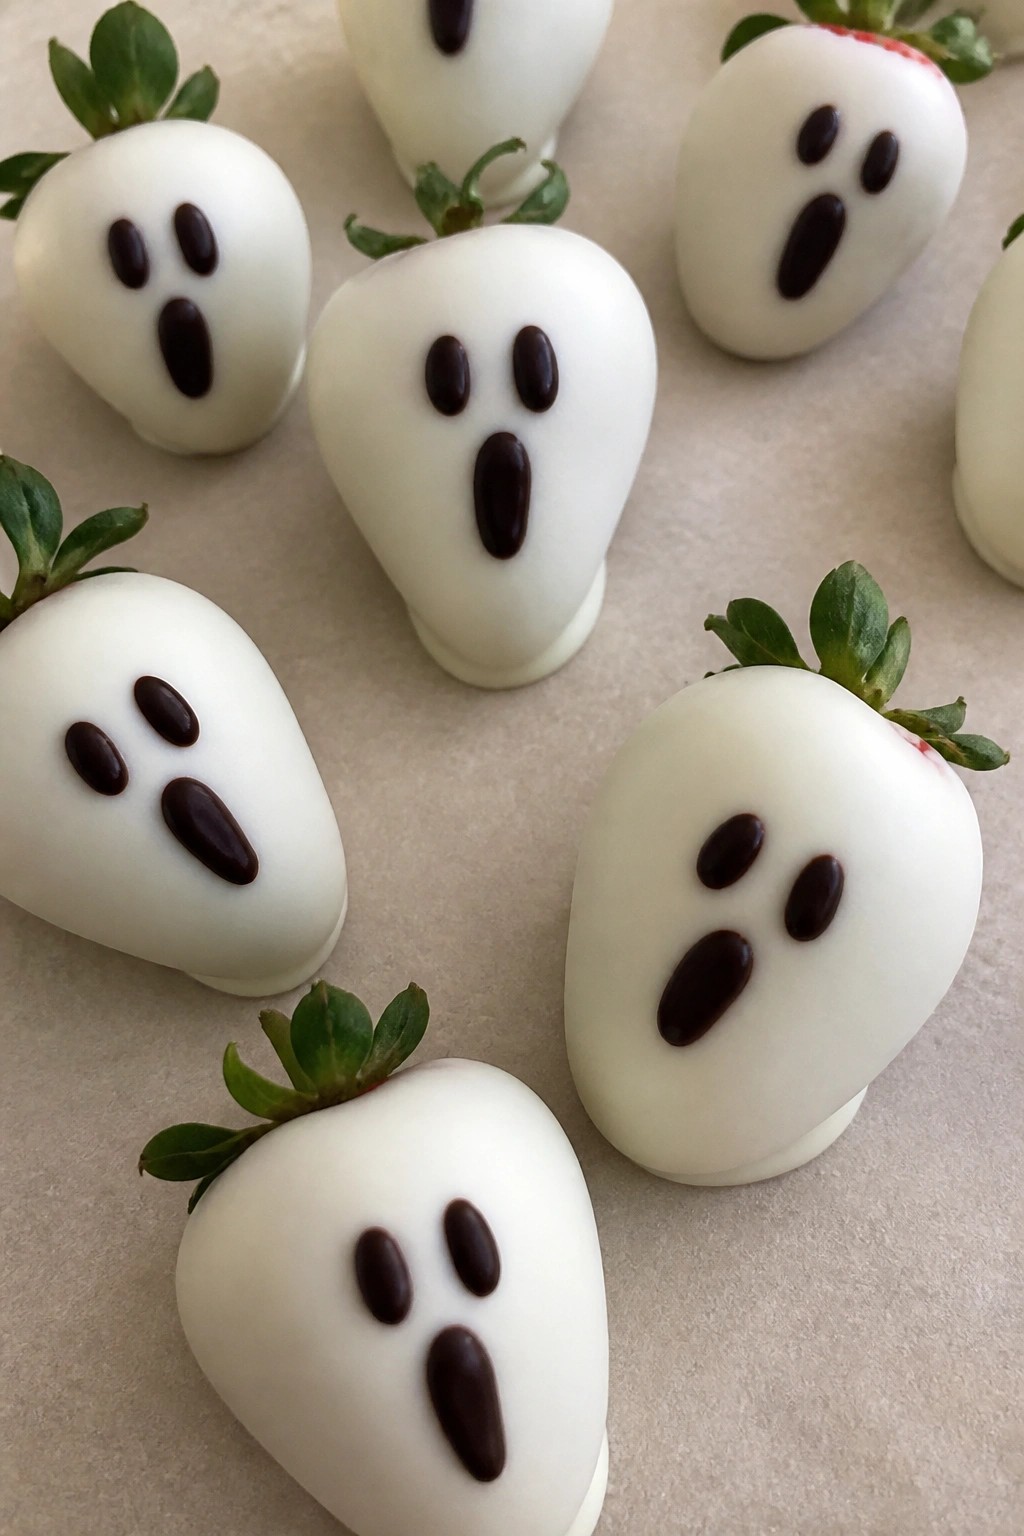
These strawberries get a simple white chocolate coating and quick faces drawn on with dark chocolate. Kids enjoy the sweet and juicy bite, and the design makes them easy to serve at a Halloween party or after-school snack.
The finished treat has a smooth white shell that sets firm around the fresh berry, with just enough dark chocolate detail to look like little ghosts. The flavor stays light and fruity without extra mix-ins.
Serves 4 people.
Ingredients
- 12 large strawberries
- 8 ounces white chocolate chips
- 2 ounces dark chocolate chips
- 1 tablespoon coconut oil
Instructions
- Rinse the strawberries and pat them completely dry with a paper towel. Set them on a plate or tray lined with parchment paper.
- Place the white chocolate chips and coconut oil in a microwave-safe bowl. Heat in 20-second bursts, stirring after each burst, until the mixture is smooth and fully melted.
- Hold each strawberry by the green top and dip it into the melted white chocolate until it is mostly covered, leaving a small section near the top uncovered. Let excess chocolate drip off, then place the strawberry back on the parchment paper.
- Repeat with all strawberries. Place the tray in the refrigerator for 10 minutes so the white chocolate can set.
- While the strawberries chill, melt the dark chocolate chips in a separate bowl using the same microwave method. Spoon the melted dark chocolate into a small zip-top bag and snip off one tiny corner.
- Remove the tray from the refrigerator. Pipe two small dots for eyes and a simple curved line for a mouth on each white-coated strawberry. Return the tray to the refrigerator for another 5 minutes to set the faces.
Extra Tips
Work with dry strawberries so the white chocolate sticks evenly. If the melted white chocolate thickens while you dip, stir in a tiny extra drop of coconut oil to loosen it. Store finished strawberries in a single layer in the refrigerator and serve them the same day for the best texture. Course: Snack Cuisine: American Equipment: Microwave-safe bowls, Parchment paper, Zip-top bag
Spooky Spiderweb Popcorn Balls
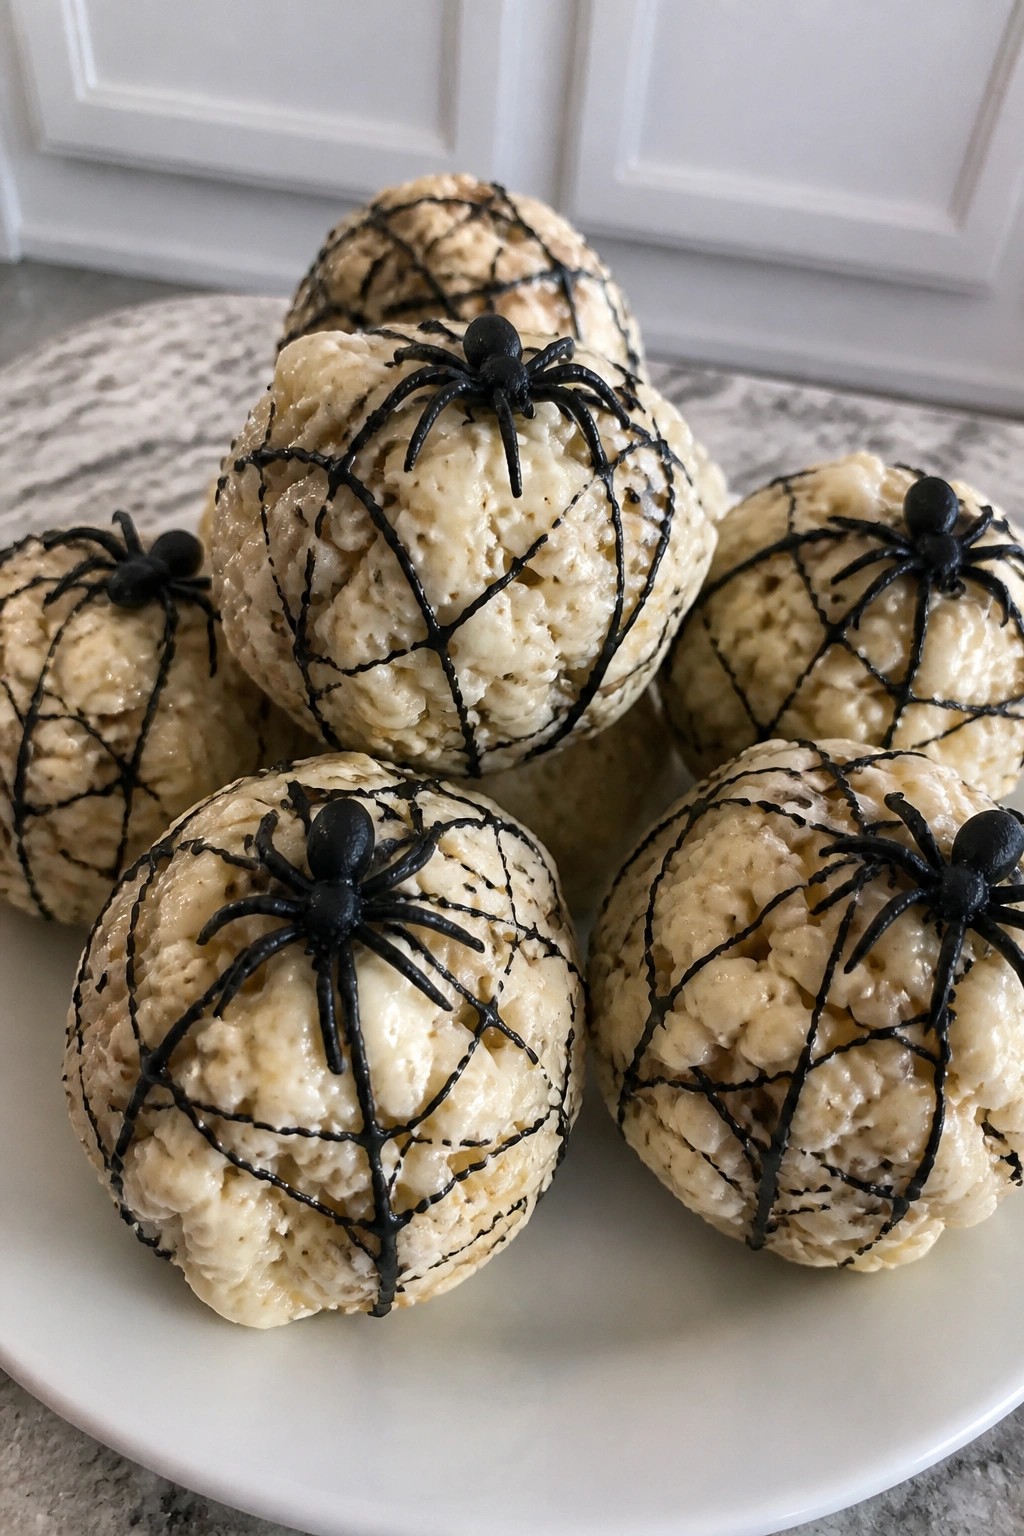
These popcorn balls give kids a crunchy and chewy snack that looks like it took more effort than it does. They fit well at Halloween parties or as a weekend project when you want something hands-on but simple.
The base tastes sweet and buttery with a light texture from the popcorn. The spiderweb comes from quick chocolate drizzles that set on the surface.
Serves 4 people.
Ingredients
- 8 cups popped popcorn
- 3 tablespoons unsalted butter
- 3 1/2 cups mini marshmallows
- 1 teaspoon vanilla extract
- 3/4 cup white chocolate chips
- 1/4 teaspoon black gel food coloring
- 4 small plastic spiders (for garnish)
Instructions
- Place the popped popcorn in a large bowl and set it aside.
- Melt the butter in a saucepan over medium heat. Add the mini marshmallows and stir until fully melted and smooth.
- Remove the pan from heat and stir in the vanilla extract.
- Pour the marshmallow mixture over the popcorn and stir until the popcorn is evenly coated.
- Lightly grease your hands and shape the mixture into 8 balls. Place them on a parchment-lined baking sheet to cool.
- Melt the white chocolate chips in a microwave-safe bowl in 20-second bursts, stirring between each.
- Transfer half the melted white chocolate to a separate bowl and stir in the black gel food coloring until uniform.
- Spoon the white chocolate into a small zip-top bag, snip a tiny corner, and drizzle thin circles and lines over each popcorn ball to form webs. Repeat with the black chocolate.
- Press one plastic spider onto each ball while the chocolate is still soft. Let the chocolate set before serving.
Extra Tips
Work quickly when shaping the balls so the mixture does not harden in the bowl. If the white chocolate thickens while piping, warm it for five seconds to loosen it again. The plastic spiders can be swapped for edible candy spiders if preferred, but avoid anything heavy that might sink into the chocolate. Course: Snack Cuisine: American Equipment: Large bowl, Saucepan, Baking sheet, Microwave-safe bowl, Zip-top bag
Mummy Mini Hot Dog Rolls
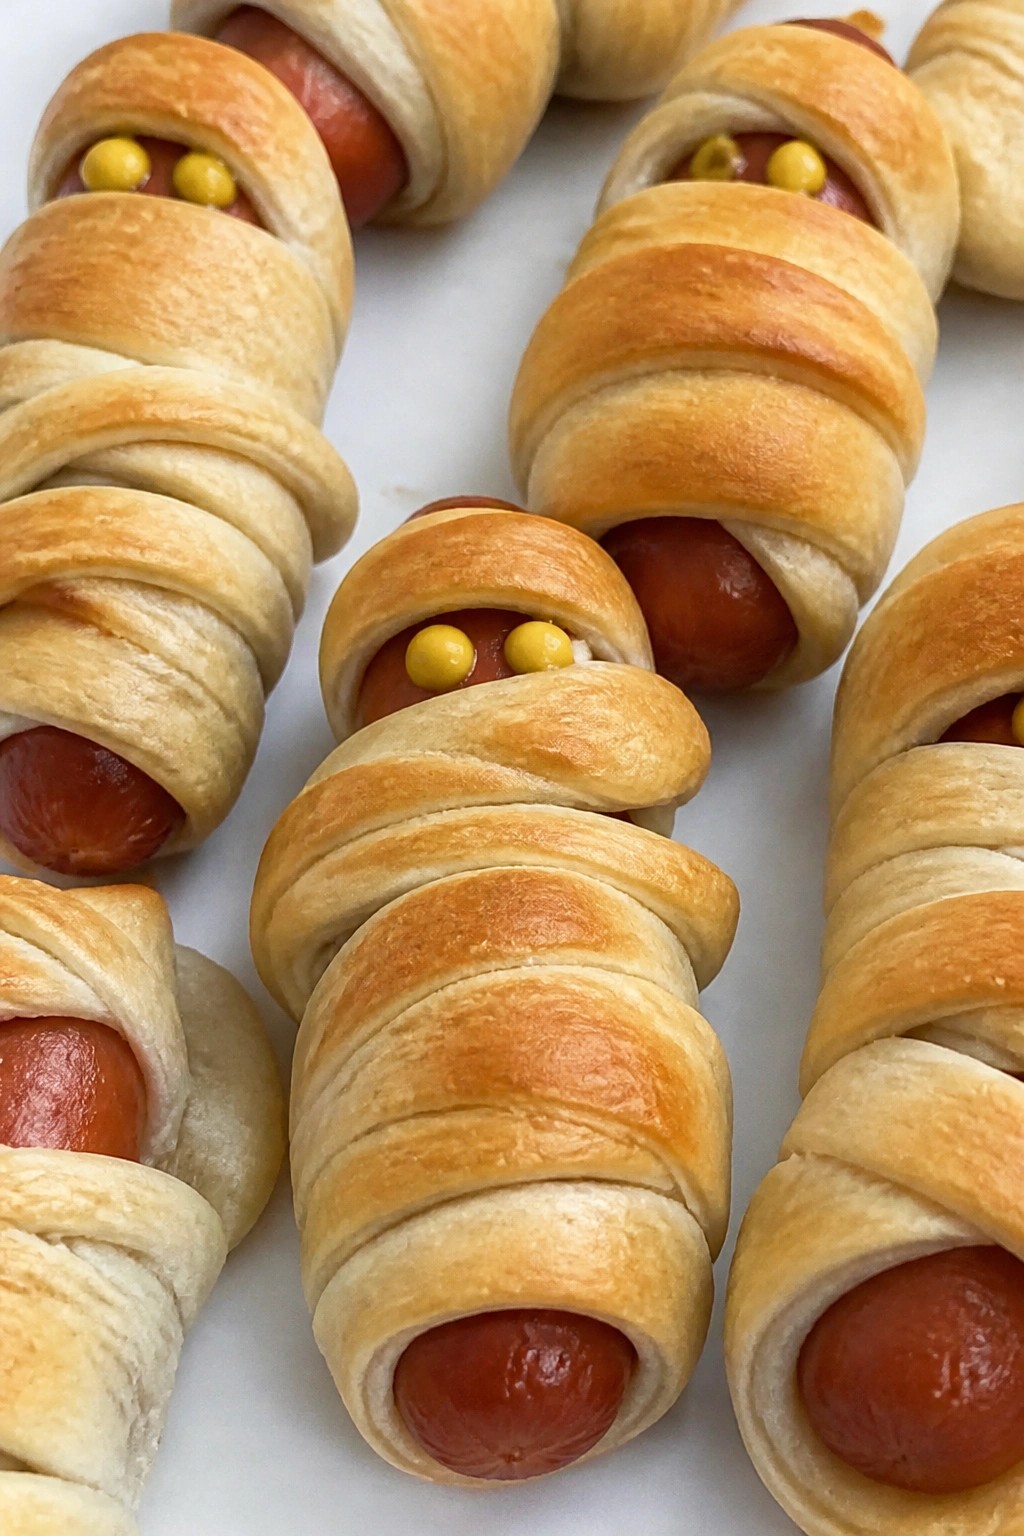
These mummy mini hot dog rolls turn a simple snack into a playful Halloween treat. Kids enjoy the fun wrapped look while parents appreciate a quick savory bite that pairs well with other party foods. The flaky dough bakes up crisp around the juicy hot dogs for a satisfying contrast in texture.
The recipe works best as an afternoon snack or addition to a kid-friendly spread. It delivers a mild, savory flavor that most children accept without hesitation.
Serves 4 people.
Ingredients
- 8 mini hot dogs
- 1 can (8-count) crescent roll dough
- 2 teaspoons yellow mustard
Instructions
- Preheat the oven to 375°F and line a baking sheet with parchment paper.
- Open the can of crescent roll dough and unroll it on a clean surface. Press the seams together to form a single sheet.
- Cut the dough into thin strips about ¼ inch wide.
- Wrap each mini hot dog with several dough strips, leaving small gaps to create a mummy bandage effect. Place the wrapped hot dogs on the prepared baking sheet.
- Bake for 12 to 15 minutes until the dough turns golden brown.
- Remove from the oven and let cool for 2 minutes. Use a small dab of yellow mustard on each hot dog to form two eyes.
Extra Tips
Space the wrapped hot dogs evenly on the sheet so air can circulate and the dough stays crisp. If you prepare them ahead, cover the tray and refrigerate for up to two hours before baking. Serve them warm with a small bowl of ketchup on the side for dipping. Course: Snack Cuisine: American Equipment: Baking sheet, Oven, Knife
Pumpkin Patch Dirt Pudding Cups
These cups turn simple chocolate pudding into a playful Halloween snack. Kids enjoy spotting the candy pumpkins on top and scooping through the cookie "dirt" layer. The result is a creamy pudding base with a crunchy cookie texture that holds up well in small servings.
They suit after-school treats or a quick addition to a Halloween party spread. The chocolate flavor stays mild enough for most children while the toppings add a seasonal touch.
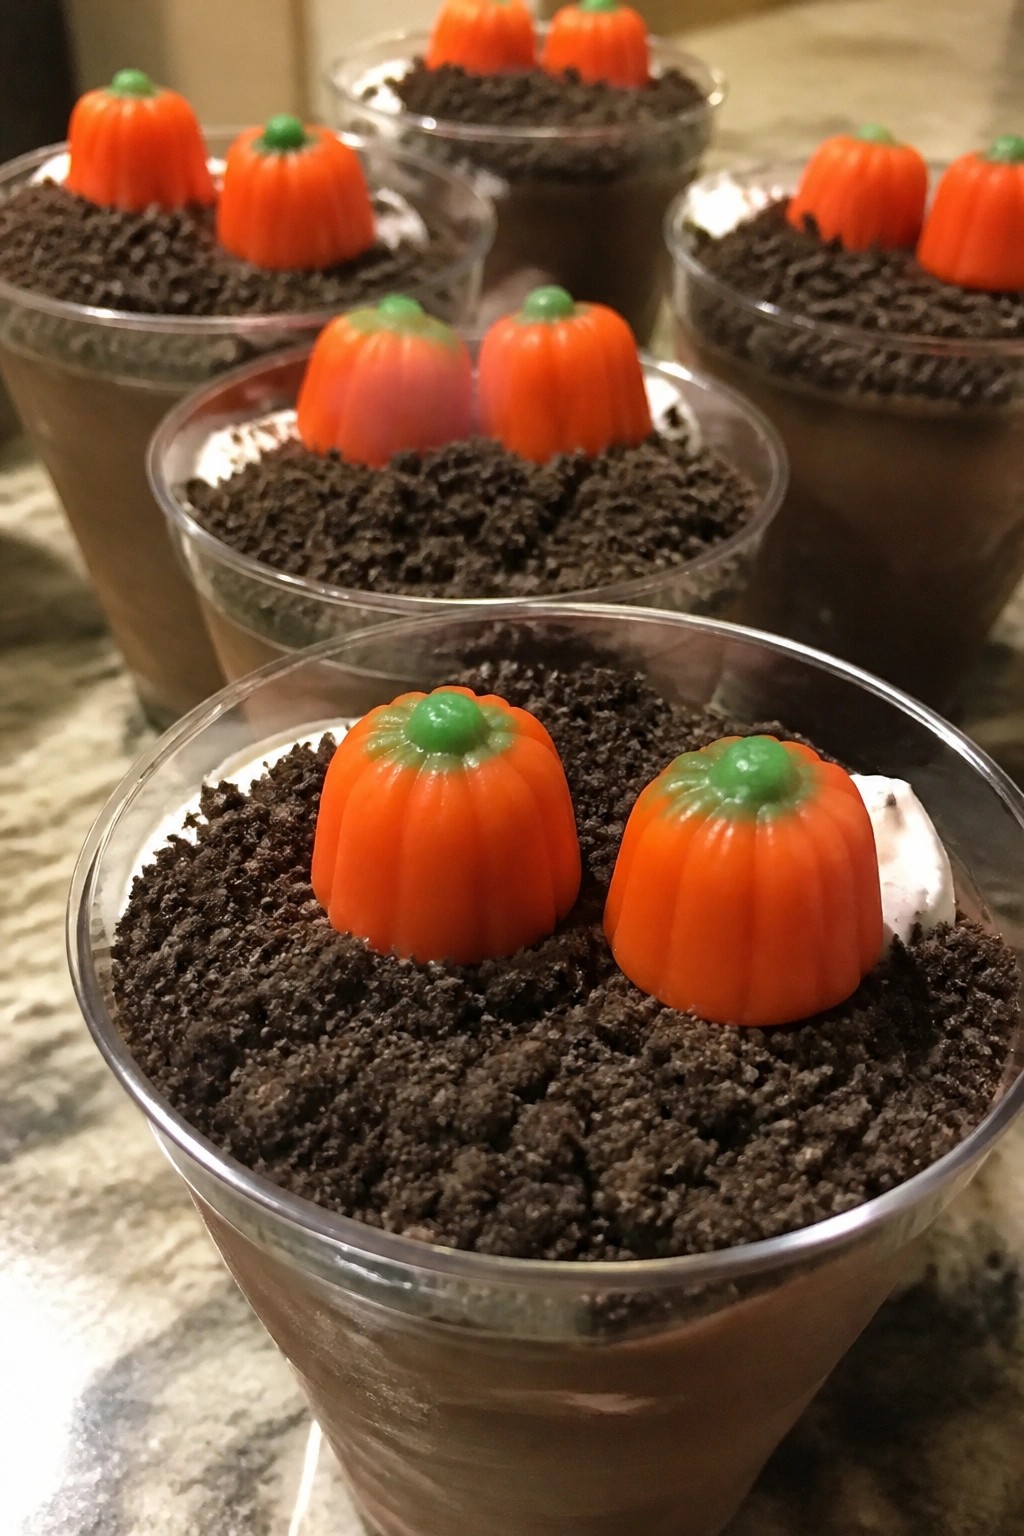
Serves 4 people.
Ingredients
- 1 (3.9 oz) box instant chocolate pudding mix
- 2 cups cold milk
- 20 chocolate sandwich cookies
- 1 cup whipped topping
- 8 candy pumpkins
Instructions
- Pour the cold milk into a mixing bowl and add the instant chocolate pudding mix. Whisk for two minutes until the mixture thickens.
- Place the chocolate sandwich cookies in a zip-top bag and crush them with a rolling pin until they form coarse crumbs.
- Spoon a layer of pudding into the bottom of each of four clear cups. Add a layer of cookie crumbs on top.
- Repeat the layers once more so each cup has pudding and crumbs. Finish with a dollop of whipped topping.
- Press two candy pumpkins into the whipped topping on each cup to create the pumpkin patch look.
Extra Tips
Crush the cookies just before assembly so they stay crisp under the pudding. If you need to prepare the cups ahead, add the cookie layer and whipped topping right before serving to avoid sogginess. Swap the candy pumpkins for pumpkin-shaped gummies if that is what you have on hand. Course: Snack Cuisine: American Equipment: Mixing Bowl, Whisk, Rolling Pin, 4 Clear Cups
Monster Green Apple Nachos
These Monster Green Apple Nachos give kids a playful way to enjoy fresh fruit with a Halloween twist. The green apple slices stand in for tortilla chips and get topped with bright green chocolate and monster faces made from candy. They work well for classroom parties, after-school snacks, or a quick weekend activity.
The result is a mix of crisp, tart apple and sweet, creamy chocolate with crunchy sprinkles. Children can help add the candy eyes, which keeps them involved without needing the stove.
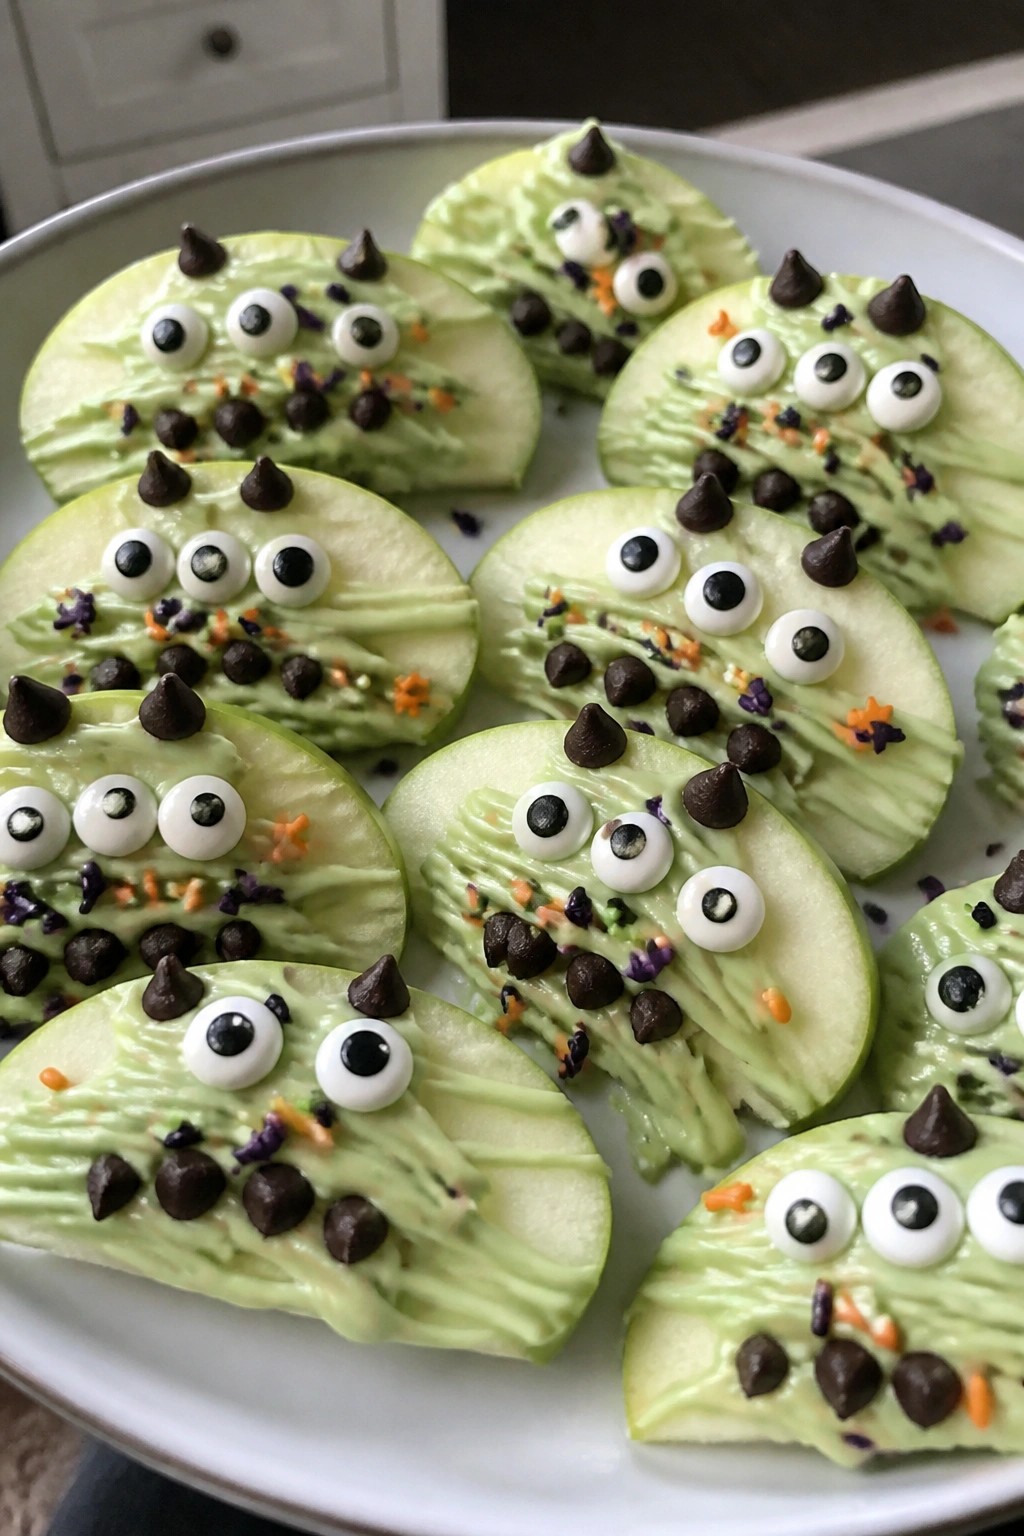
Serves 4 people.
Ingredients
- 4 large green apples
- 1 cup white chocolate chips
- 1/2 teaspoon green food coloring
- 1/4 cup mini chocolate chips
- 16 candy eyeballs
- 2 tablespoons Halloween sprinkles
Instructions
- Wash the green apples and slice each one into thin wedges, removing the core.
- Arrange the apple wedges on a large serving platter in a single overlapping layer.
- Place the white chocolate chips in a microwave-safe bowl. Heat in 30-second bursts, stirring between each, until fully melted and smooth.
- Stir the green food coloring into the melted white chocolate until the color is even.
- Drizzle the green chocolate evenly over the apple slices.
- While the chocolate is still soft, scatter the mini chocolate chips, candy eyeballs, and Halloween sprinkles across the top.
- Let the chocolate set for about 5 minutes before serving.
Extra Tips
Choose firm green apples so the slices stay crisp under the chocolate. Add the candy eyeballs right after drizzling so they stay in place as the chocolate cools. Leftovers can be stored in the fridge for a few hours, though the apples are best the same day they are prepared. Course: Snack Cuisine: American Equipment: Microwave-safe bowl, Sharp knife, Serving platter
Bat Wing Cheese Quesadilla Bites
These cheese quesadilla bites get their name from the bat wing shapes cut into each tortilla. Kids enjoy the crispy edges and gooey cheese center, and the simple process works well for an afternoon snack or a quick addition to a Halloween party spread. The flavor stays mild and cheesy with a light crunch from the toasted tortilla.
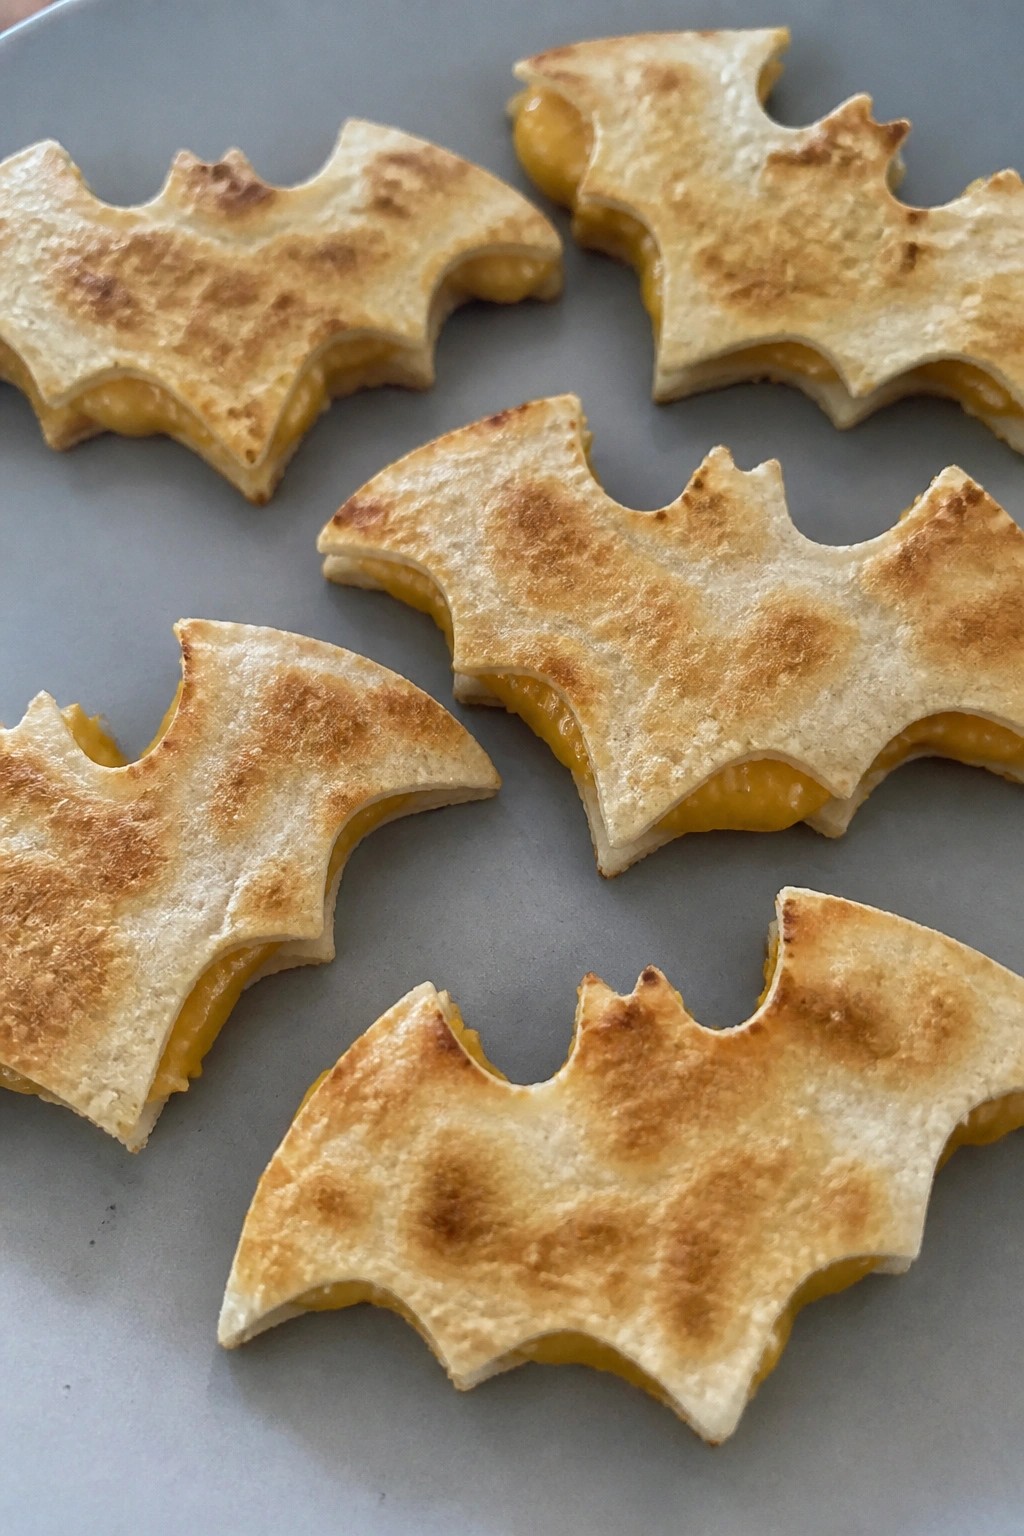
Serves 4 people.
Ingredients
- 4 large flour tortillas
- 2 cups shredded cheddar cheese
- 2 tablespoons butter, softened
- 1/2 cup salsa
Instructions
- Lay one tortilla flat on a cutting board and use kitchen scissors to cut two curved bat wing shapes from opposite sides, leaving a connected center strip. Repeat with the remaining three tortillas.
- Spread 1/2 cup shredded cheddar cheese over the center of one cut tortilla. Place a second cut tortilla on top to form a sandwich. Repeat with the remaining tortillas and cheese to make four assembled pieces.
- Heat a large skillet over medium heat and spread a thin layer of softened butter on the outside of each assembled piece.
- Place one piece in the skillet and cook for 2 to 3 minutes until the bottom is golden. Flip carefully and cook the second side until the cheese melts and the tortilla is crisp. Repeat with the remaining pieces.
- Let the quesadillas rest for one minute, then cut each into smaller bite-size sections if desired. Serve with salsa on the side.
Extra Tips
Butter the tortillas lightly before cooking to get even browning without sogginess. If the cheese starts to leak during cooking, press down gently with a spatula. These bites taste best right after cooking but can be reheated in a dry skillet for a minute to restore crispness. Skip the salsa if your kids prefer plain cheese. Course: Snack Cuisine: American Equipment: Large Skillet, Cutting Board, Kitchen Scissors
Skeleton Carrot Sticks with Hummus
This snack turns plain carrots into a playful skeleton that kids can assemble or eat right away. The sticks stand in for bones while a bowl of hummus acts as the head, making it an easy addition to a Halloween party spread or an after-school activity. Carrots stay crisp and the hummus stays creamy, so the textures contrast nicely without any extra work.
It suits a small group of kids because the pieces are easy to grab and dip. The olives add a simple face detail that still keeps the focus on the vegetables.
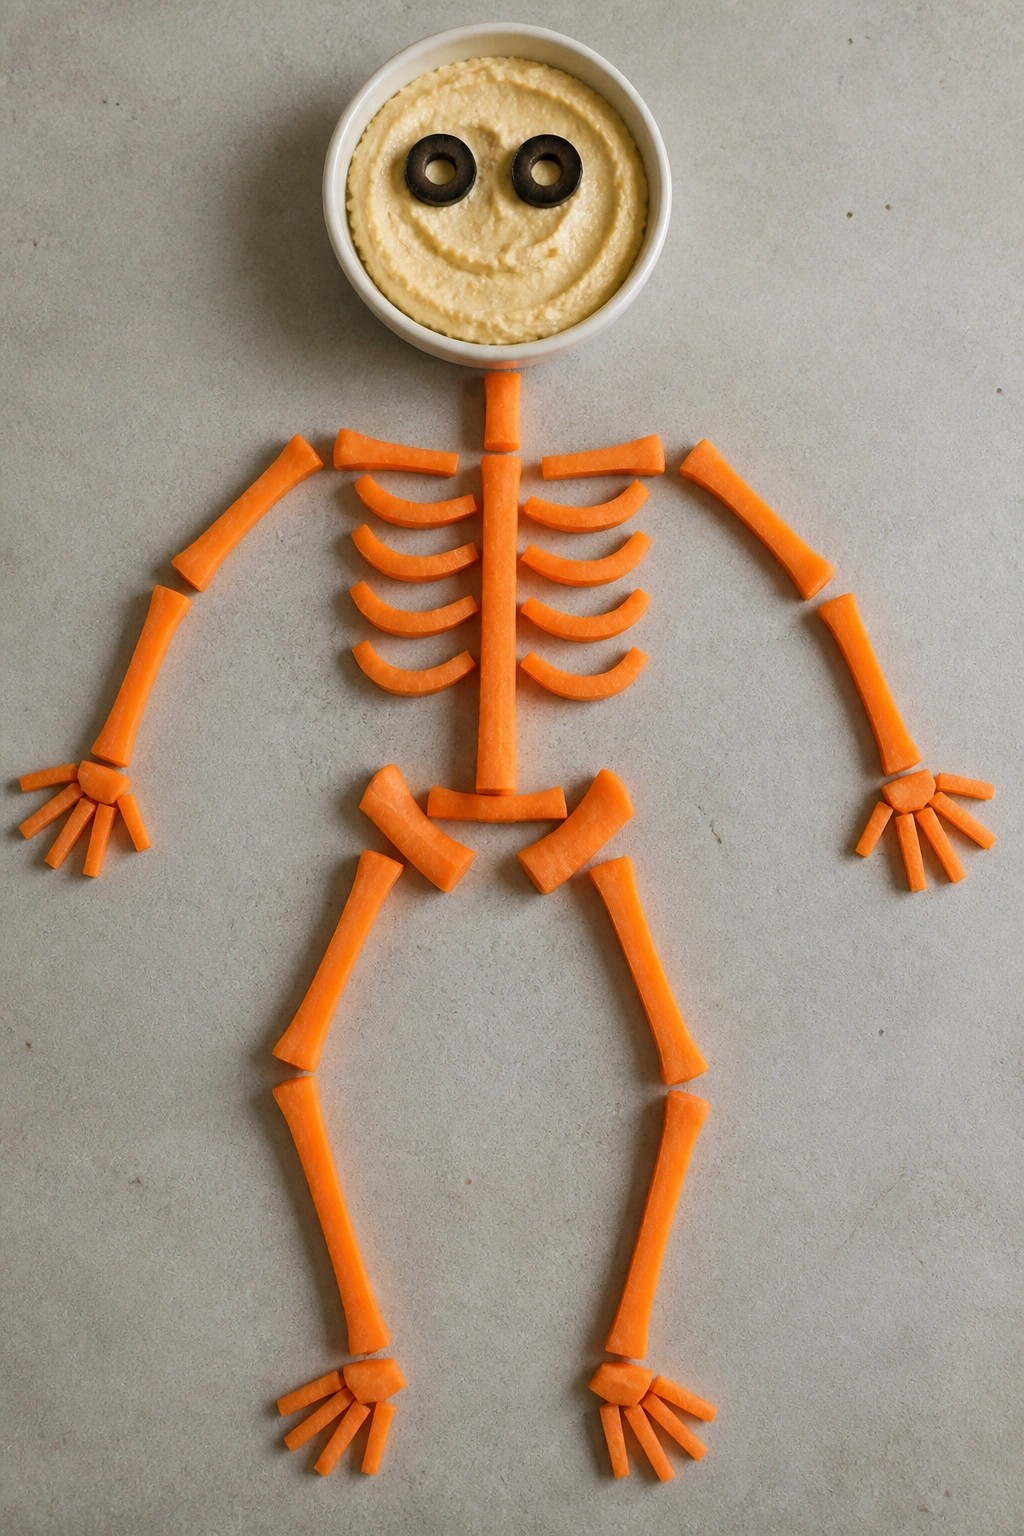
Serves 4 people.
Ingredients
- 8 large carrots, peeled and cut into sticks of varying lengths
- 2 cups hummus
- 4 black olives, halved
Instructions
- Peel the carrots and cut them into sticks of different lengths so they look like bones of various sizes.
- Arrange the carrot sticks on a large platter in the rough shape of a skeleton body and limbs.
- Spoon the hummus into a small bowl and set it at the top of the platter to serve as the head.
- Press the halved black olives into the surface of the hummus to form eyes.
Extra Tips
Cut a few extra-long and extra-short sticks so the skeleton shape looks more natural on the platter. Place the hummus bowl only after the carrots are arranged to avoid smearing. If you need to make it ahead, keep the cut carrots in cold water and assemble just before serving so they stay crisp. Course: Snack Cuisine: American Equipment: Vegetable peeler, Knife, Cutting board, Large platter, Small bowl
Witch Finger Sugar Cookies
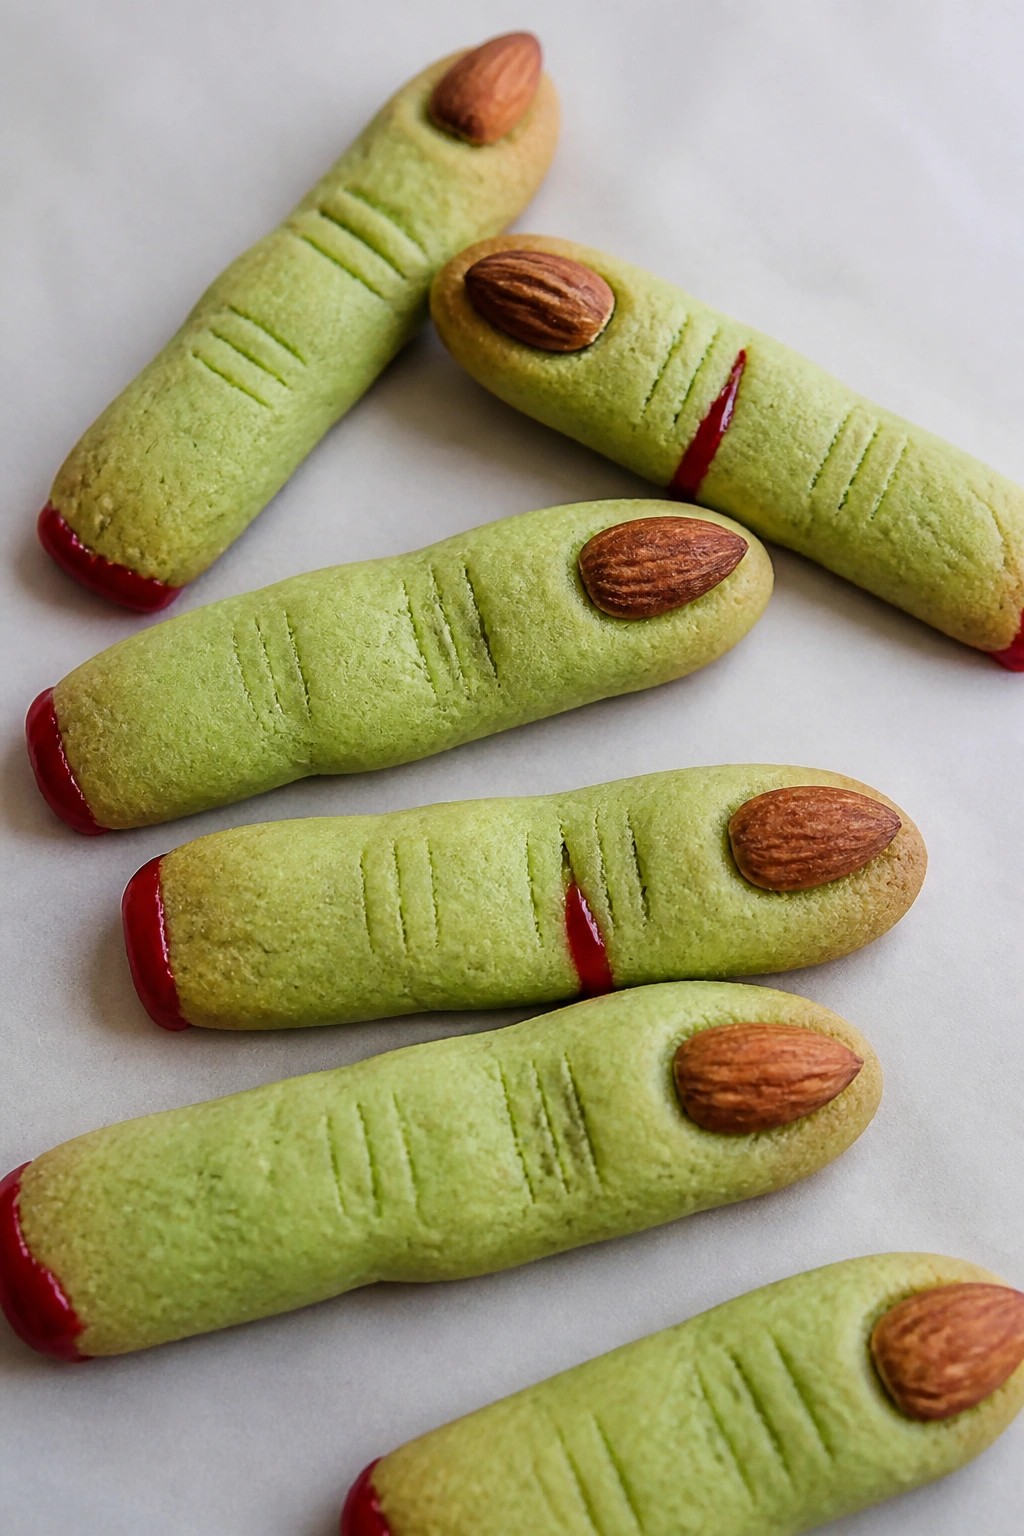
These witch finger sugar cookies give kids a hands-on way to create spooky shapes for Halloween. The dough bakes into sweet, buttery cookies with light crisp edges and a soft center. They fit well at parties or as an easy after-school treat.
The almond "nails" and red gel details make each cookie look like a witch finger without extra steps. Kids can press in the almonds and score the knuckles before baking.
Serves 4 people.
Ingredients
- 1/2 cup unsalted butter, softened
- 1/2 cup granulated sugar
- 1 large egg
- 1 teaspoon vanilla extract
- 1 1/4 cups all-purpose flour
- 1/4 teaspoon baking powder
- 1/4 teaspoon salt
- Green food coloring
- 12 whole almonds
- Red gel icing
Instructions
- Heat the oven to 350°F and line a baking sheet with parchment paper.
- In a mixing bowl, beat the softened butter and granulated sugar until light and fluffy.
- Add the egg and vanilla extract, then mix until combined.
- Stir in the flour, baking powder, and salt until a dough forms.
- Mix in a few drops of green food coloring until the dough reaches a pale green shade.
- Scoop out 12 portions of dough and roll each into a finger shape about 4 inches long.
- Use a knife to score two or three lines across the middle of each finger to form knuckles.
- Press one almond into the tip of each finger to create a fingernail.
- Place the shaped cookies on the baking sheet and bake for 10 to 12 minutes until the edges turn lightly golden.
- Let the cookies cool on the sheet for 5 minutes, then add a small amount of red gel icing around the base of each almond and at the knuckle lines.
Extra Tips
Score the knuckles lightly before baking so they stay visible after the cookies cool. Store leftovers in an airtight container at room temperature for up to three days. If the dough feels too soft to shape, chill it for 15 minutes before forming the fingers. Course: Snack Cuisine: American Equipment: Mixing Bowl, Baking Sheet, Oven
Eyeball Deviled Egg Snacks
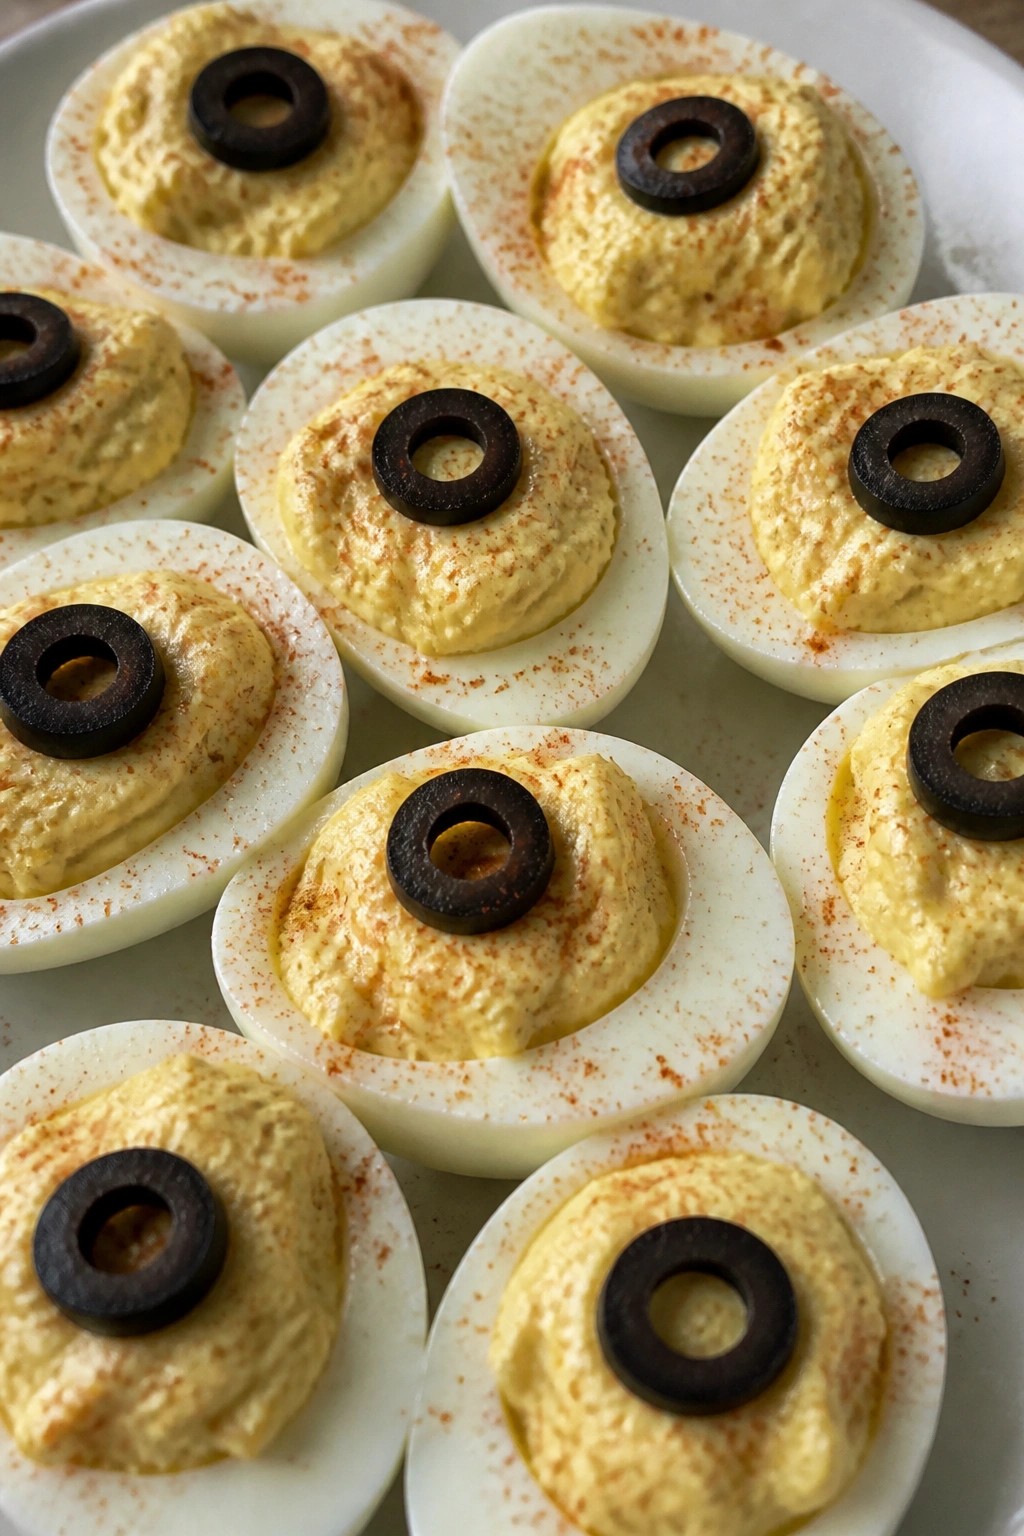
These deviled eggs get a playful Halloween twist that makes them fun for kids to eat at parties or after-school snacks. The creamy filling stays mild enough for young tastes while the olive accents add a simple spooky detail. They hold up well on a platter and travel easily to gatherings.
The result has a smooth, rich center with a slight tang and a soft bite from the egg white. Kids often enjoy assembling the eyeballs as much as eating them.
Serves 4 people.
Ingredients
- 8 large eggs
- 1/4 cup mayonnaise
- 1 tablespoon yellow mustard
- 1 teaspoon white vinegar
- 1/2 teaspoon salt
- 1/4 teaspoon black pepper
- 1 teaspoon paprika
- 8 pitted black olives, sliced into 16 thin rounds
Instructions
- Place the eggs in a large pot and cover with cold water by one inch. Bring the water to a boil over medium-high heat, then remove the pot from the heat, cover it, and let the eggs sit for 12 minutes.
- Drain the hot water and run cold water over the eggs until they feel cool enough to handle. Peel the eggs and slice each one in half lengthwise.
- Scoop the yolks into a mixing bowl. Add the mayonnaise, mustard, vinegar, salt, and black pepper. Mash everything together until the mixture is smooth.
- Spoon or pipe the yolk filling back into the egg white halves, mounding it slightly.
- Top each filled egg with one black olive round placed in the center of the yolk to form the pupil. Lightly sprinkle paprika over the tops.
Extra Tips
Make the eggs a day ahead and store them covered in the refrigerator, then add the olive slices just before serving so they stay dark and distinct. If you want a milder filling, reduce the mustard by half. Leftovers keep well for two days in an airtight container. Course: Snack Cuisine: American Equipment: Large pot, mixing bowl, spoon
Candy Corn Yogurt Parfait Cups
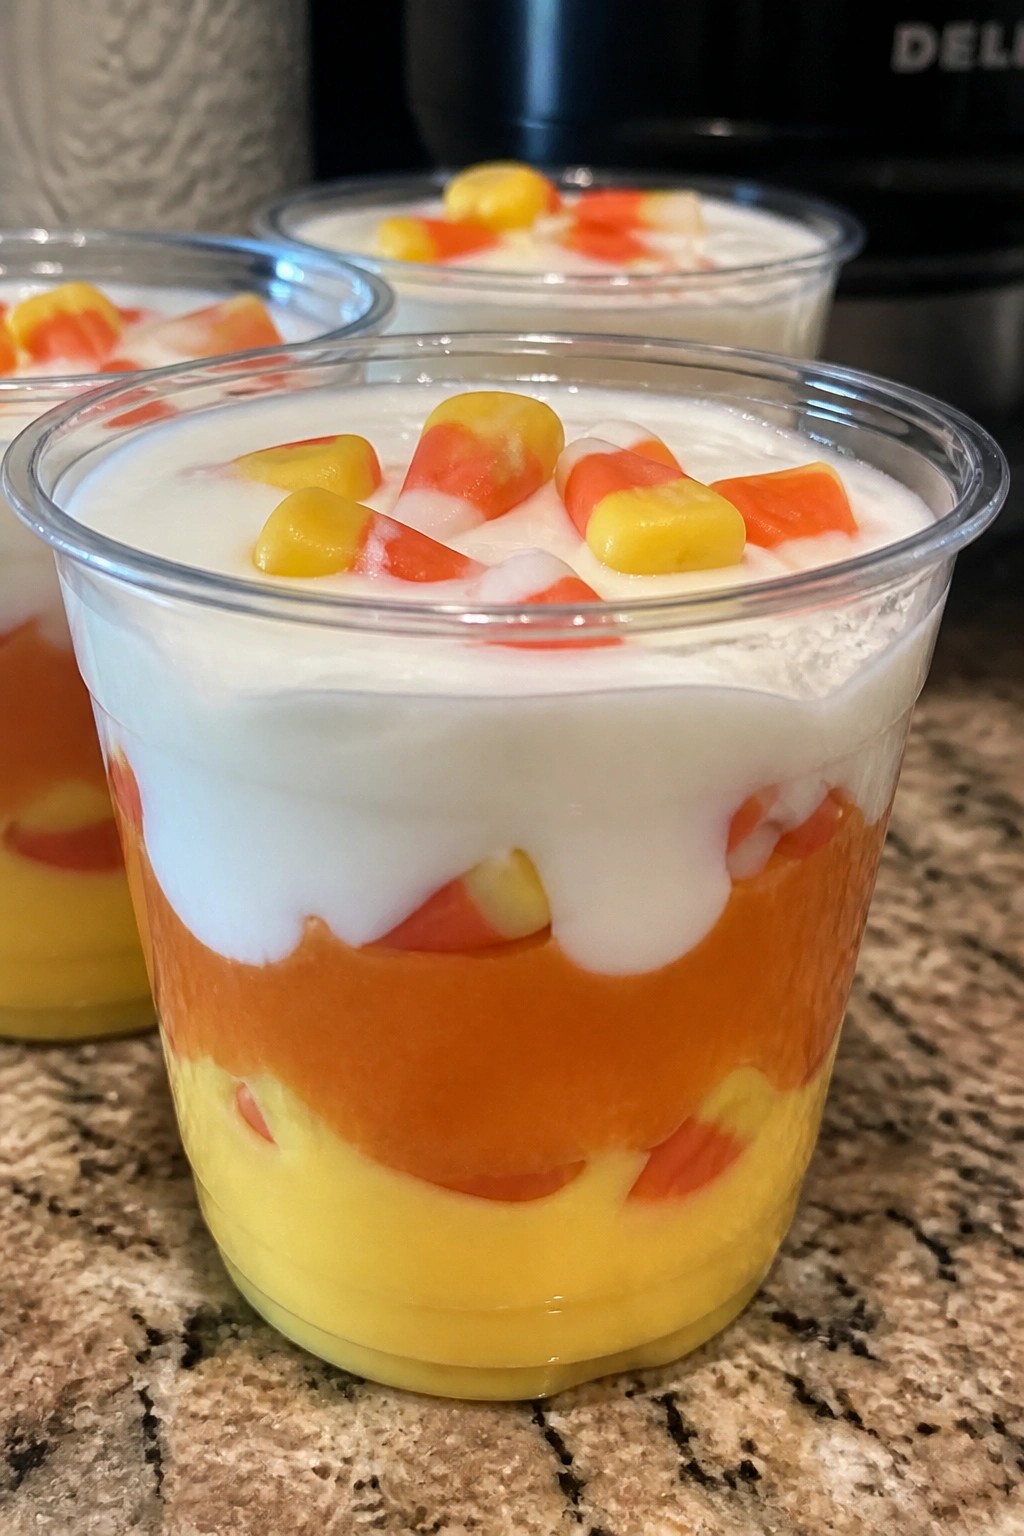
These layered cups bring candy corn colors to the table without any baking. They work well for after-school snacks or small Halloween gatherings where kids want something quick and hands-on. The vanilla yogurt stays creamy while the candy corn adds a bit of chew at the end.
The colors come from simple food coloring mixed into portions of the yogurt. Each cup shows a clear yellow base, orange middle, and white top that matches the candy corn look kids recognize right away.
Serves 4 people.
Ingredients
- 2 cups vanilla Greek yogurt
- 8 drops yellow food coloring
- 8 drops orange food coloring
- 1 cup candy corn
Instructions
- Divide the yogurt evenly into three small bowls, using about 2/3 cup in each bowl.
- Add the yellow food coloring to the first bowl and stir until the color is even. Add the orange food coloring to the second bowl and stir until the color is even. Leave the third bowl plain.
- Spoon the yellow yogurt into the bottom of four clear cups, using about 2 tablespoons per cup. Add the orange yogurt on top of the yellow layer in each cup, again using about 2 tablespoons per cup. Finish with the plain yogurt as the top layer.
- Top each cup with a few pieces of candy corn right before serving.
Extra Tips
Mix the food coloring in small amounts first so the shades stay bright but not too dark. The candy corn softens quickly once it sits on the yogurt, so add it only when you are ready to serve. Clear cups help show the layers, and any leftover yogurt can be stored in the fridge without the candy corn on top. Course: Snack Cuisine: American Equipment: Mixing bowls, Spoons, Clear cups
Frankenstein Avocado Toast Rounds
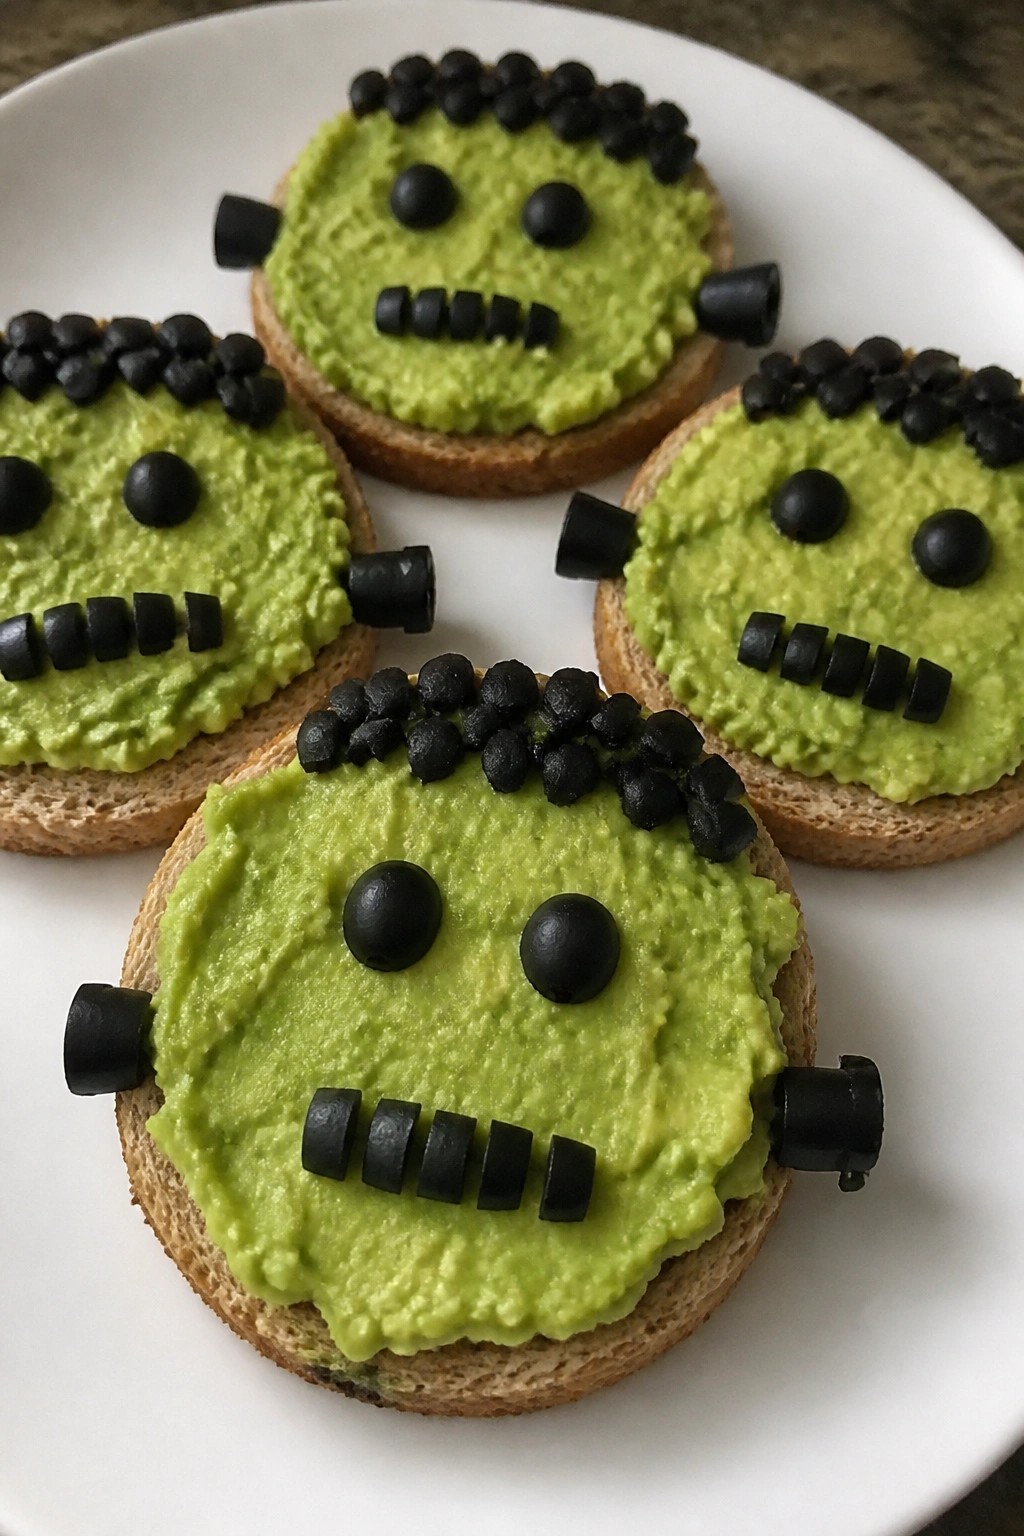
These avocado toast rounds give kids a hands-on way to make spooky snacks without much fuss. The bright green mash stands out on the plate and fits right into a Halloween spread when you need something quick that still feels festive. They work especially well for after-school snacks or small party trays.
The finished bites offer creamy avocado against crisp toast with salty pops from the olives. Kids enjoy building the faces, and the mild flavor keeps even picky eaters interested.
Serves 4 people.
Ingredients
- 4 slices whole wheat bread
- 2 ripe avocados
- 1 tablespoon lemon juice
- 1/4 teaspoon salt
- 8 pitted black olives
Instructions
- Toast the bread slices until golden and firm, then use a round cutter or glass to cut four circles from the slices.
- Cut the avocados in half, remove the pits, and scoop the flesh into a bowl. Add the lemon juice and salt, then mash with a fork until mostly smooth with a few small chunks remaining.
- Spread the mashed avocado evenly over each toast round, covering the surface completely.
- Slice four olives in half lengthwise to create eyes and press two halves onto each round. Cut the remaining olives into thin strips and arrange a few strips on each round to form a mouth and side bolts.
Extra Tips
Mash the avocado just before serving so the lemon juice keeps the color bright. If you prep the toast rounds ahead, store them in an airtight container and add the avocado and olives right before kids eat them. The olives stay in place best when pressed gently into the soft mash rather than the dry toast. Course: Snack Cuisine: American Equipment: Toaster, Mixing bowl, Knife
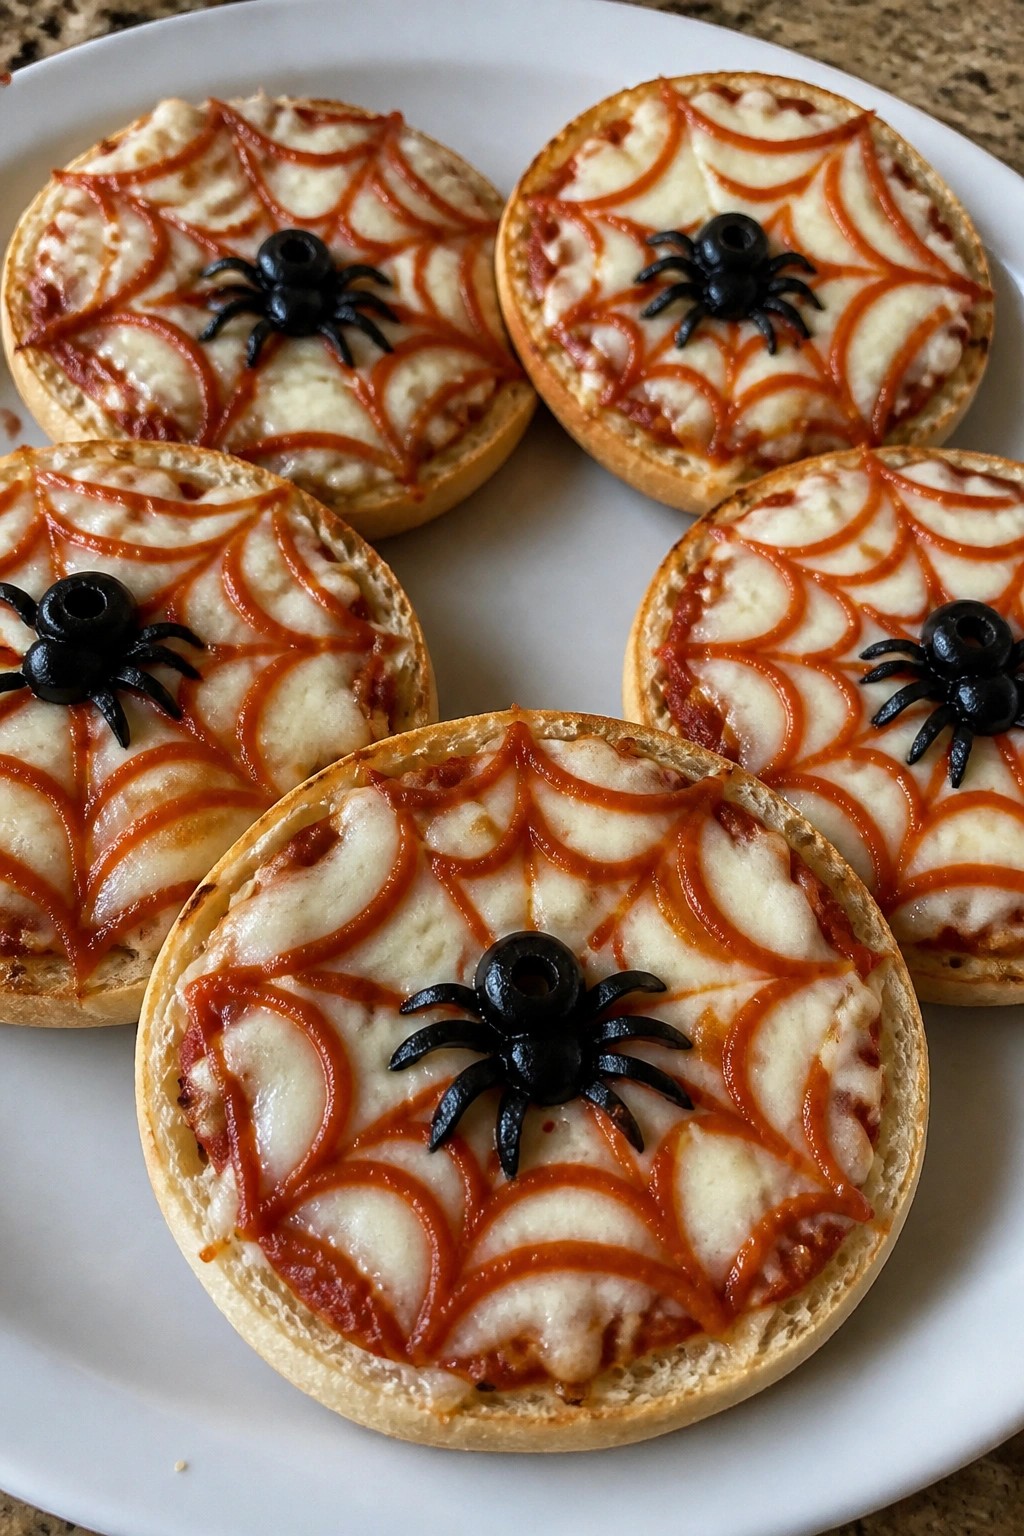
Spiderweb Mini Pizzas
These mini pizzas turn a simple cheese and sauce base into a quick Halloween snack. Kids enjoy spotting the olive spiders and the web lines drawn across the top. The result is a crisp muffin base with gooey cheese and a light tomato flavor.
They work well for an after-school treat or a party platter. The design stays clear after baking, so the spiderweb pattern remains easy to see.
Serves 4 people.
Ingredients
- 4 English muffins, halved
- 1 cup pizza sauce
- 2 cups shredded mozzarella cheese
- 1/2 cup sliced black olives
Instructions
- Heat the oven to 400 degrees F and line a baking sheet with parchment paper.
- Place the English muffin halves cut side up on the baking sheet.
- Spread 1 tablespoon of pizza sauce on each muffin half.
- Sprinkle about 1/4 cup of mozzarella cheese over the sauce on each half.
- Spoon the remaining pizza sauce into a small zip-top bag, snip a tiny corner, and pipe four or five concentric circles on top of the cheese.
- Drag a toothpick from the center outward through the circles to form a web pattern on each pizza.
- Arrange sliced black olives into small spider shapes, using one olive half for the body and thin slices for the legs.
- Bake for 8 to 10 minutes until the cheese melts and the edges turn golden.
Extra Tips
Pipe the web sauce just before baking so the lines stay distinct. If the cheese browns too quickly, tent the sheet loosely with foil for the last two minutes. Leftovers reheat well in a toaster oven at 350 degrees F for about five minutes to restore crispness. Course: Snack Cuisine: American Equipment: Baking Sheet, Oven, Piping Bag or Zip-Top Bag
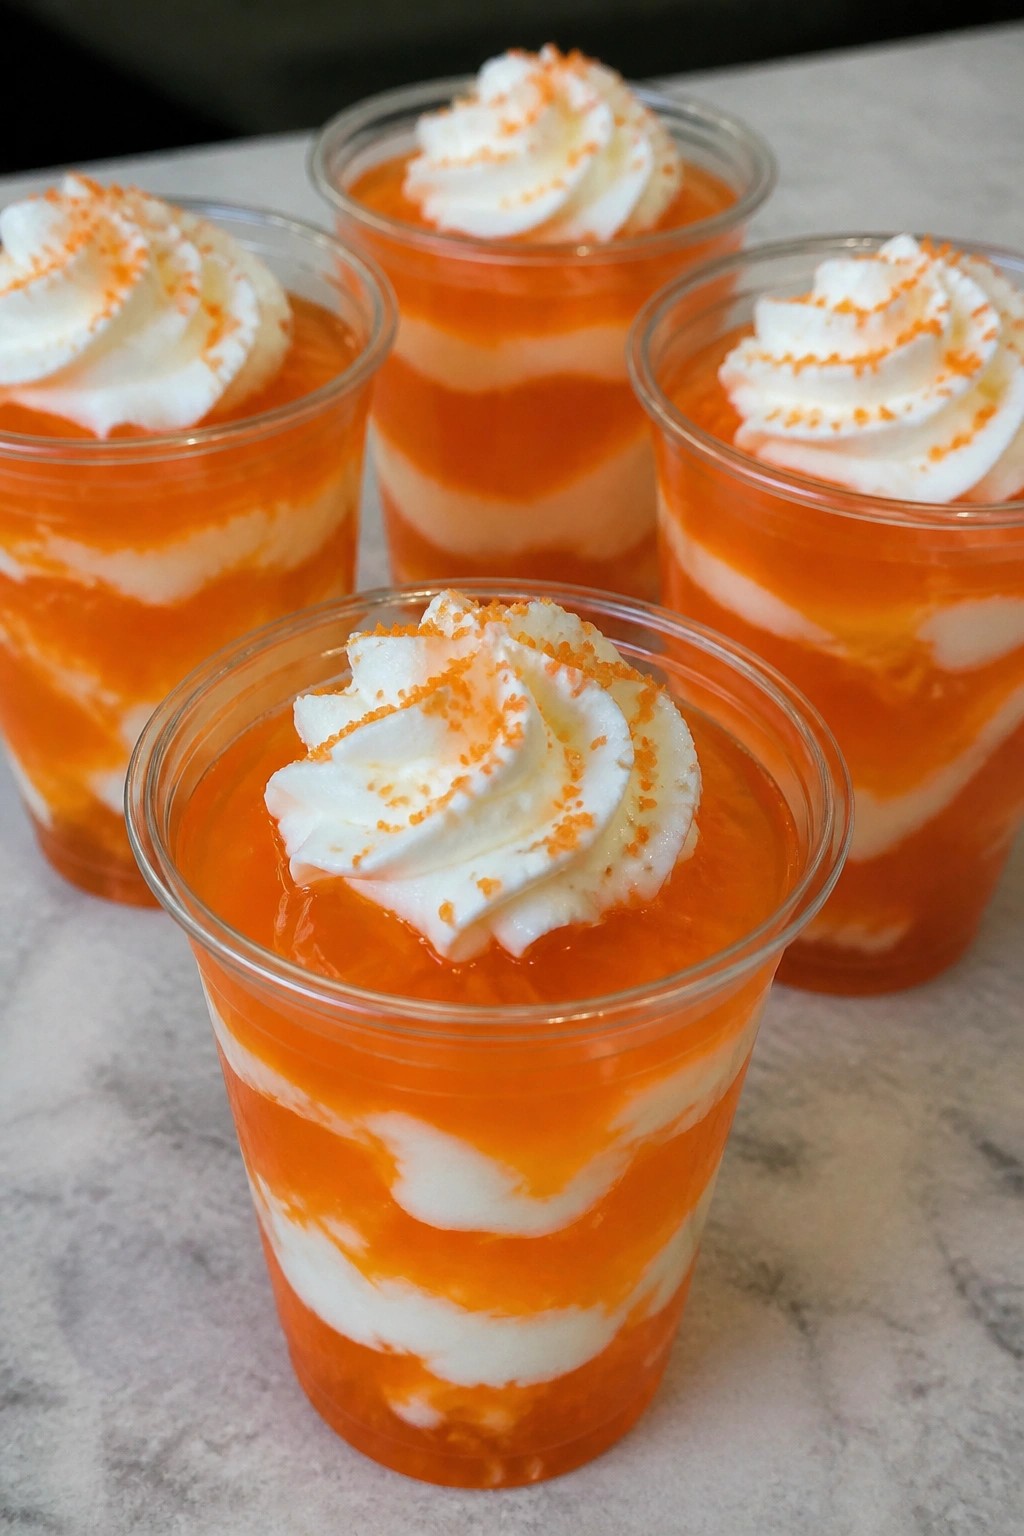
Orange Creamsicle Jello Cups
These Orange Creamsicle Jello Cups offer a bright orange flavor with a smooth vanilla cream swirl that kids recognize from their favorite frozen treats. The jiggly texture makes them easy to eat with a spoon and adds a playful element to any Halloween snack spread.
They work well for parties because each portion comes ready in its own cup with no extra plates needed. The combination stays light and refreshing while still feeling like a special treat.
Serves 4 people.
Ingredients
- 1 (3 oz) package orange gelatin
- 1 cup boiling water
- 1 cup cold water
- 1 cup vanilla yogurt
- Whipped cream, for topping
- Orange sprinkles, for garnish
Instructions
- Pour the orange gelatin into a mixing bowl and add the boiling water. Stir until the gelatin is completely dissolved.
- Add the cold water and stir to combine.
- Mix in the vanilla yogurt until the mixture looks smooth and uniform.
- Divide the mixture evenly among four clear cups.
- Place the cups in the refrigerator and chill until the Jello is fully set, about four hours.
- Just before serving, add a dollop of whipped cream to each cup and finish with a sprinkle of orange sprinkles.
Extra Tips
Use clear cups so the bright orange color shows through. Prepare the cups the night before the party and add the whipped cream and sprinkles right before serving to keep the topping fresh. If the yogurt you use is very thick, give the mixture an extra stir after it cools slightly to avoid any streaks. Course: Snack Cuisine: American Equipment: Mixing Bowl, Whisk, Refrigerator
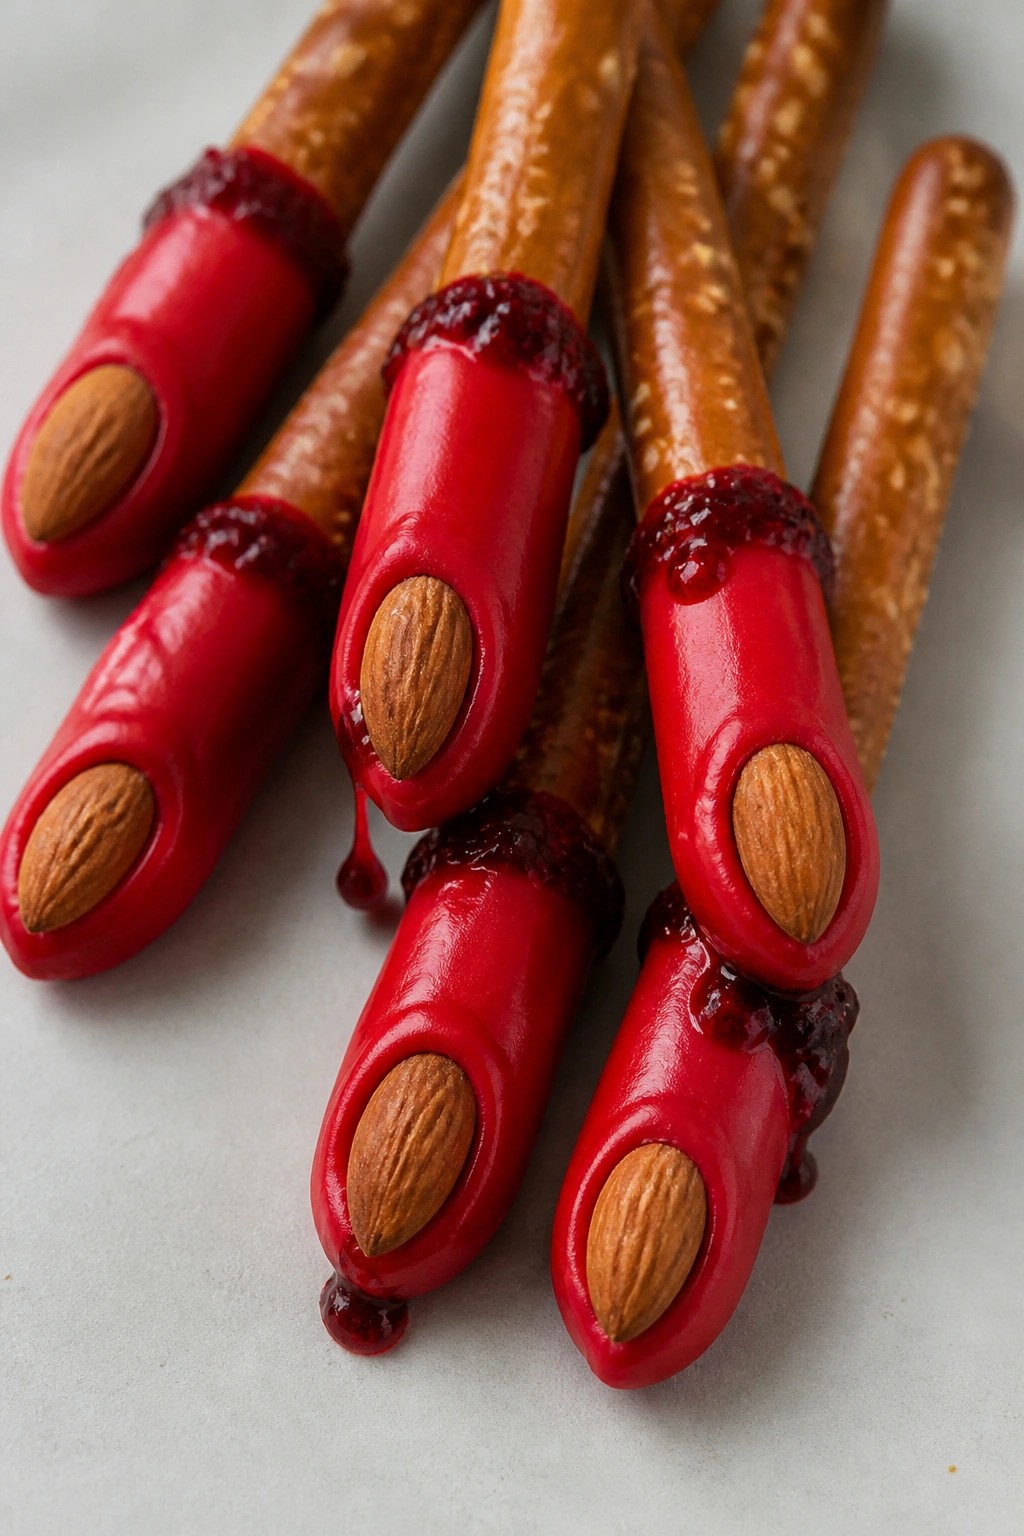
Bloody Finger Pretzel Rods
These pretzel rods make a simple snack that looks like spooky fingers without much effort. They work well for Halloween parties or an easy afternoon treat during October. The salty crunch of the pretzel pairs with a sweet coating and a bit of tart jam.
Serves 4 people.
Ingredients
- 12 pretzel rods
- 1 cup red candy melts
- 12 whole almonds
- 1/4 cup raspberry jam
Instructions
- Line a baking sheet with parchment paper and set it aside.
- Place the red candy melts in a microwave-safe bowl and heat in 30-second bursts, stirring each time until fully melted and smooth.
- Dip one end of each pretzel rod into the melted candy melts, coating about two inches to form the fingertip.
- Press one almond onto the coated end of each pretzel to create a fingernail shape.
- Use a spoon to dab or drizzle a small amount of raspberry jam near the almond and along the edge of the coating to give a bloody look.
- Set each finished pretzel rod on the prepared baking sheet and let the coating harden at room temperature.
Extra Tips
Work quickly once the candy melts are ready, since the coating sets fast. If the jam is too thick to drizzle, stir in a teaspoon of warm water to loosen it. Store any leftovers in an airtight container at room temperature for up to two days to keep the pretzels crisp. Course: Snack Cuisine: American Equipment: Microwave-safe bowl, Baking sheet, Parchment paper
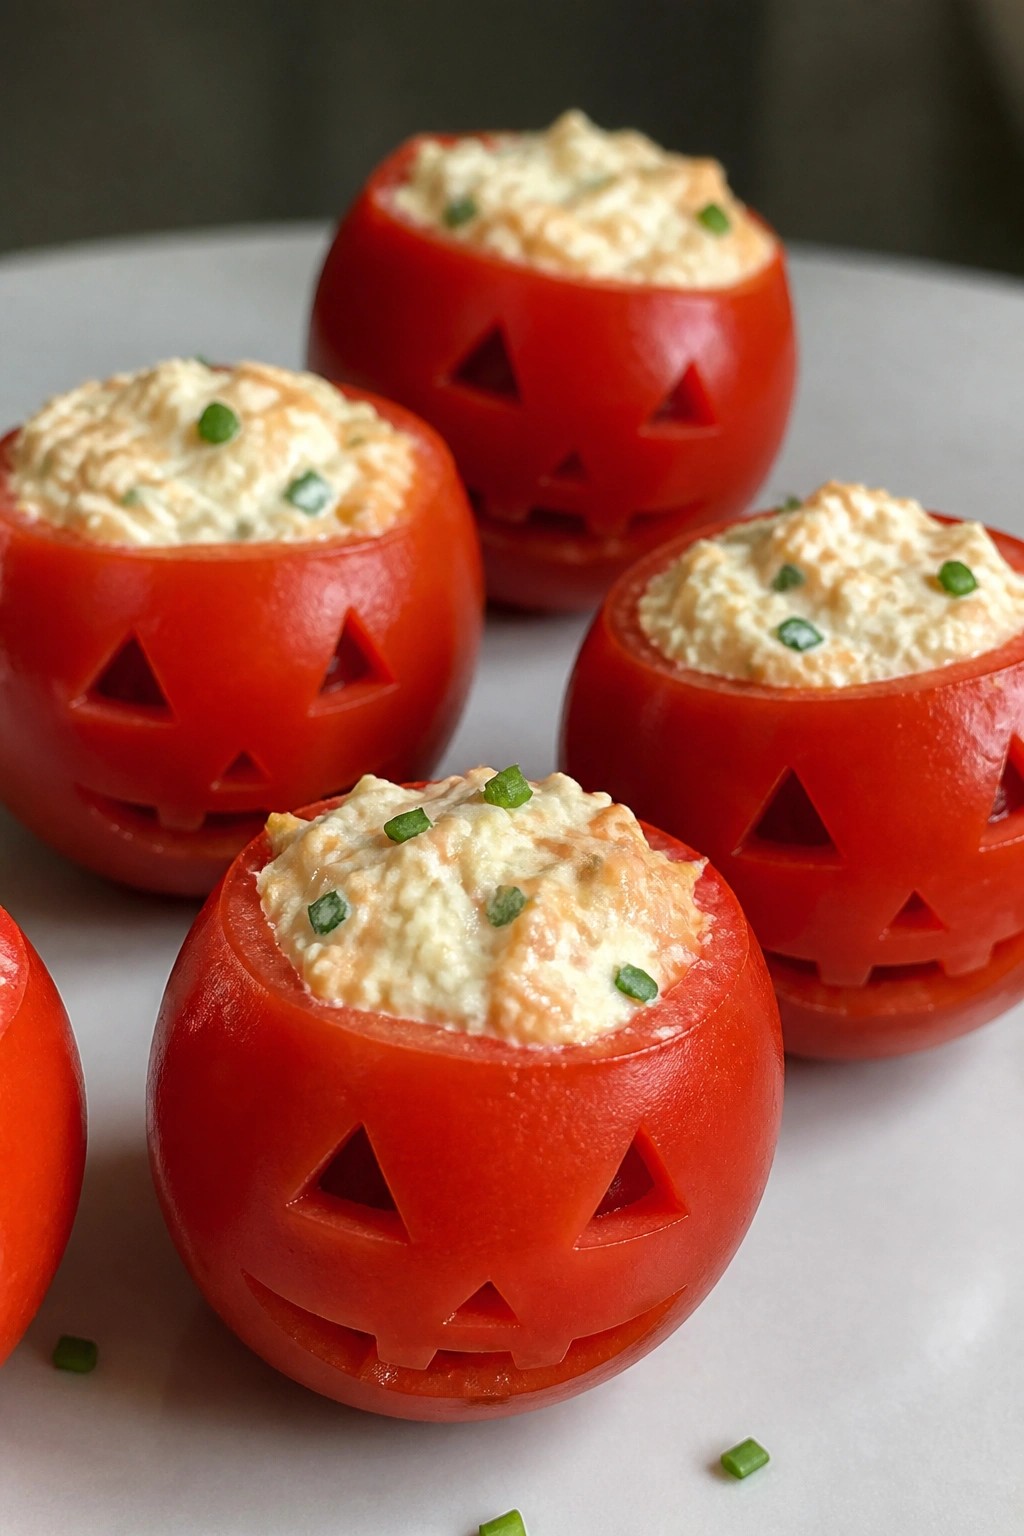
Jack-o’-Lantern Stuffed Cherry Tomatoes
These cherry tomatoes turn into tiny jack-o’-lanterns that kids enjoy spotting on a snack plate. The carved faces give them a playful look that fits right into a Halloween spread, while the creamy filling adds a mild taste and smooth texture that pairs well with the juicy tomato shells. They come together quickly and work as finger food at parties or after-school snacks.
Serves 4 people.
Ingredients
- 12 cherry tomatoes
- 4 ounces cream cheese, softened
- 1/4 cup shredded cheddar cheese
- 1 tablespoon chopped chives
- 1/4 teaspoon garlic powder
- Salt and black pepper to taste
Instructions
- Slice a thin cap off the top of each cherry tomato and gently scoop out the seeds and pulp with a small spoon to create space for the filling.
- Use a sharp paring knife to cut small triangle eyes and a jagged mouth into the front of each tomato so they resemble jack-o’-lanterns.
- Place the cream cheese, cheddar cheese, chives, garlic powder, salt, and black pepper in a bowl and stir until the mixture is smooth and evenly combined.
- Spoon or pipe the cheese mixture into each hollowed tomato until it is filled to the top.
- Set the filled tomatoes on a plate and chill them briefly before serving so the filling stays in place.
Extra Tips
Chill the filled tomatoes for at least 15 minutes so the cheese firms up and the carved faces stay neat. If the cream cheese feels too stiff to mix, let it sit at room temperature a few extra minutes. These work best eaten the same day, since the tomatoes release liquid once cut. Course: Snack Cuisine: American Equipment: Sharp knife, Small spoon, Mixing bowl