


Halloween party planning often means finding food that looks good but does not take hours to prepare. I gathered 14 recipes that focus on simple steps and ingredients most people keep on hand. These ideas cover both sweet and savory options that hold up well at a gathering. Each one aims to be practical so you can spend less time in the kitchen and more time with guests. You should find several that fit your menu without extra stress.
Helpful Tips Before You Start
These tips will help your Halloween party foods come together smoothly and look their best on the table.
Prep What You Can Ahead
Make dips, cookie dough, and snack mixes the day before. This cuts down on last minute work and keeps your kitchen calmer.
Balance Sweet and Savory Items
Pair sweet treats with savory bites like stuffed peppers or cheese boards. Guests stay satisfied longer when they have choices.
Label Everything Clearly
Add small tags with fun names and allergy notes. This helps people with restrictions and adds to the party theme without extra effort.
Use Sturdy Serving Pieces
Choose platters and bowls that hold up to lots of handling. Halloween parties often mean crowded tables and quick refills.
Spiderweb Seven-Layer Dip with Tortilla Chips
This seven-layer dip stands out at Halloween parties because the sour cream web on top gives it a fun, spooky look while the layers stay familiar and crowd-pleasing. It works well on a buffet table since it can be made ahead and served cold with chips for easy scooping.
The flavors stay savory and creamy, with beans and guacamole at the base, a seasoned sour cream layer, and fresh toppings that add brightness and crunch.
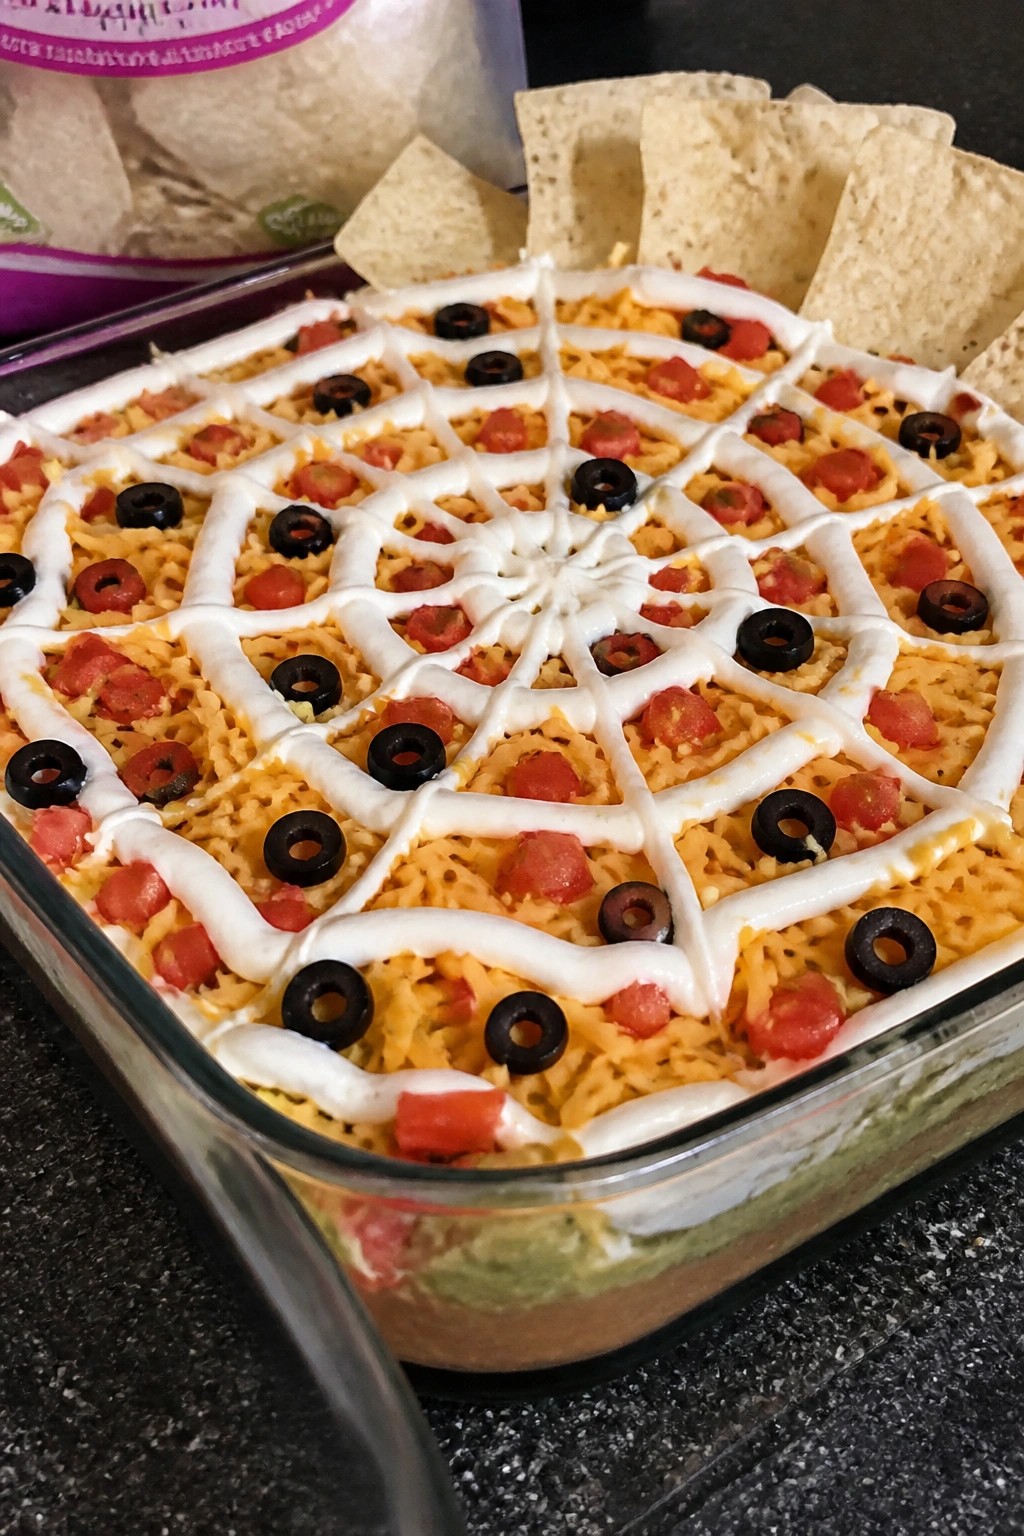
Serves 4 people.
Ingredients
- 1 can (16 oz) refried beans
- 1 1/2 cups guacamole
- 1 cup sour cream, divided
- 1 packet taco seasoning
- 1 cup shredded cheddar cheese
- 1/2 cup diced tomatoes
- 1/4 cup sliced black olives
- 2 tablespoons salsa
- Tortilla chips, for serving
Instructions
- Spread the refried beans evenly across the bottom of a shallow serving dish or pie plate.
- Spoon the guacamole over the beans and smooth it into an even layer.
- Mix 3/4 cup of the sour cream with the taco seasoning in a small bowl until blended, then spread this mixture over the guacamole.
- Sprinkle the shredded cheddar cheese evenly over the seasoned sour cream layer.
- Scatter the diced tomatoes across the cheese.
- Place the remaining 1/4 cup sour cream in a small zip-top bag, snip off one corner, and pipe it into a spiderweb pattern over the top.
- Use the salsa to pipe small dots or lines along the web if desired for contrast, then arrange the black olives around the edge or as simple spider shapes.
- Serve right away with tortilla chips on the side.
Extra Tips
Pipe the sour cream web slowly and hold the bag close to the surface so the lines stay thin and neat. If you make the dip ahead, add the web and olives just before serving so the sour cream stays bright white. The olives give the web a nice dark contrast without needing extra ingredients. Course: Appetizer Cuisine: American Equipment: Shallow serving dish, Mixing bowl, Zip-top bag
Mummy-Wrapped Italian Sausage Rolls
These mummy-wrapped Italian sausage rolls turn a simple savory snack into a playful Halloween party bite. Flaky dough strips wrap around juicy Italian sausages, giving a crisp texture that contrasts with the rich, herbed meat inside.
They fit well at casual gatherings where guests want something handheld and fun. The mummy look comes together quickly with basic pantry items and still delivers familiar flavors everyone enjoys.
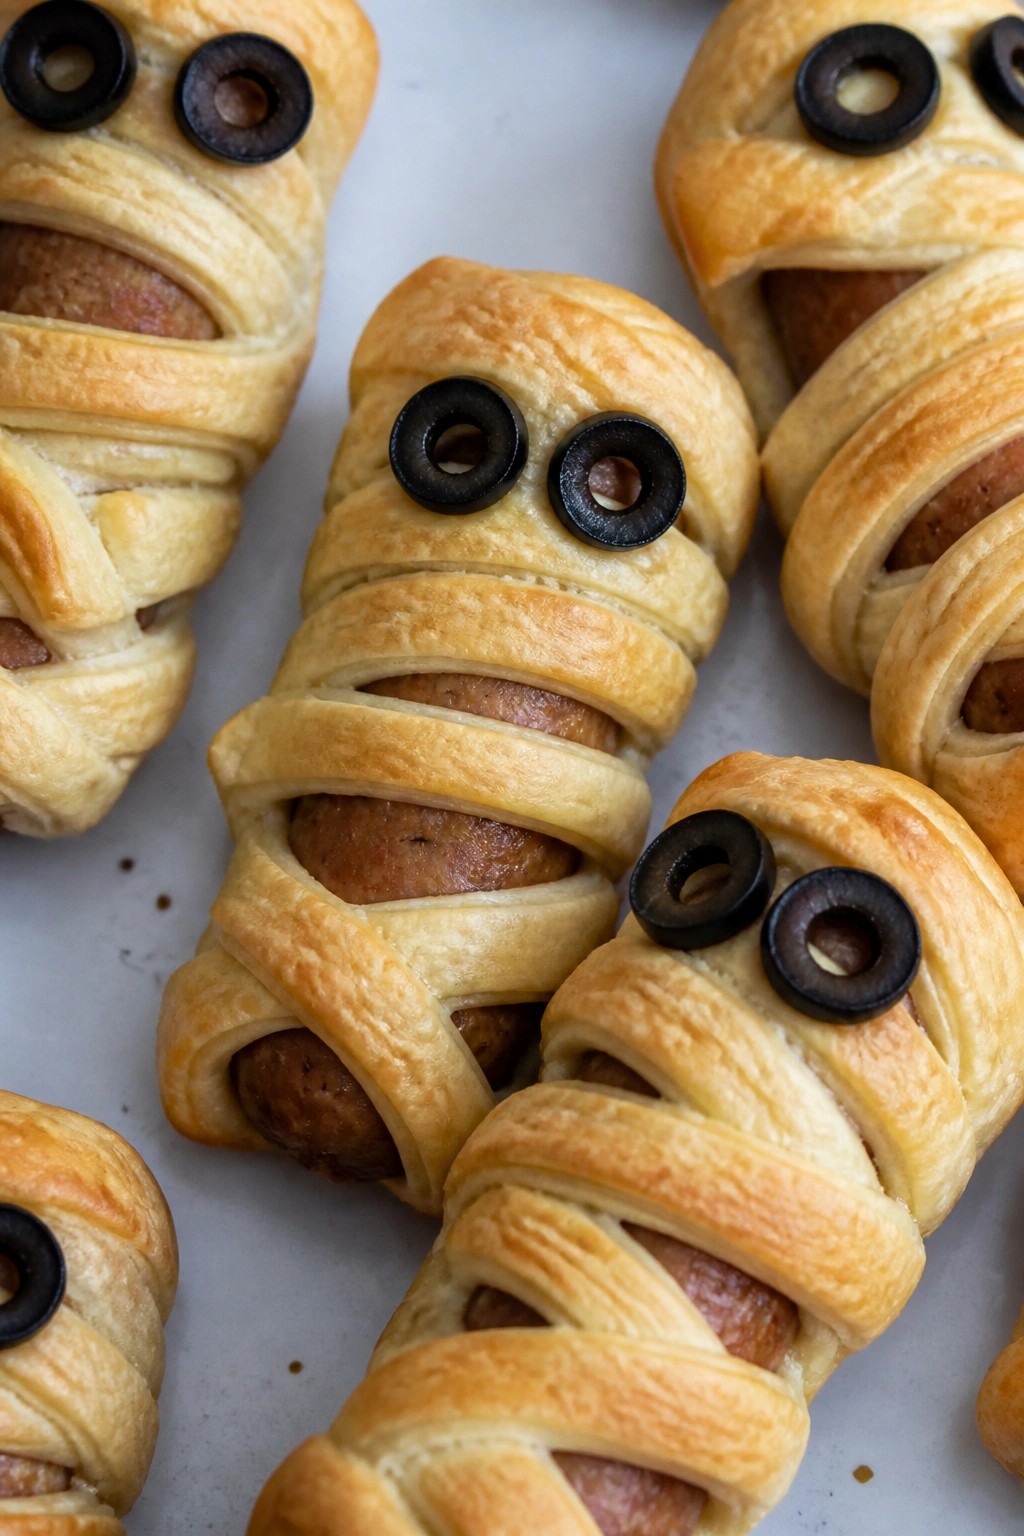
Serves 4 people.
Ingredients
- 4 Italian sausages
- 1 can (8 oz) refrigerated crescent rolls
- 1 large egg
- 8 thin slices black olives
Instructions
- Preheat the oven to 375°F and line a baking sheet with parchment paper.
- Cook the Italian sausages in a skillet over medium heat for about 5 minutes, turning until browned on all sides but not fully cooked through. Set aside to cool slightly.
- Unroll the crescent dough on a lightly floured surface and cut it into thin strips about ½ inch wide.
- Wrap the dough strips around each sausage, leaving small gaps between strips to create a mummy bandage effect.
- Beat the egg with 1 tablespoon of water and brush the mixture over the wrapped sausages.
- Arrange the sausages on the prepared baking sheet and bake for 15 to 20 minutes until the dough is golden brown and the sausages reach an internal temperature of 160°F.
- Remove from the oven and gently press two black olive slices onto each sausage to form eyes.
Extra Tips
Let the sausages cool for a few minutes after browning so the dough stays firm while wrapping. Cut the dough with a pizza cutter or sharp knife for clean, even strips that wrap neatly. Serve the rolls right after baking while the pastry stays crisp. Course: Appetizer Cuisine: American Equipment: Baking Sheet, Skillet, Pastry Brush
Jack-o’-Lantern Stuffed Bell Peppers with Rice and Beef
These bell peppers get carved into jack-o’-lantern faces before they are stuffed and baked. The result is a simple main dish that fits right into a Halloween party spread without much extra effort.
The filling combines seasoned beef with rice and tomato for a hearty, savory bite. The peppers soften just enough while keeping their shape for easy serving.
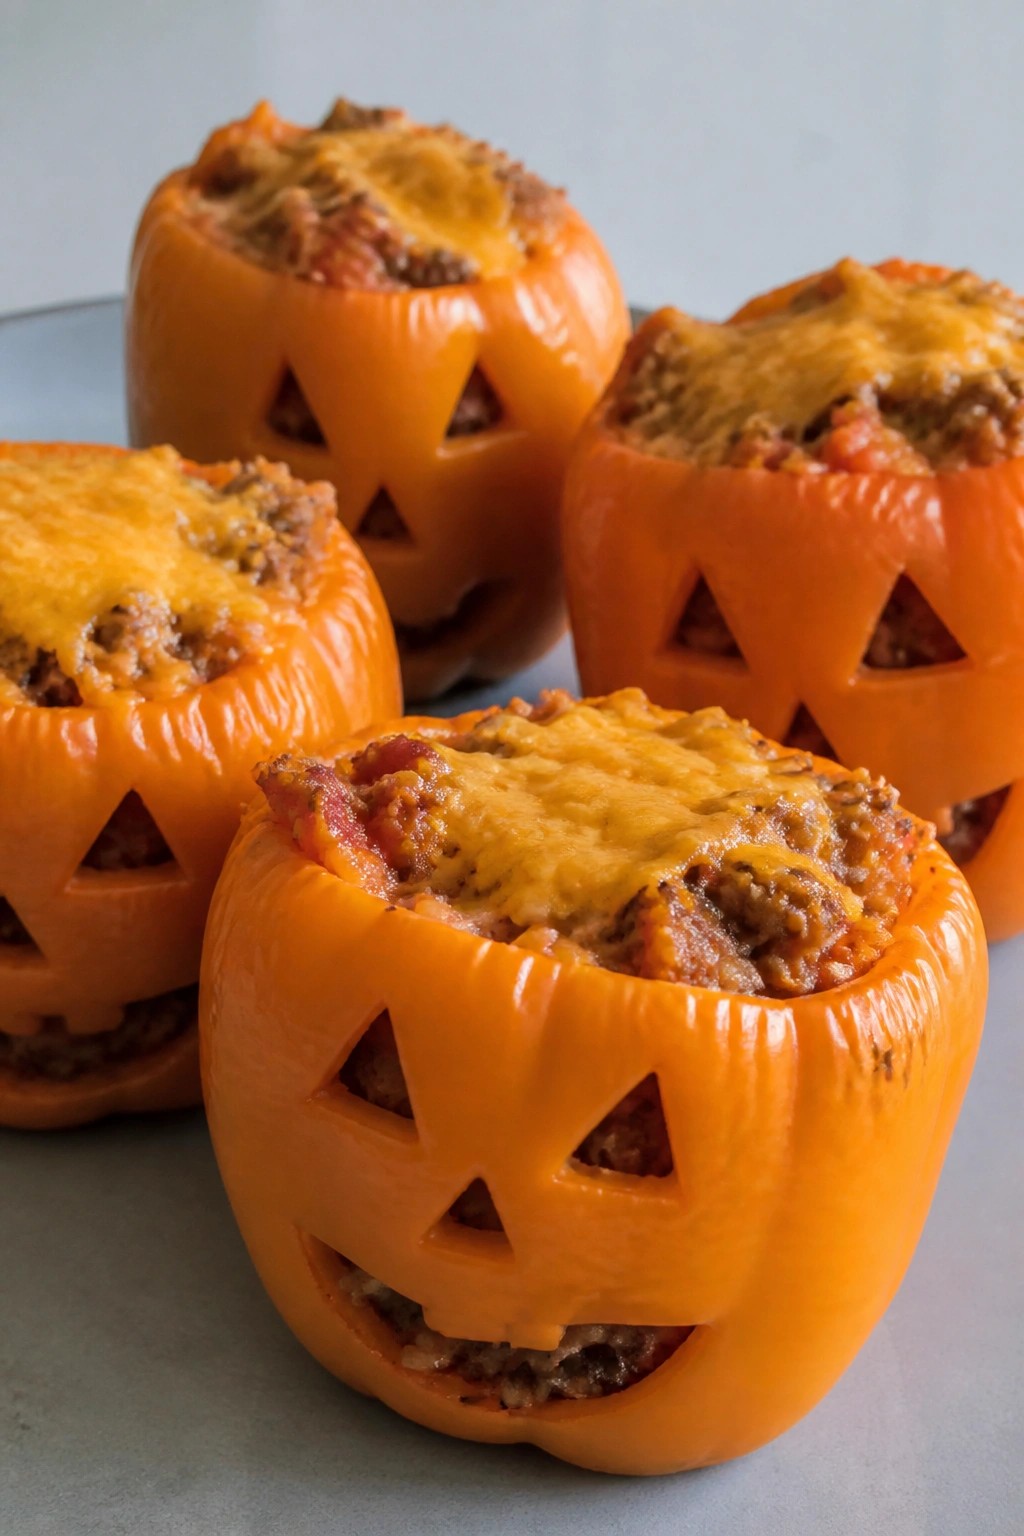
Serves 4 people.
Ingredients
- 4 large orange bell peppers
- 1 pound ground beef
- 2 cups cooked white rice
- 1 medium onion, chopped
- 2 cloves garlic, minced
- 1 (15 oz) can tomato sauce
- 1 teaspoon salt
- 1/2 teaspoon black pepper
- 1 cup shredded cheddar cheese
Instructions
- Preheat the oven to 375°F. Cut the tops off each bell pepper and remove the seeds and membranes. Use a small knife to carve simple jack-o’-lantern faces into the sides of the peppers.
- Heat a large skillet over medium heat. Add the ground beef, chopped onion, and minced garlic. Cook until the beef is browned and the onion is soft. Drain any excess fat.
- Stir the cooked rice, tomato sauce, salt, and black pepper into the skillet. Mix well and let it simmer for 2 minutes.
- Place the carved peppers upright in a baking dish. Spoon the beef and rice mixture evenly into each pepper.
- Sprinkle the shredded cheddar cheese over the top of each stuffed pepper. Bake for 25 minutes until the peppers are tender and the cheese is melted.
Extra Tips
Carve the faces after removing the seeds so the peppers stay sturdy during baking. The dish reheats well in the microwave if you want to prepare the stuffed peppers a day ahead and bake them the day of the party. Course: Main Course Cuisine: American Equipment: Baking dish, Large skillet, Knife
Bloody Vampire Bite Sliders on Hawaiian Rolls
These sliders turn simple beef patties and sweet rolls into a Halloween party hit. The marinara sauce adds a red drip that looks like fresh bites, while the soft rolls balance the savory filling. They work well for casual gatherings where guests want something easy to grab and eat.
The cheese melts over the beef for a rich bite, and the slight sweetness from the rolls keeps the whole thing from feeling heavy. You can set them out on a platter with the sauce showing for the full effect.
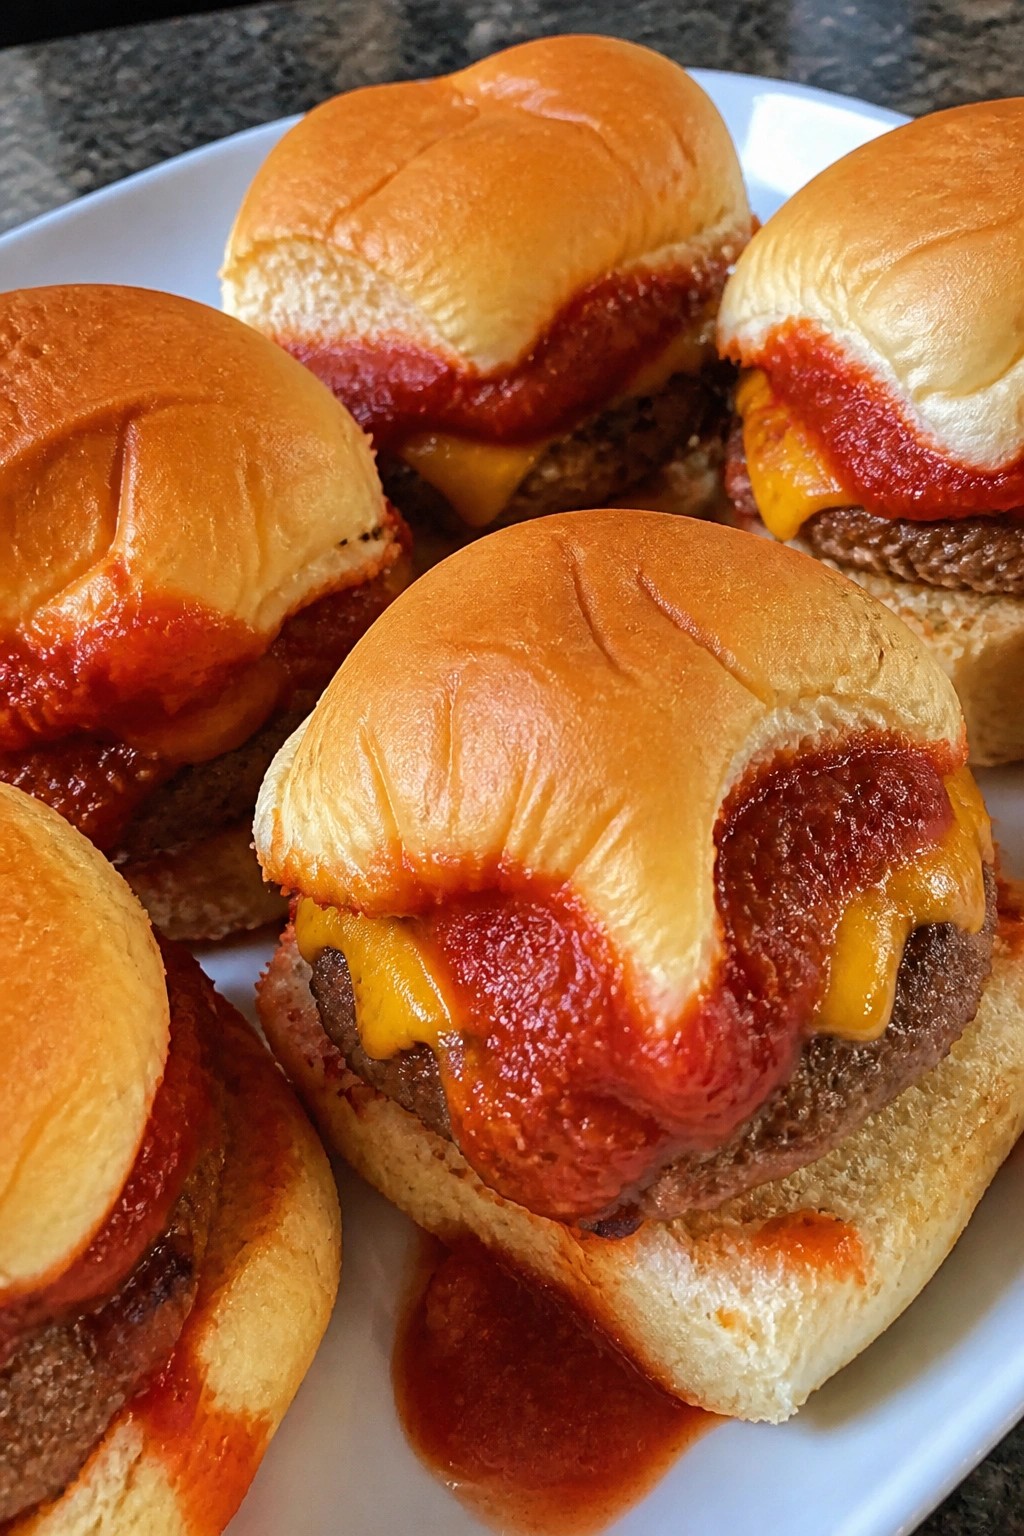
Serves 4 people.
Ingredients
- 8 Hawaiian sweet rolls
- 1 pound ground beef
- 1 teaspoon garlic powder
- 1/2 teaspoon salt
- 1/4 teaspoon black pepper
- 4 slices cheddar cheese
- 1/2 cup marinara sauce
- 1 tablespoon olive oil
Instructions
- Heat the olive oil in a large skillet over medium heat. Add the ground beef and break it up with a spatula. Sprinkle in the garlic powder, salt, and black pepper. Cook until the beef is browned and no longer pink, about 8 minutes.
- Split the Hawaiian rolls in half horizontally while keeping the bottoms attached. Place the cooked beef mixture evenly over the roll bottoms. Lay the cheddar cheese slices on top of the beef so they cover it fully.
- Spread 1/4 cup of the marinara sauce over the cheese. Place the roll tops back on. Spoon the remaining 1/4 cup marinara sauce across the tops in thin lines so it drips down the sides like bite marks. Cut a small slit in each top roll if you want more defined drips.
Extra Tips
Warm the assembled sliders for a few minutes in a 350 degree oven if the cheese needs extra melting after assembly. Use a spoon to control how much marinara drips for the best visual effect. Leftovers keep in the fridge for one day and reheat best in a low oven to avoid drying out the rolls. Course: Appetizer Cuisine: American Equipment: Large skillet, Baking sheet, Knife
Witch’s Cauldron Beef Chili with Cornbread Dippers
This chili brings a hearty, smoky beef base with black beans and tomatoes that hold up well at a party table. The cornbread dippers turn it into an easy, hands-on dish that works for Halloween gatherings or casual weeknight meals with friends. The texture stays thick enough for dipping while the cornbread adds a mild, slightly sweet contrast.
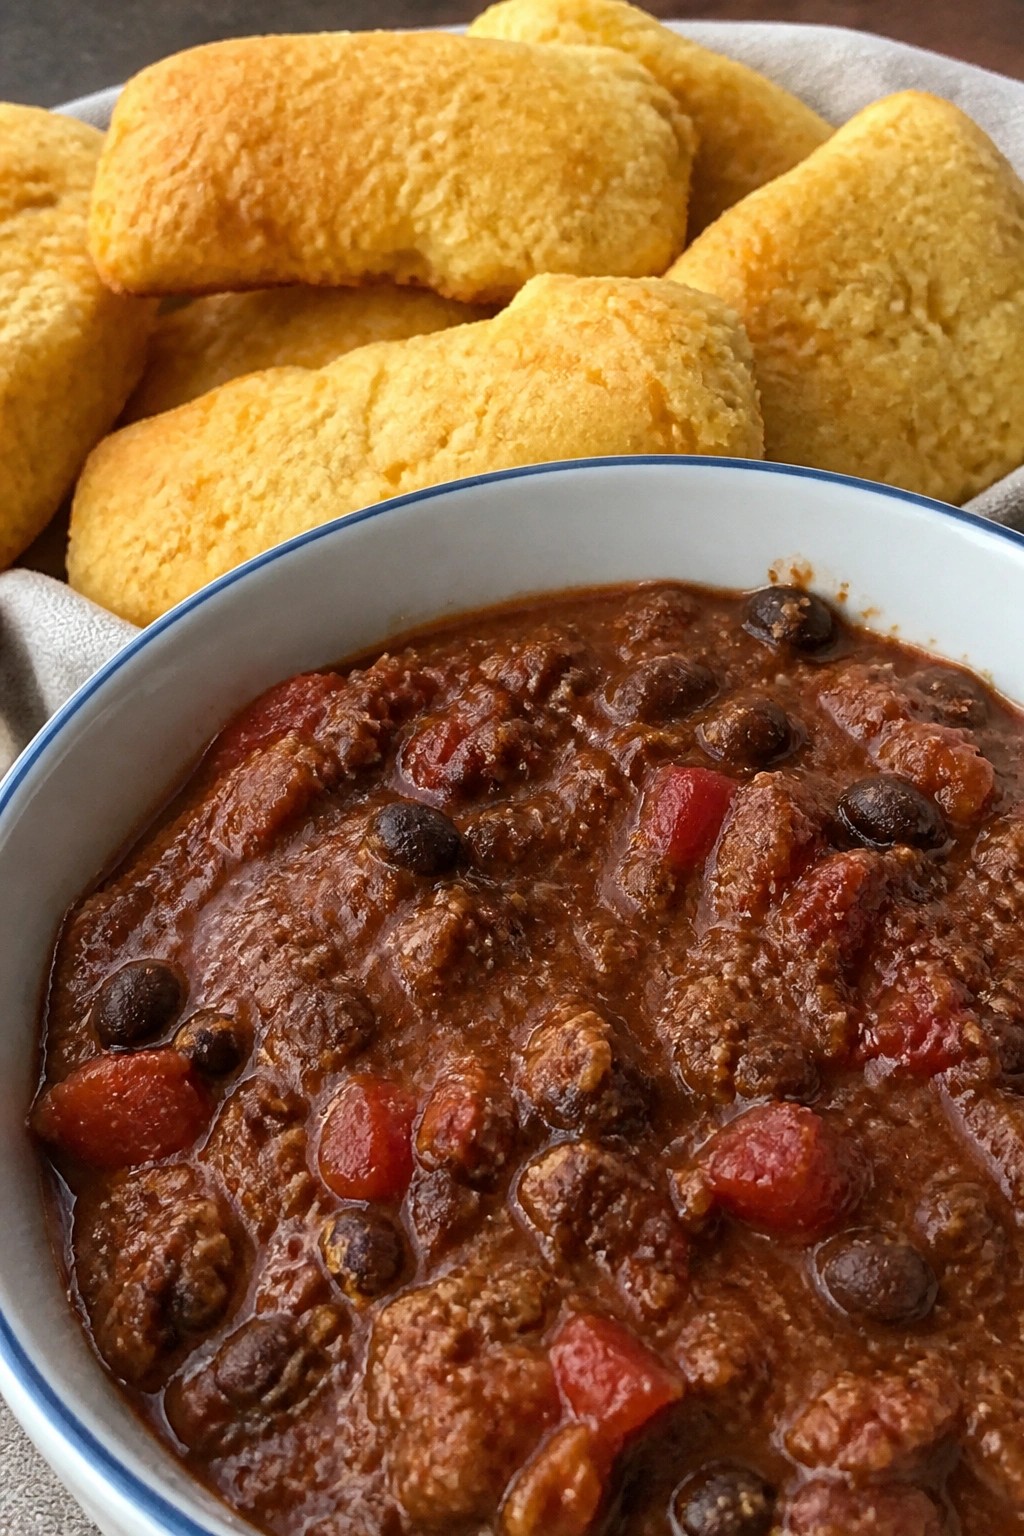
Serves 4 people.
Ingredients
- 1 pound ground beef
- 1 medium onion, diced
- 2 cloves garlic, minced
- 1 can (15 oz) black beans, rinsed and drained
- 1 can (14.5 oz) fire-roasted tomatoes
- 2 tablespoons chili powder
- 1 teaspoon ground cumin
- 1 teaspoon salt
- 1/2 teaspoon black pepper
- 1 cup cornmeal
- 3/4 cup all-purpose flour
- 1 tablespoon baking powder
- 1 cup milk
- 1 large egg
- 2 tablespoons melted butter
- 1/2 cup shredded cheddar cheese
Instructions
- Heat a large pot over medium heat and cook the ground beef until browned, breaking it up as it cooks. Drain excess fat if needed.
- Add the diced onion and minced garlic to the pot. Cook for 3 to 4 minutes until the onion softens.
- Stir in the black beans, fire-roasted tomatoes, chili powder, cumin, salt, and black pepper. Simmer uncovered for 15 minutes, stirring occasionally.
- While the chili simmers, preheat the oven to 400 degrees. In a mixing bowl, combine the cornmeal, flour, and baking powder.
- Whisk the milk, egg, and melted butter together, then pour into the dry ingredients. Stir until just combined.
- Spread the batter into a greased 8×8 baking dish and bake for 15 to 18 minutes until golden on top. Let it cool for 5 minutes, then cut into strips for dipping.
- Ladle the chili into bowls and top with shredded cheddar cheese. Serve the cornbread strips on the side for dipping.
Extra Tips
Make the chili a day ahead so the flavors deepen. Reheat gently on the stove and add a splash of water if it thickens too much. Cut the cornbread into wide strips so they stay sturdy when dipped. Skip the cheese on top if you want a cleaner chili surface for the dippers. Course: Main Course Cuisine: American Equipment: Large Pot, Mixing Bowl, 8×8 Baking Dish
Ghostly White Chicken Enchilada Casserole
This creamy white chicken enchilada casserole brings a mild, cheesy flavor with tender chicken and soft tortillas. The white sauce and pale cheese give it a light appearance that fits a Halloween spread without extra fuss. It works well for parties because it can be assembled ahead and baked just before guests arrive.
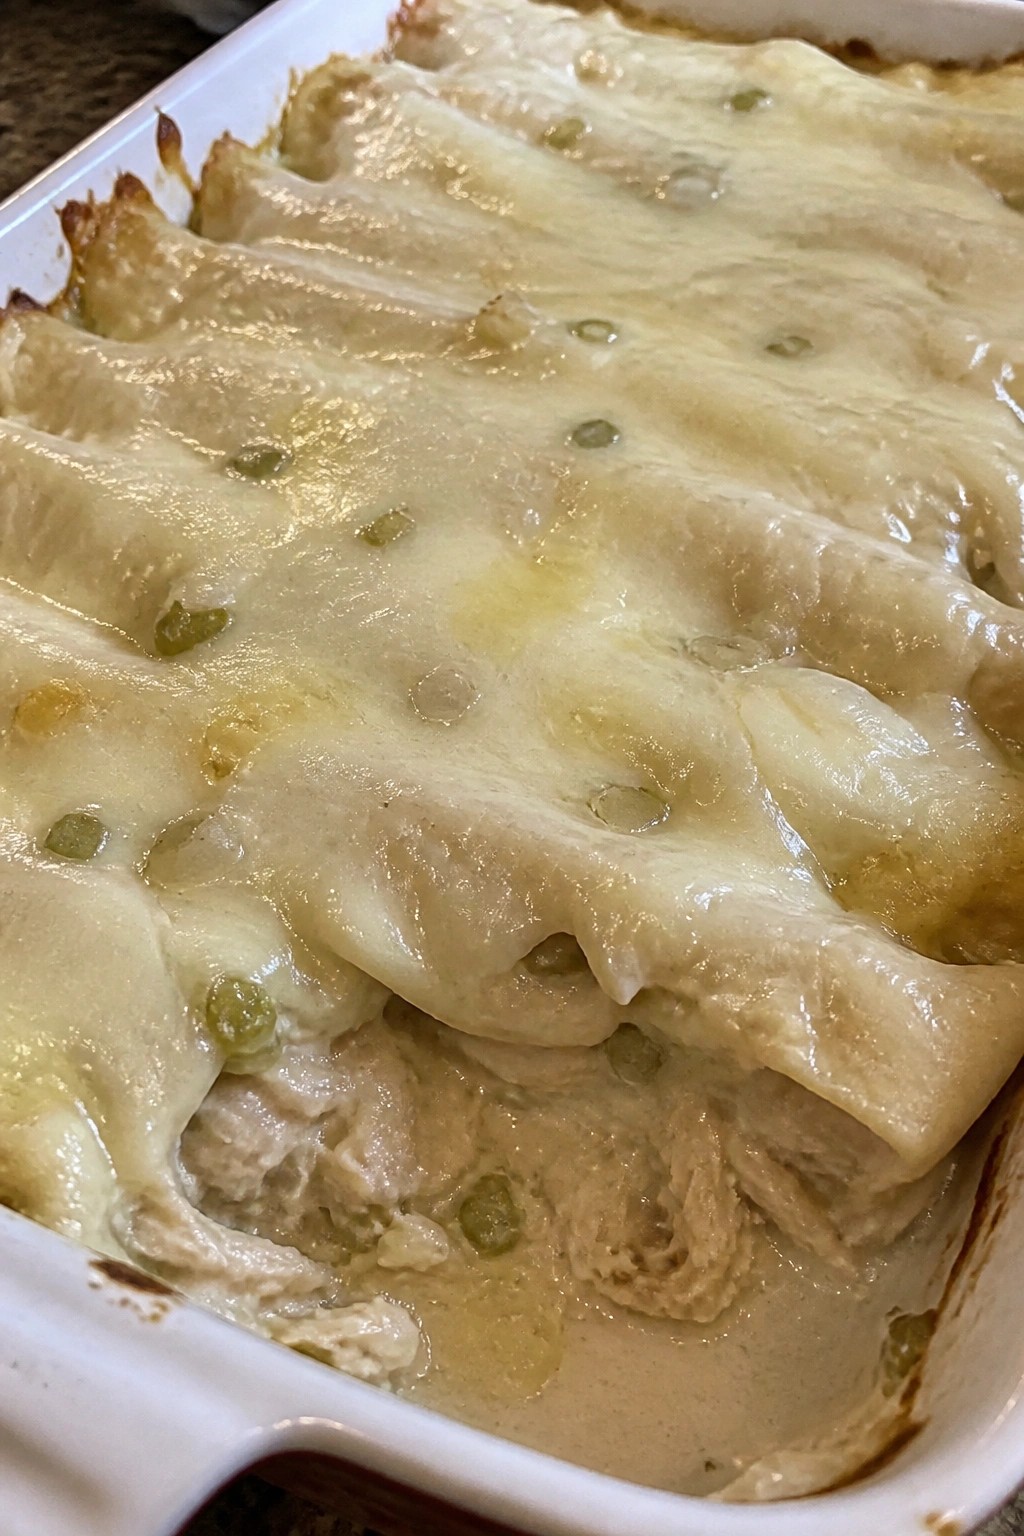
Serves 4 people.
Ingredients
- 2 cups cooked shredded chicken
- 8 small flour tortillas
- 1 (10.5 oz) can cream of chicken soup
- 1 cup sour cream
- 1 (4 oz) can diced green chiles
- 1/2 cup diced white onion
- 2 cups shredded Monterey Jack cheese, divided
- 1/2 teaspoon garlic powder
- Salt and black pepper to taste
- Extra sour cream for topping
Instructions
- Preheat the oven to 350°F and lightly grease a 9×13 baking dish.
- In a mixing bowl, stir together the cream of chicken soup, sour cream, diced green chiles, diced white onion, garlic powder, salt, and black pepper until smooth.
- Spread a thin layer of the sauce mixture across the bottom of the prepared baking dish.
- Fill each flour tortilla with about 1/4 cup shredded chicken and a sprinkle of Monterey Jack cheese, then roll them up and place them seam-side down in the dish.
- Pour the remaining sauce evenly over the rolled tortillas and top with the rest of the shredded Monterey Jack cheese.
- Bake for 25 to 30 minutes until the cheese is melted and the edges are lightly golden.
- Let the casserole rest for 5 minutes, then pipe or spoon extra sour cream on top to create simple ghost shapes before serving.
Extra Tips
Use room-temperature sour cream so it spreads evenly without curdling the sauce. If you want less onion flavor, cook the diced white onion in a skillet for a few minutes first. Leftovers reheat well in the microwave with a splash of milk stirred in to loosen the sauce. Course: Main Course Cuisine: Mexican Equipment: 9×13 Baking Dish, Mixing Bowl, Oven
Skeleton Ribs with Smoky BBQ Sauce and Coleslaw
These skeleton ribs turn a classic barbecue dish into a Halloween party centerpiece. The ribs are slow-cooked until tender, then arranged on the platter to resemble a ribcage for a fun visual effect that fits right in with spooky spreads.
The smoky barbecue sauce adds deep flavor while the coleslaw brings a cool, crunchy contrast. This combination keeps the meal balanced and easy to serve to a group.
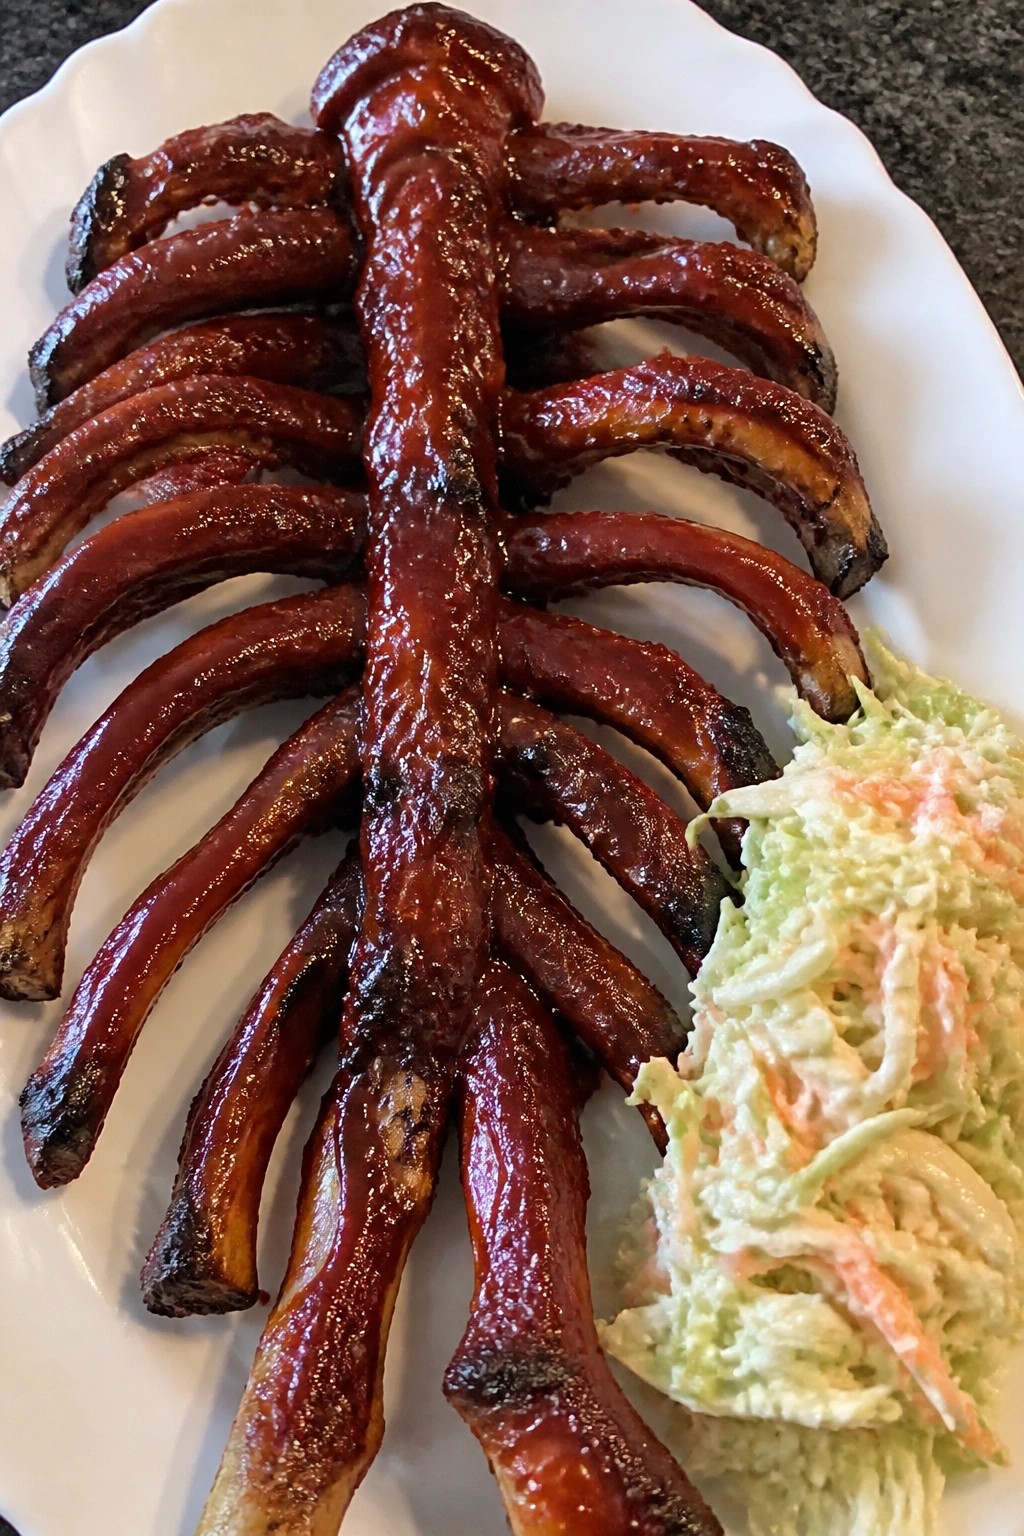
Serves 4 people.
Ingredients
- 2 racks baby back ribs (about 3-4 lbs total)
- 1 cup ketchup
- 1/4 cup brown sugar
- 2 tbsp apple cider vinegar
- 1 tbsp smoked paprika
- 1 tsp garlic powder
- 1 tsp onion powder
- Salt and black pepper to taste
- 4 cups shredded green cabbage
- 1 cup shredded carrots
- 1/2 cup mayonnaise
- 1 tbsp Dijon mustard
- 1 tsp celery seeds
Instructions
- Preheat the oven to 300°F. Season both racks of ribs on all sides with salt, black pepper, smoked paprika, garlic powder, and onion powder.
- Place the ribs on a foil-lined baking sheet, cover tightly with more foil, and bake for 2 hours until the meat is tender and pulls away from the bone easily.
- While the ribs bake, stir together the ketchup, brown sugar, and 2 tablespoons of apple cider vinegar in a small saucepan. Simmer over low heat for 10 minutes to thicken into a smoky sauce, then set aside.
- In a large bowl, combine the shredded cabbage, shredded carrots, mayonnaise, Dijon mustard, celery seeds, and a pinch of salt and pepper. Toss until evenly coated and chill until ready to serve.
- Remove the ribs from the oven, uncover, and brush generously with the smoky barbecue sauce. Return to the oven uncovered for 15 minutes to set the glaze.
- Transfer the ribs to a large platter and arrange them to form a skeleton ribcage shape. Serve with the coleslaw on the side.
Extra Tips
Brush on extra sauce right before serving so the ribs stay glossy. If you want a bit more heat, add a pinch of cayenne to the barbecue sauce while it simmers. The coleslaw can be made a few hours ahead and kept in the fridge to let the flavors meld. Course: Main Course Cuisine: American Equipment: Baking sheet, Mixing bowls, Saucepan, Tongs
Poison Apple Pork Tenderloin with Roasted Root Vegetables
This pork tenderloin dish brings a dark, dramatic touch to a Halloween spread. The roasted root vegetables add earthy sweetness while the apple glaze gives the meat a glossy, deep color that fits the theme without extra effort. It works well as a main for a sit-down party or as a hearty option alongside other spooky bites.
The result is tender pork with caramelized edges and soft, flavorful vegetables that soak up the glaze. Guests get a mix of savory, sweet, and slightly tart notes in one plate.
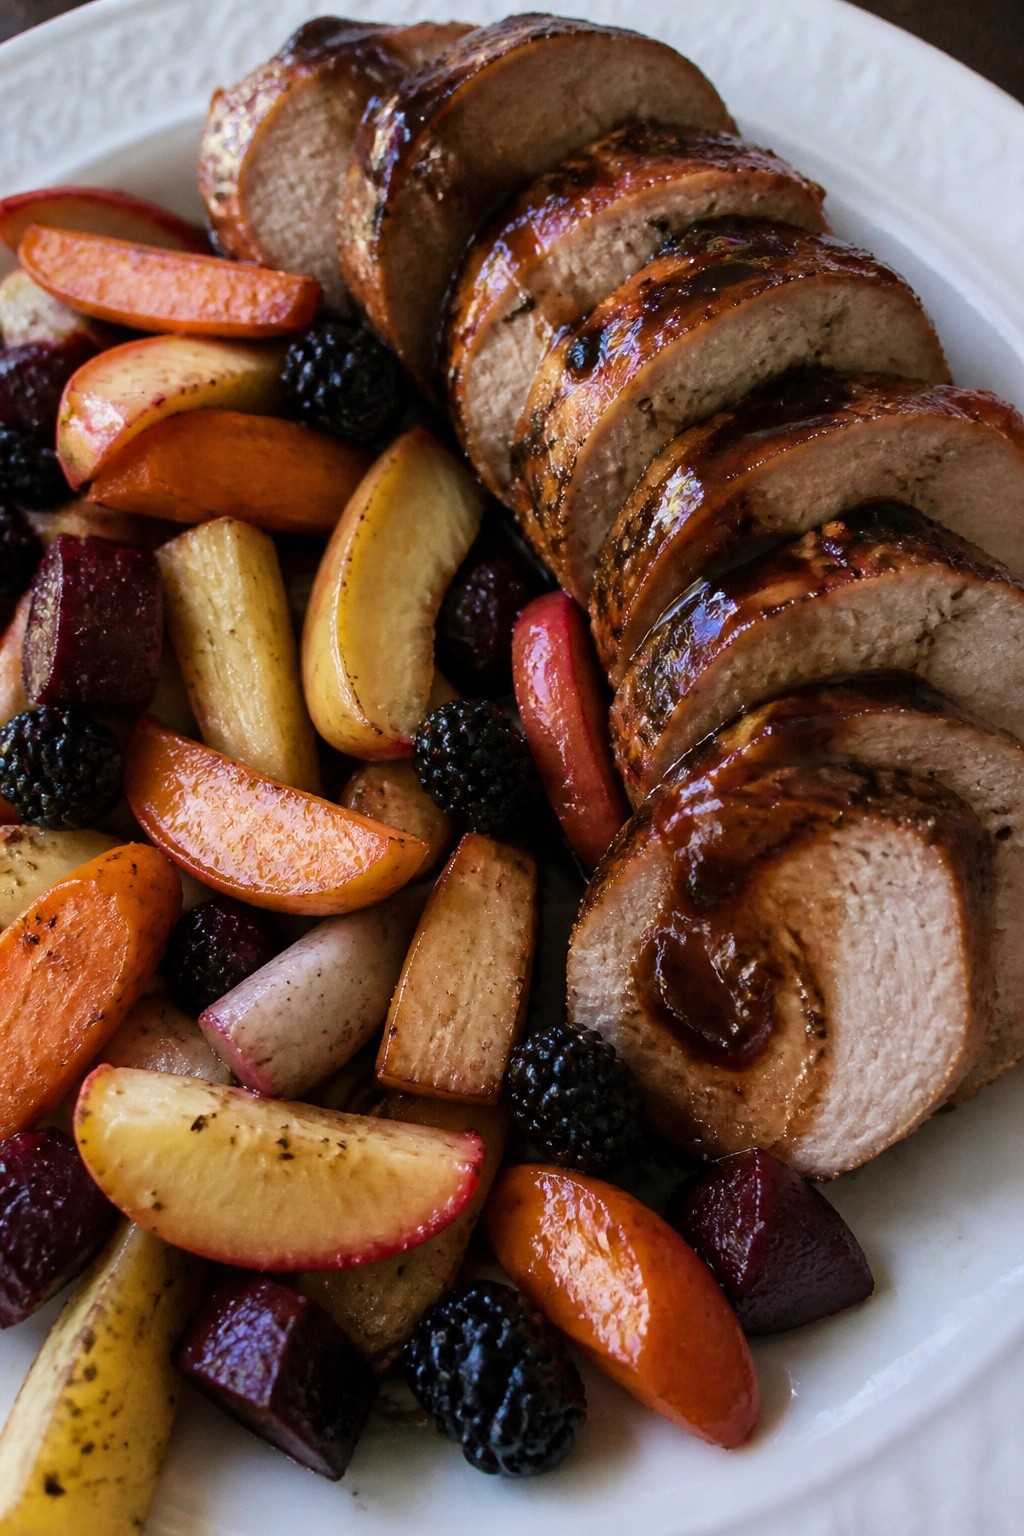
Serves 4 people.
Ingredients
- 1 pork tenderloin (about 1.5 pounds)
- 2 tart apples, cored and sliced
- 3 carrots, peeled and cut into chunks
- 2 parsnips, peeled and cut into chunks
- 1 small beet, peeled and cubed
- 2 tablespoons olive oil
- 1 teaspoon salt
- 1/2 teaspoon black pepper
- 2 cloves garlic, minced
- 1 tablespoon fresh rosemary, chopped
- 1/4 cup apple cider
- 2 tablespoons balsamic vinegar
- 1/2 cup blackberries
Instructions
- Preheat the oven to 425 degrees. Toss the carrots, parsnips, beet, and apples with 1 tablespoon olive oil, half the salt, and half the pepper on a large baking sheet.
- Place the pork tenderloin in the center of the sheet. Rub it with the remaining olive oil, salt, pepper, minced garlic, and rosemary.
- Roast everything for 20 minutes. While it cooks, mash the blackberries in a small bowl and stir in the apple cider and balsamic vinegar.
- Remove the sheet from the oven and pour the blackberry mixture over the pork and vegetables. Return to the oven for 10 to 15 more minutes until the pork reaches 145 degrees internally.
- Let the pork rest for 5 minutes before slicing. Serve the slices with the roasted vegetables and any pan juices spooned over the top.
Extra Tips
Brush the glaze on during the last 10 minutes of roasting to keep the blackberry color bright instead of burning. Leftovers reheat well in a covered skillet over low heat with a splash of apple cider to loosen the glaze. If you want less sweetness, use one apple instead of two and add an extra pinch of salt to the vegetables before roasting. Course: Main Course Cuisine: American Equipment: Baking sheet, Oven, Small bowl, Skillet
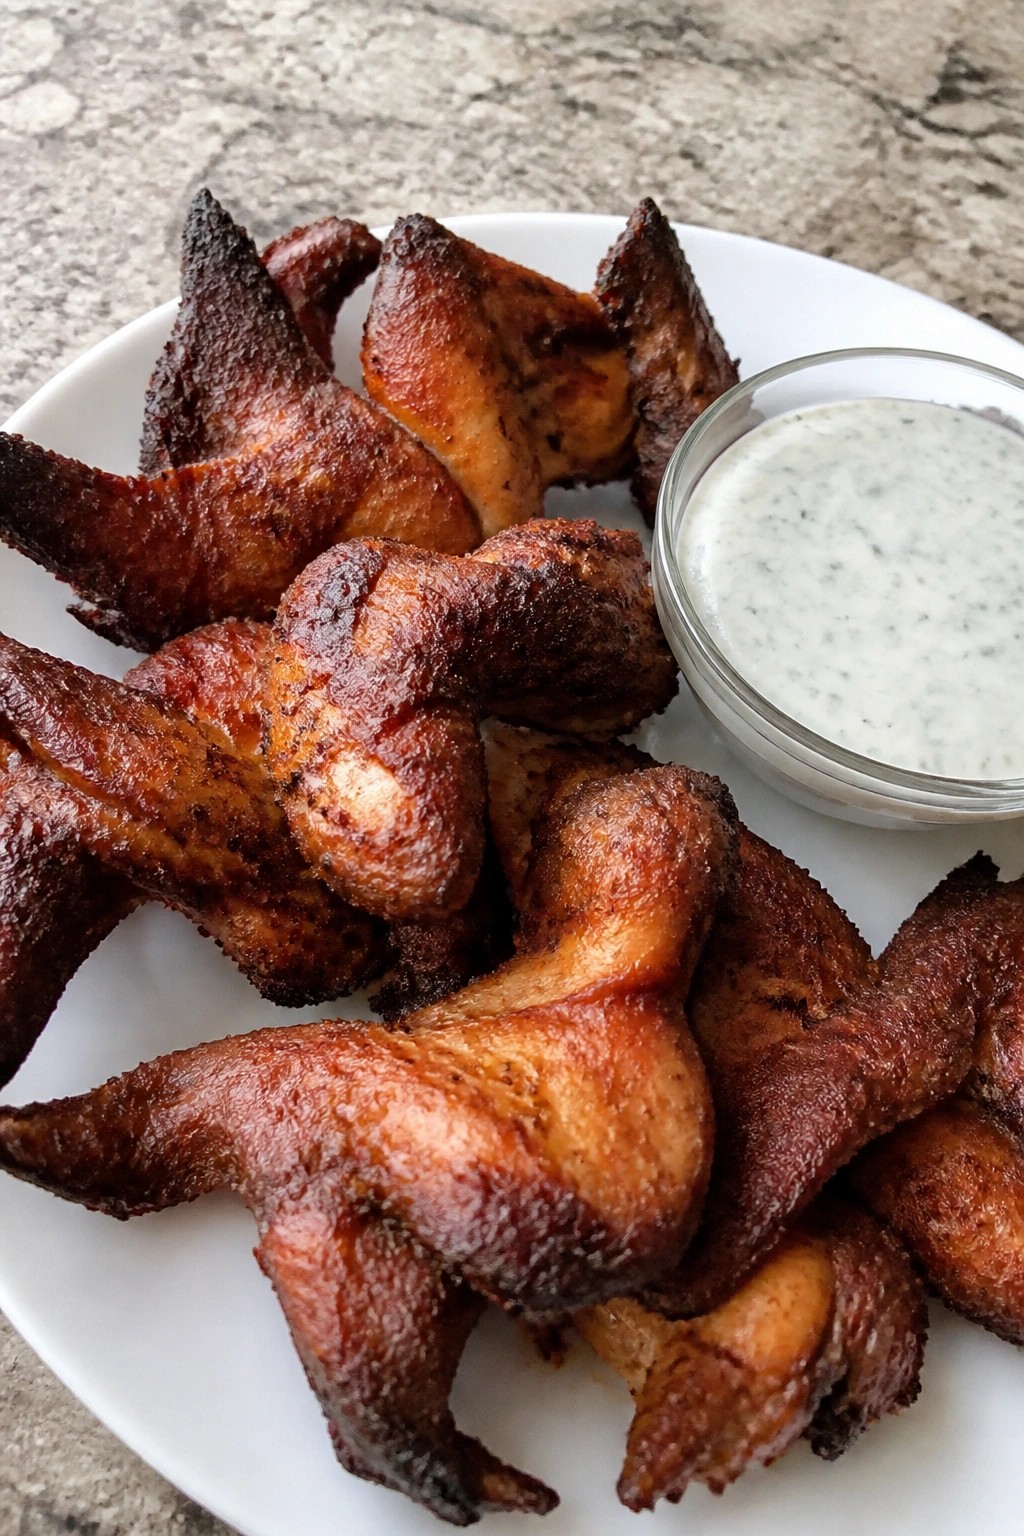
Bat Wing Crispy Chicken Wings with Ranch Dip
These bat wing crispy chicken wings give classic party food a Halloween spin that guests notice right away. The wings bake up with a crunchy exterior and juicy center, while the cool ranch dip balances the smoky seasoning. They fit well at casual gatherings or themed parties where people want something savory to grab and dip.
The flavor leans bold from the paprika and garlic but stays grounded by the creamy, herby dip. This combination keeps everyone coming back for another wing without feeling heavy.
Serves 4 people.
Ingredients
- 2 pounds chicken wings
- 2 tablespoons vegetable oil
- 1 tablespoon baking powder
- 1 teaspoon smoked paprika
- 1 teaspoon salt
- 1/2 teaspoon garlic powder
- 1/2 teaspoon black pepper
- 1 cup sour cream
- 1/2 cup mayonnaise
- 1 tablespoon fresh dill, chopped
- 1 teaspoon lemon juice
- 1/2 teaspoon onion powder
Instructions
- Preheat the oven to 400 degrees F. Line a baking sheet with foil and set a wire rack on top.
- Place the chicken wings in a large bowl and add the vegetable oil, baking powder, smoked paprika, salt, garlic powder, and black pepper. Toss until every wing is evenly coated.
- Arrange the wings in a single layer on the wire rack. Bake for 40 to 45 minutes, turning once halfway through, until the skin is golden and crisp.
- While the wings bake, combine the sour cream, mayonnaise, dill, lemon juice, onion powder, and a pinch of salt and pepper in a medium bowl. Stir until smooth.
- Remove the wings from the oven and let them rest on the rack for 3 minutes. Transfer to a platter and serve with the ranch dip.
Extra Tips
The baking powder is what creates the lasting crunch, so measure it carefully and coat the wings thoroughly. You can mix the dip a few hours ahead and keep it in the fridge to let the flavors settle. If you want a little extra color for the theme, add an extra pinch of smoked paprika to the wings before baking. Course: Appetizer Cuisine: American Equipment: Baking Sheet, Wire Rack, Mixing Bowls
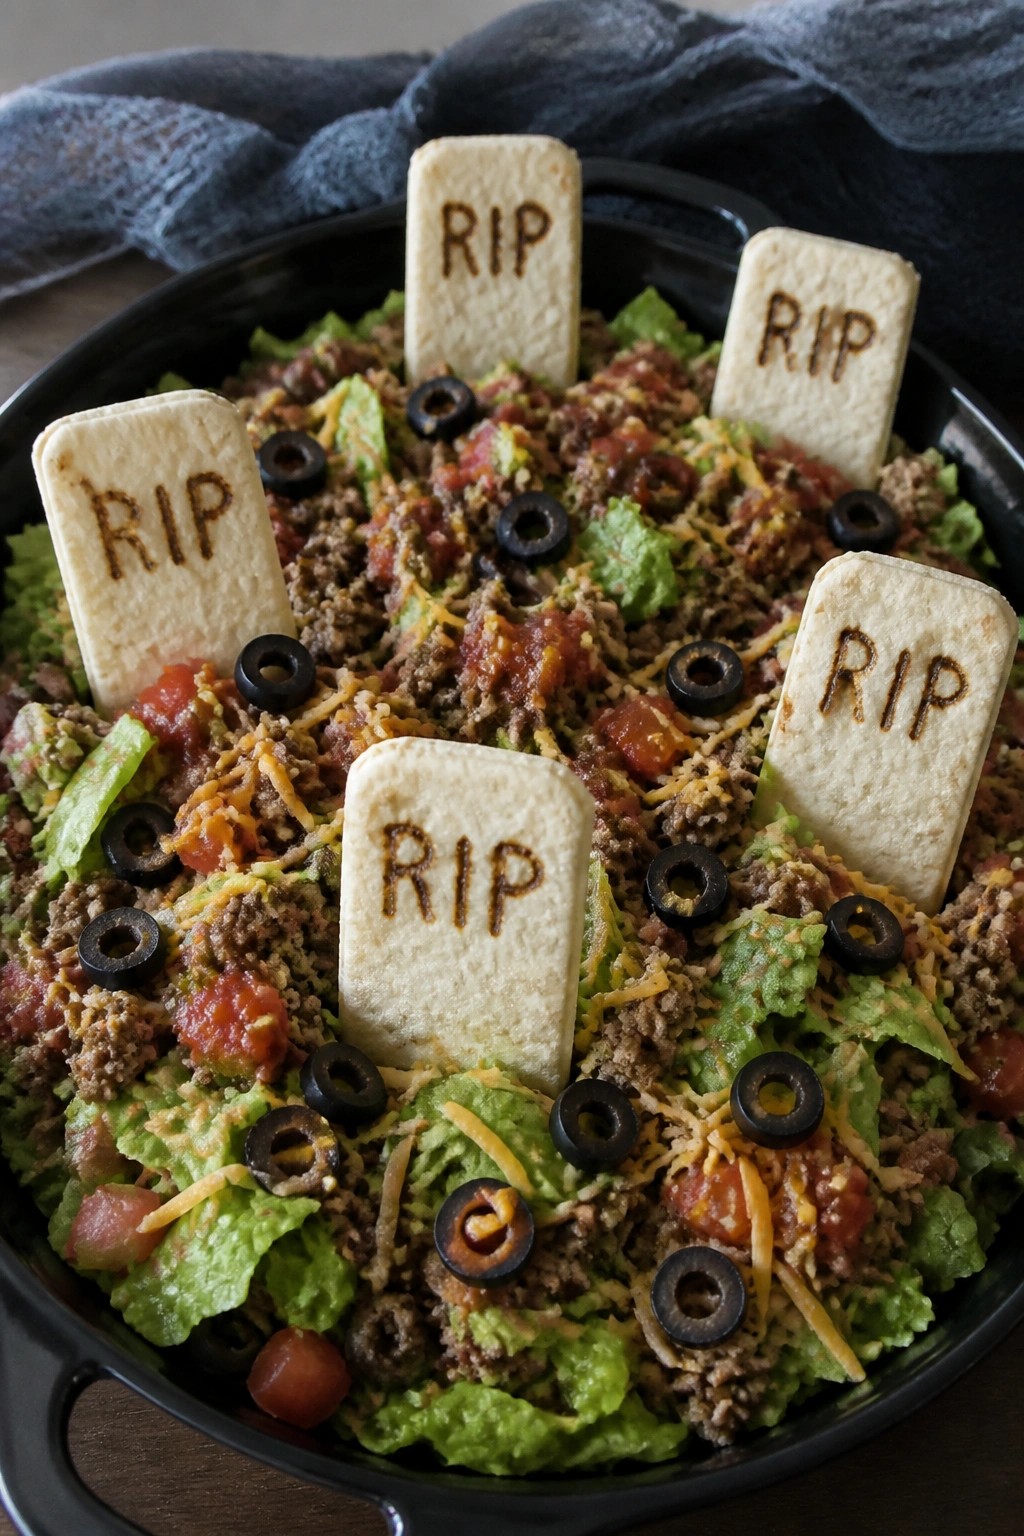
Graveyard Taco Salad with Tortilla Tombstones
This taco salad turns a classic party dish into a Halloween centerpiece. The base looks like dark soil while upright tortilla tombstones give it a graveyard appearance that guests notice right away. It works well for potlucks or kid-friendly gatherings because the flavors stay familiar and zesty.
The salad combines seasoned beef, crisp lettuce, fresh tomatoes, and melted cheese with crunchy tortilla pieces. Each bite mixes warm taco filling with cool vegetables and a light salsa finish.
Serves 4 people.
Ingredients
- 1 pound ground beef
- 2 tablespoons taco seasoning
- 4 large flour tortillas
- 6 cups chopped romaine lettuce
- 2 tomatoes, diced
- 1 cup shredded cheddar cheese
- 1/2 cup sliced black olives
- 1 cup salsa
- 1/2 cup sour cream
Instructions
- Heat a large skillet over medium heat. Add the ground beef and cook until browned, breaking it up with a spoon. Stir in the taco seasoning and 1/4 cup water. Simmer for 3 minutes until thickened, then remove from heat.
- Preheat the oven to 375 degrees. Cut each flour tortilla into a tombstone shape using a knife. Place the shapes on a baking sheet and bake for 8 minutes until crisp and lightly golden.
- In a large mixing bowl, toss the chopped romaine lettuce with half of the diced tomatoes and half of the shredded cheddar cheese.
- Spread the seasoned beef over the lettuce mixture. Top with the remaining tomatoes, cheese, and sliced black olives.
- Spoon the salsa evenly across the top. Add dollops of sour cream around the surface.
- Insert the baked tortilla tombstones upright into the salad so they stand like markers.
Extra Tips
Bake the tortilla tombstones a few hours ahead and store them in an airtight container so they stay crisp until serving. If the salad sits too long before guests arrive, keep the beef and lettuce separate and combine just before adding the tombstones. Swap cheddar for pepper jack if you want more heat without changing any other steps. Course: Salad Cuisine: Mexican Equipment: Large skillet, Baking sheet, Mixing bowl
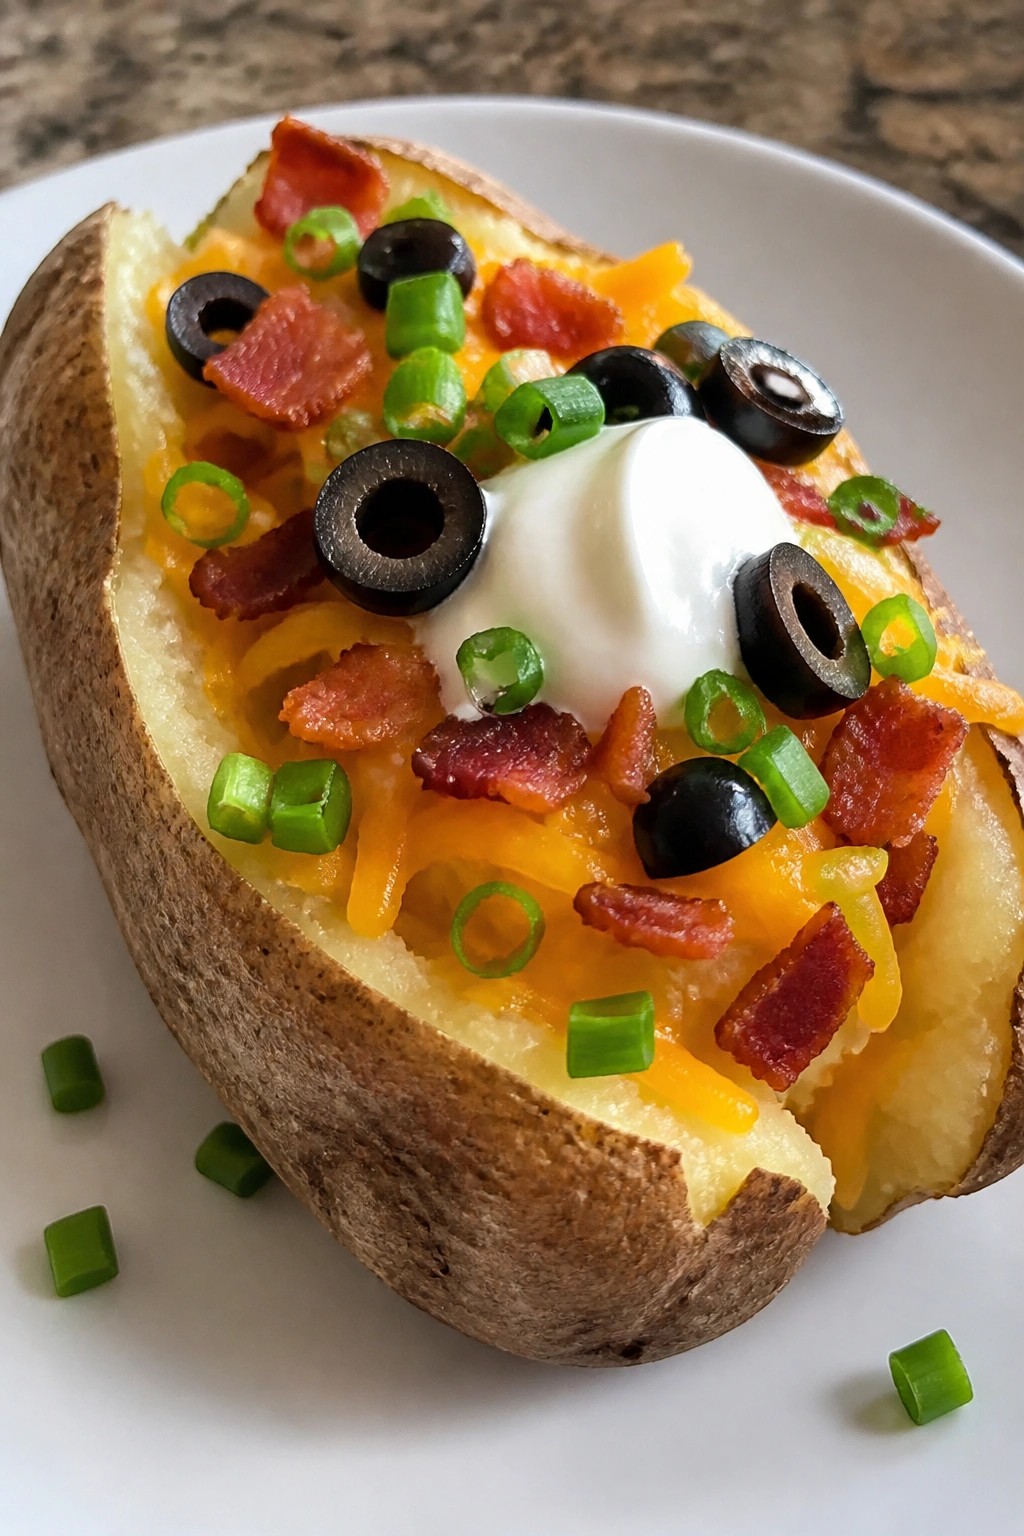
Monster Mash Loaded Baked Potato Bar
This loaded baked potato bar turns a simple side into a hands-on Halloween activity. Guests bake their potatoes ahead, then mash the centers right at the table before piling on toppings. The result is creamy potato with crispy, savory, and fresh bites in every forkful.
It works well for parties because everyone builds their own plate. The mix of melted cheese, salty bacon, and cool sour cream gives it that classic loaded potato taste with a fun monster mash twist.
Serves 4 people.
Ingredients
- 4 large russet potatoes
- 2 tablespoons olive oil
- 1 teaspoon salt
- 4 tablespoons butter
- 1/2 cup sour cream
- 1 cup shredded cheddar cheese
- 6 slices cooked bacon, crumbled
- 1/4 cup chopped green onions
- 1/4 cup sliced black olives
Instructions
- Preheat the oven to 400 degrees. Rub each potato with olive oil and sprinkle with salt. Place the potatoes on a baking sheet and bake for 50 to 60 minutes until the skins are crisp and a knife slides in easily.
- Remove the potatoes from the oven. Let them cool for 5 minutes. Slice each potato open lengthwise and fluff the inside with a fork.
- Add 1 tablespoon of butter and 2 tablespoons of sour cream to each potato. Mash the filling until it is creamy and well combined.
- Set out the shredded cheddar cheese, crumbled bacon, chopped green onions, and sliced black olives in separate bowls. Let each person add their own toppings to finish the loaded potatoes.
Extra Tips
Set up the toppings in small bowls so guests can reach everything easily while the potatoes are still hot. Use thick-cut bacon for better texture once crumbled. Leftovers reheat well in the microwave with a splash of milk stirred into the mashed center to keep them creamy. Course: Side Dish Cuisine: American Equipment: Baking sheet, Oven, Fork
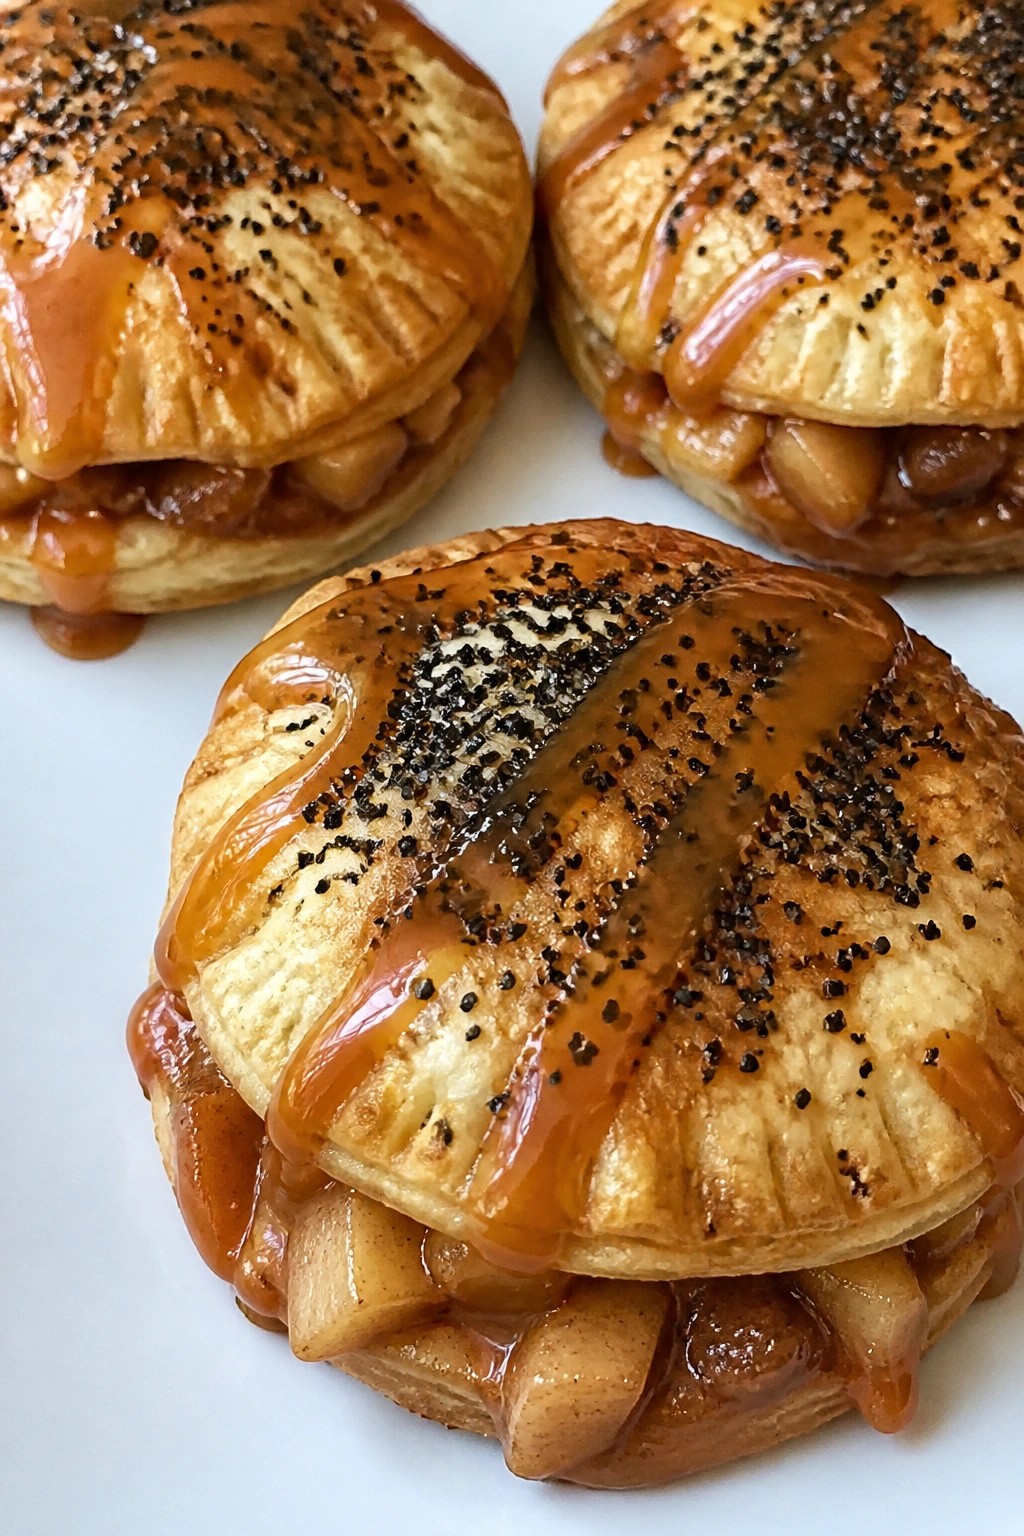
Caramel-Drizzled Apple Hand Pies with Black Sugar
These hand pies bring a simple spooky touch to any Halloween party spread. The black sugar creates a dark, eye-catching crust that stands out on a dessert table, while the warm apple filling and caramel drizzle keep them comforting and familiar. They hold up well at room temperature, making them easy to serve at gatherings without extra fuss.
The result is a flaky, buttery pastry with soft cinnamon apples inside and a glossy caramel finish on top. The black sugar adds a light crunch and visual contrast that fits the season without extra decoration.
Serves 4 people.
Ingredients
- 1 package refrigerated pie crusts (2 crusts)
- 2 medium apples, peeled and diced
- 2 tablespoons granulated sugar
- 1 teaspoon ground cinnamon
- 1 tablespoon lemon juice
- 1 egg, beaten
- 1/4 cup caramel sauce
- 2 tablespoons black sanding sugar
Instructions
- Preheat the oven to 400 degrees and line a baking sheet with parchment paper.
- In a bowl, combine the diced apples, granulated sugar, cinnamon, and lemon juice. Stir until the apples are evenly coated.
- Unroll the pie crusts on a lightly floured surface and cut each crust into two 5-inch circles for a total of four circles.
- Place a heaping spoonful of the apple mixture in the center of each circle. Fold the dough over to form a half-moon shape and crimp the edges with a fork to seal.
- Brush the tops of each hand pie with the beaten egg. Sprinkle black sanding sugar evenly over the surface of each pie.
- Cut a small slit in the top of each pie for steam to escape. Place the pies on the prepared baking sheet.
- Bake for 18 to 20 minutes until the crust is golden. Remove from the oven and let cool for 10 minutes.
- Drizzle caramel sauce over the cooled pies before serving.
Extra Tips
Use a thick caramel sauce so it stays in place on the crust instead of soaking in. If the black sanding sugar is hard to find, mix regular sugar with a drop of black food coloring as a backup. Store leftovers in an airtight container at room temperature for up to two days and warm briefly in the microwave to refresh the crust before serving. Course: Dessert Cuisine: American Equipment: Mixing Bowl, Baking Sheet, Pastry Brush
Spooky Stuffed Mushroom Caps with Herbed Cream Cheese
These stuffed mushrooms work well as a simple appetizer for Halloween parties. The creamy filling pairs with the tender caps to create an easy bite that guests can grab while mingling.
They fit nicely into a larger spread of savory snacks. The filling brings a light garlic and herb flavor that balances the earthy taste of the mushrooms without overpowering them.
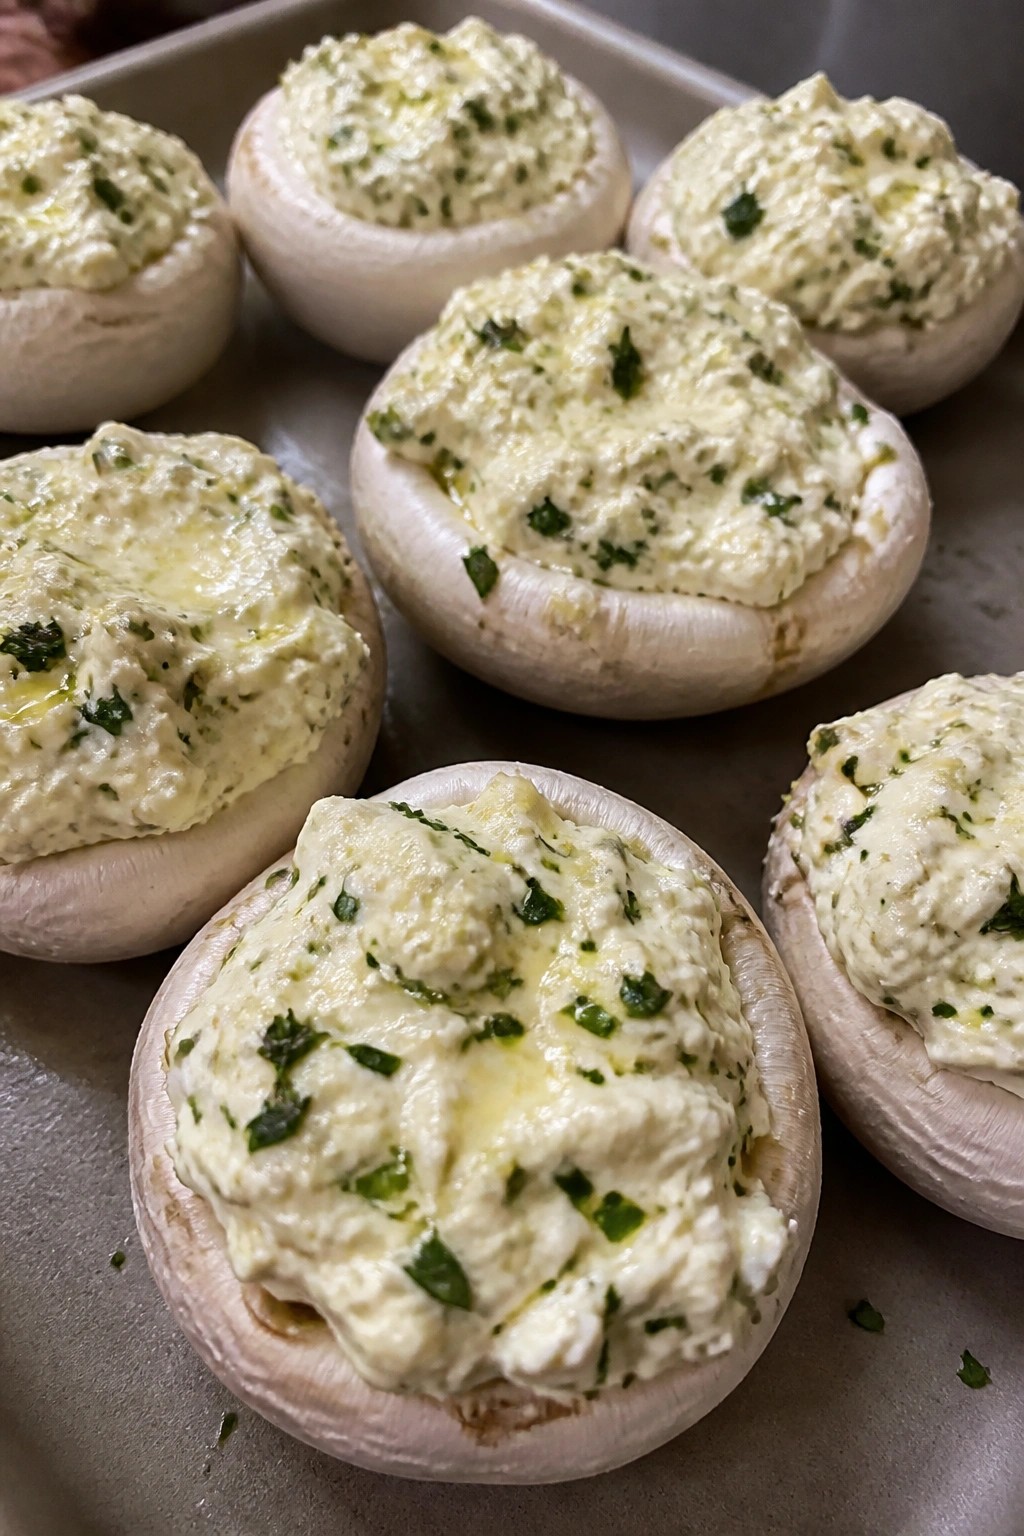
Serves 4 people.
Ingredients
- 16 large white mushrooms
- 8 oz cream cheese, softened
- 2 garlic cloves, minced
- 1/4 cup chopped mixed fresh herbs (parsley, chives, thyme)
- 1 tbsp olive oil
- Salt and pepper to taste
Instructions
- Preheat the oven to 375°F and line a baking sheet with parchment paper.
- Wipe the mushrooms clean with a damp cloth, then twist out the stems to create space for the filling.
- In a mixing bowl, combine the softened cream cheese, minced garlic, chopped herbs, salt, and pepper until evenly mixed.
- Brush the outside of each mushroom cap lightly with olive oil.
- Spoon or pipe the cream cheese mixture into the hollow of each cap, filling them evenly.
- Arrange the stuffed caps on the baking sheet and bake for 18 to 20 minutes until the mushrooms soften and the tops turn lightly golden.
Extra Tips
Mix the filling a few hours ahead and keep it chilled so the flavors meld before stuffing. Use a small spoon to avoid overfilling, which can cause the mixture to spill during baking. Leftovers reheat best in a 350°F oven for about 8 minutes to restore texture. Course: Appetizer Cuisine: American Equipment: Baking sheet, Mixing bowl, Spoon
Candy Corn Layered Yogurt Parfaits with Granola
These parfaits capture the bright candy corn colors in a simple layered format that stands out on a Halloween party table. The combination of creamy yogurt, crunchy granola, and sweet candy corn gives a nice mix of textures without feeling heavy.
They work well for make-ahead party prep since the layers hold up in the fridge. The result is a festive treat that feels playful yet balanced.
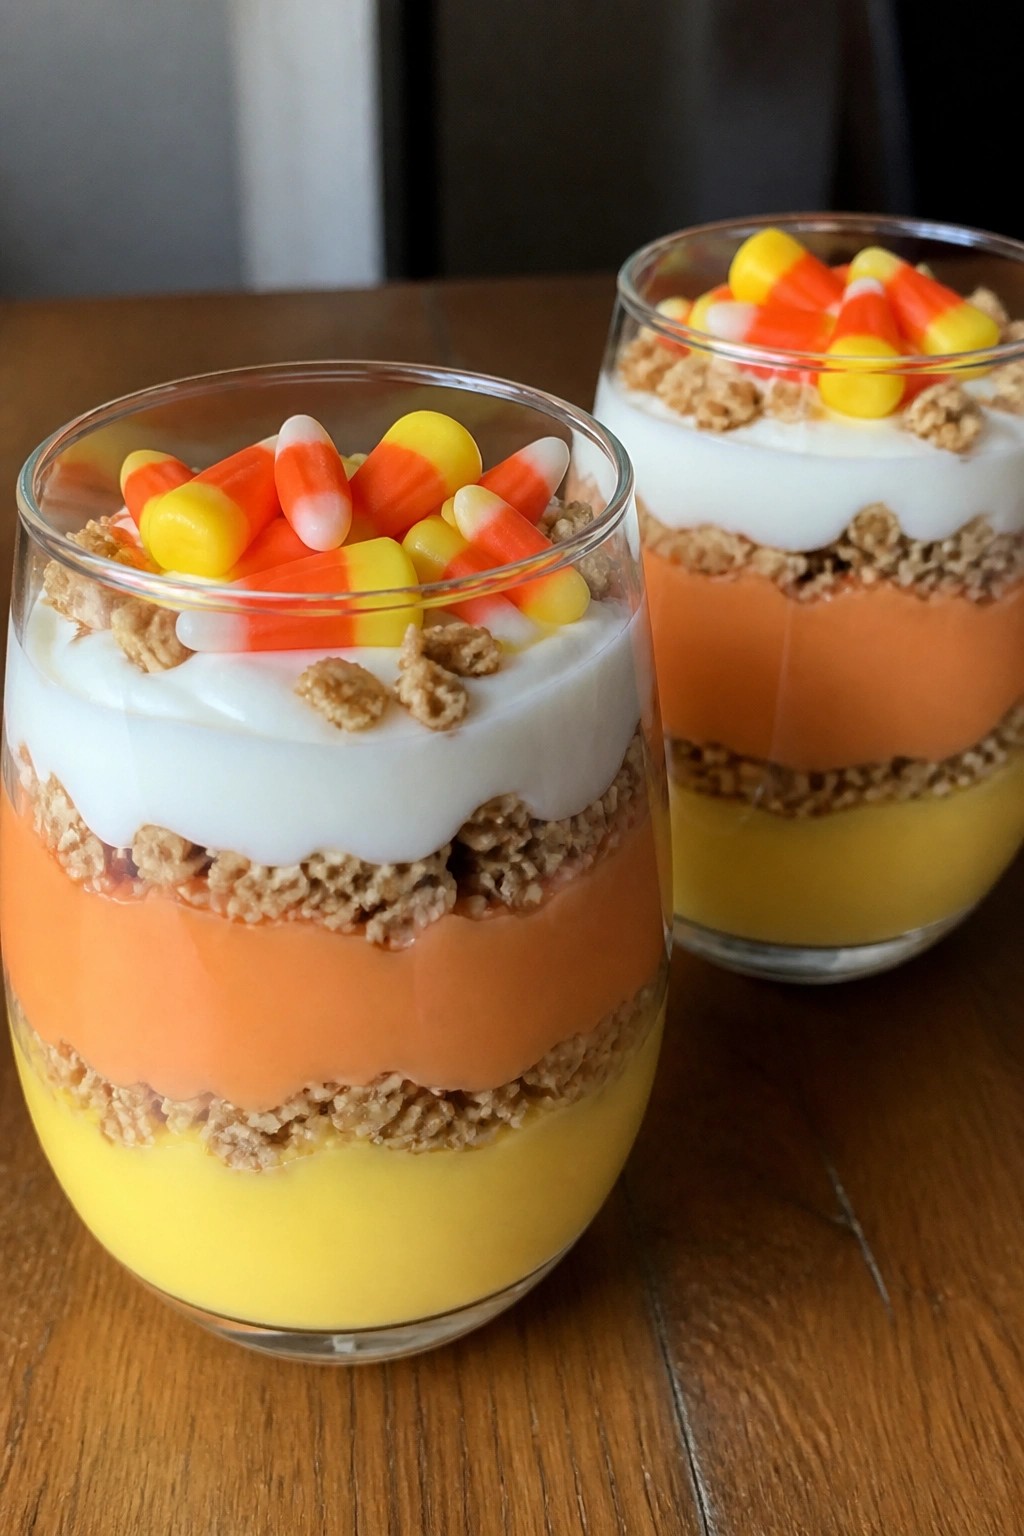
Serves 4 people.
Ingredients
- 3 cups vanilla Greek yogurt, divided
- 8 drops yellow food coloring
- 8 drops orange food coloring
- 1 cup granola
- 1/2 cup candy corn
Instructions
- Divide the vanilla Greek yogurt evenly into three separate bowls. Add the yellow food coloring to one bowl and stir until the color is uniform. Add the orange food coloring to the second bowl and stir until uniform. Leave the third bowl plain.
- Spoon 2 tablespoons of granola into the bottom of each of four clear glasses or jars. Add a layer of the yellow yogurt on top, followed by a layer of the orange yogurt, then finish with a layer of the plain yogurt.
- Sprinkle the remaining granola evenly over the top of each parfait. Finish each one with a few pieces of candy corn placed on the surface.
Extra Tips
Use clear glasses so the three colored layers stay visible. Stir the food coloring in gently to avoid thinning the yogurt too much. The parfaits can be assembled up to four hours ahead and kept covered in the fridge until serving. Course: Dessert Cuisine: American Equipment: Mixing bowls, Spoon, Parfait glasses