

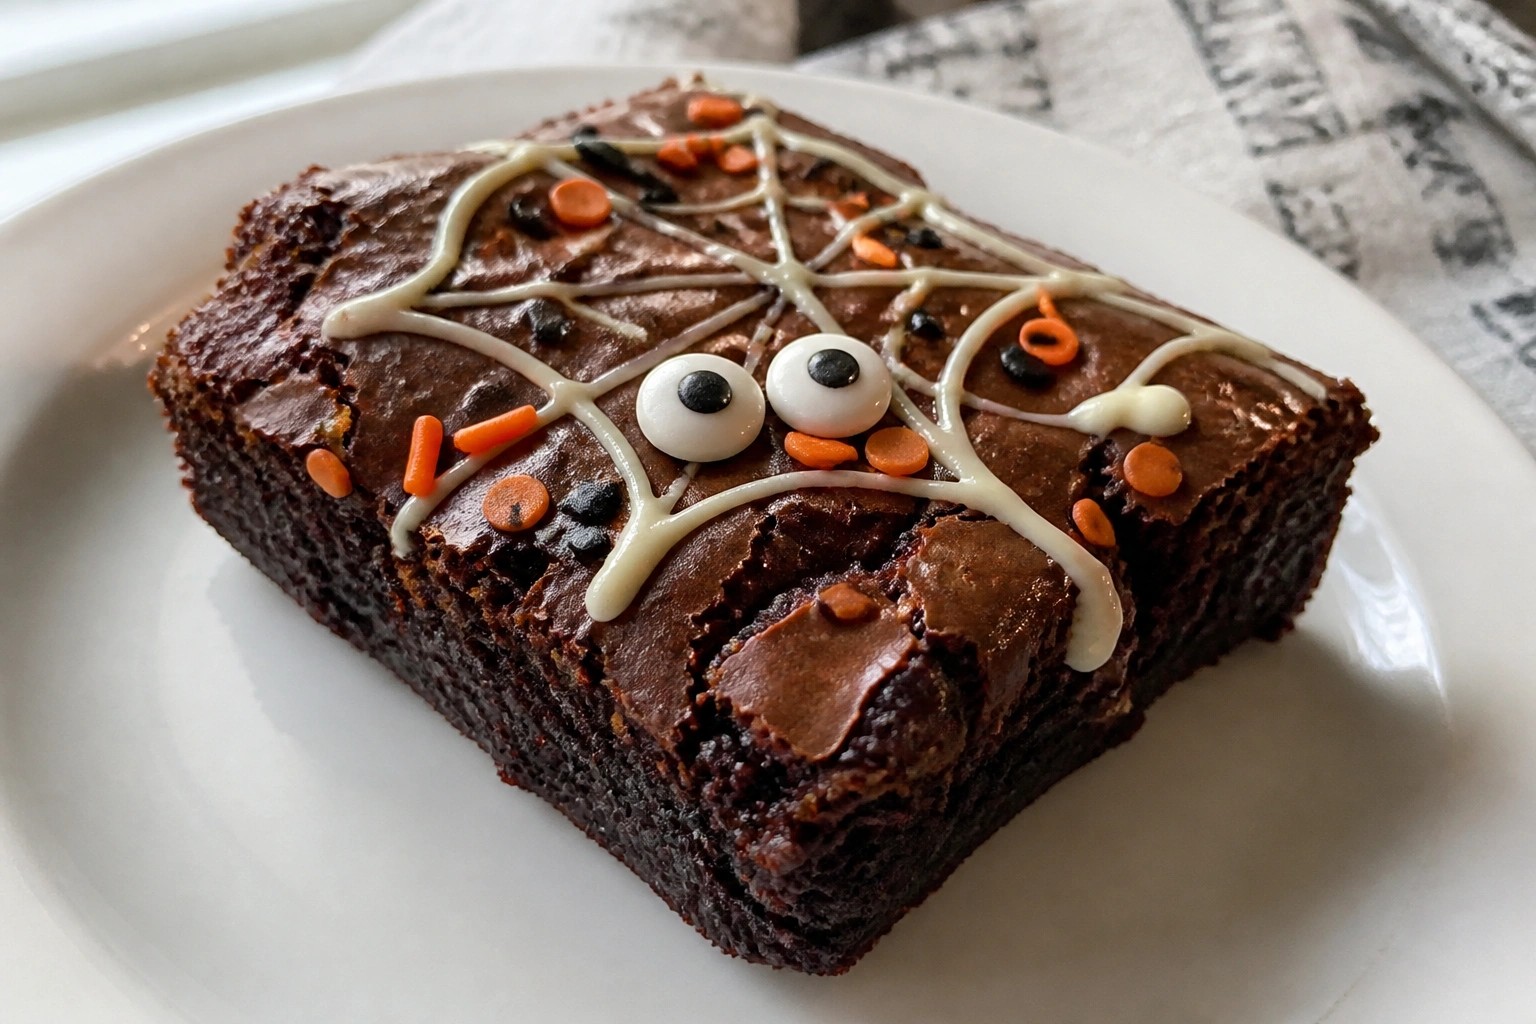
Halloween is a good time to bake brownies for parties or school events. These recipes keep the focus on a fudgy center with easy Halloween touches like colored swirls or simple shapes. I chose ideas that use pantry staples so you do not need a big shopping trip. Each one includes notes on storage and how to make a smaller batch if needed. You can scroll through and pick what fits your plans this year.
Helpful Tips Before You Start
These tips will help you get fudgy brownies with clear Halloween details.
Recommended Products

Includes 3 packs of ghost-shaped marshmallows
Use Room Temperature Eggs
Cold eggs can make the batter seize and affect the texture. Set them out for 20 minutes before mixing.
Melt Chocolate Gently
Heat chocolate and butter together over low heat or in short microwave bursts. Stir often to avoid grainy spots in the final brownies.
Test Early for Doneness
Insert a toothpick a few minutes before the timer ends. A few moist crumbs mean the center will stay fudgy once cooled.
Add Toppings After Cooling
Wait until the brownies reach room temperature before placing candy eyes, sprinkles, or shaped marshmallow pieces. This keeps the decorations in place.
Cut With a Warm Knife
Run a knife under hot water and wipe it dry between cuts. Clean edges make the brownies easier to serve at a party.
Spooky Spiderweb Fudgy Brownies
These brownies deliver a dense, fudgy center with a crackly top and a simple white chocolate spiderweb piped across the surface. They work well for a small Halloween gathering or as an afternoon treat when you want something chocolatey without extra fuss.
The white chocolate adds a mild sweetness that contrasts the dark brownie base while keeping the whole dessert straightforward to make at home.

Serves 4 people.
Ingredients
- 1/2 cup unsalted butter
- 3/4 cup semisweet chocolate chips
- 1 cup granulated sugar
- 2 large eggs
- 1 teaspoon vanilla extract
- 1/2 cup all-purpose flour
- 1/4 cup unsweetened cocoa powder
- 1/4 teaspoon salt
- 1/4 cup white chocolate chips
Instructions
- Preheat the oven to 350 degrees and line a small square pan with parchment paper.
- In a saucepan over low heat, melt the butter with the semisweet chocolate chips until smooth. Remove from heat and stir in the sugar.
- Add the eggs one at a time, mixing well after each addition, then stir in the vanilla extract.
- Whisk together the flour, cocoa powder, and salt in a separate bowl. Fold the dry mixture into the chocolate mixture until just combined.
- Pour the batter into the prepared pan and bake for 25 to 28 minutes until the edges look set. Let the brownies cool completely in the pan.
- Melt the white chocolate chips in the microwave in short bursts. Spoon the melted chocolate into a small zip-top bag, snip off a tiny corner, and pipe concentric circles on top of the cooled brownies. Drag a toothpick from the center outward to form the web pattern. Slice into four pieces.
Extra Tips
Melt the white chocolate slowly so it stays fluid enough to pipe clean lines. If you prefer a slightly less sweet top, use a darker white chocolate or reduce the amount by a tablespoon. Store leftovers in an airtight container at room temperature for up to two days. The web holds best if the brownies are fully cooled before piping. Course: Dessert Cuisine: American Equipment: Saucepan, Mixing bowl, Baking pan, Piping bag
Pumpkin Cheesecake Swirl Halloween Brownies
These brownies bring together a dense chocolate base with a spiced pumpkin cheesecake mixture swirled throughout. The result gives a fudgy bite and a creamy top layer that shows off warm fall colors. They suit Halloween parties or casual autumn get-togethers when you want something a little festive without extra decoration.
The pumpkin and cream cheese add a gentle tang and spice that cut through the rich chocolate. This keeps the brownies moist while the swirl pattern makes each square look finished on its own.

Serves 4 people.
Recommended Products

loop for easy hanging

Halloween Cupcake Decorate Spoof, With Bloodstain Kinfe Scissors, Play Joke With Friends In Halloween Party.
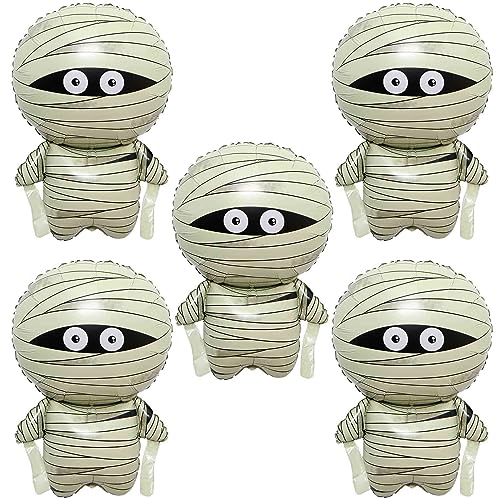
【What You Will Get】: 5 pcs large mummy balloons, 3D simulation design to make your party full of fun.
Ingredients
- 1/2 cup unsalted butter
- 3/4 cup granulated sugar
- 2 large eggs
- 1/3 cup unsweetened cocoa powder
- 1/2 cup all-purpose flour
- 1/4 teaspoon salt
- 1 teaspoon vanilla extract
- 4 ounces cream cheese, softened
- 1/4 cup pumpkin puree
- 1 egg yolk
- 1/2 teaspoon ground cinnamon
- 1/4 teaspoon ground nutmeg
Instructions
- Preheat the oven to 350 degrees F and line a small square pan with parchment so the brownies lift out easily after baking.
- Melt the butter in a medium bowl, then stir in 1/2 cup of the sugar until combined.
- Add both eggs and the vanilla extract to the butter mixture and whisk until smooth.
- Stir in the cocoa powder, flour, and salt until no dry streaks remain. Spread the batter evenly in the prepared pan.
- In a separate bowl, beat the cream cheese with the remaining 1/4 cup sugar until creamy.
- Mix in the pumpkin puree, egg yolk, cinnamon, and nutmeg until the swirl mixture is uniform.
- Drop spoonfuls of the pumpkin mixture over the brownie batter, then run a knife through the top in gentle swirls to create the pattern.
- Bake for 25 to 28 minutes until the edges look set and a toothpick comes out with a few moist crumbs.
- Cool the brownies completely in the pan before cutting into four squares.
Extra Tips
Let the brownies reach room temperature before serving so the cheesecake swirl stays soft and the flavors come through clearly. If you want a stronger pumpkin note, add an extra pinch of cinnamon to the swirl mixture before baking. Store leftovers in an airtight container in the fridge for up to three days and bring slices back to room temperature for ten minutes before eating. Course: Dessert Cuisine: American Equipment: Mixing Bowls, Whisk, Small Square Baking Pan, Oven
Black Cocoa Bat Fudgy Brownies
These brownies rely on black cocoa powder to create a deep, dark color and rich chocolate flavor that stands out on a Halloween spread. They bake up dense and fudgy inside with a thin crackly top, which makes them easy to cut and serve at small gatherings.
The recipe works well when you want a quick batch without extra fuss. The ingredients keep the texture moist and the taste bold enough to pair with coffee or milk.
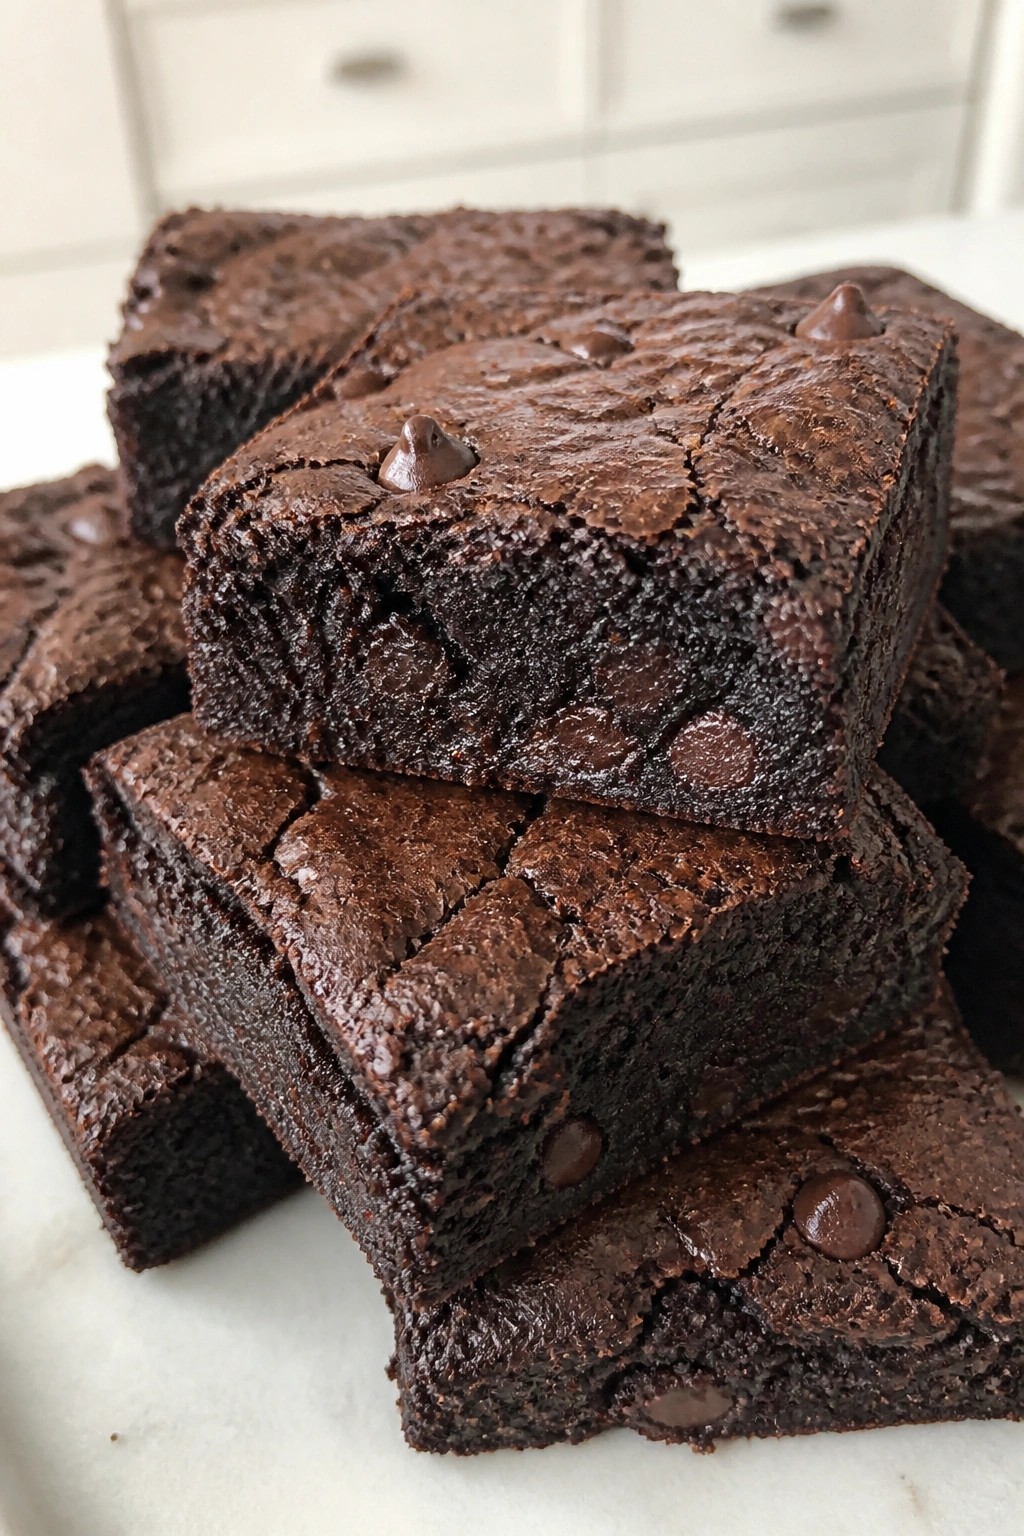
Serves 4 people.
Recommended Products

Halloween Cupcake Decorations: The set of 8 violet witch hats cupcake toppers and 8 black. It's perfect for your Halloween party Dessert

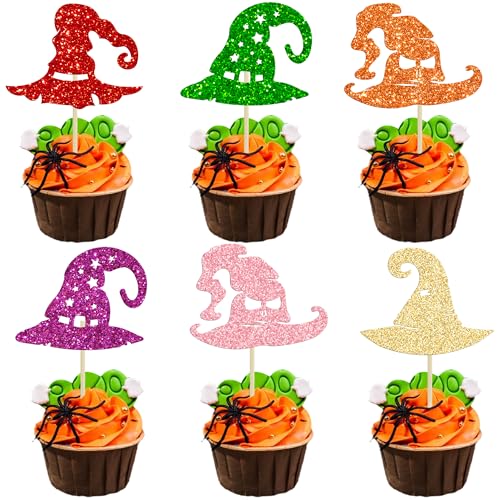
💖Package included: 24Pcs Halloween Cupcake Toppers. Comes with assembled, so you can insert into your cake directly, which make your cake more interesting.
Ingredients
- 1/2 cup unsalted butter
- 3/4 cup granulated sugar
- 2 large eggs
- 1 teaspoon vanilla extract
- 1/3 cup black cocoa powder
- 1/2 cup all-purpose flour
- 1/4 teaspoon salt
- 1/2 cup semisweet chocolate chips
Instructions
- Preheat the oven to 350 degrees F and line an 8×8 inch pan with parchment paper.
- Melt the butter in a medium bowl, then stir in the sugar until smooth.
- Add the eggs and vanilla extract, and mix until fully combined.
- Stir in the black cocoa powder until the batter turns dark and uniform.
- Add the flour and salt, and mix just until no dry streaks remain.
- Fold in the chocolate chips.
- Spread the batter evenly in the prepared pan.
- Bake for 22 to 25 minutes, until the edges look set but the center still has a slight jiggle.
- Cool completely in the pan before cutting into four squares.
Extra Tips
Cool the brownies fully before slicing to keep the fudgy center intact. Black cocoa gives the strongest color, so skip regular cocoa if you want the bat-black look. Store leftovers in an airtight container at room temperature for up to three days. Course: Dessert Cuisine: American Equipment: Mixing Bowl, 8×8 Baking Pan, Whisk
Caramel Apple Crumble Brownies
These brownies bring together a dense chocolate base with chunks of fresh apple and ribbons of caramel throughout. The oat crumble on top bakes into a crisp layer that contrasts with the soft, fudgy center. They suit cool evenings or small Halloween gatherings when you want something familiar yet a little different.
The flavor leans rich and slightly tart from the apple, while the caramel keeps each bite sweet without overwhelming the chocolate. Cut into four generous squares for easy sharing.

Serves 4 people.
Ingredients
- 1/2 cup unsalted butter
- 1 cup granulated sugar
- 2 large eggs
- 1/3 cup unsweetened cocoa powder
- 1/2 cup all-purpose flour
- 1/4 teaspoon salt
- 1 teaspoon vanilla extract
- 1 medium apple, peeled and diced
- 1/4 cup caramel sauce
- 1/4 cup rolled oats
- 2 tablespoons brown sugar
- 2 tablespoons cold unsalted butter
Instructions
- Preheat the oven to 350 degrees and line an 8×8 pan with parchment paper.
- Melt the 1/2 cup butter in a medium bowl, then stir in the granulated sugar until smooth.
- Add the eggs and vanilla extract and mix well.
- Stir in the cocoa powder, flour, and salt until the batter is thick and glossy.
- Fold the diced apple into the batter, then spread the mixture evenly in the prepared pan.
- Drizzle the caramel sauce over the batter in a zigzag pattern.
- In a small bowl, combine the rolled oats, brown sugar, and 2 tablespoons cold butter. Rub the mixture together with your fingers until it forms small clumps.
- Sprinkle the crumble evenly over the caramel layer.
- Bake for 25 to 28 minutes until the edges look set but the center still has a slight jiggle.
- Cool in the pan for at least 20 minutes before slicing.
Extra Tips
Use a firm tart apple so the pieces stay distinct after baking. Warm each square for a few seconds before serving to keep the caramel soft. Leftovers stay fudgy when stored in a sealed container at room temperature for two days. Course: Dessert Cuisine: American Equipment: Mixing Bowl, 8×8 Baking Pan, Oven
Mint Chocolate Frankenstein Brownies
These mint chocolate Frankenstein brownies offer a cool, refreshing twist on a fudgy base. The mint cuts through the deep chocolate flavor, and a simple green-tinted topping adds a playful touch that suits fall gatherings or casual weekend baking.
They come together in one pan and hold up well at room temperature, making them easy to slice and serve. The finished brownies stay dense with a slight chew and a clean mint finish.
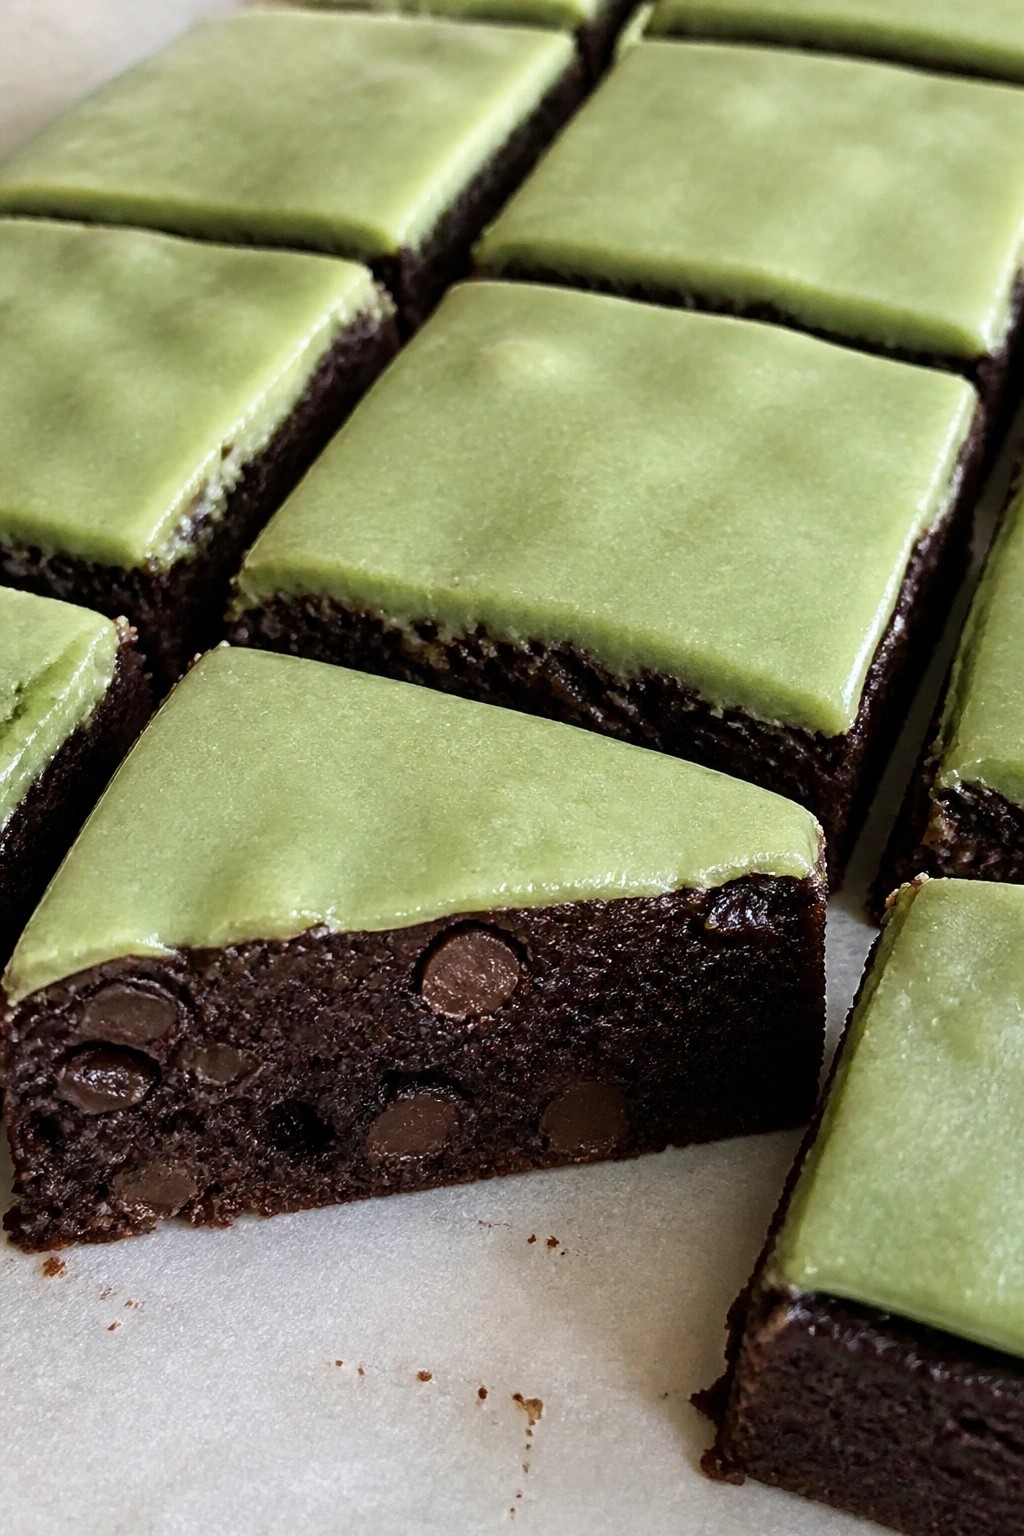
Serves 4 people.
Ingredients
- ½ cup unsalted butter
- ¾ cup granulated sugar
- 2 large eggs
- ⅓ cup unsweetened cocoa powder
- ½ cup all-purpose flour
- 1 teaspoon mint extract
- 3 drops green food coloring
- ½ cup semisweet chocolate chips
- ½ cup powdered sugar
- 1 tablespoon milk
Instructions
- Preheat the oven to 350°F and line a small square baking pan with parchment paper.
- Melt the butter in a medium bowl, then stir in the granulated sugar until smooth.
- Add the eggs one at a time, mixing well after each addition.
- Stir in the cocoa powder, flour, and ½ teaspoon of the mint extract until no dry streaks remain.
- Pour the batter into the prepared pan and bake for 22-25 minutes until a toothpick comes out with a few moist crumbs.
- Let the brownies cool completely in the pan.
- In a small bowl, mix the powdered sugar, milk, remaining ½ teaspoon mint extract, and green food coloring until smooth.
- Spread the green mint mixture over the cooled brownies, then scatter the chocolate chips on top while the icing is still soft. Slice into four squares once the icing sets.
Extra Tips
Use room-temperature eggs so the batter mixes evenly without curdling. If the green icing looks too bright, add a touch more powdered sugar to tone it down. Store leftovers in an airtight container at room temperature for up to two days; the mint flavor stays clear and the top stays slightly crisp. Course: Dessert Cuisine: American Equipment: Mixing Bowl, Baking Pan, Oven
Espresso Skeleton Bone Brownies
These brownies bring a coffee boost to classic fudgy chocolate squares, making them a solid choice for Halloween gatherings or a simple fall treat. The espresso deepens the cocoa flavor without overpowering it, while white chocolate details on top add a playful skeleton bone look that fits the season.
The texture stays dense and moist thanks to the butter and egg ratio, and the decorations set quickly once the brownies cool.

Serves 4 people.
Ingredients
- 1/2 cup unsalted butter
- 1 cup granulated sugar
- 2 large eggs
- 1/3 cup unsweetened cocoa powder
- 1 tablespoon espresso powder
- 1/2 cup all-purpose flour
- 1/4 teaspoon salt
- 1 teaspoon vanilla extract
- 1/2 cup white chocolate chips
Instructions
- Preheat the oven to 350 degrees F and line a small 8×8 baking pan with parchment paper.
- Melt the butter in a saucepan over low heat, then stir in the sugar until combined.
- Remove the pan from heat and whisk in the eggs one at a time, followed by the vanilla extract.
- Stir in the cocoa powder, espresso powder, flour, and salt until the batter is smooth and no dry streaks remain.
- Pour the batter into the prepared pan and bake for 20 to 22 minutes until the center is just set.
- Let the brownies cool completely in the pan.
- Melt the white chocolate chips in a microwave-safe bowl in 20-second bursts, stirring between each until smooth.
- Spoon the melted white chocolate into a small zip-top bag, snip a tiny corner, and pipe simple bone shapes across the top of the cooled brownies.
- Allow the white chocolate to set before cutting into four squares.
Extra Tips
Pipe the bone shapes while the white chocolate is still fluid but not hot, and work quickly so the lines stay clean. If you want a stronger coffee note, increase the espresso powder by half a teaspoon next time. Store any leftovers in an airtight container at room temperature for up to three days. Course: Dessert Cuisine: American Equipment: Saucepan, Mixing Bowl, 8×8 Baking Pan
Raspberry Ghost Fudgy Brownies
These brownies bring a fun Halloween twist with a rich fudgy base and bright raspberry pieces folded right in. The white chocolate ghosts on top make them stand out on a dessert table for parties or a simple night at home with family.
The texture stays dense and chewy while the raspberries add a slight tart bite that balances the chocolate. They work well for small gatherings since the batch stays manageable.

Serves 4 people.
Ingredients
- 4 tablespoons unsalted butter
- 4 ounces semi-sweet chocolate
- 3/4 cup granulated sugar
- 2 large eggs
- 1/2 teaspoon vanilla extract
- 1/3 cup all-purpose flour
- 2 tablespoons unsweetened cocoa powder
- 1/4 teaspoon salt
- 1 cup fresh raspberries
- 1/2 cup white chocolate chips
Instructions
- Preheat the oven to 350 degrees and line an 8×8 pan with parchment paper.
- Melt the butter and semi-sweet chocolate together in a saucepan over low heat, stirring until smooth.
- Remove the pan from heat and stir in the sugar, then add the eggs one at a time followed by the vanilla extract.
- Stir in the flour, cocoa powder, and salt until just combined.
- Gently fold in 3/4 cup of the fresh raspberries.
- Spread the batter evenly into the prepared pan and scatter the remaining raspberries on top.
- Bake for 25 minutes, then let the brownies cool completely in the pan.
- Melt the white chocolate chips and pipe ghost shapes onto the cooled brownies.
Extra Tips
Let the brownies cool fully before adding the white chocolate ghosts so the shapes hold their form. Use a zip-top bag with a small corner cut off if you do not have a piping bag. Store leftovers in an airtight container at room temperature for up to two days to keep the fudgy texture. Course: Dessert Cuisine: American Equipment: Saucepan, Mixing Bowl, 8×8 Baking Pan
Peanut Butter Mummy Crunch Brownies
These brownies bring together a rich fudgy base with a swirl of peanut butter and a crunchy peanut topping. The white chocolate strips on top create a simple mummy effect that fits right into a Halloween spread.
They work well for small gatherings or as a make-ahead treat. The texture stays dense and chewy with pops of crunch from the peanuts.

Serves 4 people.
Ingredients
- 1/2 cup unsalted butter
- 1 cup granulated sugar
- 1/2 cup unsweetened cocoa powder
- 2 large eggs
- 1 teaspoon vanilla extract
- 1/2 cup all-purpose flour
- 1/4 teaspoon salt
- 1/2 cup creamy peanut butter
- 1/2 cup white chocolate chips
- 8 candy eyes
- 1/4 cup crushed roasted peanuts
Instructions
- Preheat the oven to 350 degrees and line an 8×8 baking pan with parchment paper.
- Melt the butter in a medium saucepan over low heat. Stir in the sugar and cocoa powder until smooth. Remove from heat and let cool for 5 minutes.
- Whisk in the eggs one at a time, then add the vanilla. Stir in the flour and salt until just combined. Pour the batter into the prepared pan.
- Drop spoonfuls of peanut butter across the batter and swirl gently with a knife. Bake for 25 minutes until the edges are set. Cool completely in the pan.
- Melt the white chocolate chips in the microwave in 20-second bursts. Drizzle thin strips over the cooled brownies to form mummy bandages. Press candy eyes into place and sprinkle crushed peanuts over the top before the chocolate sets. Cut into 4 squares.
Extra Tips
Press the crushed peanuts on while the white chocolate is still soft so they stick well. Store leftovers in an airtight container at room temperature for up to three days. If the peanut butter is too thick to swirl, warm it slightly in the microwave first. Course: Dessert Cuisine: American Equipment: Mixing Bowl, 8×8 Baking Pan, Saucepan
Orange Creamsicle Layered Brownies
These brownies combine a rich fudgy base with bright orange cream and a smooth vanilla layer on top. The orange flavor gives them a fresh twist that stands out at fall gatherings or Halloween parties. They come together in one pan and deliver a nice mix of chewy brownie texture with creamy layers.
This recipe serves 4 people.
– 4 tablespoons unsalted butter – 1/2 cup granulated sugar – 1 large egg – 1/4 cup unsweetened cocoa powder – 1/3 cup all-purpose flour – 1/2 teaspoon vanilla extract – 4 ounces cream cheese, softened – 2 tablespoons powdered sugar – 1 teaspoon orange zest – 2 tablespoons fresh orange juice – 1/4 cup white chocolate chips
### Instructions 1. Preheat the oven to 350 degrees and line a small baking pan with parchment paper. 2. Melt the butter in a bowl, then stir in the granulated sugar and egg until smooth. 3. Add the cocoa powder, flour, and vanilla extract, and mix until the batter is thick and even. 4. Spread the brownie batter into the prepared pan and bake for 18 minutes, then let it cool fully. 5. Beat the cream cheese with the powdered sugar, orange zest, and orange juice until creamy and spreadable. 6. Spread the orange cream evenly over the cooled brownie layer. 7. Melt the white chocolate chips and drizzle or spread it over the orange layer. 8. Chill the pan for at least 30 minutes before slicing into portions.
### Extra Tips Chill the brownies well before cutting so the layers stay neat. If the orange cream seems too thick, add a few drops more orange juice to loosen it. These keep in the fridge for two days in a covered container. For a stronger creamsicle taste, grate a little extra orange zest over the white chocolate layer right before serving.
Course: Dessert Cuisine: American Equipment: Mixing Bowls, Small Baking Pan, Whisk

Serves 4 people.
Instructions
- Preheat the oven to 350 degrees and line a small baking pan with parchment paper.
- Melt the butter in a bowl, then stir in the granulated sugar and egg until smooth.
- Add the cocoa powder, flour, and vanilla extract, and mix until the batter is thick and even.
- Spread the brownie batter into the prepared pan and bake for 18 minutes, then let it cool fully.
- Beat the cream cheese with the powdered sugar, orange zest, and orange juice until creamy and spreadable.
- Spread the orange cream evenly over the cooled brownie layer.
- Melt the white chocolate chips and drizzle or spread it over the orange layer.
- Chill the pan for at least 30 minutes before slicing into portions.
Extra Tips
Chill the brownies well before cutting so the layers stay neat. If the orange cream seems too thick, add a few drops more orange juice to loosen it. These keep in the fridge for two days in a covered container. For a stronger creamsicle taste, grate a little extra orange zest over the white chocolate layer right before serving. Course: Dessert Cuisine: American Equipment: Mixing Bowls, Small Baking Pan, Whisk
Toffee Witch Hat Brownies
These brownies bring a fun Halloween twist with fudgy centers packed with chewy toffee. They work well for a small gathering or as a simple treat to share with family during the holiday season. The rich chocolate base pairs with buttery toffee for a mix of soft and crunchy textures.
The witch hat decorations sit right on top using extra chocolate and toffee to create the shape. This keeps the focus on the toffee flavor while adding a visual element that fits the season.

Serves 4 people.
Ingredients
- 1/2 cup unsalted butter
- 1 cup semi-sweet chocolate chips, divided
- 3/4 cup granulated sugar
- 2 large eggs
- 1/2 cup all-purpose flour
- 1/4 cup cocoa powder
- 3/4 cup toffee bits, divided
Instructions
- Preheat the oven to 350 degrees and line a small baking pan with parchment paper.
- Melt the butter and half the chocolate chips in a saucepan over low heat, stirring until smooth. Remove from heat and stir in the sugar until combined.
- Add the eggs one at a time, mixing well after each addition. Stir in the flour and cocoa powder until no dry streaks remain.
- Fold in half the toffee bits, then spread the batter evenly in the prepared pan. Bake for 20 to 25 minutes until the center is set. Let the brownies cool completely in the pan.
- Melt the remaining chocolate chips. Use the melted chocolate to attach the remaining toffee bits on top of each brownie, forming a circle base with a peaked center to create the witch hat shape. Allow the chocolate to set before serving.
Extra Tips
Cut the brownies into four large squares so each one has room for a full witch hat on top. If the toffee bits seem too large for shaping, break them into smaller pieces before using them for the decorations. Store leftovers in an airtight container at room temperature for up to three days to keep the toffee from softening too much. Course: Dessert Cuisine: American Equipment: Saucepan, Mixing Bowl, Baking Pan
Matcha Monster Swirl Brownies
These brownies pair deep chocolate with a bright green matcha swirl that gives them a playful look for fall gatherings. They come out dense and fudgy with a slight earthy note from the matcha that balances the sweetness. Serve them at a Halloween get-together or keep a small batch on hand for weekday snacks.

Serves 4 people.
Ingredients
- 4 tablespoons unsalted butter
- 2 ounces bittersweet chocolate, chopped
- 1/2 cup granulated sugar
- 1 large egg
- 1/4 cup all-purpose flour
- 2 tablespoons unsweetened cocoa powder
- 1 tablespoon matcha powder
- 2 tablespoons cream cheese, softened
Instructions
- Preheat the oven to 350 degrees F and line a small loaf pan with parchment paper.
- Melt the butter and bittersweet chocolate together in a small saucepan over low heat, stirring until smooth. Remove from heat and stir in the sugar.
- Beat in the egg until the mixture looks glossy.
- Stir in the flour and cocoa powder until no dry streaks remain.
- In a separate bowl, mix the matcha powder with the cream cheese until evenly green.
- Spread most of the chocolate batter into the prepared pan, then dollop the matcha cream cheese mixture on top and swirl gently with a knife.
- Bake for 22 to 25 minutes until the edges look set but the center still has a slight give. Cool completely in the pan before slicing.
Extra Tips
Let the brownies cool fully before cutting so the swirl stays neat. If the matcha tastes too grassy, a pinch more sugar in the cream cheese mixture can soften it. Store leftovers in an airtight container at room temperature for up to two days. Course: Dessert Cuisine: American Equipment: Saucepan, Mixing Bowl, Loaf Pan, Knife
Candy Corn Fudge Patch Brownies
These brownies bring together a dense fudge center with scattered pieces of candy corn for a simple Halloween dessert. They suit an after-school snack or a small gathering when you want something quick to share.
The flavor leans rich and chocolatey with sweet, chewy spots from the candy corn. The result feels like a dressed-up brownie without extra steps.

Serves 4 people.
Ingredients
- 1/2 cup unsalted butter
- 1 cup granulated sugar
- 2 large eggs
- 1/3 cup unsweetened cocoa powder
- 1/2 cup all-purpose flour
- 1/4 teaspoon salt
- 1/2 cup semi-sweet chocolate chips
- 1/2 cup candy corn, divided
Instructions
- Preheat the oven to 350 degrees F and line an 8×8 inch baking pan with parchment paper.
- Melt the butter in a saucepan over low heat. Remove from heat and stir in the sugar until combined.
- Add the eggs one at a time, mixing well after each addition.
- Stir in the cocoa powder, flour, and salt until the batter is smooth.
- Fold in the chocolate chips and half of the candy corn.
- Spread the batter evenly in the prepared pan.
- Bake for 25 minutes, then remove from the oven and scatter the remaining candy corn over the top.
- Let the brownies cool in the pan for at least 20 minutes before cutting.
Extra Tips
Press the candy corn lightly into the surface right after baking so it sticks without sinking. For a softer chew, warm individual squares for 10 seconds in the microwave before serving. Store leftovers in an airtight container at room temperature for up to two days. Course: Dessert Cuisine: American Equipment: Saucepan, Mixing Bowl, 8×8 Inch Baking Pan
Blood Orange Pecan Brownies
These brownies bring a bright citrus note to a classic fudgy base. The blood orange adds a subtle tartness that pairs well with rich chocolate, while pecans give a welcome crunch. They fit nicely into a Halloween spread without needing extra decorations.
Serve them at fall gatherings or as a simple weekend treat. The texture stays moist in the center with a slight chew around the edges, and the orange flavor comes through clearly once cooled.

Serves 4 people.
Ingredients
- 4 tablespoons unsalted butter
- 3 ounces bittersweet chocolate, chopped
- 3/4 cup granulated sugar
- 2 large eggs
- 1/2 teaspoon vanilla extract
- 1/3 cup all-purpose flour
- 2 tablespoons unsweetened cocoa powder
- 1/4 teaspoon salt
- Zest and juice of 1 blood orange
- 1/2 cup chopped pecans
Instructions
- Preheat the oven to 350 degrees F and line a small 8×8 baking pan with parchment paper.
- Melt the butter and bittersweet chocolate together in a saucepan over low heat, stirring until smooth. Remove from heat.
- Stir the sugar into the chocolate mixture until fully combined, then add the eggs one at a time and mix well. Add the vanilla extract.
- Whisk together the flour, cocoa powder, and salt in a separate bowl, then fold the dry ingredients into the wet mixture until no streaks remain.
- Stir in the blood orange zest and juice along with the chopped pecans until evenly distributed.
- Pour the batter into the prepared pan and smooth the top. Bake for 22 to 25 minutes until the edges look set but the center still has a slight give.
- Cool completely in the pan before slicing into squares.
Extra Tips
Toast the pecans lightly before adding them if you want extra nuttiness. The brownies taste best the day after baking once the orange flavor settles. Store leftovers in an airtight container at room temperature for up to three days. Course: Dessert Cuisine: American Equipment: Saucepan, Mixing Bowl, 8×8 Baking Pan
Dark Chocolate Zombie Brain Brownies
These brownies bring a dark chocolate base with a raspberry swirl that creates a brain-like pattern on top. They work well for Halloween parties or movie nights when you want a fudgy treat that still feels themed. The texture stays dense and rich thanks to the high chocolate content.
The flavor balances bitter dark chocolate with sweet berry notes from the preserves. Each bite delivers chew at the edges and a soft center. They pair nicely with coffee or a glass of milk.

Serves 4 people.
Ingredients
- 1/2 cup unsalted butter
- 4 ounces dark chocolate, chopped
- 1 cup granulated sugar
- 2 large eggs
- 1/2 cup all-purpose flour
- 1/4 cup unsweetened cocoa powder
- 1 teaspoon vanilla extract
- 1/4 teaspoon salt
- 1/4 cup raspberry preserves
Instructions
- Preheat the oven to 350 degrees F and line a small square baking pan with parchment paper.
- Melt the butter and dark chocolate together in a saucepan over low heat, stirring until smooth.
- Remove the pan from heat and stir in the sugar until fully combined.
- Add the eggs one at a time, mixing well after each addition.
- Stir in the flour, cocoa powder, vanilla extract, and salt until no dry streaks remain.
- Pour the batter into the prepared pan and smooth the top.
- Drop spoonfuls of raspberry preserves across the surface and use a knife to swirl them gently into the batter.
- Bake for 25 to 30 minutes until the edges look set but the center still has a slight give.
- Cool completely in the pan before slicing into four squares.
Extra Tips
Swirl the preserves just enough to create visible lines without fully mixing them into the batter. Store leftovers in an airtight container at room temperature for up to three days. If you want a stronger berry taste, warm a little extra preserves and drizzle it over each brownie before serving. Course: Dessert Cuisine: American Equipment: Saucepan, Mixing Bowl, Baking Pan, Whisk
Spiced Jack-o’-Lantern Fudgy Brownies
These brownies bring pumpkin and warm spices into a rich chocolate base for a Halloween treat that stays moist and dense. The pumpkin puree keeps the texture fudgy while the spices add a gentle kick that pairs well with chocolate. They work nicely for a small gathering or as a make-ahead dessert for October parties.
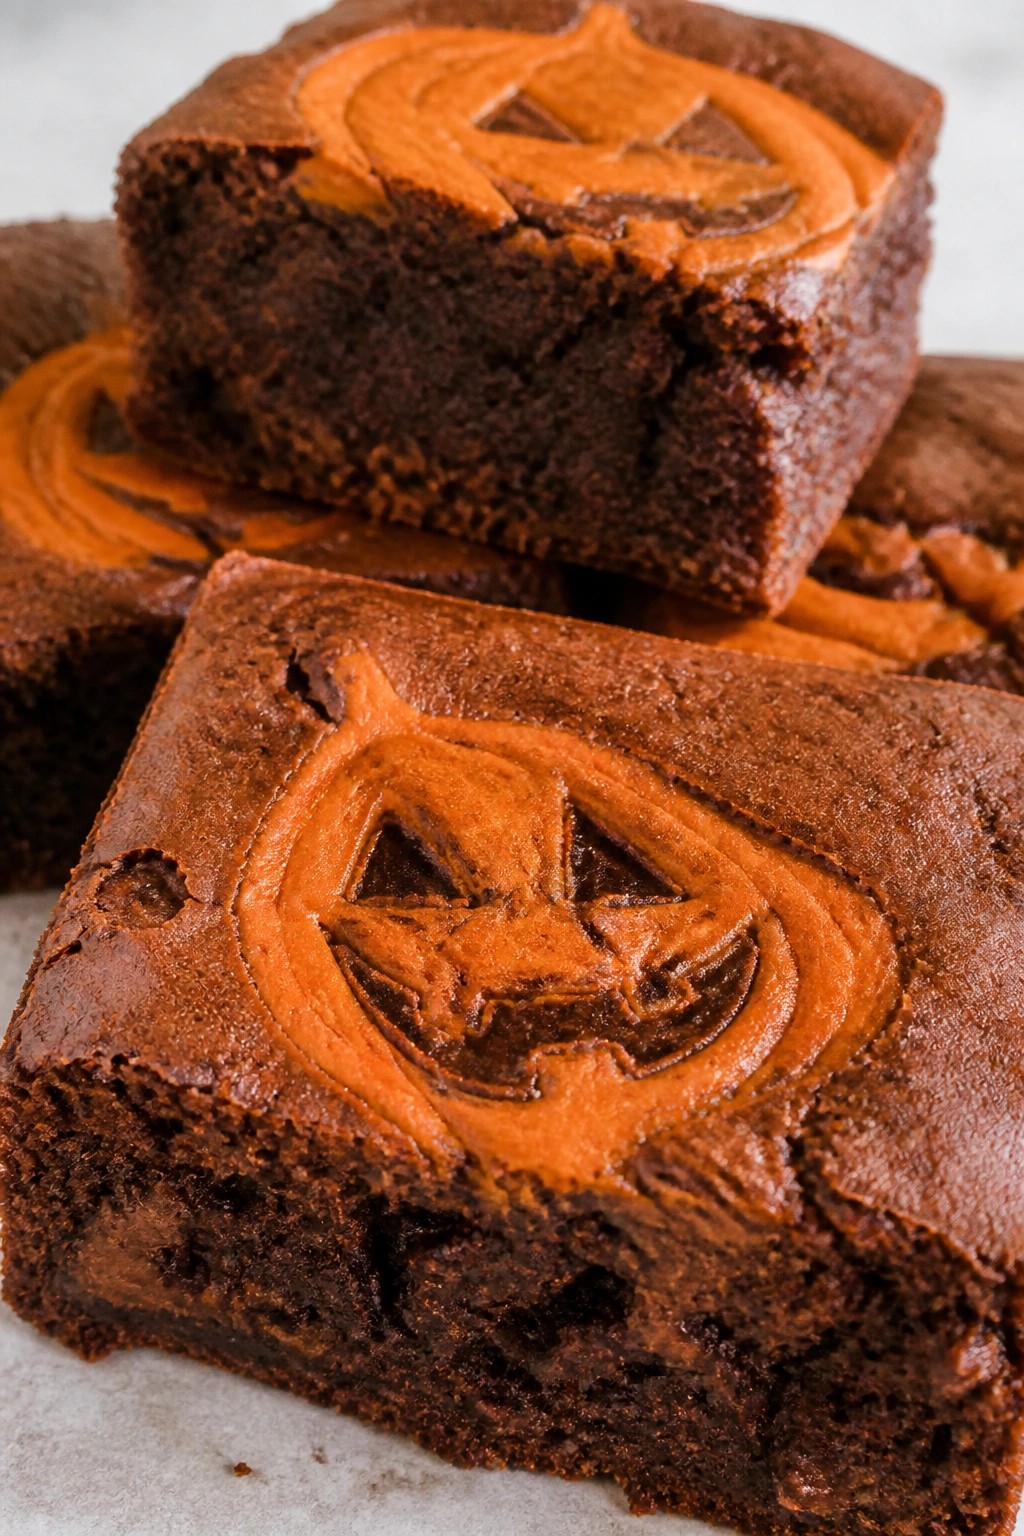
Serves 4 people.
Ingredients
- 1/2 cup unsalted butter
- 4 ounces dark chocolate, chopped
- 3/4 cup granulated sugar
- 2 large eggs
- 1/2 cup pumpkin puree
- 1/2 cup all-purpose flour
- 1/4 cup unsweetened cocoa powder
- 2 teaspoons pumpkin pie spice
- 1 teaspoon vanilla extract
- 1/4 teaspoon salt
Instructions
- Preheat the oven to 350 degrees and line an 8-inch square pan with parchment paper.
- Melt the butter and dark chocolate together in a saucepan over low heat, stirring until smooth. Remove from heat and stir in the sugar.
- Add the eggs one at a time, mixing well after each addition. Stir in the pumpkin puree and vanilla extract until combined.
- In a separate bowl, whisk together the flour, cocoa powder, pumpkin pie spice, and salt.
- Fold the dry mixture into the wet mixture until no streaks remain. Spread the batter evenly in the prepared pan.
- Bake for 25 to 28 minutes, until the edges look set but the center still has a slight give. Cool completely in the pan before cutting.
Extra Tips
Cut the cooled brownies into rounds and use a small knife to etch simple jack-o’-lantern faces on top before serving. Store leftovers in an airtight container at room temperature for up to three days. If the brownies seem too soft to cut cleanly, chill them for 20 minutes first. Course: Dessert Cuisine: American Equipment: Saucepan, Mixing Bowl, 8-inch Square Pan, Oven