

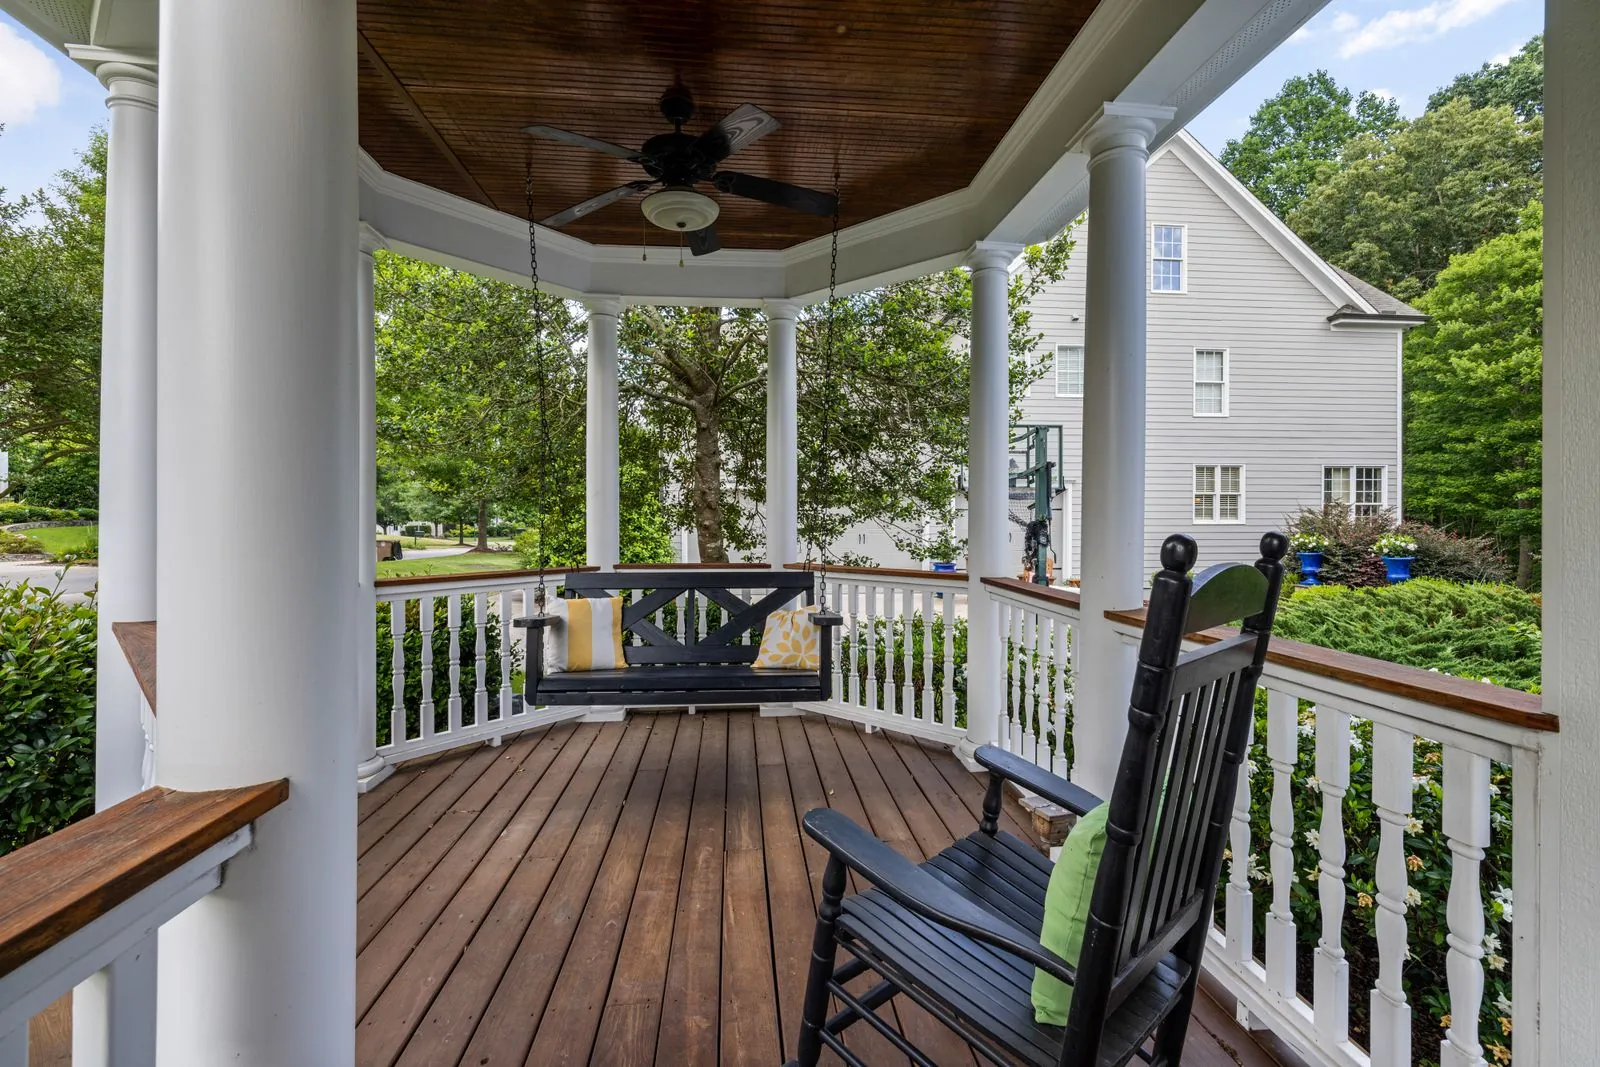
Curb appeal posts often show houses after a full rebuild. These are real exteriors that home bloggers changed themselves, often in stages, with the paint colors, costs and mistakes written down.
I picked eight with a lesson you can use, from a front door refresh on a brick ranch to full painted brick makeovers in the US and Australia. Each photo belongs to the blogger credited under it, so visit them for the full before and after. For more ideas by house type, see my brick ranch makeover ideas and simple updates for houses that look flat from the street.
How I chose these houses
- They are the bloggers’ own homes, not builder photos.
- Each one shows a choice you can copy, such as a paint color, a front door or what to remove.
- They cover painted brick, siding and a single front door, so there is something for most budgets.
1. Muddy brown brick painted creamy white
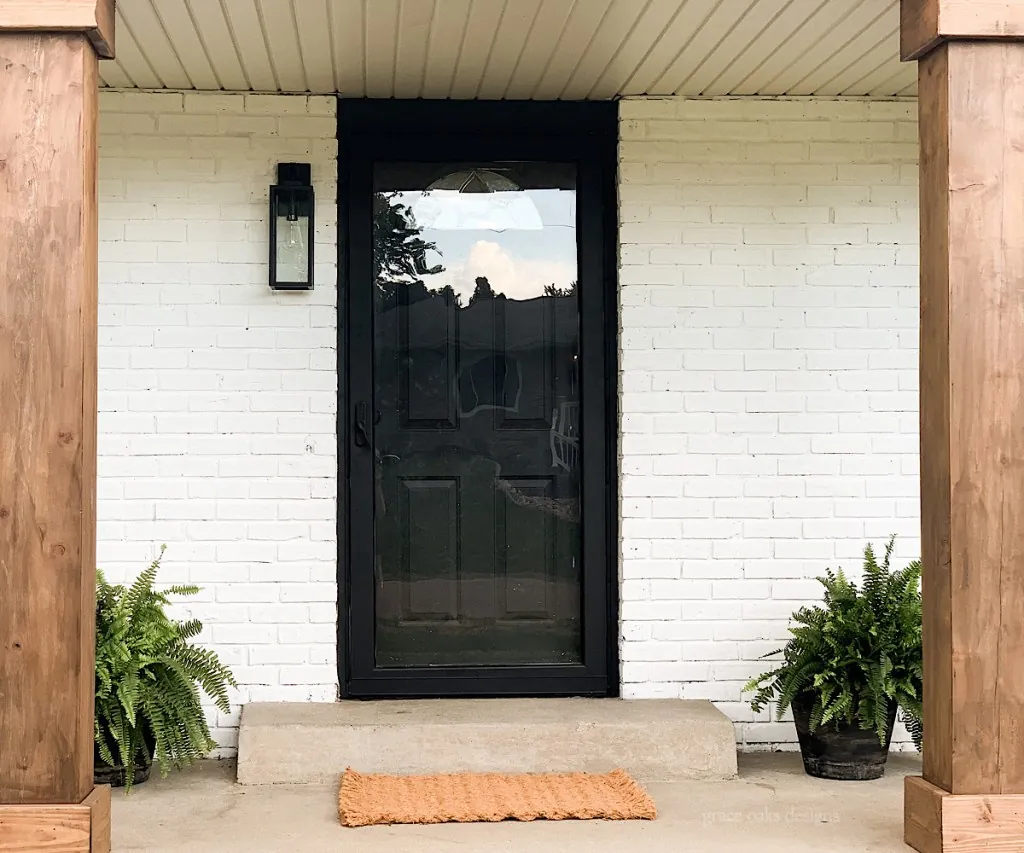
Hillary had wanted to change her exterior for more than five years, and a One Room Challenge finally pushed it through in about seven weeks. The previous owners had painted the brick a muddy brown that made the porch feel dark.
She painted it a creamy bright white, built out the porch columns, added wood shutters and matte black lights, and updated the garage door hardware and landscaping. For the deck stain she chose Sherwin-Williams Realist Beige, a warm white, because the cooler whites she tried looked almost too cold in her deck’s bright full sun.
Worth borrowing: test whites outdoors in the exact spot they will live. A white that looks perfect indoors can turn cold and stark in full sun.
2. A colonial without its awnings, painted white with black shutters
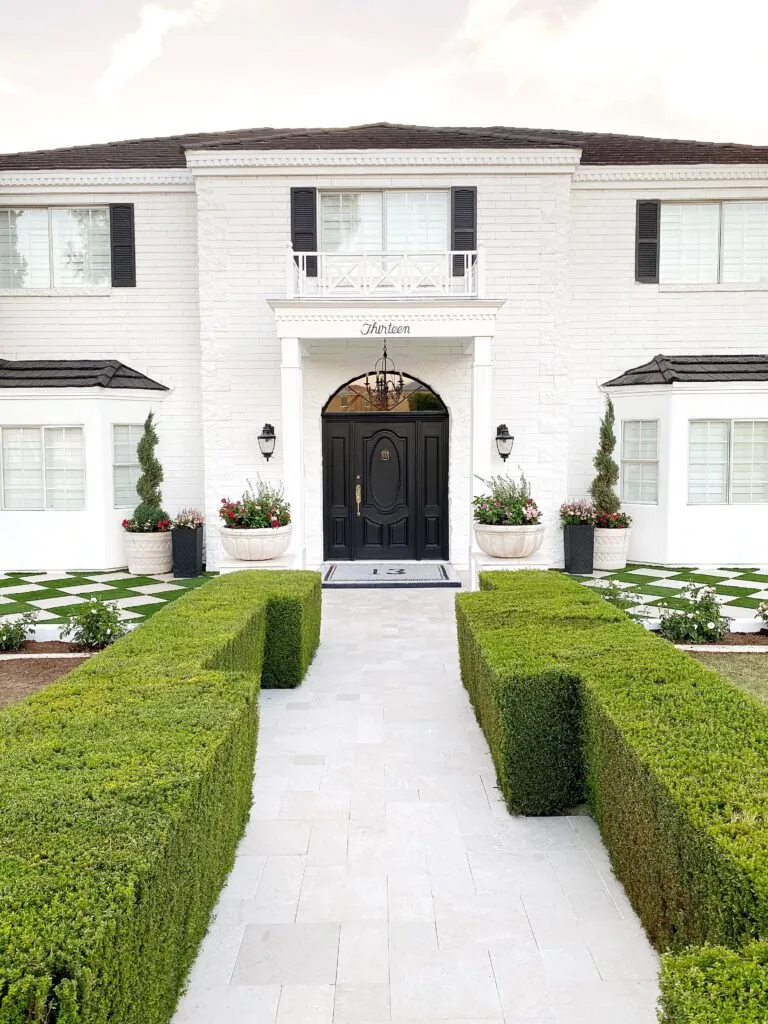
Mallory could see past the green awnings when she bought House No. 13. She and her family did almost all of the exterior work themselves, except the pavers and courtyard landscaping.
The list is long but each step is simple on its own: remove the awnings, power wash, spray the brick white with masonry paint, paint the shutters and front door in a near-black, then add a small portico, dentil trim, a mosaic house number on the stoop and new garage hardware.
Worth borrowing: taking things off is often the cheapest curb appeal win. Awnings, dated shutters and old storm doors can make a house look older than it is.
3. Orange-red brick painted a warm greige instead of stark white
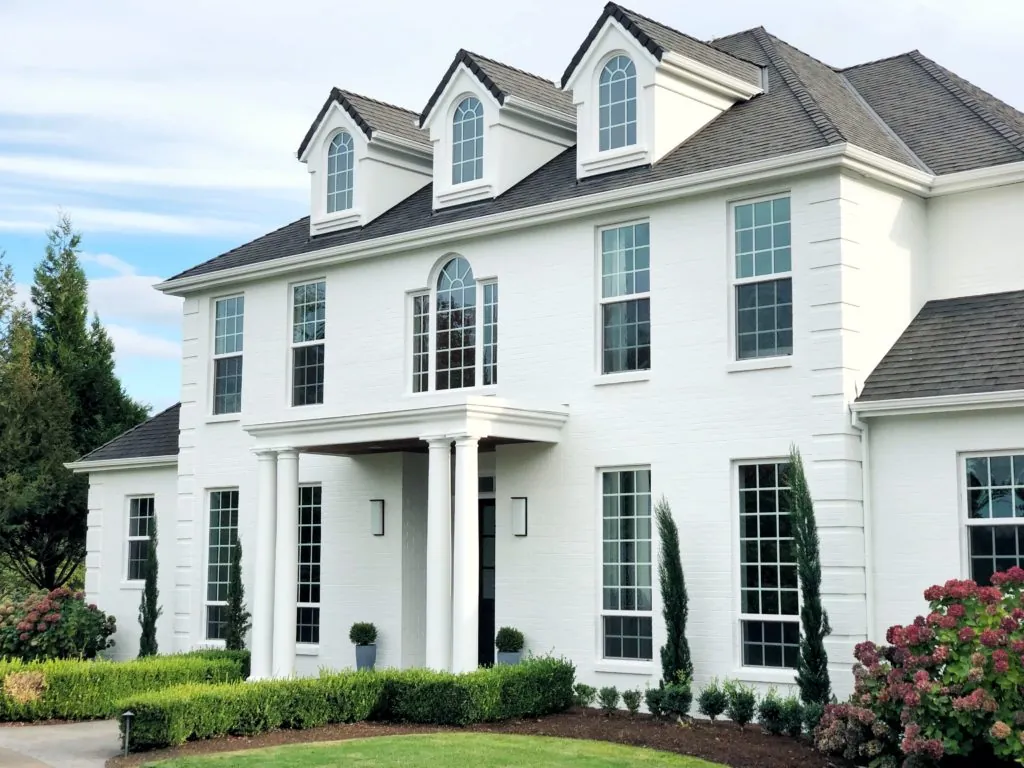
Jennifer Gizzi did not want a stark white house, so she painted her orange-toned brick Revere Pewter, a warm greige she had used indoors. Outside, in full sun, it reads as a soft warm white, which is exactly why she chose a darker color than the look she wanted.
She contrasted it with darker trim and bronze gutters, gave the garage doors a DIY faux wood finish instead of a $7,000 replacement, and limewashed the brick walk. Her other lesson: she got three gutter quotes of $8K, $14K and $28K for the same job.
Worth borrowing: outdoor light makes colors look lighter. Test a shade or two darker than you think you need, and always get more than one quote for big exterior jobs.
4. A brick ranch front door makeover on a small budget
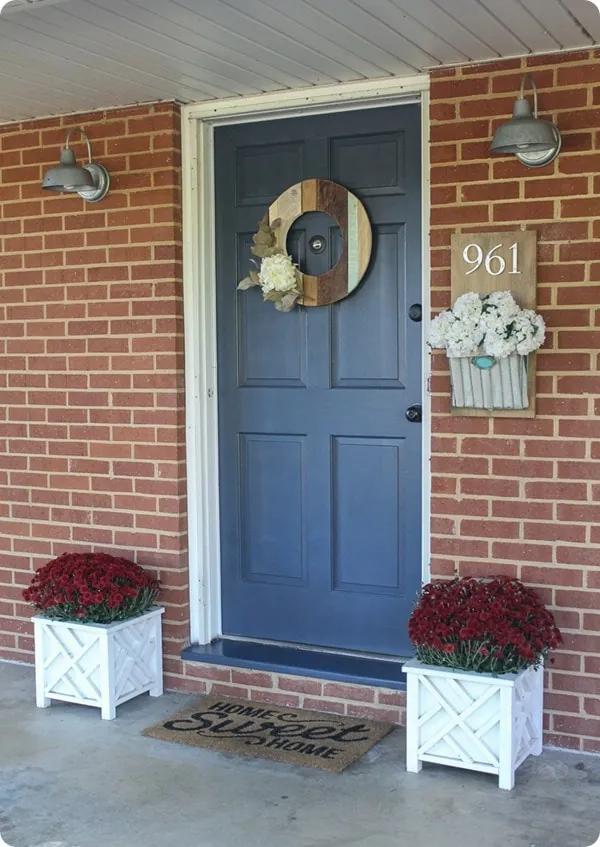
Carrie calls her 1970s brick ranch ugly, and she could not change the orange brick or the concrete porch yet. So she focused only on the front entrance: she removed the old storm door and intercom, swapped the lights and added a DIY house number sign.
The door color took real testing. Some navies washed out in morning sun, others looked almost black in afternoon shade, and some blended into the bronze hardware. She painted samples right on the door, watched them through the day and chose Valspar Pitch Cobalt.
Worth borrowing: paint door samples on the actual door and check them morning and afternoon. A color that looks right on a chip can disappear next to your brick.
5. Dark green siding with white trim on a first fixer upper
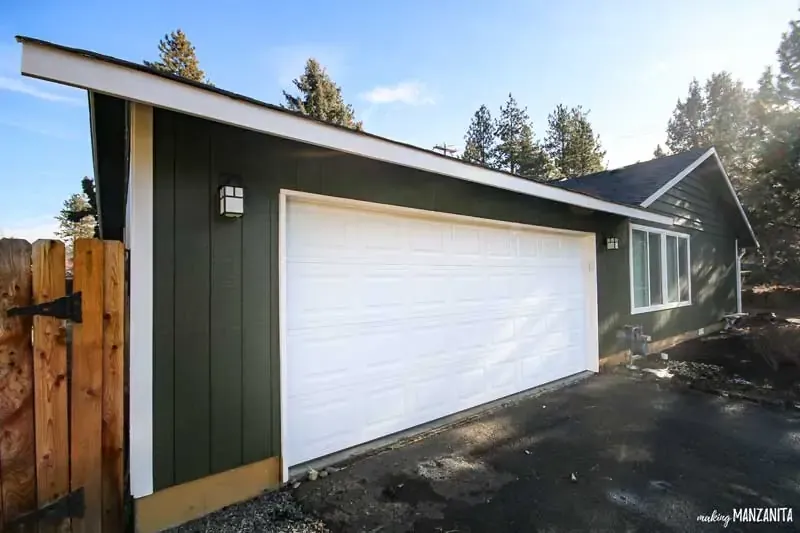
Chelsea and Logan worked on their first fixer upper’s exterior in stages as time and money allowed: dark mulch and new plants in the front bed first, then a wood fence, and finally the big change, paint.
They painted the house themselves in Behr Black Bamboo, a dark green, with white trim and a lighter blue-green front door. It shows how a dark body color can make a plain house look intentional.
Worth borrowing: you do not have to do curb appeal all at once. Mulch and plants first, paint when you can, and each step still makes a visible difference.
6. A 70s split entry with gray paint, stone and cedar
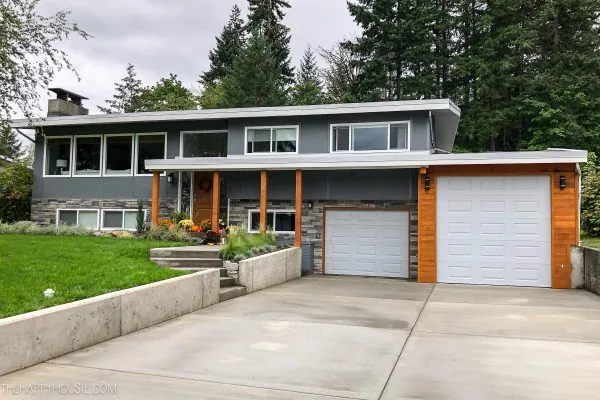
Krista’s 70s split entry needed a lot: a new driveway and retaining wall, safe front steps and repairs to cracked siding. They hired trusted contractors for the concrete and framing, which she says was not a DIY job, and painted the house themselves.
The colors came from the stone. She pulled two warm grays from the cultured stone, used the darker one on the house, and used a lighter one for the garage doors, which read almost white. Solid cedar posts and cedar trim around the garage add warmth.
Worth borrowing: choose exterior paint colors from the material you cannot change, such as stone, brick or roof. Matching their undertone keeps everything looking like it belongs together.
7. Yellow brick to textured white, with a soft blue door
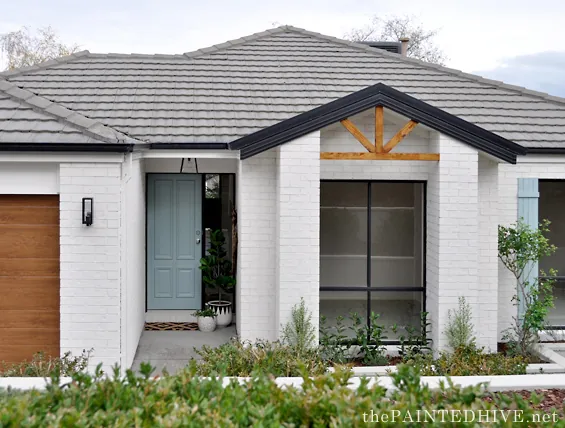
This Australian flip house was only about 14 years old and looked like every other house on the street, including the one next door with the same color scheme. The blogger painted the yellow brick with a textured masonry paint in Antique White USA, which gives a bagged, rendered look rather than flat paint.
She admits she pulled skeptical faces at the bright white for a few weeks before deciding it was right. The warmth comes back through a timber-look garage door and a front door and shutters in a soft duck-egg blue. Her price list is unusually honest: she paid about $1,770 and also lists the full value of the items that were gifted.
Worth borrowing: if a big white change feels too stark, warm it up with one natural material, such as a wood-look garage door, and one soft color at the front door.
8. Painting a 70-year-old brick house, with the prep done right
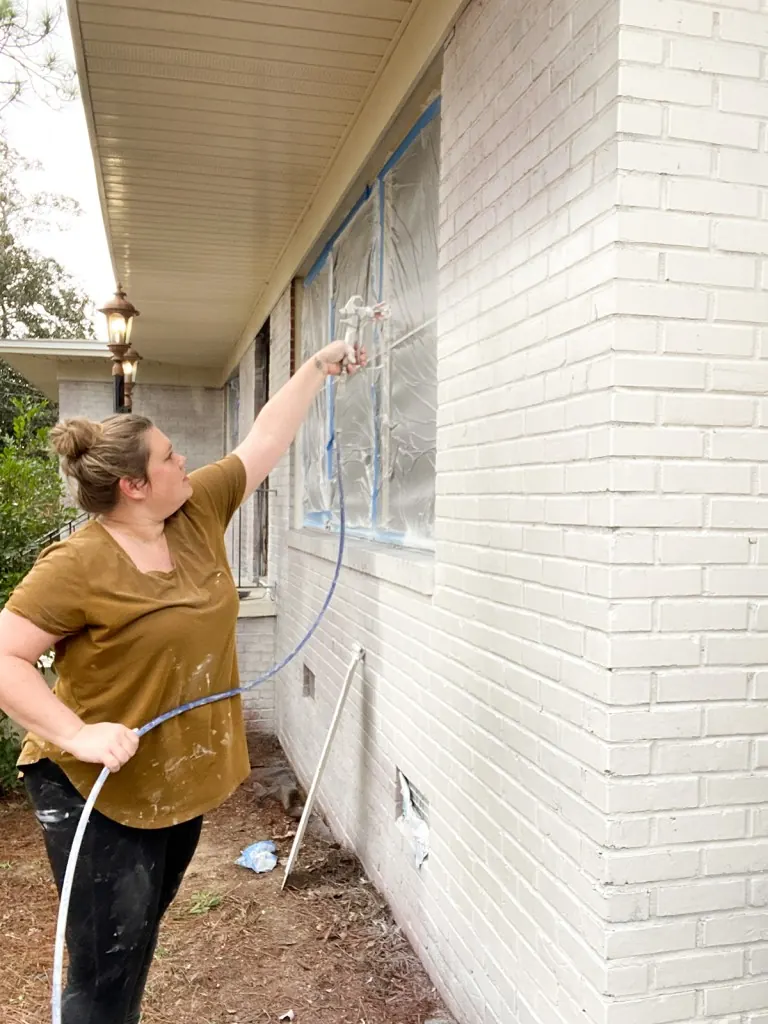
Emma knows painted brick divides people, so she explains her reasoning: a roof less than a year old to limit moisture from above, and a willingness to keep up the maintenance. Then she did the prep properly: cut back the bushes, removed warped shutters, pressure washed and let the brick dry for four days, and caulked gaps and old screw holes.
One detail I had not thought about: she left the weep holes near the bottom of the wall open, because they let moisture behind the brick drain out. She sprayed one coat of masonry primer and two coats of a brick-friendly exterior latex, and shares the sprayer lessons she learned the hard way.
Worth borrowing: never caulk or paint over the weep holes at the base of a brick wall. And give the brick several dry days after washing before the primer goes on.
Plan your own exterior
Start with what you cannot change: roof, brick, stone and windows. Then pick the body, trim and door colors around them. My exterior color pairing helper suggests trim and door colors for common siding colors, and the front door makeover ideas are a good small first project. There is more in the curb appeal hub.
Credits and sources
Every photo in this roundup belongs to the blogger credited directly under it, and each credit links to the original post. Please visit them for the full project, the materials they used and many more photos. If you are one of the featured bloggers and would like a photo changed or removed, email me at [email protected] and I will take care of it.