

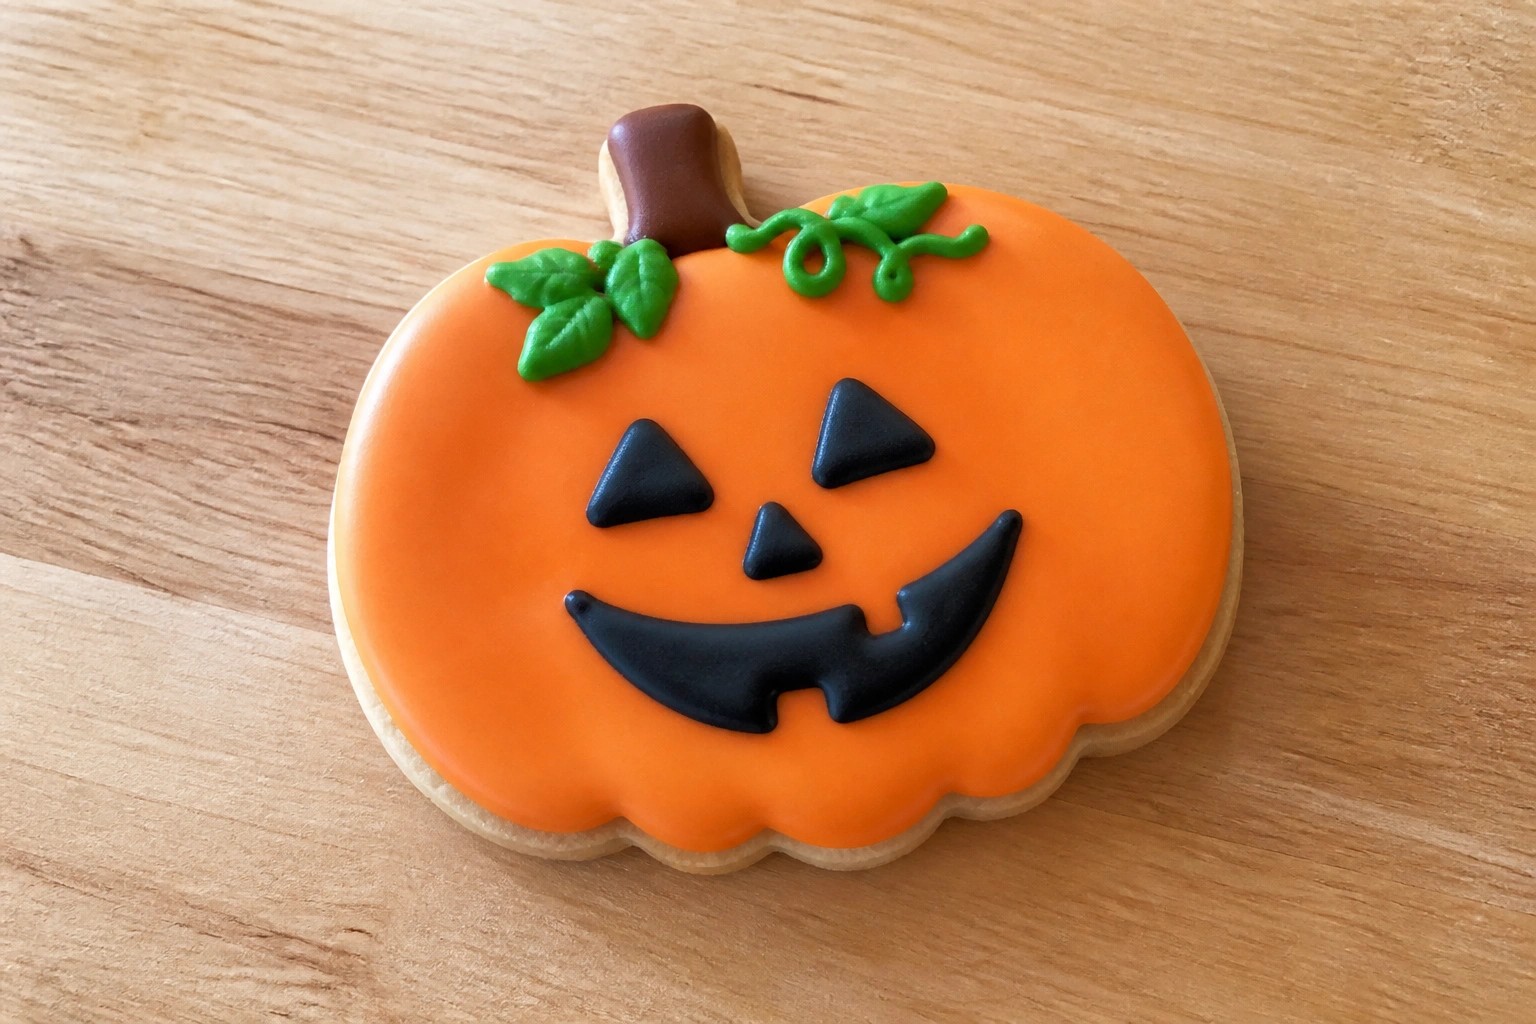
Getting ready for Halloween with kids often means finding treats that are simple to make. These recipes focus on easy steps and ingredients you can pick up at the store. Most use basic items like cookies or candy that you might already have on hand. They create cute results without needing special skills or tools. Here are 14 ideas that work for parties or family time.
Helpful Tips Before You Start
A bit of planning keeps these desserts fun and low stress for both you and the kids.
Let Kids Join the Decorating
Give them simple tasks like placing candy eyes or drizzling icing. This builds excitement and reduces the chance they will lose interest before the treats are done.
Start with No-Bake Options
Choose recipes that skip the oven when possible. Items like chocolate-covered pretzel sticks or yogurt-covered strawberries come together quickly and avoid burns.
Prep Components Ahead
Measure sprinkles, melt chocolate, and cut fruit the day before. Having everything ready means assembly stays short and the kitchen stays cleaner.
Watch Portion Sizes
Make smaller treats so kids can sample a few different ones without overeating. Mini versions also fit better on a party table.
Ghostly Meringue Pops
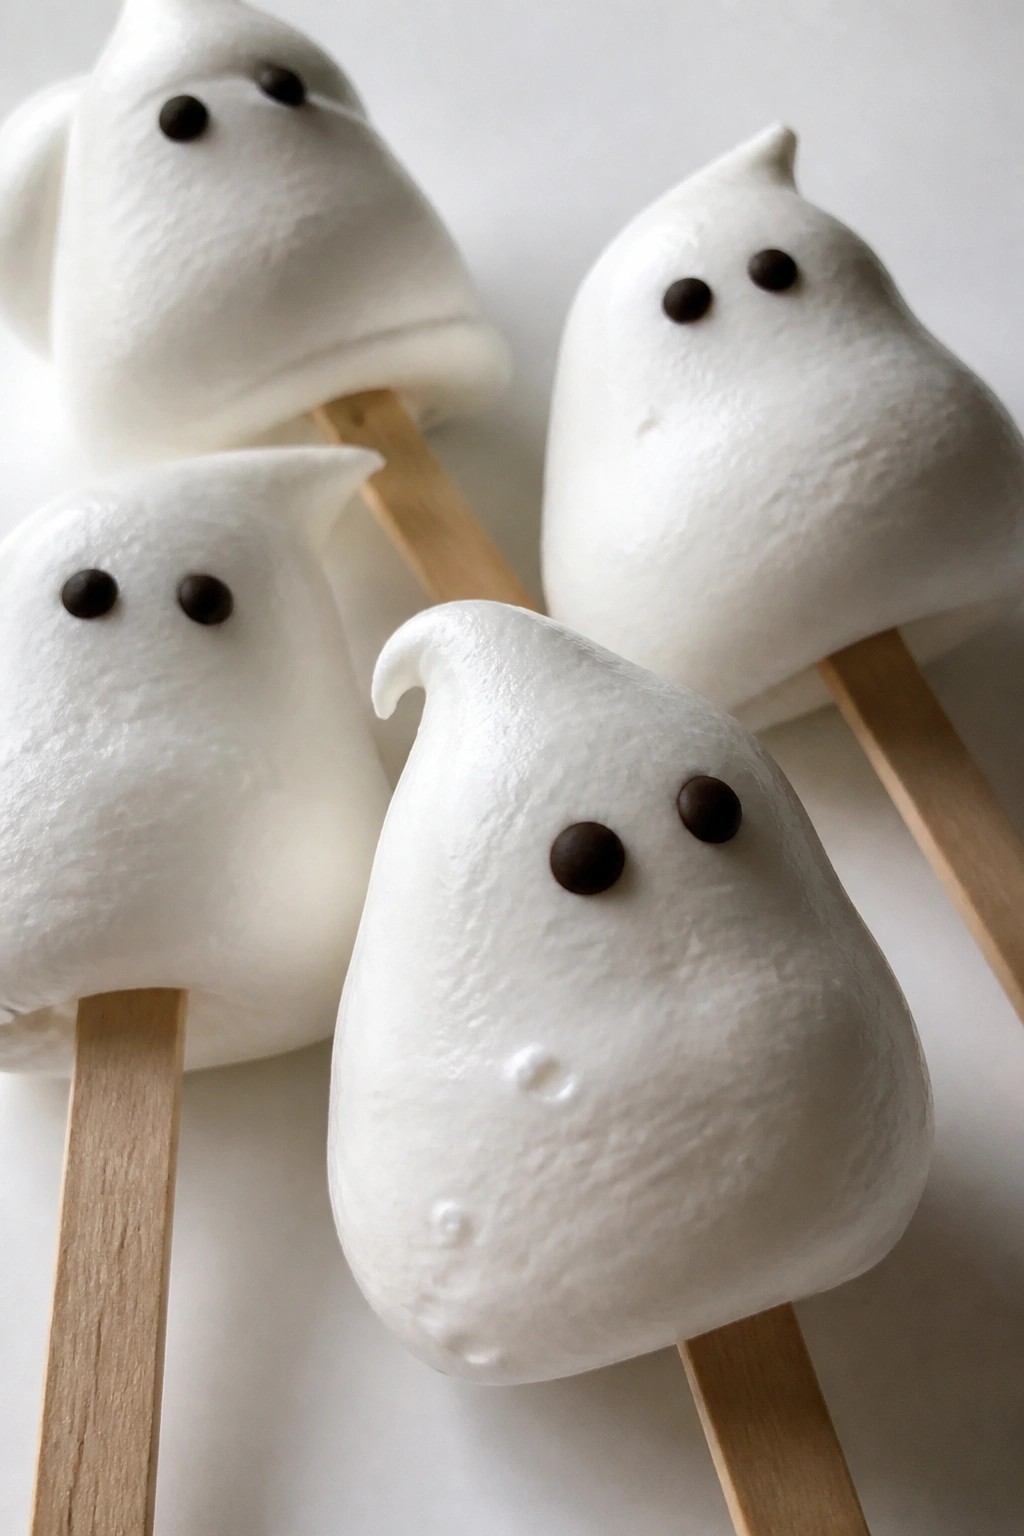
Ghostly Meringue Pops offer a light and playful treat for Halloween. Kids enjoy the crisp shells and the simple ghost shapes on sticks. They suit after-school snacks or small parties without much fuss.
These pops deliver a sweet vanilla flavor with an airy texture that melts quickly. The recipe keeps things basic so home cooks can focus on the fun shapes.
Serves 4 people.
Ingredients
- 2 large egg whites
- 1/2 cup granulated sugar
- 1/4 teaspoon cream of tartar
- 1/2 teaspoon vanilla extract
- 4 popsicle sticks
- 8 mini chocolate chips
Instructions
- Preheat the oven to 200 degrees Fahrenheit and line a baking sheet with parchment paper.
- Place the egg whites and cream of tartar in a clean mixing bowl. Beat with an electric mixer on medium speed until soft peaks form.
- Add the sugar a little at a time while beating on high speed. Continue until the mixture reaches stiff, glossy peaks.
- Mix in the vanilla extract on low speed until just combined.
- Spoon the meringue into a piping bag fitted with a round tip. Pipe four ghost shapes onto the prepared sheet, leaving space between each one.
- Insert one popsicle stick into the base of each ghost before baking.
- Bake for two hours until the meringues feel dry and lift easily from the paper. Turn off the oven and leave the pops inside to cool completely.
- Press two mini chocolate chips into each ghost to form eyes once the pops have cooled.
Extra Tips
Pipe the ghosts with a slightly wider base so the sticks stay secure after baking. Store the finished pops in an airtight container at room temperature for up to three days to keep the shells crisp. Avoid humid days, as moisture can soften the meringue quickly. Course: Dessert Cuisine: American Equipment: Electric mixer, Mixing bowl, Baking sheet, Parchment paper, Piping bag
Spiderweb Swirl Brownies
These brownies bring a fun Halloween touch to any kids table with their dark chocolate base and white swirls that form a spiderweb pattern. They work well for after-school treats or a small party because the recipe makes just enough for four without much leftover. The texture stays fudgy in the center with a light crackly top, while the white chocolate adds a mild sweetness that balances the cocoa.

Serves 4 people.
Ingredients
- 4 tablespoons unsalted butter
- ½ cup granulated sugar
- 1 large egg
- 3 tablespoons unsweetened cocoa powder
- ¼ cup all-purpose flour
- ⅛ teaspoon salt
- ¼ cup white chocolate chips
Instructions
- Preheat the oven to 350°F and line a small 8×8 baking pan with parchment paper.
- Melt the butter in a microwave-safe bowl, then stir in the sugar until combined.
- Add the egg and mix well until the batter looks smooth and glossy.
- Stir in the cocoa powder, flour, and salt until no dry streaks remain.
- Pour the brownie batter into the prepared pan and spread it evenly.
- Melt the white chocolate chips in 20-second bursts in the microwave, stirring between each burst until smooth.
- Drop small spoonfuls of the melted white chocolate across the batter surface, then drag a toothpick through the drops in circles to create a web pattern.
- Bake for 18 to 20 minutes until the edges look set but the center still has a slight give.
- Cool completely in the pan before cutting into four squares.
Extra Tips
Melt the white chocolate just until smooth so it stays thick enough to hold the web lines when dragged. If the chocolate firms up while you work, warm it for five seconds to loosen it again. Store cooled brownies in an airtight container at room temperature for up to two days to keep the swirl pattern crisp. Course: Dessert Cuisine: American Equipment: Mixing Bowl, 8×8 Baking Pan, Microwave-Safe Bowl
Pumpkin Patch Dirt Cups
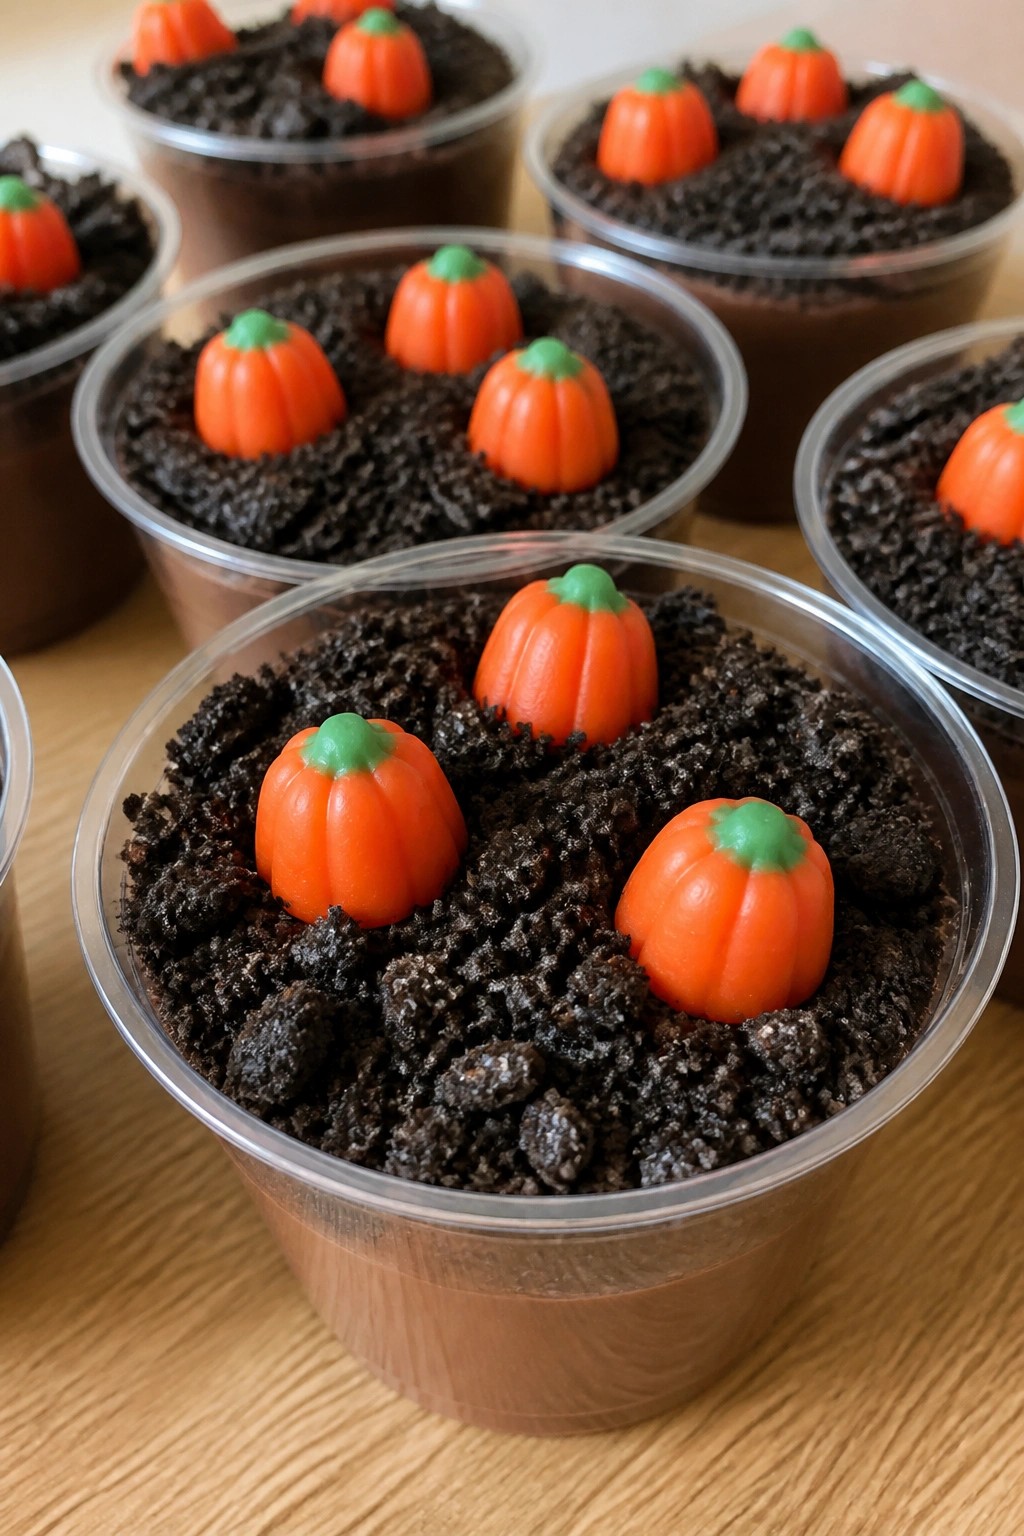
These dirt cups turn a classic chocolate treat into a fun Halloween activity for kids. They work well for classroom parties or an easy after-school project when you need something quick and hands-on. The layers give a creamy pudding base with a crunchy cookie topping that kids enjoy assembling themselves.
The finished cups have a rich chocolate flavor balanced by the sweet, slightly waxy texture of the candy pumpkins on top.
Serves 4 people.
Ingredients
- 1 box (3.9 oz) instant chocolate pudding mix
- 2 cups cold milk
- 12 Oreo cookies
- 8 candy pumpkins
Instructions
- Pour the instant chocolate pudding mix and cold milk into a mixing bowl. Whisk for two minutes until the mixture thickens and no lumps remain.
- Place the Oreo cookies in a zip-top bag and crush them with a rolling pin until they form fine crumbs.
- Divide the pudding evenly among four small cups or jars.
- Sprinkle the crushed Oreo crumbs over the pudding in each cup to create the dirt layer.
- Press two candy pumpkins gently into the cookie crumbs on top of each cup.
Extra Tips
Crush the cookies just before assembling so they stay crisp instead of softening too soon. If the pudding sits for more than a few hours, give it a quick stir before adding the crumbs. Candy pumpkins can be swapped for pumpkin-shaped gummies if you prefer a softer chew. Course: Dessert Cuisine: American Equipment: Mixing bowl, whisk, zip-top bag, rolling pin, four small cups
Candy Corn Parfait Jars
These layered jars bring the classic candy corn look to the table in a creamy form that kids can assemble and enjoy. The colors stack up just like the real candy, making them a fun addition to Halloween parties or after-school treats.
The result is a cool, smooth dessert with sweet vanilla notes and a light whipped topping. Kids like the visual surprise when they dig in with a spoon.

Serves 4 people.
Ingredients
- 2 cups vanilla pudding
- Yellow food coloring
- Orange food coloring
- 1 cup whipped topping
- 12 pieces candy corn
- 4 small glass jars
Instructions
- Divide the vanilla pudding into two equal portions in separate bowls. Add yellow food coloring to one portion and stir until the color is even. Add orange food coloring to the second portion and stir until the color is even.
- Spoon the yellow pudding into the bottom of each jar to form the first layer. Use the back of the spoon to smooth it flat.
- Add the orange pudding on top of the yellow layer in each jar. Smooth the surface again so the layers stay distinct.
- Spoon the whipped topping over the orange layer in each jar to create the final white band.
- Place three pieces of candy corn on top of the whipped topping in each jar just before serving.
Extra Tips
Make the colored pudding layers a few hours ahead and keep the jars covered in the fridge so the colors stay bright. Stir the food coloring in small amounts until you reach a shade close to real candy corn. The whipped topping should be added right before serving to keep its shape. Course: Dessert Cuisine: American Equipment: Mixing bowls, Spoons, Glass jars
Frankenstein Monster Cookies
These Frankenstein Monster Cookies make a simple project for an afternoon with kids before a Halloween party. The soft centers and light edges give them a pleasant bite that holds up well to decorating.
The mild vanilla taste comes through clearly once the cookies cool, while the chocolate details add a little richness without overpowering the base.

Serves 4 people.
Ingredients
- 1/2 cup unsalted butter, softened
- 1/2 cup granulated sugar
- 1 large egg
- 1 teaspoon vanilla extract
- 1 1/2 cups all-purpose flour
- 1/2 teaspoon baking soda
- Green food coloring
- 1/4 cup chocolate chips
- 8 candy eyes
Instructions
- Heat the oven to 350 degrees and line a baking sheet with parchment paper.
- Beat the butter and sugar together in a mixing bowl until light and creamy.
- Add the egg, vanilla extract, and several drops of green food coloring. Mix until the color is even.
- Stir in the flour and baking soda until a soft dough forms.
- Scoop the dough into eight balls and place them on the baking sheet. Flatten each ball slightly.
- Bake for 10 to 12 minutes until the edges turn lightly golden. Let the cookies cool on the sheet for five minutes, then move them to a wire rack.
- Melt the chocolate chips in a small bowl. Use the melted chocolate to attach two candy eyes to each cookie and to draw a simple mouth or hairline.
Extra Tips
Melt the chocolate in short bursts in the microwave so it stays smooth for piping. Press the candy eyes into the chocolate while it is still warm so they stay in place. Store cooled cookies in an airtight container at room temperature for up to three days. Course: Dessert Cuisine: American Equipment: Mixing Bowl, Baking Sheet, Wire Rack
Bat Wing Chocolate Cupcakes
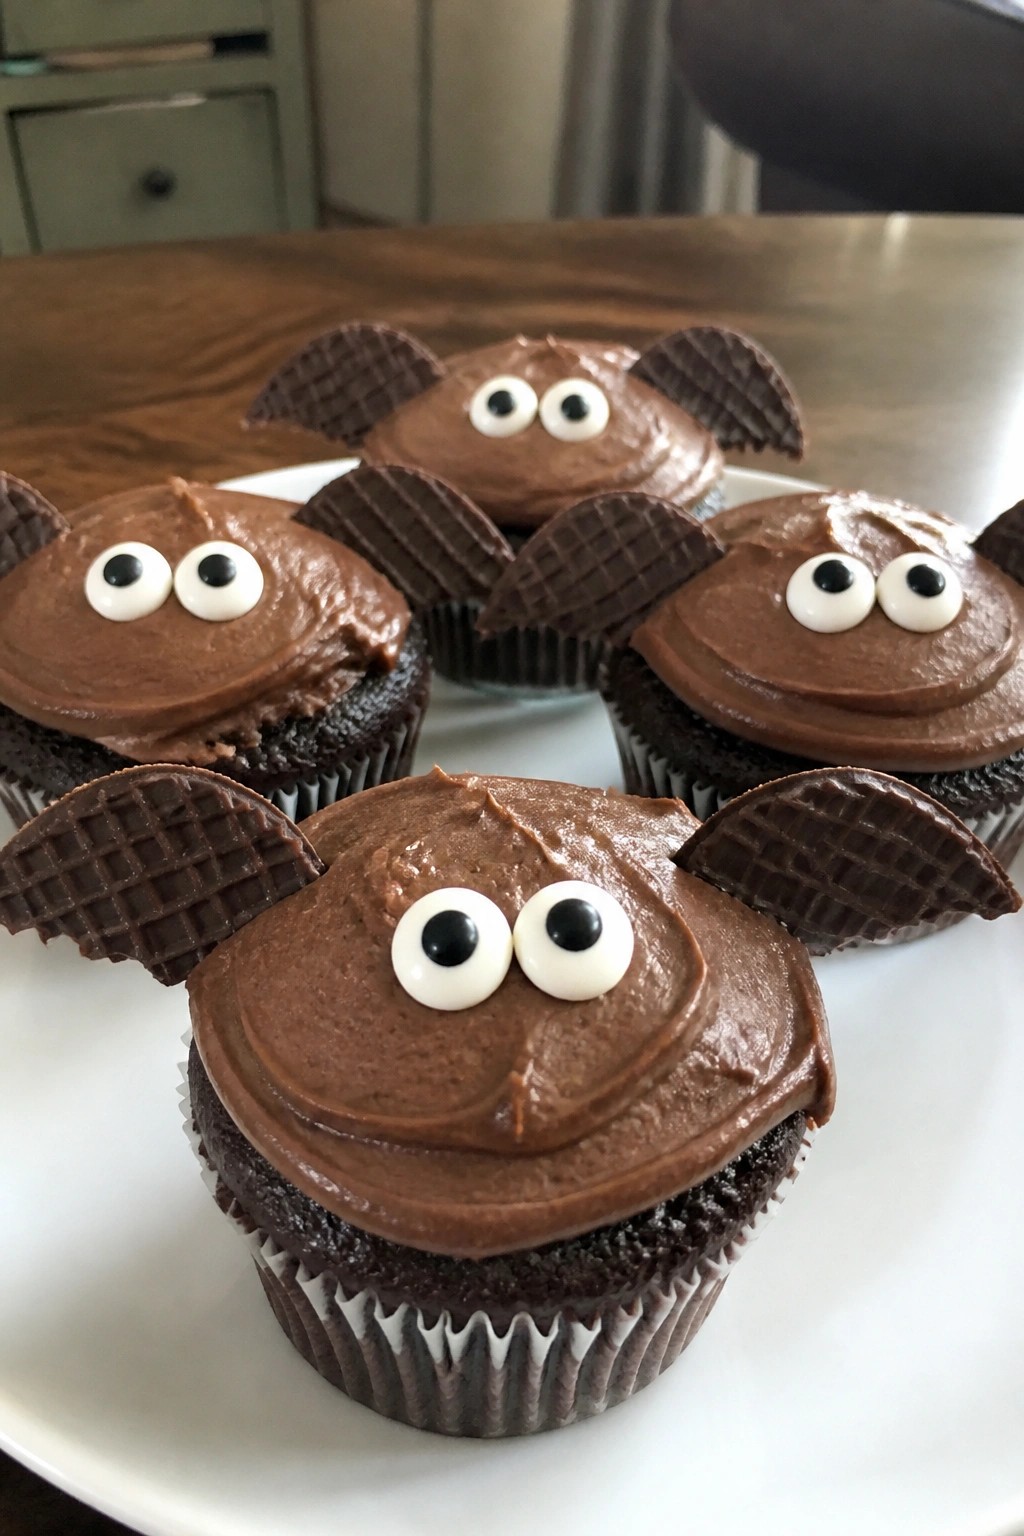
These chocolate cupcakes give kids a fun bat shape without any complicated decorating skills. They work well for an after-school treat or a small Halloween party table. The cupcakes come out moist with a deep cocoa flavor and a light crumb.
The chocolate frosting adds richness while the cookie wings create a simple bat look that holds up on the plate. Kids enjoy the sweet taste and the playful detail of the wings.
Serves 4 people.
Ingredients
- ½ cup all-purpose flour
- ¼ cup unsweetened cocoa powder
- ½ teaspoon baking soda
- ¼ teaspoon salt
- ½ cup sugar
- 1 large egg
- ¼ cup milk
- 2 tablespoons vegetable oil
- 1 cup chocolate frosting
- 8 thin chocolate wafer cookies
- 8 candy eyes
Instructions
- Preheat the oven to 350°F and line a cupcake pan with 4 paper liners.
- In a mixing bowl, whisk together the flour, cocoa powder, baking soda, salt, and sugar.
- Add the egg, milk, and vegetable oil to the dry ingredients. Stir until the batter is smooth and no dry streaks remain.
- Divide the batter evenly among the 4 liners, filling each about two-thirds full.
- Bake for 18 minutes or until a toothpick inserted in the center comes out clean. Let the cupcakes cool completely in the pan.
- Spread or pipe the chocolate frosting over each cooled cupcake.
- Press two chocolate wafer cookies into the sides of each cupcake to form wings.
- Place two candy eyes on the frosting near the front of each cupcake.
Extra Tips
Use a slightly thicker chocolate frosting so the wafer cookies stay upright. If the cookies feel too wide, trim one edge before inserting them. Store any leftovers in an airtight container at room temperature for up to two days. The wings soften if refrigerated, so keep the cupcakes out until serving. Course: Dessert Cuisine: American Equipment: Mixing Bowl, Cupcake Pan, Oven, Piping Bag
Mummy Wrapped Truffles
These mummy wrapped truffles give kids a hands-on way to create a Halloween treat. They suit classroom parties or family movie nights when you want something quick yet themed. The chocolate centers stay soft while the white coating sets into a firm shell.
Each truffle tastes like classic milk chocolate with a sweet white layer on top. The candy eyes bring a light crunch that contrasts the creamy inside.
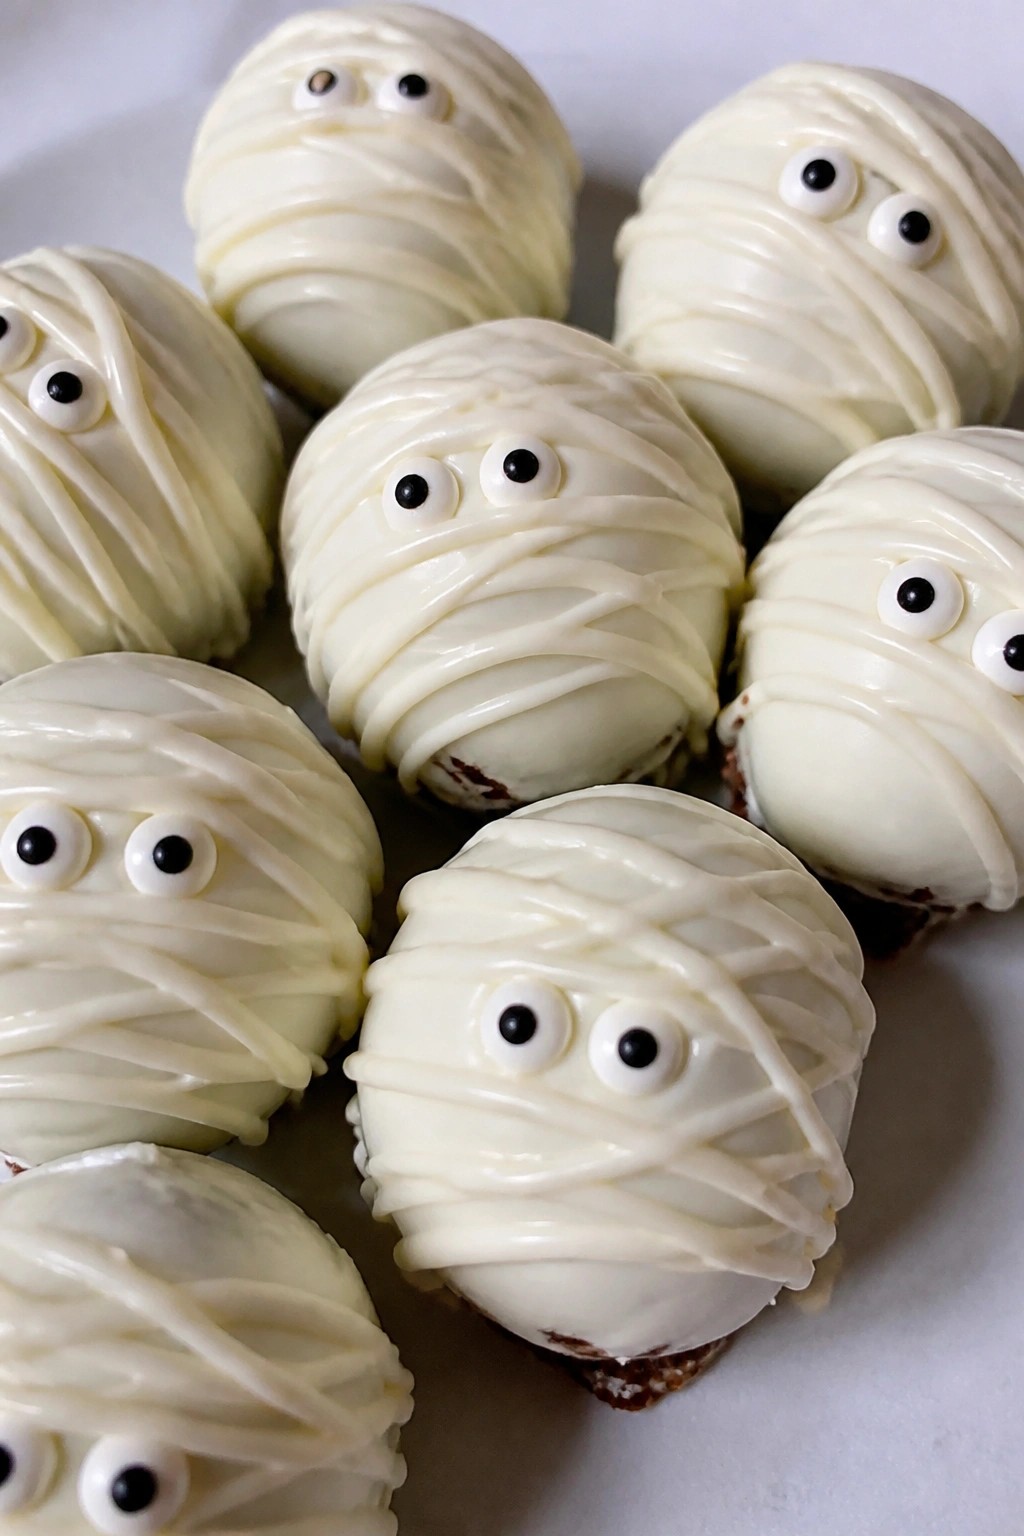
Serves 4 people.
Ingredients
- 12 chocolate truffles
- 12 ounces white candy melts
- 2 teaspoons coconut oil
- 24 candy eyeballs
Instructions
- Line a baking sheet with parchment paper and set it aside.
- Place the white candy melts and coconut oil in a microwave-safe bowl. Heat in 30-second bursts, stirring between each, until fully melted and smooth.
- Drop one chocolate truffle into the melted mixture. Use a fork to roll it and lift it out, letting excess coating drip back into the bowl. Place the coated truffle on the prepared baking sheet.
- Immediately press two candy eyeballs onto the top of the truffle before the coating sets.
- Repeat with the remaining truffles. Transfer the leftover melted candy melts to a small zip-top bag, snip a tiny corner, and drizzle thin lines across each truffle to create the mummy wrap look.
- Let the truffles sit at room temperature until the coating hardens.
Extra Tips
Work in small batches when dipping so the candy melts stay warm and thin. If the drizzle feels too thick, stir in a few extra drops of melted coconut oil. Store finished truffles in an airtight container in the fridge for up to three days and bring them out 10 minutes before serving so the centers soften slightly. Course: Dessert Cuisine: American Equipment: Microwave-safe bowl, Baking sheet, Parchment paper
Witch Hat Sugar Cookies
These witch hat sugar cookies give kids a playful treat for Halloween without much fuss. They work well for parties or an afternoon baking project together. The base stays soft in the middle with light crisp edges, while the chocolate top adds a smooth, rich bite.
The orange sprinkles add a bright pop that fits the season. Kids enjoy the simple shape and the mix of sweet cookie and chocolate.
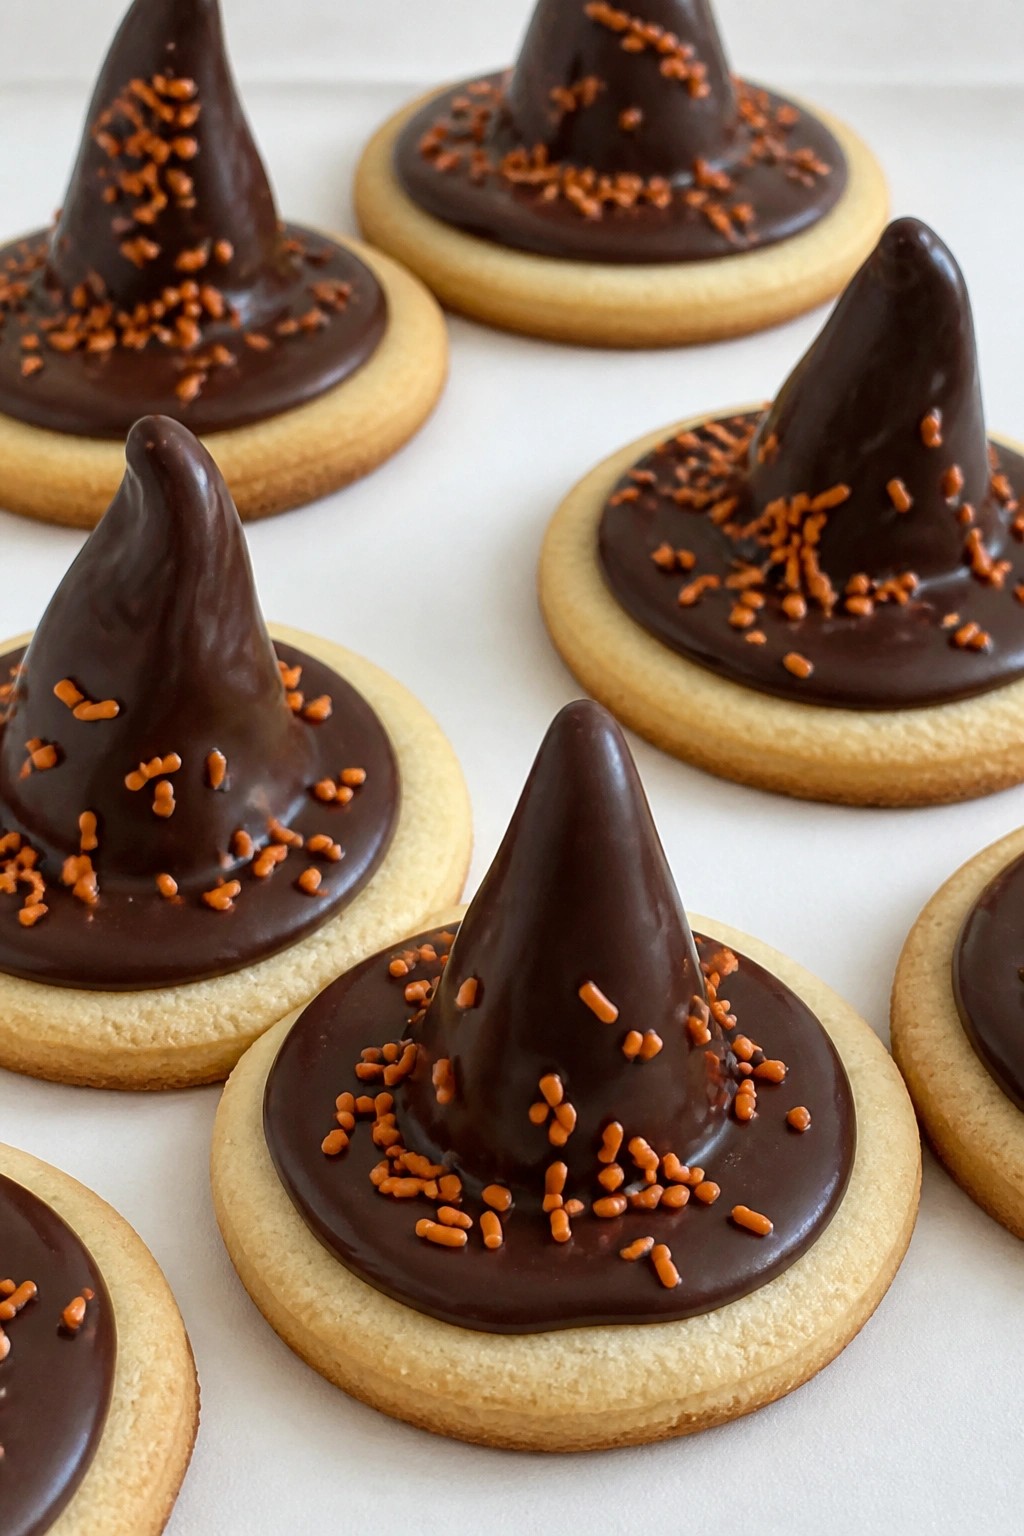
Serves 4 people.
Ingredients
- 1 cup all-purpose flour
- 1/2 teaspoon baking powder
- 1/4 teaspoon salt
- 1/2 cup unsalted butter, softened
- 1/2 cup granulated sugar
- 1 large egg
- 1 teaspoon vanilla extract
- 1 cup semisweet chocolate chips
- 2 tablespoons orange sprinkles
Instructions
- Heat the oven to 350 degrees and line a baking sheet with parchment paper.
- Stir the flour, baking powder, and salt together in a mixing bowl.
- Cream the butter and sugar in a second bowl until light and fluffy, then beat in the egg and vanilla.
- Add the dry mixture to the wet mixture and stir until a soft dough forms.
- Roll the dough into eight small balls, place them on the baking sheet, and flatten each one slightly.
- Bake for 10 to 12 minutes until the edges turn golden, then let the cookies cool completely on the sheet.
- Melt the chocolate chips in a microwave-safe bowl in 20-second bursts, stirring between each burst until smooth.
- Spoon a small circle of melted chocolate onto each cookie and add a pointed dollop in the center to form the hat shape.
- Scatter orange sprinkles around the base of the chocolate while it is still soft.
Extra Tips
Let the chocolate set at room temperature rather than in the fridge so it keeps a slight shine. If the dough feels sticky during rolling, chill it for 15 minutes. The sprinkles stay put best when added right after the chocolate is piped. Course: Dessert Cuisine: American Equipment: Mixing Bowl, Baking Sheet, Microwave-safe Bowl
Skeleton Bone Biscotti
These biscotti come out long and slightly curved so they look like real bones on a dessert tray. Kids enjoy the light crunch and mild sweetness, which makes them easy to serve at Halloween parties or as an after-school treat.
The recipe uses simple pantry items and bakes into sturdy pieces that hold up well in lunch boxes or on a spooky snack table. A quick white chocolate dip at the ends gives them that pale bone look without extra fuss.

Serves 4 people.
Ingredients
- 2 cups all-purpose flour
- 3/4 cup granulated sugar
- 1 teaspoon baking powder
- 1/2 cup chopped almonds
- 2 large eggs
- 1/4 cup unsalted butter, melted
- 1 teaspoon vanilla extract
- 1/2 cup white chocolate chips
Instructions
- Heat the oven to 350 degrees and line a baking sheet with parchment paper.
- In a mixing bowl, stir together the flour, sugar, baking powder, and chopped almonds.
- Add the eggs, melted butter, and vanilla extract. Mix until a stiff dough forms.
- Divide the dough in half and shape each half into a long, narrow log about 10 inches long.
- Place the logs on the baking sheet and bake for 25 minutes until firm and lightly golden.
- Remove from the oven, let cool for 10 minutes, then slice each log on a diagonal into bone-shaped pieces.
- Return the slices to the baking sheet and bake for another 10 minutes to crisp them.
- Melt the white chocolate chips in a small bowl. Dip both ends of each cooled biscotti piece into the chocolate and set on parchment to harden.
Extra Tips
Let the biscotti cool fully before dipping so the white chocolate sets in a clean line. If the dough feels too dry while mixing, add one teaspoon of milk. Store leftovers in an airtight container at room temperature for up to five days. Course: Dessert Cuisine: Italian Equipment: Mixing Bowl, Baking Sheet, Oven
Orange Creamsicle Pudding Cups
These pudding cups bring the bright orange and creamy vanilla flavors of a classic creamsicle into an easy treat. Kids enjoy the smooth texture and cheerful color, and the dessert works well for Halloween parties or after-school snacks.
The recipe uses simple mixing and chilling steps. Clear cups let the orange hue show through, and a quick garnish adds a festive touch without extra work.
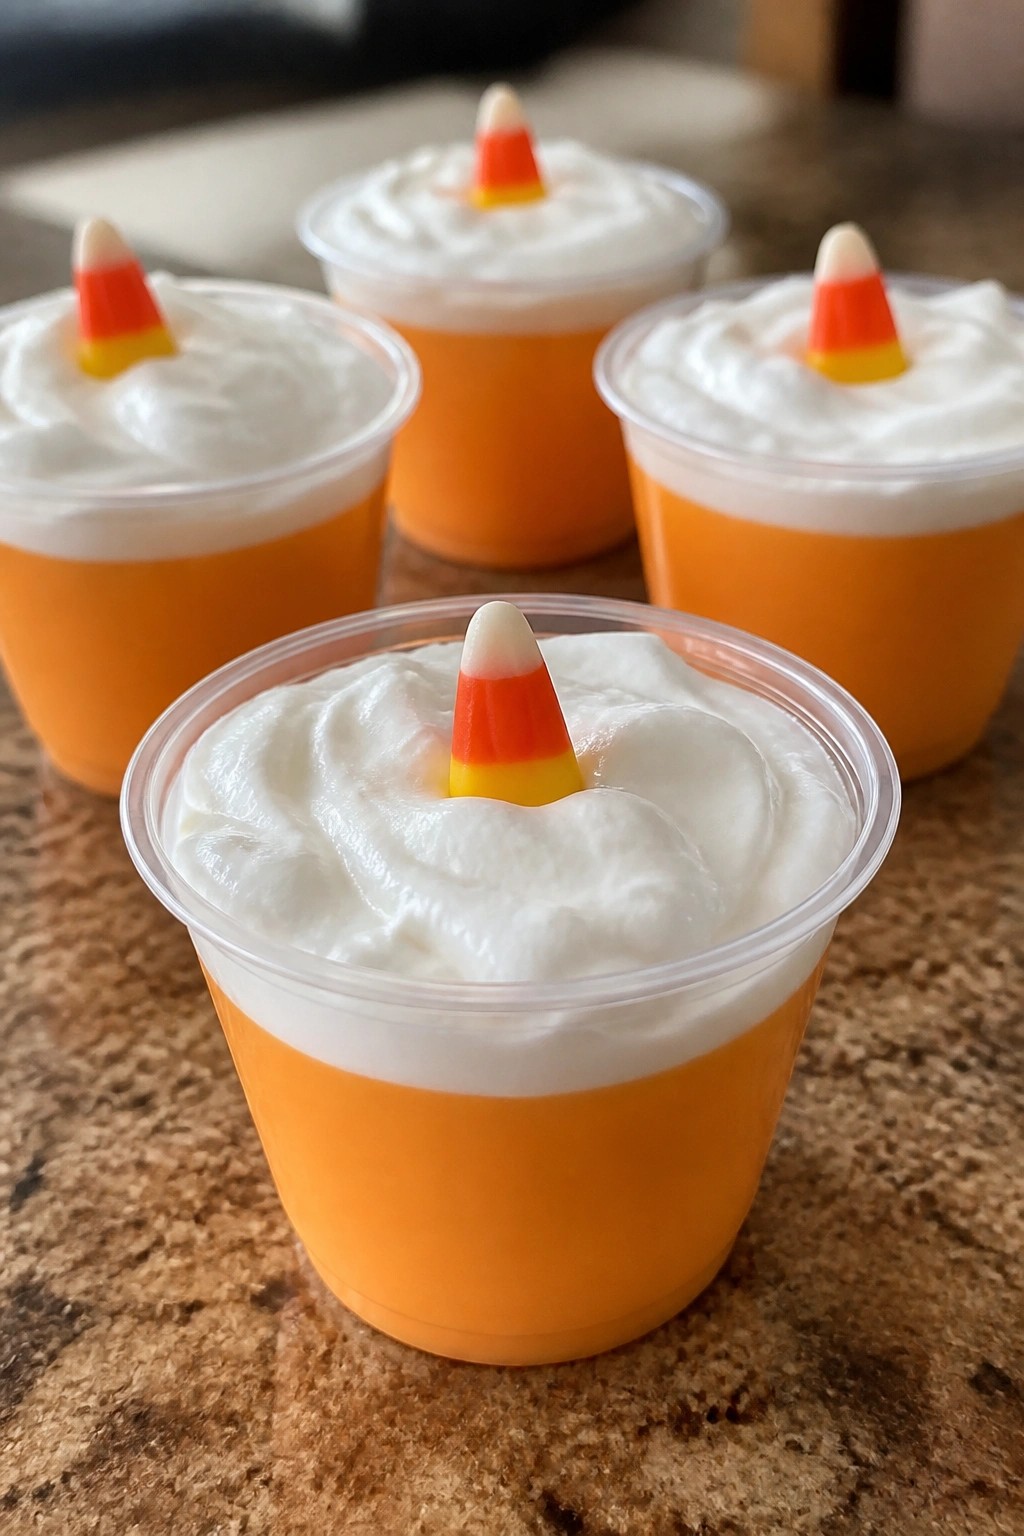
Serves 4 people.
Ingredients
- 1 (3.4-ounce) package instant vanilla pudding mix
- 2 cups cold milk
- 1/2 cup thawed orange juice concentrate
- 1 cup whipped topping
- 12 pieces candy corn
Instructions
- Pour the instant vanilla pudding mix into a mixing bowl. Add the cold milk and whisk for two minutes until the mixture thickens.
- Stir in the thawed orange juice concentrate until the pudding turns a uniform orange color and no streaks remain.
- Spoon the pudding evenly into four small clear cups. Place the cups in the refrigerator for at least 30 minutes so the pudding sets fully.
- Just before serving, top each cup with a dollop of whipped topping. Add three pieces of candy corn to each cup as garnish.
Extra Tips
Chill the pudding long enough for a firm texture that holds the whipped topping in place. If the orange flavor tastes too strong after mixing, add an extra spoonful of pudding mix to balance it. Keep the cups covered in the refrigerator for up to one day before adding the final toppings. Course: Dessert Cuisine: American Equipment: Mixing Bowl, Whisk, Refrigerator, Serving Cups
Black Cat Macaron Sandwiches
These black cat macaron sandwiches bring a fun Halloween touch to dessert time. Kids enjoy the bold color and the mix of crisp shells with a smooth chocolate center. They work well for parties or a weekend baking project at home.
The texture stays light with a slight chew, while the filling adds a rich note that balances the sweetness. The recipe keeps steps straightforward so home cooks can follow along without stress.
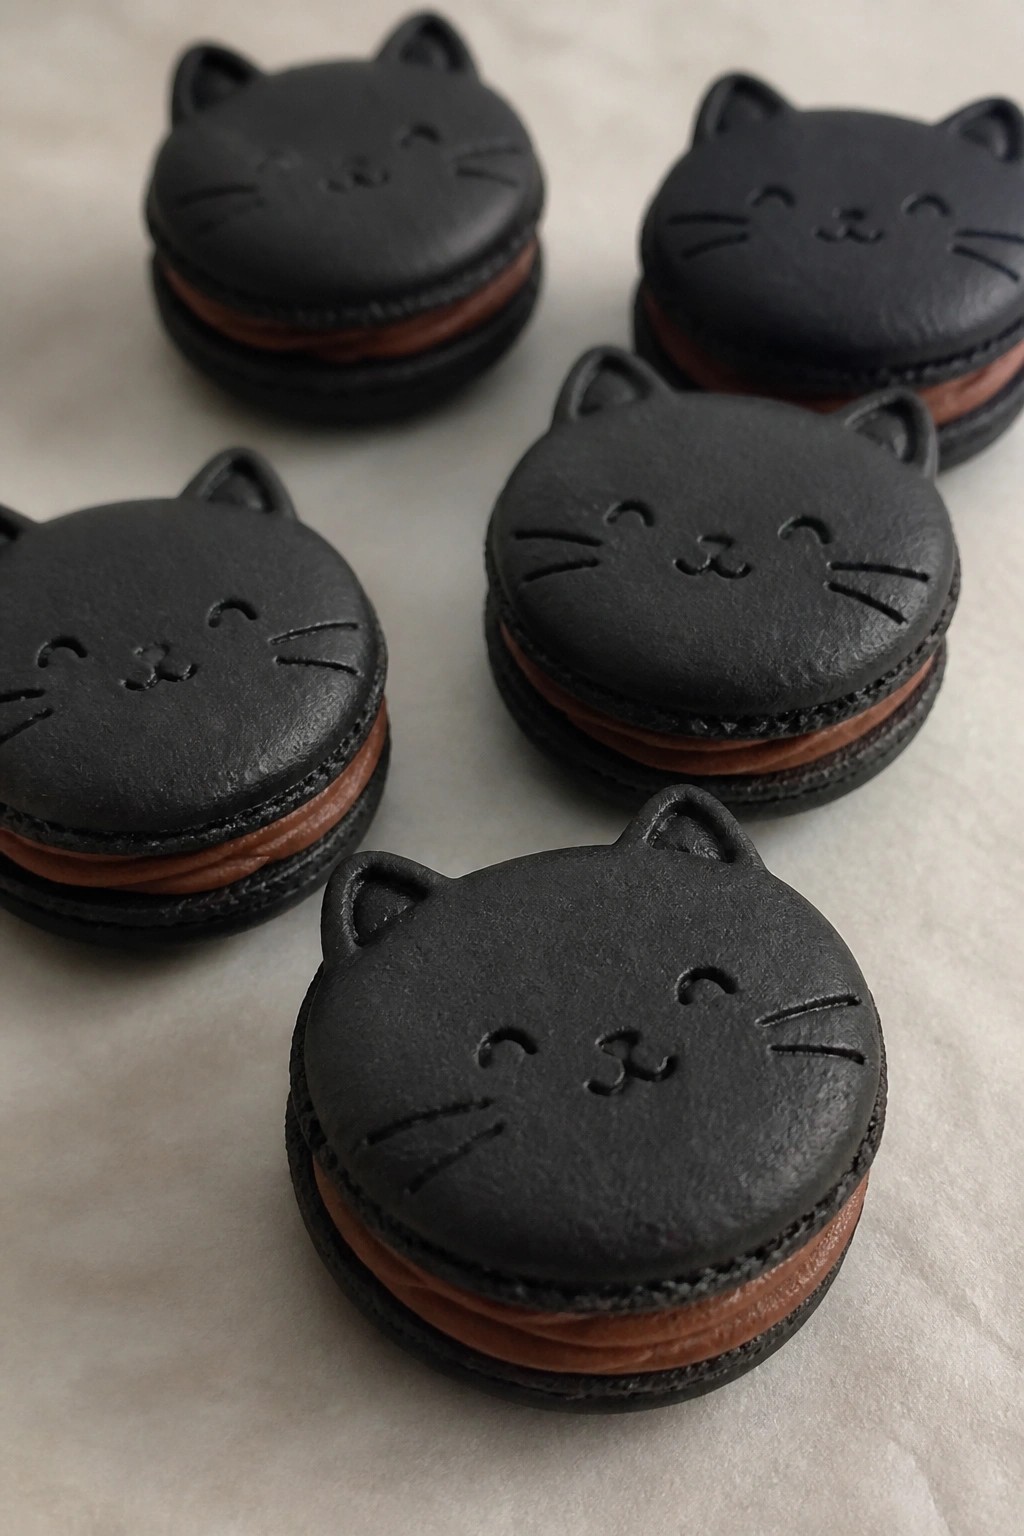
Serves 4 people.
Ingredients
- 1 cup almond flour
- 1 3/4 cups powdered sugar
- 3 large egg whites
- 1/4 cup granulated sugar
- 1 teaspoon black gel food coloring
- 1/2 cup unsalted butter, softened
- 1 cup powdered sugar
- 2 tablespoons cocoa powder
- 1 teaspoon vanilla extract
Instructions
- Sift the almond flour and 1 3/4 cups powdered sugar into a large bowl and set aside.
- Whip the egg whites in a clean bowl until foamy, then add the granulated sugar gradually while beating until stiff peaks form.
- Fold the dry mixture into the egg whites in batches until the batter flows like lava, then add the black gel food coloring and mix until the color is even.
- Pipe small rounds onto lined baking sheets and let them rest until a skin forms on top.
- Bake at 300°F for 15 minutes, then cool completely on the sheets.
- Beat the softened butter with 1 cup powdered sugar, cocoa powder, and vanilla extract until smooth to make the filling.
- Spread or pipe the filling onto half the cooled shells and top with the remaining shells to form sandwiches.
Extra Tips
Pipe the shells a bit smaller than usual so each sandwich fits a child’s hand. Store finished macarons in an airtight container in the fridge for up to two days to keep the shells crisp. If the batter feels too thick during mixing, add a tiny extra drop of egg white rather than overfolding. Course: Dessert Cuisine: French Equipment: Mixing bowls, Electric mixer, Piping bags, Baking sheets
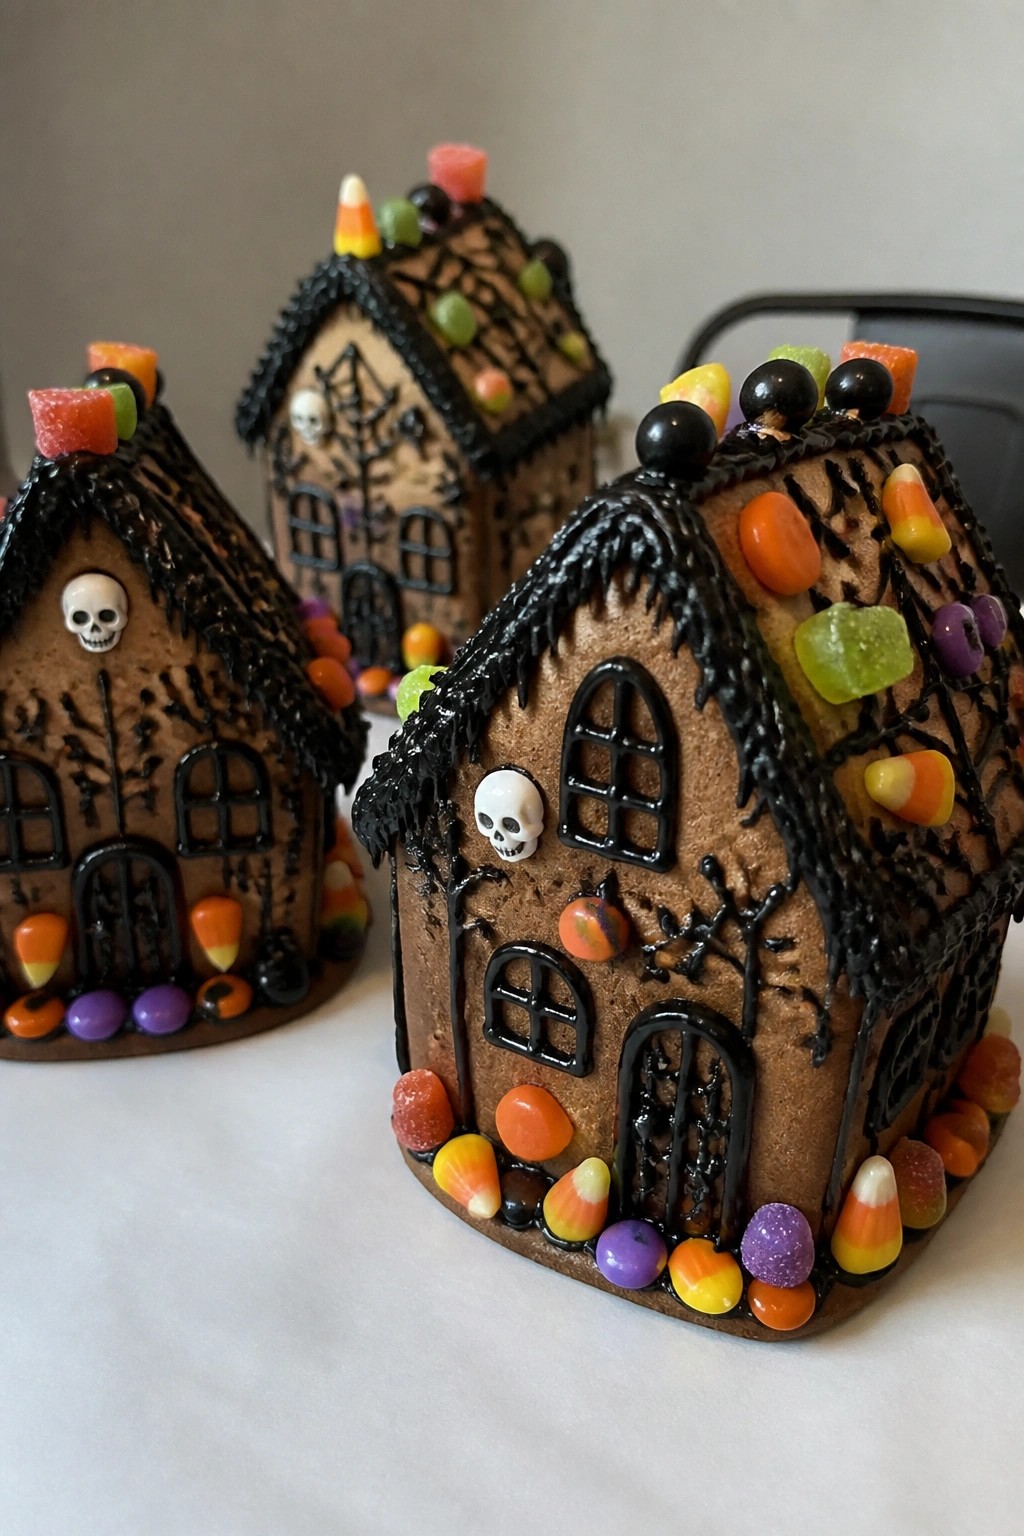
Haunted Gingerbread Houses
These mini haunted gingerbread houses give kids a hands-on way to create their own Halloween treats. They work well as an afternoon activity or a party project where everyone decorates together. The spiced cookie base pairs with sweet icing and crunchy candies for a mix of chewy and crisp textures.
Serves 4 people.
Ingredients
- 12 gingerbread cookies
- 2 cups royal icing
- Black food coloring
- 1 cup assorted Halloween candies
Instructions
- Place three gingerbread cookies on a flat surface to form the base and two sides of each house. Use a small amount of royal icing to glue the edges together and let them set for a minute.
- Add the roof cookies on top and pipe more royal icing along the seams to hold them in place. Repeat until all four houses are assembled.
- Divide the remaining royal icing into two bowls. Leave one bowl white and stir black food coloring into the second bowl until it reaches a dark shade.
- Pipe white icing on the roofs to look like snow and use the black icing to draw windows and doors. Add Halloween candies as decorations while the icing is still soft.
Extra Tips
Tint a little extra icing black ahead of time so kids can make the houses look dark and spooky without waiting. Press candy eyes and gummy pieces firmly into the icing so they stay put once it dries. Store finished houses in a single layer in an airtight container at room temperature for up to two days. Course: Dessert Cuisine: American Equipment: Mixing bowls, Piping bags
Jack-o’-Lantern Cheesecake Bites
These mini cheesecakes bring pumpkin flavor and bright orange color to the table. Kids enjoy spotting the jack-o-lantern faces piped on top, and the creamy filling pairs well with a simple graham crust. They work nicely for an after-school treat or a Halloween party spread.
The texture stays smooth inside with a light crunch from the base. Each bite offers a mild pumpkin taste without being heavy, so children can easily finish one or two.

Serves 4 people.
Ingredients
- 1 cup graham cracker crumbs
- 3 tablespoons butter, melted
- 8 ounces cream cheese, softened
- 1/4 cup sugar
- 1/2 cup pumpkin puree
- 1 large egg
- 1 teaspoon vanilla extract
- 1/4 cup semisweet chocolate chips, melted
Instructions
- Heat the oven to 325 degrees and line a muffin tin with 8 paper liners.
- Stir the graham cracker crumbs with the melted butter until the crumbs are evenly coated. Press about 1 tablespoon of the mixture into the bottom of each liner.
- Beat the cream cheese and sugar together until smooth. Add the pumpkin puree, egg, and vanilla extract. Mix until the filling looks uniform and orange.
- Spoon the filling over the crusts, filling each liner almost to the top. Bake for 20 minutes until the centers are set.
- Let the bites cool in the tin for 10 minutes, then move them to a wire rack. Once fully cool, use a small piping bag or zip-top bag with a corner cut to draw jack-o-lantern faces on each top with the melted chocolate.
Extra Tips
Make the faces right after the bites reach room temperature so the chocolate sets cleanly without melting into the surface. If you want a stronger pumpkin note, you can swap half the sugar for brown sugar. Store leftovers in a sealed container in the fridge for up to three days. Course: Dessert Cuisine: American Equipment: Muffin tin, Mixing bowls, Wire rack, Piping bag
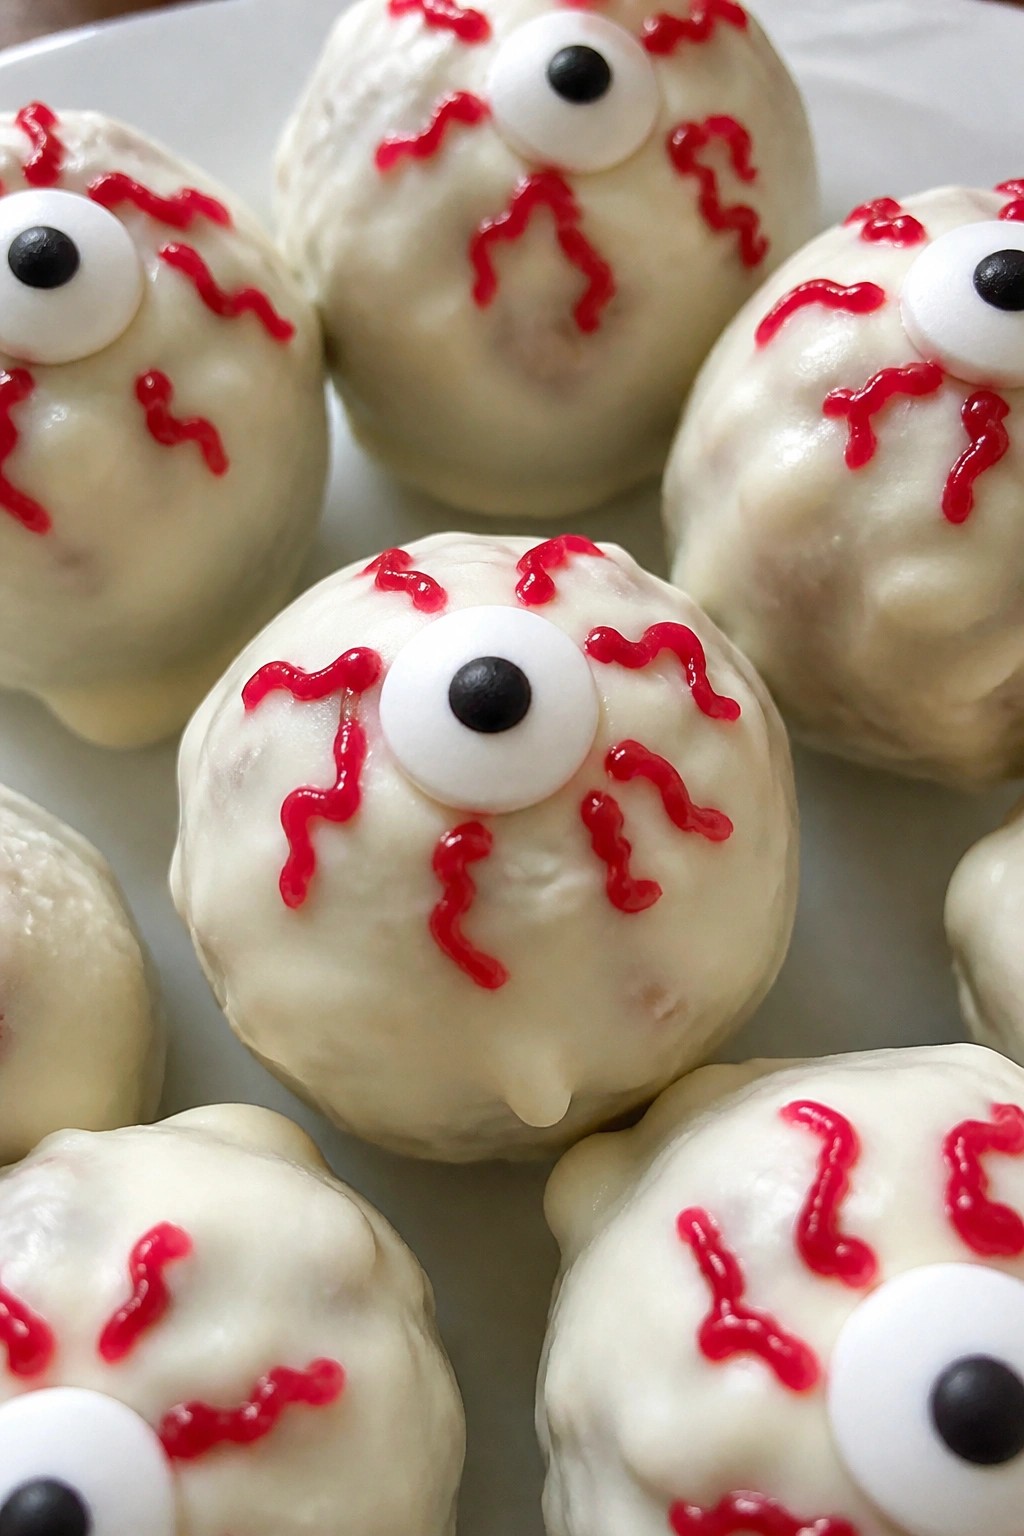
Monster Eyeball Rice Krispie Balls
These Rice Krispie balls turn a classic treat into a fun Halloween snack. Kids like the chewy texture and the chance to help add the eye decorations. They work well for parties or after-school snacks when you need something quick and hands-on.
The flavor stays simple with sweet marshmallow and a white chocolate coating. The red gel adds a playful touch without changing the taste much.
Serves 4 people.
Ingredients
- 2 tablespoons unsalted butter
- 2 cups mini marshmallows
- 3 cups Rice Krispies cereal
- 1 cup white chocolate melting wafers
- 12 candy eyeballs
- Red decorating gel
Instructions
- Melt the butter in a large saucepan over medium heat. Add the mini marshmallows and stir until fully melted and smooth.
- Remove the pan from the heat. Pour in the Rice Krispies cereal and stir until the cereal is evenly coated.
- Let the mixture cool for two minutes. Scoop out portions and roll them into balls about the size of a golf ball. Place the balls on a baking sheet lined with parchment paper.
- Melt the white chocolate melting wafers in a microwave-safe bowl in 20-second bursts, stirring between each burst until smooth.
- Dip the top of each Rice Krispie ball into the melted white chocolate. Press one candy eyeball into the center of the chocolate while it is still wet.
- Use the red decorating gel to draw short lines around the candy eyeball to create a bloodshot look. Let the chocolate set before serving.
Extra Tips
Form the balls while the mixture is still warm but not hot to avoid burning your hands. If the white chocolate starts to thicken, warm it for a few more seconds. These hold up well when made a day ahead and stored in an airtight container at room temperature. Course: Dessert Cuisine: American Equipment: Large saucepan, Microwave-safe bowl, Baking sheet