

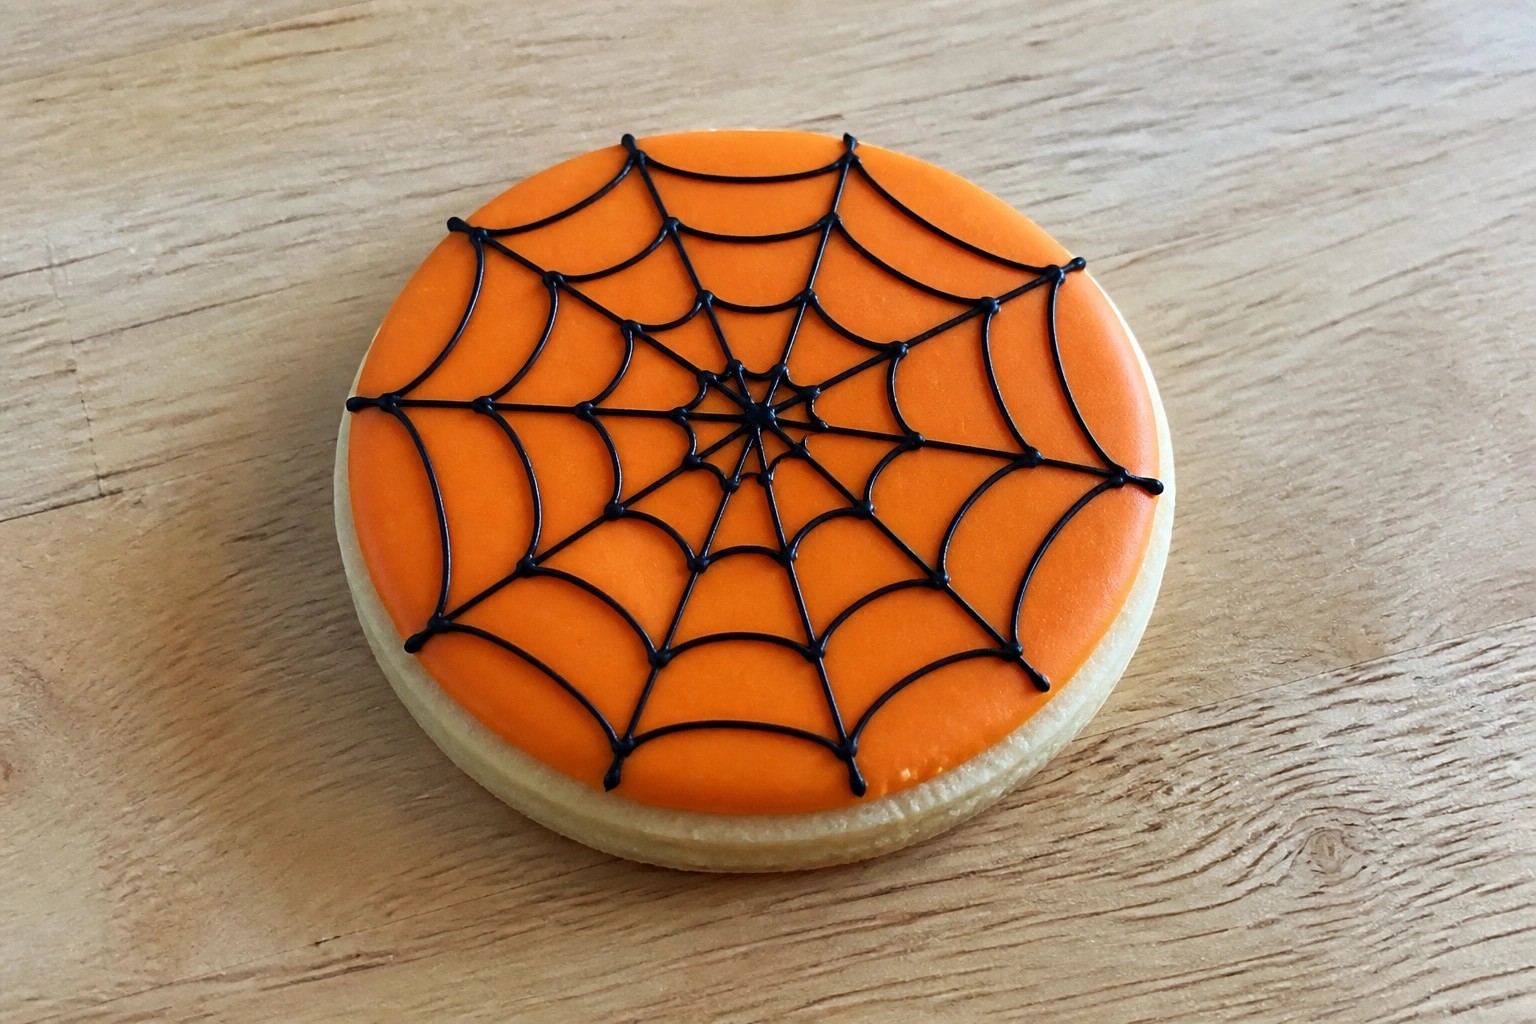
Bringing treats to the office around Halloween is a simple way to share something with coworkers. I put together these recipe ideas with easy steps and ingredients you probably have or can grab quickly. They focus on flavors that travel well and hold up in a break room. You can choose ones that match how much time you have and what your coworkers usually like. Each recipe gives clear directions so you can make them without extra stress.
Helpful Tips Before You Start
Keep these points in mind so your treats travel well and suit a shared office setting.
Recommended Products

11.31 oz Complete Decorating Kit – Everything you need in one box: 3 squeeze frosting tubes (3 oz each in Orange, Black, White), 4 decorating nozzles, and a 2 oz Halloween sprinkle mix with candy eyeballs.

Halloween Candy Eyeballs: Edible eye decorations make it easy to create spooky monsters, ghosts, creatures, and playful characters on your favorite Halloween treats.
Pick Shelf Stable Recipes
Choose items that do not need refrigeration and can sit out for a few hours without quality loss.
Use Individual Packaging
Pack treats in small bags or boxes so coworkers can grab one without extra utensils or plates.
Note Common Allergens
Add a small card or label that lists nuts, gluten, or dairy so people with restrictions can choose safely.
Prep the Night Before
Assemble or bake most recipes ahead of time to avoid morning rush and keep everything fresh for the workday.
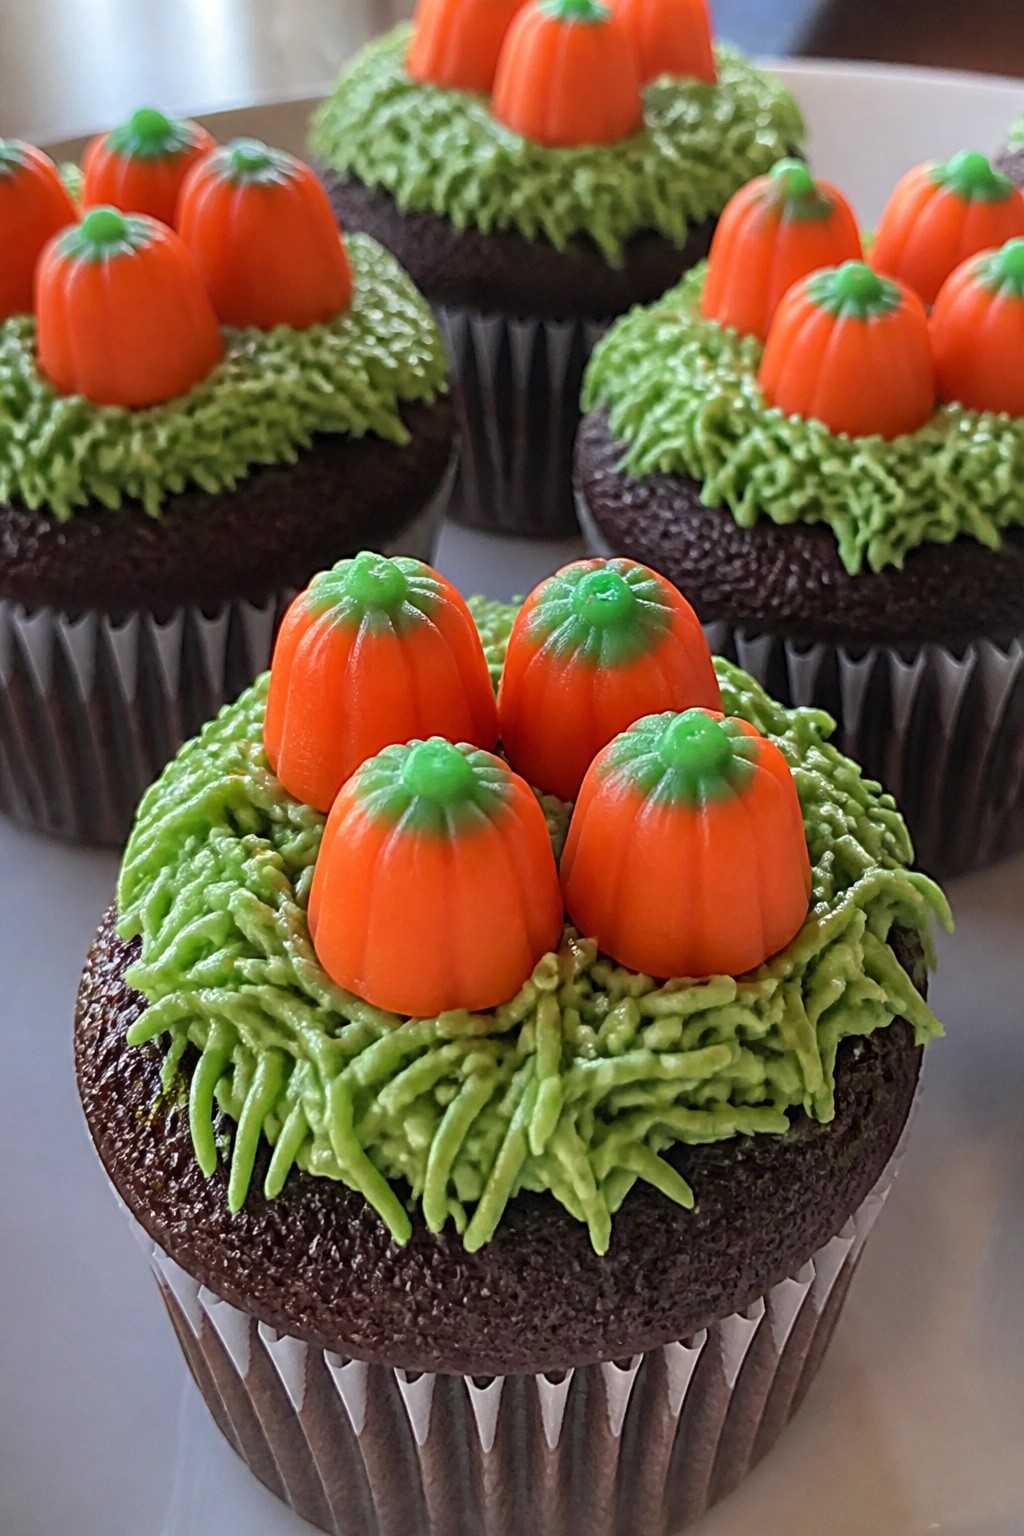
Pumpkin Patch Chocolate Cupcakes
These cupcakes bring a fun fall twist to office treats with chocolate cake that hides a hint of pumpkin. They travel well in a box and give coworkers something festive without being overly sweet or complicated. The result is moist chocolate cake with warm spice notes and a playful topping that looks like a tiny pumpkin patch.
The flavor stays balanced so the chocolate leads while the pumpkin adds moisture and a soft autumn taste. Green frosting creates a simple grass base, and candy pumpkins finish the look without extra work.
Serves 4 people.
Recommended Products

Rice Krispies Treats Squares Original With Sprinkles 23.2oz


Halloween Themed Treats: Original marshmallow Rice Krispies Treats featuring festive Halloween packaging, perfect for seasonal celebrations, trick-or-treaters, and holiday gatherings throughout the spooky season
Ingredients
- ½ cup all-purpose flour
- ¼ cup unsweetened cocoa powder
- ½ cup granulated sugar
- ½ teaspoon baking soda
- ¼ teaspoon salt
- ¼ cup pumpkin puree
- 2 tablespoons vegetable oil
- 1 large egg
- ¼ cup milk
- ½ teaspoon vanilla extract
- 2 tablespoons butter, softened
- ½ cup powdered sugar
- Green food coloring
- 4 candy pumpkins
Instructions
- Preheat the oven to 350 degrees and line a muffin tin with four paper liners.
- In a medium bowl, whisk together the flour, cocoa powder, granulated sugar, baking soda, and salt. In a separate bowl, mix the pumpkin puree, vegetable oil, egg, milk, and vanilla until smooth. Pour the wet mixture into the dry ingredients and stir until just combined.
- Divide the batter evenly among the four liners. Bake for 18 to 20 minutes, or until a toothpick comes out clean. Let the cupcakes cool completely in the tin.
- While the cupcakes cool, beat the softened butter with the powdered sugar until creamy. Add a few drops of green food coloring and mix until the frosting reaches a light grass-green shade. Spread or pipe the green frosting over each cooled cupcake. Place one candy pumpkin on top of each cupcake.
Extra Tips
Make the cupcakes the night before and frost them the morning you take them to work so the candy pumpkins stay bright. If you want less sweetness, reduce the powdered sugar by one tablespoon. Store any leftovers in an airtight container at room temperature for up to two days. Course: Dessert Cuisine: American Equipment: Mixing bowls, muffin tin, oven, whisk
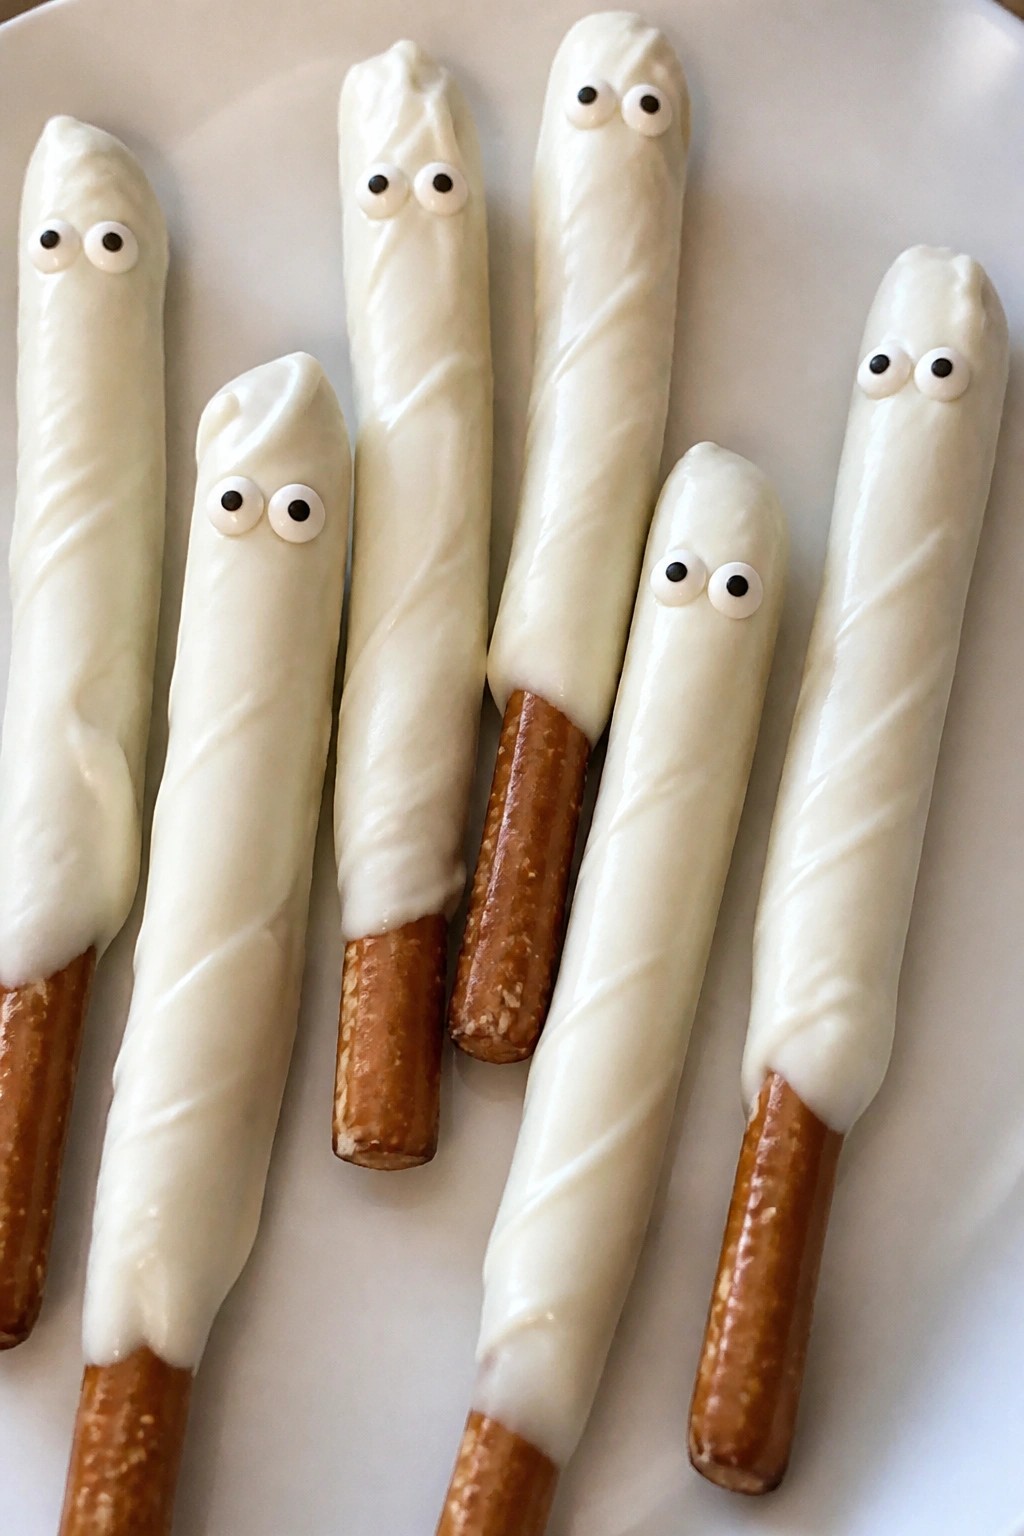
Ghostly White Chocolate Pretzel Rods
These white chocolate pretzel rods make a simple Halloween treat that travels well to the office. The salty crunch of the pretzel balances the sweet coating, and the ghost faces add a lighthearted touch without extra effort. They work well for coworker gifts or a shared break room platter because they stay crisp for a day or two.
Serves 4 people.
Ingredients
- 12 pretzel rods
- 8 ounces white chocolate chips
- 1 tablespoon coconut oil
- 24 small candy eyes
Instructions
- Line a baking sheet with parchment paper and set it aside.
- Place the white chocolate chips and coconut oil in a microwave-safe bowl. Heat in 30-second bursts, stirring after each interval, until the mixture is fully melted and smooth.
- Hold each pretzel rod by one end and dip the other two-thirds into the melted white chocolate. Let excess chocolate drip back into the bowl, then lay the coated rod on the prepared baking sheet.
- While the chocolate is still soft, press two candy eyes near the top of the coated section to create a ghost face. Repeat with the remaining rods.
- Place the baking sheet in the refrigerator for 15 minutes until the coating is firm.
Extra Tips
Store the finished rods in an airtight container at room temperature for up to two days to keep the pretzels crisp. If your office is warm, pack them in a cooler bag so the white chocolate stays set. For a different look, use a small piping bag of melted dark chocolate to draw faces instead of candy eyes. Course: Dessert Cuisine: American Equipment: Microwave-safe bowl, Baking sheet, Parchment paper
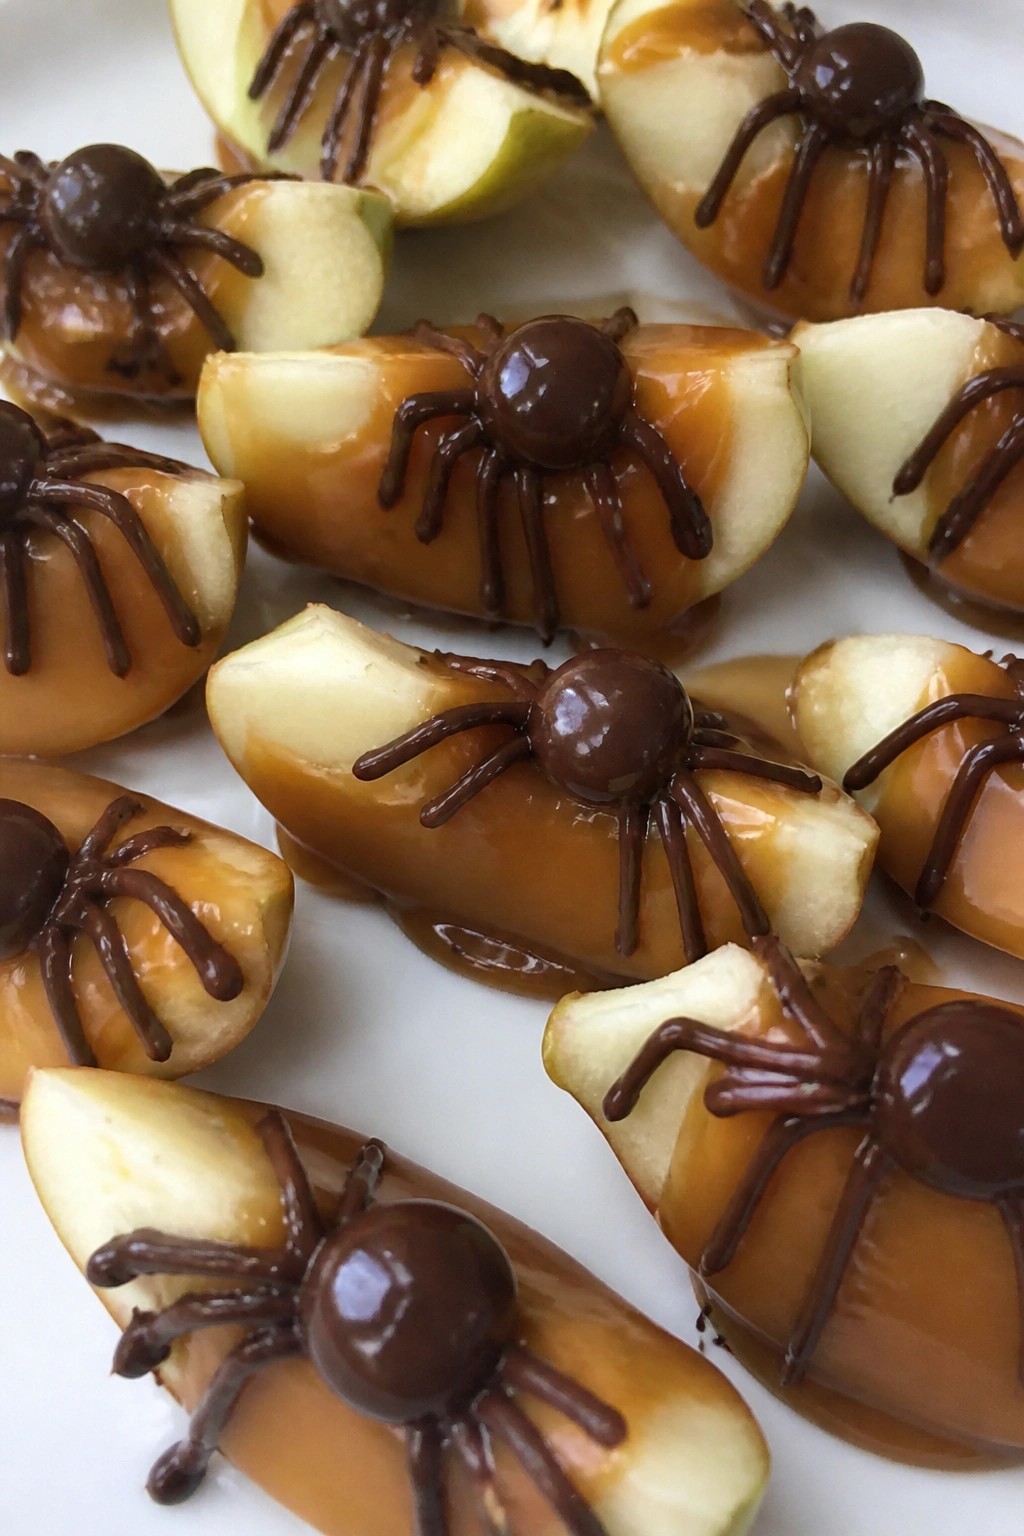
Spooky Spider Caramel Apple Slices
These caramel apple slices bring a fun Halloween twist to a classic treat. They work well for office parties or coworker gift bags because they travel easily and require no utensils. The crisp apple pairs with rich caramel and a bit of chocolate crunch from the spider details.
This recipe serves 4 people.
– 2 large Granny Smith apples – 1 cup caramel sauce – 1/2 cup semi-sweet chocolate chips – 16 thin pretzel sticks
### Instructions 1. Core the apples and cut each one into 8 wedges. Pat the slices dry with a paper towel. 2. Arrange the wedges on a parchment-lined tray. Drizzle or lightly dip each slice in caramel sauce, leaving the top surface mostly clear for the spider. 3. Place the chocolate chips in a microwave-safe bowl. Heat in 20-second bursts, stirring between each, until fully melted and smooth. 4. Spoon the melted chocolate into a small zip-top bag and snip off one corner. Pipe a small oval body near the center of each apple slice. 5. Break the pretzel sticks in half. Press four halves into each side of the chocolate body to form legs.
### Extra Tips Use firm, tart apples so the slices hold their shape after the caramel is added. Pipe the chocolate spiders right before serving to keep the pretzels crisp. If the caramel is too thick, warm it slightly for easier drizzling.
Course: Dessert Cuisine: American Equipment: Cutting board, Sharp knife, Microwave-safe bowl, Parchment paper
Serves 4 people.
Instructions
- Core the apples and cut each one into 8 wedges. Pat the slices dry with a paper towel.
- Arrange the wedges on a parchment-lined tray. Drizzle or lightly dip each slice in caramel sauce, leaving the top surface mostly clear for the spider.
- Place the chocolate chips in a microwave-safe bowl. Heat in 20-second bursts, stirring between each, until fully melted and smooth.
- Spoon the melted chocolate into a small zip-top bag and snip off one corner. Pipe a small oval body near the center of each apple slice.
- Break the pretzel sticks in half. Press four halves into each side of the chocolate body to form legs.
Extra Tips
Use firm, tart apples so the slices hold their shape after the caramel is added. Pipe the chocolate spiders right before serving to keep the pretzels crisp. If the caramel is too thick, warm it slightly for easier drizzling. Course: Dessert Cuisine: American Equipment: Cutting board, Sharp knife, Microwave-safe bowl, Parchment paper
Bat Wing Halloween Sprinkle Cookies
These cookies bring a playful Halloween touch to any office break room. Shaped like bat wings and finished with colorful sprinkles, they feel festive without being overly sweet. The vanilla dough bakes up with a light crunch on the edges and a tender center, making them easy to pack and share.
They work well for coworker gifts or potluck tables because they stay fresh for a couple of days at room temperature. The dark chocolate details add a rich note that balances the sprinkles nicely.
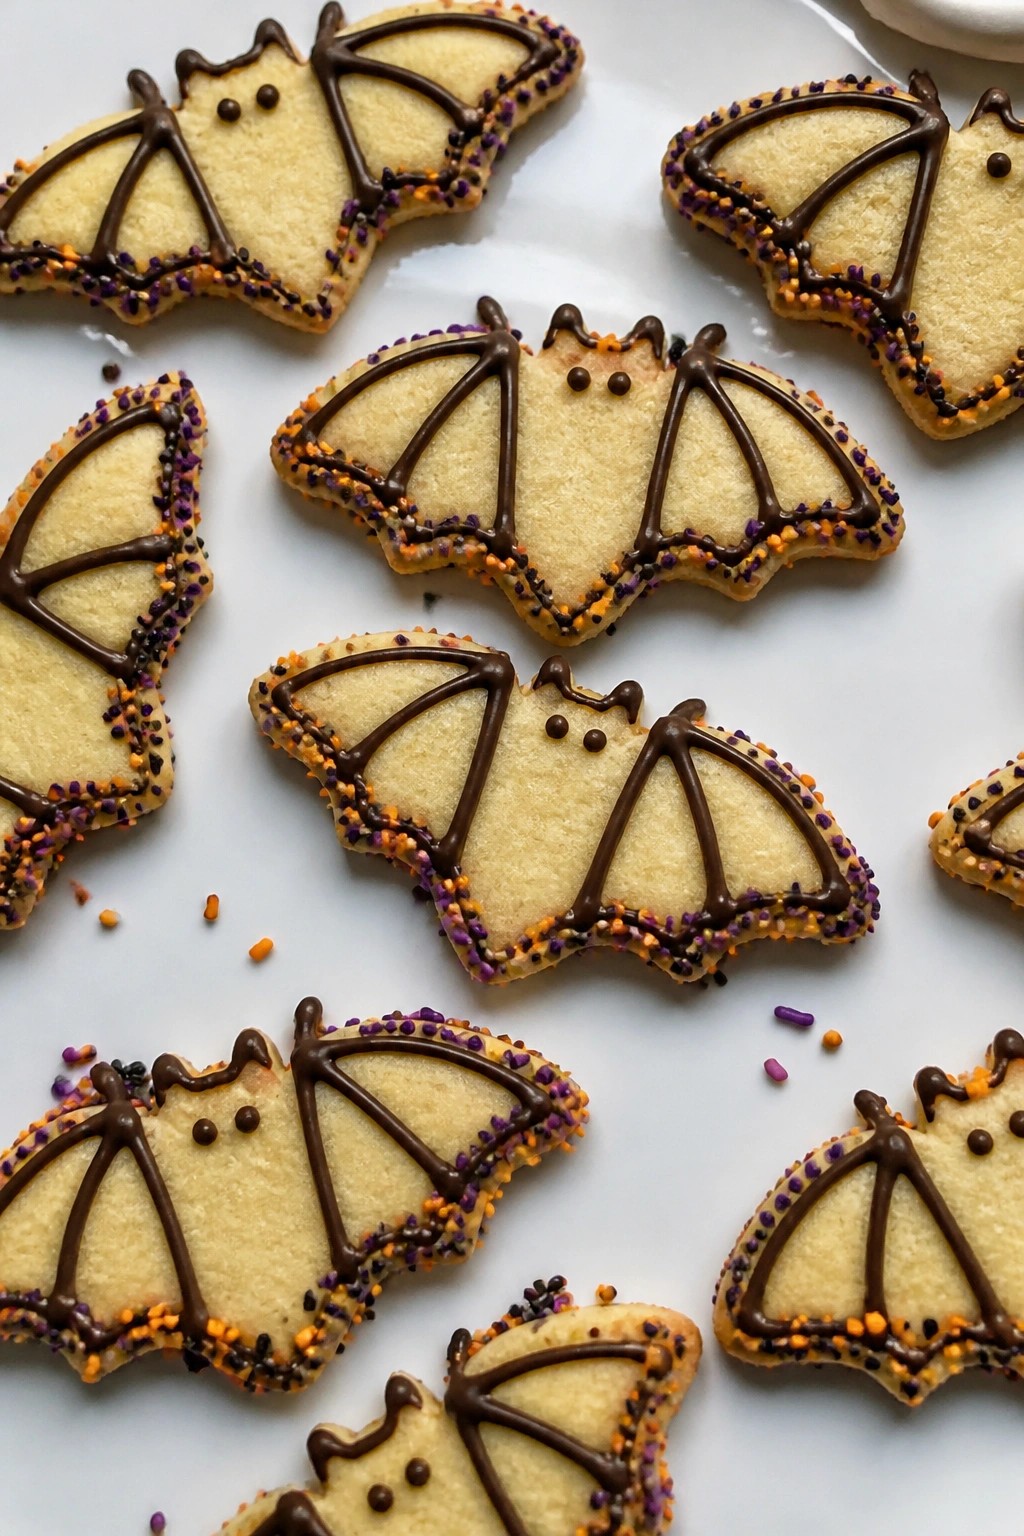
Serves 4 people.
Ingredients
- 1 cup all-purpose flour
- 1/2 cup unsalted butter, softened
- 1/3 cup granulated sugar
- 1 large egg yolk
- 1 teaspoon vanilla extract
- 1/4 teaspoon salt
- 1/2 cup Halloween sprinkles
- 3 ounces dark chocolate
Instructions
- Heat the oven to 350 degrees and line a baking sheet with parchment paper.
- In a mixing bowl, beat the softened butter and sugar until smooth. Add the egg yolk and vanilla extract, then mix until combined.
- Stir in the flour and salt until a soft dough forms. Divide the dough into 8 equal pieces and shape each into a simple bat wing form on the prepared sheet.
- Press the top of each wing lightly into the Halloween sprinkles so they stick.
- Bake for 10 to 12 minutes until the edges turn lightly golden. Let the cookies cool on the sheet for 5 minutes before moving them to a rack.
- Melt the dark chocolate in a small bowl. Use a spoon or piping tool to add thin wing details or veins on each cooled cookie.
Extra Tips
Melt the chocolate in short microwave bursts to keep it smooth for piping. Store the finished cookies in a single layer inside an airtight container so the chocolate details stay intact. If you want less sweetness, use fewer sprinkles on half the batch and focus more on the chocolate accents. Course: Dessert Cuisine: American Equipment: Mixing Bowl, Baking Sheet, Parchment Paper
Mummy-Wrapped Brownie Bites
These mummy-wrapped brownie bites make a simple yet festive addition to any office treat table. They hold up well in a container for transport and give coworkers a sweet break without needing plates or forks. The chewy brownie base stays moist under a thin layer of white chocolate that mimics bandages.
The finished bites offer a balance of rich chocolate flavor and light sweetness from the coating. Candy eyes add a playful touch that fits the Halloween theme while keeping the recipe straightforward for home cooks.
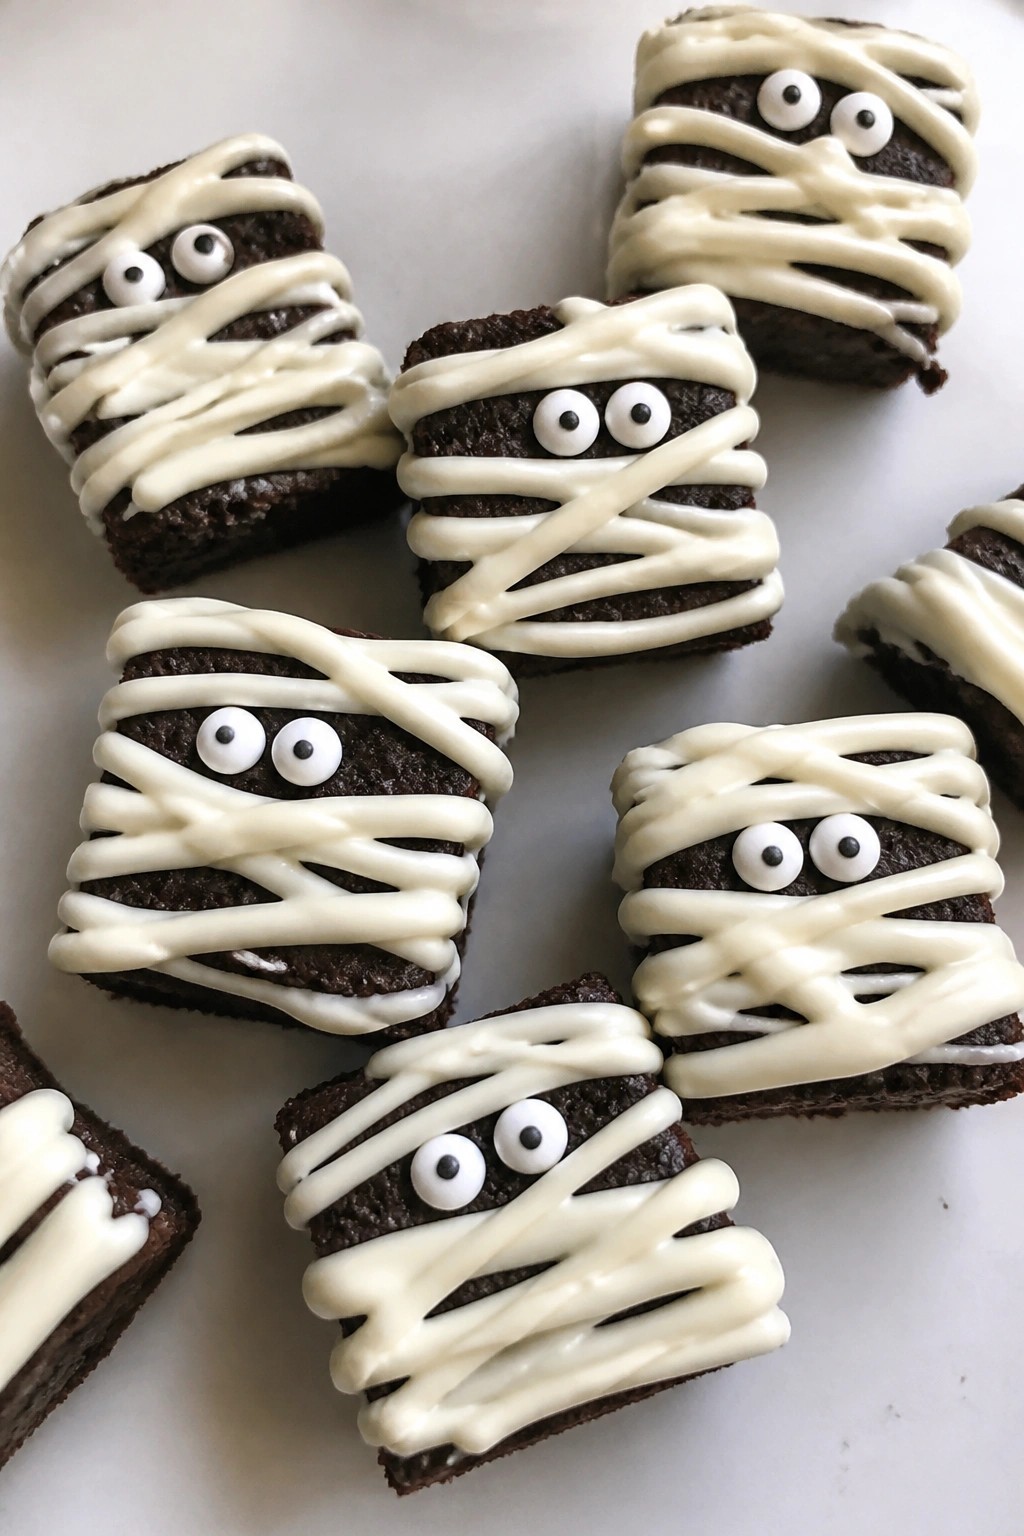
Serves 4 people.
Ingredients
- 1 (18.3 oz) box brownie mix
- 1/4 cup water
- 1/2 cup vegetable oil
- 2 large eggs
- 1 cup white chocolate melting wafers
- 24 candy eyes
Instructions
- Preheat the oven to 350 degrees and line an 8×8 baking pan with parchment paper. In a mixing bowl, combine the brownie mix, water, vegetable oil, and eggs until smooth.
- Pour the batter into the prepared pan and bake for 25 to 30 minutes until a toothpick comes out with moist crumbs. Let the brownies cool completely in the pan.
- Cut the cooled brownies into 12 small squares. Place the white chocolate melting wafers in a microwave-safe bowl and heat in 20-second bursts, stirring between each, until fully melted.
- Transfer the melted chocolate to a piping bag or zip-top bag with one corner snipped. Pipe thin lines across each brownie bite to create a wrapped mummy effect, leaving space for the eyes.
- Immediately press two candy eyes onto each brownie bite while the chocolate is still soft. Let the chocolate set at room temperature before moving the bites.
Extra Tips
Pipe the white chocolate in uneven lines for a more bandage-like look rather than straight rows. Store the finished bites in an airtight container at room temperature for up to two days to keep the chocolate from softening. If the melting wafers seem too thick after heating, stir in a tiny drop of neutral oil to loosen them for easier piping. Course: Dessert Cuisine: American Equipment: Mixing Bowl, Baking Pan, Microwave-safe Bowl
Witch’s Brew Popcorn Snack Mix
This snack mix gives popcorn a Halloween makeover with a green coating that looks like a bubbling witch’s brew. It is quick to put together and travels well to the office for sharing.
The finished mix stays light and crunchy with salty pretzels balancing the sweet candy touches. Coworkers can grab a handful without needing plates or utensils.
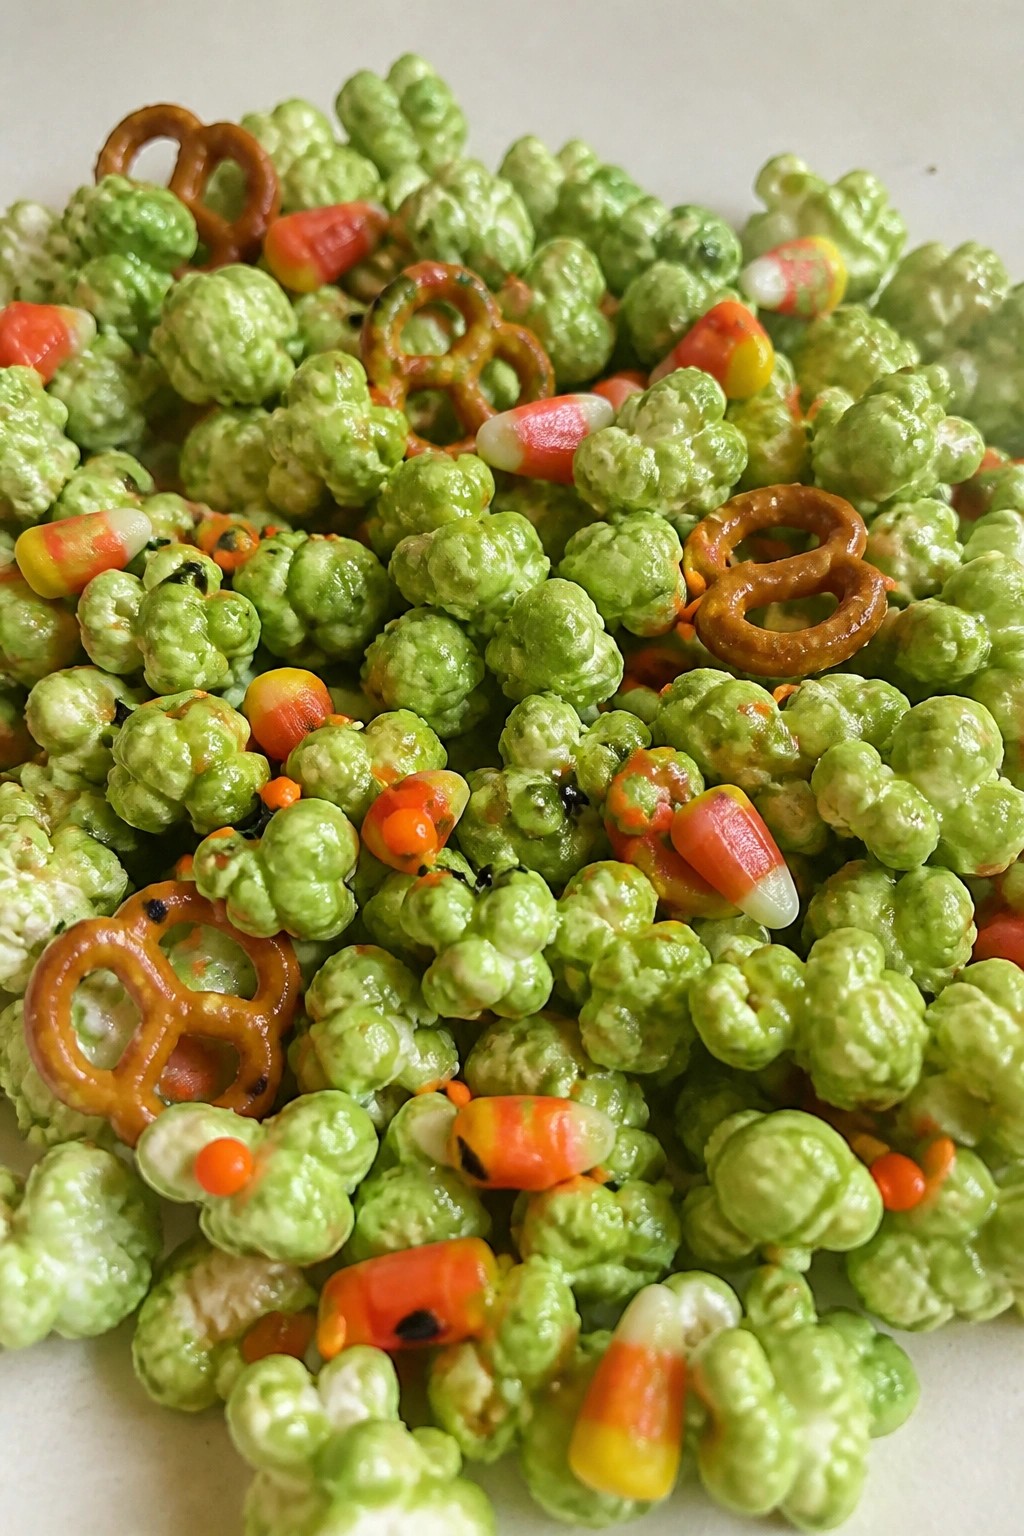
Serves 4 people.
Recommended Products

Flipz White Fudge Pretzels, 5oz (Pack of 1)
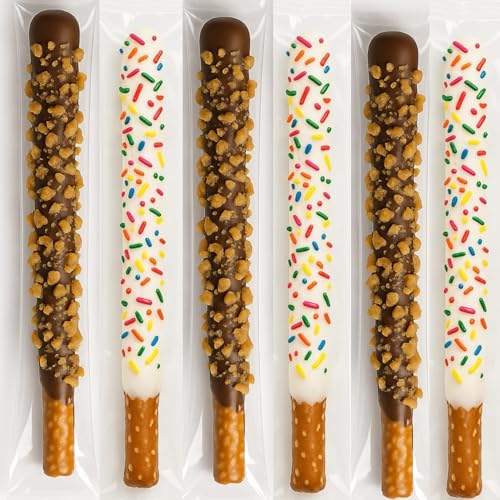
TWO CROWD-FAVORITE FLAVORS IN ONE BOX Enjoy the perfect balance of sweet, salty, crunchy, and colorful. This 20-pack includes 10 dark chocolate pretzel rods coated with buttery toffee bits and 10 white chocolate pretzel rods covered in vibrant rainbow sprinkles—something for everyone in one box.

GIFT READY: Elegantly presented in a gift tube containing 12 individually wrapped white chocolate covered pretzel rods, perfect for corporate gifting or special occasions
Ingredients
- 8 cups popped popcorn
- 2 cups mini pretzels
- 1 cup green candy melts
- ½ cup orange and black sprinkles
- 1 cup candy corn
Instructions
- Add the popped popcorn and mini pretzels to a large bowl and stir gently to combine.
- Melt the green candy melts in a microwave-safe bowl following the package directions until smooth.
- Pour the melted candy melts over the popcorn mixture and toss quickly with a spatula until most pieces are lightly coated.
- Spread the coated mixture onto a parchment-lined baking sheet in an even layer.
- While the coating is still wet, scatter the orange and black sprinkles and candy corn evenly across the top.
- Let the mix sit at room temperature until the coating sets, then break it into clusters.
Extra Tips
Work in two batches if your bowl is small so the candy melts do not cool before everything is coated. Store the cooled mix in an airtight container at room temperature for up to three days. Skip the sprinkles if you want a milder look for a mixed crowd. Course: Snack Cuisine: American Equipment: Large bowl, Microwave-safe bowl, Baking sheet
Candy Corn Cheesecake Bars
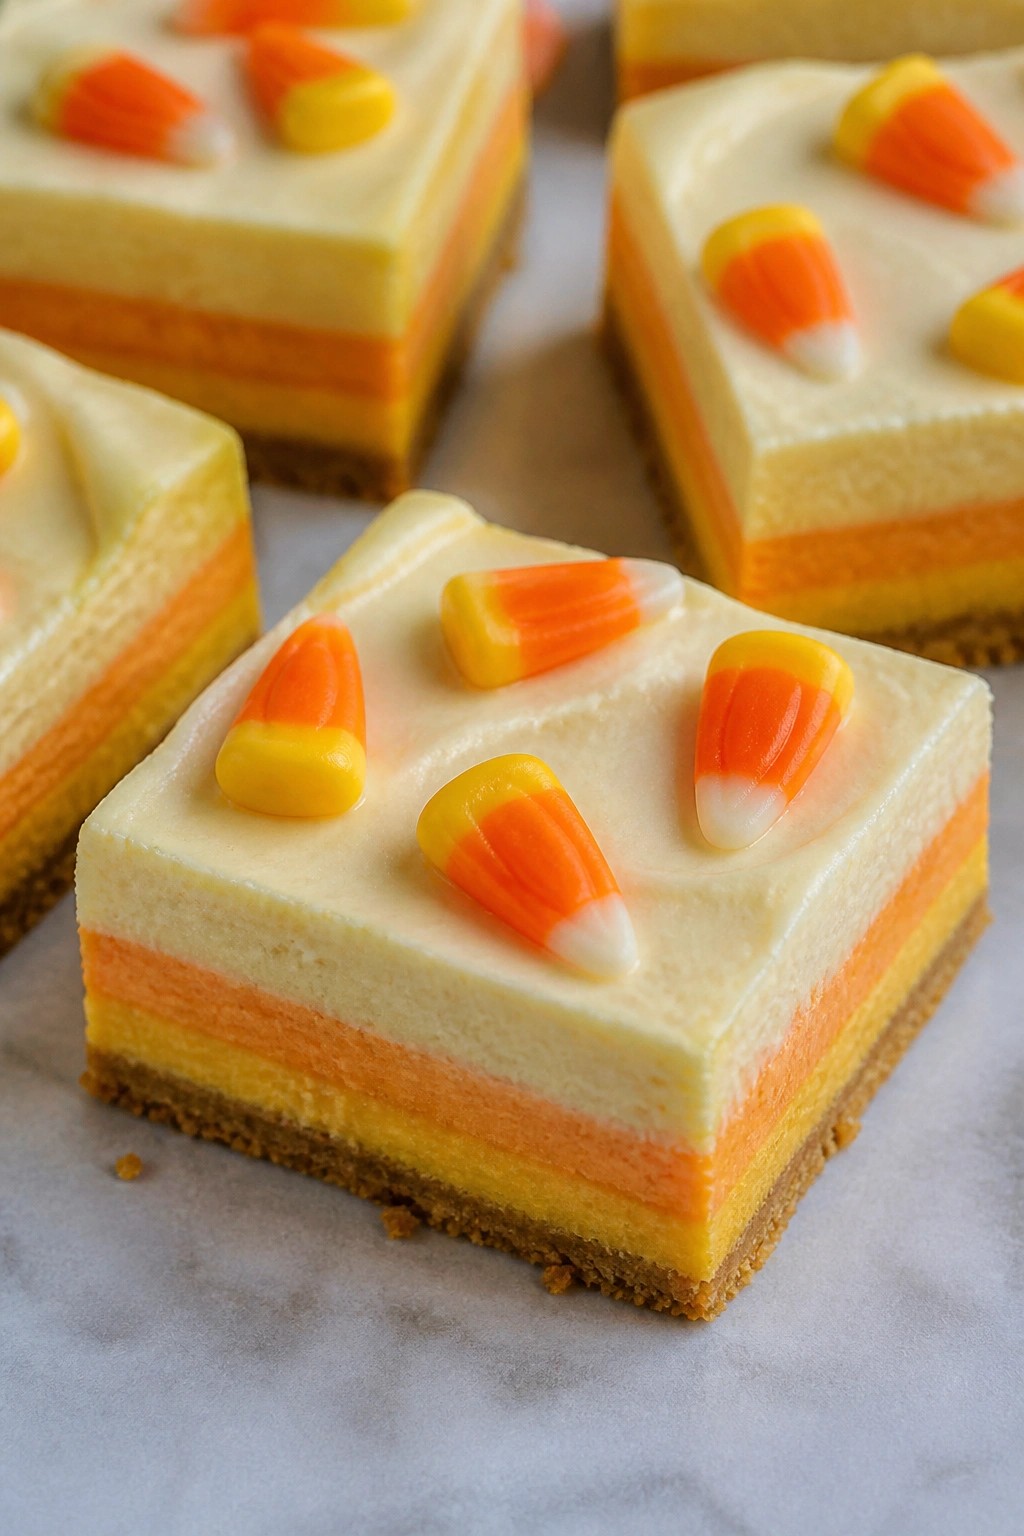
These bars bring a festive Halloween touch to the office break room with their bright layers that echo classic candy corn. They travel well in a container and slice neatly for easy sharing among coworkers without any extra fuss.
The creamy cheesecake sits on a simple graham crust and gets finished with a few candy corn pieces on top. The result is a smooth bite with just enough sweetness to feel like a treat rather than a heavy dessert.
Serves 4 people.
Ingredients
- 3/4 cup graham cracker crumbs
- 2 tablespoons butter, melted
- 8 ounces cream cheese, softened
- 1/4 cup sugar
- 1 large egg
- 1 teaspoon vanilla extract
- Yellow food coloring
- Orange food coloring
- 12 candy corn pieces
Instructions
- Stir the graham cracker crumbs and melted butter together in a bowl until the crumbs are evenly coated. Press the mixture firmly into the bottom of a small baking pan to form a crust.
- In a mixing bowl, beat the cream cheese, sugar, egg, and vanilla extract until the mixture is smooth and free of lumps.
- Divide the batter into three equal portions. Leave one portion plain, tint the second portion yellow, and tint the third portion orange.
- Spread the plain batter over the crust first, followed by the yellow layer, then the orange layer. Smooth the top gently with a spatula.
- Bake until the center is set. Remove from the oven and let the bars cool completely at room temperature.
- Cut into four bars and place three candy corn pieces on top of each bar before serving.
Extra Tips
Chill the bars for at least an hour after cooling so the layers hold their shape when sliced. If you want a stronger candy corn flavor, chop a few extra pieces and fold them into the plain batter layer before spreading it over the crust. Store leftovers in an airtight container in the fridge for up to three days. Course: Dessert Cuisine: American Equipment: Mixing Bowl, Small Baking Pan, Hand Mixer
Monster Eyeball Cake Pops
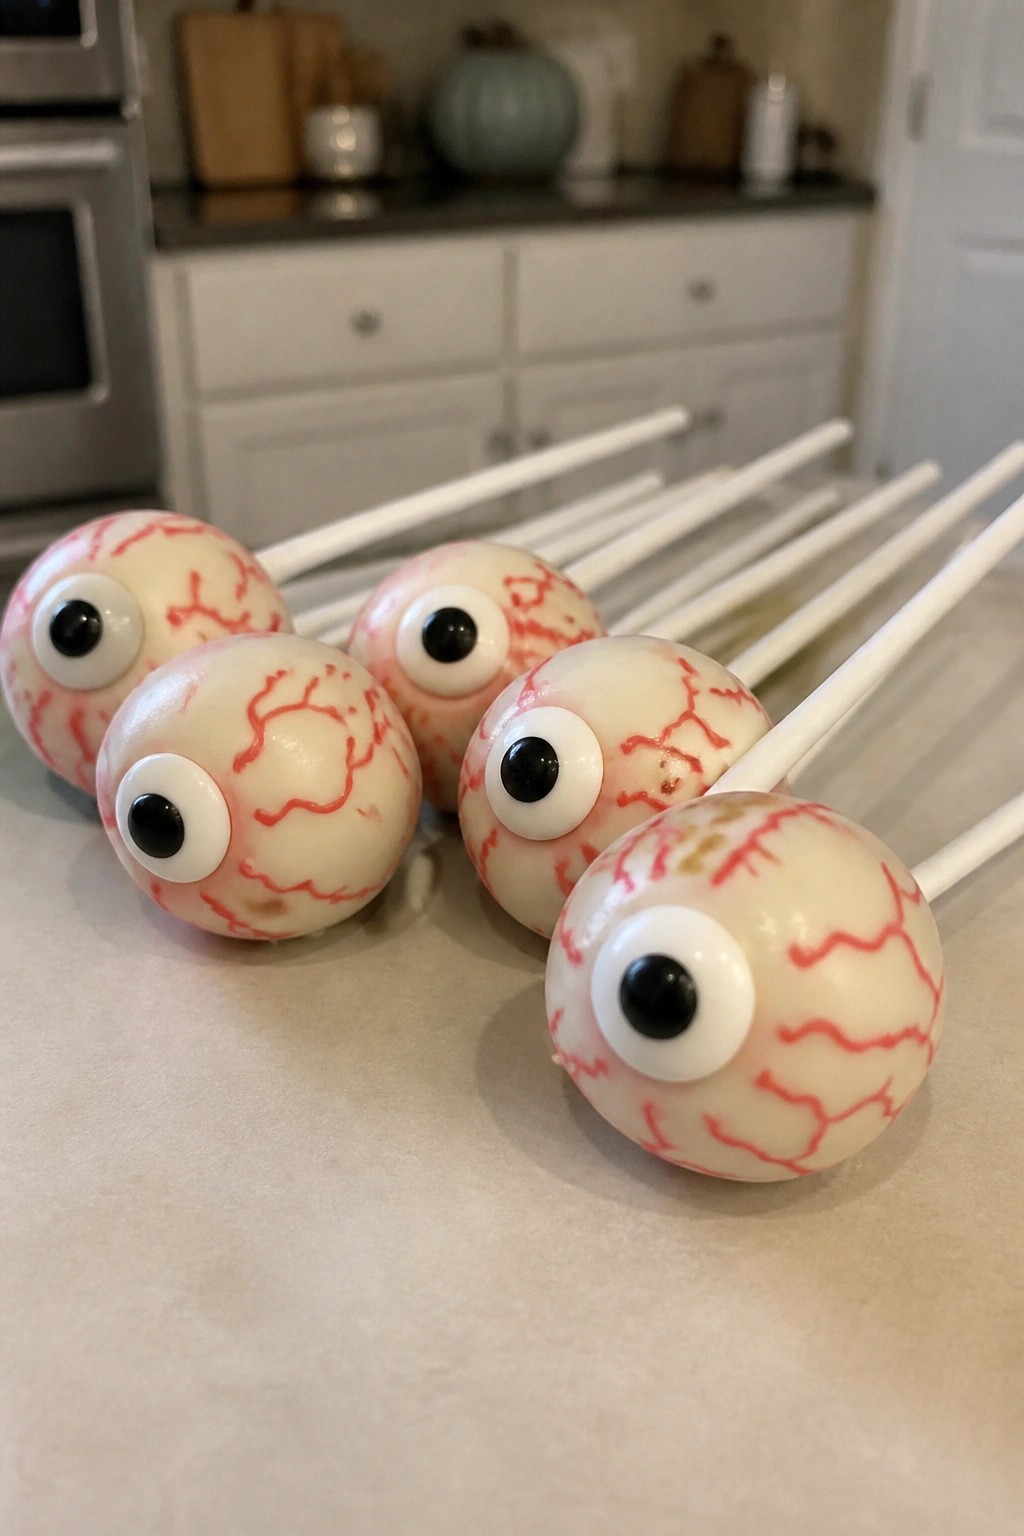
These cake pops bring a fun Halloween twist to office sharing. They travel well in a box and give coworkers a bite-sized treat without needing plates or forks. The inside stays moist from the cake and frosting mix while the outer shell sets firm for easy handling.
The flavor is mild vanilla with a sweet white chocolate coating. Red food coloring creates simple vein details on the surface and a single candy eyeball finishes each pop for a playful look.
Serves 4 people.
Ingredients
- 2 cups crumbled vanilla cake
- 1/2 cup cream cheese frosting
- 8 ounces white chocolate
- 1 tablespoon shortening
- 1 teaspoon red food coloring
- 8 candy eyeballs
- 8 lollipop sticks
Instructions
- Combine the crumbled vanilla cake and cream cheese frosting in a mixing bowl until the mixture holds together when pressed.
- Scoop the mixture into 8 equal portions and roll each into a smooth ball. Insert a lollipop stick into the center of each ball.
- Place the cake pops on a baking sheet and chill them for 30 minutes to firm up.
- Melt the white chocolate and shortening together in a microwave-safe bowl, stirring until smooth.
- Dip each chilled cake pop into the melted white chocolate to coat completely. Let excess drip off and return the pops to the baking sheet.
- While the coating is still wet, use a toothpick dipped in red food coloring to draw thin vein lines across the surface. Press one candy eyeball onto the center of each pop.
- Chill the finished pops again until the coating hardens.
Extra Tips
Chill the cake balls thoroughly before dipping so they do not slide off the sticks. If the white chocolate thickens while you work, warm it briefly in the microwave in short bursts. Store the finished pops in an airtight container in the refrigerator and bring them to room temperature for 15 minutes before serving so the coating softens slightly. Course: Dessert Cuisine: American Equipment: Mixing Bowl, Baking Sheet, Microwave-Safe Bowl
Haunted Forest Fudge Brownies
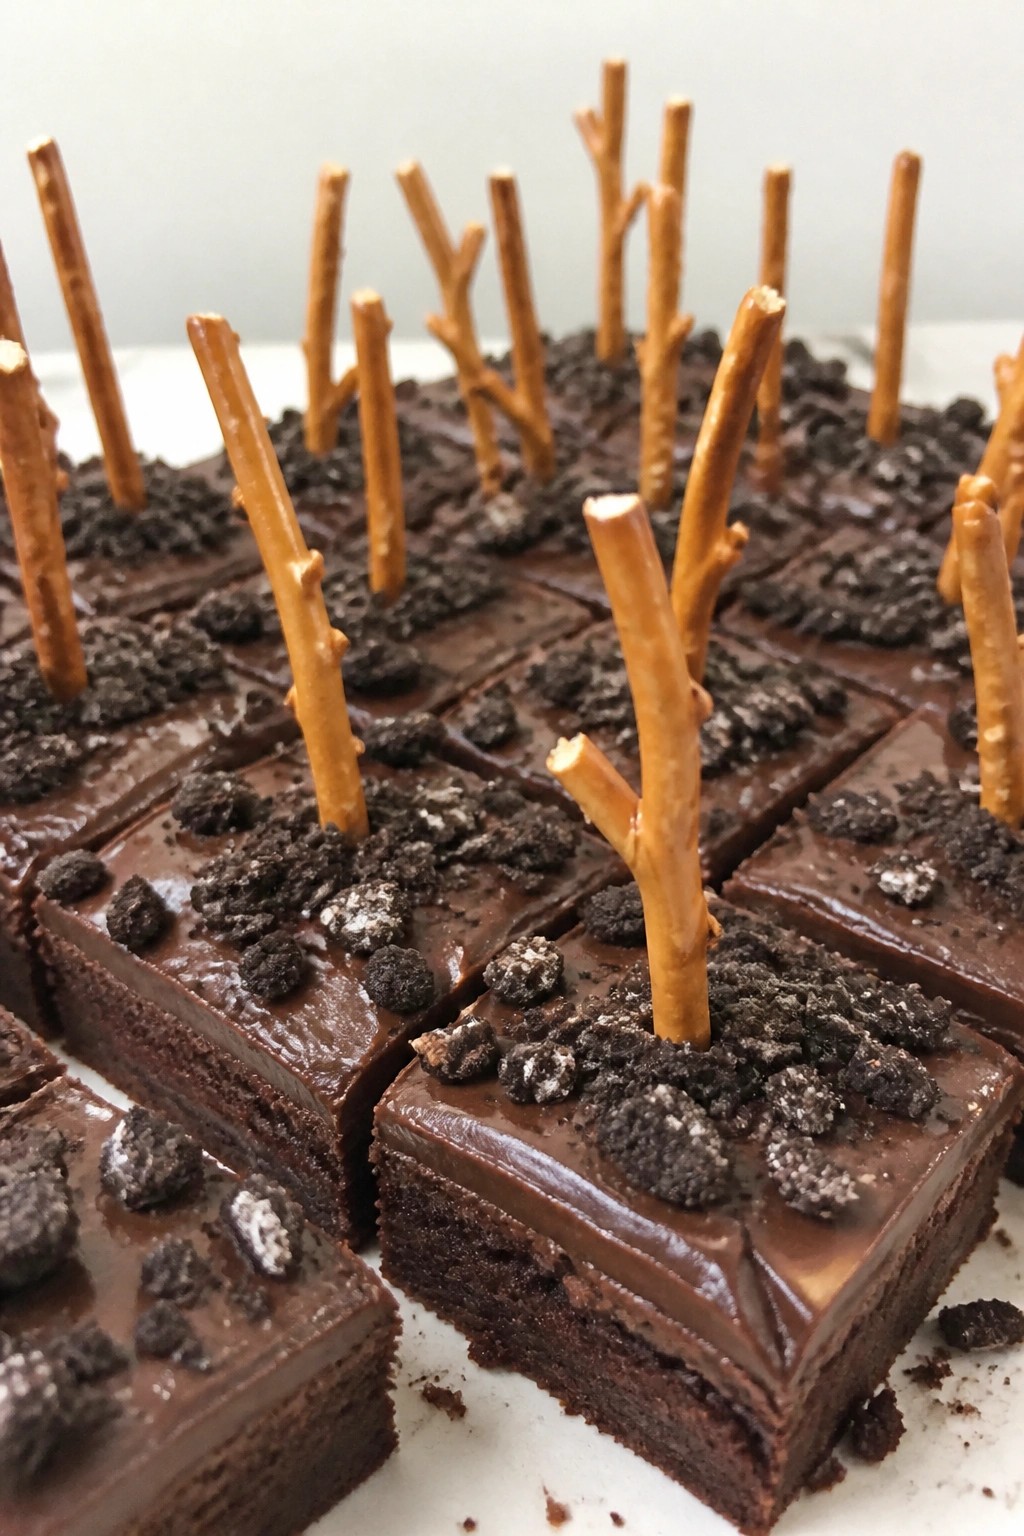
These brownies bring a simple chocolate base with a thick fudge layer on top. The crushed cookies create a dark forest floor while pretzel sticks stand in as bare trees. They travel well to the office and hold up in a shared break room without needing refrigeration.
The texture stays dense and fudgy rather than cakey. The dark cocoa gives a rich taste that pairs with the sweet fudge topping. Coworkers can grab one with coffee or take a square home.
Serves 4 people.
Ingredients
- 1/2 cup unsalted butter
- 3/4 cup granulated sugar
- 2 large eggs
- 1/2 cup dark cocoa powder
- 1/4 cup all-purpose flour
- 1/4 teaspoon salt
- 1/2 cup semisweet chocolate chips
- 1/4 cup heavy cream
- 1/2 cup crushed chocolate sandwich cookies
- 8 thin pretzel sticks
Instructions
- Preheat the oven to 325 degrees and line a small 8×8 pan with parchment paper.
- Melt the butter in a saucepan over low heat. Remove from heat and stir in the sugar until combined. Add the eggs one at a time, mixing well after each.
- Stir in the dark cocoa powder, flour, and salt until no dry streaks remain. Pour the batter into the prepared pan and bake for 22 minutes. Let the brownies cool completely in the pan.
- Place the chocolate chips and heavy cream in a small bowl. Microwave in 20-second bursts, stirring between each, until smooth. Spread the fudge evenly over the cooled brownies.
- Sprinkle the crushed chocolate sandwich cookies over the fudge layer. Press the pretzel sticks upright into the top to form trees. Slice into four squares once the fudge sets.
Extra Tips
Press the pretzels in right after spreading the fudge so they stand straight. If the fudge feels too soft to slice, chill the pan for 15 minutes. Store leftovers in an airtight container at room temperature for up to two days. Course: Dessert Cuisine: American Equipment: Mixing Bowl, Baking Pan, Saucepan
Vampire Bite Strawberry Truffles
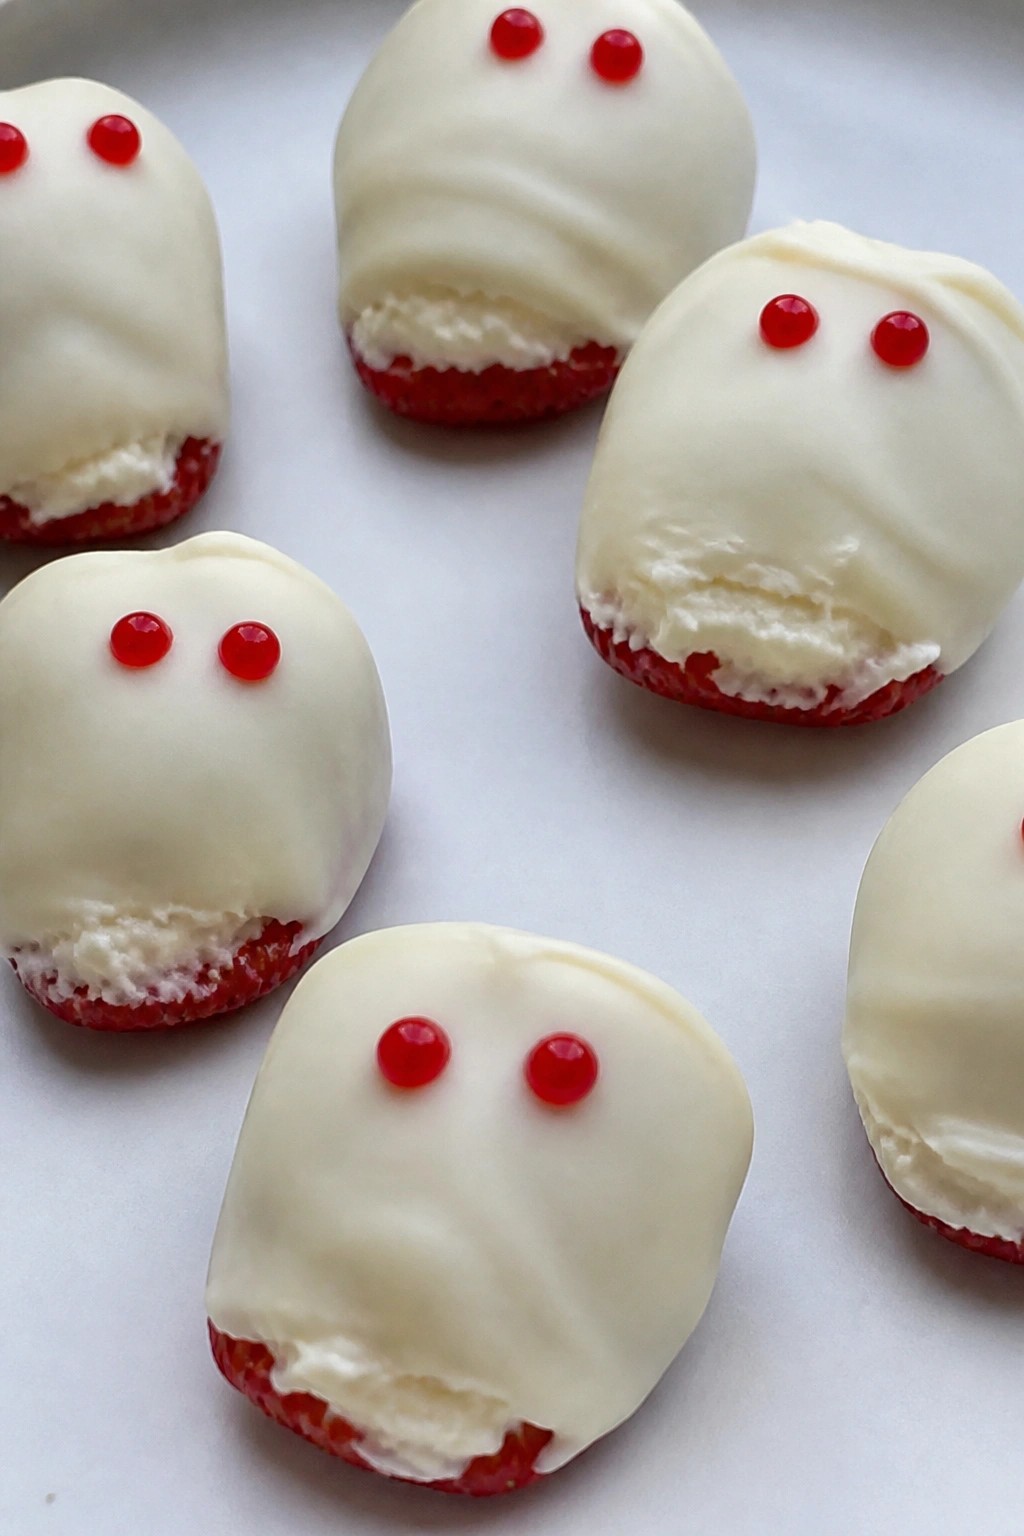
These truffles bring a fun Halloween twist to the office break room. Fresh strawberries give them a bright fruit flavor while the white chocolate coating keeps them looking clean and easy to pick up. They hold up well on a shared platter and feel a bit more special than plain candy.
The texture is creamy inside with a smooth shell. Two small dots of red gel on top create the vampire bite detail without extra steps or ingredients.
Serves 4 people.
Ingredients
- 8 large fresh strawberries, hulled
- 8 ounces cream cheese, softened
- 1/4 cup powdered sugar
- 1 cup white chocolate melting wafers
- 2 tablespoons red decorating gel
Instructions
- Place the strawberries in a mixing bowl and mash them well with a fork until they form a chunky puree.
- Add the cream cheese and powdered sugar to the bowl. Stir until the mixture is smooth and holds together.
- Scoop out small portions and roll them into 1-inch balls. Place the balls on a baking sheet and chill in the refrigerator for 30 minutes.
- Melt the white chocolate melting wafers in the microwave in 20-second bursts, stirring between each until smooth.
- Dip each chilled ball into the melted white chocolate, letting the excess drip off. Return the coated truffles to the baking sheet.
- Chill the truffles again for 15 minutes until the coating sets. Add two small dots of red decorating gel to the top of each truffle to create the bite marks.
Extra Tips
Keep the truffles refrigerated until you pack them for the office so the cream cheese filling stays firm. If the red gel looks too bright, let it sit a minute after applying so it settles into the white chocolate. These do not freeze well because the fresh strawberry base can turn watery when thawed. Course: Dessert Cuisine: American Equipment: Mixing Bowl, Baking Sheet, Microwave
Pumpkin Pie No-Bake Cookie Bars
These bars combine the familiar taste of pumpkin pie with a simple no-bake method. They travel well and hold up at room temperature, which makes them a good choice to bring to the office. The texture stays soft and slightly chewy from the cookie base while the pumpkin layer adds creaminess without needing an oven.
They work best when you need a seasonal treat that feels festive but does not require much active time. The spices come through clearly, and the bars slice cleanly once chilled.
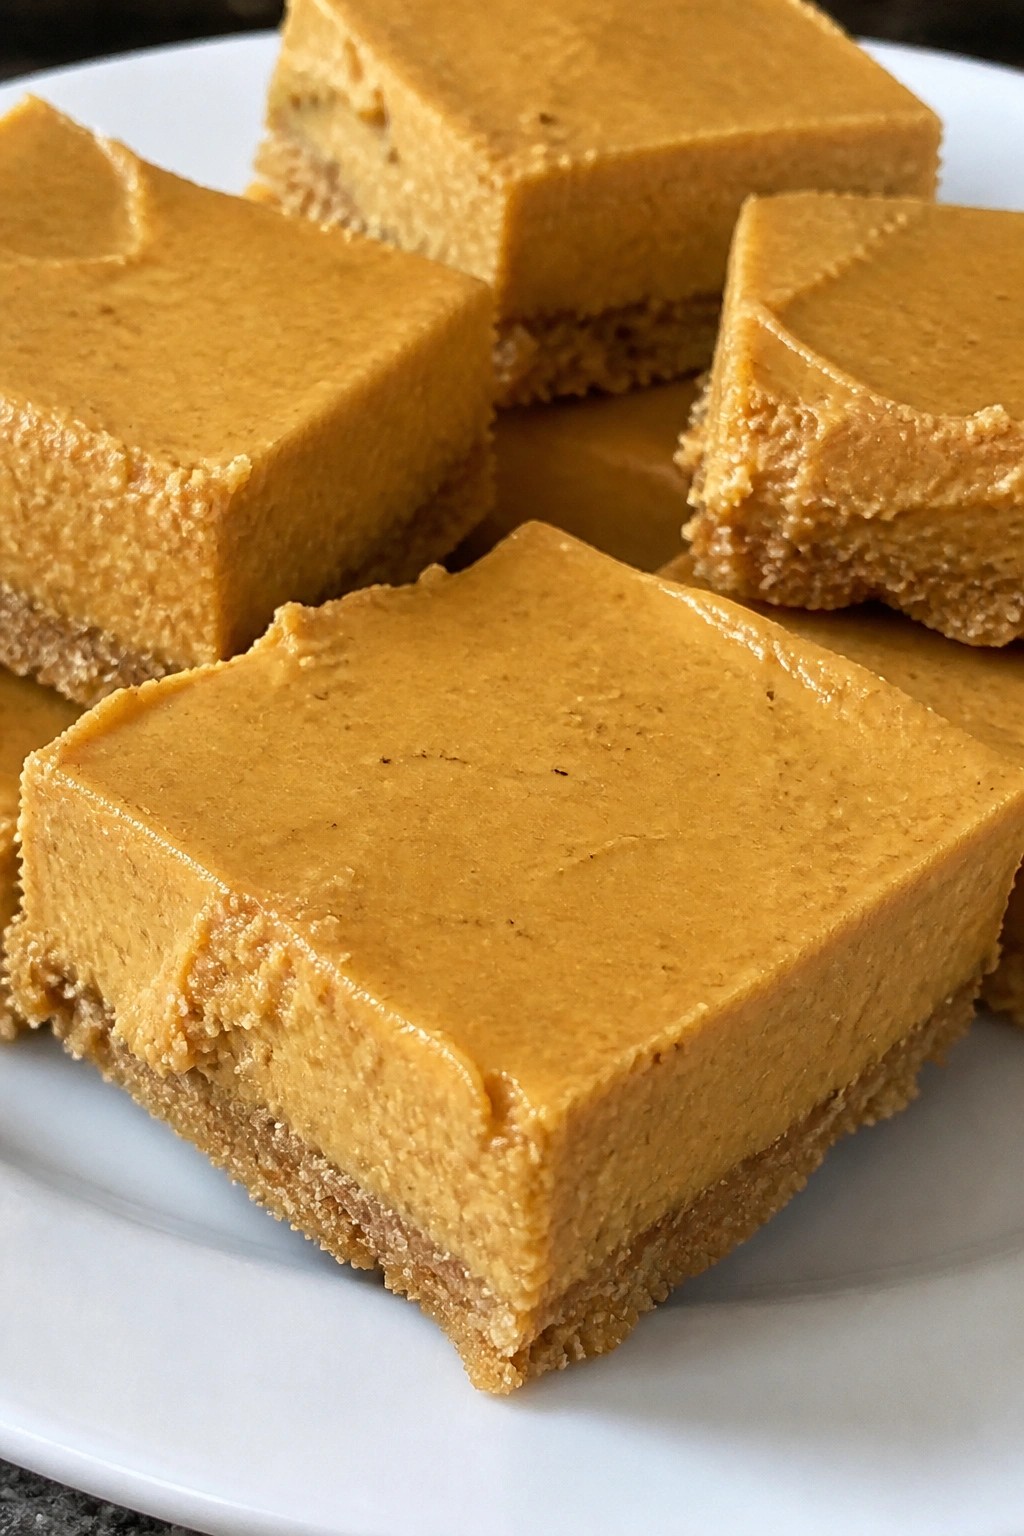
Serves 4 people.
Ingredients
- 1 1/2 cups graham cracker crumbs
- 6 tablespoons unsalted butter, melted
- 1/2 cup pumpkin puree
- 4 ounces cream cheese, softened
- 1/4 cup granulated sugar
- 1 teaspoon pumpkin pie spice
- 1/2 teaspoon vanilla extract
- Pinch of salt
Instructions
- Line an 8×8 inch pan with parchment paper.
- Stir the graham cracker crumbs and melted butter together in a bowl until the crumbs are evenly coated. Press the mixture firmly into the bottom of the prepared pan to form a crust.
- In the same bowl, beat the softened cream cheese and sugar until smooth. Add the pumpkin puree, pumpkin pie spice, vanilla extract, and salt. Mix until fully combined and no streaks remain.
- Spread the pumpkin mixture evenly over the crust.
- Cover the pan and refrigerate for at least three hours, or until the bars feel firm when pressed.
- Lift the bars out using the parchment paper and cut into squares before serving.
Extra Tips
Chill the bars a little longer if your kitchen is warm so they slice without crumbling. Store leftovers in a covered container in the refrigerator for up to three days. The flavor tastes best when the bars are served cold, and the crust stays crisp longer if you keep the pan covered tightly. Course: Dessert Cuisine: American Equipment: Mixing Bowl, 8×8 Baking Pan, Refrigerator
Black Cat Chocolate Macarons
These macarons bring a fun Halloween touch to any office gathering. The black cat theme makes them stand out on a shared table, and coworkers can grab a couple without needing plates or utensils.
The shells have a crisp outside and soft chew inside, filled with smooth chocolate ganache. The cocoa gives a rich flavor that pairs well with coffee or tea at work.
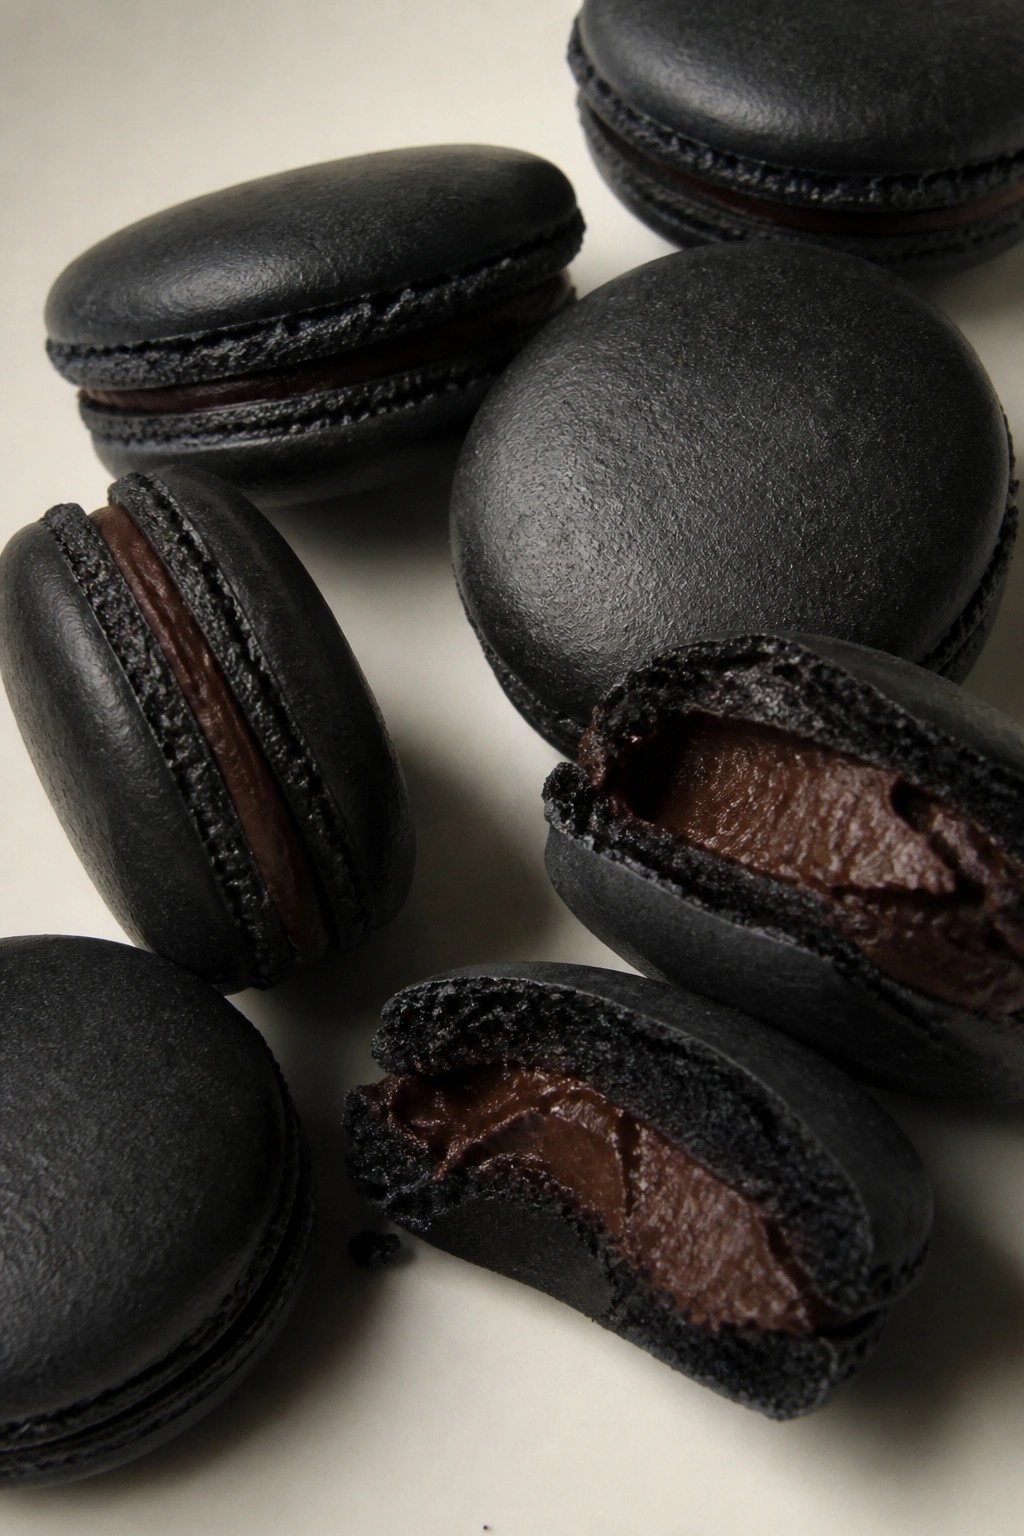
Serves 4 people.
Ingredients
- 1 cup almond flour
- 1 3/4 cups powdered sugar
- 1/4 cup cocoa powder
- 3 egg whites
- 1/4 cup granulated sugar
- 1/2 teaspoon black gel food coloring
- 1/2 cup heavy cream
- 4 ounces dark chocolate, chopped
- 1 teaspoon vanilla extract
Instructions
- Sift the almond flour, powdered sugar, and cocoa powder into a bowl. Discard any large bits left in the sifter.
- In a separate bowl, beat the egg whites with an electric mixer until foamy. Slowly add the granulated sugar and continue beating until stiff peaks form.
- Fold the dry mixture into the egg whites in two additions. Add the black gel food coloring and fold until the batter flows like thick lava.
- Transfer the batter to a piping bag fitted with a round tip. Pipe small circles onto a baking sheet lined with parchment paper. Tap the sheet on the counter to release air bubbles.
- Let the piped shells sit at room temperature until a skin forms on top, about 30 minutes. Meanwhile, heat the heavy cream in a small saucepan until it simmers.
- Pour the hot cream over the chopped dark chocolate in a bowl. Let it sit for one minute, then stir until smooth. Stir in the vanilla extract and let the ganache cool until thick.
- Once the shells are dry, bake at 300 degrees Fahrenheit for 15 minutes. Cool completely on the sheet.
- Pair up matching shells. Pipe ganache onto the flat side of one shell and sandwich with the second shell.
Extra Tips
Pipe the ganache a little thick so it stays inside the shells during transport to the office. If the macaron batter feels too stiff after adding color, fold a few extra times to reach the right consistency. Store filled macarons in an airtight container in the fridge for up to two days before bringing them in. Course: Dessert Cuisine: French Equipment: Mixing Bowl, Electric Mixer, Baking Sheet, Piping Bag, Oven
Skeleton Bone Vanilla Sugar Cookies
These vanilla sugar cookies get shaped into bones for a simple Halloween touch that travels well to the office. They offer a light vanilla flavor with a crisp edge and tender center, making them easy to pack in small boxes or trays for coworkers.
They work best as a make-ahead treat since the dough chills quickly and the baked cookies hold their shape during transport.
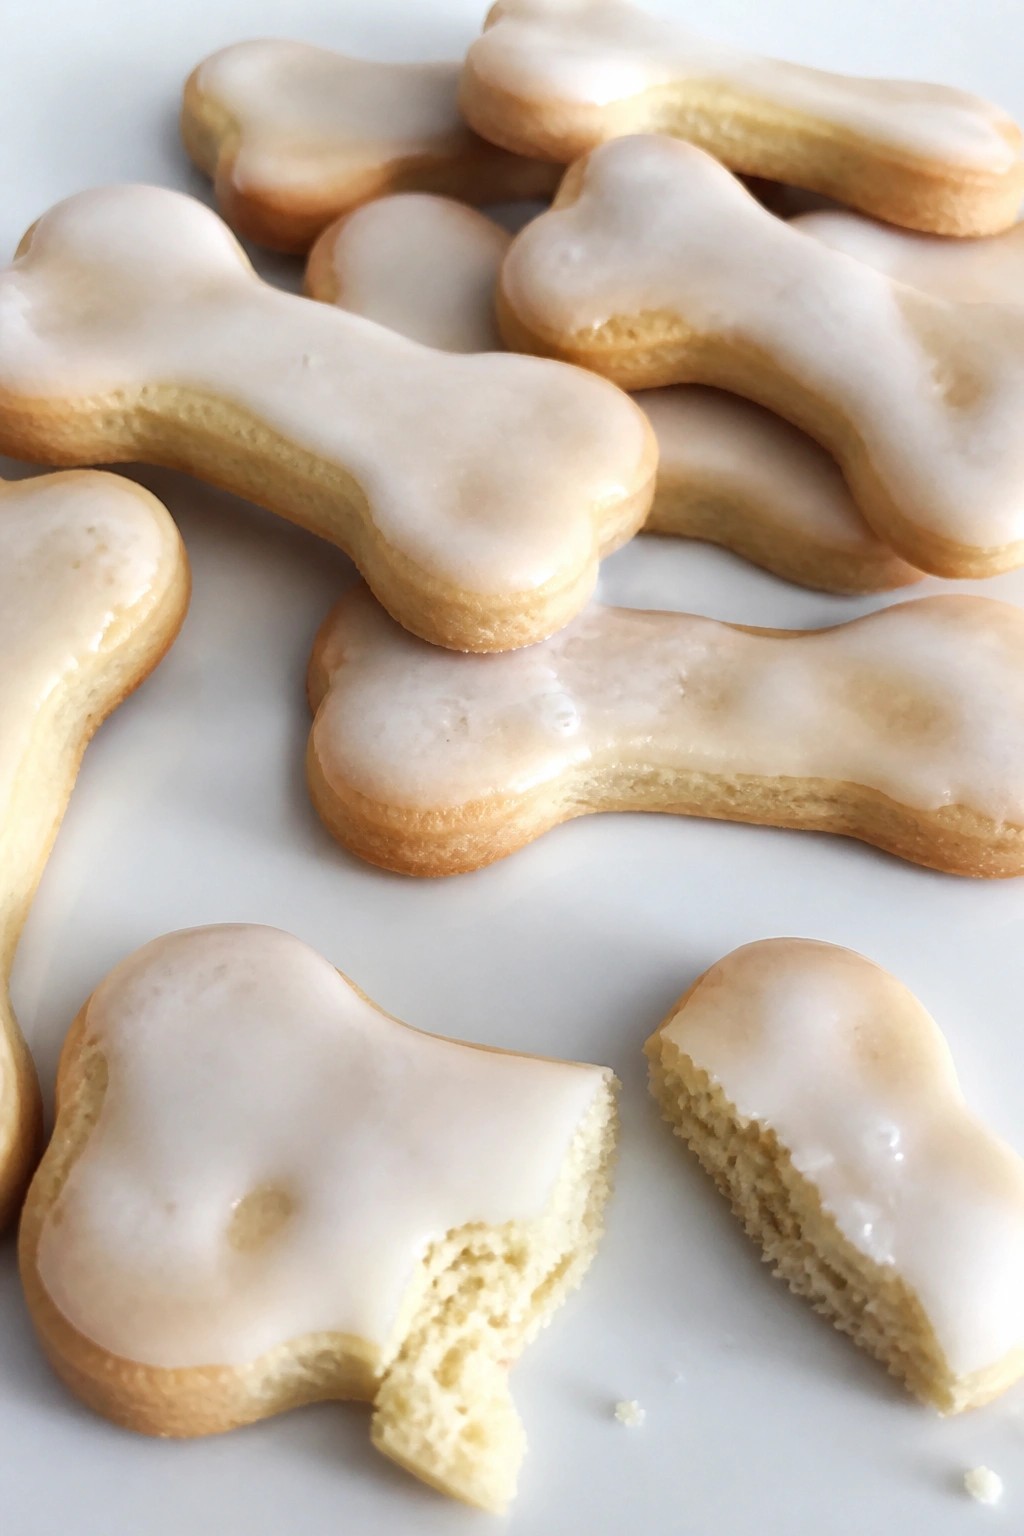
Serves 4 people.
Ingredients
- 1 cup all-purpose flour
- 1/2 cup unsalted butter, softened
- 1/4 cup granulated sugar
- 1 teaspoon vanilla extract
- 1/4 teaspoon baking powder
- 1/8 teaspoon salt
- 1/2 cup powdered sugar
- 1 tablespoon milk
Instructions
- Heat the oven to 350 degrees and line a baking sheet with parchment paper.
- In a mixing bowl, beat the softened butter and granulated sugar until light and creamy.
- Stir in the vanilla extract until fully combined.
- Add the flour, baking powder, and salt to the bowl and mix until a soft dough forms.
- Roll the dough into small logs and shape each one into a bone by pressing the ends slightly wider.
- Place the shaped cookies on the baking sheet and bake for 10 to 12 minutes until the edges turn lightly golden.
- Cool the cookies completely on the baking sheet.
- Stir the powdered sugar and milk together in a small bowl until smooth.
- Pipe or drizzle the icing over the cooled cookies to highlight the bone shapes.
Extra Tips
Chill the shaped cookies for 15 minutes before baking if the dough feels soft. Use a zip-top bag with one corner snipped off for easy icing lines. Store cooled cookies in an airtight container at room temperature for up to three days. Course: Dessert Cuisine: American Equipment: Mixing Bowl, Baking Sheet, Piping Bag
Jack-o’-Lantern Orange Shortbread
These shortbread cookies bring a bright citrus note to classic buttery dough and get cut into simple rounds that you can finish with chocolate faces. They travel well in a tin and give coworkers a seasonal treat without being overly sweet or messy.
The flavor stays light and fresh thanks to the orange zest and juice, while the texture stays tender and crumbly. Shape them at home the night before a potluck or team meeting for an easy Halloween touch.
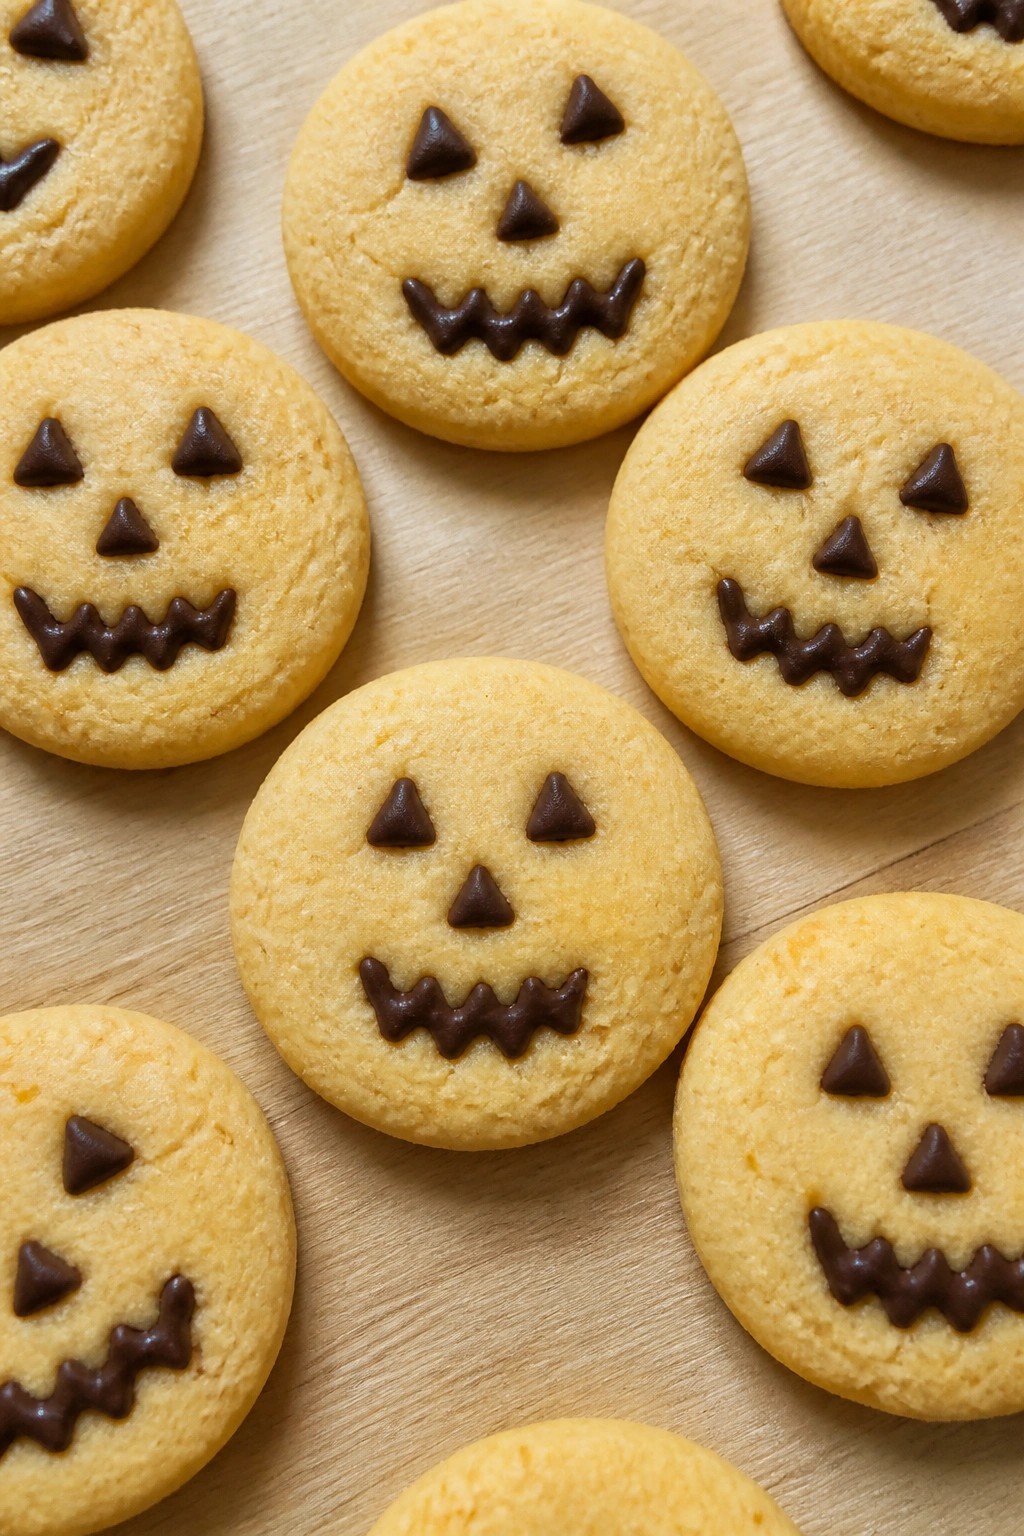
Serves 4 people.
Ingredients
- 1 cup all-purpose flour
- ½ cup unsalted butter, softened
- ¼ cup powdered sugar
- Zest of 1 orange
- 2 tablespoons fresh orange juice
- ¼ teaspoon salt
- 2 tablespoons semi-sweet chocolate chips
Instructions
- Heat the oven to 325°F and line a baking sheet with parchment paper.
- In a mixing bowl, beat the softened butter and powdered sugar until smooth.
- Stir in the orange zest, orange juice, and salt until evenly combined.
- Add the flour and mix just until a soft dough forms.
- Roll the dough to about ¼-inch thickness on a lightly floured surface.
- Cut the dough into 3-inch rounds and place them on the prepared baking sheet.
- Bake for 18 to 20 minutes until the edges turn lightly golden.
- Cool the cookies completely on the baking sheet.
- Melt the chocolate chips in a small bowl and pipe simple jack-o’-lantern faces onto each cookie.
Extra Tips
Melt the chocolate in short bursts in the microwave so it stays thick enough for clean lines on the faces. Store cooled cookies in an airtight container at room temperature for up to three days. If the dough feels too soft to roll, chill it for 15 minutes before cutting. Course: Dessert Cuisine: American Equipment: Mixing Bowl, Baking Sheet, Rolling Pin, Piping Bag or Small Zip-Top Bag
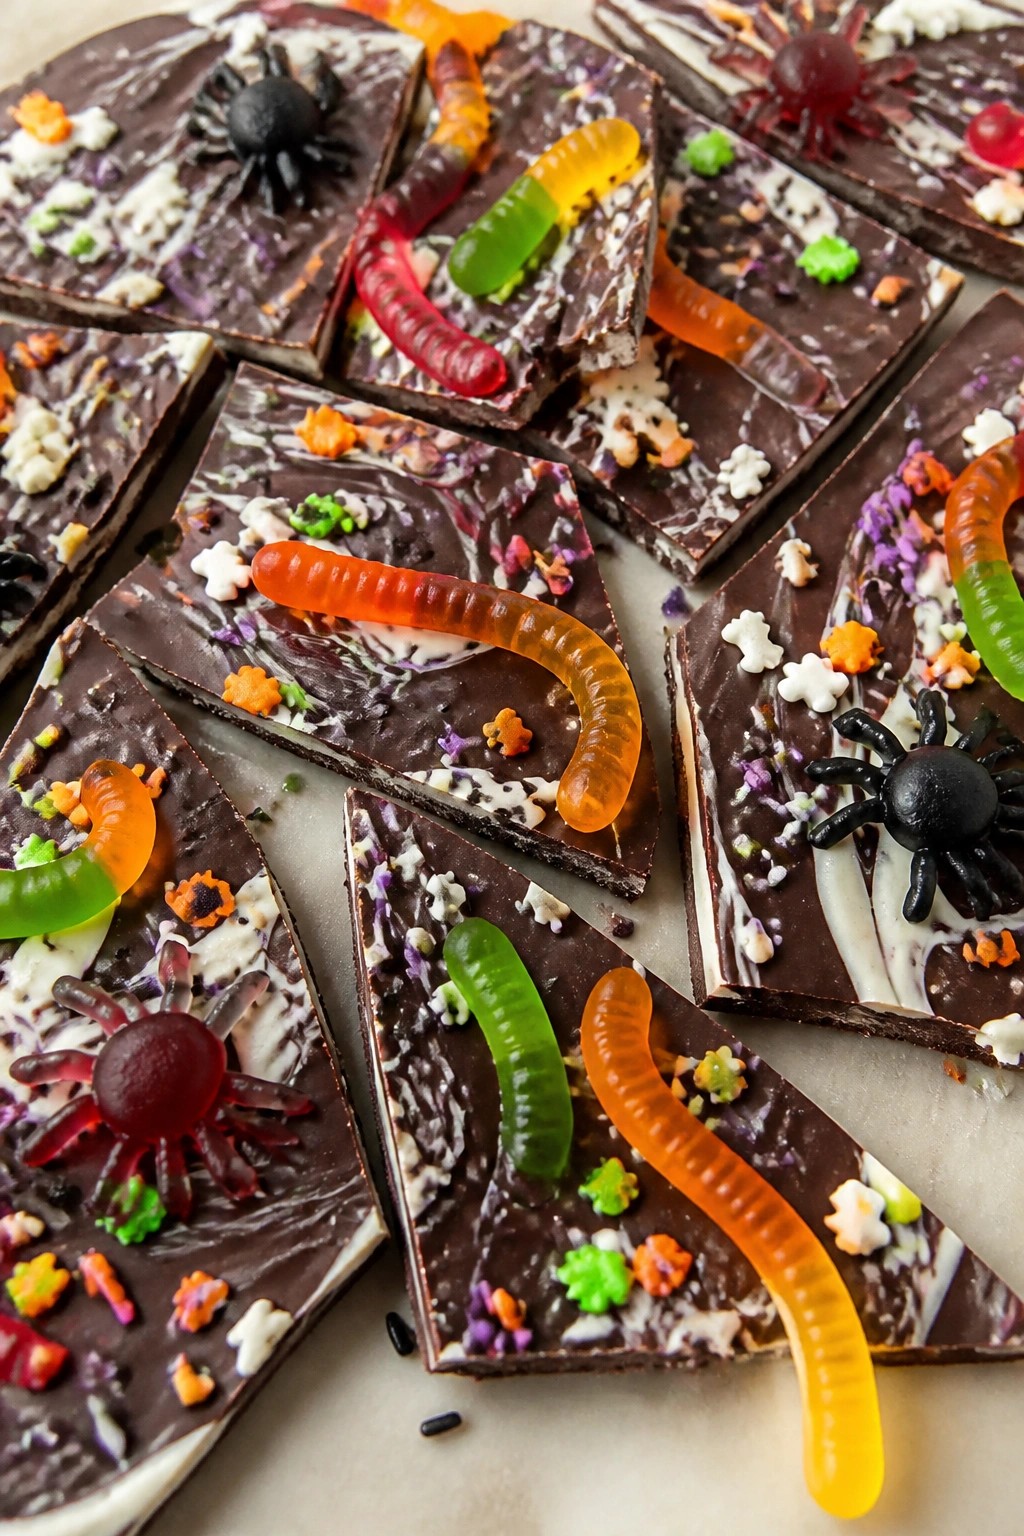
Creepy Crawly Halloween Candy Bark
This bark turns basic chocolate into a shareable Halloween treat that fits right into an office setting. The dark base gets topped with chewy gummy pieces and candy accents that add crunch and color without extra work.
It travels well in a sealed container and breaks into neat portions, so coworkers can grab a piece without any fuss. The flavor stays simple and sweet with a bit of chew from the candies.
Serves 4 people.
Ingredients
- 8 ounces semisweet chocolate chips
- 4 ounces white chocolate chips
- 1/2 cup gummy worms
- 1/4 cup gummy spiders
- 2 tablespoons Halloween sprinkles
Instructions
- Line a baking sheet with parchment paper and set it aside.
- Place the semisweet chocolate chips in a microwave-safe bowl. Heat in 30-second bursts, stirring after each one, until the chocolate is fully melted and smooth.
- Pour the melted chocolate onto the prepared baking sheet. Use a spatula to spread it into a thin, even layer about 1/4 inch thick.
- Scatter the gummy worms and gummy spiders evenly over the chocolate while it is still soft. Add the Halloween sprinkles on top.
- Melt the white chocolate chips in the same way as the semisweet chocolate. Drizzle it over the bark in thin lines to create a web effect.
- Place the baking sheet in the refrigerator for 30 minutes or until the chocolate is firm. Break the bark into pieces once it has set.
Extra Tips
Cut the gummy worms into shorter lengths before adding them if you want smaller pieces that fit neatly into gift bags. Store the finished bark in an airtight container at room temperature for up to three days to keep the chocolate from sweating. Course: Dessert Cuisine: American Equipment: Baking sheet, Parchment paper, Microwave-safe bowl