

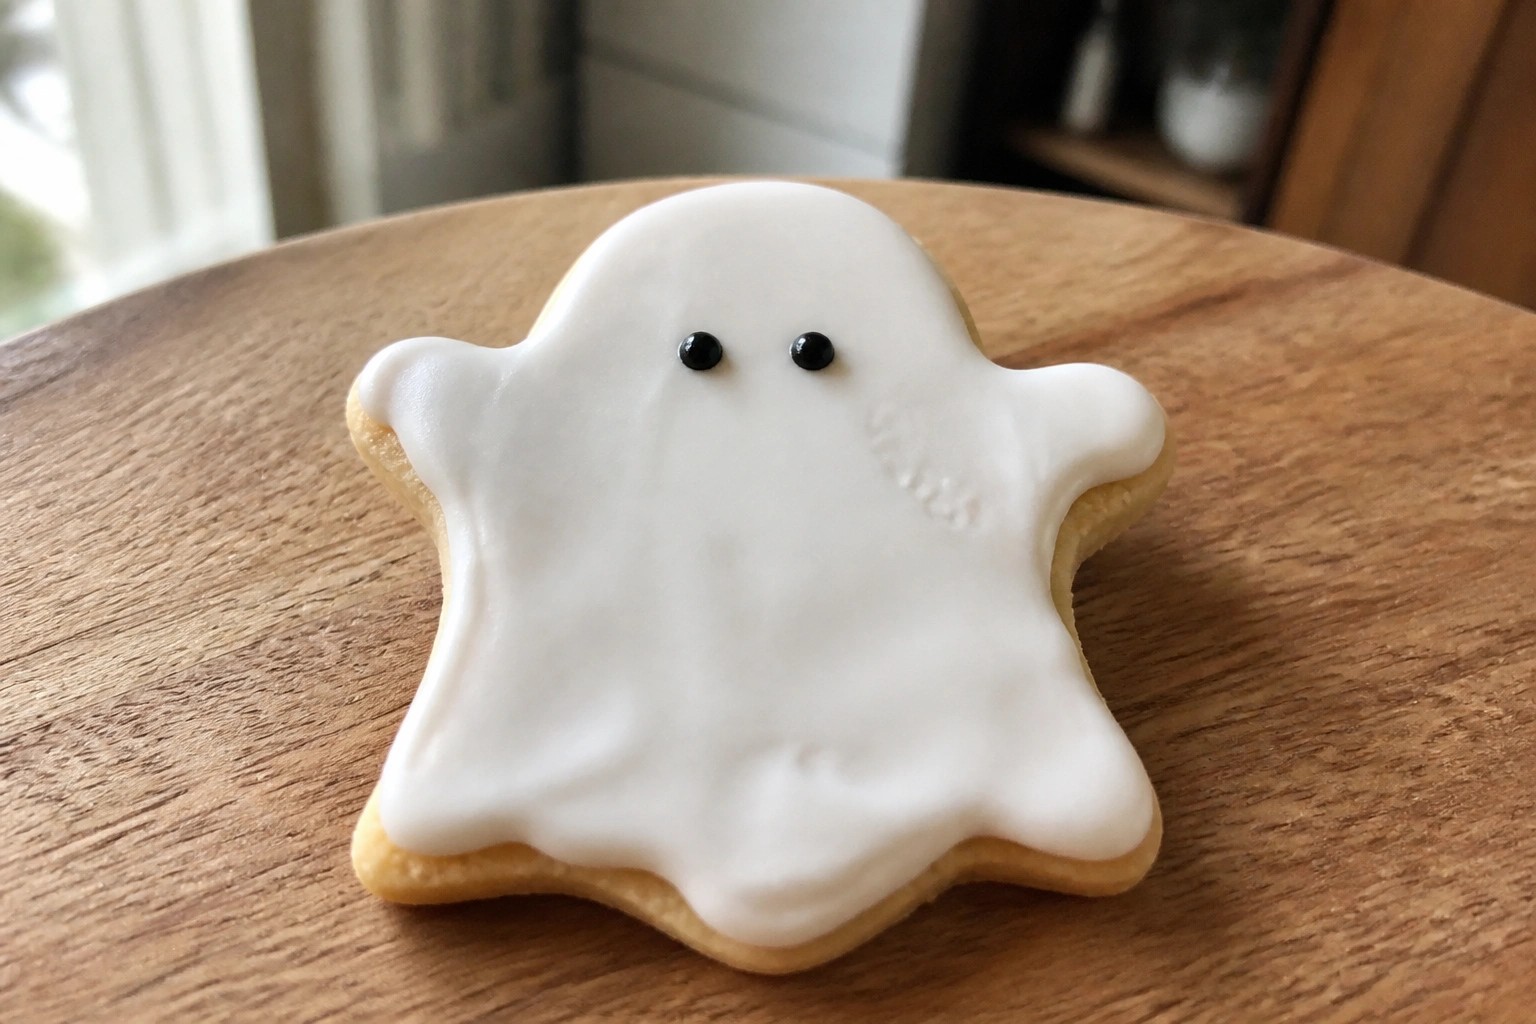
These Halloween treats are made with simple steps so you can enjoy the process with your kids. Most use store bought items mixed with a few homemade touches. You will see ideas that work for different ages and time limits. They turn out looking festive without extra effort. Each one includes what you need and how to put it together.
Helpful Tips Before You Start
These tips will help you keep the process simple and kid friendly.
Set Up Stations Ahead
Lay out ingredients and tools on the counter before kids join. This reduces waiting and keeps the activity moving.
Pick No Bake Bases
Start with store bought cookies, pretzels, or rice cereal treats. You skip oven time and focus on quick decorating.
Let Kids Handle Toppings
Give them small bowls of sprinkles, candy eyes, or fruit pieces to add. They stay busy while you manage any cutting or melting.
Cover the Table
Spread parchment or wax paper over the workspace. Sticky candy and frosting come off easily when you are done.
Make a Test Batch
Prepare one sample treat first to check timing and steps. You can adjust before the full group starts.
Ghostly Banana Yogurt Pops
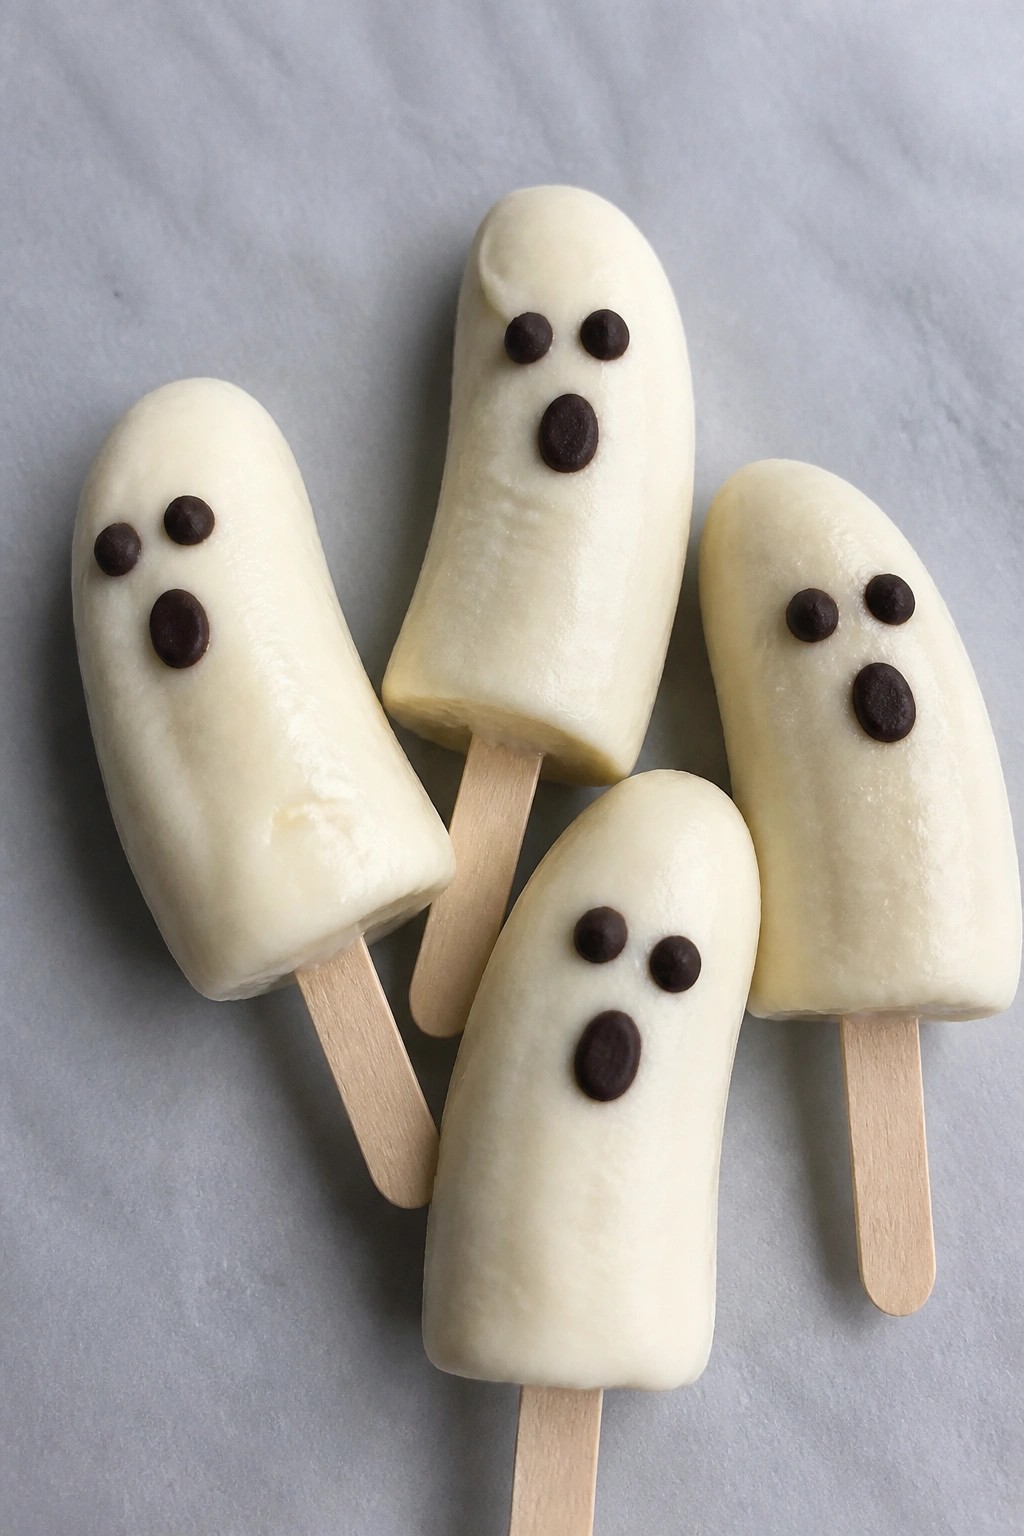
These banana yogurt pops turn simple ingredients into a fun Halloween snack that kids can help assemble. They work well for after-school treats, classroom parties, or a quick make-ahead dessert when you want something lighter than candy. The frozen pops have a creamy yogurt coating over sweet banana with a bit of tang.
The texture stays smooth once frozen, and the chocolate chip faces give them a playful ghost look without any complicated decorating.
Serves 4 people.
Ingredients
- 4 ripe bananas
- 2 cups vanilla Greek yogurt
- 12 mini chocolate chips
- 4 popsicle sticks
Instructions
- Peel the bananas and insert one popsicle stick into the cut end of each banana.
- Pour the vanilla Greek yogurt into a bowl. Dip each banana into the yogurt, turning to coat it evenly on all sides.
- Place the coated bananas on a parchment-lined baking sheet. Press three mini chocolate chips into the yogurt on each banana to form eyes and a mouth while the coating is still soft.
- Transfer the baking sheet to the freezer and freeze until the yogurt is firm, about three hours.
Extra Tips
Freeze the pops on a flat surface so the yogurt sets evenly. If the chocolate chips do not stick well, add them right after dipping before the yogurt starts to drip. Store leftovers in a freezer bag for up to one week. Course: Dessert Cuisine: American Equipment: Baking sheet, Parchment paper, Mixing bowl
Spiderweb Chocolate Brownies
These brownies bring a simple Halloween touch to any kid table. The chocolate base stays fudgy while a quick white chocolate web on top adds the festive detail without extra fuss. They work well for an after-school project or a last-minute party tray.
The flavor stays rich and cocoa-forward with just enough sweetness from the melted web. Kids enjoy the visual surprise, and the steps stay straightforward for home cooks.

Serves 4 people.
Ingredients
- 4 tablespoons unsalted butter
- 1/2 cup granulated sugar
- 1 large egg
- 1/4 cup unsweetened cocoa powder
- 1/4 cup all-purpose flour
- Pinch of salt
- 1/4 cup semisweet chocolate chips
- 2 tablespoons white chocolate chips
Instructions
- Preheat the oven to 350 degrees and line a small square pan with parchment.
- Melt the butter in a mixing bowl, then stir in the sugar until smooth.
- Add the egg and mix until fully combined.
- Stir in the cocoa powder, flour, and salt until no dry streaks remain.
- Fold in the semisweet chocolate chips.
- Spread the batter evenly in the prepared pan and bake for 18 to 20 minutes until a toothpick comes out with moist crumbs.
- Let the brownies cool completely in the pan.
- Melt the white chocolate chips in short microwave bursts, stirring until smooth.
- Pipe or drizzle the melted white chocolate in circles over the brownies, then drag a toothpick through the circles to form a web pattern.
- Slice into four squares once the white chocolate sets.
Extra Tips
Melt the white chocolate in 10-second bursts to avoid seizing. Draw the web right after the brownies cool so the lines stay clean and do not sink. Store leftovers in an airtight container at room temperature for up to two days. Course: Dessert Cuisine: American Equipment: Mixing Bowl, Small Square Baking Pan, Microwave-Safe Bowl
Pumpkin Patch Sugar Cookies
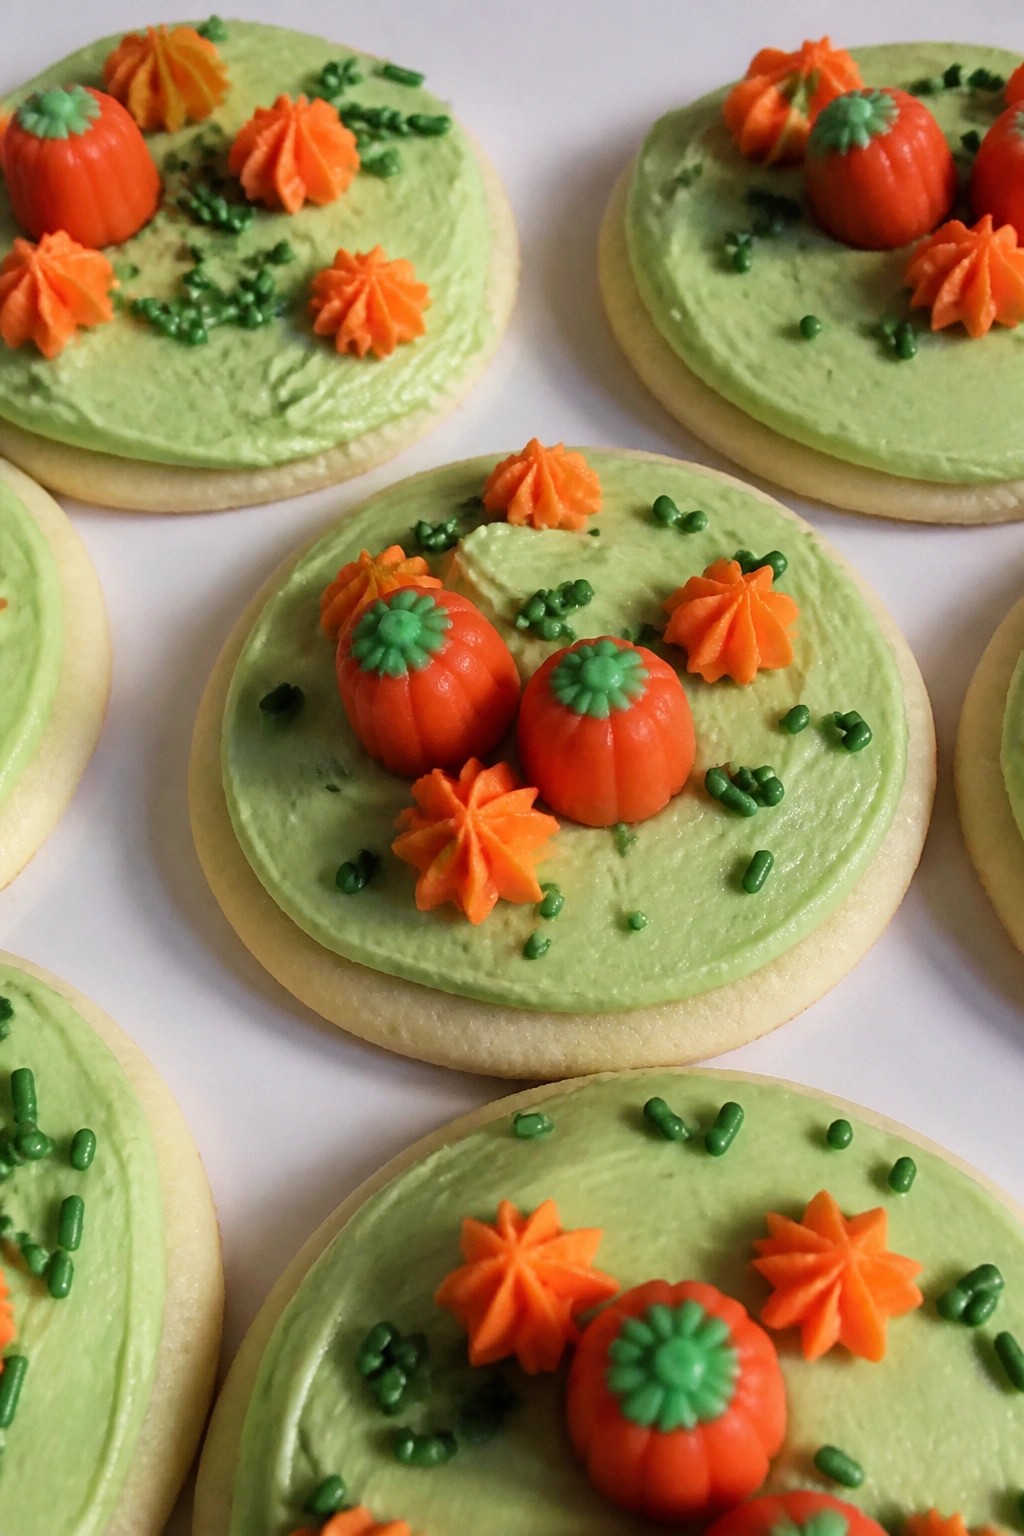
These cookies create a simple pumpkin patch scene that kids can help decorate. They work well for Halloween parties, school treats, or a weekend baking activity with little ones.
The finished cookies taste like classic sweet sugar cookies with a soft center and crisp edges. Green frosting forms the base while orange accents and candy pieces suggest pumpkins in a patch.
Serves 4 people.
Ingredients
- 1 package (16 oz) refrigerated sugar cookie dough
- 1 cup green buttercream frosting
- 1/2 cup orange buttercream frosting
- 8 small candy pumpkins
- 2 tablespoons green sprinkles
Instructions
- Preheat the oven to 350 degrees and line a baking sheet with parchment paper.
- Slice the sugar cookie dough into 12 rounds and place them on the baking sheet.
- Bake for 10 to 12 minutes until the edges turn light golden. Let the cookies cool completely on the sheet.
- Spread a thin layer of green buttercream frosting over each cooled cookie to create the patch base.
- Pipe small orange buttercream pumpkins onto the green frosting or place one candy pumpkin in the center of each cookie.
- Add a few green sprinkles around the pumpkins to suggest vines.
Extra Tips
Use a zip-top bag with one corner snipped for easy piping if you lack piping tips. Store finished cookies in a single layer in an airtight container at room temperature for up to two days to keep the frosting smooth. Swap the candy pumpkins for orange gummy candies if needed. Course: Dessert Cuisine: American Equipment: Baking sheet, Parchment paper, Mixing bowls
Witch Hat Marshmallow Treats
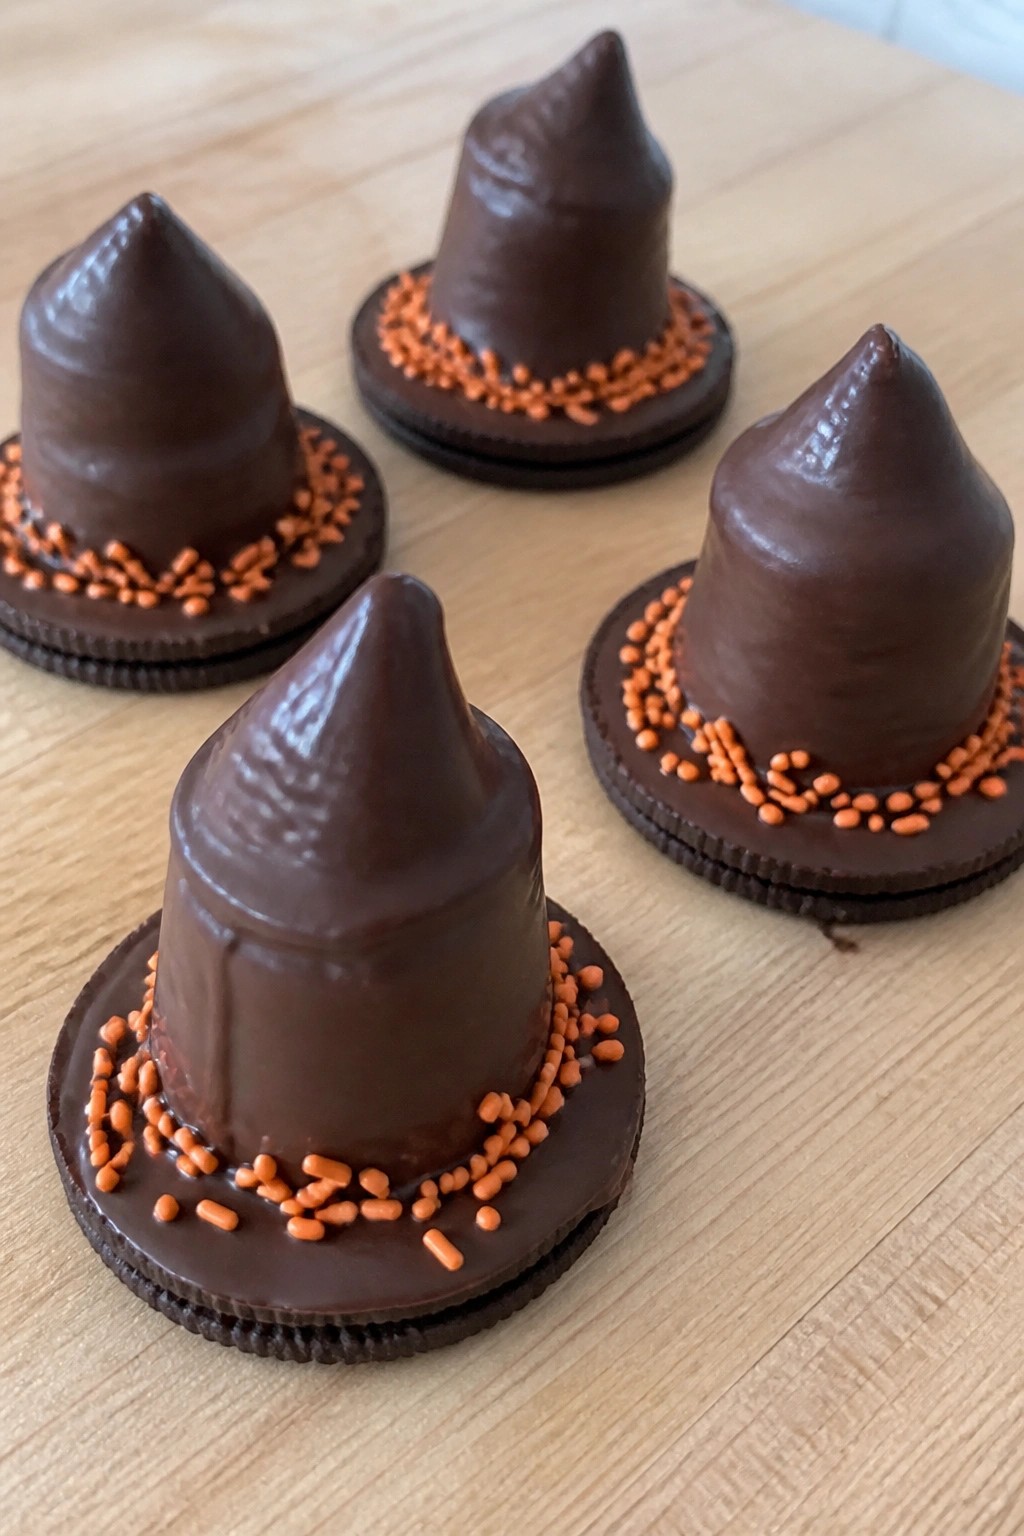
These treats stack a marshmallow on a chocolate cookie and coat it in melted chocolate to create a simple witch hat shape. Kids enjoy helping with the dipping step, and the treats come together quickly for Halloween parties or after-school snacks. The result is a sweet mix of crisp cookie, soft marshmallow, and rich chocolate.
They work well when you need a no-bake option that still looks themed. The chocolate sets firm on the outside while the inside stays chewy.
Serves 4 people.
Ingredients
- 4 round chocolate cookies
- 4 large marshmallows
- 1 cup semisweet chocolate chips
- 1 tablespoon shortening
- 2 tablespoons orange sprinkles
Instructions
- Place one marshmallow in the center of each chocolate cookie.
- Combine the chocolate chips and shortening in a microwave-safe bowl. Heat in 20-second intervals, stirring between each, until the mixture is smooth.
- Hold a cookie by the edge and dip the marshmallow into the melted chocolate. Rotate to coat all sides, then lift and let excess chocolate drip back into the bowl.
- Set the coated treat back on a parchment-lined surface and immediately scatter orange sprinkles over the wet chocolate before it sets.
- Repeat with the remaining treats. Allow the chocolate to firm at room temperature for 20 minutes before serving.
Extra Tips
If the chocolate thickens while you work, warm it for five seconds in the microwave and stir to loosen. Use a fork to lift the treats out of the chocolate if your fingers get messy. Store any leftovers in a single layer in an airtight container at room temperature for up to two days. Course: Dessert Cuisine: American Equipment: Microwave-safe bowl, Baking sheet, Parchment paper
Mummy Pretzel Rods
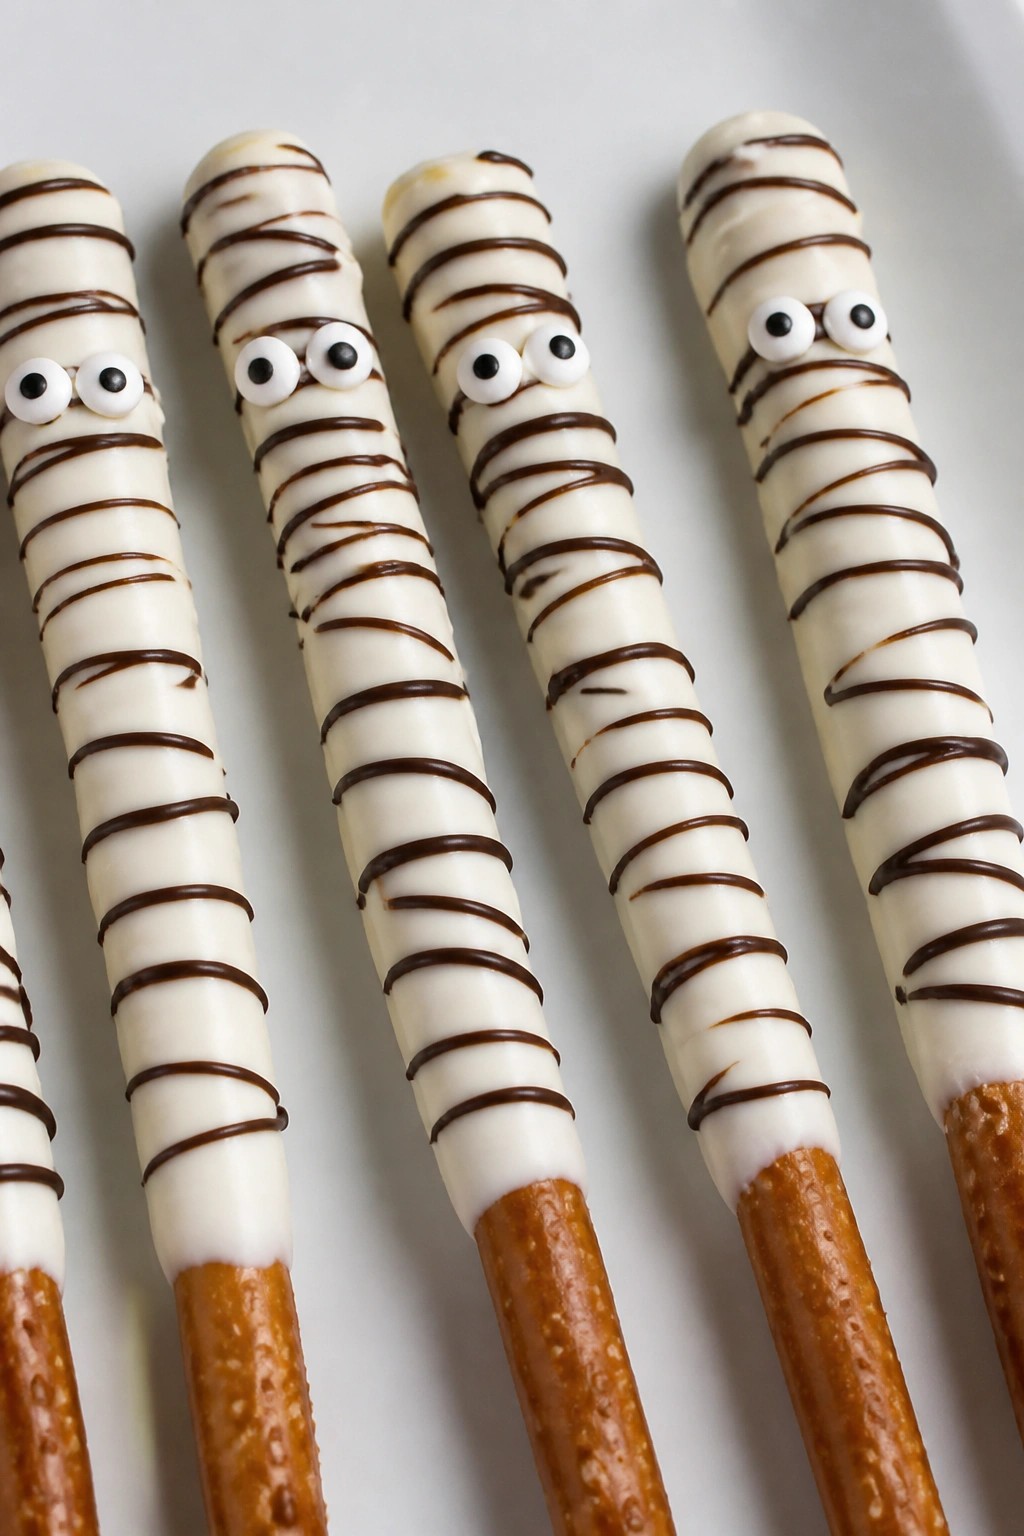
Mummy Pretzel Rods turn plain pretzels into a playful Halloween snack. Kids enjoy adding the candy eyes, and the mix of salty crunch and sweet coating makes them a hit at parties or lunchboxes.
The finished rods have a smooth white surface with simple dark lines that suggest bandages, all without any baking required.
Serves 4 people.
Ingredients
- 12 pretzel rods
- 1 cup white candy melts
- 24 candy eyes
- 1/4 cup dark chocolate chips
Instructions
- Line a baking sheet with parchment paper and set it aside.
- Place the white candy melts in a microwave-safe bowl and heat in 30-second bursts, stirring after each, until fully melted and smooth.
- Dip each pretzel rod into the melted white candy, leaving about two inches uncoated at the bottom for a handle. Lay the coated rods on the prepared baking sheet.
- While the coating is still soft, press two candy eyes onto the upper third of each rod.
- Melt the dark chocolate chips in a separate bowl using the same microwave method. Spoon the melted chocolate into a zip-top bag, snip a small corner, and drizzle thin lines across each rod to create a wrapped look.
- Let the rods sit at room temperature until the coatings are fully set.
Extra Tips
If the white coating thickens while you work, warm it for a few seconds in the microwave to loosen it again. Store finished rods in an airtight container at room temperature for up to three days. For a milder look, skip the dark chocolate drizzle and let the candy eyes stand out on the plain white surface. Course: Snack Cuisine: American Equipment: Microwave-safe bowl, Baking sheet, Parchment paper, Zip-top bag
Bat Wing Cupcakes
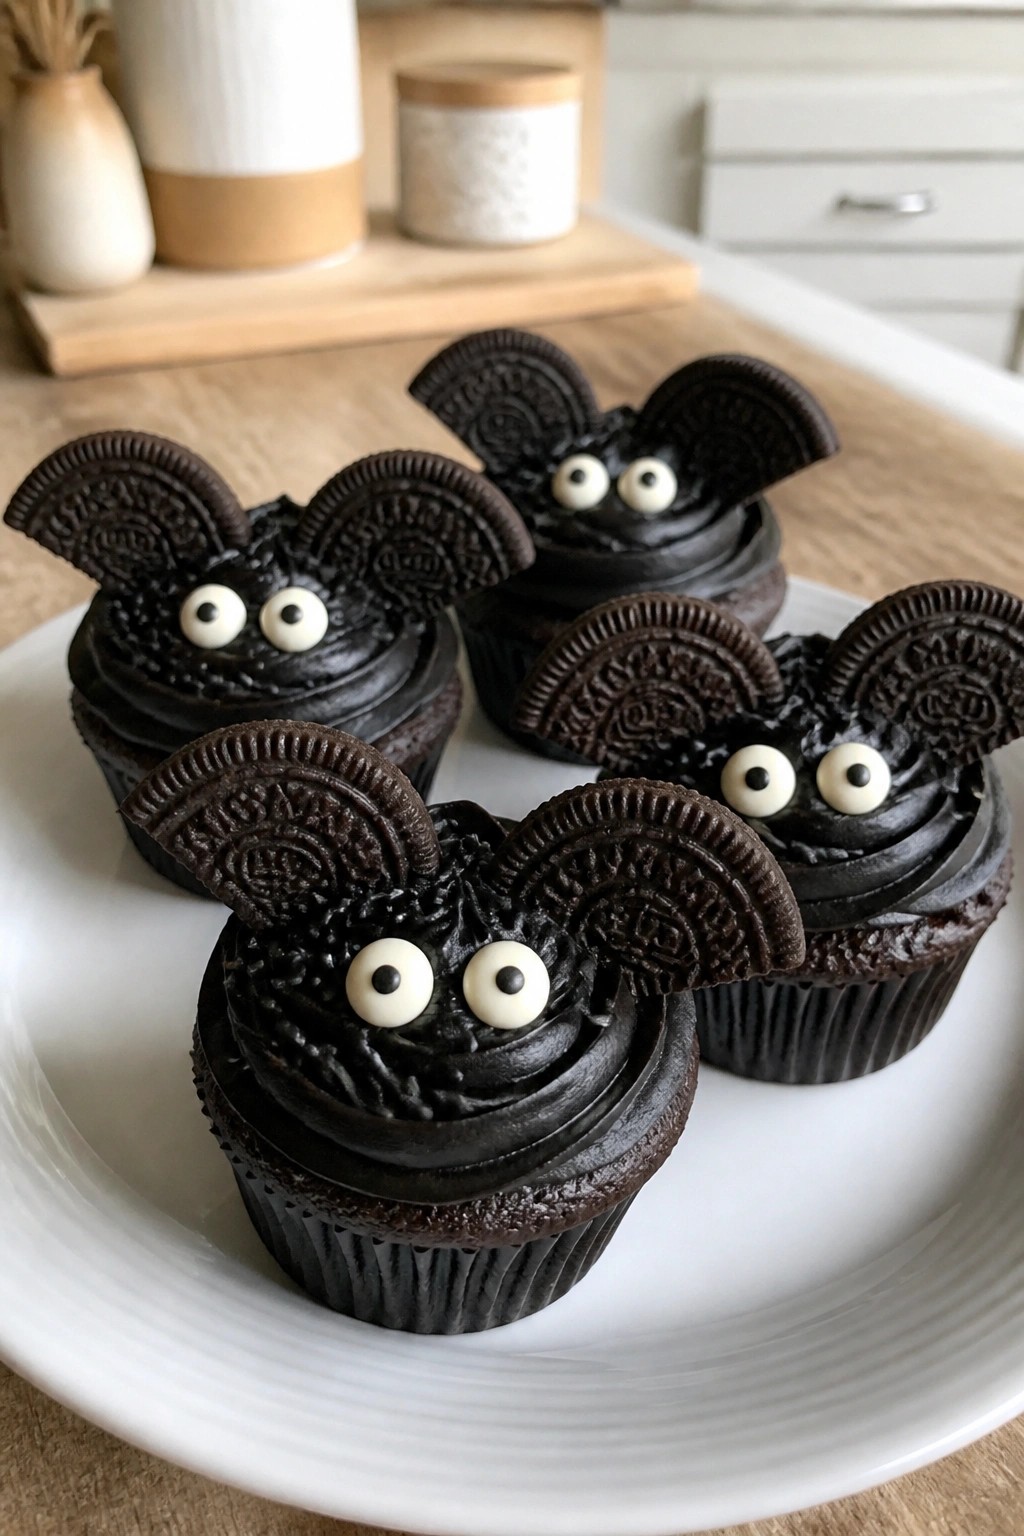
These Bat Wing Cupcakes add a playful spooky element to any Halloween gathering. Kids enjoy pressing the wings into place and adding the eyes, making the process simple and hands-on.
The chocolate cupcakes stay moist under a layer of dark frosting, while the cookie wings give a light crunch. The result is cute enough for little ones yet easy to put together in minutes.
Serves 4 people.
Ingredients
- 4 baked chocolate cupcakes
- 1 cup chocolate frosting
- Black food coloring
- 8 chocolate sandwich cookies
- 8 candy eyes
- 2 tablespoons black sprinkles
Instructions
- Place the chocolate frosting in a bowl and stir in black food coloring a few drops at a time until the color turns deep black.
- Spread an even layer of the tinted frosting over the top of each chocolate cupcake.
- Carefully split each chocolate sandwich cookie in half to create two wing pieces.
- Press two cookie halves into the frosting on opposite sides of each cupcake to form the wings.
- Position two candy eyes near the center of each cupcake between the wings.
- Scatter black sprinkles lightly across the frosting for added detail.
Extra Tips
Use a thicker frosting so the cookie wings stay upright without sliding. Assemble the cupcakes no more than a few hours before serving to keep the cookies crisp. Store any leftovers in a single layer in an airtight container at room temperature. Course: Dessert Cuisine: American Equipment: Mixing Bowl, Spatula, Cupcake Pan
Candy Corn Parfait Cups
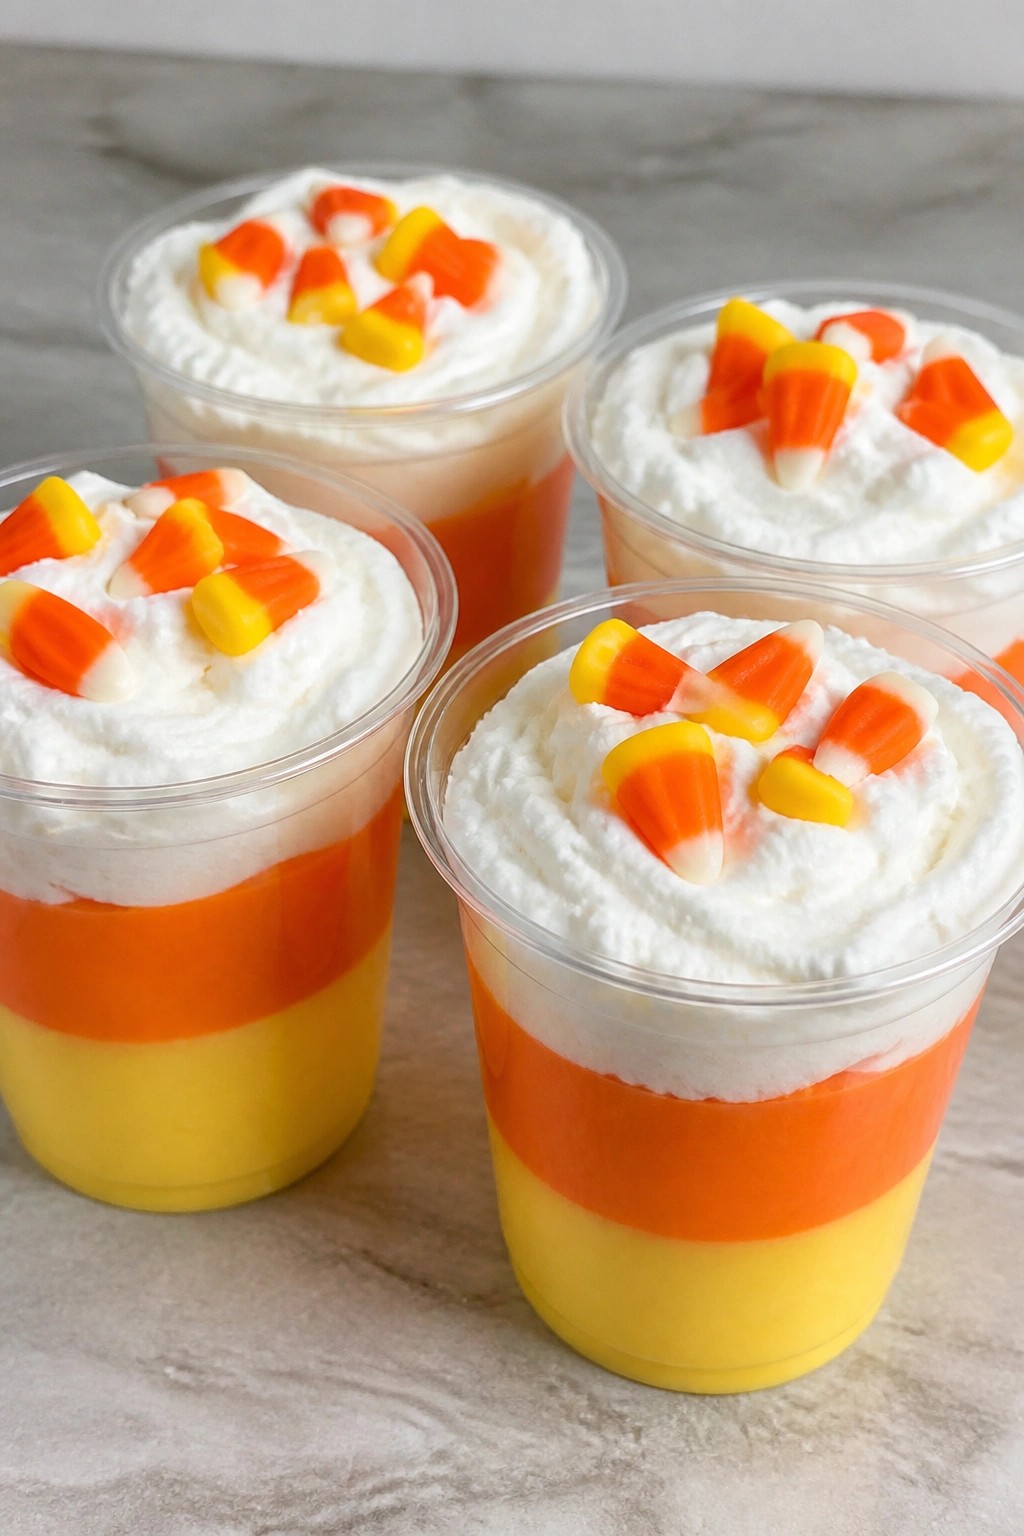
These layered cups bring the classic candy corn look to the table with simple ingredients and no baking required. Kids enjoy the bright stripes and the creamy vanilla taste, while parents appreciate how quickly the whole thing comes together for a party or after-school snack.
The texture stays light because of the whipped topping, and the colors stay separate when you spoon the layers carefully. Clear cups let the yellow, orange, and white stripes show through for a fun Halloween touch.
Serves 4 people.
Ingredients
- 1 (3.4-ounce) package instant vanilla pudding mix
- 2 cups cold milk
- Yellow food coloring
- Orange food coloring
- 1 cup whipped topping
- Candy corn pieces for garnish
- 4 clear plastic cups
Instructions
- Whisk the pudding mix and cold milk in a medium bowl until smooth and thickened, about two minutes.
- Divide the pudding into two smaller bowls. Stir several drops of yellow food coloring into one bowl until the color is bright. Stir several drops of orange food coloring into the second bowl until the color is bright.
- Spoon the yellow pudding into the bottom of each cup to form the first layer. Use the back of the spoon to smooth it flat.
- Add the orange pudding on top of the yellow layer in each cup, again smoothing the surface.
- Spoon the whipped topping over the orange layer to create the final white stripe.
- Place a few candy corn pieces on the whipped topping for garnish right before serving.
Extra Tips
Make the layers in advance and keep the cups covered in the refrigerator, then add the candy corn just before serving so it stays crisp. Clear cups help the stripes stay visible, and a small spoon works best for neat layers. If you want a milder orange shade, start with fewer drops of food coloring and add more as needed. Course: Dessert Cuisine: American Equipment: Mixing bowls, Whisk, Clear plastic cups
Frankenstein Rice Krispie Squares
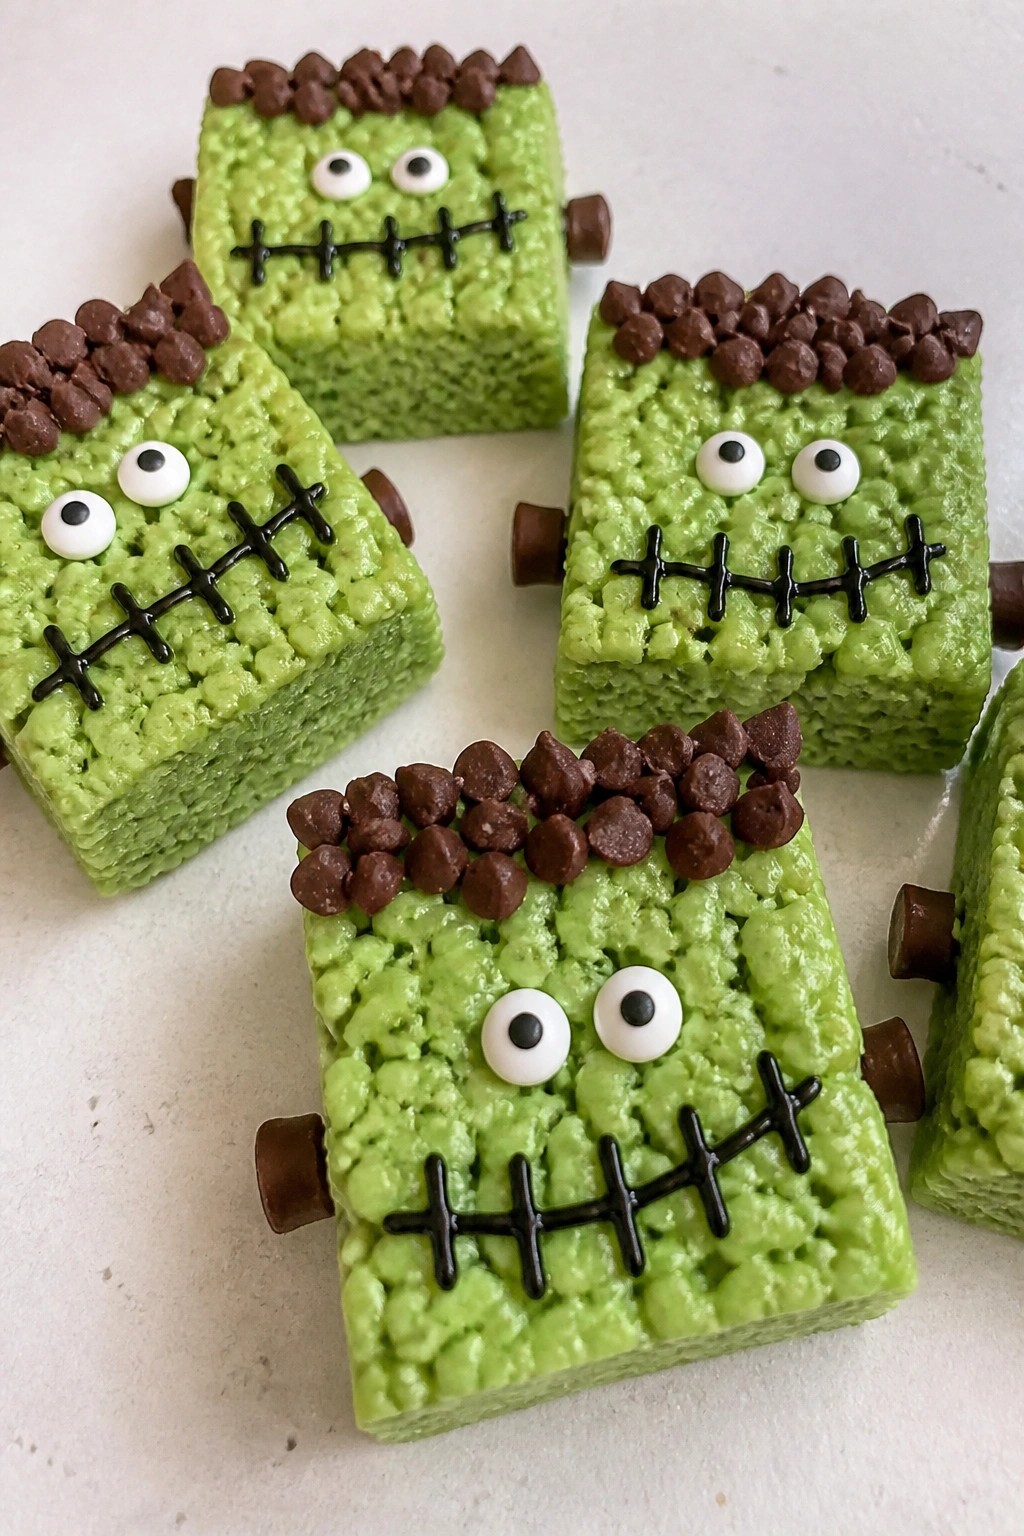
These green Rice Krispie squares get dressed up with simple candy features to look like Frankenstein for Halloween. Kids enjoy helping press the treats into shape and add the eyes and stitches. The result is a chewy, lightly sweet snack that feels festive without much fuss.
The squares hold their shape well once cooled, making them easy to pack for school parties or small gatherings. The green color comes from just a few drops of food coloring, while melted chocolate and candy eyes create the monster look.
Serves 4 people.
Ingredients
- 2 tablespoons unsalted butter
- 3 cups mini marshmallows
- 4 cups Rice Krispies cereal
- 4 to 6 drops green food coloring
- 1/4 cup semisweet chocolate chips
- 8 candy eyeballs
- Black decorating gel
Instructions
- Melt the butter in a large saucepan over low heat. Add the mini marshmallows and stir until fully melted and smooth.
- Remove the pan from the heat and stir in the green food coloring until the mixture reaches a bright green shade. Add the Rice Krispies cereal and mix until every piece is coated.
- Press the mixture evenly into a greased 8-inch square pan using a spatula or lightly buttered hands. Let it cool for 15 minutes until firm.
- Cut the cooled slab into 4 squares. Melt the chocolate chips in a microwave-safe bowl in 20-second bursts, stirring between each burst until smooth. Spread a thin line of melted chocolate across the top of each square to form hair.
- Press two candy eyeballs onto each square below the chocolate. Use the black decorating gel to draw a small mouth and a few short lines across the forehead for stitches.
Extra Tips
Let the squares cool completely before adding the chocolate and candy so the features stay in place. If the melted chocolate thickens, warm it for a few seconds to loosen it again. Store leftovers in an airtight container at room temperature for up to two days. Course: Dessert Cuisine: American Equipment: Large saucepan, Spatula, 8-inch square pan, Microwave-safe bowl
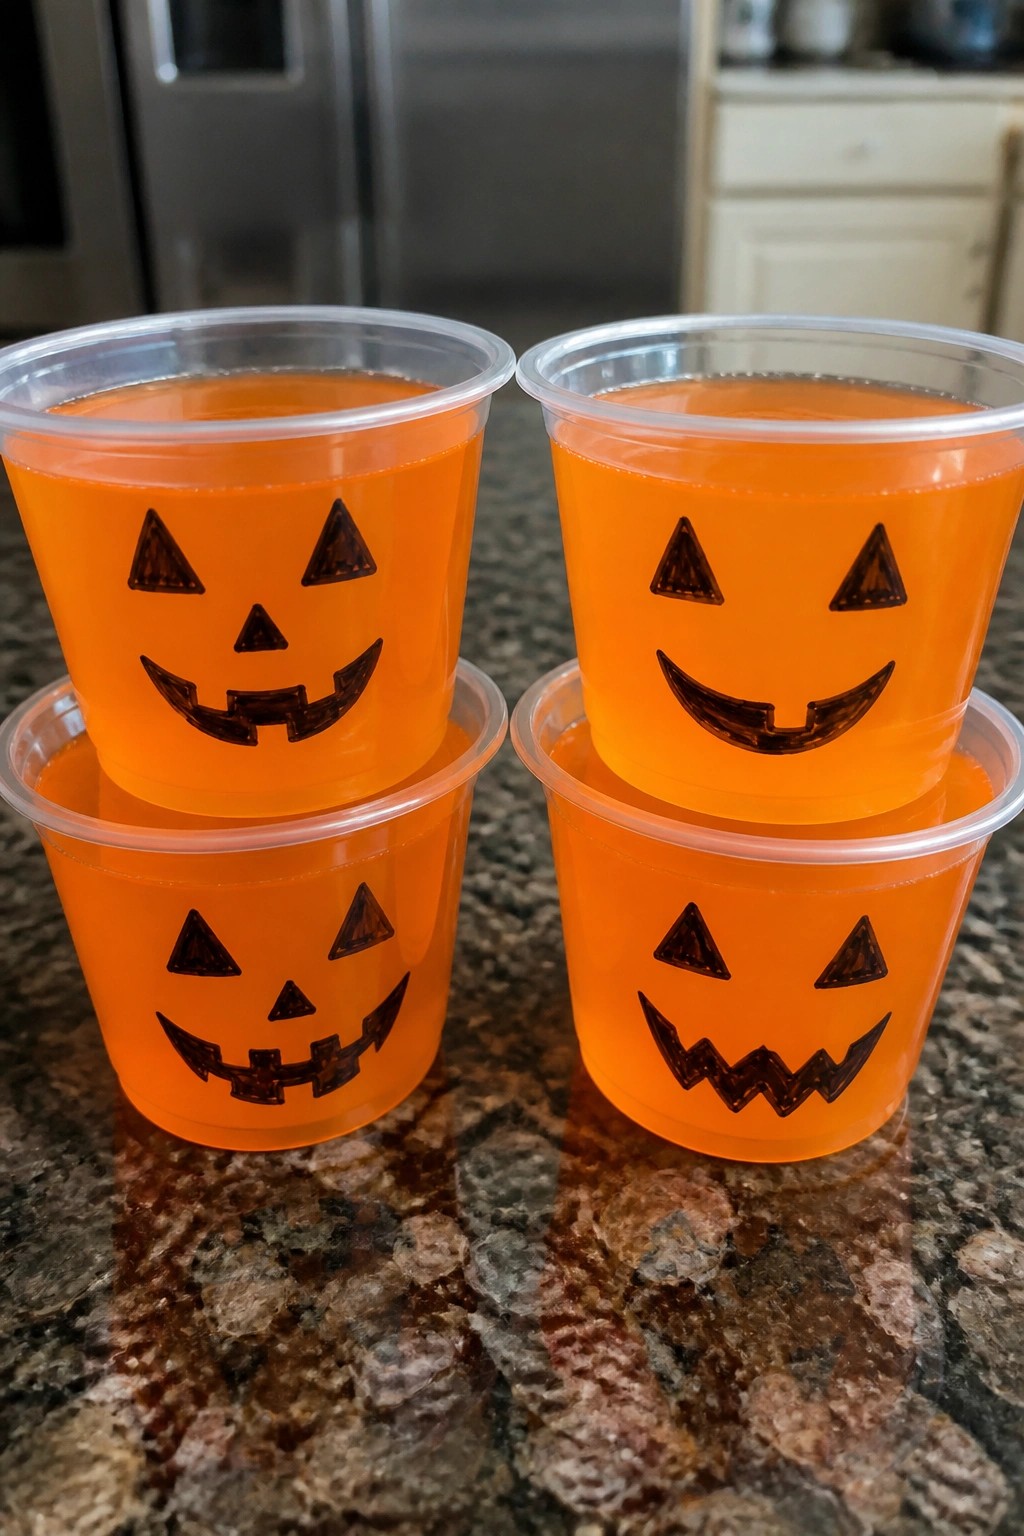
Jack-o’-Lantern Orange Jello Cups
These Jack-o’-Lantern Orange Jello Cups turn a simple gelatin dessert into a playful Halloween activity. Kids can help with the final step of drawing faces, which makes the treat feel more like a craft project than a recipe. The bright orange color stands out on any party table.
The finished cups have a sweet orange taste and a soft, jiggly texture that holds its shape once set. Clear plastic cups let the color show through while serving as the canvas for the jack-o’-lantern designs.
Serves 4 people.
Ingredients
- 1 package (3 ounces) orange gelatin
- 1 cup boiling water
- 1 cup cold water
- 4 clear plastic cups (5 ounces each)
- Black permanent marker
Instructions
- Pour the orange gelatin into a mixing bowl and add the boiling water. Stir until the gelatin completely dissolves.
- Add the cold water and stir until the mixture is smooth and evenly combined.
- Divide the gelatin mixture evenly among the four clear plastic cups.
- Place the cups in the refrigerator and chill for at least four hours until the jello is fully set.
- Once the jello has set, use the black permanent marker to draw jack-o’-lantern faces on the outside of each cup.
Extra Tips
Draw the faces right before serving so the marker lines stay crisp. If you need to make the cups ahead, prepare the jello and store them covered in the refrigerator, then add the faces just before the kids see them. The cups travel well in a cooler for school parties or neighborhood events. Course: Dessert Cuisine: American Equipment: Mixing bowl, Measuring cups, Whisk, Refrigerator
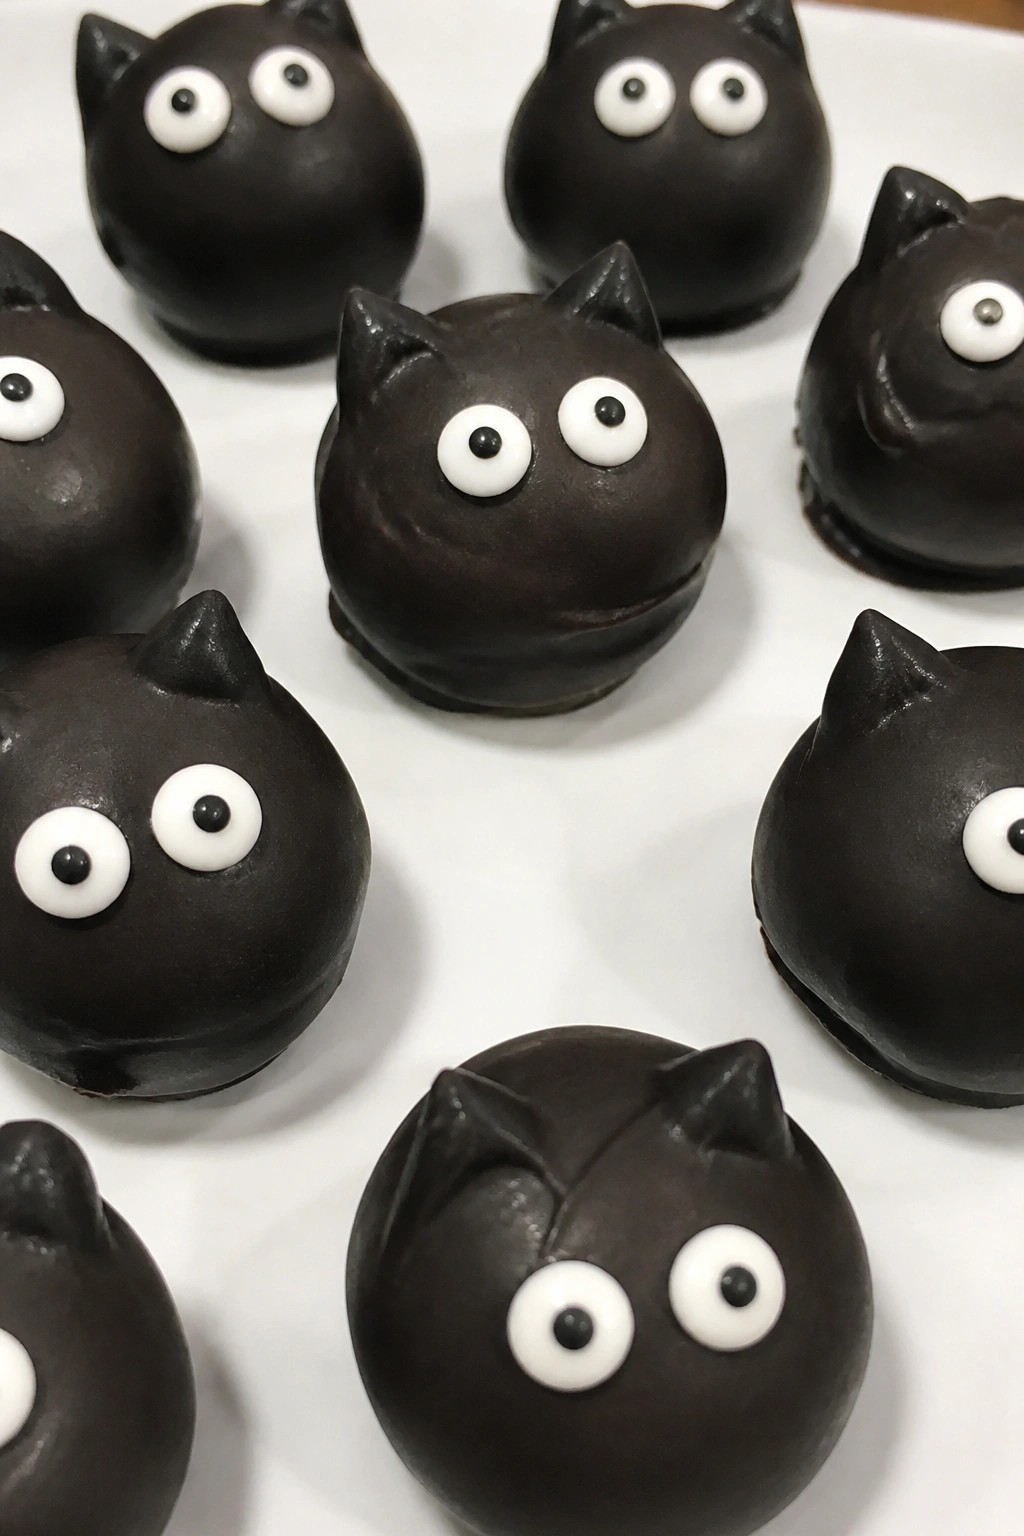
Black Cat Oreo Truffles
These no-bake truffles turn classic Oreos into playful black cats that kids will love to help decorate. They work well for Halloween parties or an easy after-school project because the steps stay simple and the results look festive without much effort. The texture stays creamy inside with a crisp chocolate shell, and the flavor blends rich chocolate with a mild cookie taste.
Serves 4 people.
Ingredients
- 14 Oreo cookies
- 4 ounces cream cheese, softened
- 8 ounces black candy melts
- 8 candy eyes
Instructions
- Place 12 Oreo cookies in a food processor and pulse until they form fine crumbs. Transfer the crumbs to a mixing bowl.
- Add the softened cream cheese to the Oreo crumbs and stir until the mixture holds together evenly.
- Roll the mixture into 8 small balls and set them on a parchment-lined baking sheet. Chill the balls in the refrigerator for 15 minutes.
- Melt the black candy melts in a microwave-safe bowl in 30-second intervals, stirring between each until smooth.
- Dip each chilled ball into the melted candy melts to coat completely, then return it to the baking sheet.
- Immediately press two candy eyes onto each truffle before the coating sets.
- Cut the remaining 2 Oreo cookies into small triangle pieces and press two triangles onto the top of each truffle to form ears. Let the truffles set at room temperature.
Extra Tips
Chill the truffles for at least 10 minutes after coating if your kitchen feels warm, since the black candy melts can stay soft longer than milk chocolate. Use a fork to lift each truffle from the coating to let excess drip off cleanly. Store leftovers in an airtight container in the refrigerator for up to three days. Course: Dessert Cuisine: American Equipment: Food Processor, Mixing Bowl, Baking Sheet, Microwave-Safe Bowl
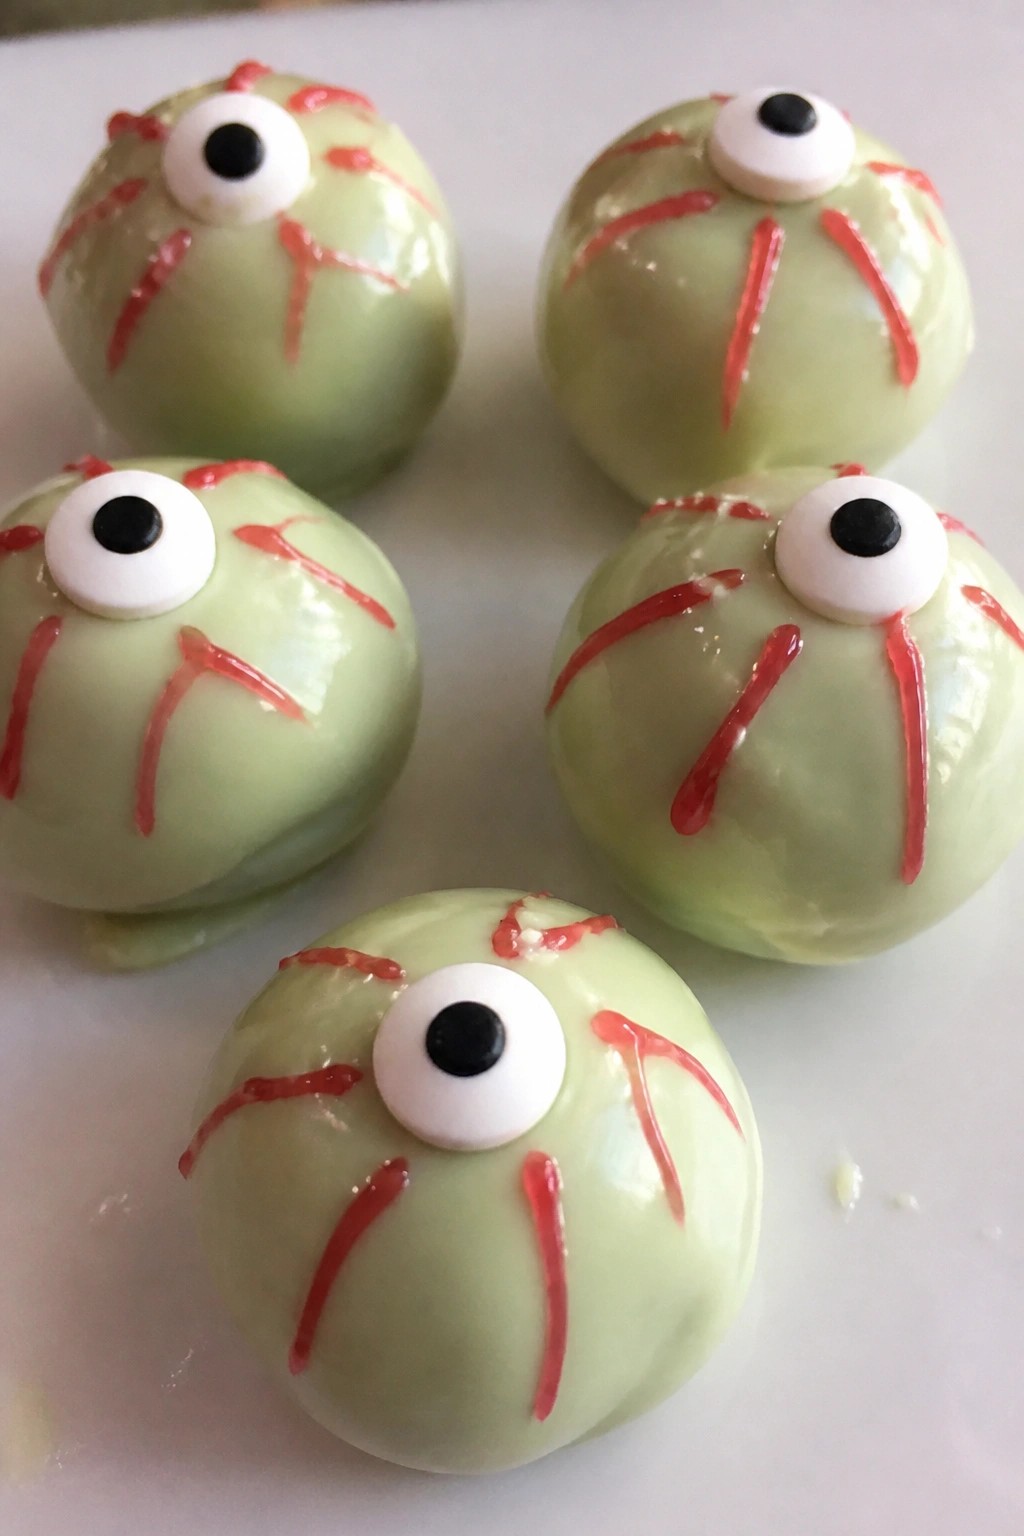
Monster Eyeball Donut Holes
These monster eyeball donut holes make a quick Halloween snack that kids can help assemble. They turn plain donut holes into something playful with a white coating and a single candy center. The result is sweet and slightly chewy with a crisp chocolate shell.
They work well for parties or an easy after-school treat in October. The green tint and red lines give them a fun eyeball look without much effort.
Serves 4 people.
Ingredients
- 12 plain donut holes
- 1 cup white chocolate chips
- 1 tablespoon vegetable oil
- 6 drops green food coloring
- 12 candy eyeballs
- 2 tablespoons red gel icing
Instructions
- Line a baking sheet with parchment paper and set the donut holes nearby.
- Place the white chocolate chips and vegetable oil in a microwave-safe bowl. Heat in 20-second bursts, stirring between each, until fully melted and smooth.
- Stir the green food coloring into the melted chocolate until the color is even.
- Dip each donut hole into the green chocolate, turning to coat completely. Let excess drip off, then set it on the prepared baking sheet.
- Press one candy eyeball gently into the top of each coated donut hole while the chocolate is still soft.
- Use the red gel icing to draw thin lines around the candy eyeball to look like veins. Let the chocolate set at room temperature before serving.
Extra Tips
Work in small batches when dipping so the chocolate stays warm and smooth. If the coating feels too thick, add another half teaspoon of oil. Store any leftovers in an airtight container in the fridge to keep the chocolate from softening. Course: Dessert Cuisine: American Equipment: Microwave-safe bowl, Baking sheet, Parchment paper
Haunted House Graham Cracker Houses
These Haunted House Graham Cracker Houses give kids a hands-on way to create their own spooky snacks. The activity works well for small groups or family nights since it needs no oven and uses basic items most kitchens already have.
The finished treats combine crunchy graham cracker walls with smooth frosting and chewy candies. They deliver a sweet flavor that feels like a dressed-up cookie while staying simple enough for little hands to help build.

Serves 4 people.
Ingredients
- 24 graham cracker squares
- 1 1/2 cups vanilla frosting
- Black food coloring
- 1/2 cup semisweet chocolate chips
- 20 candy corn pieces
- 12 gummy ghost candies
Instructions
- Place 1 cup of vanilla frosting in a bowl and tint it black with food coloring. Set the remaining 1/2 cup of white frosting aside for assembly.
- Use the white frosting to glue four graham cracker squares into a simple house shape for each of the four houses. Press the squares together at the edges to form the walls and let them set for a minute.
- Melt the chocolate chips in a microwave-safe bowl in 20-second bursts, stirring between each until smooth. Spread a thin layer of melted chocolate over the top of each house to create a roof.
- Spoon the black frosting into a small bag or use a knife to draw window and door outlines on the front of each house.
- Press candy corn pieces along the roof edges and attach gummy ghost candies near the doors as final decorations.
Extra Tips
Let the houses sit for 10 minutes after assembly so the frosting firms up before moving them. If the chocolate thickens while you work, warm it for a few seconds to keep it spreadable. These treats stay crisp for a few hours at room temperature, so make them close to serving time. Course: Dessert Cuisine: American Equipment: Mixing bowl, Microwave-safe bowl, Spoon
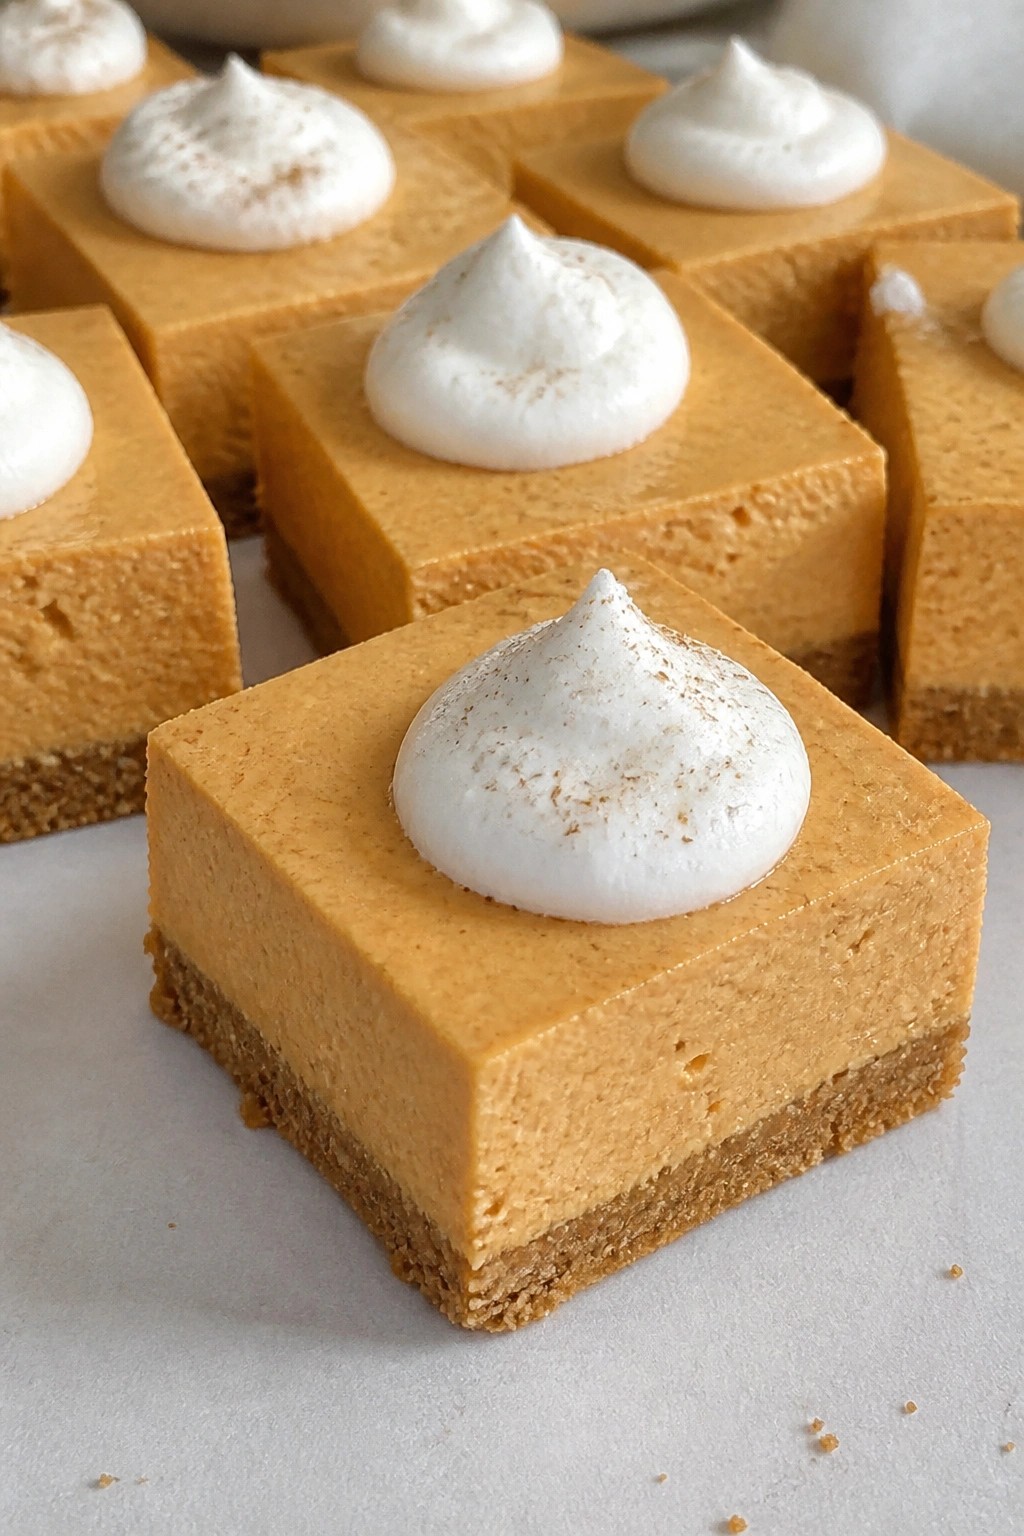
Pumpkin Pie No-Bake Cheesecake Bars
These no-bake bars combine a crunchy graham cracker base with a creamy pumpkin filling that tastes like pie and cheesecake in one bite. They come together fast with simple mixing and chilling, making them a good choice for Halloween gatherings or quick kid-friendly treats.
The spiced pumpkin flavor stays mild and sweet while the whipped topping keeps the texture light. Kids can help press the crust or stir the filling with supervision.
Serves 4 people.
Ingredients
- 1 cup graham cracker crumbs
- 4 tablespoons unsalted butter, melted
- 8 ounces cream cheese, softened
- 3/4 cup pumpkin puree
- 1/2 cup powdered sugar
- 1 teaspoon pumpkin pie spice
- 1 teaspoon vanilla extract
- 1 cup whipped topping, thawed
- Extra whipped topping for garnish
Instructions
- Stir the graham cracker crumbs and melted butter together in a bowl until the crumbs look like wet sand. Press the mixture firmly into the bottom of an 8×8 inch pan to form an even crust layer.
- Beat the softened cream cheese in a large bowl until smooth. Add the pumpkin puree, powdered sugar, pumpkin pie spice, and vanilla extract. Mix until fully combined and no lumps remain.
- Fold the whipped topping into the pumpkin mixture gently with a spatula until the filling turns light orange and uniform.
- Spread the filling evenly over the prepared crust. Smooth the top with the spatula.
- Cover the pan and place it in the refrigerator for at least 4 hours until the bars feel firm when touched.
- Cut the chilled mixture into 4 bars. Add a small dollop of extra whipped topping to each bar before serving.
Extra Tips
Use room temperature cream cheese so the filling mixes without lumps. The bars hold their shape best when kept cold, so store leftovers in the fridge and serve them straight from there. Skip the garnish if you want a simpler look for little hands. Course: Dessert Cuisine: American Equipment: Mixing Bowl, 8×8 Inch Pan, Spatula