

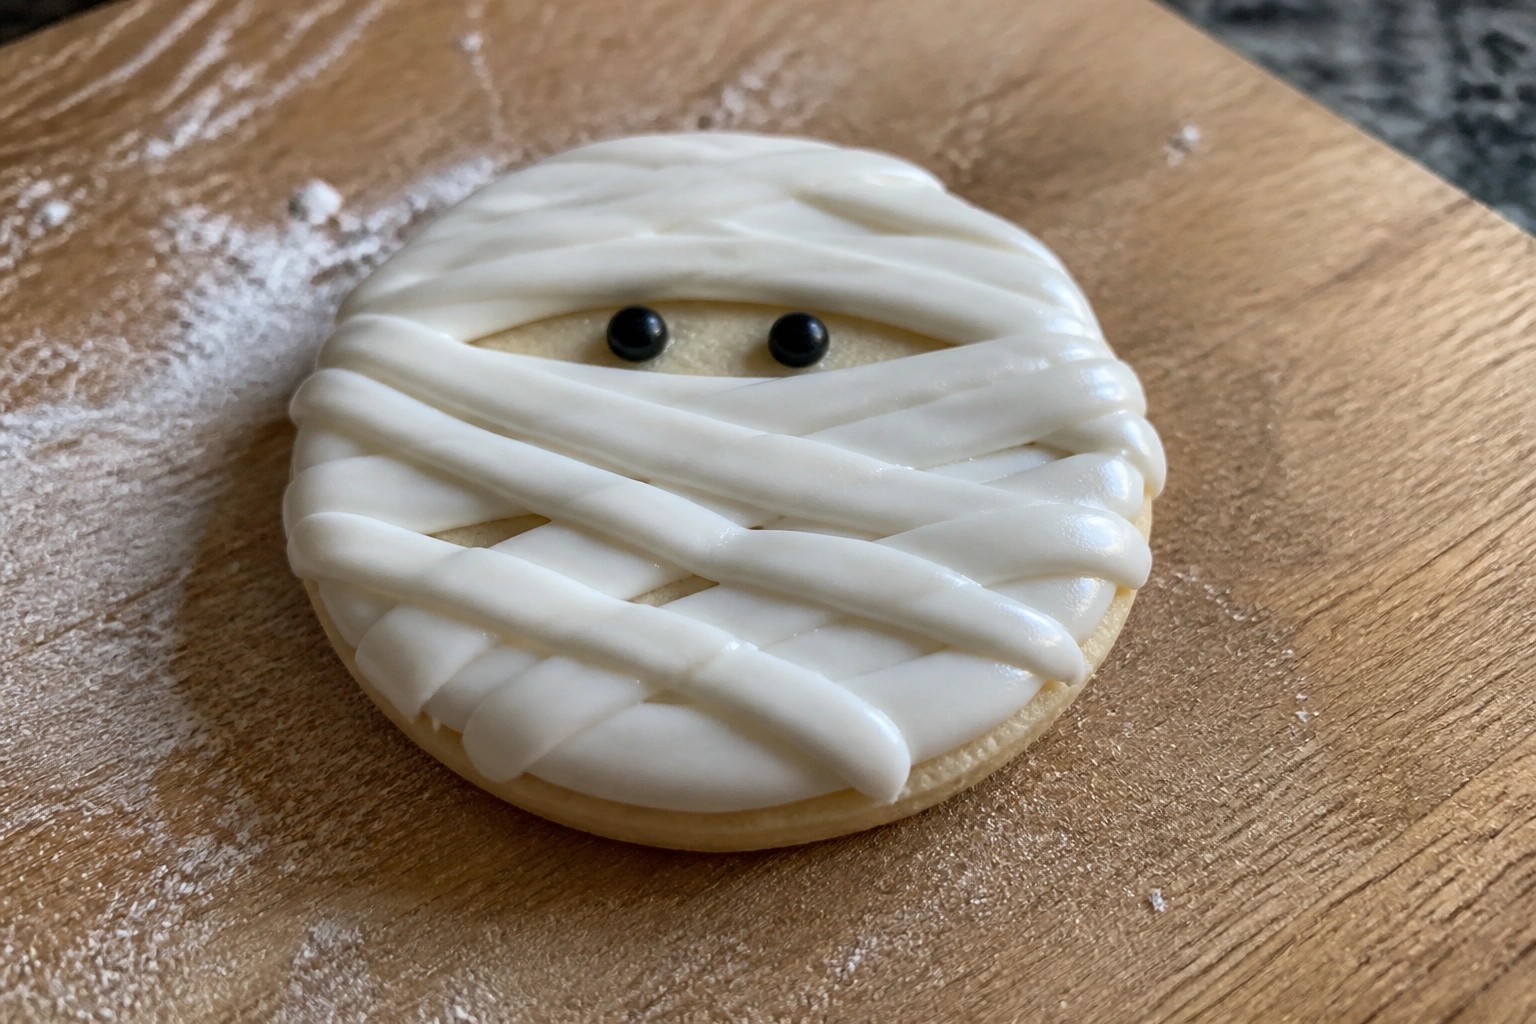
Halloween is a good time to bake cookies for parties or school events. These ideas focus on decorations that are doable with basic tools and ingredients. You will see options using sugar cookies or gingerbread as the base. Each recipe includes tips for making the designs without spending hours on details. Pick a few that match the supplies you already have at home.
Tips for Neat Halloween Cookie Decorations
These steps help your cookies hold their shape and keep the icing details clean.
Chill the Dough
Roll out the dough, cut the shapes, and place the cookies on the baking sheet. Chill them for 20 minutes before baking to reduce spreading.
Use Two Icing Consistencies
Make a thicker icing for outlines and a thinner one for flooding the centers. This keeps lines sharp and fills areas evenly.
Let Each Layer Dry
Pipe outlines first and let them set for at least 30 minutes. Add the flood icing only after the outlines feel firm to the touch.
Pipe Small Details Last
Add faces, lines, or sprinkles after the base colors dry completely. This prevents colors from bleeding together.
Pumpkin Spice Cut-Out Cookies with Royal Icing Jack-o’-Lantern Faces
These cut-out cookies bring warm pumpkin spice to Halloween baking. The dough holds its shape after baking, which makes it easy to add faces later. Royal icing gives the cookies a smooth surface for simple jack-o’-lantern details that set firmly.
They suit cookie exchanges or an afternoon spent decorating with kids. The finished cookies taste lightly spiced with a crisp edge and soft center. The icing adds sweetness without softening the base too much.

Serves 4 people.
Ingredients
- 1 3/4 cups all-purpose flour
- 1 teaspoon pumpkin pie spice
- 1/2 teaspoon baking powder
- 1/4 teaspoon salt
- 1/2 cup unsalted butter, softened
- 1/2 cup granulated sugar
- 1 large egg
- 1 teaspoon vanilla extract
- 1 1/2 cups powdered sugar
- 1 tablespoon meringue powder
- 3 to 4 tablespoons water
- Orange food coloring
- Black food coloring
Instructions
- Whisk the flour, pumpkin pie spice, baking powder, and salt in a medium bowl.
- Beat the butter and granulated sugar in a large bowl until light. Add the egg and vanilla, then mix until smooth.
- Stir the dry mixture into the wet mixture until a dough forms. Shape the dough into a disk, wrap it, and chill for 30 minutes.
- Heat the oven to 350 degrees. Roll the dough to 1/4 inch thick on a lightly floured surface. Cut into pumpkin or round shapes and place on lined baking sheets.
- Bake for 8 to 10 minutes until the edges turn lightly golden. Cool the cookies completely on the sheets.
- Mix the powdered sugar, meringue powder, and 3 tablespoons water until thick and glossy. Add more water if needed to reach piping consistency.
- Divide the icing and tint one portion orange and the other black. Pipe orange faces on each cookie, then add black features for the jack-o’-lantern look. Let the icing set for 1 hour.
Extra Tips
Chill the dough a full 30 minutes so the cut shapes stay sharp during baking. Pipe a thin outline first with slightly thicker icing, then fill in the centers for even coverage. Store finished cookies in a single layer between sheets of parchment so the faces do not smudge. Course: Dessert Cuisine: American Equipment: Mixing Bowls, Baking Sheets, Rolling Pin, Piping Bags
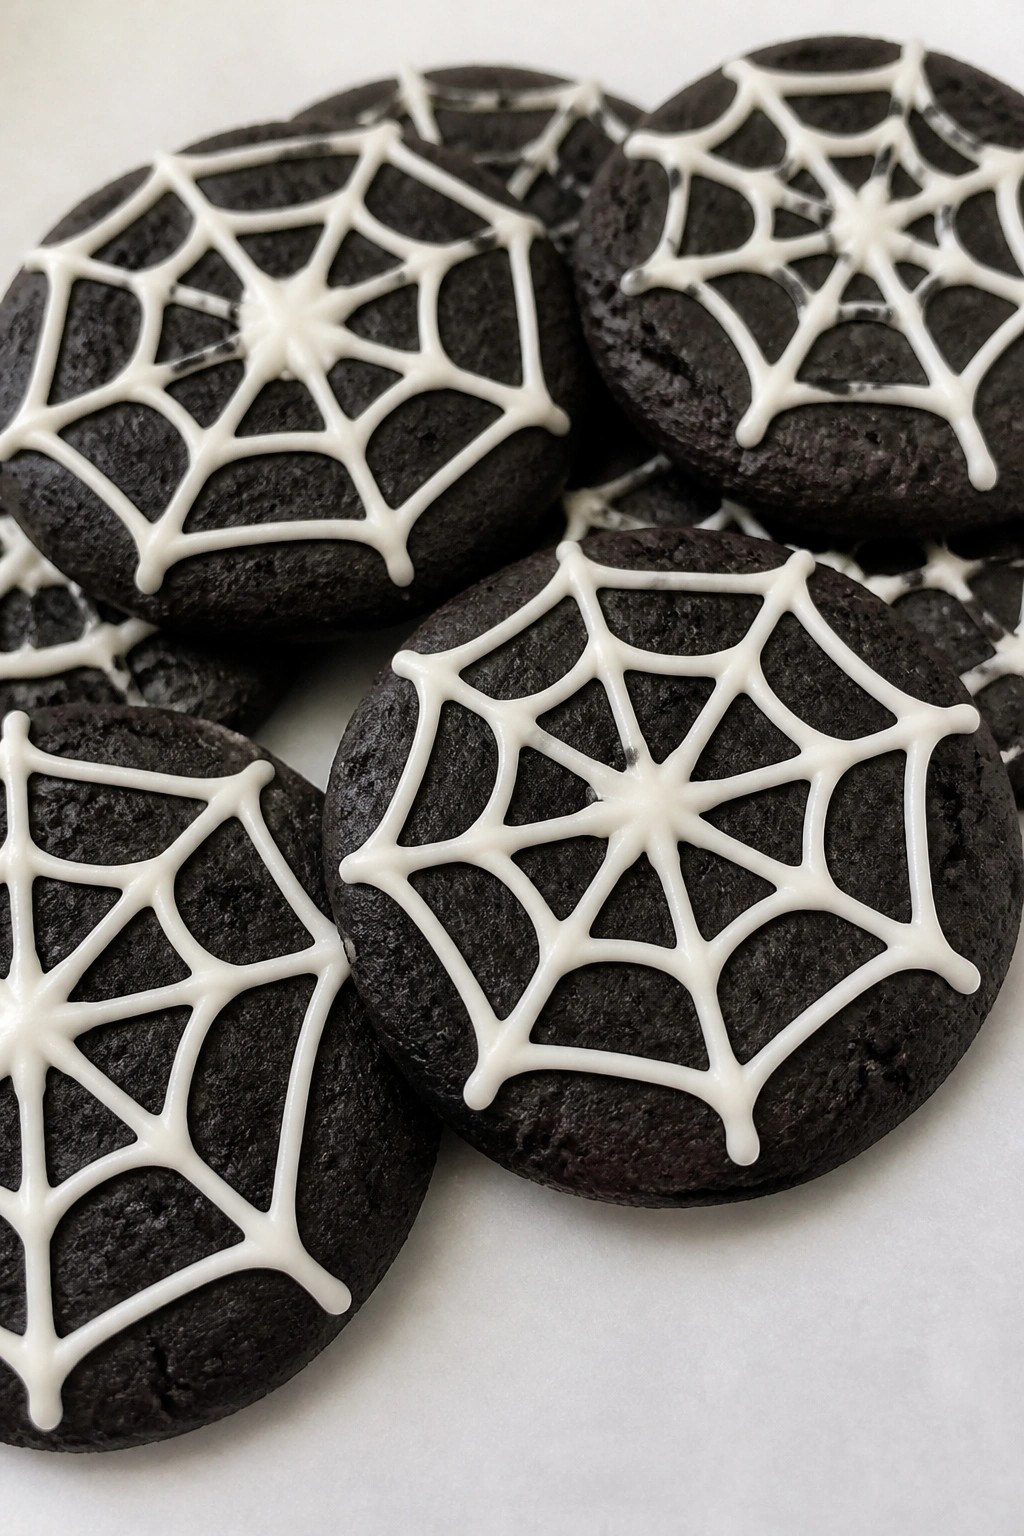
Black Cocoa Spiderweb Cookies with White Piping Details
These cookies use black cocoa to create a true dark base that shows off the white piping. The result is a crisp chocolate cookie with bold visual contrast that fits right into a Halloween spread. They taste like a grown-up version of a chocolate sugar cookie, with just enough sweetness to balance the cocoa.
They suit a party table or a small batch for gifting. The spiderweb design stays simple once you have the icing ready, and the cookies travel well without smudging.
Serves 4 people.
Ingredients
- 1 cup all-purpose flour
- 1/2 cup black cocoa powder
- 1/4 teaspoon salt
- 1/2 cup unsalted butter, softened
- 1/3 cup granulated sugar
- 1 large egg
- 1 teaspoon vanilla extract
- 1 cup powdered sugar
- 2 tablespoons milk
Instructions
- Whisk the flour, black cocoa powder, and salt in a bowl until evenly mixed.
- In a second bowl, beat the softened butter and granulated sugar until light and creamy.
- Add the egg and vanilla extract to the butter mixture and beat until smooth.
- Stir the dry ingredients into the wet ingredients until a dough forms.
- Shape the dough into a disk, wrap it, and chill for 30 minutes.
- Heat the oven to 350 degrees and line a baking sheet with parchment.
- Roll the dough to 1/4-inch thickness, cut into rounds, and place on the sheet.
- Bake for 10 to 12 minutes until the edges are set, then cool completely on a rack.
- Stir the powdered sugar and milk together until the icing is smooth and pipeable.
- Pipe concentric circles on each cooled cookie, then drag a toothpick from the center outward to form the webs.
Extra Tips
Chill the cookies fully before piping so the icing sets cleanly on the surface. If the icing feels too thick, add milk a drop at a time. Store finished cookies in a single layer in an airtight container to keep the white lines sharp. Course: Dessert Cuisine: American Equipment: Mixing Bowl, Baking Sheet, Piping Bag
Vanilla Ghost Meringue Cookies with Candy Eye Accents
These light cookies bring a simple spooky touch to any Halloween spread. They work well for parties or after-school treats because they need just a few ingredients and come together without much fuss. The texture stays crisp on the outside with a soft center, and the vanilla flavor stays mild and sweet.

Serves 4 people.
Ingredients
- 2 large egg whites
- 1/2 cup granulated sugar
- 1/4 teaspoon cream of tartar
- 1/2 teaspoon vanilla extract
- 24 candy eyes
Instructions
- Preheat the oven to 200 degrees F and line a baking sheet with parchment paper.
- Place the egg whites in a clean mixing bowl and add the cream of tartar. Beat with an electric mixer on medium speed until soft peaks form.
- Add the sugar one tablespoon at a time while beating on high speed. Continue until the mixture reaches stiff, glossy peaks.
- Mix in the vanilla extract on low speed until just combined.
- Spoon the meringue into a piping bag fitted with a round tip. Pipe ghost shapes onto the prepared baking sheet, leaving space between each one.
- Bake for 90 minutes, then turn off the oven and leave the cookies inside to cool completely for at least one hour.
- Once cooled, press two candy eyes onto each ghost.
Extra Tips
Pipe the ghosts with a wider base that tapers at the bottom so they stand upright after baking. Store the finished cookies in an airtight container at room temperature for up to three days to keep them crisp. If the meringue feels too soft to pipe, beat it a little longer until it holds its shape. Course: Dessert Cuisine: American Equipment: Electric Mixer, Mixing Bowl, Piping Bag, Baking Sheet
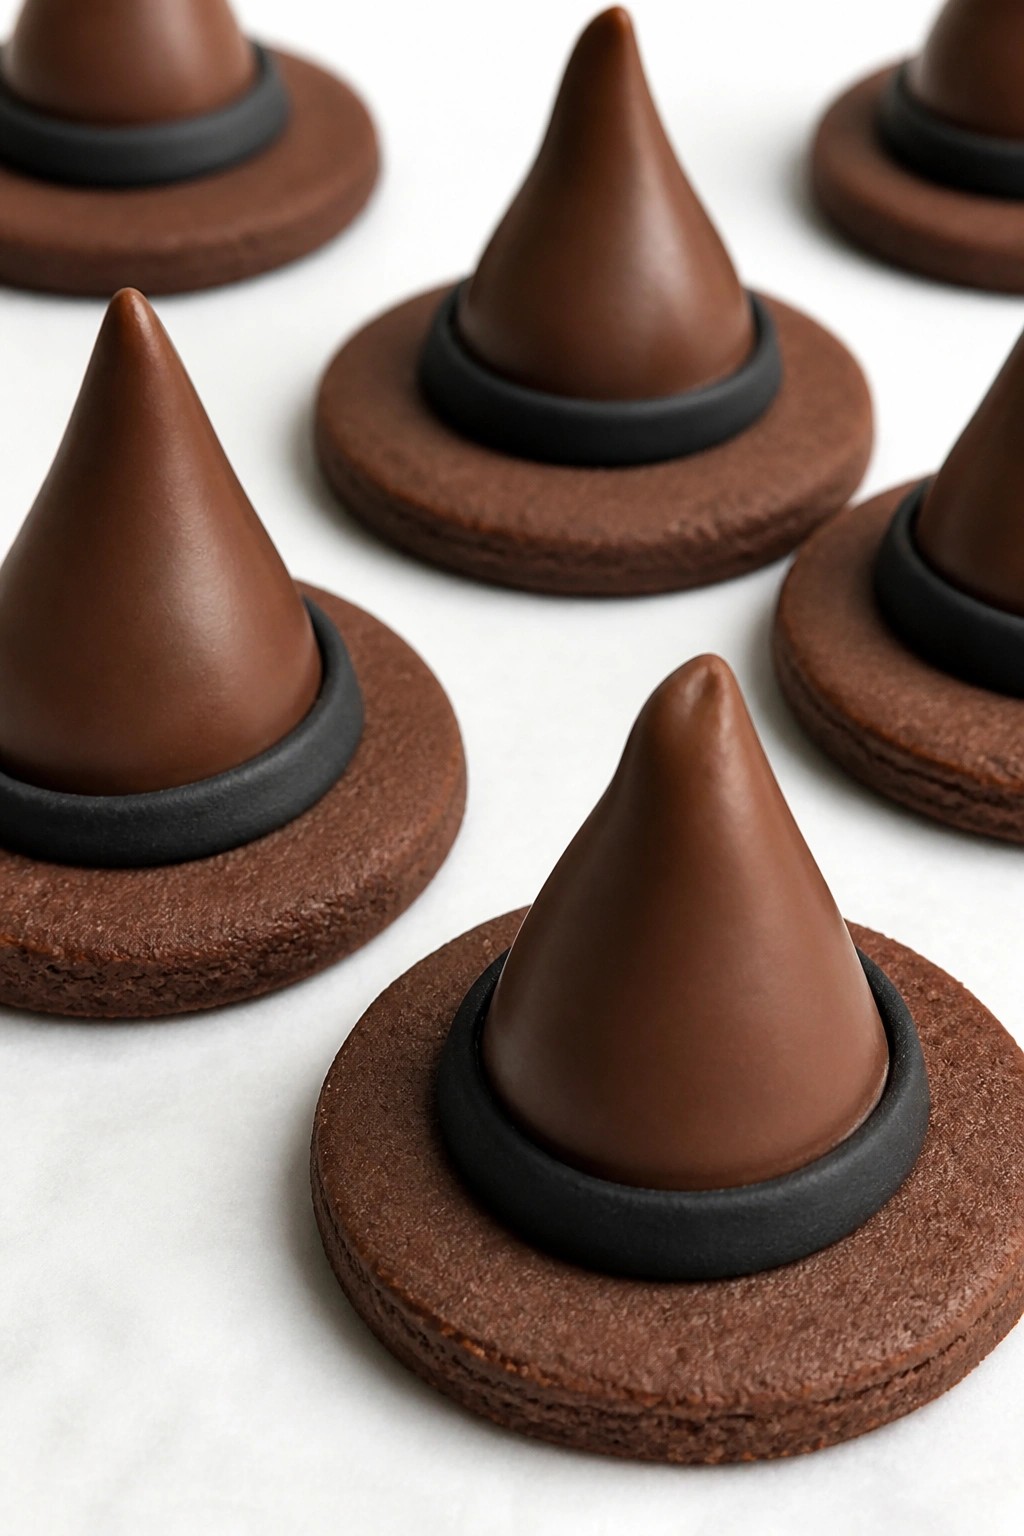
Chocolate Witch Hat Shortbread Cookies with Fondant Trim
These cookies combine crisp chocolate shortbread with a layer of smooth chocolate and a neat fondant band. They work well for Halloween gatherings or as a make-ahead treat for a party table. The shortbread stays buttery and firm while the fondant adds a soft, sweet contrast.
Serves 4 people.
Ingredients
- 1 cup all-purpose flour
- ½ cup unsalted butter, softened
- ¼ cup granulated sugar
- 2 tablespoons cocoa powder
- 1 teaspoon vanilla extract
- ¼ teaspoon salt
- 8 ounces chocolate candy melts
- 4 ounces black fondant
Instructions
- Heat the oven to 325°F and line a baking sheet with parchment paper.
- In a mixing bowl, beat the softened butter and sugar until light. Add the vanilla extract and mix again.
- Stir in the flour, cocoa powder, and salt until a soft dough forms.
- Roll the dough to ¼-inch thickness on a lightly floured surface. Cut into 3-inch circles and 2-inch triangles to form hat shapes. Place the shapes on the baking sheet.
- Bake for 12 to 14 minutes until the edges are firm. Cool completely on the sheet.
- Melt the chocolate candy melts according to package directions. Dip the base of each cookie into the chocolate and let the excess drip off. Set on parchment to harden.
- Roll the black fondant thin and cut narrow strips. Press one strip around the base of each hat to create the trim.
Extra Tips
Roll the fondant strips while the chocolate is still slightly tacky so they stick without extra icing. If the shortbread spreads during baking, trim the edges with a knife before dipping. Store finished cookies in a single layer in an airtight container at room temperature for up to three days. Course: Dessert Cuisine: American Equipment: Mixing Bowl, Baking Sheet, Rolling Pin, Parchment Paper
Cinnamon Skeleton Bone Cookies with Intricate Icing Patterns
These cinnamon skeleton bone cookies stand out on a Halloween spread with their simple bone shapes and fine icing lines that mimic skeleton details. They work well for parties, school events, or packaged gifts because the flavor stays balanced and the cookies hold their shape after baking. The dough bakes to a lightly crisp edge with a soft center, while the cinnamon adds warmth that contrasts the sweet, smooth icing.

Serves 4 people.
Ingredients
- 2 cups all-purpose flour
- 1 1/2 teaspoons ground cinnamon
- 1/2 teaspoon baking powder
- 1/4 teaspoon salt
- 1/2 cup unsalted butter, softened
- 3/4 cup granulated sugar
- 1 large egg
- 1 teaspoon vanilla extract
- 1 1/2 cups powdered sugar
- 3 tablespoons milk
- Black food coloring
Instructions
- Preheat the oven to 350 degrees and line a baking sheet with parchment paper.
- Stir together the flour, cinnamon, baking powder, and salt in a medium bowl.
- In a separate bowl, beat the butter and granulated sugar until light, then mix in the egg and vanilla extract.
- Add the dry ingredients to the butter mixture and stir until a dough forms.
- Roll the dough to 1/4-inch thickness on a lightly floured surface, then cut into bone shapes with a cookie cutter or knife.
- Place the shapes on the prepared baking sheet and bake for 10 to 12 minutes until the edges turn lightly golden.
- Cool the cookies completely on a wire rack.
- Whisk the powdered sugar, milk, and vanilla extract in a small bowl until smooth, then stir in black food coloring a drop at a time until the icing reaches a pipeable consistency.
- Spoon the icing into a piping bag fitted with a small tip and draw fine lines and patterns across each cookie to create skeleton details.
- Let the icing set at room temperature before moving the cookies.
Extra Tips
Roll the dough between two sheets of parchment to keep it from sticking and to maintain even thickness for uniform bone shapes. If the icing feels too thick for fine lines, add milk one teaspoon at a time. Store finished cookies in a single layer in an airtight container so the icing stays intact. Course: Dessert Cuisine: American Equipment: Mixing bowl, baking sheet, rolling pin, piping bag
Matcha Monster Face Cookies with Candy Feature Toppings
These matcha cookies bring a gentle earthy flavor and bright green color that works well for Halloween treats. The soft texture pairs nicely with crunchy and chewy candy decorations, making them a good choice for parties or family baking sessions.
The recipe keeps the steps simple so you can focus on creating fun monster faces with the candy toppings.

Serves 4 people.
Ingredients
- 1 cup all-purpose flour
- 1/2 teaspoon baking powder
- 1 tablespoon matcha powder
- 1/4 cup unsalted butter, softened
- 1/3 cup granulated sugar
- 1 large egg
- 1/2 teaspoon vanilla extract
- 12 candy eyes
- 8 gummy worms
- 1/4 cup mini chocolate chips
Instructions
- Preheat the oven to 350 degrees F and line a baking sheet with parchment paper.
- Whisk the flour, baking powder, and matcha powder together in a medium bowl.
- In a separate bowl, beat the butter and sugar until light. Add the egg and vanilla extract and mix until combined.
- Stir the dry ingredients into the wet mixture until a soft dough forms.
- Scoop the dough into eight portions and place them on the baking sheet. Flatten each slightly with your fingers.
- Bake for 10 to 12 minutes until the edges are set. Cool the cookies on the sheet for 5 minutes, then move them to a wire rack.
- Once cool, press candy eyes and mini chocolate chips into the tops to form faces. Cut gummy worms into small pieces and add them as mouths or horns.
Extra Tips
Use a small dab of melted chocolate to help the candy eyes stay in place if the cookies are fully cooled. Store leftovers in an airtight container at room temperature for up to three days. Reduce the matcha powder to one teaspoon if you prefer a milder green tea taste. Course: Dessert Cuisine: American Equipment: Mixing bowls, Baking sheet, Parchment paper, Wire rack
Almond Black Cat Cookies with Fondant Whiskers and Eyes
These almond black cat cookies add a nutty twist to Halloween baking. They suit party trays, school events, or an afternoon project when you want something simple yet themed. The finished cookies offer a crisp edge and soft center with clear almond flavor.
The black dough creates a striking base for the fondant details. White and black fondant pieces form the eyes and whiskers, giving each cookie a finished cat face without much fuss.

Serves 4 people.
Ingredients
- 1 cup all-purpose flour
- 1/2 cup almond flour
- 1/2 cup unsalted butter, softened
- 1/3 cup granulated sugar
- 1 egg yolk
- 1 teaspoon almond extract
- 1/4 teaspoon salt
- 1/2 teaspoon black gel food coloring
- 4 ounces black fondant
- 2 ounces white fondant
Instructions
- Heat the oven to 350 degrees and line a baking sheet with parchment paper.
- Stir the all-purpose flour, almond flour, and salt together in a bowl.
- Cream the butter and sugar in a second bowl until light. Add the egg yolk and almond extract and mix until smooth.
- Add the dry ingredients to the wet mixture and stir until a dough forms. Mix in the black gel food coloring until the color is even.
- Roll the dough to 1/4-inch thickness on a lightly floured surface. Cut out cat shapes with a cookie cutter and place them on the baking sheet.
- Bake for 10 to 12 minutes until the edges are set. Let the cookies cool completely on a wire rack.
- Roll the black fondant thin and cut thin strips for whiskers. Roll the white fondant thin and cut small circles for eyes.
- Press the fondant whiskers and eyes onto the cooled cookies, arranging them to form cat faces.
Extra Tips
Roll the fondant on a surface lightly dusted with powdered sugar to keep it from sticking. If the fondant pieces slide, press them gently into the cookie surface while the cookies are still slightly warm. Store the finished cookies in an airtight container at room temperature for up to three days. Course: Dessert Cuisine: American Equipment: Mixing Bowl, Baking Sheet, Rolling Pin, Cookie Cutter, Oven
Gingerbread Haunted House Cookies with Icing Window Details
These gingerbread cookies bring a spooky touch to Halloween with their house shapes and detailed icing windows. They work well for cookie swaps, school parties, or an afternoon baking session with kids. The cookies have a warm spiced flavor and a crisp edge that holds up well to decorating.
The dough comes together quickly and rolls out smoothly for clean cuts. Once baked, the cookies get a layer of white icing piped into window frames that stand out against the dark gingerbread.

Serves 4 people.
Ingredients
- 2 1/2 cups all-purpose flour
- 1 tablespoon ground ginger
- 1 teaspoon ground cinnamon
- 1/2 teaspoon baking soda
- 1/4 teaspoon salt
- 1/2 cup unsalted butter, softened
- 1/2 cup granulated sugar
- 1/4 cup molasses
- 1 large egg
- 1 teaspoon vanilla extract
- 2 cups powdered sugar
- 3 tablespoons milk
- Black food coloring
Instructions
- Preheat the oven to 350 degrees and line two baking sheets with parchment paper.
- In a medium bowl, whisk together the flour, ginger, cinnamon, baking soda, and salt.
- In a large bowl, beat the butter and granulated sugar until light. Add the molasses, egg, and vanilla extract and mix until smooth.
- Gradually stir the dry ingredients into the wet mixture until a dough forms. Divide the dough in half and roll each portion to 1/4-inch thickness on a lightly floured surface.
- Cut the dough into house shapes using a cookie cutter. Place the shapes on the prepared baking sheets.
- Bake for 8 to 10 minutes until the edges are firm. Let the cookies cool completely on the baking sheets.
- In a small bowl, stir the powdered sugar and milk together until smooth. Divide the icing and tint half of it black with food coloring.
- Spoon the white icing into a piping bag and pipe window outlines on each cookie. Use the black icing to fill in the window panes and add door details. Let the icing set before serving.
Extra Tips
Pipe the white icing first so it creates clean frames before adding the black details inside the windows. If the icing feels too thick, add a few drops of milk at a time until it flows easily from the piping tip. Store the finished cookies in an airtight container at room temperature for up to five days. Course: Dessert Cuisine: American Equipment: Mixing bowls, Baking sheets, Piping bags, Cookie cutters
Brown Butter Graveyard Cookies with Crumbled Cookie Soil
These cookies bring a nutty brown butter base to a Halloween display. The rich flavor pairs with a sandy texture from the crumbled cookie topping, creating a graveyard scene that feels festive without extra fuss.
They work well for a party spread or a quiet evening bake when you want something simple yet themed. The contrast between the crisp cookie edges and the soft, crumbly soil gives each bite a nice balance.

Serves 4 people.
Ingredients
- 1/2 cup unsalted butter
- 1 1/2 cups all-purpose flour
- 1/2 cup packed brown sugar
- 1/4 cup granulated sugar
- 1 large egg
- 2 teaspoons vanilla extract
- 1/2 teaspoon baking soda
- 1/4 teaspoon salt
- 8 chocolate sandwich cookies, crushed into crumbs
- 1/4 cup chocolate chips, melted
Instructions
- Melt the butter in a skillet over medium heat and cook it until it turns golden brown and smells nutty. Pour it into a mixing bowl and let it cool slightly.
- Stir the brown sugar and granulated sugar into the browned butter until smooth. Add the egg and vanilla extract and mix well.
- In a separate bowl, whisk together the flour, baking soda, and salt. Add this dry mix to the wet ingredients and stir until a dough forms.
- Divide the dough and shape most pieces into round cookies. Form a few into small rectangles to act as gravestones. Place them on a lined baking sheet.
- Bake at 350 degrees F for 10 to 12 minutes until the edges turn golden. Let the cookies cool completely on the sheet.
- Use the melted chocolate chips to pipe simple "RIP" letters on the rectangular cookies. Scatter the crushed chocolate sandwich cookies around the baked rounds to form the soil layer.
Extra Tips
Crush the chocolate sandwich cookies just before serving so the crumbs stay dry and textured against the cookies. If the melted chocolate sets too quickly, warm it gently again before writing on the gravestones. Store leftovers in an airtight container at room temperature for up to three days to keep the soil layer from turning soggy. Course: Dessert Cuisine: American Equipment: Skillet, Mixing bowl, Baking sheet
Orange Candy Corn Swirl Sugar Cookies with Layered Icing
These cookies bring a fun candy corn look to any Halloween spread. The swirl dough creates a playful pattern while the layered icing adds bright stripes that stand out on a cookie tray. They work well for parties or as a weekend baking project with kids.
The sugar cookie base stays soft in the center with slightly crisp edges. Orange extract gives a light citrus note that pairs nicely with the sweet icing layers.

Serves 4 people.
Ingredients
- 1 cup all-purpose flour
- 1/2 cup unsalted butter, softened
- 1/4 cup granulated sugar
- 1 egg yolk
- 1 teaspoon vanilla extract
- 1/2 teaspoon baking powder
- 1/4 teaspoon salt
- 1 teaspoon orange extract
- Orange food coloring
- Yellow food coloring
- 1 cup powdered sugar
- 2 tablespoons milk
Instructions
- Preheat the oven to 350 degrees and line a baking sheet with parchment paper.
- Cream the butter and granulated sugar in a bowl until light. Add the egg yolk, vanilla extract, and orange extract and mix until combined.
- Stir in the flour, baking powder, and salt until a dough forms. Divide the dough into three equal parts. Leave one part plain, tint the second part orange, and tint the third part yellow.
- Press small pieces of each colored dough together and gently roll into balls to create a swirl effect. Place the balls on the baking sheet and flatten slightly.
- Bake for 10 to 12 minutes until the edges are set. Cool the cookies completely on a wire rack.
- Mix the powdered sugar and milk in a bowl until smooth. Divide the icing into three small bowls and tint one orange and one yellow, leaving the third white.
- Pipe or spread thin layers of the three icings across each cookie in stripes to mimic candy corn colors. Let the icing set before serving.
Extra Tips
Chill the dough for 15 minutes before shaping if it feels too soft to hold the swirl. Use gel food coloring for brighter stripes without thinning the icing. Store finished cookies in a single layer between sheets of parchment so the icing stays intact. Course: Dessert Cuisine: American Equipment: Mixing bowls, Baking sheet, Piping bags
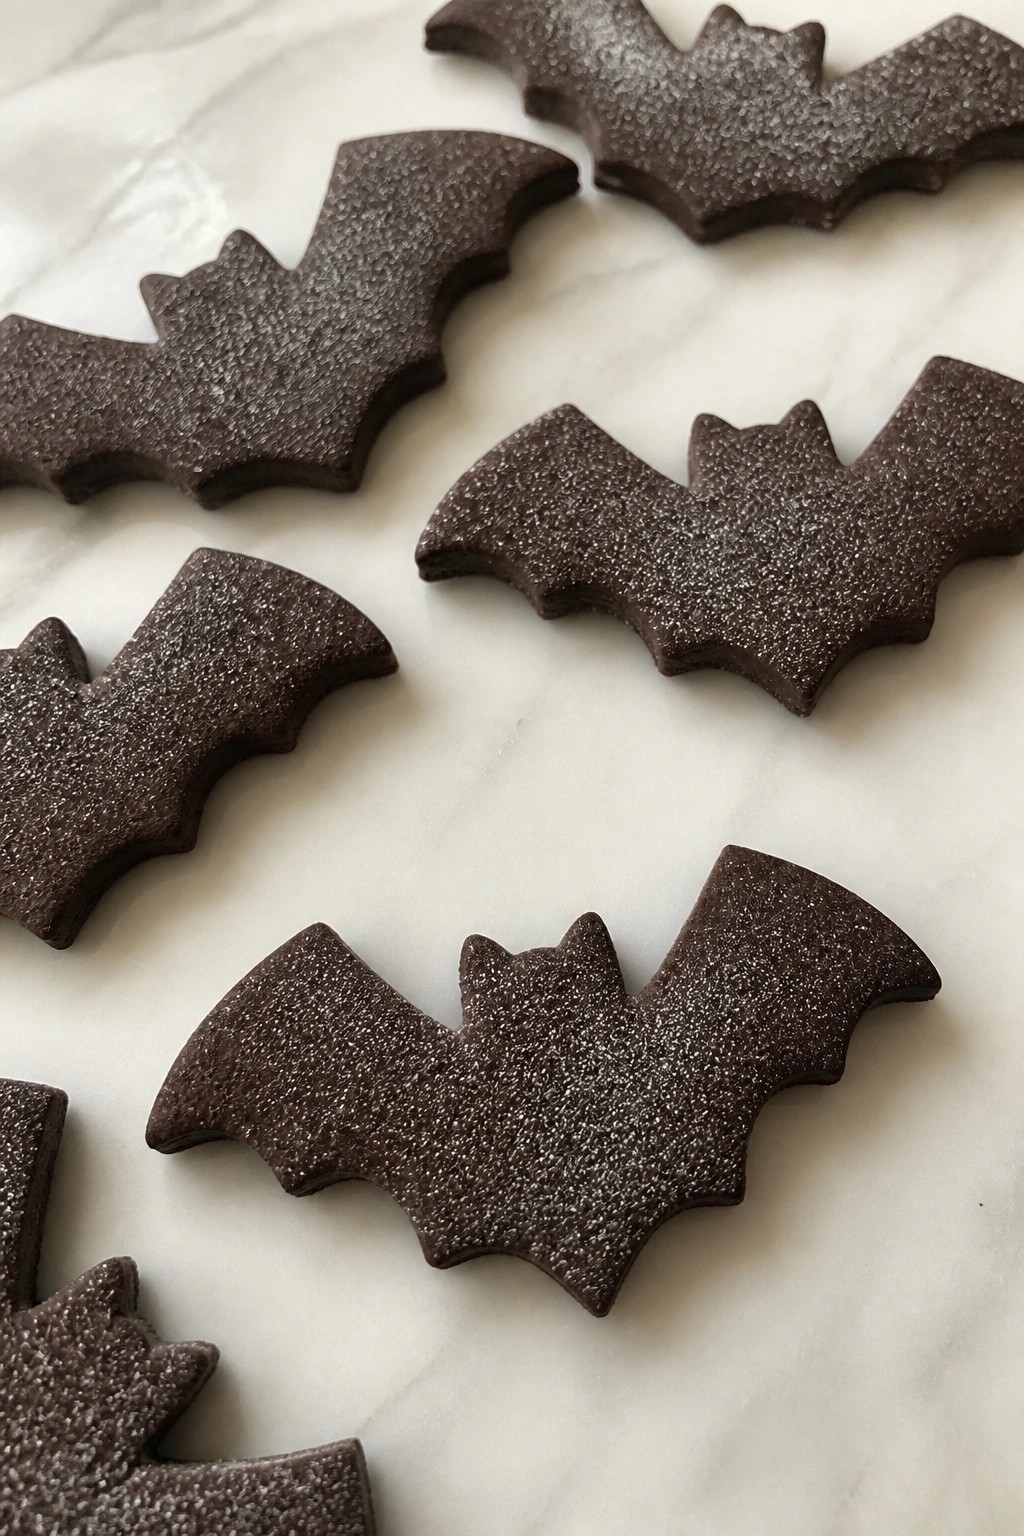
Espresso Bat Wing Cut-Out Cookies with Silver Dust Accents
These espresso bat wing cookies add a bold coffee note to Halloween treats. The dark dough holds its shape well during baking, creating crisp wings that look striking against a platter of other sweets.
The cookies offer a balanced mix of bitter espresso and sweet cocoa with a tender yet firm texture. Silver dust gives them a subtle shimmer without overpowering the flavor.
Serves 4 people.
Ingredients
- 1 1/4 cups all-purpose flour
- 1/2 cup unsalted butter, softened
- 1/2 cup granulated sugar
- 2 tablespoons instant espresso powder
- 1 large egg
- 1 teaspoon vanilla extract
- 1/4 cup cocoa powder
- 1/2 teaspoon baking powder
- 1/4 teaspoon salt
- Edible silver dust, for decorating
Instructions
- Cream the softened butter and sugar together in a mixing bowl until light and fluffy.
- Beat in the egg, vanilla extract, and instant espresso powder until fully combined.
- In a separate bowl, whisk together the flour, cocoa powder, baking powder, and salt.
- Gradually mix the dry ingredients into the wet mixture to form a smooth dough. Wrap and chill for 30 minutes.
- Preheat the oven to 350 degrees F. Roll the dough to 1/4 inch thickness on a lightly floured surface.
- Cut out bat wing shapes with cookie cutters and place them on a baking sheet lined with parchment.
- Bake for 10 to 12 minutes until the edges are set. Cool completely, then brush on edible silver dust for the accents.
Extra Tips
Chill the dough fully to keep the bat wing edges sharp during cutting. Apply the silver dust with a dry brush after baking for even coverage that will not smear. Store cooled cookies in an airtight container at room temperature to maintain their crisp texture for several days. Course: Dessert Cuisine: American Equipment: Mixing Bowl, Baking Sheet, Rolling Pin, Cookie Cutters
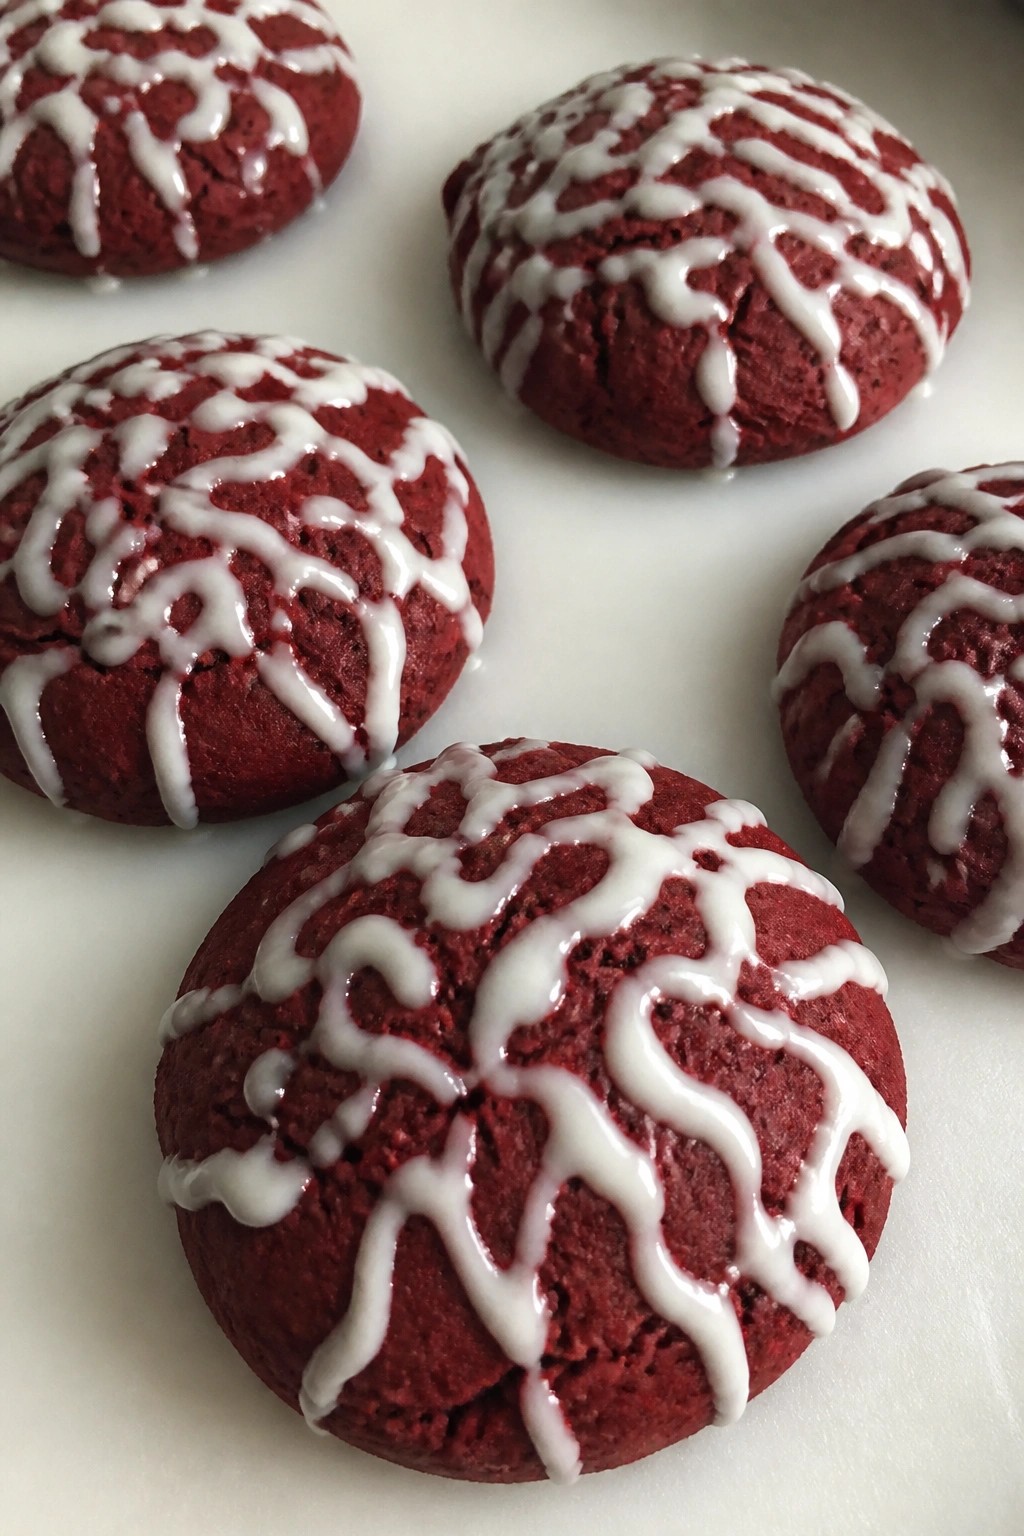
Red Velvet Zombie Brain Cookies with Drizzled Glaze Details
These cookies turn classic red velvet into a Halloween treat with their soft texture and detailed glaze patterns. They suit party platters or a weekend baking session when you want something festive but not overly complicated. The mild cocoa flavor and slight tang come through in each bite, while the glaze adds a sweet finish.
Serves 4 people.
Ingredients
- 1 cup all-purpose flour
- 2 tablespoons unsweetened cocoa powder
- 1/2 teaspoon baking soda
- 1/4 teaspoon salt
- 1/2 cup unsalted butter, softened
- 3/4 cup granulated sugar
- 1 large egg
- 1 tablespoon red food coloring
- 1 cup powdered sugar
- 2 tablespoons milk
Instructions
- Preheat the oven to 350 degrees and line a baking sheet with parchment paper.
- Whisk together the flour, cocoa powder, baking soda, and salt in a medium bowl.
- In a separate bowl, beat the softened butter and granulated sugar until light and fluffy.
- Add the egg and red food coloring to the butter mixture and mix until fully combined.
- Stir the dry ingredients into the wet ingredients until a soft dough forms.
- Scoop the dough into 8 small rounds on the baking sheet and flatten each slightly with your fingers.
- Bake for 10 to 12 minutes until the edges are set. Let the cookies cool on the sheet for 5 minutes before moving them to a wire rack.
- Stir the powdered sugar and milk together in a small bowl until smooth.
- Drizzle the glaze over the cooled cookies in thin, winding lines to create brain-like details.
Extra Tips
Use a zip-top bag with one corner snipped off to control the glaze drizzle and keep the lines fine. The cookies stay softest when baked just until the centers lose their shine. Store leftovers in an airtight container at room temperature for up to three days. Course: Dessert Cuisine: American Equipment: Mixing Bowl, Baking Sheet, Whisk