

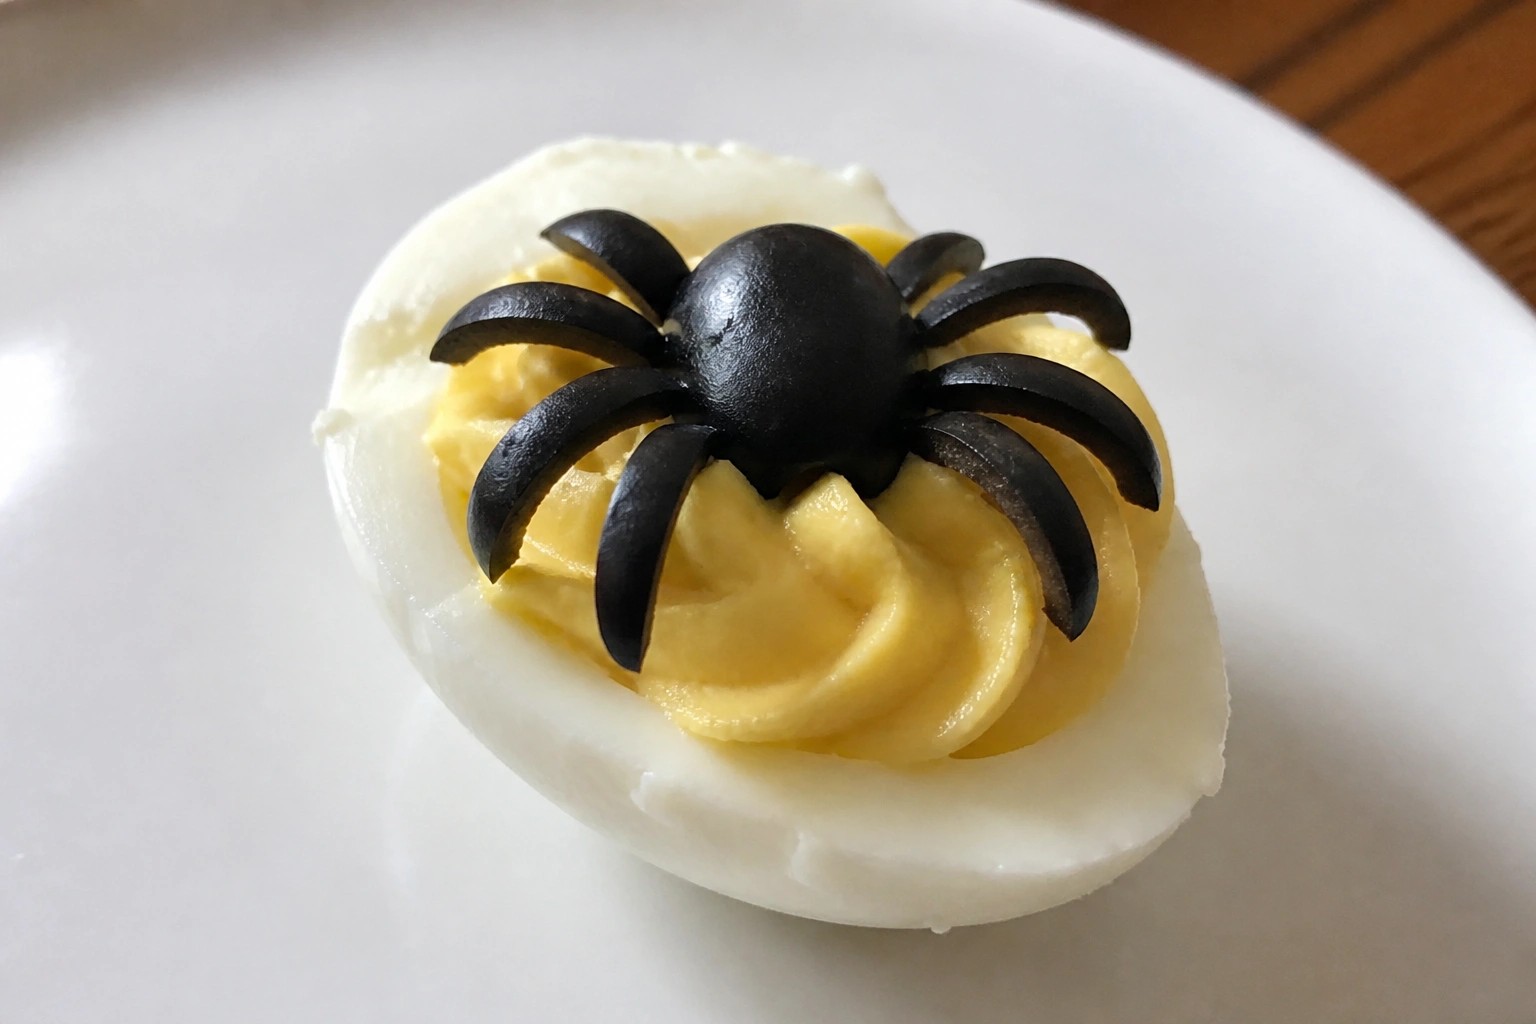
Planning appetizers for a Halloween party does not have to be complicated. These recipes are straightforward and use ingredients you probably already have. They suit different themes so you can pick what matches your setup. Each one is quick to put together. You will find 14 ideas below that are perfect for any gathering.
Helpful Tips Before You Start
These tips will help you create appetizers that work for any Halloween party without extra stress.
Recommended Products

Light Up Halloween Gift Set: This pumpkin glowing Halloween jumping spring comes in 6 different styles, with 4 pieces of each style, totaling 24 pieces. Each one is equipped with LED lights, making it very suitable as a gift for birthday parties or prizes. This would be an interesting Halloween gift for someone you love.

Breaded cream cheese stuffed jalapenos
Choose recipes with common ingredients
Stick to items you can find at one grocery store. This keeps shopping quick and lets you swap in what you already have.
Prep components the day before
Chop vegetables, mix dips, or bake bases ahead of time. Assemble everything right before guests arrive for the best texture.
Keep portions small and handheld
Bite sized snacks are easier for people to eat while mingling. They also stretch further when you have multiple appetizers on the table.
Match decorations to your theme last
Add simple touches like colored toothpicks or shaped cheese slices after the food is ready. This lets the same recipe fit a spooky or fun party style.
Set up a make your own station
Offer plain bases with a few topping choices on the side. Guests can customize and it reduces last minute work for you.
Mummy Wrapped Pigs in a Blanket
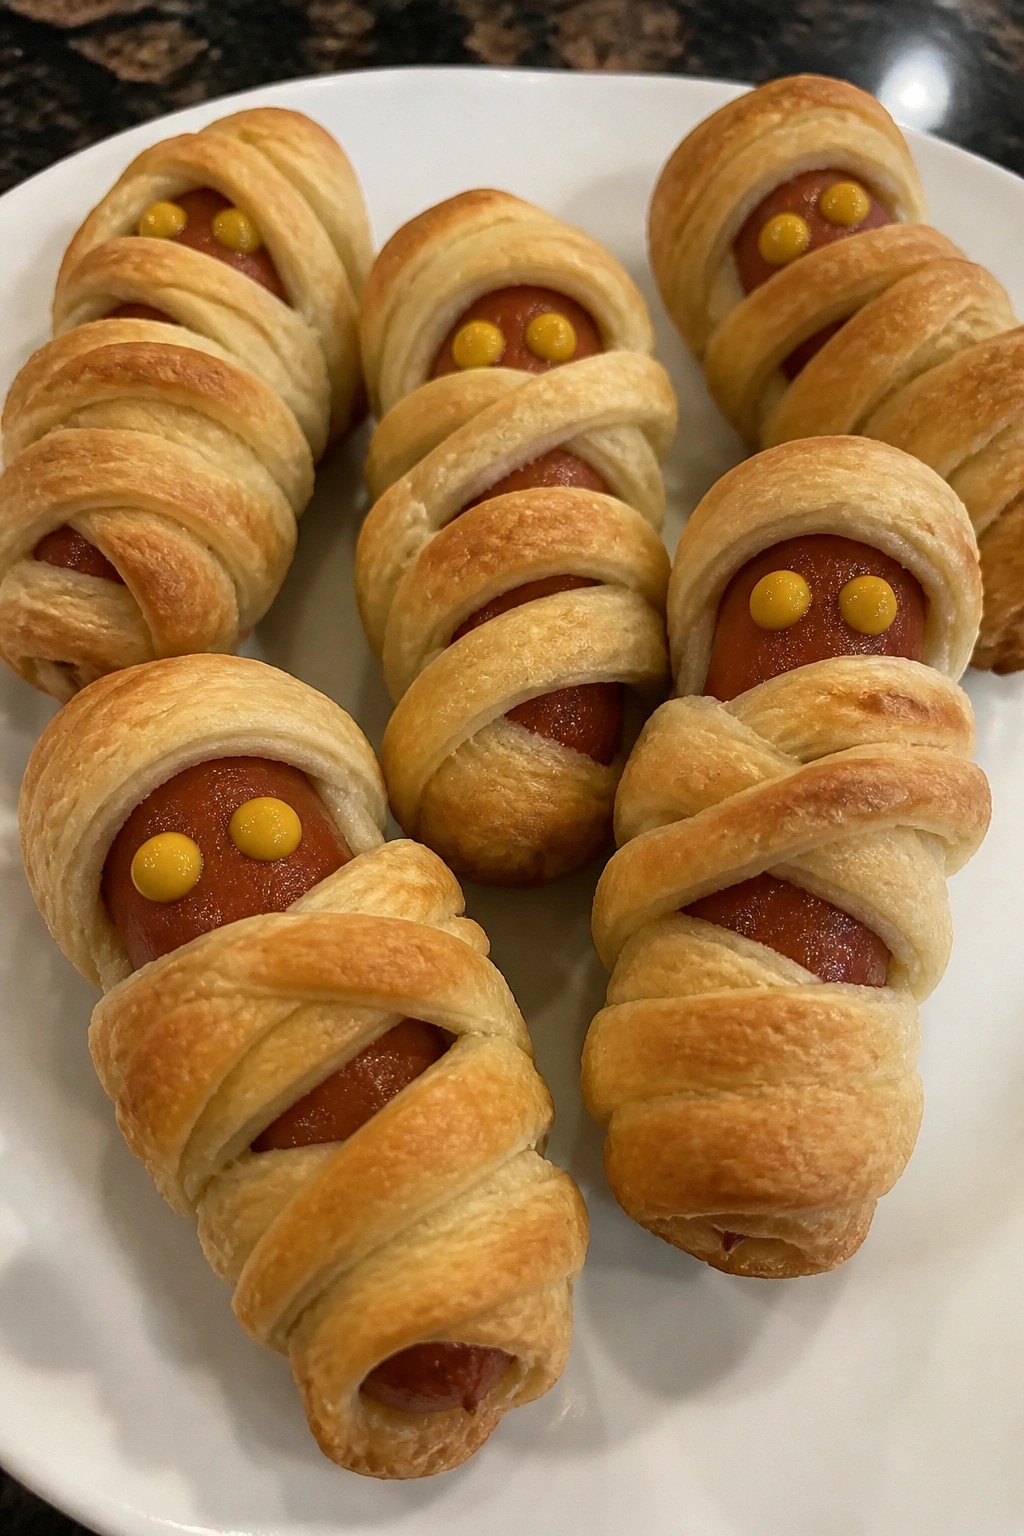
These mummy wrapped pigs in a blanket bring a fun Halloween twist to a classic party snack. The flaky dough wraps around savory sausages to create a playful bandage look that fits right into any themed spread. They bake up crisp on the outside with juicy centers, making them easy to grab and eat while mingling.
This version works well for casual Halloween gatherings or kids’ parties where you want something simple yet festive. The mild flavors appeal to most guests without overpowering other appetizers on the table.
Serves 4 people.
Ingredients
- 8 cocktail sausages
- 1 can (8-count) crescent roll dough
- 2 tablespoons yellow mustard
Instructions
- Preheat the oven to 375 degrees and line a baking sheet with parchment paper.
- Unroll the crescent roll dough on a cutting board and cut it into thin strips about half an inch wide.
- Wrap each strip around a cocktail sausage in a crisscross pattern, leaving small gaps near one end for the mummy face.
- Place the wrapped sausages on the prepared baking sheet and bake for 12 to 15 minutes until the dough turns golden brown.
- Remove from the oven and let them cool for two minutes. Use a small spoon or toothpick to add two dots of yellow mustard in the gaps as eyes.
Extra Tips
Make the dough strips slightly uneven so the mummies look more wrapped and less uniform. If you want to prepare ahead, assemble them on the baking sheet, cover, and refrigerate up to four hours before baking. Leftovers reheat well in a 350-degree oven for five minutes to restore crispness. Course: Appetizer Cuisine: American Equipment: Baking Sheet, Knife
Spiderweb Seven-Layer Dip
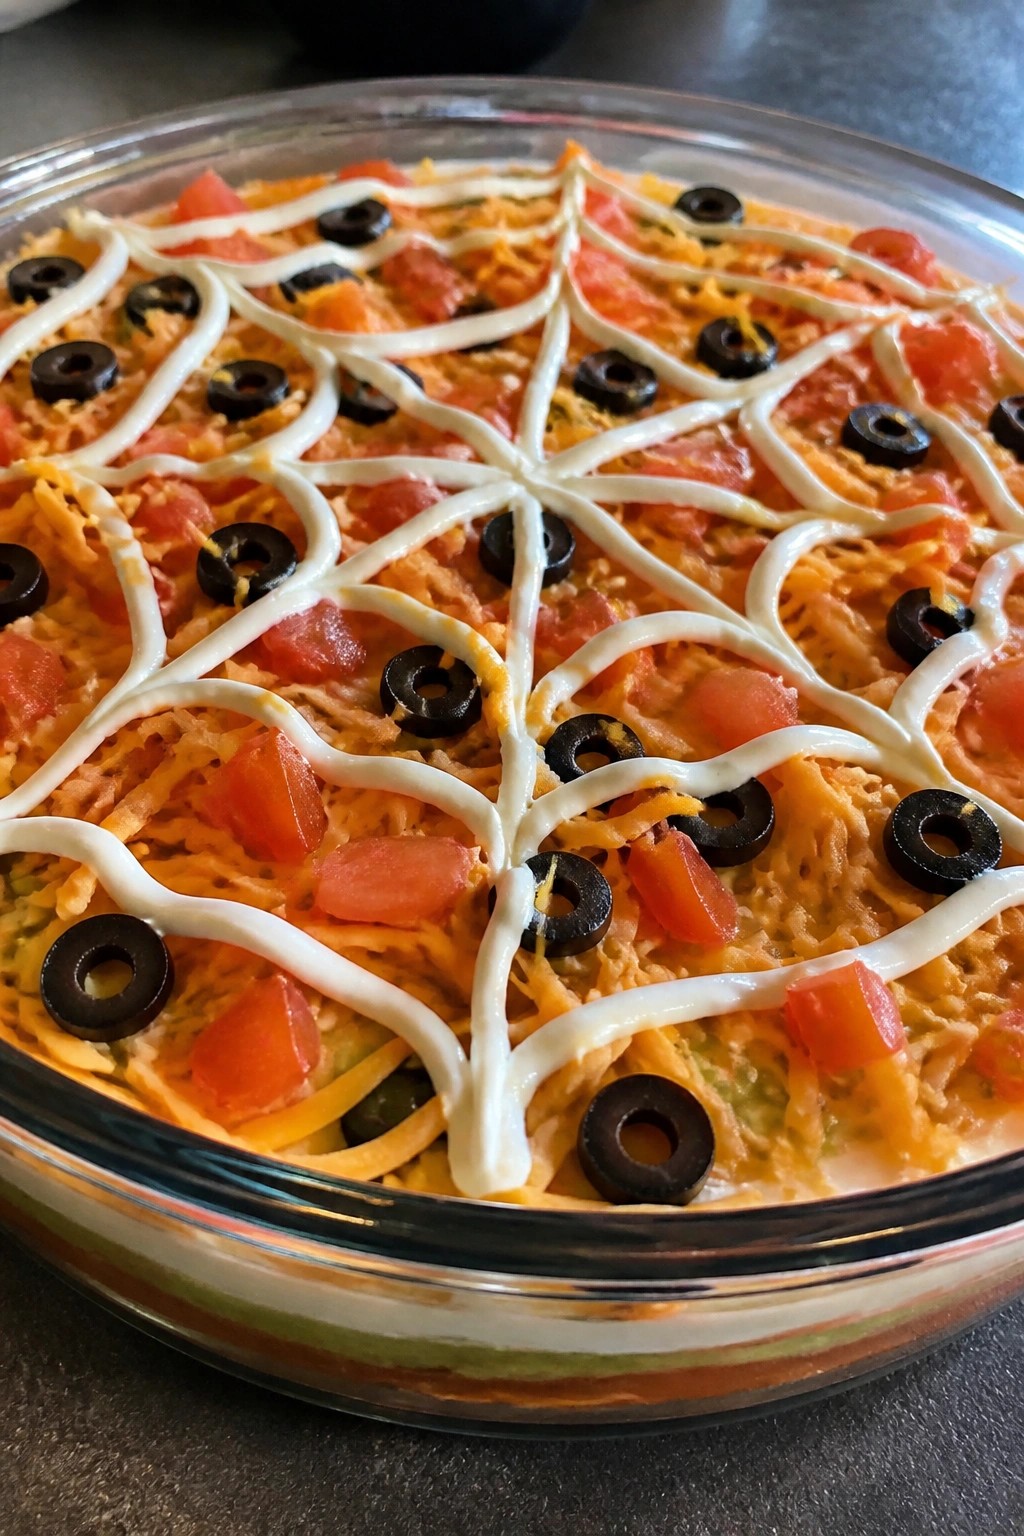
This spiderweb seven-layer dip turns a standard party dip into something festive for Halloween. The layers build familiar flavors, while the top gets a simple web design that draws attention on the table. It fits well at small gatherings where guests want something they can scoop and share.
The dip combines creamy beans and guacamole with cool sour cream and bright salsa. Cheese adds sharpness, while tomatoes and olives bring freshness and a bit of salt. The web sits right on top so it stays visible until the first scoop.
Serves 4 people.
Recommended Products

Made with garden-grown potatoes and vegetables

10 - 0.5 oz. snack-size bags of ready-to-eat veggie chips with sea salt

Ingredients
- 1 (16-ounce) can refried beans
- 2 ripe avocados, mashed
- 1 cup sour cream, divided
- 1/2 cup salsa
- 1 cup shredded cheddar cheese
- 1/2 cup diced tomatoes
- 1/4 cup sliced black olives
Instructions
- Spread the refried beans evenly across the bottom of an 8-inch square dish.
- Layer the mashed avocados directly on top of the beans and smooth the surface.
- Spread 3/4 cup of the sour cream over the avocado layer.
- Spoon the salsa over the sour cream and spread it gently to cover.
- Sprinkle the shredded cheddar cheese evenly across the salsa.
- Scatter the diced tomatoes over the cheese.
- Place the sliced black olives on top as the final layer.
- Spoon the remaining 1/4 cup sour cream into a small plastic bag, snip off one corner, and pipe concentric circles on the surface. Drag a knife from the center outward at intervals to form the web design.
Extra Tips
Pipe the sour cream web just before serving so the lines stay sharp. If you want a thicker web, chill the dip for 30 minutes after assembly and add the design right before guests arrive. Leftovers keep in the fridge for one day, though the avocado layer may darken slightly. Course: Appetizer Cuisine: American Equipment: Mixing Bowl, 8-inch Square Dish, Plastic Bag
Jack-O’-Lantern Cheese Quesadillas
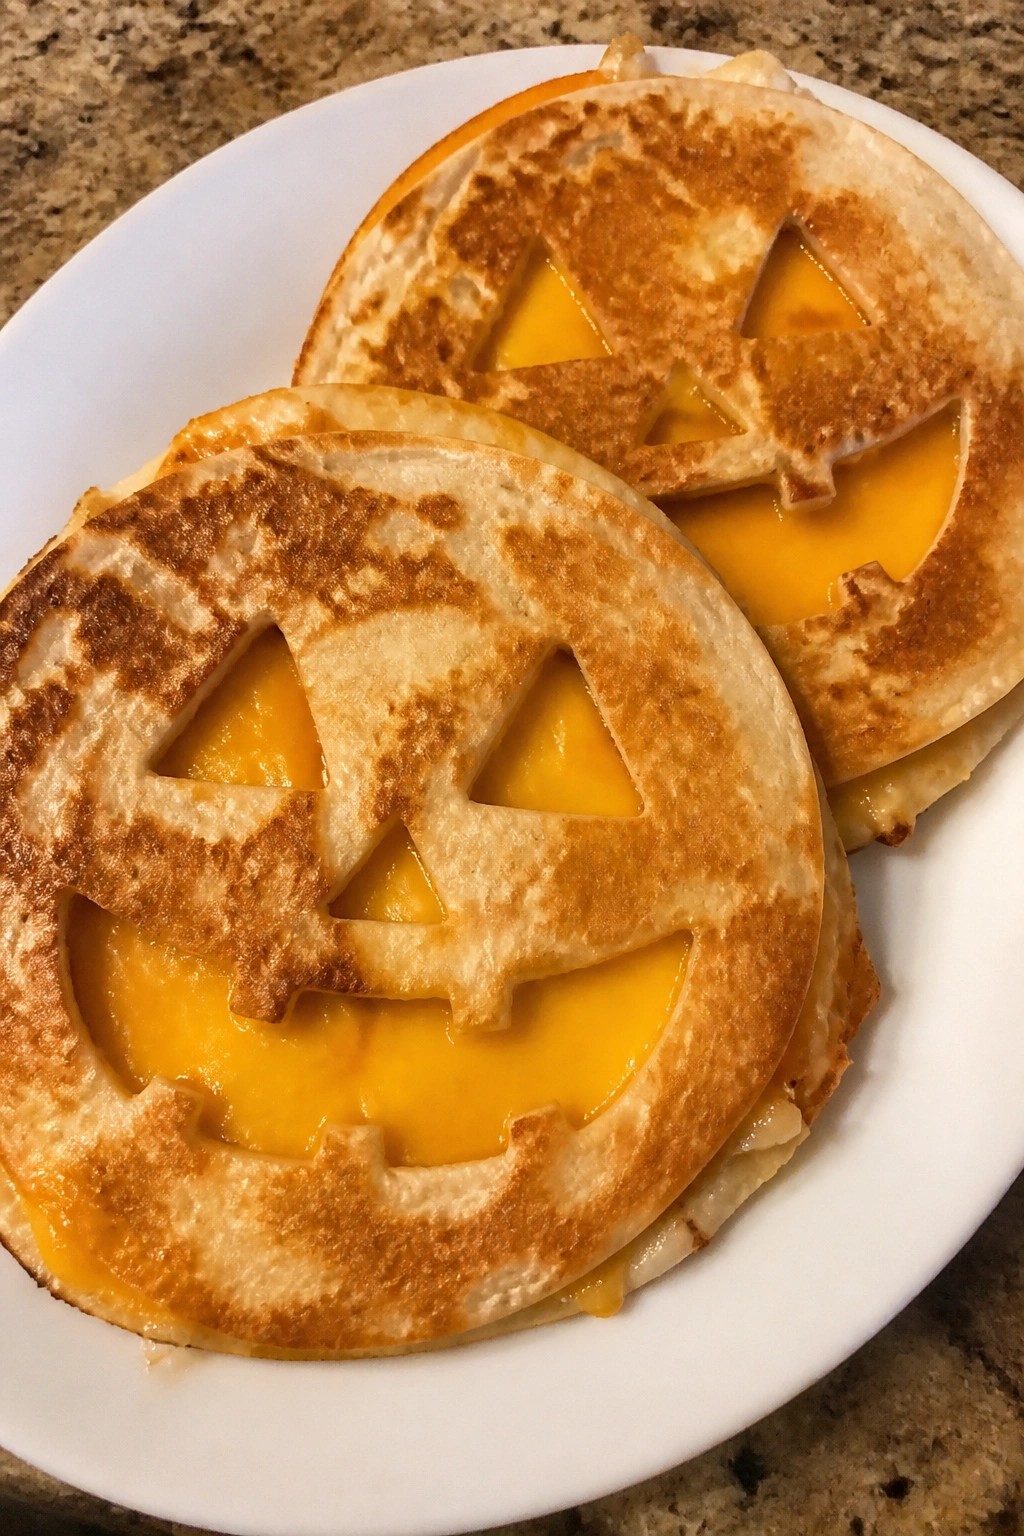
These Jack-O’-Lantern Cheese Quesadillas add a simple Halloween touch to any party table. The carved faces on top make them easy to spot while the melted cheese inside stays gooey and satisfying.
They fit well for casual gatherings because they cook fast in a skillet and require few ingredients. The buttered tortillas turn crisp on the outside while the cheddar stays creamy in the center.
Serves 4 people.
Ingredients
- 8 flour tortillas
- 2 cups shredded cheddar cheese
- 4 tablespoons butter, softened
Instructions
- Use a sharp knife to cut a jack-o’-lantern face into four of the tortillas. Set the carved tortillas aside.
- Spread the softened butter evenly over one side of all eight tortillas.
- Lay four plain tortillas buttered side down on a work surface. Divide the shredded cheddar cheese among them, using 1/2 cup per tortilla.
- Top each cheese-covered tortilla with one of the carved tortillas, buttered side up.
- Heat a large skillet over medium heat. Place one quesadilla in the skillet and cook for 2 to 3 minutes until the bottom is golden. Flip and cook the other side until the cheese melts and the second side turns golden. Repeat with the remaining quesadillas.
Extra Tips
Cut the faces into the tortillas before buttering them so the surface stays dry and easy to handle. Cook over steady medium heat to avoid burning the butter before the cheese melts. Serve the quesadillas right after cooking while the cheese still stretches when pulled apart. Course: Appetizer Cuisine: Mexican Equipment: Large Skillet, Knife
Olive Eyeball Caprese Skewers
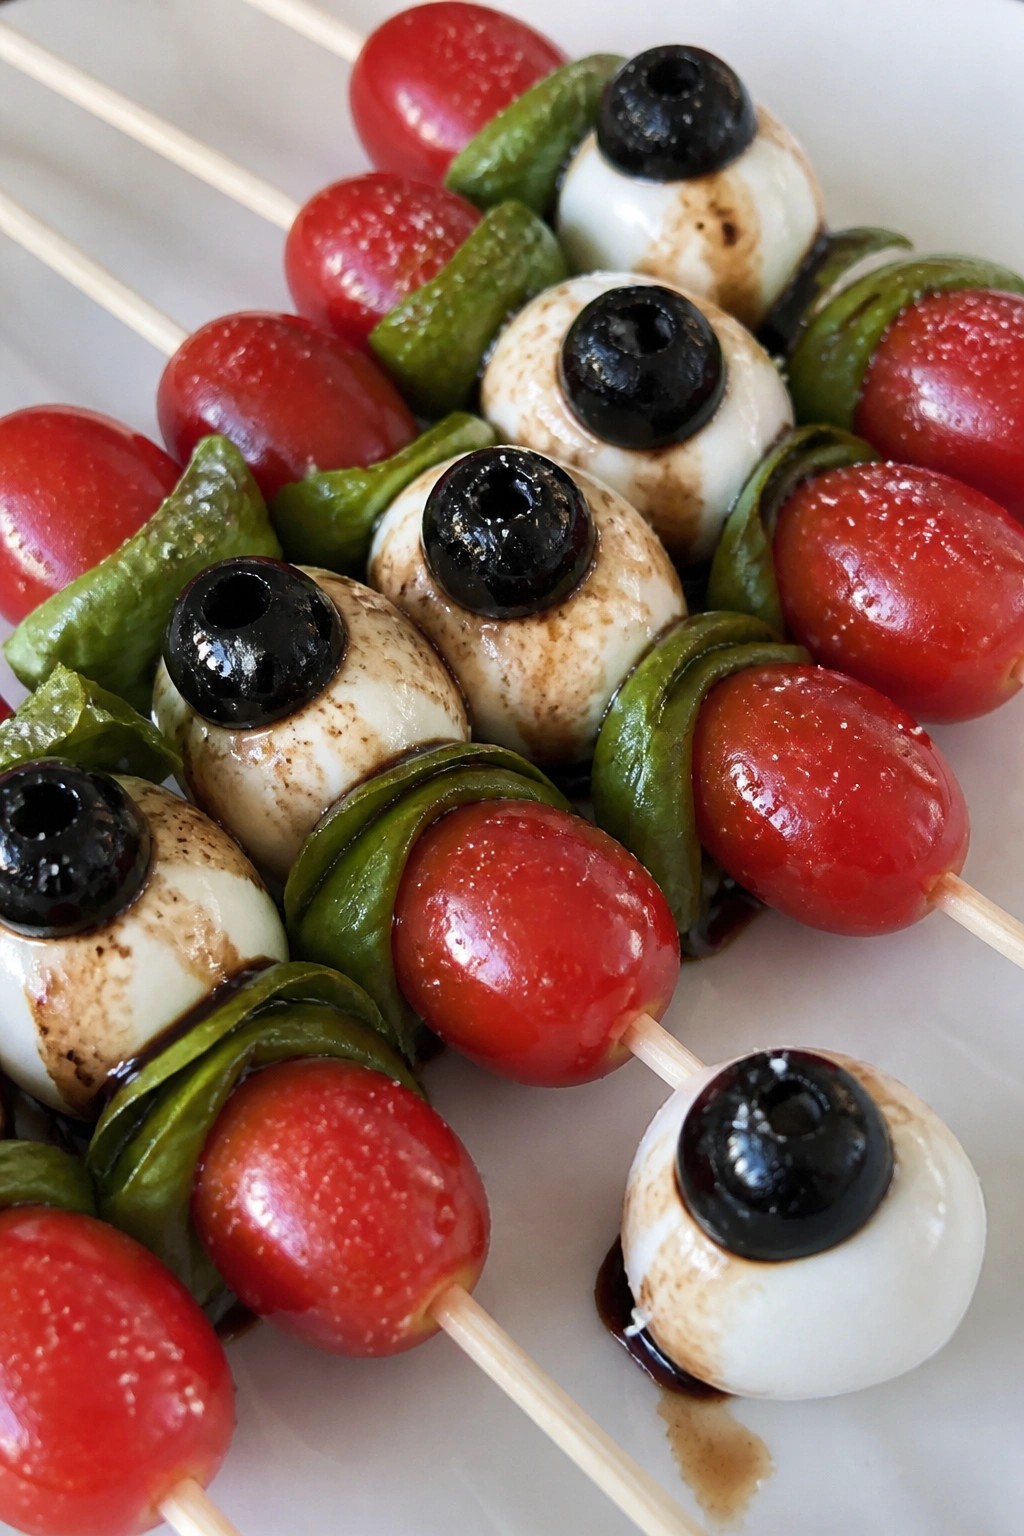
These skewers turn a classic Caprese combination into a fun Halloween bite. The black olive on top of each mozzarella ball creates a simple eyeball effect that fits right into any spooky spread. They stay light and fresh, which makes them a good choice when you want something quick that still feels like it belongs on the table.
The flavors stay bright with juicy tomato, creamy cheese, and a touch of basil. A drizzle of balsamic at the end adds just enough tang without overpowering the other ingredients. They work well for both kids and adults at a casual party.
Serves 4 people.
Ingredients
- 12 cherry tomatoes
- 12 small fresh mozzarella balls
- 12 fresh basil leaves
- 12 pitted black olives
- 12 wooden skewers
- 2 tablespoons balsamic glaze
- 1/4 teaspoon salt
Instructions
- Thread one cherry tomato onto each skewer, pushing it toward the bottom to leave room for the rest of the ingredients.
- Add one basil leaf on top of each tomato.
- Place one mozzarella ball on each skewer after the basil.
- Set one black olive on top of each mozzarella ball to create the eyeball look.
- Arrange the finished skewers on a serving plate.
- Drizzle the balsamic glaze evenly over the skewers.
- Sprinkle the salt lightly across the top before serving.
Extra Tips
Make these up to two hours ahead and keep them covered in the fridge so the basil stays fresh. If you want the olives to sit more securely, slice a tiny piece off the bottom of each one before placing it on the mozzarella. Use a thick balsamic glaze instead of thin vinegar so it clings better to the cheese and tomato. Course: Appetizer Cuisine: Italian Equipment: Wooden skewers, Serving plate
Spooky Stuffed Jalapeño Poppers
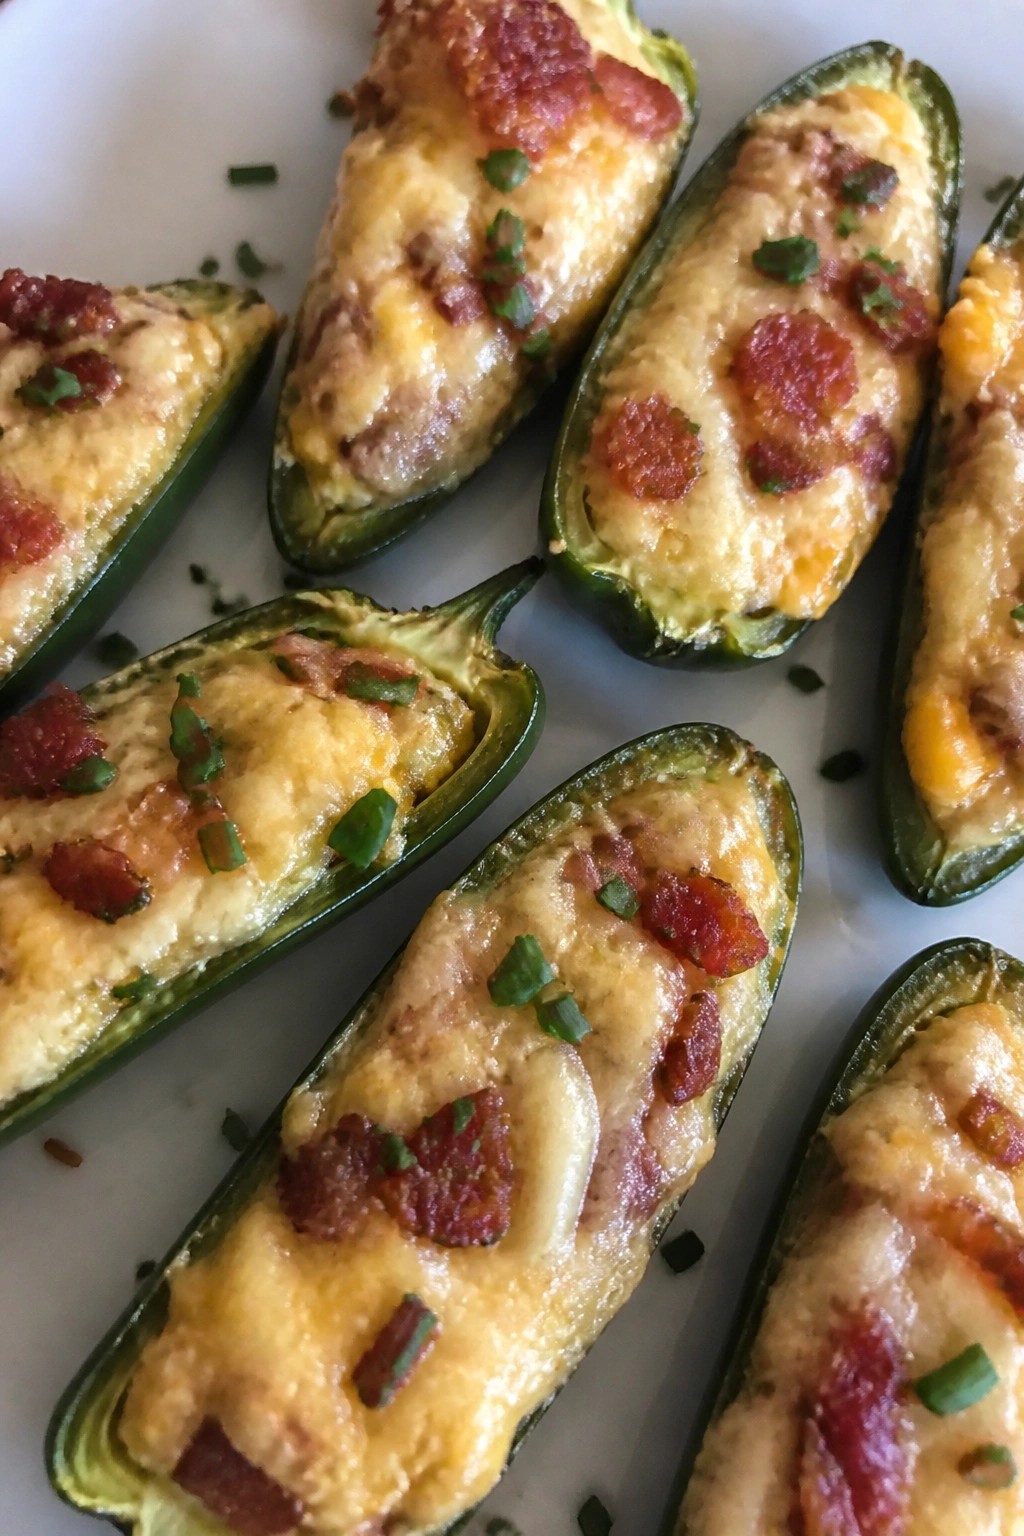
These jalapeño poppers bring a creamy, cheesy filling with a smoky bacon note that balances the pepper heat. They work well as finger food at Halloween gatherings and hold up on a buffet table without much fuss. The texture stays crisp on the outside with a soft center.
Serves 4 people.
Ingredients
- 12 fresh jalapeño peppers
- 8 ounces cream cheese, softened
- 1 cup shredded cheddar cheese
- 4 slices cooked bacon, crumbled
- 1 teaspoon garlic powder
- 1/2 teaspoon onion powder
- Salt and black pepper to taste
- 2 tablespoons chopped chives
Instructions
- Preheat the oven to 400 degrees and line a baking sheet with parchment paper.
- Slice each jalapeño in half lengthwise and remove the seeds and membranes with a spoon.
- In a mixing bowl, combine the softened cream cheese, shredded cheddar, crumbled bacon, garlic powder, onion powder, salt, and black pepper. Stir until evenly mixed.
- Spoon the cheese mixture into each jalapeño half, filling them to the top.
- Place the filled halves on the prepared baking sheet.
- Bake for 15 to 18 minutes until the peppers soften and the filling turns lightly golden.
- Remove from the oven and sprinkle with chopped chives before serving.
Extra Tips
Wear gloves when handling the jalapeños to avoid skin irritation from the seeds. You can stuff the peppers up to a day ahead and keep them covered in the fridge, then bake right before guests arrive. Skip the bacon and add a pinch more salt if you need a vegetarian version. Course: Appetizer Cuisine: American Equipment: Baking Sheet, Mixing Bowl, Spoon
Ghostly Parmesan Breadsticks
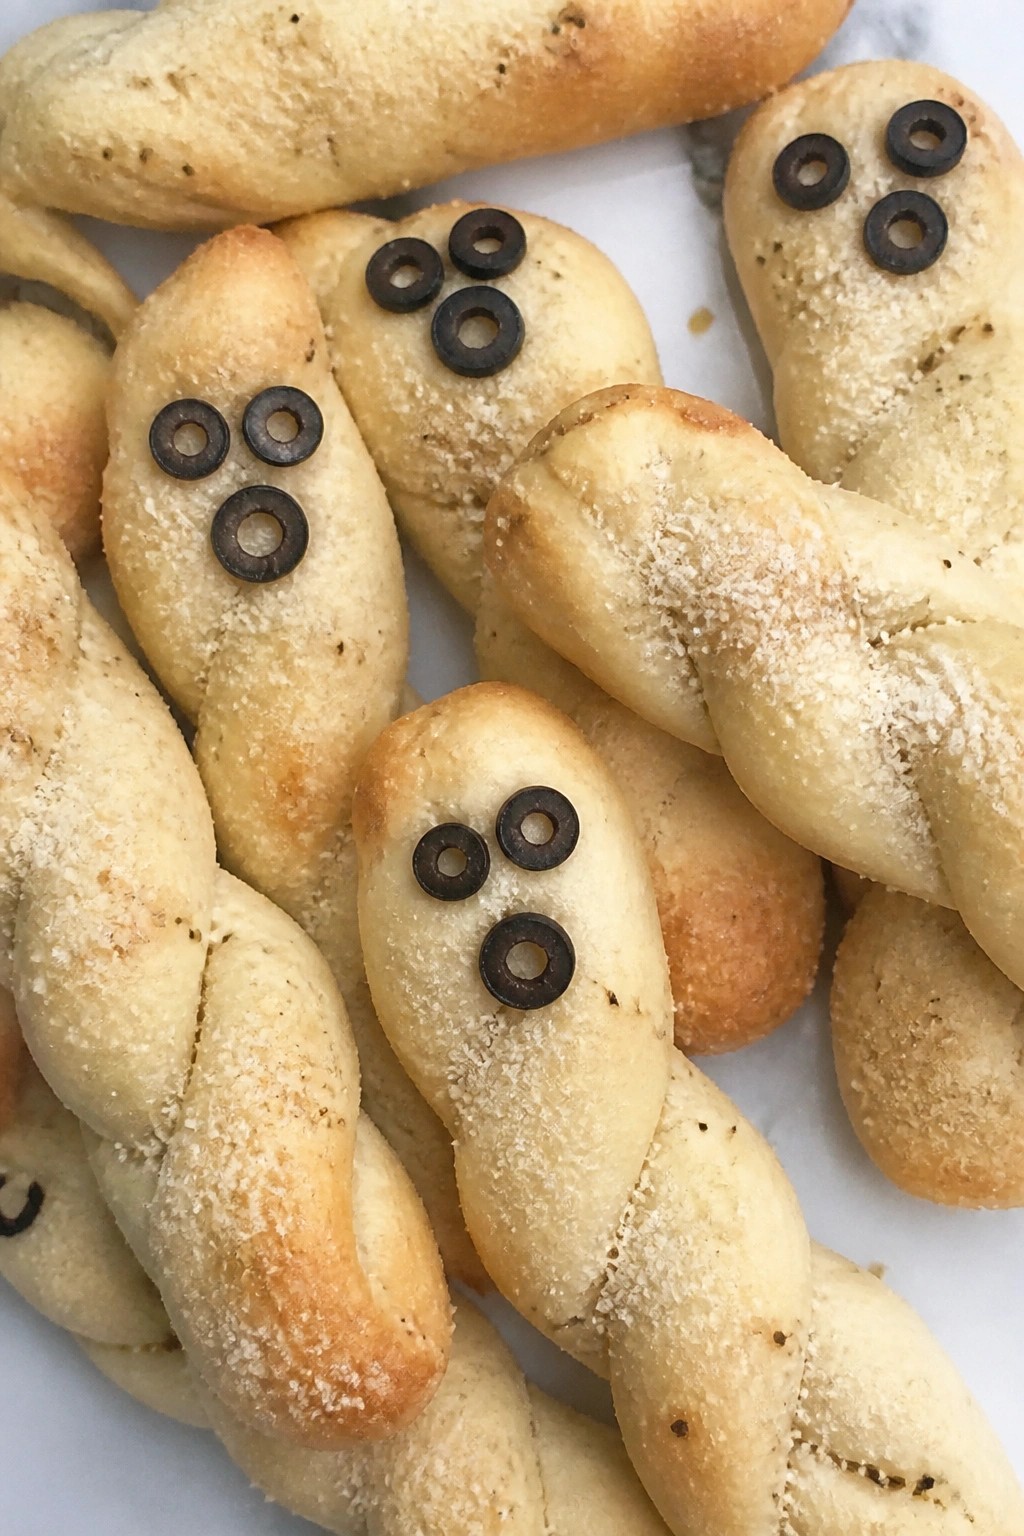
These breadsticks bring a simple Halloween touch to any party spread. The dough gets shaped into basic ghost forms, then finished with Parmesan for a savory, cheesy bite that pairs well with dips or stands alone as finger food. They bake up golden on the edges with a soft center and just enough garlic flavor to keep guests coming back.
The recipe uses store-bought dough for speed and adds black olive slices to create the faces, so each piece looks playful without extra steps. They work as an easy starter before a main meal or as part of a larger appetizer table.
Serves 4 people.
Recommended Products

Spooky & Fun Edible Eyes: These 1cm candy eyeballs add a playfultouch to your desserts, perfect for Halloween parties, and fun baking projects.

Edible Eyes Sprinkles with food-grade raw materials: Preservative Free,Nut Free, Dairy Free, Chemical Free,Soy Free,Non-GMO.Produced using food-safe standards, the process does not come into contact with allergenic substances and uses Tamper-proof food label.They're just as safe as they are tasty!

Playful Candy Eyes: Add a mischievous touch to your treats with our eyeball mix sprinkles in assorted sizes, resembling quirky eye motifs, perfect for adding a spooky yet fun twist to your Halloween or prank-themed creations
Ingredients
- 1 can (8 count) refrigerated breadstick dough
- 2 tablespoons butter, melted
- 1/4 cup grated Parmesan cheese
- 1/2 teaspoon garlic powder
- 8 black olive slices
Instructions
- Preheat the oven to 375°F and line a baking sheet with parchment paper.
- Open the can of dough and separate the breadsticks. Gently stretch and shape each piece into a loose ghost form by rounding the top for a head and leaving the bottom tapered.
- Place the shaped dough on the prepared baking sheet. Brush each piece lightly with the melted butter.
- Sprinkle the garlic powder evenly over the buttered dough, then top with the grated Parmesan cheese.
- Press two black olive slices onto the head of each ghost to form eyes.
- Bake for 11 to 13 minutes until the edges turn golden. Remove from the oven and let cool for 2 minutes before serving.
Extra Tips
Brush a second light coat of melted butter right after baking if you want extra shine on the Parmesan. The olive slices stay in place best when pressed down firmly before the breadsticks go into the oven. Leftovers can be stored in an airtight container at room temperature for one day and reheated briefly in a 300°F oven to restore crisp edges. Course: Appetizer Cuisine: American Equipment: Baking sheet, Pastry brush, Parchment paper
Bat Wing Buffalo Cauliflower Bites
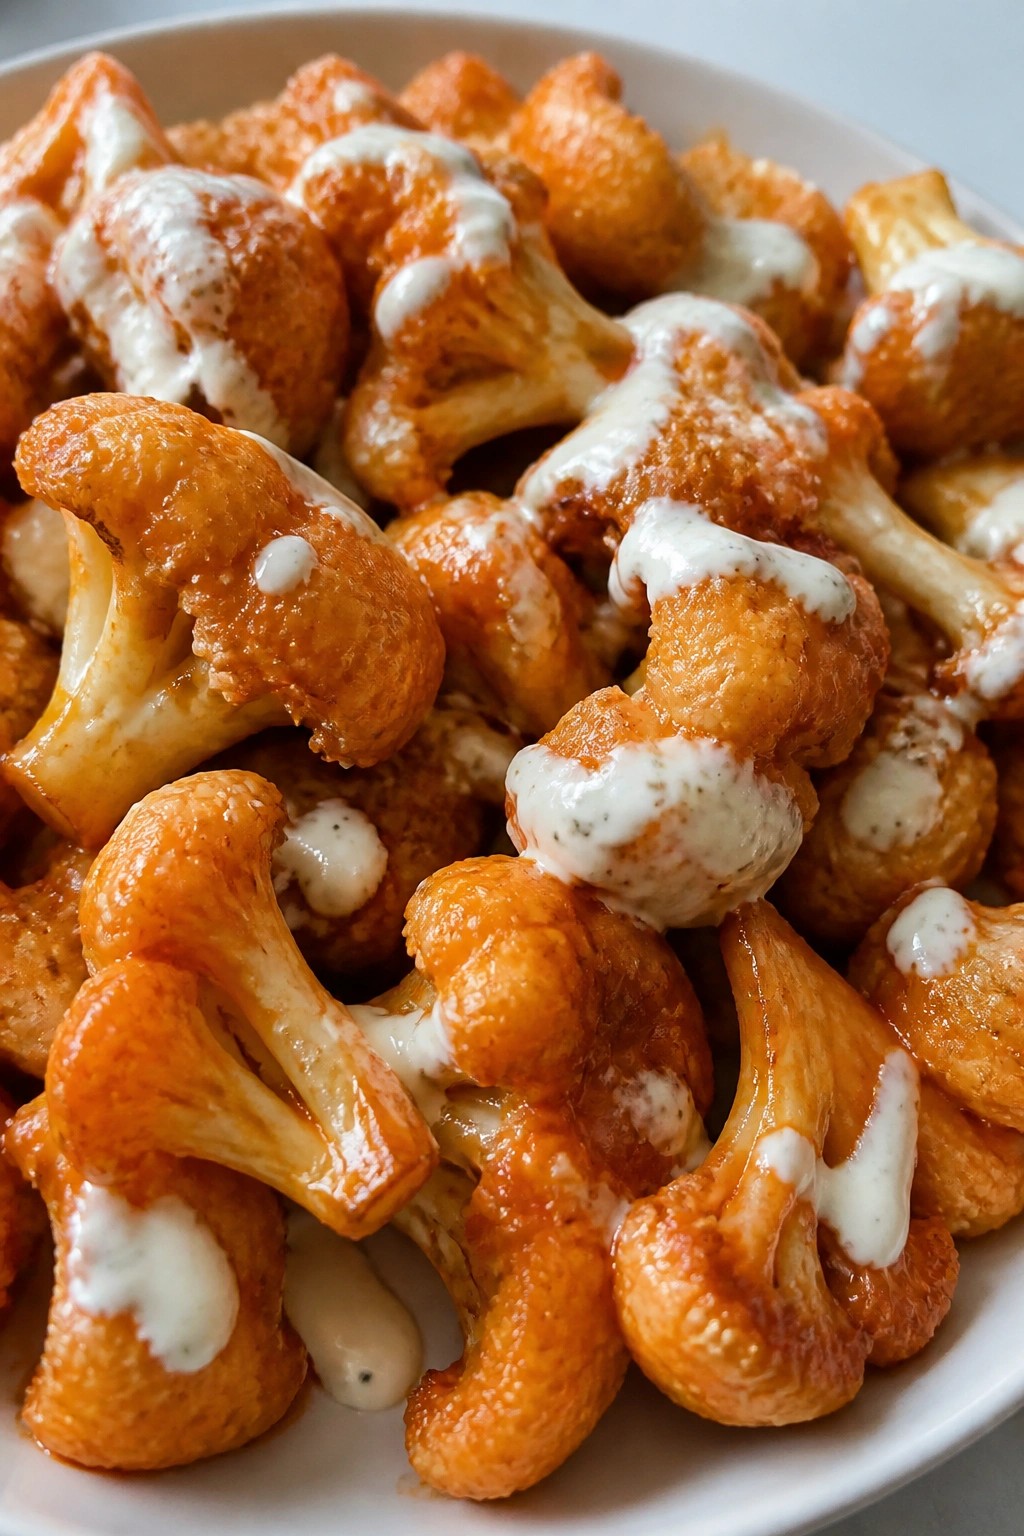
These Bat Wing Buffalo Cauliflower Bites add a spicy, crispy element to any Halloween party table. They suit game-day spreads, costume parties, or casual gatherings where guests want something lighter than traditional wings but still full of flavor.
The florets roast until golden and crisp, then get tossed in a simple buffalo sauce for that familiar tangy heat. A cool ranch drizzle at the end balances the spice without overpowering the dish.
Serves 4 people.
Ingredients
- 1 large head cauliflower, cut into bite-sized florets
- ¾ cup all-purpose flour
- ¾ cup milk
- 1 teaspoon garlic powder
- 1 teaspoon paprika
- ½ teaspoon salt
- ½ cup buffalo wing sauce
- 2 tablespoons melted butter
- Ranch dressing for serving
Instructions
- Preheat the oven to 425°F and line a baking sheet with parchment paper.
- In a mixing bowl, whisk together the flour, milk, garlic powder, paprika, and salt until a smooth batter forms.
- Add the cauliflower florets to the bowl and stir until each piece is evenly coated.
- Spread the coated florets in a single layer on the prepared baking sheet.
- Bake for 20 minutes, flipping the pieces halfway through.
- While the cauliflower bakes, stir the buffalo wing sauce and melted butter together in a large bowl.
- Remove the cauliflower from the oven and transfer it to the bowl with the sauce. Toss gently to coat.
- Return the coated florets to the baking sheet and bake for 10 more minutes.
- Drizzle with ranch dressing before serving.
Extra Tips
For extra crisp edges, avoid crowding the baking sheet and bake in two batches if needed. The ranch can be swapped for blue cheese dressing if you prefer a stronger flavor contrast. Leftovers reheat best in a 375°F oven for 8 minutes to restore crunch. Course: Appetizer Cuisine: American Equipment: Baking Sheet, Mixing Bowl, Whisk
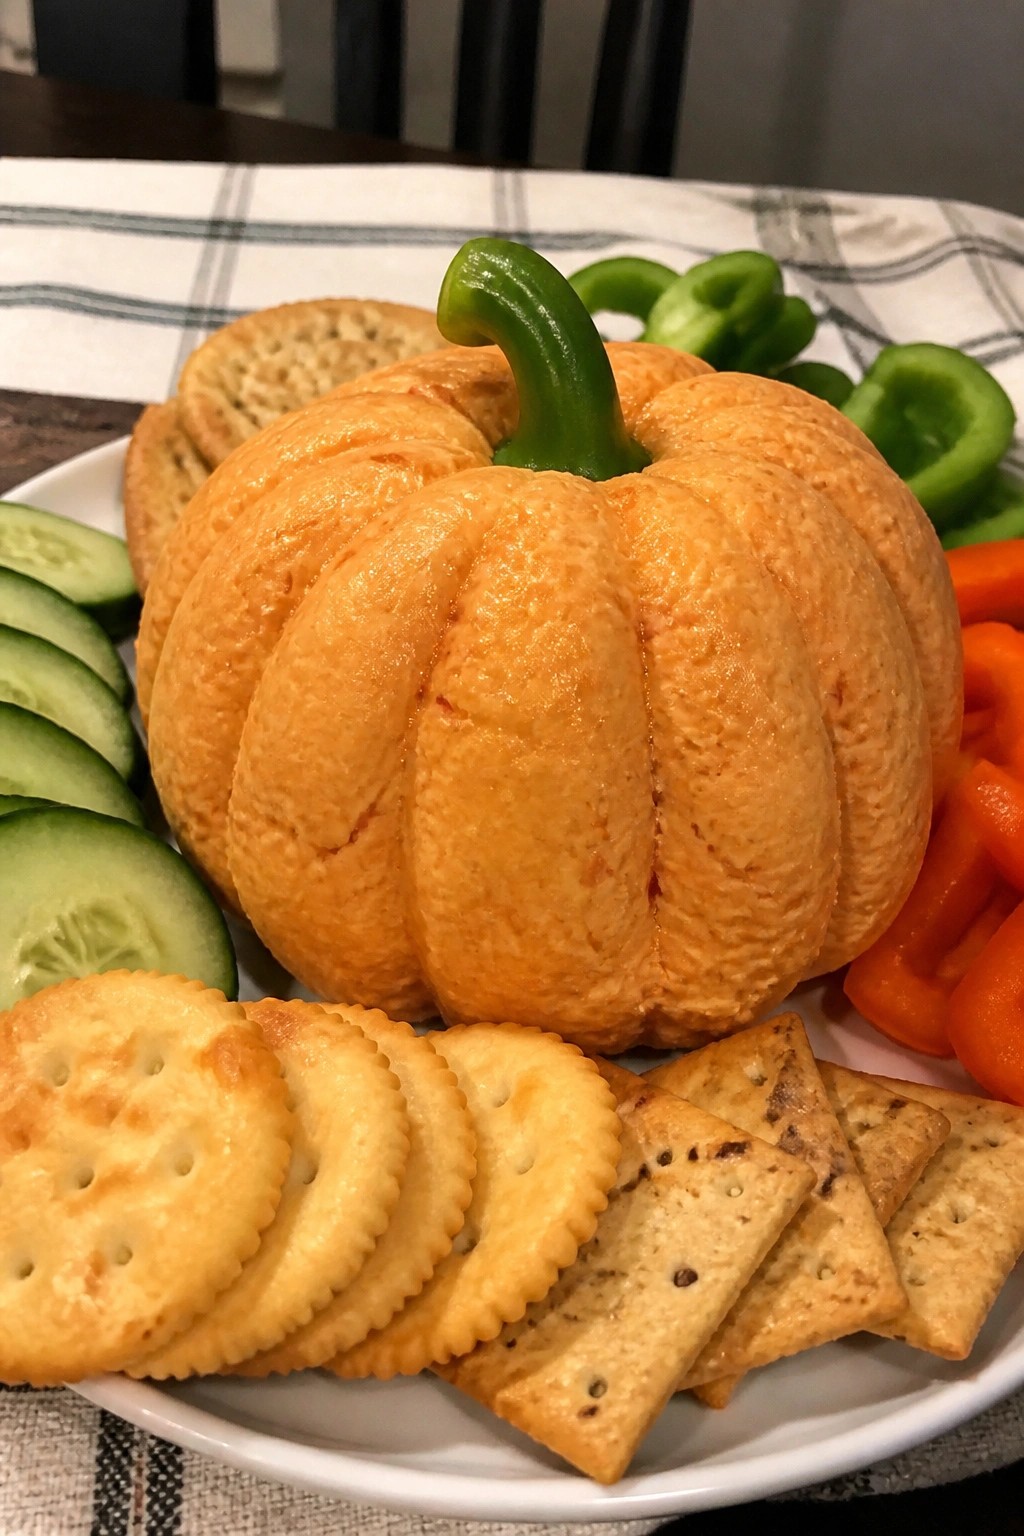
Pumpkin-Shaped Cheese Ball Platter
This cheese ball turns a simple mix of cheeses into a fun centerpiece for Halloween parties. The orange tint and ridged shape give it a pumpkin look that sits nicely on a platter with crackers and veggies. It has a creamy texture with a mild savory flavor that pairs well with crunchy dippers.
The recipe works for casual gatherings or kid-friendly events since it needs no cooking. Guests can spread it on crackers or use it as a dip for vegetables.
Serves 4 people.
Ingredients
- 8 ounces cream cheese, softened
- 1 1/2 cups shredded cheddar cheese
- 1 teaspoon garlic powder
- 1/2 teaspoon paprika
- 1 small green bell pepper
- Assorted crackers and vegetables for serving
Instructions
- Place the softened cream cheese, shredded cheddar cheese, garlic powder, and paprika in a mixing bowl. Stir until the mixture is smooth and evenly colored.
- Lay a sheet of plastic wrap on the counter. Scoop the cheese mixture onto the wrap and shape it into a round ball. Use your hands or a spoon to press gentle ridges around the sides to resemble a pumpkin.
- Wrap the ball tightly and chill it in the refrigerator for at least 30 minutes so it firms up.
- Slice off the top of the green bell pepper and trim it into a short stem shape. Unwrap the chilled cheese ball and press the stem into the top center.
- Place the finished cheese ball on a serving platter and arrange crackers and vegetables around it.
Extra Tips
Chill the cheese ball longer if your kitchen is warm so the ridges hold their shape. Use a sturdy cracker that can hold a thick spread without breaking. If you want less paprika flavor, reduce it to a quarter teaspoon and rely on the cheddar for color. Course: Appetizer Cuisine: American Equipment: Mixing Bowl, Plastic Wrap, Serving Platter
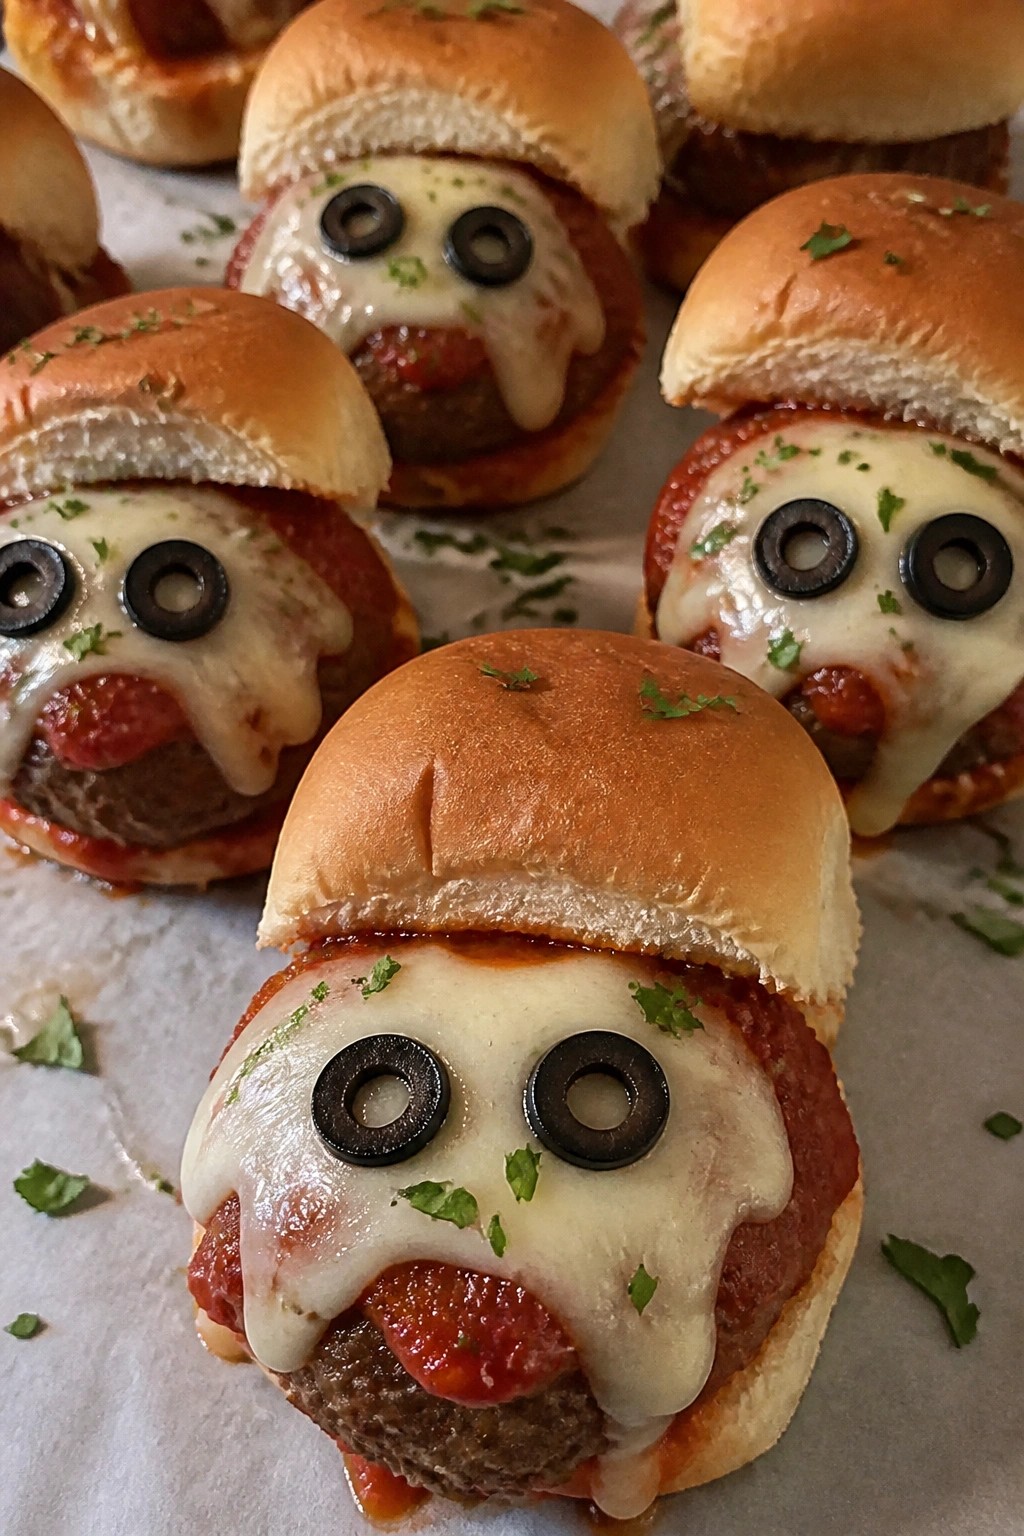
Monster Meatball Sliders
These Monster Meatball Sliders add a fun Halloween twist to a classic party bite. Juicy beef meatballs get tucked into soft buns with marinara and melted cheese that doubles as monster faces. The result is a savory, saucy slider with a bit of chew from the bun and gooey cheese on top.
They suit any casual Halloween gathering where guests want something hearty but easy to eat by hand. The meatballs stay moist from the egg and breadcrumbs while the olives give a salty pop that balances the sauce.
Serves 4 people.
Ingredients
- 1 lb ground beef
- 1 large egg
- 1/2 cup Italian breadcrumbs
- 2 cloves garlic, minced
- 1 tsp dried oregano
- 1/2 tsp salt
- 1/4 tsp black pepper
- 2 cups marinara sauce
- 8 slider buns
- 8 slices mozzarella cheese
- 16 black olives
- 2 tbsp chopped fresh parsley
Instructions
- Preheat the oven to 400°F. In a large bowl, mix the ground beef, egg, breadcrumbs, minced garlic, oregano, salt, and black pepper until just combined.
- Shape the mixture into 8 meatballs, each about 2 inches wide. Place them on a baking sheet and bake for 15 minutes.
- While the meatballs bake, warm the marinara sauce in a skillet over medium heat. Add the baked meatballs to the sauce and simmer for 5 minutes, turning once to coat them evenly.
- Split the slider buns and place one meatball on each bottom bun. Spoon a little extra sauce over each meatball.
- Top each meatball with a slice of mozzarella. Return the assembled sliders to the oven for 3 minutes until the cheese melts.
- Slice 2 black olives in half for each slider and press them onto the melted cheese to create eyes. Sprinkle chopped parsley over the tops before adding the bun lids.
Extra Tips
Press the olives firmly into the warm cheese so they stay in place once the sliders cool slightly. If you want less sauce on the buns, drain the meatballs for a minute before assembling. Leftovers keep well in the fridge for two days and reheat best in a 350°F oven for 8 minutes to keep the buns from getting soggy. Course: Appetizer Cuisine: American Equipment: Mixing Bowl, Baking Sheet, Skillet
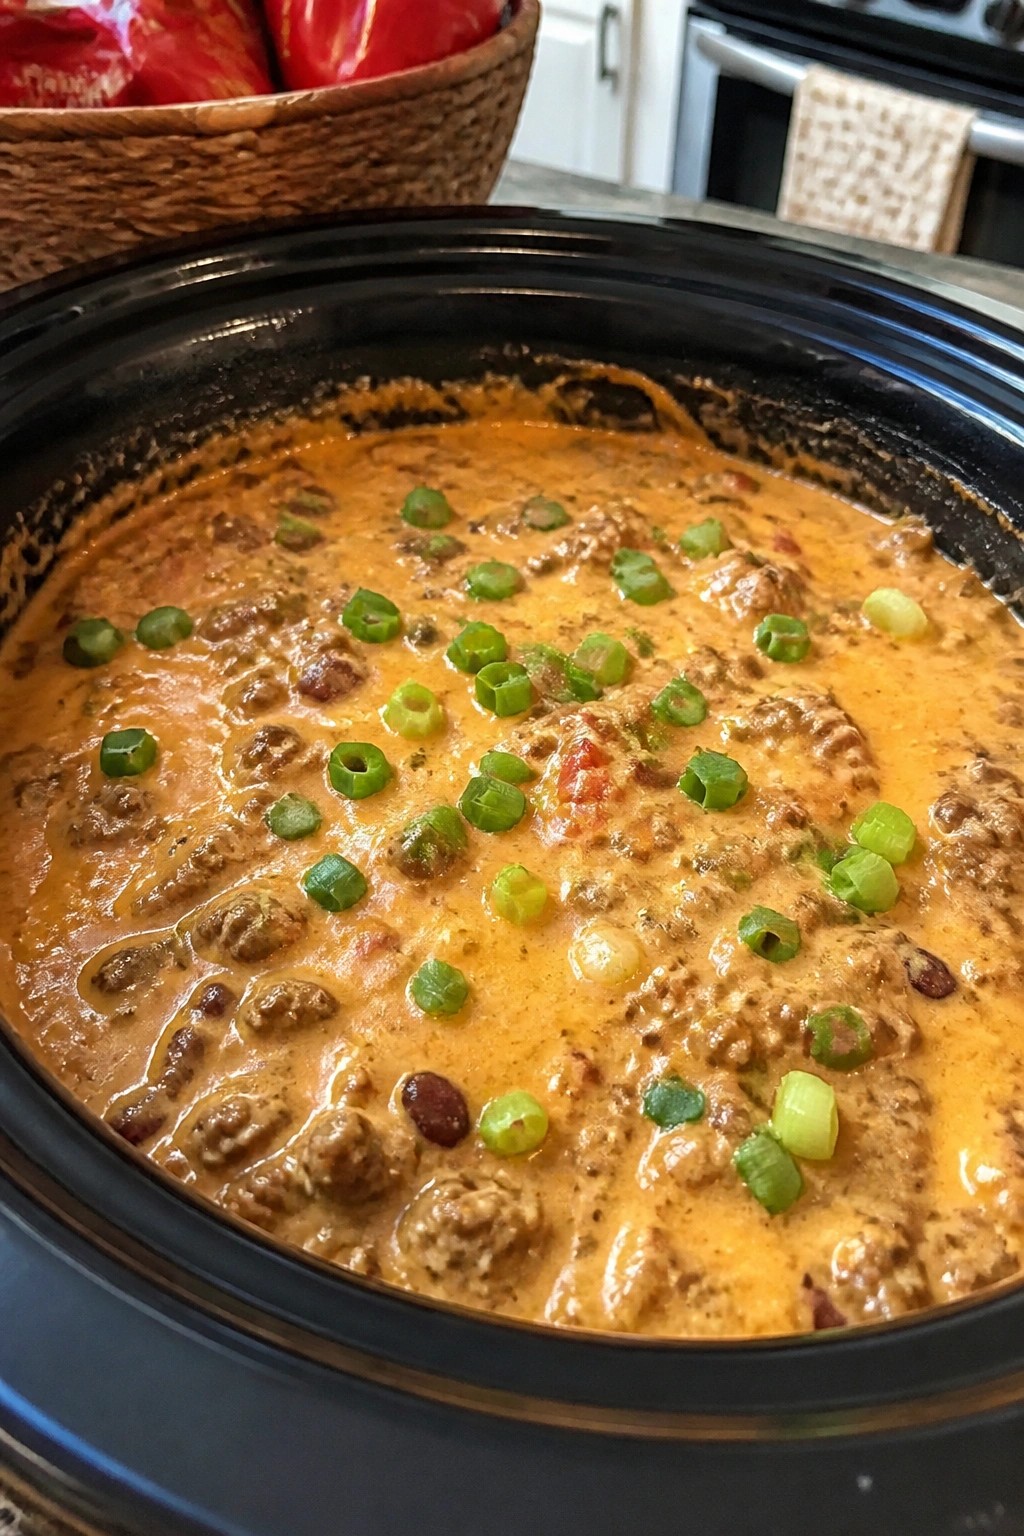
Witch’s Cauldron Chili Cheese Dip
This dip creates a warm, bubbling pot of chili and cheese that fits right into a Halloween party spread. It works well for casual gatherings where people want something hearty to share while they mingle.
The flavor is savory with a mild kick from the chili powder and tomatoes. The texture stays thick enough for dipping yet creamy from the melted cheeses.
Serves 4 people.
Ingredients
- 8 ounces ground beef
- 1 can (15 ounces) chili beans, undrained
- 1 can (10 ounces) diced tomatoes with green chilies, drained
- 4 ounces cream cheese, cut into cubes
- 1 1/2 cups shredded cheddar cheese
- 1 teaspoon chili powder
- Tortilla chips, for serving
- Chopped green onions, for garnish
Instructions
- Cook the ground beef in a medium skillet over medium heat until it is browned and no longer pink. Drain any excess fat.
- Stir in the chili beans, diced tomatoes with green chilies, and chili powder. Let the mixture simmer for 5 minutes so the flavors combine.
- Add the cream cheese cubes and stir until they melt into the chili.
- Sprinkle the shredded cheddar cheese over the top. Cover the skillet and let it sit for 2 minutes until the cheese melts.
- Stir once more to blend the cheeses evenly. Serve warm with tortilla chips and top with chopped green onions.
Extra Tips
Keep the dip warm in the skillet on low heat during the party so it stays scoopable. If it thickens too much, stir in a splash of milk to loosen it. Leftovers reheat well in the microwave in short bursts, stirring between each one. Course: Appetizer Cuisine: American Equipment: Medium Skillet, Wooden Spoon, Can Opener
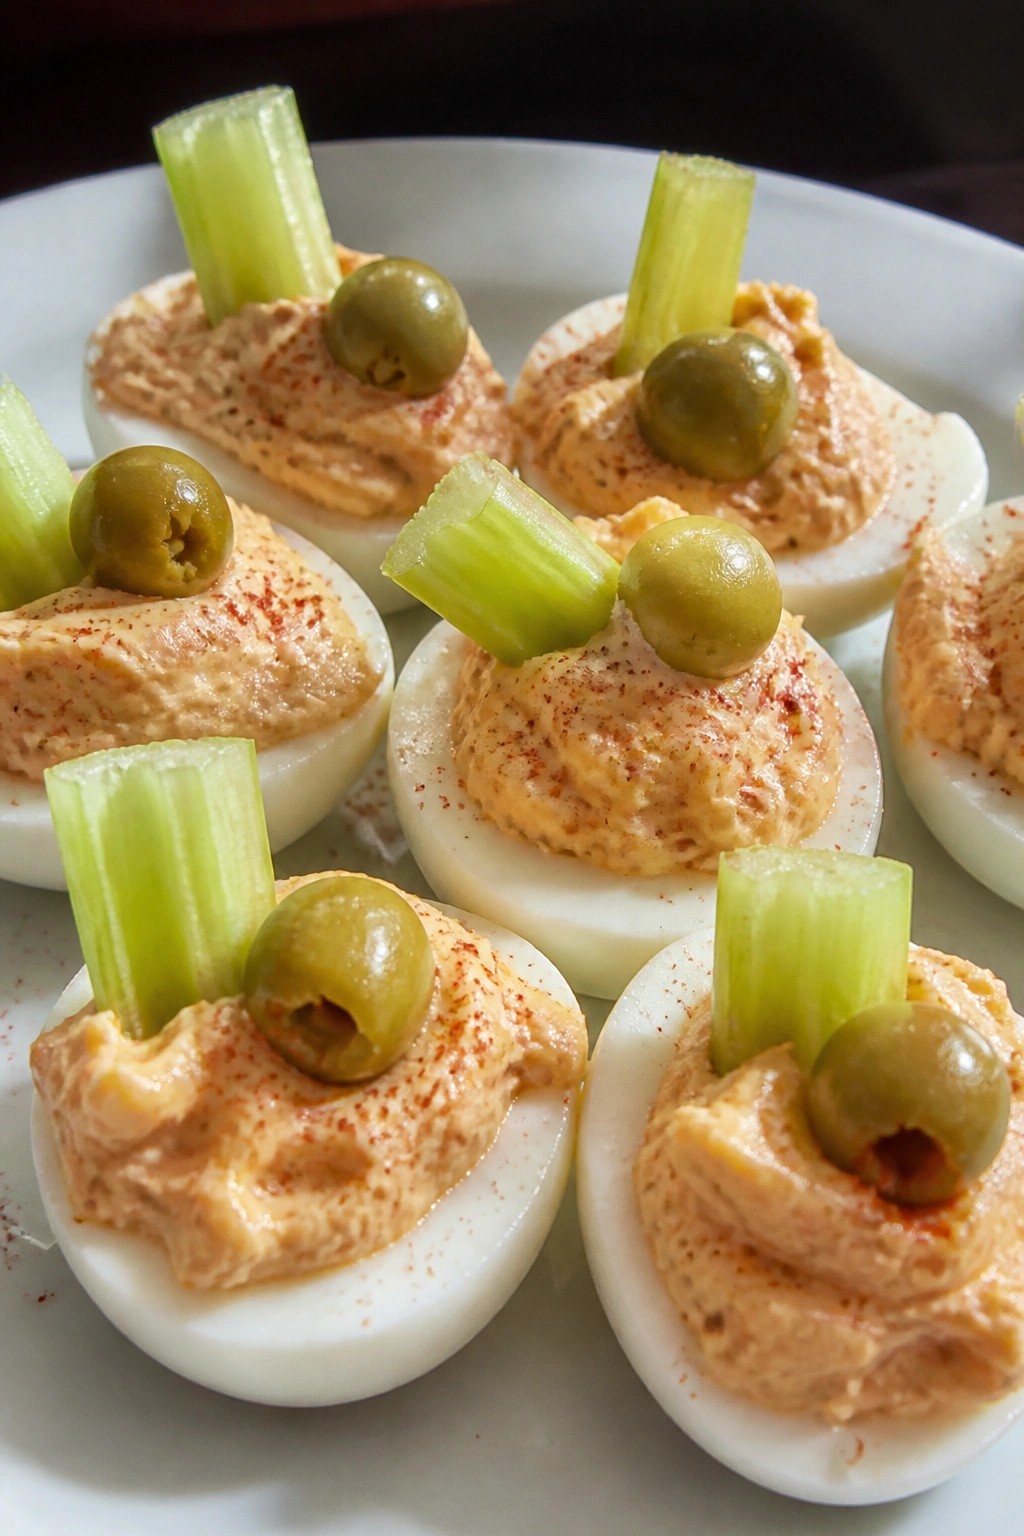
Bloody Mary Deviled Eggs
These deviled eggs bring the bold flavors of a Bloody Mary into a bite-sized appetizer. The creamy filling gets a savory boost from tomato, horseradish, and Worcestershire, with just enough heat to keep things interesting. They work well at Halloween parties or any gathering where you want something familiar but with a twist.
The texture stays smooth and rich while the celery salt and lemon add brightness. Garnish with celery sticks and olives to echo the classic drink.
Serves 4 people.
Ingredients
- 6 large eggs
- 3 tablespoons mayonnaise
- 1 tablespoon tomato juice
- 1 teaspoon prepared horseradish
- 1/2 teaspoon Worcestershire sauce
- 1 teaspoon lemon juice
- 1/4 teaspoon celery salt
- Hot sauce to taste
- Celery sticks and green olives for garnish
Instructions
- Place the eggs in a saucepan and cover with cold water. Bring to a boil over medium heat, then remove from heat, cover, and let sit for 12 minutes.
- Drain the eggs and transfer them to a bowl of ice water. Once cool, peel and slice each egg in half lengthwise.
- Scoop the yolks into a mixing bowl. Add mayonnaise, tomato juice, horseradish, Worcestershire sauce, lemon juice, celery salt, and hot sauce. Mash and stir until the mixture is smooth.
- Spoon or pipe the filling back into the egg white halves. Top each egg with a small piece of celery stick and an olive half before serving.
Extra Tips
Use tomato juice rather than thicker paste so the filling stays creamy without becoming watery. Chill the filled eggs for at least 30 minutes to let the flavors blend. If you prefer less heat, start with just a drop of hot sauce and adjust after tasting the yolk mixture. Course: Appetizer Cuisine: American Equipment: Saucepan, Mixing Bowl, Knife
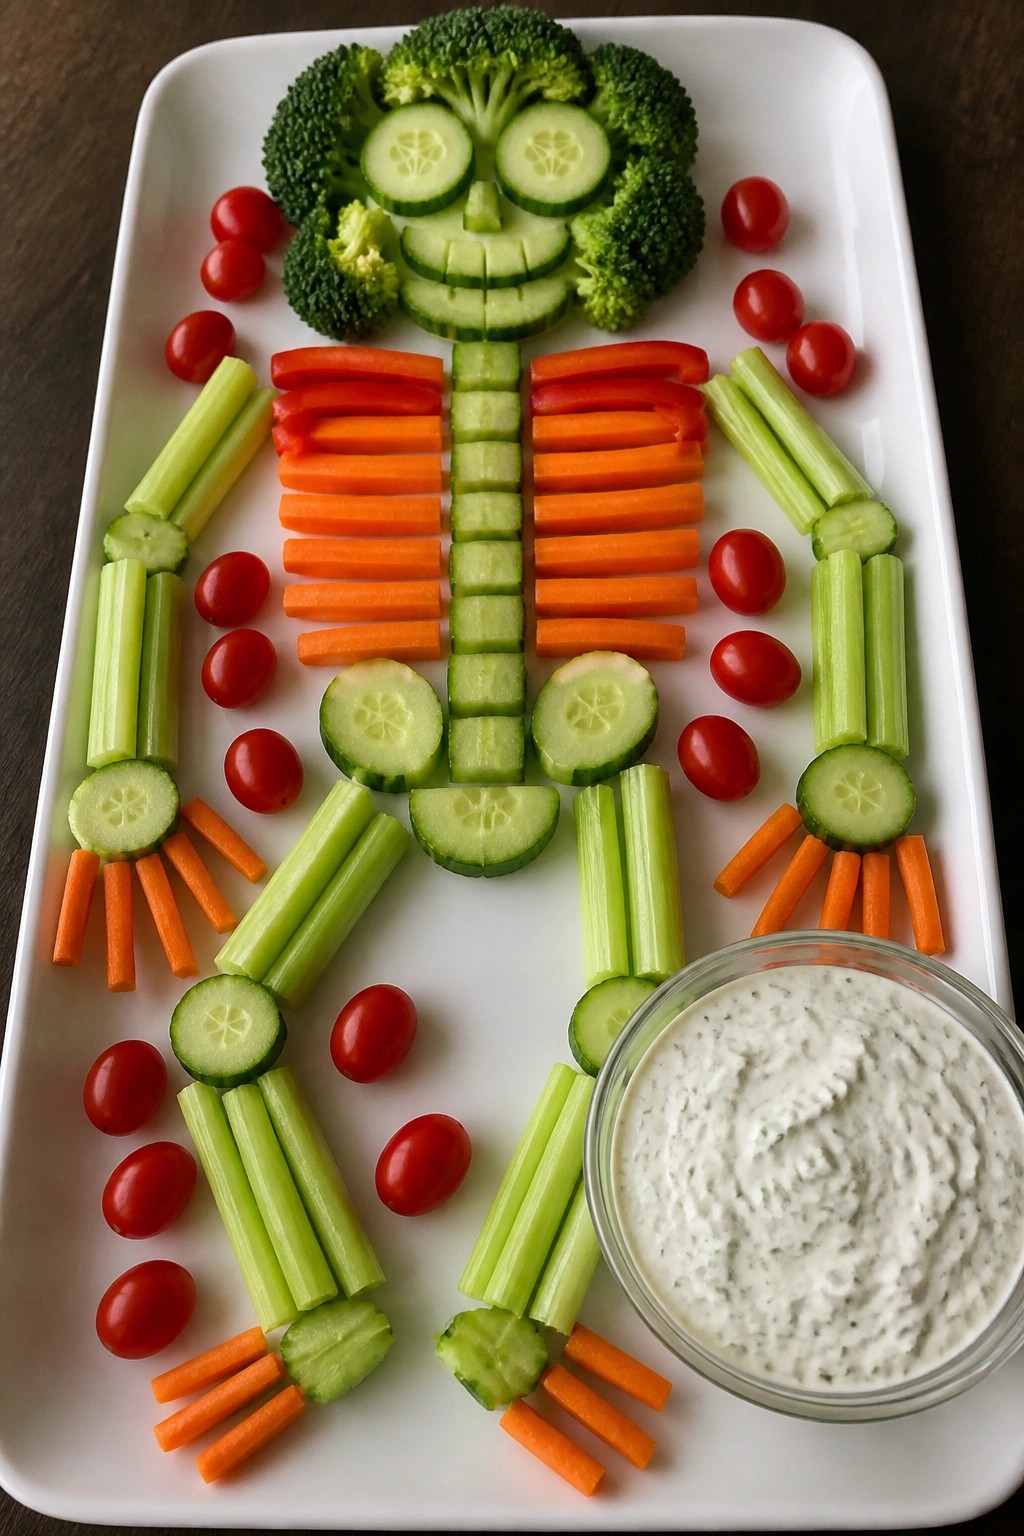
Skeleton Crudité Platter with Ranch
This skeleton crudité platter turns fresh vegetables into a fun Halloween display that fits right into any party spread. It works well for kids and adults alike because it offers a light option alongside heavier snacks. The crisp vegetables pair with a cool, herby ranch dip that keeps everyone coming back for more.
The platter brings crunch and creaminess together in one easy arrangement. You can set it out early and let guests serve themselves while the rest of the food comes together.
Serves 4 people.
Ingredients
- 2 large carrots, cut into thin sticks
- 2 celery stalks, cut into thin sticks
- 1 cucumber, cut into rounds and sticks
- 1 red bell pepper, cut into strips
- 1 cup broccoli florets
- 1 cup cherry tomatoes
- 1/2 cup mayonnaise
- 1/2 cup sour cream
- 1/4 cup buttermilk
- 1 teaspoon garlic powder
- 1 teaspoon onion powder
- 1 tablespoon chopped fresh dill
- 1 tablespoon chopped fresh parsley
- Salt and black pepper to taste
Instructions
- Mix the mayonnaise, sour cream, and buttermilk in a bowl until smooth.
- Stir in the garlic powder, onion powder, dill, parsley, salt, and pepper until well combined. Set the ranch aside.
- On a large platter, arrange the carrot sticks and celery sticks to form the skeleton’s arms and legs.
- Place the cucumber rounds down the center to create the spine and ribs.
- Position the red bell pepper strips as the skeleton’s hands and feet.
- Add the broccoli florets at the top to form the skull.
- Scatter the cherry tomatoes around the edges as accents.
- Place the bowl of ranch near the platter for dipping.
Extra Tips
Cut the vegetables into similar sizes so the skeleton shape stays clear and easy to recognize. If you need to prepare ahead, store the cut vegetables in water in the fridge and mix the ranch separately. Leftovers keep well covered in the refrigerator for one day. Course: Appetizer Cuisine: American Equipment: Serving Platter, Mixing Bowl, Knife
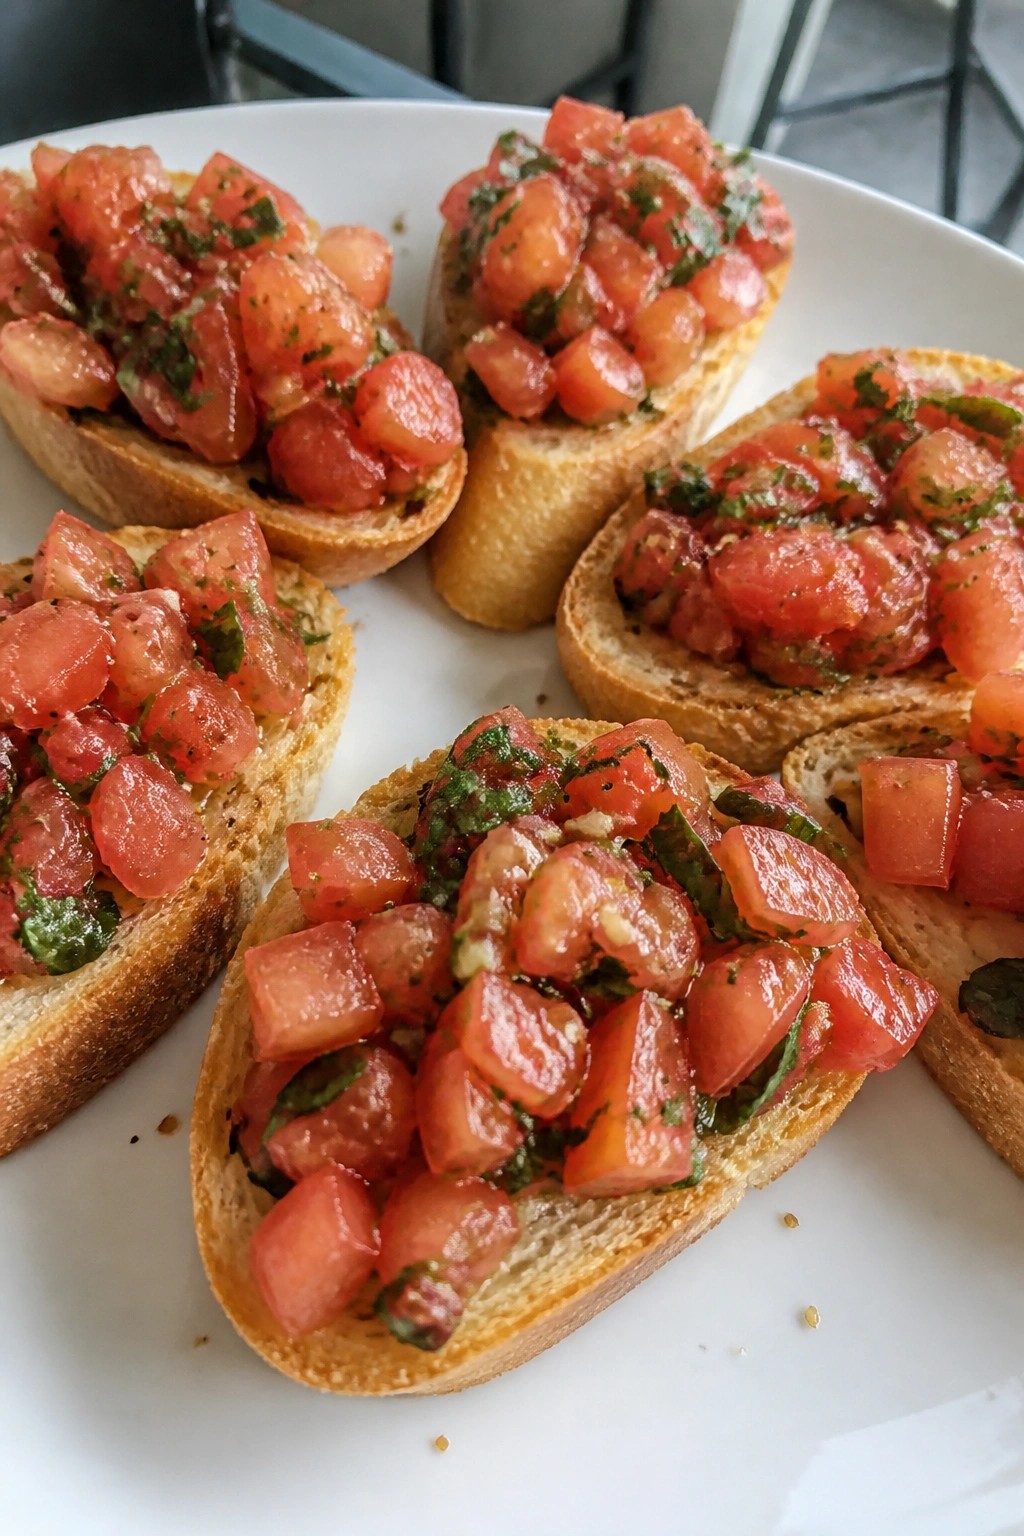
Vampire Bite Bruschetta
This bruschetta gives a simple appetizer a Halloween edge with plenty of garlic and a bright tomato topping. It fits well at any party because the pieces are easy to grab and eat while guests mingle.
The finished bites have crisp bread underneath a juicy, herb-filled mixture that stays light and fresh. A touch of balsamic adds just enough tang to balance the garlic.
Serves 4 people.
Ingredients
- 1 French baguette, cut into 12 slices
- 3 large tomatoes, diced
- 4 garlic cloves, minced
- 1/4 cup fresh basil, chopped
- 2 tablespoons olive oil
- 1 tablespoon balsamic vinegar
- 1/2 teaspoon salt
- 1/4 teaspoon red pepper flakes
Instructions
- Preheat the oven to 400 degrees F. Place the baguette slices on a baking sheet and brush both sides lightly with 1 tablespoon of the olive oil. Bake for 8 to 10 minutes until the edges turn golden.
- While the bread toasts, combine the diced tomatoes, minced garlic, chopped basil, balsamic vinegar, salt, and red pepper flakes in a mixing bowl. Stir in the remaining tablespoon of olive oil until everything is evenly coated.
- Remove the toasted bread from the oven. Let the slices cool for one minute, then spoon the tomato mixture generously over each piece.
- Arrange the bruschetta on a serving plate and serve right away while the bread stays crisp.
Extra Tips
Toast the bread slices ahead of time and store them in an airtight container so they stay dry until you add the topping. If you prefer less heat, cut the red pepper flakes in half. Leftovers do not keep well once assembled, so mix only what you plan to serve. Course: Appetizer Cuisine: Italian Equipment: Baking Sheet, Mixing Bowl, Knife
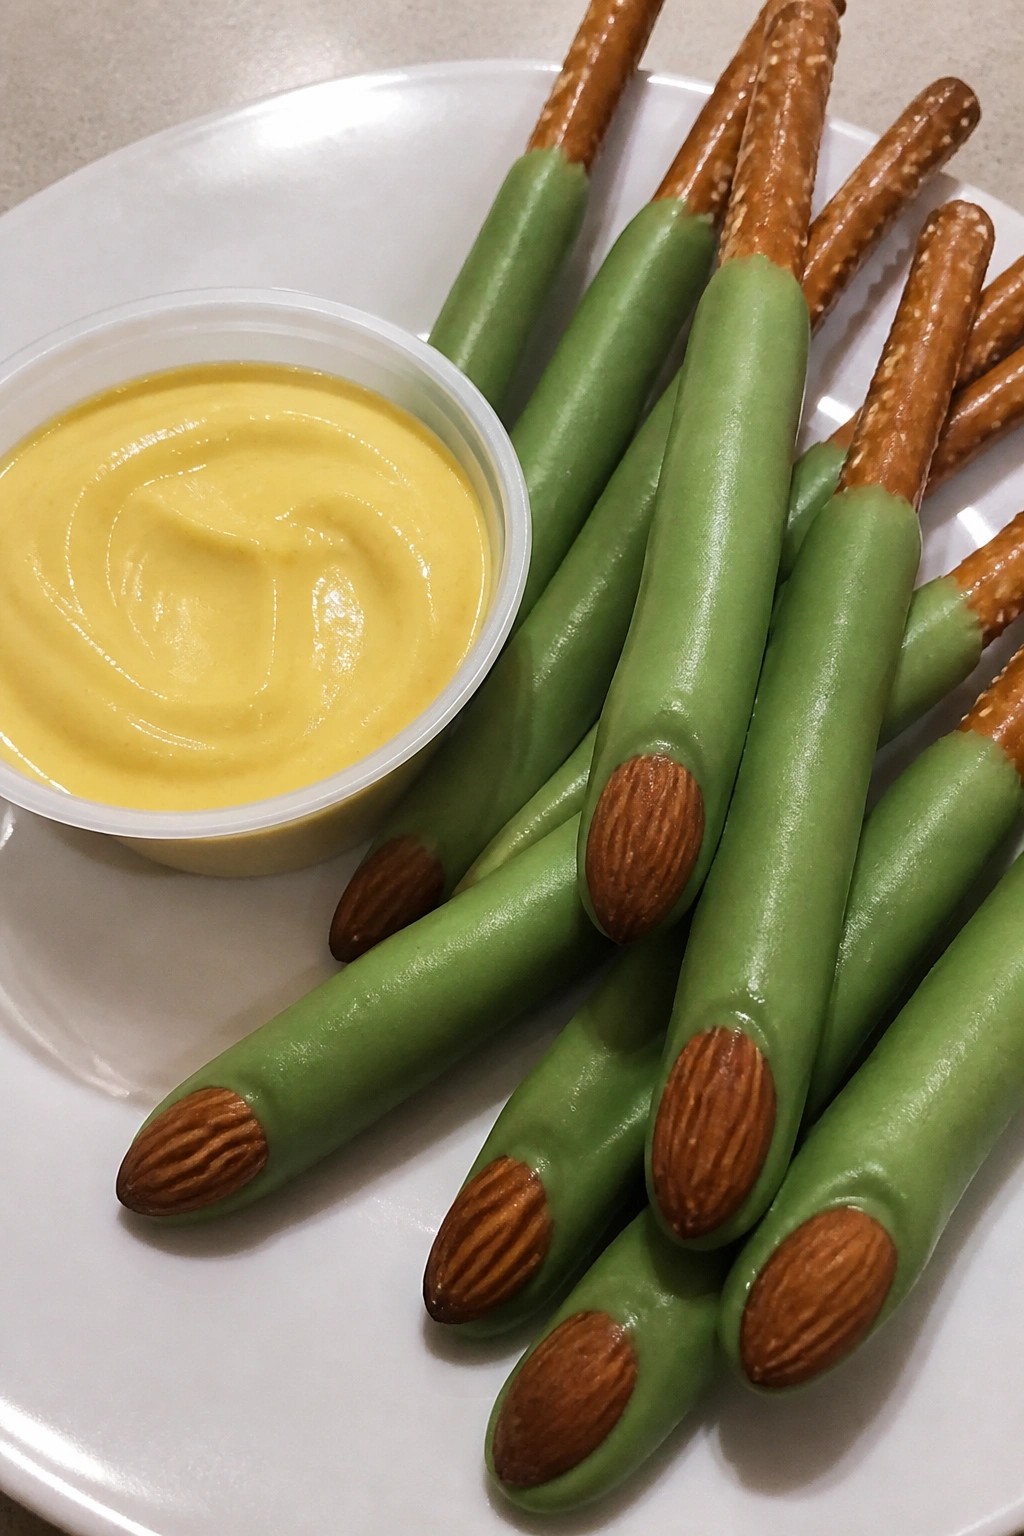
Witch Finger Pretzel Rods with Mustard Dip
These pretzel rods turn into spooky witch fingers with a quick dip in green candy coating. They make a fun addition to any Halloween spread and come together with just a few pantry staples. The salty crunch of the pretzel pairs well with the smooth coating and tangy mustard dip.
The recipe keeps things simple while still delivering that playful Halloween look. It works for last-minute party prep and travels well to gatherings.
Serves 4 people.
Ingredients
- 12 pretzel rods
- 1 cup green candy melts
- 12 whole almonds
- 1/4 cup yellow mustard
- 2 tablespoons mayonnaise
Instructions
- Line a baking sheet with parchment paper and set it aside.
- Place the green candy melts in a microwave-safe bowl and heat in 30-second bursts, stirring between each, until fully melted and smooth.
- Dip each pretzel rod into the melted candy, leaving about two inches uncovered at one end to create the finger shape. Let excess coating drip off.
- Press one almond onto the dipped end of each pretzel to form a fingernail. Place the finished rods on the prepared baking sheet.
- Stir the yellow mustard and mayonnaise together in a small bowl until combined. Serve the rods with the mustard dip on the side.
Extra Tips
Let the candy coating set fully before moving the rods so the almonds stay in place. If the mustard dip tastes too sharp, add a small pinch of sugar to mellow it. These hold up well for a couple of hours at room temperature, making them easy to prepare ahead of the party. Course: Appetizer Cuisine: American Equipment: Microwave-safe bowl, Baking sheet, Small bowl