

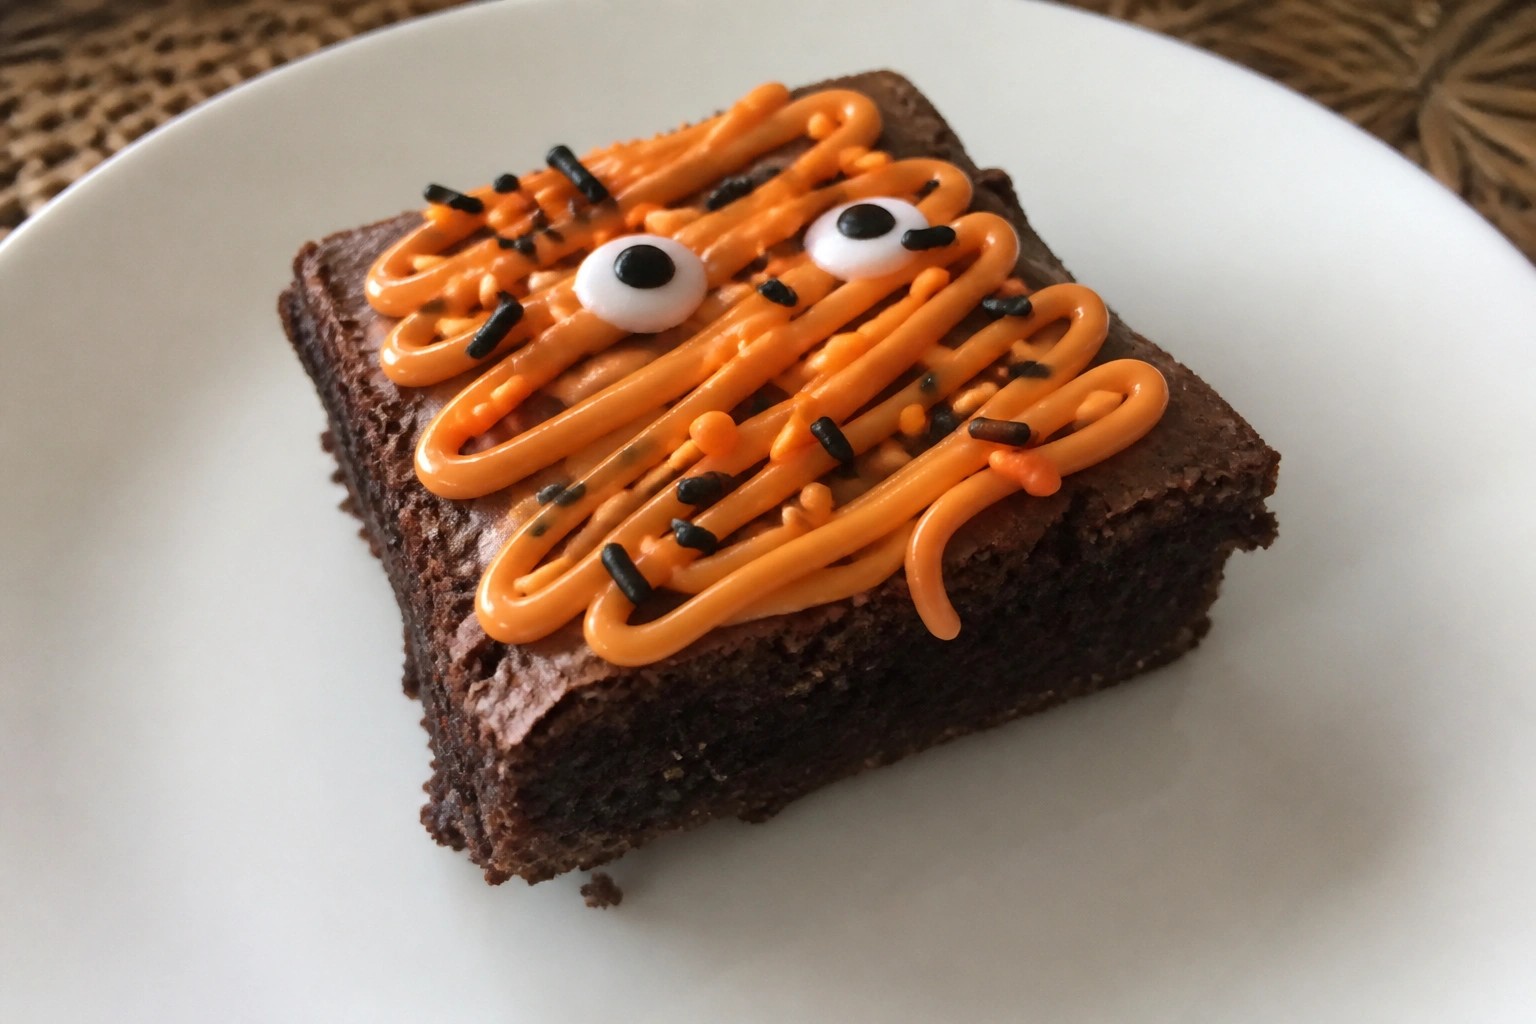
If you need Halloween desserts in a hurry these recipes keep things simple. They rely on ingredients most people already have at home. You will find 12 different ideas that come together with basic steps. Each one focuses on quick prep and minimal cleanup. Pick what works with your time and what you have on hand.
Tips for Fast Halloween Treats
These quick ideas will help you finish the desserts with minimal fuss.
Use What You Have
Check your fridge and pantry first. Chocolate chips, cookies, and cream cheese often work as bases for several recipes here.
Skip Complicated Decorations
Candy eyes, sprinkles, and melted chocolate deliver a Halloween look fast. Skip piping bags and fancy designs when time is short.
Work in Batches
Make two or three recipes that share ingredients at once. This cuts down on cleanup and shopping.
Chill Instead of Bake
Many no-bake options set in the fridge while you handle other tasks. They save oven space and reduce active cooking time.
No-Bake Ghost Oreo Truffles
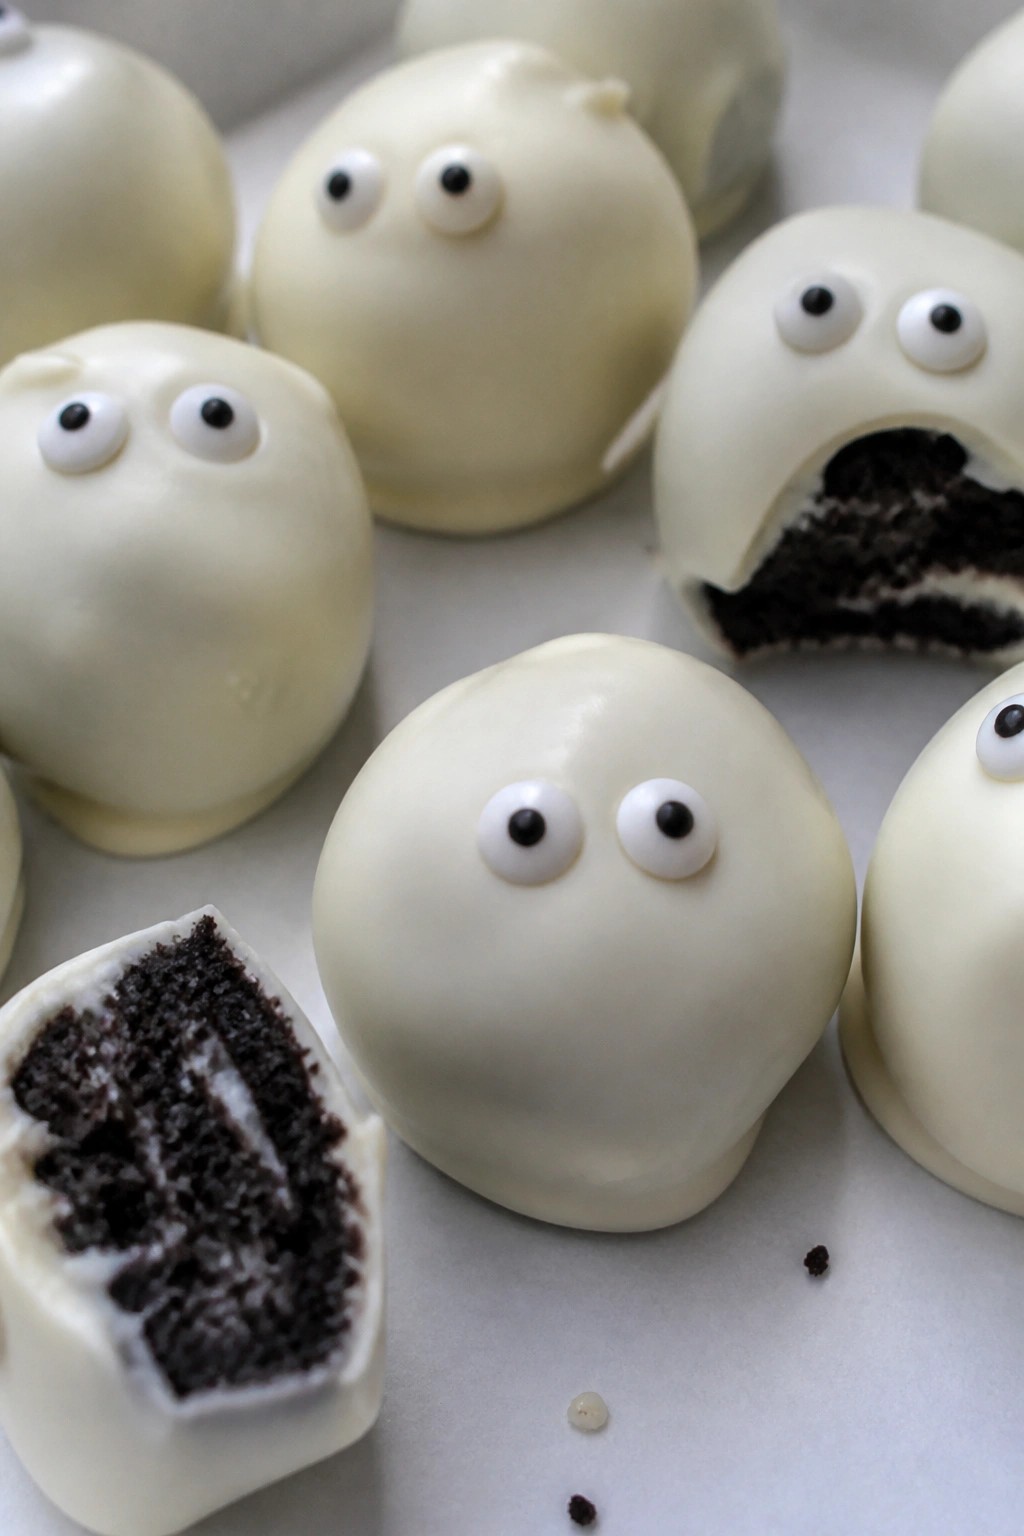
These no-bake ghost Oreo truffles come together in minutes when you need a quick Halloween sweet without any baking. They fit well for last-minute parties or an easy treat to make with kids on a busy evening.
The mix of crushed Oreos and cream cheese creates a fudgy center that gets coated in white chocolate. Candy eyes turn each piece into a simple ghost shape with a creamy bite and mild chocolate flavor.
Serves 4 people.
Ingredients
- 12 Oreo cookies
- 4 ounces cream cheese, softened
- 8 ounces white chocolate chips
- 16 candy eyes
Instructions
- Place the Oreo cookies in a zip-top bag and crush them into fine crumbs with a rolling pin.
- Transfer the crumbs to a mixing bowl and stir in the softened cream cheese until the mixture holds together.
- Scoop out tablespoon-sized portions and roll them into balls, then gently shape each one into an oval for the ghost form. Place the shapes on a parchment-lined baking sheet.
- Melt the white chocolate chips in a microwave-safe bowl in 20-second bursts, stirring between each until smooth.
- Dip each ghost shape into the melted white chocolate to coat it fully, letting excess drip off before returning it to the baking sheet.
- Press two candy eyes onto the front of each coated truffle while the chocolate is still soft. Let the truffles set at room temperature or in the fridge.
Extra Tips
Chill the shaped truffles for 10 minutes before dipping if the mixture feels too soft. Use a fork to lift them out of the chocolate for cleaner coating. Store leftovers in an airtight container in the fridge for up to three days. Course: Dessert Cuisine: American Equipment: Rolling pin, Mixing bowl, Baking sheet, Microwave-safe bowl
Pumpkin Spice Cheesecake Cups
These no-bake cups bring together creamy cheesecake and warm pumpkin spice in individual servings. They come together fast with pantry staples and store-bought whipped topping, making them a reliable choice when you need a quick Halloween dessert. The texture is smooth and lightly spiced, with a crisp graham cracker base that holds up well even after chilling.

Serves 4 people.
Ingredients
- 1 cup graham cracker crumbs
- 3 tablespoons butter, melted
- 8 ounces cream cheese, softened
- 1/2 cup pumpkin puree
- 1/3 cup powdered sugar
- 1 teaspoon pumpkin pie spice
- 1 teaspoon vanilla extract
- 1/2 cup whipped topping
- Ground cinnamon for garnish
Instructions
- Stir the graham cracker crumbs and melted butter together in a small bowl until the crumbs are evenly coated.
- Divide the crumb mixture among four small cups or jars and press it down firmly to form a base layer.
- In a medium bowl, beat the softened cream cheese until smooth. Add the pumpkin puree, powdered sugar, pumpkin pie spice, and vanilla extract. Mix until fully combined and creamy.
- Spoon the pumpkin cheesecake mixture over the crust in each cup, filling them nearly to the top.
- Chill the cups for at least 30 minutes to set the filling.
- Just before serving, add a dollop of whipped topping to each cup and sprinkle lightly with ground cinnamon.
Extra Tips
Use full-fat cream cheese for the creamiest texture. If the filling seems too thick after mixing, add one teaspoon of milk to loosen it. These cups hold well in the refrigerator for a day, so you can assemble them ahead and add the whipped topping right before guests arrive. Course: Dessert Cuisine: American Equipment: Mixing Bowls, Electric Mixer, Serving Cups
Spooky Spiderweb Brownies
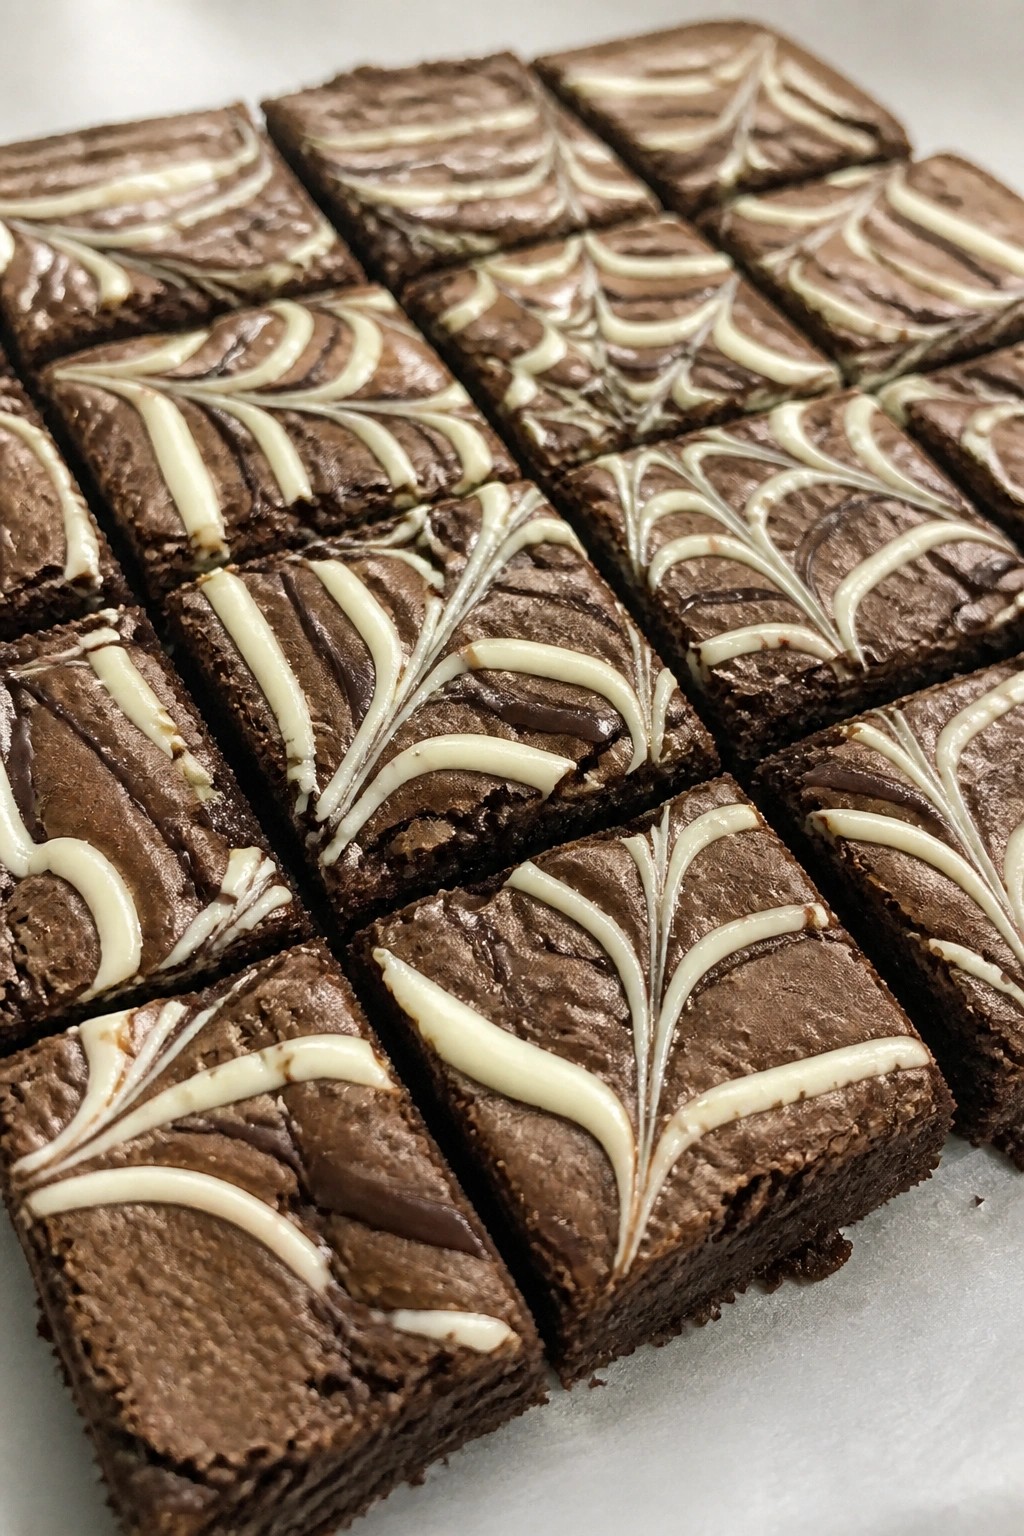
These Spooky Spiderweb Brownies use basic pantry items to create a quick treat that fits right into last-minute Halloween plans. The brownies bake up fudgy with a thin crackly top, and a simple white chocolate design adds the spiderweb detail once they cool.
They work well for small gatherings or when you need something sweet without a long shopping list. The web comes from melted white chocolate piped on top, keeping the process straightforward for any home cook.
Serves 4 people.
Ingredients
- 4 tablespoons unsalted butter
- 1/2 cup granulated sugar
- 1 large egg
- 1 teaspoon vanilla extract
- 1/4 cup unsweetened cocoa powder
- 1/4 cup all-purpose flour
- 1/8 teaspoon salt
- 1/4 cup white chocolate chips
Instructions
- Preheat the oven to 350 degrees F and line a small 8×4 inch loaf pan with parchment paper.
- Melt the butter in a microwave-safe bowl. Stir in the sugar until combined, then mix in the egg and vanilla extract.
- Add the cocoa powder, flour, and salt to the wet mixture and stir until a thick batter forms with no dry streaks remaining.
- Spread the batter evenly into the prepared pan and bake for 20 to 22 minutes until the top looks set. Let the brownies cool completely in the pan.
- Melt the white chocolate chips in the microwave in 20-second bursts, stirring between each until smooth. Spoon the melted chocolate into a small plastic bag, snip off one corner, and pipe circles on the cooled brownies. Drag a toothpick through the circles to form the web pattern.
Extra Tips
Let the brownies cool fully before adding the white chocolate so the web lines stay defined and do not sink. If the chocolate thickens while piping, warm it briefly again. Store any leftovers in an airtight container at room temperature for up to two days to keep the texture fudgy. Course: Dessert Cuisine: American Equipment: Mixing Bowl, Loaf Pan, Microwave, Plastic Bag
Candy Corn Parfait Jars
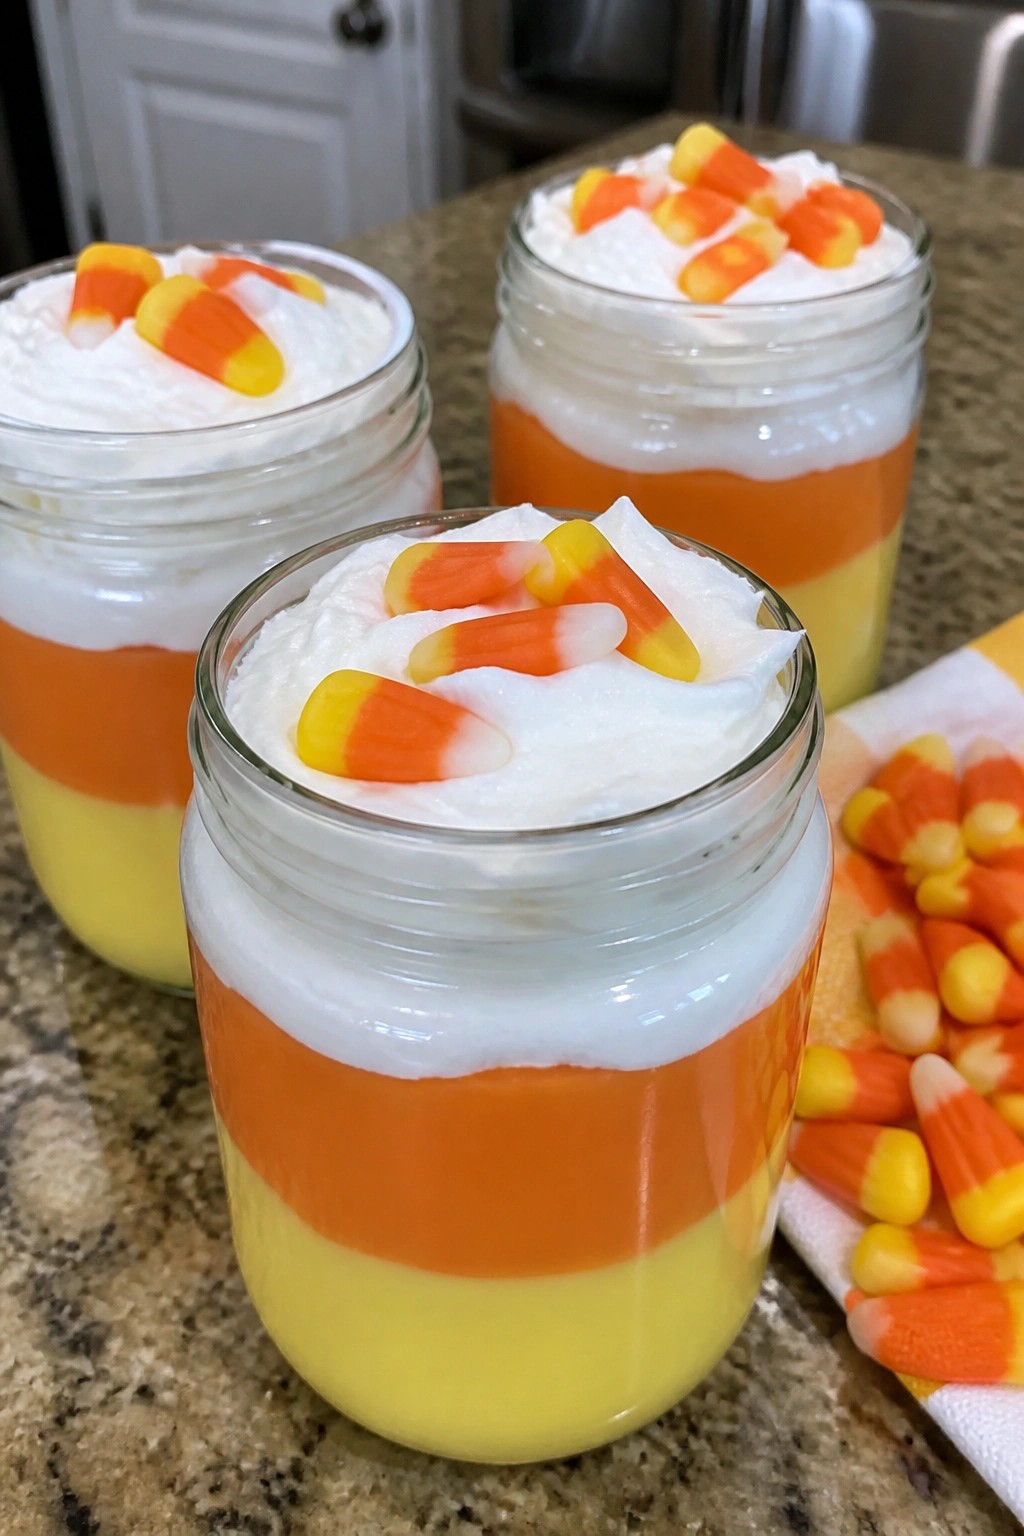
These jars come together fast with just a few pantry staples and no baking required. They work well for a quick Halloween treat when you need something festive in under 30 minutes. The layers create a candy corn look with creamy vanilla pudding in bright colors and a light whipped topping. Each bite mixes smooth texture with the chewy sweetness of candy corn on top.
Serves 4 people.
Ingredients
- 1 (3.4 oz) package instant vanilla pudding mix
- 2 cups cold milk
- Yellow food coloring
- Orange food coloring
- 1 1/2 cups whipped topping
- 1/2 cup candy corn
Instructions
- Whisk the pudding mix and cold milk in a bowl for two minutes until it thickens.
- Divide the pudding evenly into two smaller bowls. Stir several drops of yellow food coloring into one bowl and orange food coloring into the other until the shades look bright.
- Spoon the yellow pudding into the bottom of four small jars. Add a layer of the orange pudding on top.
- Pipe or spoon the whipped topping over the orange layer to finish each jar.
- Scatter candy corn over the whipped topping before serving.
Extra Tips
Chill the jars for 10 minutes after layering if the pudding feels too soft. Use clear jars so the colors show through clearly. Swap in vanilla yogurt for the pudding if you want a tangier base, but keep the food coloring amounts the same to maintain the candy corn look. Course: Dessert Cuisine: American Equipment: Mixing bowls, Whisk, Jars, Spoon
Caramel Apple Rice Krispie Squares
These Caramel Apple Rice Krispie Squares combine a classic fall pairing in an easy no-fuss format. They work well for last-minute Halloween gatherings or when you want a quick sweet treat without turning on the oven for long.
The squares stay chewy from the marshmallows while the apple pieces add a little freshness and the caramel brings a rich finish. The cereal keeps the texture light and crisp.

Serves 4 people.
Ingredients
- 2 tablespoons butter
- 2 cups mini marshmallows
- 3 cups Rice Krispies cereal
- 1 apple, diced
- 1/4 cup caramel sauce
Instructions
- Melt the butter in a large saucepan over medium heat. Add the mini marshmallows and stir until they are fully melted and smooth.
- Remove the pan from the heat. Stir in the Rice Krispies cereal and diced apple until everything is evenly coated.
- Press the mixture into a lightly greased square baking pan or dish using a spatula or wax paper.
- Drizzle the caramel sauce evenly over the top while the squares are still warm.
- Let the mixture cool for 15 minutes, then cut into squares and serve.
Extra Tips
Press the mixture firmly into the pan so the squares hold their shape after cooling. If the caramel sauce is too thick to drizzle, warm it briefly in the microwave first. Store leftovers in a single layer in an airtight container to keep the cereal crisp. Course: Dessert Cuisine: American Equipment: Large Saucepan, Square Baking Pan, Spatula
Monster Green Chocolate Bark
This bark comes together fast when you need a quick Halloween treat. The bright green color and candy eyeballs give it a playful monster look that kids and adults both enjoy. It delivers a creamy chocolate base with crisp snaps from the toppings.
It works well for last-minute parties or school events since it requires no baking. The flavor stays sweet and mild with just enough crunch to keep each bite interesting.

Serves 4 people.
Ingredients
- 12 ounces white chocolate chips
- 1/2 teaspoon green gel food coloring
- 1/3 cup candy eyeballs
- 2 tablespoons Halloween sprinkles
- 1/4 cup crushed pretzels
Instructions
- Line a baking sheet with parchment paper and set it aside.
- Place the white chocolate chips in a microwave-safe bowl. Heat in 30-second bursts, stirring after each, until fully melted and smooth.
- Stir the green gel food coloring into the melted chocolate until the color is even.
- Pour the green chocolate onto the prepared baking sheet and spread it into a thin, even layer with a spatula.
- While the chocolate is still wet, scatter the candy eyeballs, Halloween sprinkles, and crushed pretzels evenly across the surface.
- Place the baking sheet in the refrigerator for 20 to 30 minutes until the bark is firm.
- Break the chilled bark into pieces and serve.
Extra Tips
Use gel food coloring instead of liquid to keep the chocolate thick and easy to spread. If the candy eyeballs sink, press them in gently right after sprinkling. Store leftover pieces in an airtight container in the fridge for up to five days to maintain the snap. Course: Dessert Cuisine: American Equipment: Microwave-safe bowl, Baking sheet, Parchment paper
Witch Finger Pretzel Rods
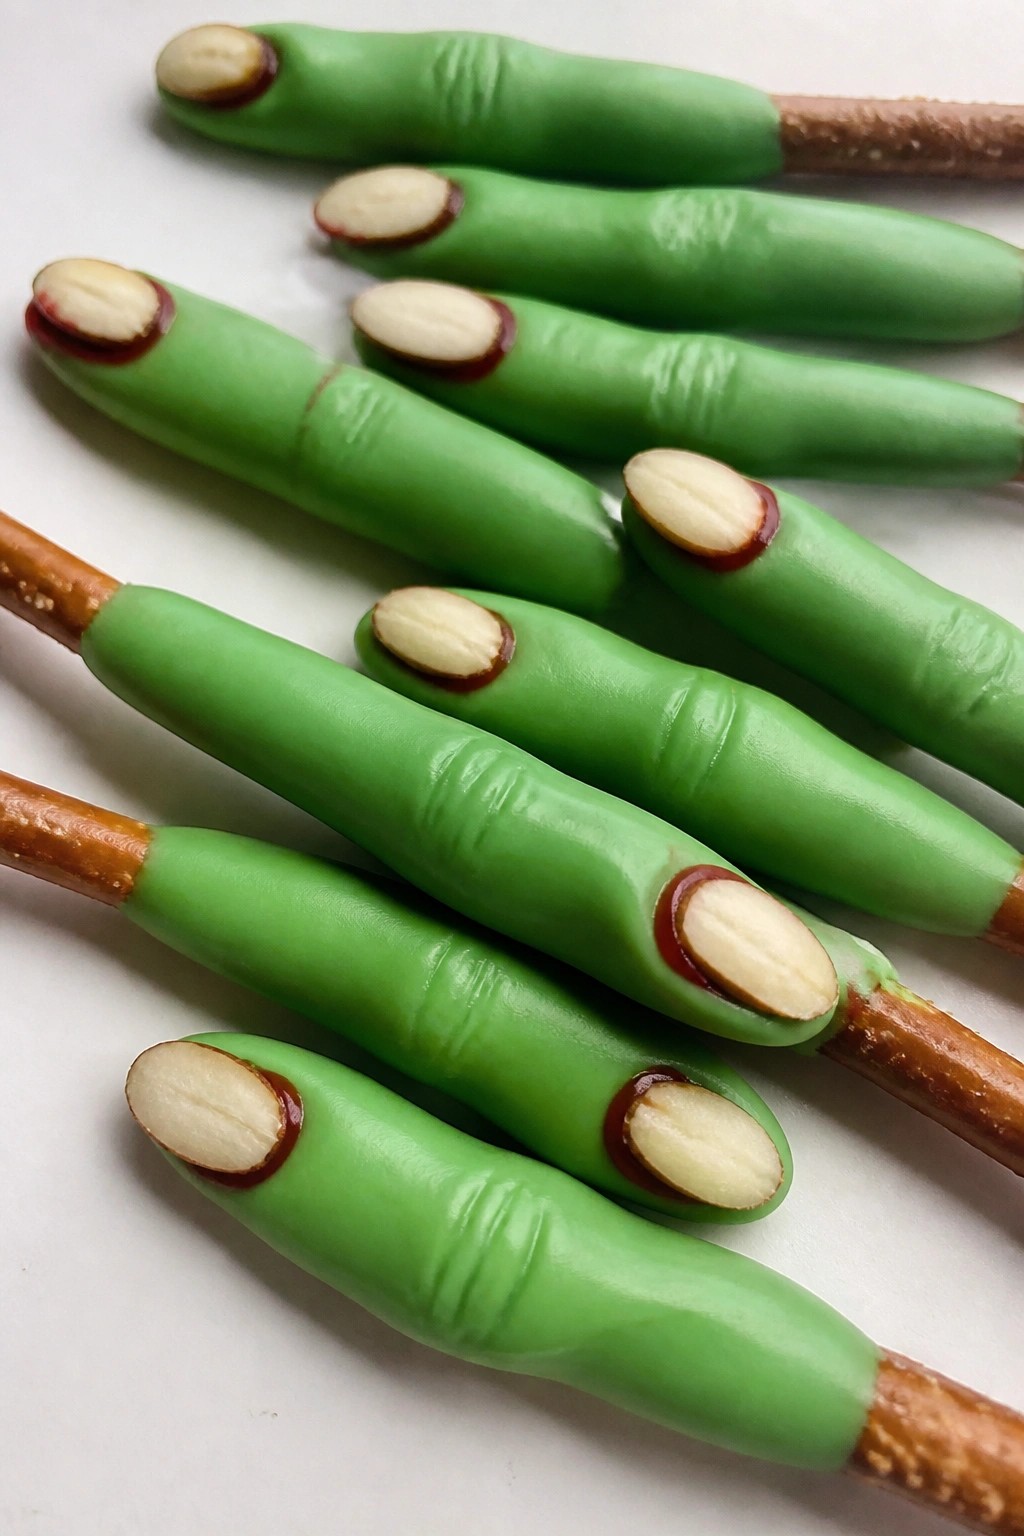
These witch finger pretzels come together fast with just a few ingredients. They give a crunchy, salty base under a sweet green coating that sets into a fun Halloween shape. The almond slice nail adds a creepy detail that works well for parties or quick treats.
The recipe keeps things simple so you can make them even when time is short. Kids can help press on the almonds once the coating is ready. The finished fingers taste like sweet and salty snacks with a light crunch.
Serves 4 people.
Ingredients
- 12 pretzel rods
- 1 cup green candy melts
- 12 blanched almonds
- 1 tablespoon red decorating gel
Instructions
- Line a baking sheet with parchment paper and set it aside.
- Place the green candy melts in a microwave-safe bowl. Heat them in 30-second bursts, stirring after each one, until fully melted and smooth.
- Dip each pretzel rod into the melted candy, leaving about two inches uncovered at one end for the finger base. Let excess coating drip off.
- Press one blanched almond onto the coated tip of each pretzel to form a fingernail. Place the pretzels on the prepared baking sheet.
- Use the red decorating gel to draw a thin line where the almond meets the coating. This creates a simple blood effect at the nail bed.
- Let the pretzels sit at room temperature until the coating hardens completely.
Extra Tips
Work quickly once the candy melts are ready so the coating does not set before you add the almonds. Store the finished fingers in an airtight container at room temperature for up to two days. If the candy melts thicken while you dip, warm them for a few seconds to loosen the texture again. Course: Dessert Cuisine: American Equipment: Microwave-safe bowl, Baking sheet, Parchment paper
Boo Berry Mousse Cups
These mousse cups deliver a light, berry-forward treat that fits right into a busy Halloween night. The creamy base pairs with sweet blueberries for a smooth texture that feels festive without much effort. They work well when you need a quick dessert that still looks like you planned ahead.

Serves 4 people.
Ingredients
- 2 cups fresh blueberries
- 1 cup heavy whipping cream
- 4 ounces cream cheese, softened
- 1/4 cup granulated sugar
- 1 teaspoon vanilla extract
- 4 small clear cups or glasses for serving
- 8 ghost-shaped shortbread cookies
Instructions
- Place the blueberries in a blender and pulse until mostly smooth, leaving a few small pieces for texture.
- In a large mixing bowl, beat the heavy whipping cream with an electric mixer on medium speed until stiff peaks form.
- In a separate bowl, beat the cream cheese, sugar, and vanilla extract until smooth and creamy.
- Gently fold the blueberry puree into the cream cheese mixture until fully combined.
- Fold the whipped cream into the blueberry mixture in two additions, keeping the texture light and airy.
- Spoon the mousse evenly into the four cups or glasses.
- Top each cup with two ghost-shaped shortbread cookies right before serving.
Extra Tips
Chill the filled cups for 15 minutes if you have time, as this helps the mousse set slightly for cleaner scoops. Swap the shortbread cookies for any plain vanilla cookie you have on hand. Leftovers keep covered in the refrigerator for one day, though the cookies soften after a few hours. Course: Dessert Cuisine: American Equipment: Blender, Electric mixer, Mixing bowls
Quick Skillet S’mores Dip
This skillet dip turns the classic s’mores combo into a quick shared dessert that fits right into a busy Halloween night. It comes together fast with items most people already have on hand, so it works well when guests show up or when you want something warm without a long project.
The result is a layer of melted chocolate topped with toasted marshmallows that stay soft in the center. Graham crackers provide the crunch and complete the familiar flavor without needing a fire.

Serves 4 people.
Ingredients
- 1 tablespoon butter
- 1 1/2 cups semisweet chocolate chips
- 2 cups mini marshmallows
- 8 graham crackers, broken into pieces
Instructions
- Turn on the broiler and let it heat while you prepare the skillet.
- Use the butter to coat the bottom and sides of a medium skillet.
- Spread the chocolate chips in an even layer across the buttered skillet.
- Scatter the mini marshmallows over the chocolate chips so they cover the surface.
- Place the skillet under the broiler for 1 to 2 minutes, watching closely until the marshmallows turn golden.
- Remove the skillet and serve at once with the broken graham crackers for dipping.
Extra Tips
Break the graham crackers into smaller sections before serving so everyone can scoop up both chocolate and marshmallow in one bite. If the top browns too quickly, pull the skillet out early since the residual heat will finish melting the chocolate underneath. Leftovers can be reheated briefly under the broiler the next day, though the texture is best right after cooking. Course: Dessert Cuisine: American Equipment: Skillet, Broiler
Black Cat Fudge Squares
These Black Cat Fudge Squares come together fast with just a few pantry staples and no oven time. They deliver a deep chocolate taste with a dense, creamy bite that satisfies a quick sweet craving. The dark color fits right into a Halloween spread and makes them easy to cut into neat squares for sharing.
This recipe serves 4 people. – 1 cup dark chocolate chips – 1/2 cup sweetened condensed milk – 2 tablespoons unsalted butter – 1 teaspoon vanilla extract – 1/4 teaspoon black gel food coloring – Pinch of salt
### Instructions 1. Line a small loaf pan with parchment paper and set it aside. 2. Place the dark chocolate chips, sweetened condensed milk, and butter in a microwave-safe bowl. 3. Microwave in 30-second bursts, stirring after each, until the mixture is fully melted and smooth. 4. Stir in the vanilla extract, black gel food coloring, and salt until the color is even. 5. Pour the mixture into the prepared pan and smooth the top with a spatula. 6. Chill in the refrigerator for at least one hour until firm. 7. Lift the fudge out with the parchment, cut into squares, and serve.
### Extra Tips Chill the fudge just until set so the squares hold clean edges. If the color looks too light after mixing, add a tiny bit more gel coloring before pouring. Store leftovers in an airtight container in the fridge to keep the texture firm.
Course: Dessert Cuisine: American Equipment: Microwave-safe bowl, Small loaf pan, Spatula

Serves 4 people.
Instructions
- Line a small loaf pan with parchment paper and set it aside.
- Place the dark chocolate chips, sweetened condensed milk, and butter in a microwave-safe bowl.
- Microwave in 30-second bursts, stirring after each, until the mixture is fully melted and smooth.
- Stir in the vanilla extract, black gel food coloring, and salt until the color is even.
- Pour the mixture into the prepared pan and smooth the top with a spatula.
- Chill in the refrigerator for at least one hour until firm.
- Lift the fudge out with the parchment, cut into squares, and serve.
Extra Tips
Chill the fudge just until set so the squares hold clean edges. If the color looks too light after mixing, add a tiny bit more gel coloring before pouring. Store leftovers in an airtight container in the fridge to keep the texture firm. Course: Dessert Cuisine: American Equipment: Microwave-safe bowl, Small loaf pan, Spatula
Frankenstein Avocado Pudding Cups
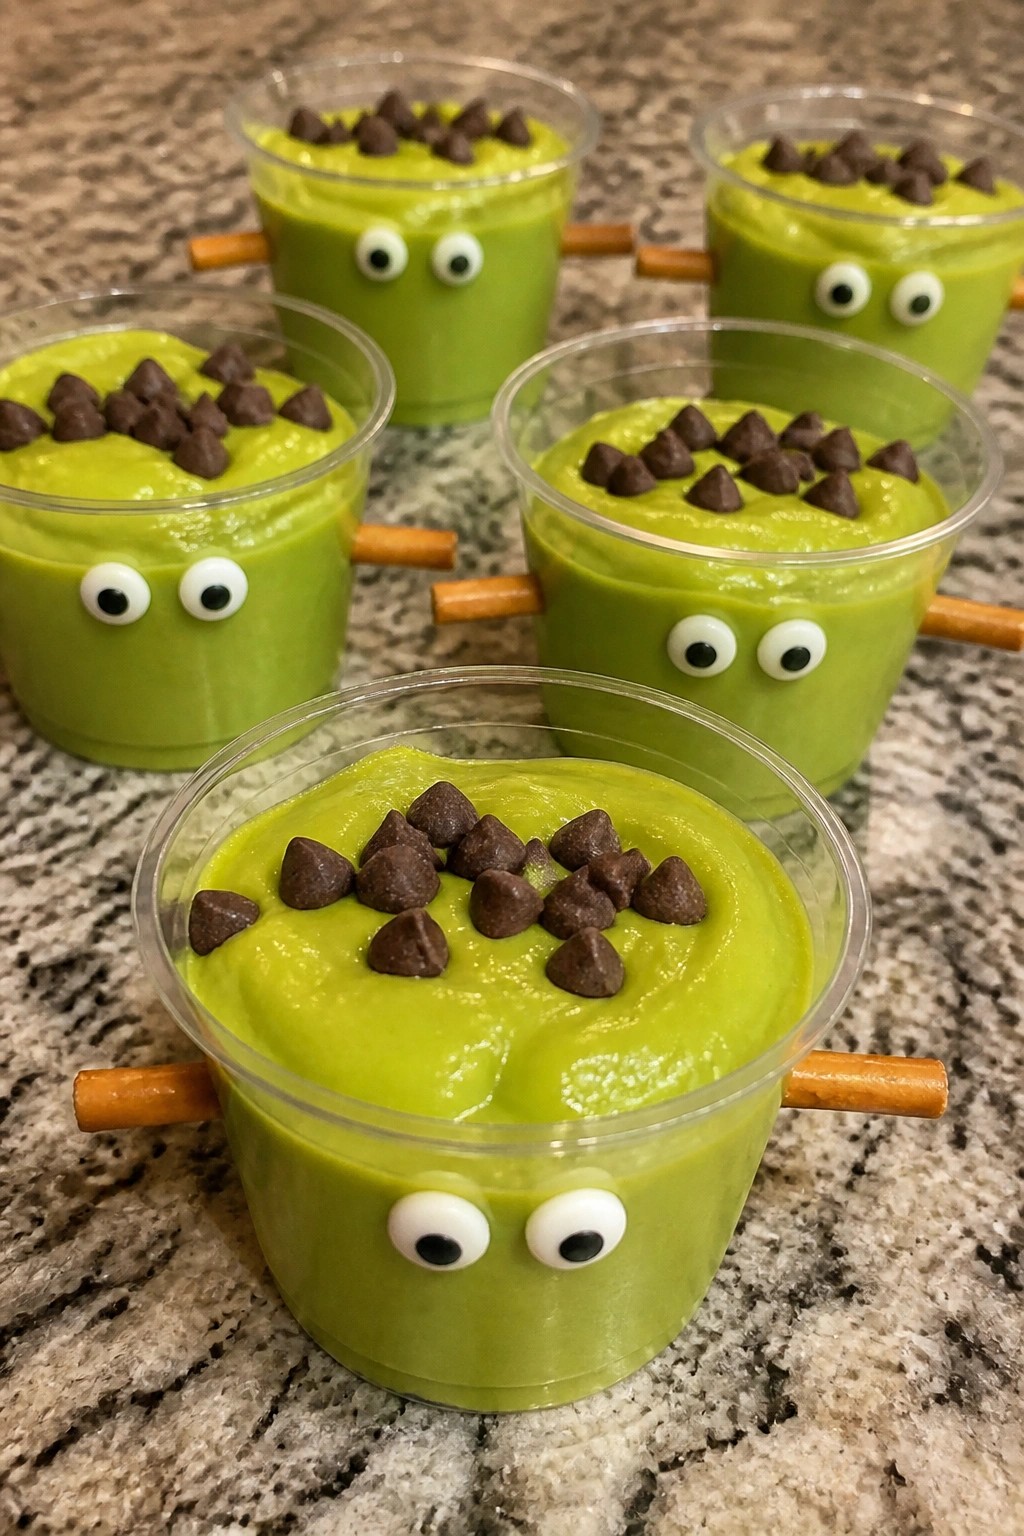
These Frankenstein Avocado Pudding Cups come together in minutes with a quick blend and a few playful decorations. They deliver a creamy texture with a mild sweet flavor that feels like a treat without much effort. The recipe works well for last-minute Halloween parties or when you need something fun to serve right away.
The natural green from the avocado sets the base for the monster theme, while simple add-ons turn each cup into a cute face. Kids and adults both enjoy assembling them, and the pudding stays light enough to enjoy after a full meal.
Serves 4 people.
Ingredients
- 2 ripe avocados, pitted and peeled
- 1/4 cup powdered sugar
- 1/2 cup milk
- 1 teaspoon vanilla extract
- 1/4 teaspoon salt
- 1/4 cup mini chocolate chips
- 8 candy eyes
- 4 pretzel sticks
Instructions
- Add the avocados, powdered sugar, milk, vanilla extract, and salt to a blender. Blend until the mixture is completely smooth and creamy.
- Spoon the pudding evenly into four small serving cups or glasses.
- Sprinkle mini chocolate chips across the top of each cup to create a hairline.
- Press two candy eyes gently into the pudding on each cup.
- Break the pretzel sticks in half and insert two pieces into the sides of each cup to form bolts.
Extra Tips
Use very ripe avocados for the smoothest pudding and adjust the powdered sugar slightly if you prefer a less sweet version. The mini chocolate chips stay in place best when sprinkled right after filling the cups. Store any leftovers in the refrigerator for up to one day, though the candy eyes may soften over time. Course: Dessert Cuisine: American Equipment: Blender, Serving Cups
Halloween Sprinkle Cookie Dough Dip
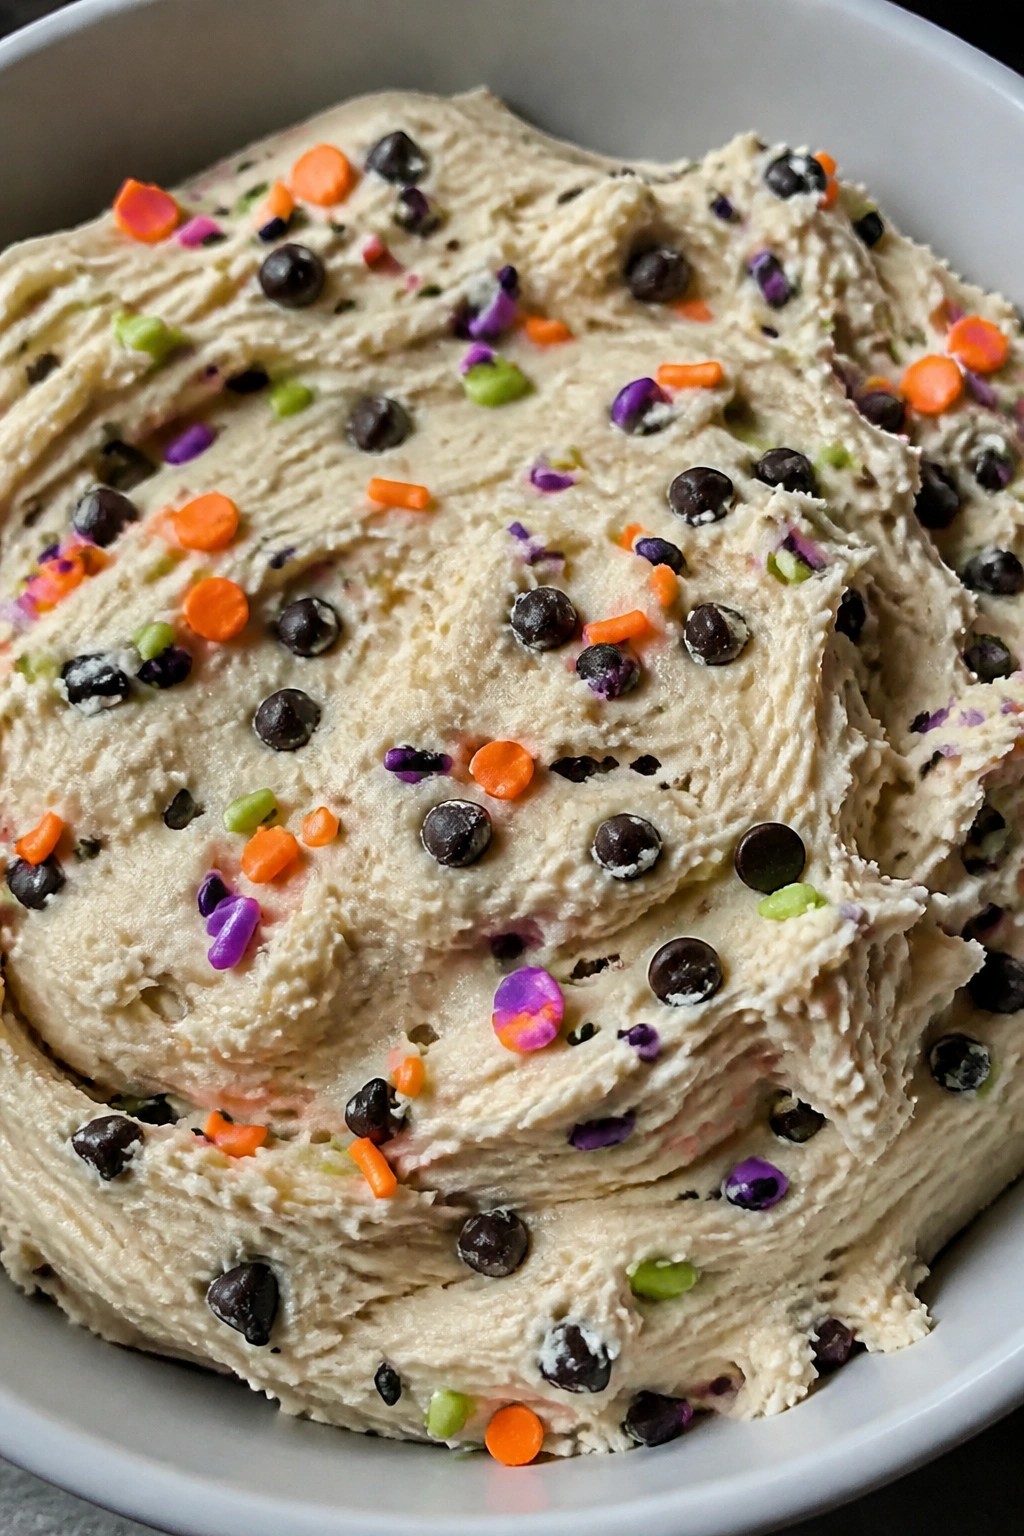
This no-bake dip brings the flavors of cookie dough into an easy party treat. It comes together quickly with basic ingredients and adds a festive touch for Halloween gatherings or last-minute cravings.
The texture is creamy and rich with bits of chocolate and crunchy sprinkles throughout. It tastes sweet and vanilla-forward, like edible cookie dough in dip form.
Serves 4 people.
Ingredients
- 8 ounces cream cheese, softened
- 1/4 cup unsalted butter, softened
- 1/2 cup brown sugar
- 1/4 cup powdered sugar
- 1 teaspoon vanilla extract
- 1 cup mini chocolate chips
- 1/3 cup Halloween sprinkles
- Graham crackers, for serving
Instructions
- Place the softened cream cheese and butter in a mixing bowl. Beat them together with a hand mixer until the mixture looks smooth and creamy.
- Add the brown sugar, powdered sugar, and vanilla extract. Continue mixing until the sugars dissolve and the dip turns light and fluffy.
- Fold in the mini chocolate chips with a spatula until they are evenly distributed.
- Spoon the dip into a serving bowl and scatter the Halloween sprinkles over the top.
- Arrange graham crackers around the bowl for dipping.
Extra Tips
For the best texture, let the cream cheese and butter sit out for about 30 minutes before mixing so they blend without lumps. If the dip firms up in the fridge, give it a quick stir before serving. You can swap the mini chocolate chips for white chocolate chips if you want a brighter contrast with the sprinkles. Course: Dessert Cuisine: American Equipment: Mixing Bowl, Hand Mixer