

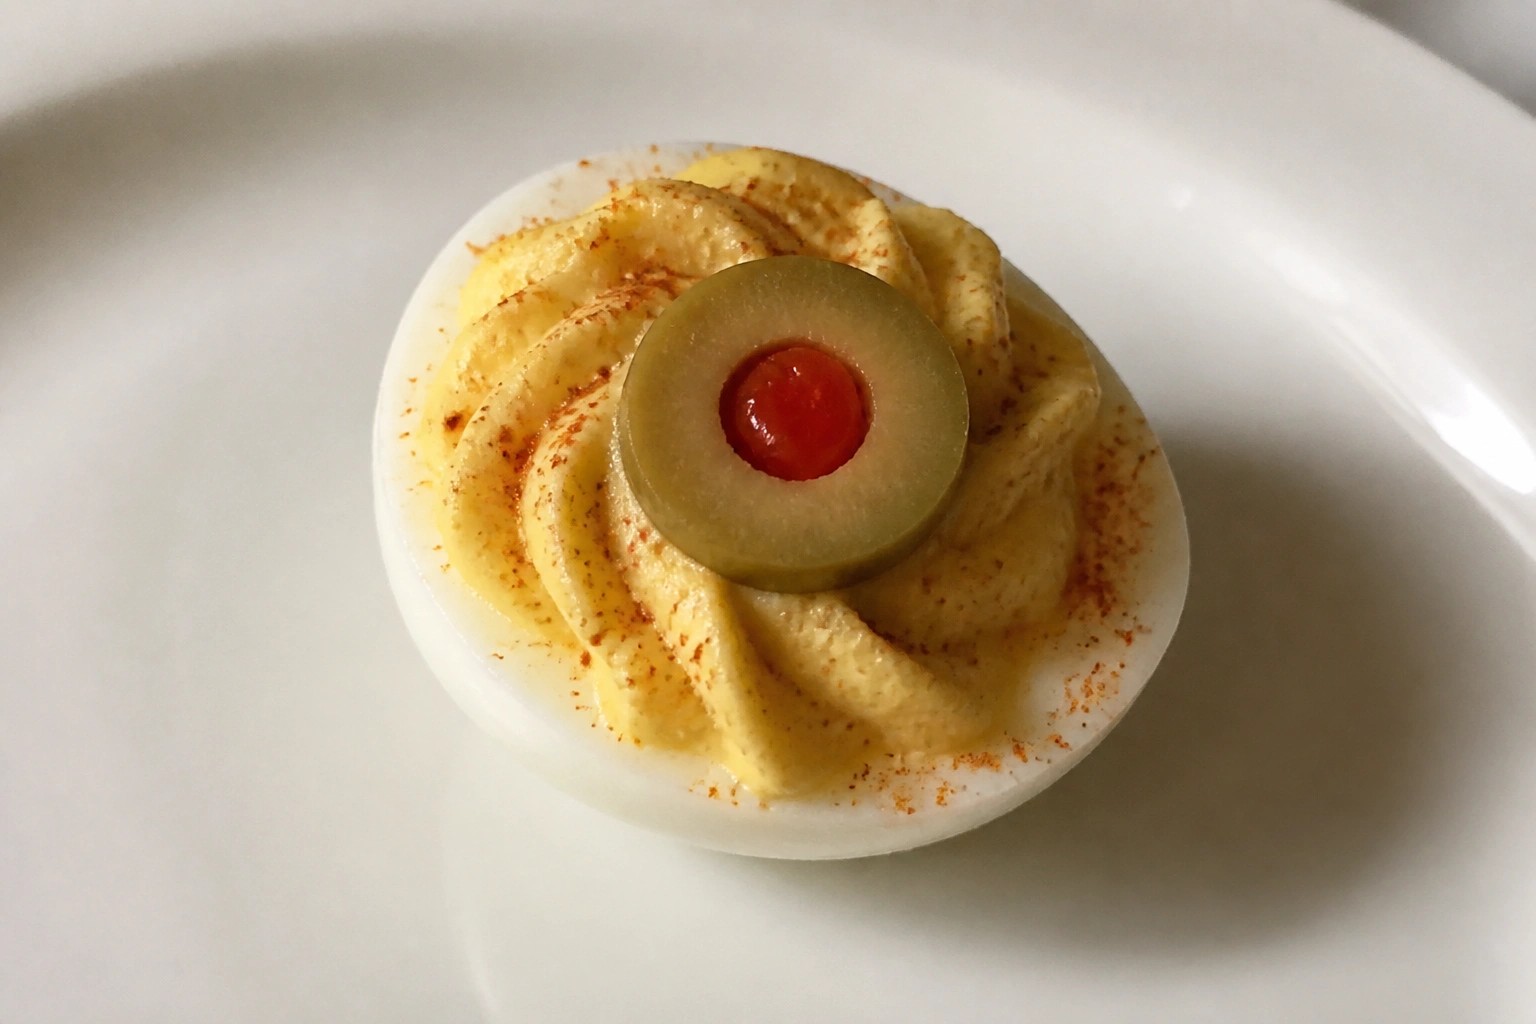
Halloween parties for adults can be simple to plan with the right recipes. These ideas focus on food that looks good without taking too much time. Most use ingredients you can find at a regular store. Each one has clear steps so you can make them ahead or on the day. Here are 13 options to try this season.
Helpful Tips Before You Start
These ideas come together faster when you keep ingredients simple and focus on easy assembly.
Pick Strong Bases
Start with store bought puff pastry, flatbreads, or cheese boards. They give you a clean canvas for quick Halloween shapes without extra baking.
Add Grown Up Flavors
Use ingredients like goat cheese, balsamic glaze, or smoked nuts. They make the snacks taste more like party food than kids treats.
Choose Dark Serving Pieces
Place food on black or dark platters. The contrast makes colors stand out and the whole spread look more finished.
Prep Components Early
Cut vegetables, mix dips, or bake bases the day before. This leaves only quick assembly on the day of your gathering.
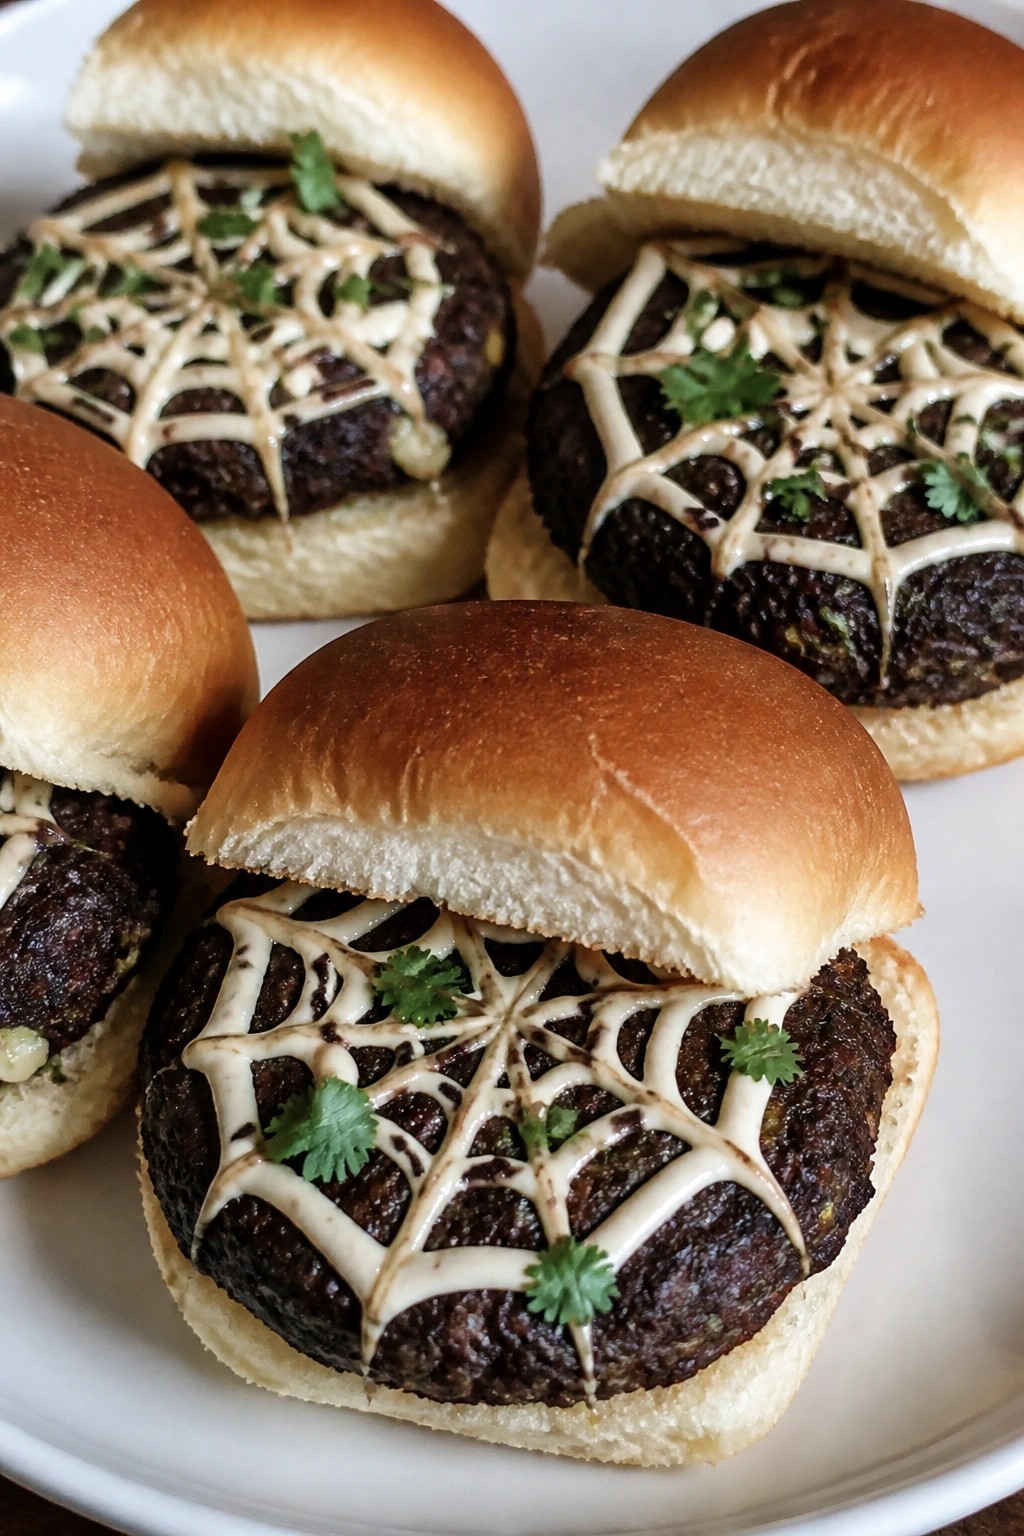
Spiderweb Black Bean Sliders with Chipotle Crema
These sliders stand out at adult Halloween parties because the white crema forms a clear spiderweb against the dark patty. They work well for small gatherings where you want something handheld that still feels a little special.
The patties stay firm and savory while the chipotle crema adds smoky heat and a cool finish. The look comes from simple piping and a quick drag of a toothpick rather than any extra ingredients.
Serves 4 people.
Ingredients
- 2 (15 oz) cans black beans, drained and rinsed
- 1 small onion, finely chopped
- 2 cloves garlic, minced
- ½ cup breadcrumbs
- 1 large egg
- 1 tsp ground cumin
- 1 tsp chili powder
- ½ tsp salt
- ¼ tsp black pepper
- 8 slider buns
- 1 cup sour cream
- 2 chipotle peppers in adobo sauce
- 1 tbsp lime juice
- Fresh cilantro leaves for garnish
Instructions
- Place the black beans in a large bowl and mash them with a fork or potato masher until most are broken down but some chunks remain.
- Add the onion, garlic, breadcrumbs, egg, cumin, chili powder, salt, and pepper to the bowl. Mix until the mixture holds together when pressed.
- Divide the mixture into 8 equal portions and shape each into a small patty about 3 inches wide.
- Heat a large skillet over medium heat and cook the patties for 4 minutes on each side until browned and heated through. Set aside on a plate.
- In a small bowl, stir together the sour cream, chipotle peppers, and lime juice until smooth. Spoon the crema into a small zip-top bag and snip off one corner.
- Place each patty on a slider bun. Pipe four concentric circles of crema on top of each patty, then drag a toothpick from the center outward in straight lines to create the web pattern.
- Top each slider with a few cilantro leaves before serving.
Extra Tips
Pipe the crema right before serving so the lines stay sharp. If the mixture feels too wet when forming patties, add another tablespoon of breadcrumbs. Leftovers keep in the fridge for two days and reheat well in a skillet over low heat. Course: Appetizer Cuisine: American Equipment: Mixing Bowl, Large Skillet
Ghostly Caprese Skewers with Balsamic Glaze
These skewers give the classic Caprese combination a light Halloween touch. The white mozzarella balls stand out against the tomatoes and create a simple ghostly effect on the plate. They work well as a no-fuss appetizer for adult gatherings where you want something fresh instead of heavy.
The flavors stay bright and balanced. Juicy tomatoes and creamy mozzarella pair with the herbal note of basil and the sweet acidity of balsamic glaze. The result feels light but still satisfying.

Serves 4 people.
Recommended Products

Precise & Even Filling: This deviled egg piping tool enables even and precise filling, creating professional and uniform shapes for devil eggs injector. Perfect for making neat and delicate deviled eggs easily.

Precise Even Filling: Our deviled egg piping injector delivers smooth, uniform filling for deviled eggs, creating consistent portion sizes without overfilling or messy spills; you can craft restaurant-quality stuffed eggs with neat, decorative cream patterns effortlessly.
Ingredients
- 24 cherry tomatoes
- 24 small fresh mozzarella balls
- 24 fresh basil leaves
- 24 wooden skewers
- 1/2 cup balsamic glaze
Instructions
- Rinse the cherry tomatoes and basil leaves under cool water and pat them dry.
- Thread one basil leaf, one cherry tomato, and one mozzarella ball onto each skewer in that order.
- Place the finished skewers on a serving platter.
- Drizzle the balsamic glaze evenly over the skewers just before serving.
Extra Tips
Assemble the skewers a few hours ahead and keep them covered in the refrigerator, then add the balsamic glaze right before guests arrive so the mozzarella stays bright white. If you want simple ghost faces, use a toothpick to draw small eyes and a mouth with a tiny amount of the glaze on each mozzarella ball. Course: Appetizer Cuisine: Italian Equipment: Wooden skewers, Serving platter
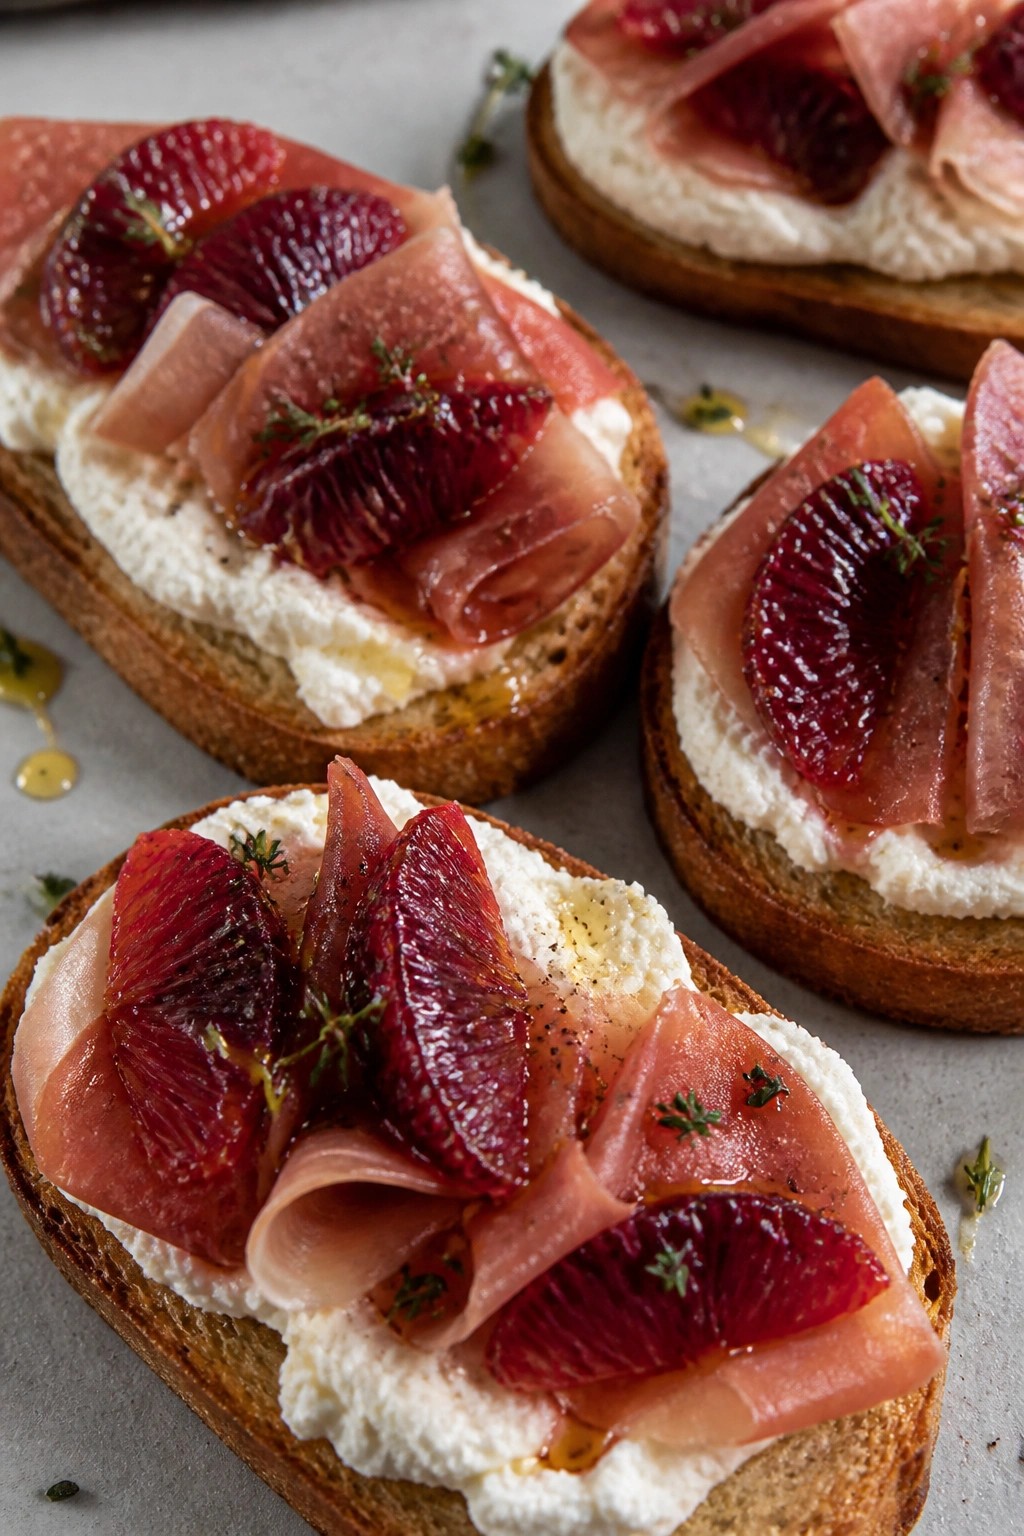
Blood Orange and Prosciutto Crostini with Whipped Ricotta
This crostini brings together the sweet tartness of blood oranges with salty prosciutto and light whipped ricotta. It works well for adult Halloween gatherings where you want something that looks striking but stays simple to prepare. The toasted bread gives a crisp base while the toppings add a mix of creamy and chewy textures.
Serves 4 people.
Recommended Products

INCLUDES: 30 4-inch Rubber Witch Fingers

Assorted Colors & Styles - The pack of Worst Witch Fingers includes 30 pieces of colorful plastic witch fingers, featuring 5 vibrant colors to add an extra touch of Halloween spirit to your costume. The assorted styles ensure a variety of looks, perfect for any witch-themed party or event

Ample Quantity: the package includes 100 pieces witch fingers, including 5 colors (randomly); Enough for classroom use, such as apply them as pointers for reading in class, and more; Ample quantity allow you to share with others
Ingredients
- 1 baguette, cut into 12 slices
- 8 oz ricotta cheese
- 6 oz prosciutto, thinly sliced
- 3 blood oranges, peeled and segmented
- 2 tablespoons olive oil
- 1 tablespoon honey
- Salt and black pepper to taste
- Fresh thyme leaves for garnish
Instructions
- Preheat the oven to 400°F. Place the baguette slices on a baking sheet and brush them lightly with olive oil. Toast for 8 to 10 minutes until the edges turn golden and crisp.
- Add the ricotta to a mixing bowl with a pinch of salt and black pepper. Whip with a fork or whisk until the cheese becomes smooth and slightly fluffy.
- Spread a layer of whipped ricotta over each cooled crostini slice.
- Lay a folded piece of prosciutto on top of the ricotta, then add two or three blood orange segments.
- Finish each crostini with a light drizzle of honey and a few fresh thyme leaves.
Extra Tips
Whip the ricotta a few hours ahead and keep it covered in the fridge so assembly stays quick. Blood oranges lose their bright color if cut too far in advance, so segment them right before serving. Skip the honey if you prefer a less sweet bite, or add an extra crack of black pepper for more contrast. Course: Appetizer Cuisine: Italian Equipment: Baking sheet, mixing bowl, oven
Mini Pumpkin and Goat Cheese Quiches
These mini quiches combine roasted pumpkin flavor with creamy goat cheese for a savory bite that feels festive without being overly sweet. They work well as a starter at adult Halloween gatherings or as part of a fall brunch spread. The flaky crust gives way to a smooth, lightly spiced filling that balances earthiness and tang.

Serves 4 people.
Ingredients
- 1 refrigerated pie crust
- ¾ cup pumpkin puree
- 4 ounces goat cheese, crumbled
- 2 large eggs
- ½ cup half-and-half
- ¼ teaspoon ground nutmeg
- ½ teaspoon salt
- ¼ teaspoon black pepper
- 1 tablespoon fresh thyme leaves
Instructions
- Preheat the oven to 375°F and lightly grease a 12-cup muffin tin.
- Roll out the pie crust on a lightly floured surface and cut 12 circles slightly larger than the muffin cups. Press each circle into the tin to form shells.
- In a mixing bowl, whisk together the pumpkin puree, eggs, half-and-half, nutmeg, salt, and black pepper until smooth.
- Crumble the goat cheese into the pumpkin mixture and stir gently to distribute without fully breaking up the pieces.
- Spoon the filling evenly into the prepared crusts, filling each about three-quarters full. Sprinkle the thyme leaves over the tops.
- Bake for 22 to 25 minutes until the crusts are golden and the centers are set. Let the quiches cool in the tin for 5 minutes before removing.
Extra Tips
Use a pumpkin puree without added sugar so the savory notes stay balanced. The quiches can be baked a day ahead and reheated at 350°F for 8 minutes to restore crisp crust edges. Fresh thyme adds a subtle herbal note that pairs well with the goat cheese; dried thyme will work in a pinch but use half the amount. Course: Appetizer Cuisine: American Equipment: Muffin tin, Mixing bowl, Whisk, Rolling pin
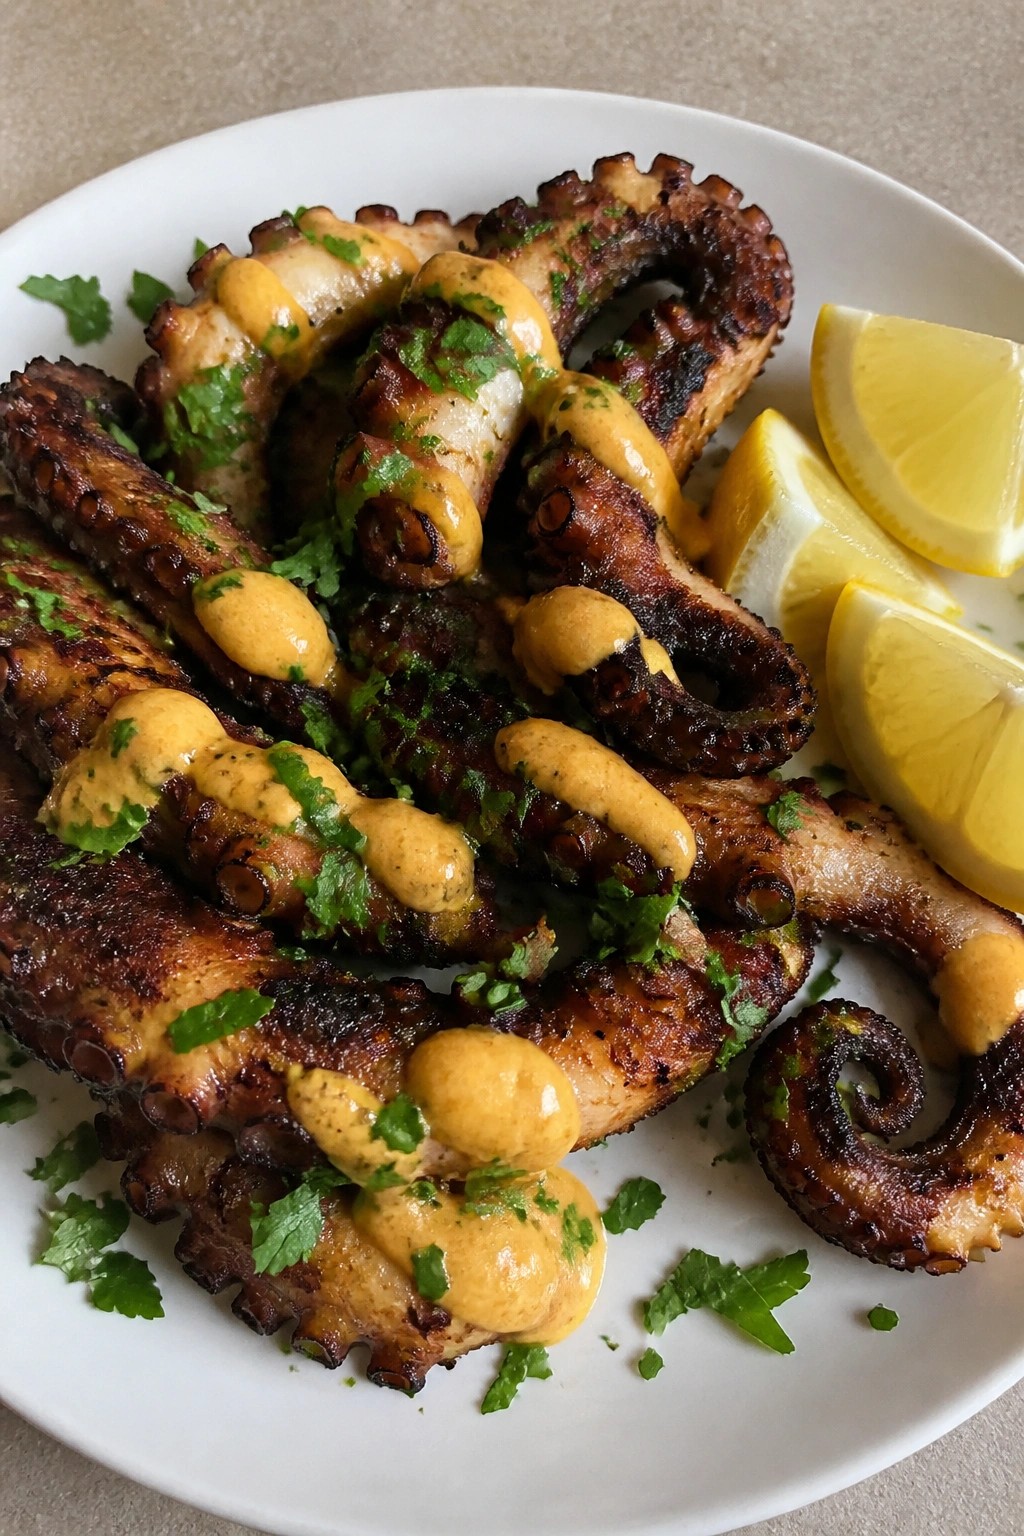
Charred Octopus with Smoked Paprika Aioli
This charred octopus brings a bold, slightly smoky flavor with tender meat and crisp edges that stand out at adult gatherings. The deep color and tentacle shape give it a striking look that fits right into a Halloween spread without needing extra decoration.
It works well as a shareable starter when you want something different from typical party food. The smoked paprika aioli adds creaminess and a gentle heat that balances the char.
Serves 4 people.
Recommended Products

Meets standards for animal welfare, feed, and more, so you can know about what you're buying (and eating)

Package includes: 20 Pairs Mini Halloween Bat Wings
Package: You will get 1 Halloween cosplay bat wing costume accessory for Halloween, elaborate and unique costume decoration supplies enrich your cosplay needs
Ingredients
- 2 pounds cleaned octopus
- 3 tablespoons olive oil, divided
- 1 teaspoon salt
- 1/2 teaspoon black pepper
- 1/2 cup mayonnaise
- 2 teaspoons smoked paprika
- 1 garlic clove, minced
- 1 tablespoon lemon juice
- Lemon wedges, for serving
- 2 tablespoons fresh parsley, chopped, for garnish
Instructions
- Fill a large pot with salted water and bring it to a boil. Add the octopus and simmer for 45 minutes until tender. Drain and set aside to cool slightly.
- Cut the octopus into smaller sections if the pieces are large. Toss them with 2 tablespoons olive oil, salt, and black pepper.
- Heat a grill or large skillet over high heat. Place the octopus pieces on the hot surface and cook for 2 to 3 minutes per side until charred in spots.
- While the octopus cooks, stir together the mayonnaise, smoked paprika, minced garlic, lemon juice, and remaining 1 tablespoon olive oil in a small bowl.
- Arrange the charred octopus on a platter. Serve with the smoked paprika aioli on the side, plus lemon wedges and chopped parsley.
Extra Tips
Make the aioli a few hours ahead so the garlic flavor mellows. Grill the octopus right before guests arrive to keep the edges crisp. If you cannot find pre-cleaned octopus, ask your fish counter to prepare it for you. Course: Appetizer Cuisine: Mediterranean Equipment: Large pot, Grill or large skillet, Mixing bowl
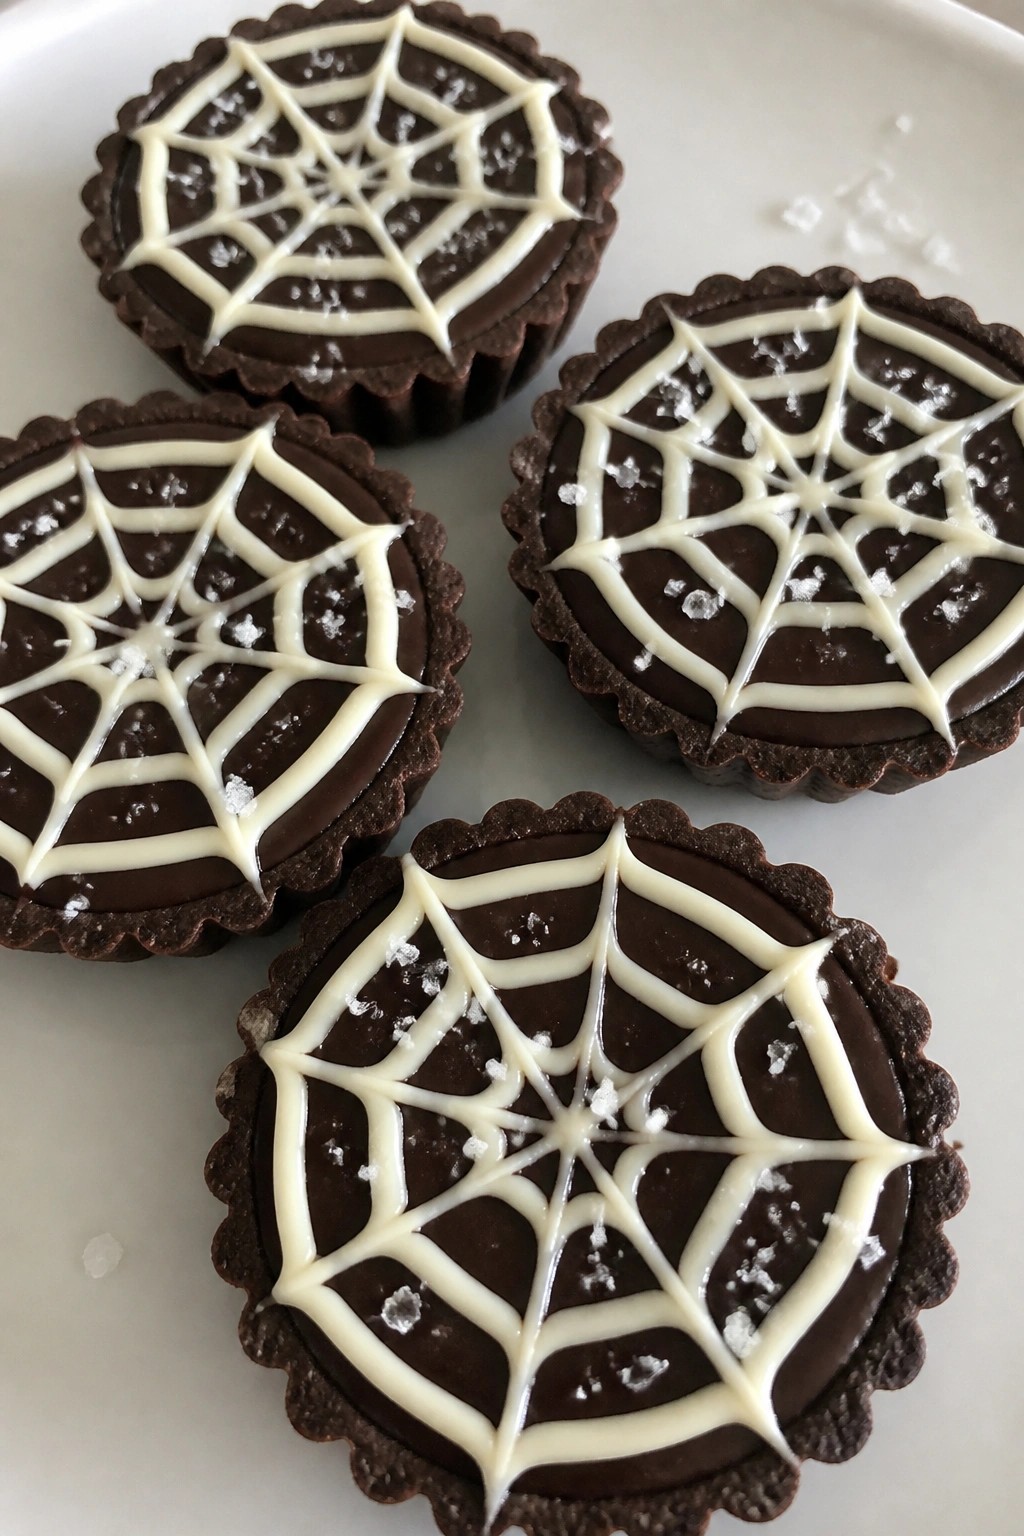
Dark Chocolate Spiderweb Tartlets with Sea Salt
These tartlets bring a grown-up twist to Halloween with their rich dark chocolate filling and striking spiderweb design on top. The flaky sea salt balances the sweetness and adds a savory note that feels special for a party. They look impressive but come together with basic steps and store-bought shells.
They work well as a plated dessert at an adult gathering or as part of a dessert table. The smooth ganache sets to a firm yet creamy texture while the white chocolate web stays crisp on the surface.
Serves 4 people.
Ingredients
- 4 mini tartlet shells
- 200g dark chocolate, chopped
- 120ml heavy cream
- 50g white chocolate, chopped
- 1 tsp flaky sea salt
Instructions
- Place the dark chocolate in a heatproof bowl. Heat the heavy cream in a small saucepan until it just begins to simmer, then pour it over the chocolate. Let it sit for one minute before stirring until smooth and glossy.
- Spoon the chocolate ganache evenly into the four tartlet shells. Smooth the tops with the back of a spoon and set the filled shells on a tray.
- Melt the white chocolate in a microwave in short bursts or over a double boiler until fully liquid. Transfer it to a small piping bag or zip-top bag with a tiny corner snipped off.
- Pipe four or five concentric circles of white chocolate onto each tartlet. Use a toothpick to drag lines from the center outward through the circles, creating a spiderweb pattern on each one.
- Sprinkle a pinch of flaky sea salt over the center of each tartlet while the white chocolate is still soft. Place the tartlets in the refrigerator for at least 30 minutes to set.
Extra Tips
Pipe the white chocolate while the ganache is still slightly soft so the web sits neatly on the surface. If the white chocolate thickens during piping, warm the bag briefly between your hands. Serve the tartlets chilled or at cool room temperature to keep the spiderweb design sharp. Course: Dessert Cuisine: American Equipment: Small saucepan, Heatproof bowl, Piping bag or zip-top bag, Toothpick
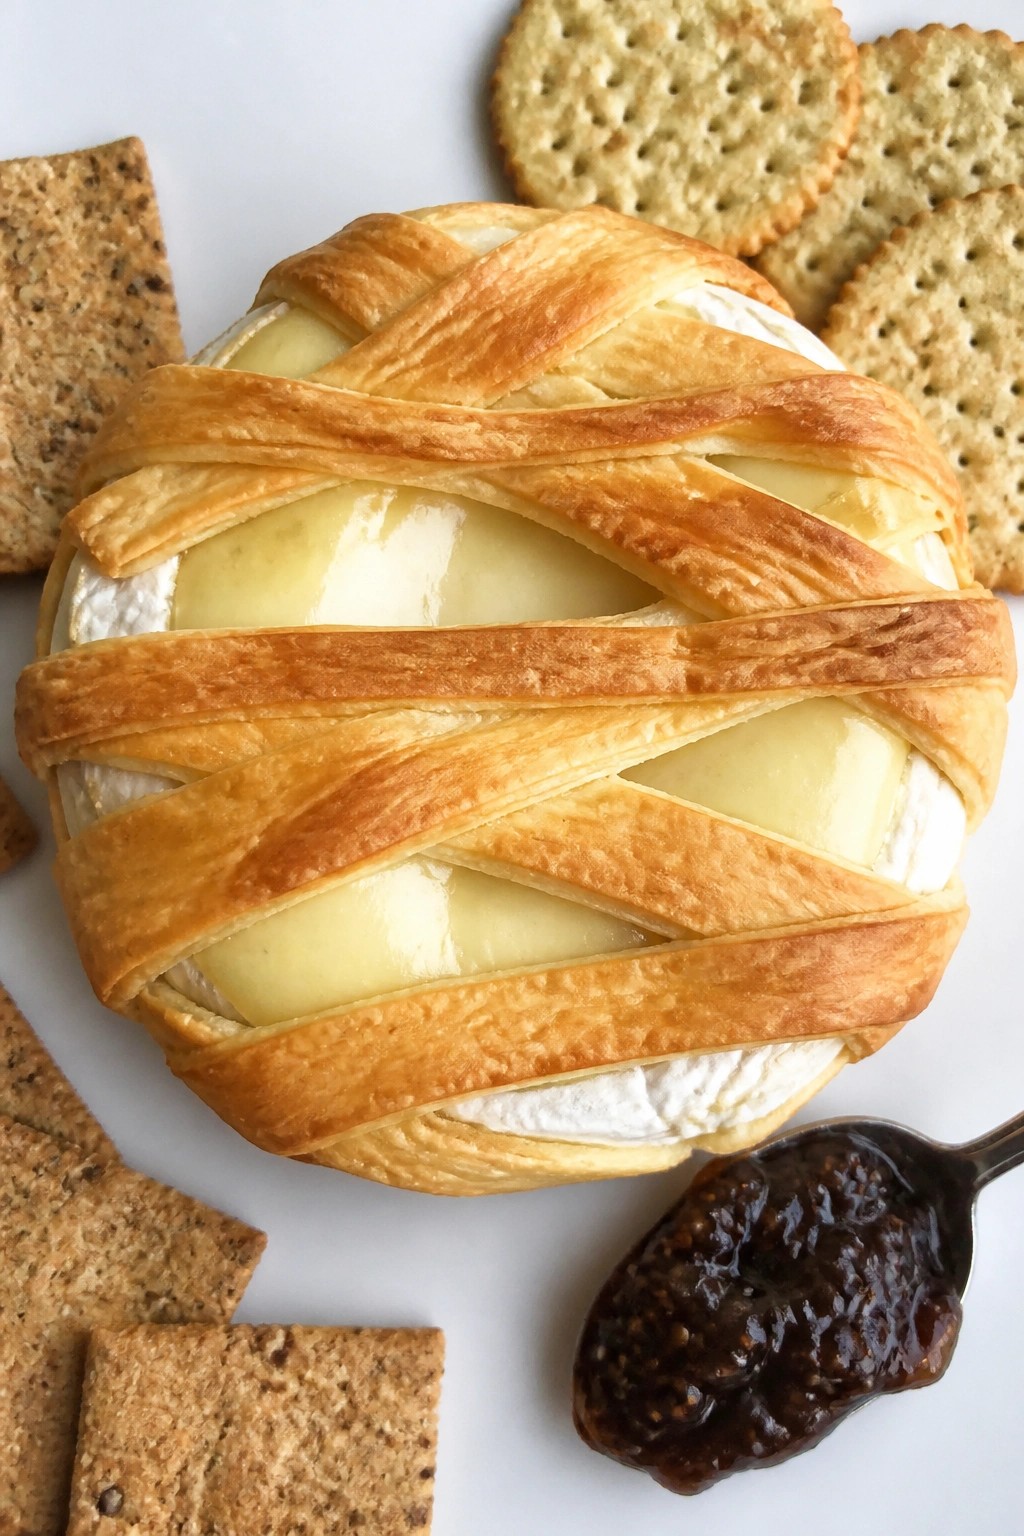
Mummy-Wrapped Brie with Fig Jam and Crackers
This baked brie turns into a simple Halloween centerpiece when wrapped in strips of dough that bake up golden and bandage-like. It works well for adult gatherings where you want something easy to share but still a bit festive. The warm cheese stays creamy, the fig jam adds a sweet note, and the crackers give a crisp contrast.
Serves 4 people.
Ingredients
- 1 (8-ounce) wheel of brie cheese
- 1 package (8 ounces) refrigerated crescent roll dough
- 1/4 cup fig jam
- 20 to 24 assorted crackers
Instructions
- Heat the oven to 375 degrees and line a baking sheet with parchment paper.
- Unroll the crescent dough on a lightly floured surface and press the seams together to form one sheet.
- Cut the dough into thin strips about half an inch wide.
- Place the brie in the center of the baking sheet and wrap the dough strips around it, overlapping slightly and leaving small gaps so the cheese shows through like bandages.
- Bake for 15 to 18 minutes until the dough is golden brown and the cheese is soft.
- Let the brie rest for 5 minutes, then transfer it to a serving plate.
- Spoon the fig jam into a small bowl and place it beside the brie with the crackers.
Extra Tips
Cut the dough strips at different widths so the finished wrap looks more like uneven mummy bandages. If the fig jam is too thick, stir in a teaspoon of warm water to loosen it for easy spreading. Leftovers can be covered and refrigerated, then rewarmed gently in a low oven to restore the texture. Course: Appetizer Cuisine: American Equipment: Baking sheet, Parchment paper, Knife
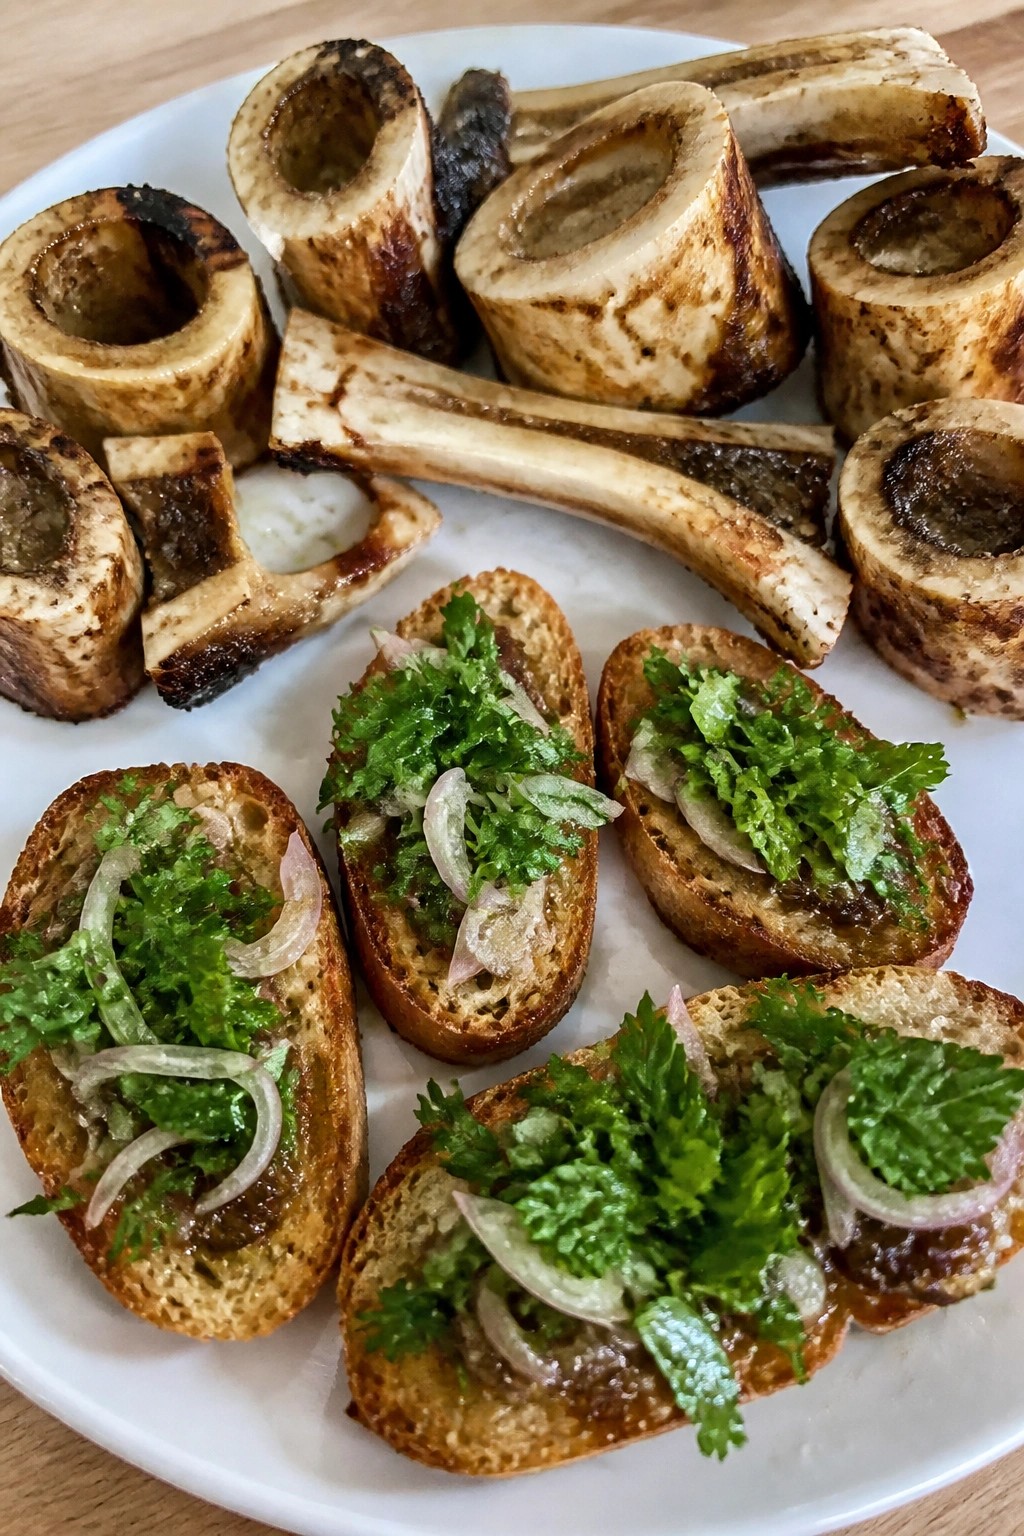
Skeleton Bone Marrow Crostini with Herb Salad
This recipe uses roasted marrow bones to create a striking Halloween look that fits right in with adult gatherings. The long bones resemble skeleton parts when plated, while the rich marrow offers a savory base for the crisp bread.
The fresh herb salad cuts through the richness with bright acidity and crunch. It makes an elegant starter that feels special without much fuss.
Serves 4 people.
Ingredients
- 8 beef marrow bones (3-4 inches long)
- 1 baguette, sliced into 8 pieces
- 2 cups mixed fresh herbs (parsley, mint, and chives)
- 1 small shallot, thinly sliced
- 3 tablespoons olive oil, divided
- 1 tablespoon lemon juice
- Salt and black pepper
- Flaky sea salt for finishing
Instructions
- Preheat the oven to 450°F. Place the marrow bones on a baking sheet cut side up and season with salt and pepper. Roast for 15-20 minutes until the marrow is soft and bubbling.
- While the bones roast, brush the baguette slices with 1 tablespoon olive oil. Place them on a second baking sheet and toast in the oven for the final 8 minutes until golden.
- In a mixing bowl, combine the fresh herbs and sliced shallot. Drizzle with the remaining 2 tablespoons olive oil and the lemon juice. Add a pinch of salt and pepper, then toss gently.
- Remove the bones from the oven. Scoop the marrow onto each toasted crostini slice and spread evenly. Top with a small mound of the herb salad.
- Finish each crostini with a light sprinkle of flaky sea salt before serving.
Extra Tips
Roast the bones just until the marrow softens to avoid drying it out. If the herb salad sits too long, the acid from the lemon will wilt the leaves, so toss it right before assembly. Serve the crostini immediately while the marrow is still warm and spreadable. Course: Appetizer Cuisine: French Equipment: Oven, Baking Sheet, Mixing Bowl
Pomegranate-Glazed Lamb Meatballs with Yogurt Dip
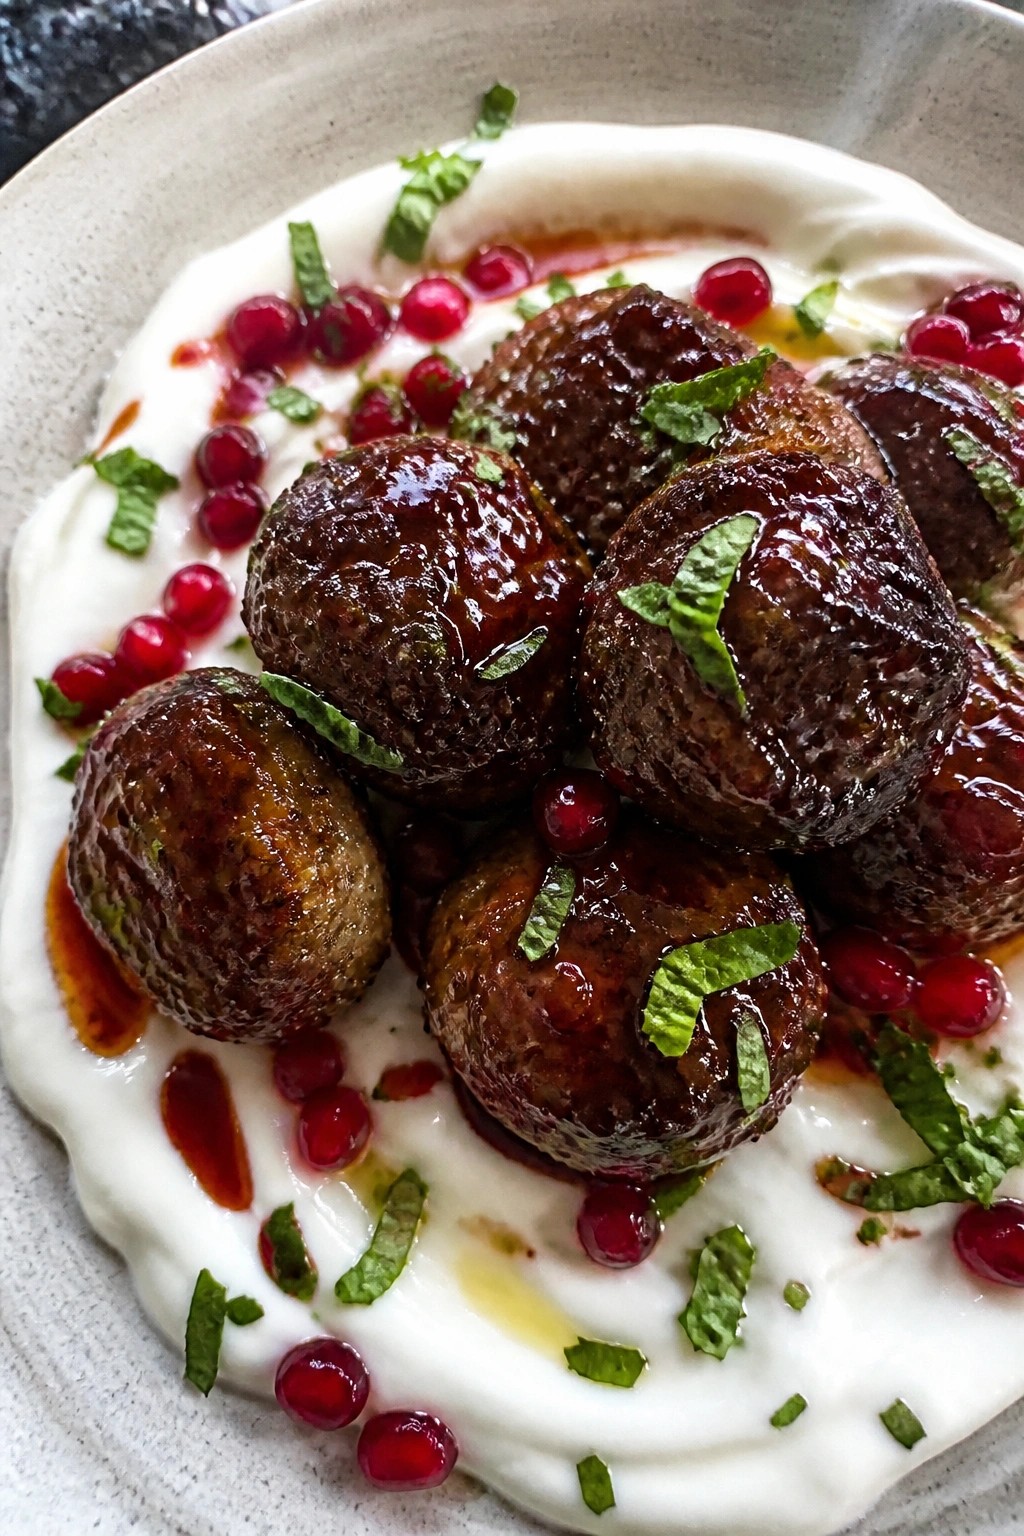
These meatballs bring a touch of elegance to a Halloween spread. The deep red pomegranate glaze catches the eye against the pale yogurt dip, giving the dish a festive look that feels grown-up without any fuss. They work well as a passed appetizer or part of a larger grazing table.
The flavor balances savory lamb with sweet-tart glaze and cool, tangy yogurt. Each bite stays juicy inside with a lightly crisp surface from a quick pan sear or bake.
Serves 4 people.
Ingredients
- 1 lb ground lamb
- 1/2 cup plain breadcrumbs
- 1 large egg
- 2 garlic cloves, minced
- 1 tsp ground cumin
- 1/2 tsp salt
- 1/4 tsp black pepper
- 2 tbsp olive oil
- 1/3 cup pomegranate molasses
- 1 cup plain Greek yogurt
- 1 tbsp lemon juice
- 2 tbsp chopped fresh mint
- 1/4 cup pomegranate seeds
Instructions
- Combine the ground lamb, breadcrumbs, egg, one minced garlic clove, cumin, salt, and pepper in a bowl. Mix until just blended, then roll into 16 small meatballs.
- Heat the olive oil in a large skillet over medium heat. Add the meatballs in a single layer and cook, turning occasionally, until browned on all sides and cooked through, about 8 to 10 minutes.
- Pour the pomegranate molasses into the skillet. Reduce the heat to low and turn the meatballs to coat them evenly in the glaze. Cook for 1 to 2 minutes more until the glaze thickens slightly and clings to the meatballs.
- Stir the remaining minced garlic clove and the lemon juice into the Greek yogurt. Spoon the yogurt into a serving bowl or spread it across a plate.
- Arrange the glazed meatballs over or beside the yogurt. Scatter the chopped mint and pomegranate seeds on top before serving.
Extra Tips
Make the meatballs a day ahead and reheat them gently in a skillet with a splash of water to loosen the glaze. If pomegranate molasses is hard to find, simmer pure pomegranate juice with a spoonful of honey until it thickens. The yogurt dip can be made several hours in advance and kept chilled until serving. Course: Appetizer Cuisine: Mediterranean Equipment: Mixing bowl, Large skillet
Witch’s Cauldron Spinach and Artichoke Dip
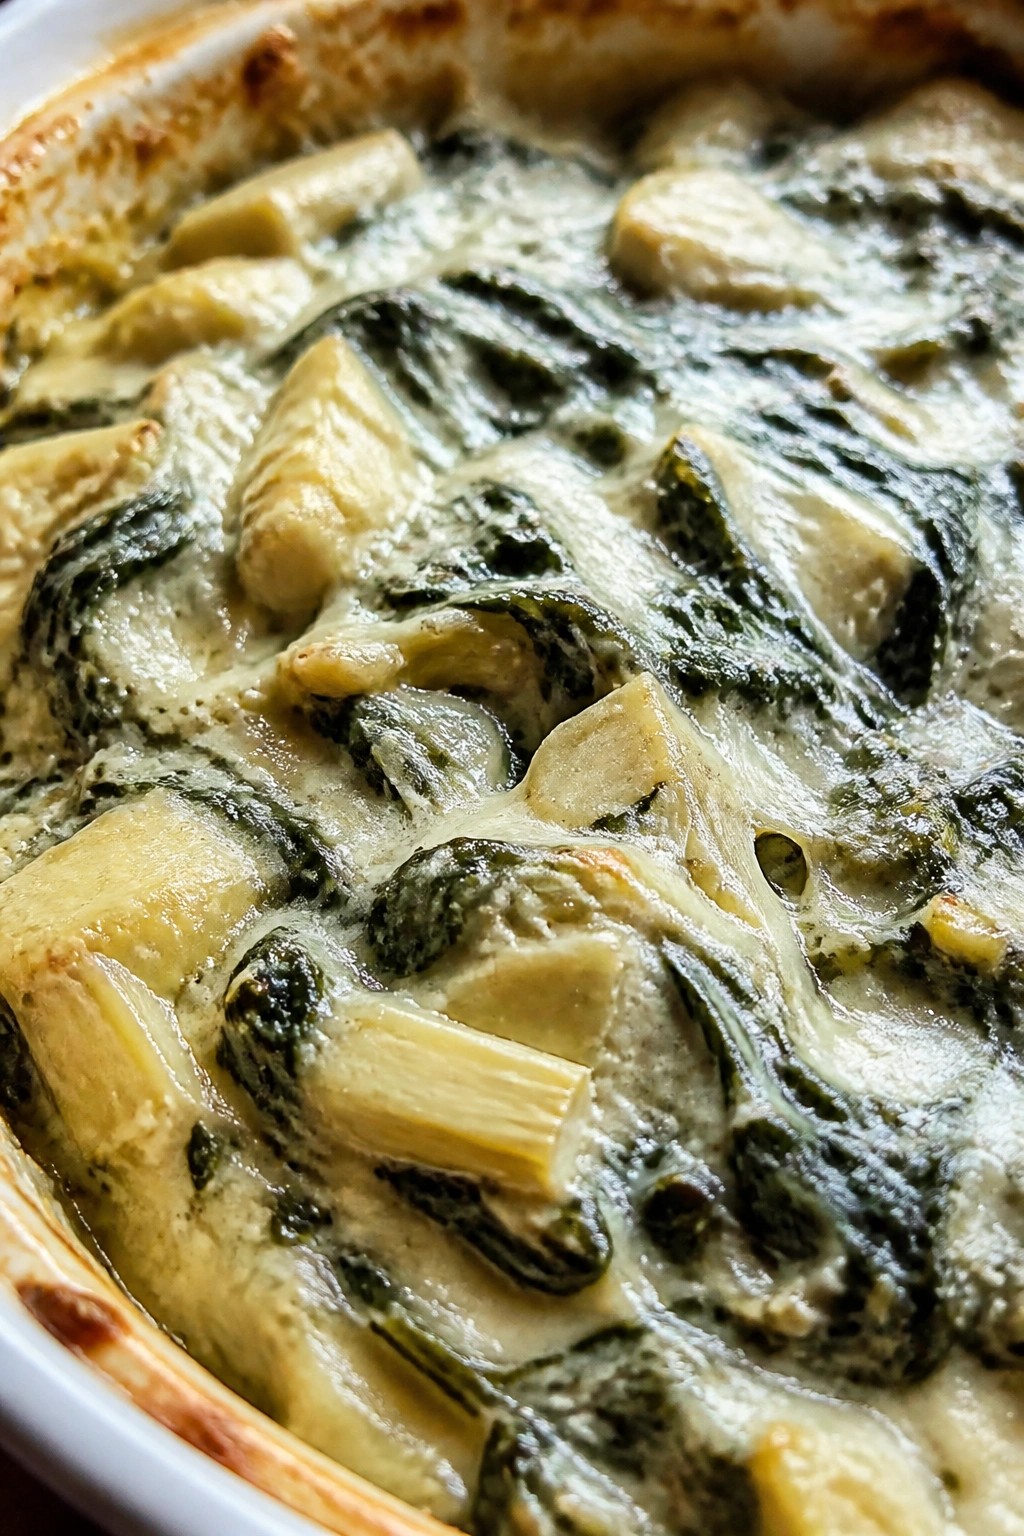
This spinach and artichoke dip works well for adult Halloween gatherings because it comes together quickly and stays warm in a small cast iron pot. The creamy base holds tender pieces of spinach and artichoke with a solid cheese pull that makes it easy to share.
The finished dip has a rich, savory taste with a slight tang from the sour cream and a mellow garlic note throughout. It pairs nicely with sturdy dippers and keeps its texture even after sitting out for a bit at a party.
Serves 4 people.
Ingredients
- 10 ounces frozen spinach, thawed and drained
- 1 (14-ounce) can artichoke hearts, drained and chopped
- 8 ounces cream cheese, softened
- 1/2 cup sour cream
- 1/2 cup mayonnaise
- 1 cup shredded mozzarella cheese
- 1/2 cup grated Parmesan cheese
- 2 garlic cloves, minced
- 1/4 teaspoon salt
- 1/4 teaspoon black pepper
Instructions
- Preheat the oven to 350°F.
- In a mixing bowl, beat the cream cheese, sour cream, and mayonnaise together until smooth.
- Add the spinach, artichoke hearts, mozzarella, Parmesan, garlic, salt, and pepper. Stir until evenly combined.
- Spoon the mixture into a small cast iron skillet or oven-safe pot.
- Bake for 20 to 25 minutes, until the top is lightly golden and the dip is bubbling at the edges.
- Remove from the oven and let it rest for 5 minutes before serving.
Extra Tips
Use the same cast iron pot to serve so the dip stays warm longer at the table. If you want a thicker texture, press the thawed spinach very dry before mixing. Leftovers reheat well in a 300°F oven for 10 minutes. Skip the mayonnaise and add an extra 1/4 cup sour cream if you prefer a lighter tang. Course: Appetizer Cuisine: American Equipment: Mixing Bowl, Cast Iron Skillet, Oven
Espresso Martini Chocolate Mousse Cups
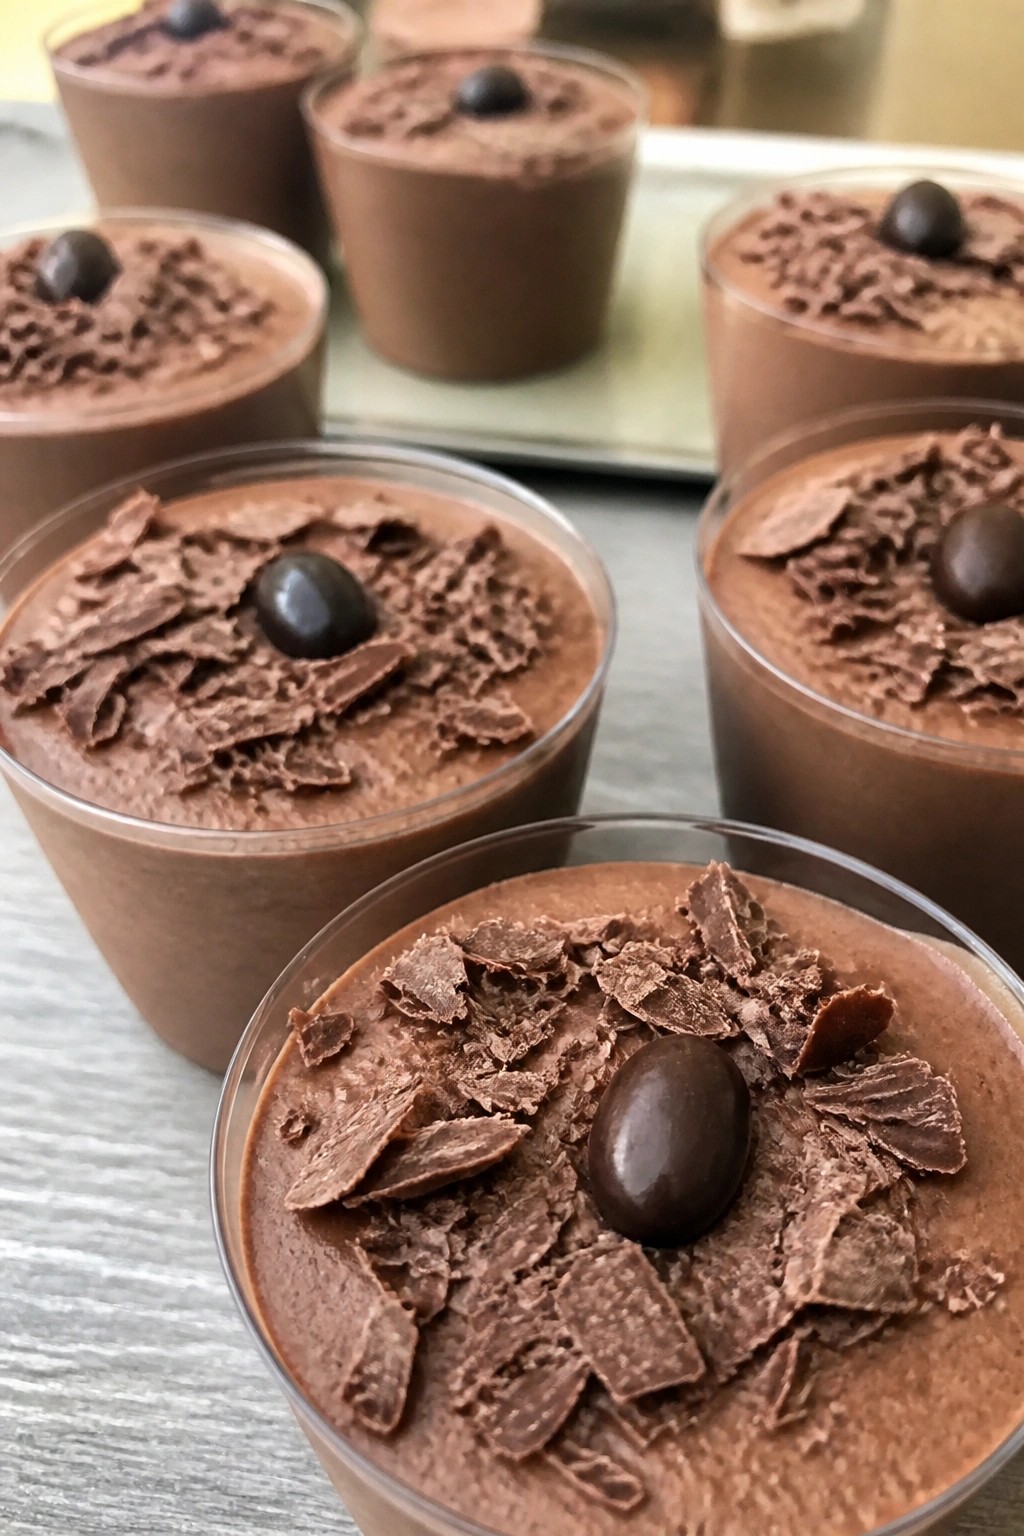
These Espresso Martini Chocolate Mousse Cups give an adult edge to Halloween gatherings. The combination of dark chocolate, fresh espresso, vodka, and coffee liqueur creates a dessert that feels like a cocktail in mousse form. Served in small cups, they look polished on a party table without much fuss.
The texture stays light and creamy with a smooth coffee note that cuts through the richness. They work well after a meal or as a make-ahead option for an evening with friends.
Serves 4 people.
Ingredients
- 200g dark chocolate, chopped
- 300ml heavy cream
- 2 large eggs, separated
- 50g sugar
- 60ml cooled espresso
- 30ml vodka
- 30ml coffee liqueur
- Pinch of salt
- Chocolate shavings, for garnish
- 8 chocolate-covered coffee beans, for garnish
Instructions
- Place the chopped dark chocolate in a heatproof bowl set over simmering water. Stir until fully melted, then remove from heat and let it cool slightly.
- In a separate bowl, whip the heavy cream to soft peaks. Set aside in the refrigerator.
- In a clean bowl, whisk the egg whites with the salt until stiff peaks form. Set aside.
- In another bowl, beat the egg yolks with the sugar until pale and thick. Stir in the cooled espresso, vodka, and coffee liqueur until combined.
- Fold the melted chocolate into the yolk mixture until smooth. Gently fold in the whipped cream, followed by the beaten egg whites, until no streaks remain.
- Spoon the mousse into four small cups or glasses. Cover and refrigerate for at least four hours until set.
- Before serving, top each cup with chocolate shavings and two chocolate-covered coffee beans.
Extra Tips
Whip the cream only to soft peaks so the mousse stays light after chilling. If the alcohol flavor feels too strong, reduce the vodka and coffee liqueur by 10ml each next time. These cups hold well in the fridge for up to two days, though the garnish is best added just before serving. Course: Dessert Cuisine: Italian Equipment: Mixing Bowls, Whisk, Saucepan, Serving Cups
Roasted Red Pepper and Feta Phyllo Triangles
These phyllo triangles bring a crisp, golden edge to any adult Halloween spread. The filling combines sweet roasted red peppers with tangy feta for a savory bite that feels elevated yet simple to prepare.
They make a strong choice for a party appetizer because they hold up well on a platter and pair easily with wine or cocktails.

Serves 4 people.
Ingredients
- 8 sheets phyllo dough, thawed
- 1 cup crumbled feta cheese
- 3/4 cup chopped roasted red peppers
- 2 tablespoons olive oil
- 1 garlic clove, minced
- 1 teaspoon dried oregano
- 2 tablespoons chopped fresh parsley
- 4 tablespoons unsalted butter, melted
Instructions
- Mix the feta, roasted red peppers, olive oil, garlic, oregano, and parsley in a bowl until evenly combined.
- Lay one sheet of phyllo dough on a clean surface and brush it lightly with melted butter. Place a second sheet on top and brush again.
- Cut the stacked sheets lengthwise into four strips. Place a teaspoon of filling near the bottom of each strip.
- Fold the bottom corner of each strip over the filling to form a triangle, then continue folding up the strip like a flag until you reach the end. Repeat with remaining sheets and filling.
- Place the triangles on a baking sheet and brush the tops with any remaining melted butter.
- Bake at 375°F for 15 to 18 minutes until the triangles turn deep golden brown. Let them cool for a few minutes before serving.
Extra Tips
Work with one phyllo sheet at a time and keep the rest covered with a damp towel to prevent cracking. The triangles taste best served warm, but you can assemble them a day ahead and bake just before guests arrive. If the filling seems too wet, drain the peppers on a paper towel first so the phyllo stays crisp. Course: Appetizer Cuisine: Mediterranean Equipment: Baking sheet, Pastry brush, Mixing bowl
Caramel Apple Nachos with Dark Chocolate and Pecans
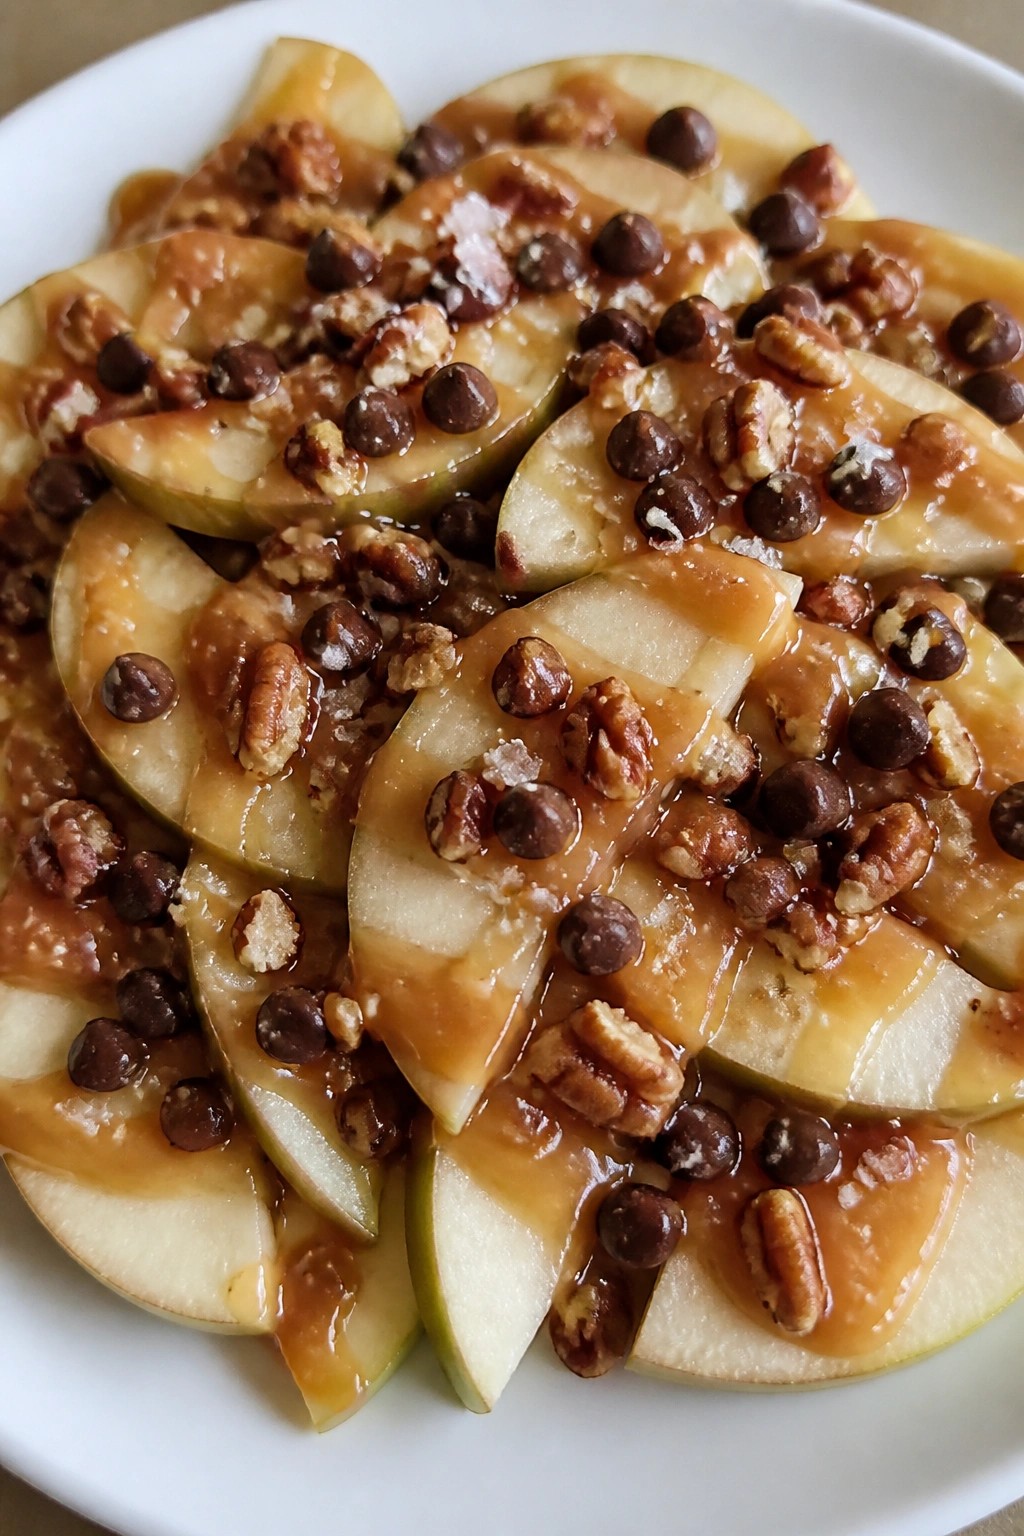
This caramel apple nachos recipe turns a classic fall pairing into an easy, shareable platter. It suits adult Halloween gatherings because it needs no baking and comes together in minutes. Crisp apple slices carry the sweet caramel and bitter dark chocolate, while pecans bring a satisfying crunch that keeps each bite interesting.
The nacho-style arrangement makes it simple to serve at a party table. Tart apples balance the richness, so the dish feels less heavy than traditional caramel apples.
Serves 4 people.
Ingredients
- 4 medium tart apples, cored and sliced
- 1/2 cup caramel sauce
- 1/2 cup dark chocolate chips
- 1/2 cup chopped pecans
- 1/4 teaspoon flaky sea salt
Instructions
- Arrange the apple slices in a single overlapping layer on a large serving platter.
- Warm the caramel sauce slightly if needed, then drizzle it evenly over the apple slices.
- Place the dark chocolate chips in a microwave-safe bowl and heat in 20-second bursts, stirring after each, until fully melted.
- Drizzle the melted chocolate over the caramel-covered apples.
- Sprinkle the chopped pecans and flaky sea salt evenly across the top.
Extra Tips
Choose firm apples like Granny Smith so the slices stay crisp under the toppings. Warm the caramel just enough to pour smoothly without making the apples soggy. Serve the platter right away, as the apples will start to brown if left sitting too long. Course: Dessert Cuisine: American Equipment: Serving platter, Microwave-safe bowl, Knife