

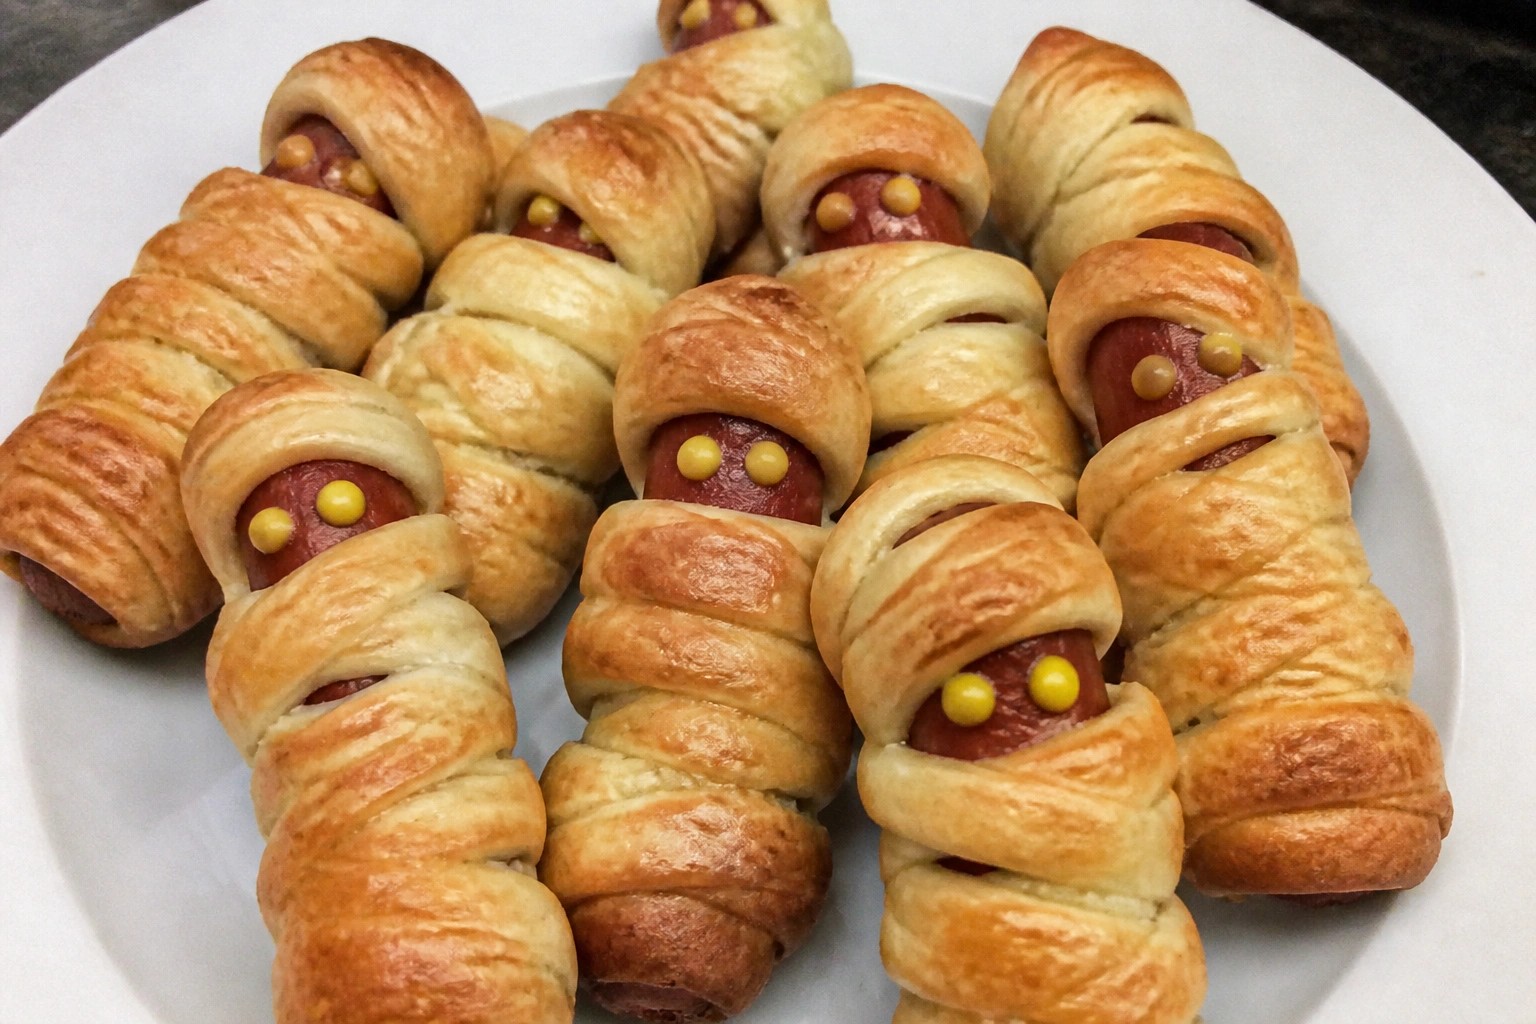
Planning a Halloween potluck doesn’t have to be complicated. These recipes are all quick to make and easy to transport. You’ll find options that use basic ingredients and minimal steps. Many of them can be prepared ahead of time. Pick a few that match what you have on hand.
Helpful Tips Before You Start
These tips will help you finish your Halloween potluck dishes in less time while keeping them easy to transport and serve.
Start with store-bought bases
Use pre-made dough, brownie mixes, or ready-made dips as your foundation. This cuts down active cooking time without losing flavor.
Pick no-bake or one-pan options
Choose recipes like chocolate bark, snack mixes, or layered dips that need little oven time. They free up your stove for other tasks.
Prep parts the night before
Chop vegetables, mix seasonings, or portion out toppings ahead of time. Quick assembly on the day keeps the whole process fast.
Use sturdy containers for travel
Pack items in lidded dishes that stack well and include serving spoons. This makes setup at the potluck smooth and reduces spills.
Add simple Halloween details last
Scatter candy eyes or drizzle colored chocolate right before you leave. These small touches create the theme without extra steps.
Spiderweb Seven-Layer Taco Dip with Tortilla Chips
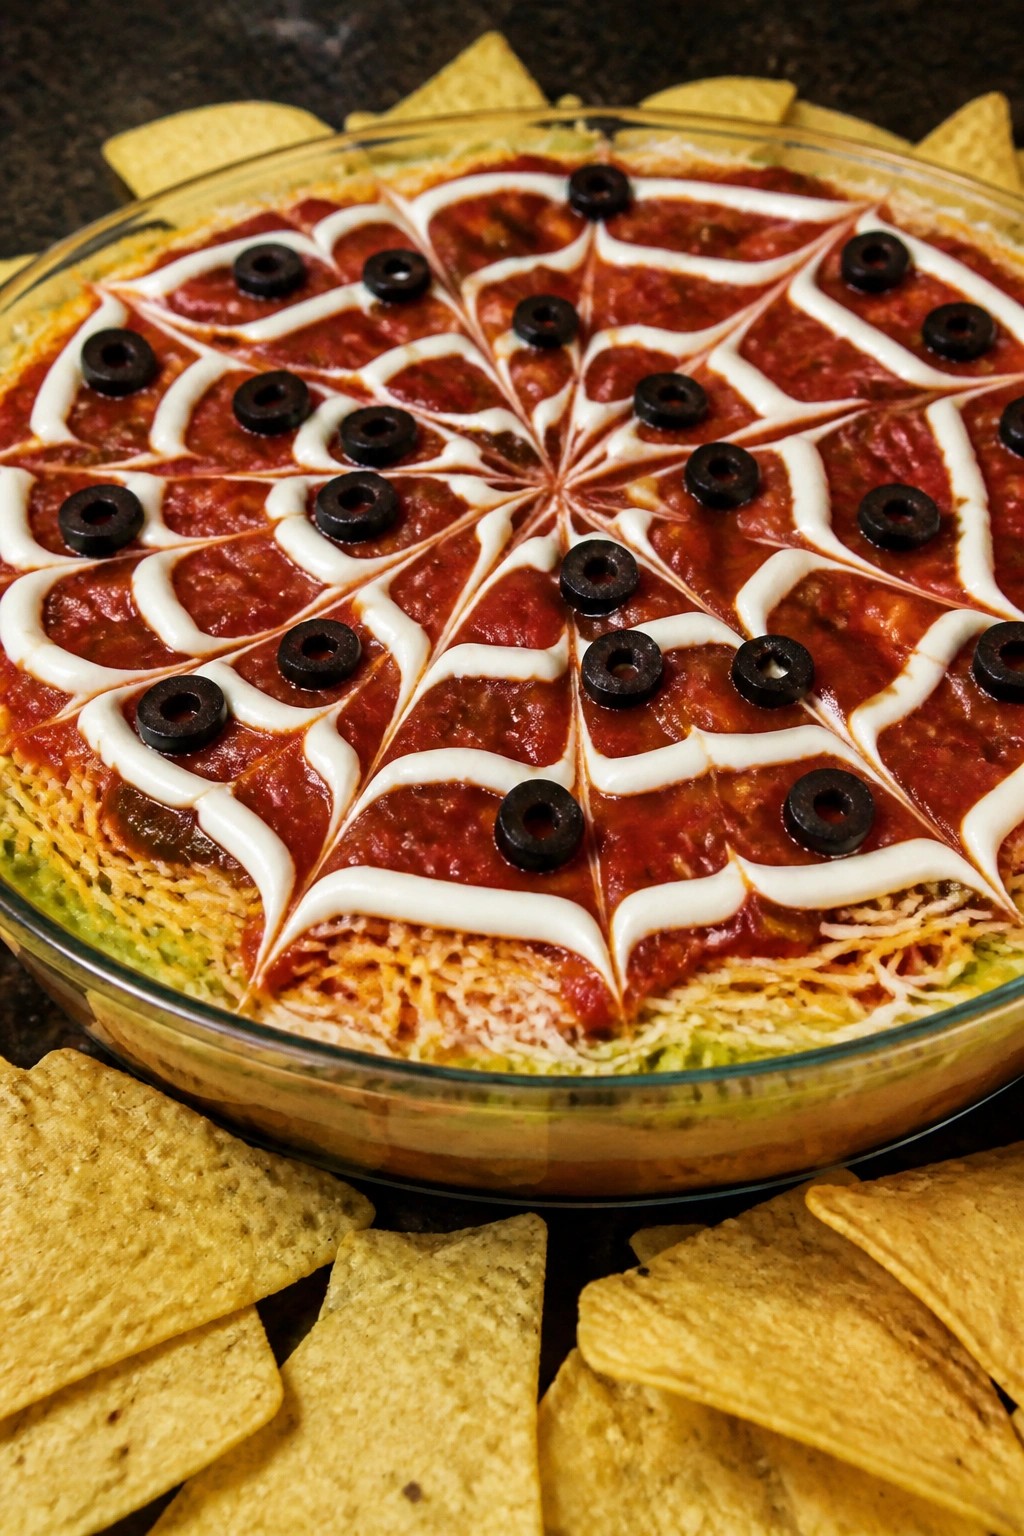
This dip brings a fun Halloween twist to a classic layered favorite. The spiderweb design on top makes it stand out at any potluck without extra work. It layers creamy, spicy, and crunchy elements that pair well with tortilla chips for quick scooping.
It works best when you need something you can assemble ahead and chill until guests arrive. The flavors stay balanced with seasoned beans, cool sour cream, and fresh toppings.
Serves 4 people.
Ingredients
- 1 (16-ounce) can refried beans
- 2 tablespoons taco seasoning
- 1 cup sour cream, divided
- 1 cup guacamole
- 1 cup chunky salsa
- 1 1/2 cups shredded Mexican cheese blend
- 1/4 cup sliced black olives
- Tortilla chips, for serving
Instructions
- Stir the refried beans and taco seasoning together in a bowl until evenly combined.
- Spread the bean mixture into the bottom of a shallow serving dish to form the first layer.
- Spoon the guacamole over the beans and smooth it into an even layer.
- Add the salsa as the next layer and spread it gently to cover the guacamole.
- Sprinkle the shredded cheese evenly over the salsa.
- Scatter the black olives across the cheese.
- Place the remaining sour cream into a zip-top bag, snip a small corner, and pipe concentric circles on top. Drag a toothpick from the center outward to create the spiderweb pattern.
- Serve with tortilla chips for dipping.
Extra Tips
Pipe the sour cream web right before serving so the lines stay sharp. If you prepare the base layers earlier, cover and refrigerate them, then add the web and olives just before guests arrive. Use thick guacamole and chunky salsa so the layers hold their shape when scooped. Course: Appetizer Cuisine: Mexican Equipment: Mixing bowl, shallow serving dish, zip-top bag, spoon
Mummy Jalapeño Poppers
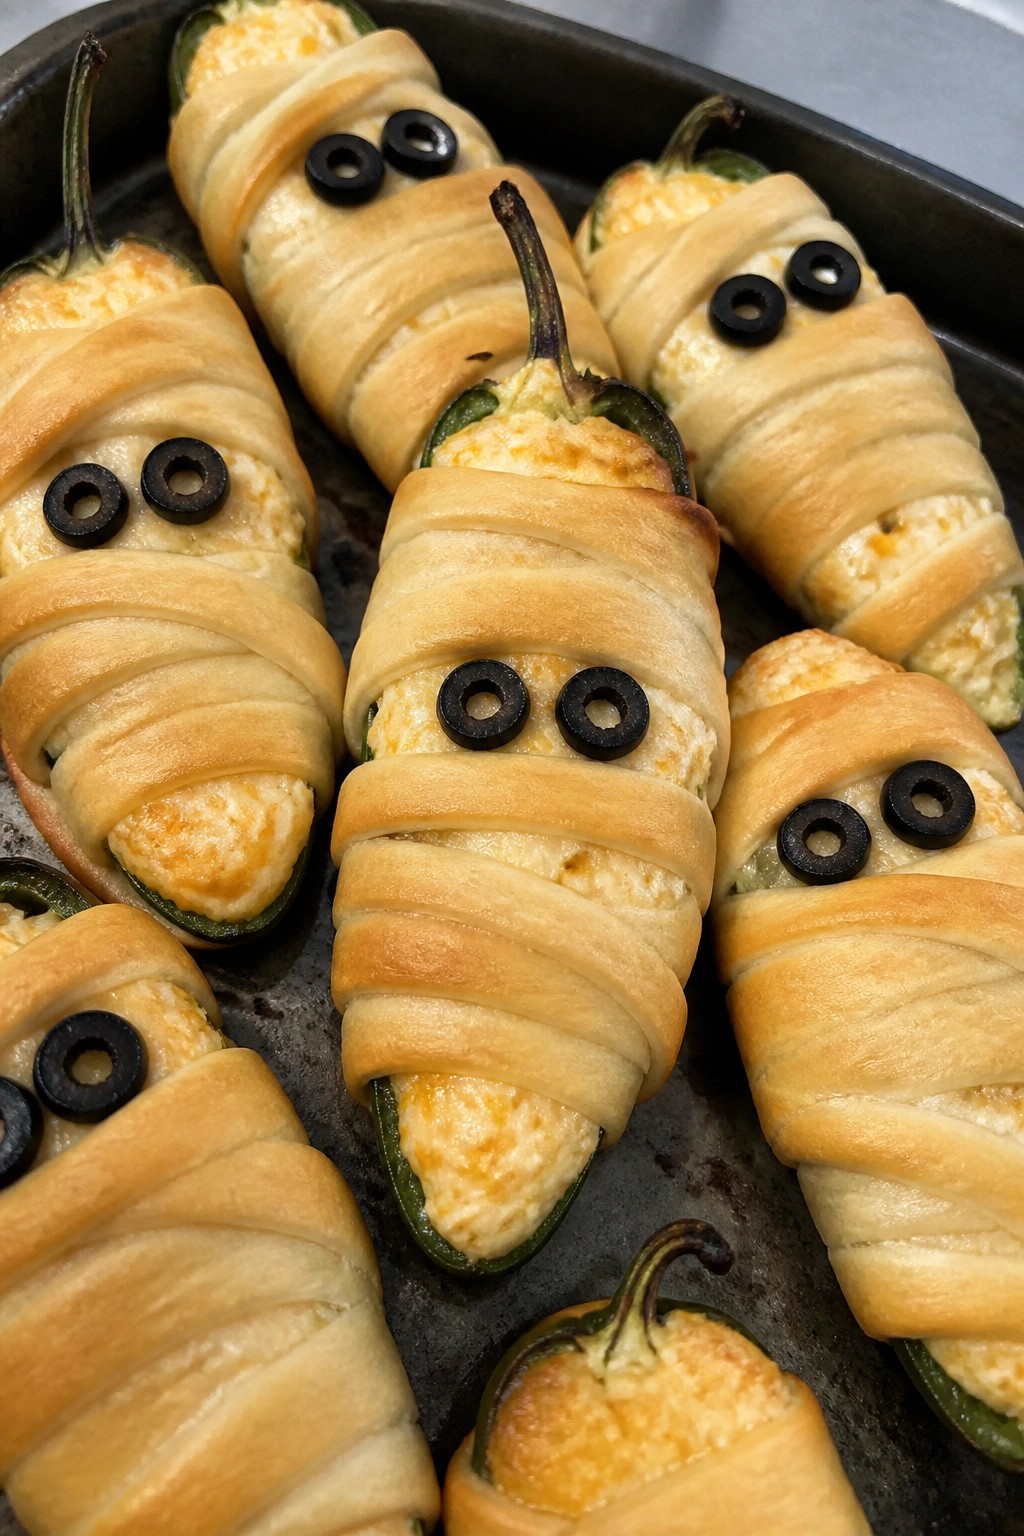
These Mummy Jalapeño Poppers bring a quick Halloween twist to potluck tables. They use everyday ingredients and bake in one pan, so they fit busy schedules and last-minute plans without much fuss.
The creamy filling balances the pepper heat while the dough strips create a crisp outer layer. Olive slices add simple eyes that complete the mummy look.
Serves 4 people.
Ingredients
- 8 large jalapeño peppers
- 4 ounces cream cheese, softened
- 1 cup shredded cheddar cheese
- 1/2 teaspoon garlic powder
- 1 can crescent roll dough
- 16 black olive slices
Instructions
- Preheat the oven to 375 degrees and line a baking sheet with parchment paper.
- Cut each jalapeño in half lengthwise and remove the seeds and membranes.
- Mix the cream cheese, cheddar cheese, and garlic powder in a bowl until smooth.
- Spoon the cheese mixture into each jalapeño half and press it down gently.
- Unroll the crescent dough and cut it into thin strips. Wrap the strips around each stuffed pepper to look like bandages, leaving space for the eyes.
- Place the wrapped peppers on the baking sheet and bake for 12 to 15 minutes until the dough turns golden.
- Remove from the oven and press two olive slices onto each popper while still warm.
Extra Tips
Slice the dough strips narrow so they bake evenly without overpowering the pepper. If you want less heat, soak the halved peppers in cold water for 10 minutes before filling. These poppers travel well in a single layer once cooled, and any leftovers reheat best in a 350-degree oven for a few minutes to restore crispness. Course: Appetizer Cuisine: American Equipment: Baking Sheet, Mixing Bowl, Sharp Knife
Pumpkin Hummus Platter with Pita and Crudités
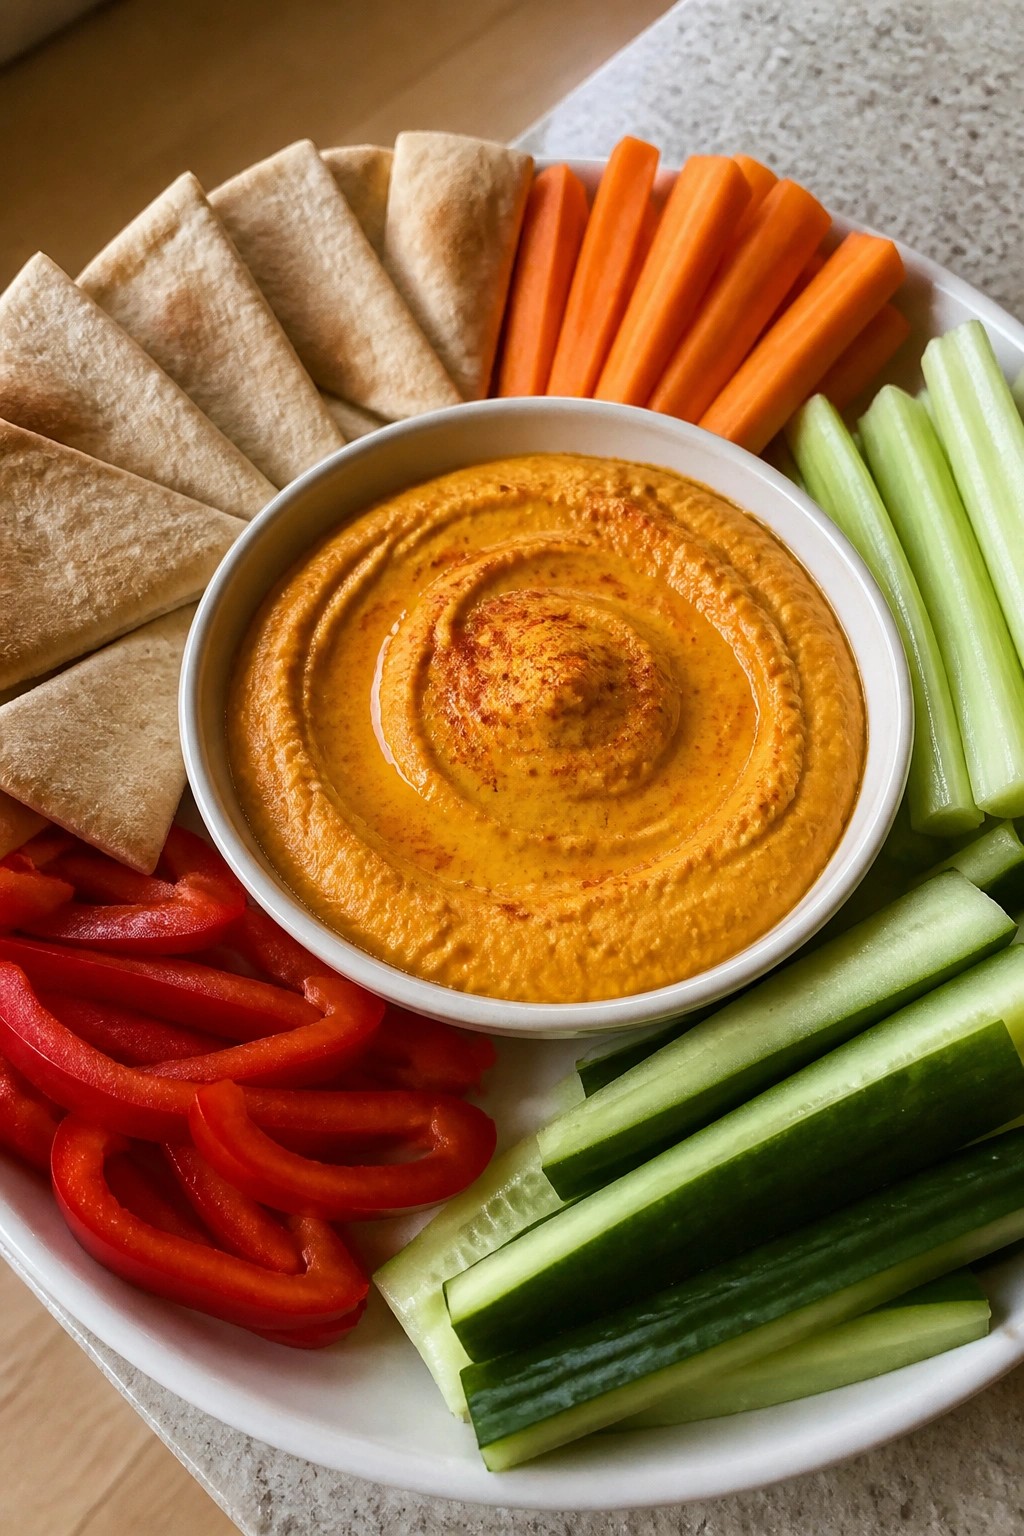
This pumpkin hummus brings a festive orange color to any Halloween spread. It works well for potlucks because it comes together quickly with pantry staples and needs no oven time. The dip tastes creamy and lightly spiced with a bright lemon finish. Crisp pita and fresh vegetables add crunch that balances the smooth texture.
Serves 4 people.
Ingredients
- 1 (15-ounce) can chickpeas, drained and rinsed
- 1 cup canned pumpkin puree
- 1/4 cup tahini
- 2 cloves garlic, minced
- 2 tablespoons olive oil, plus more for drizzling
- Juice of 1 lemon
- 1 teaspoon ground cumin
- 1/2 teaspoon smoked paprika, plus more for garnish
- Salt and pepper to taste
- 4 pita breads, cut into wedges
- 2 carrots, cut into sticks
- 2 celery stalks, cut into sticks
- 1 cucumber, cut into sticks
- 1 red bell pepper, cut into strips
Instructions
- Add the chickpeas, pumpkin puree, tahini, minced garlic, olive oil, lemon juice, cumin, smoked paprika, salt, and pepper to a food processor.
- Blend the mixture until it becomes smooth and creamy, stopping to scrape down the sides as needed.
- Spoon the hummus onto a large platter and spread it into an even layer.
- Arrange the pita wedges, carrot sticks, celery sticks, cucumber sticks, and bell pepper strips around the hummus.
- Drizzle the top with a little extra olive oil and sprinkle with additional smoked paprika before serving.
Extra Tips
Make the hummus a day ahead and keep it covered in the fridge so the flavors meld. If the texture thickens overnight, stir in a teaspoon of water or olive oil to loosen it. Use any leftover crudités in a salad the next day. Smoked paprika adds a subtle savory note that pairs well with the pumpkin. Course: Appetizer Cuisine: Mediterranean Equipment: Food processor, Serving platter, Knife
Ghostly Marshmallow Cereal Treats
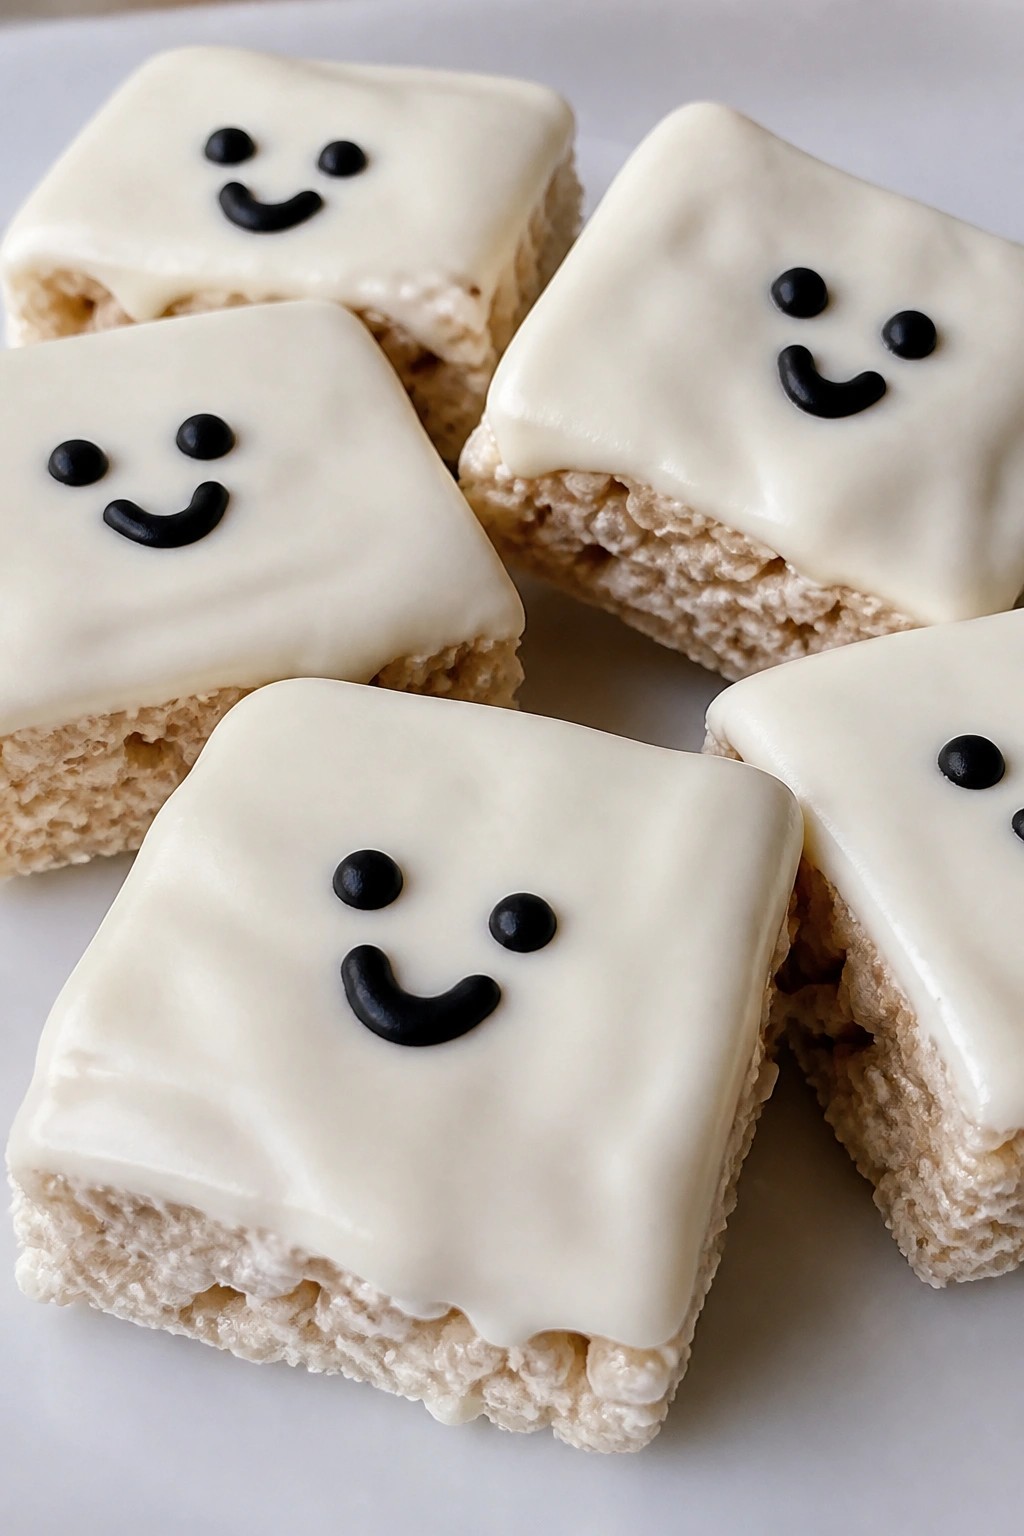
These Ghostly Marshmallow Cereal Treats offer a quick way to add a Halloween touch to a potluck table. They use basic pantry items and come together in one pan, making them practical for last-minute contributions. The result is a chewy cereal base with a light, sweet marshmallow flavor, finished with a white coating and simple faces for a playful look.
Serves 4 people.
Ingredients
- 3 cups crispy rice cereal
- 2 tablespoons unsalted butter
- 3 cups mini marshmallows
- 1/2 cup white chocolate chips
- Black decorating gel
Instructions
- Grease an 8×8 inch baking pan lightly with butter or cooking spray and set it aside.
- In a large saucepan, melt the unsalted butter over low heat.
- Add the mini marshmallows to the pan and stir constantly until they are fully melted and smooth.
- Remove the pan from heat and immediately stir in the crispy rice cereal until every piece is evenly coated.
- Press the mixture firmly into the prepared pan using a spatula or greased hands, then let it cool for 15 minutes.
- In a microwave-safe bowl, heat the white chocolate chips in 20-second bursts, stirring between each, until melted and smooth.
- Cut the cooled cereal mixture into rectangles or ghost shapes, then drizzle or lightly dip each piece with the melted white chocolate.
- Use the black decorating gel to add simple eyes and mouths on the white coating.
Extra Tips
Press the cereal mixture firmly while it is still warm to help the treats hold their shape after cutting. If the white chocolate thickens while working, warm it briefly again to keep it spreadable. These treats travel well in a single layer and stay fresh for a day or two when stored in an airtight container at room temperature. Course: Dessert Cuisine: American Equipment: Large saucepan, 8×8 baking pan, Microwave-safe bowl
Candy Corn Popcorn Snack Mix
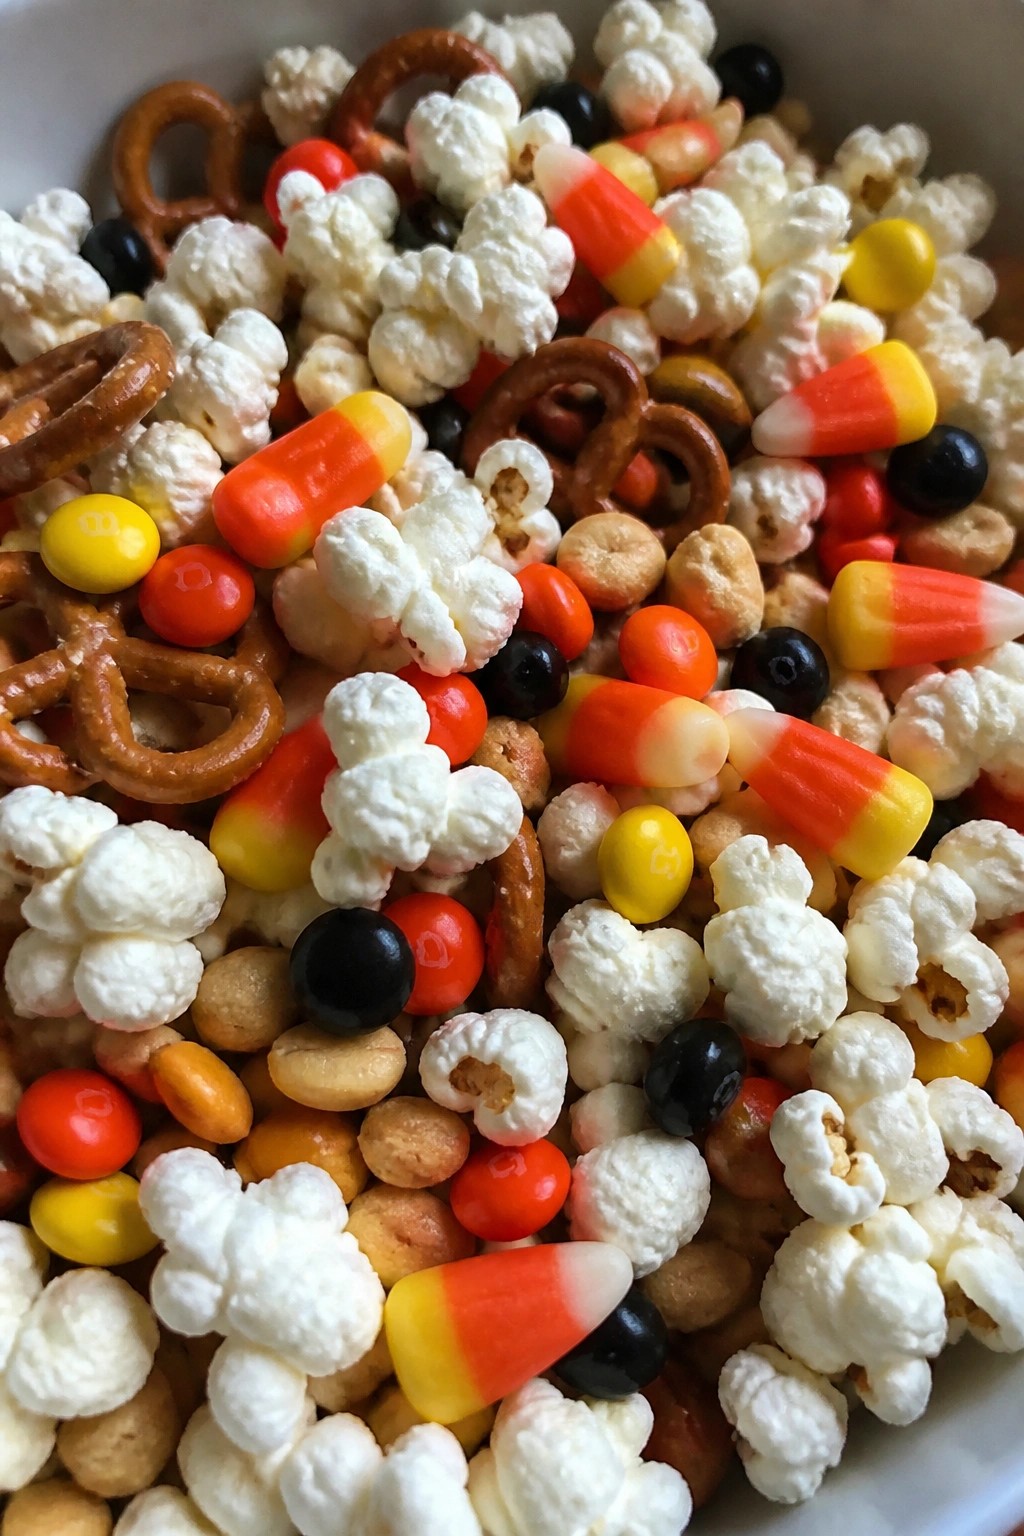
This snack mix combines popcorn with candy corn for a quick Halloween treat that travels well to any potluck. It comes together in minutes with no cooking required, making it ideal when you need something festive but fast.
The mix balances sweet candy corn with salty pretzels and peanuts for a crunchy bite that appeals to both kids and adults. It works as a casual snack that holds up in a bowl on a shared table.
Serves 4 people.
Ingredients
- 8 cups popped popcorn
- 2 cups candy corn
- 1 cup pretzel twists
- 1 cup Halloween-colored M&Ms
- 1/2 cup dry roasted peanuts
Instructions
- Place the popped popcorn in a large mixing bowl.
- Add the candy corn, pretzel twists, M&Ms, and dry roasted peanuts to the bowl.
- Stir gently with a large spoon until the ingredients are evenly distributed.
- Transfer to a serving bowl or divide into smaller containers for the potluck.
Extra Tips
For the best texture, add the candy corn and M&Ms last so they do not sink to the bottom. This mix stays fresh in an airtight container for up to two days, so you can prepare it ahead and take it straight to the gathering without any last-minute steps. Course: Snack Cuisine: American Equipment: Large mixing bowl, Measuring cups
Monster Guacamole Deviled Eggs
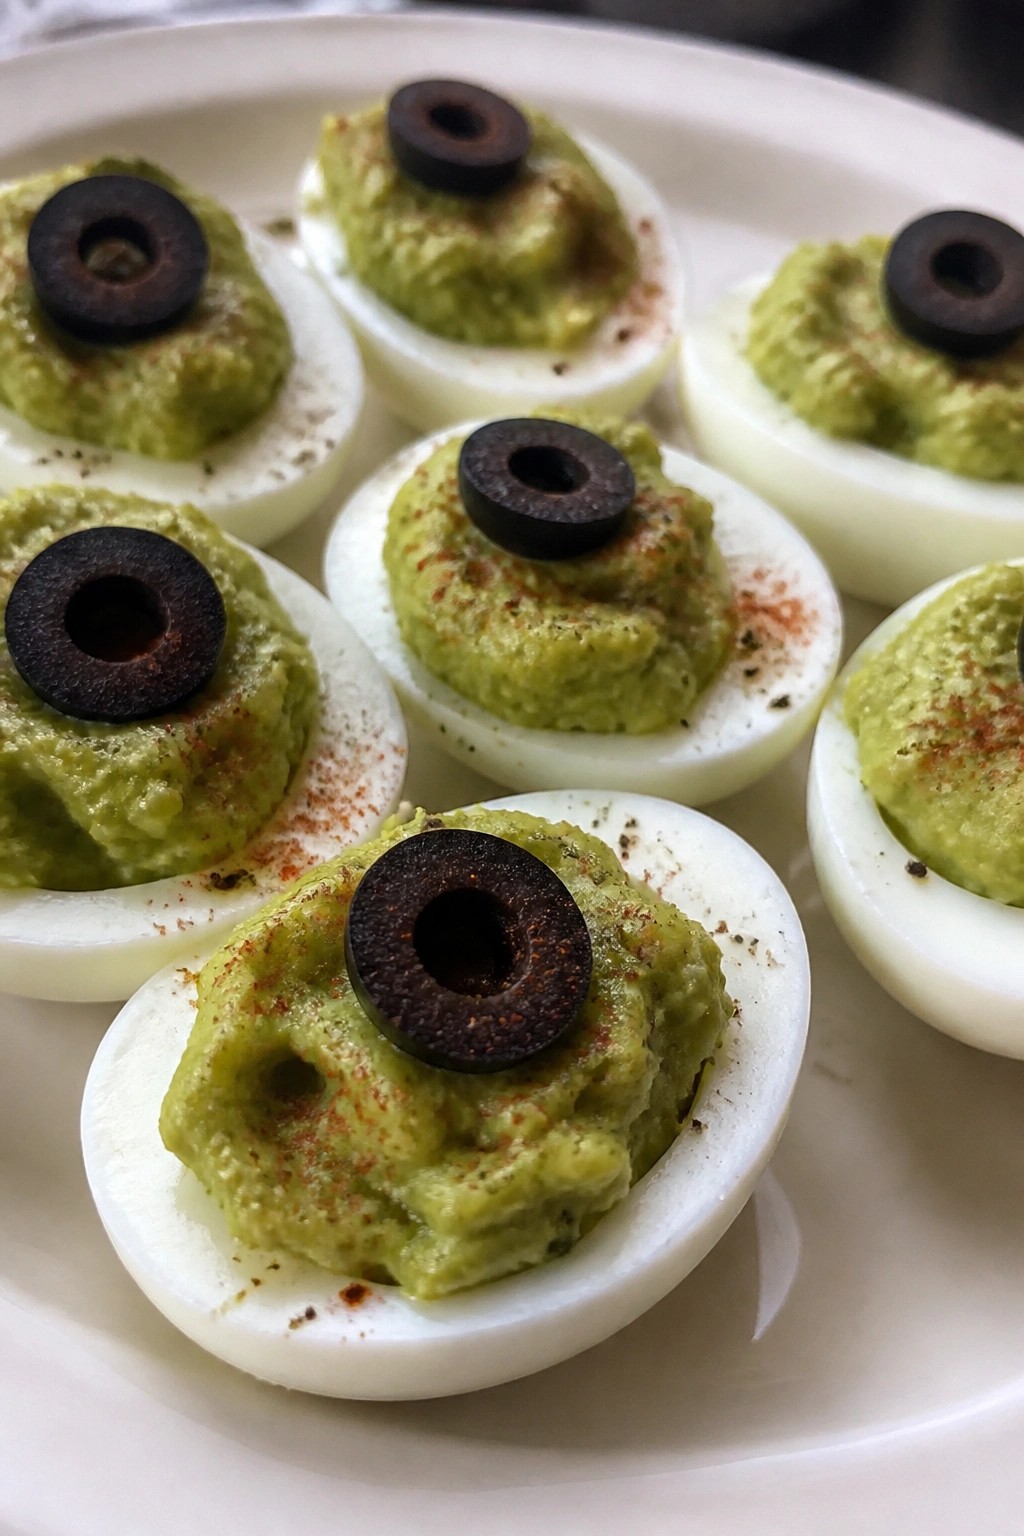
These Monster Guacamole Deviled Eggs bring a bright green filling to a classic potluck dish. The avocado adds creaminess while the egg whites stay light and mild. They make an easy addition to any Halloween spread and hold up well when you need to transport them.
The flavor stays simple with lime and garlic notes that complement the eggs without overpowering them. You can prepare the eggs ahead and finish the filling close to serving time so the color stays fresh.
Serves 4 people.
Ingredients
- 4 large eggs
- 1 ripe avocado
- 1 tablespoon fresh lime juice
- 1/4 teaspoon garlic powder
- 1/4 teaspoon salt
- Pinch of black pepper
- 4 black olives, sliced into rounds
- 1/4 teaspoon paprika
Instructions
- Place the eggs in a pot and cover with cold water. Bring the water to a boil over medium heat, then reduce to a simmer and cook for 10 minutes.
- Drain the eggs and transfer them to a bowl of ice water. Once cool, peel the eggs and slice each one in half lengthwise.
- Scoop the yolks into a mixing bowl. Add the avocado, lime juice, garlic powder, salt, and black pepper. Mash everything together until the mixture is smooth.
- Spoon or pipe the filling back into the hollows of the egg whites.
- Press two olive rounds onto the top of each filled egg to form eyes. Finish with a light sprinkle of paprika.
Extra Tips
Mash the avocado right before filling the eggs to keep the color bright. If you need to transport these, pack the filling separately in a zip bag and snip a corner to pipe it on site. Skip the olives if anyone dislikes them and use a small piece of red bell pepper instead for the same monster effect. Course: Appetizer Cuisine: American Equipment: Pot, Mixing Bowl, Spoon
Witch Finger Pretzel Rods
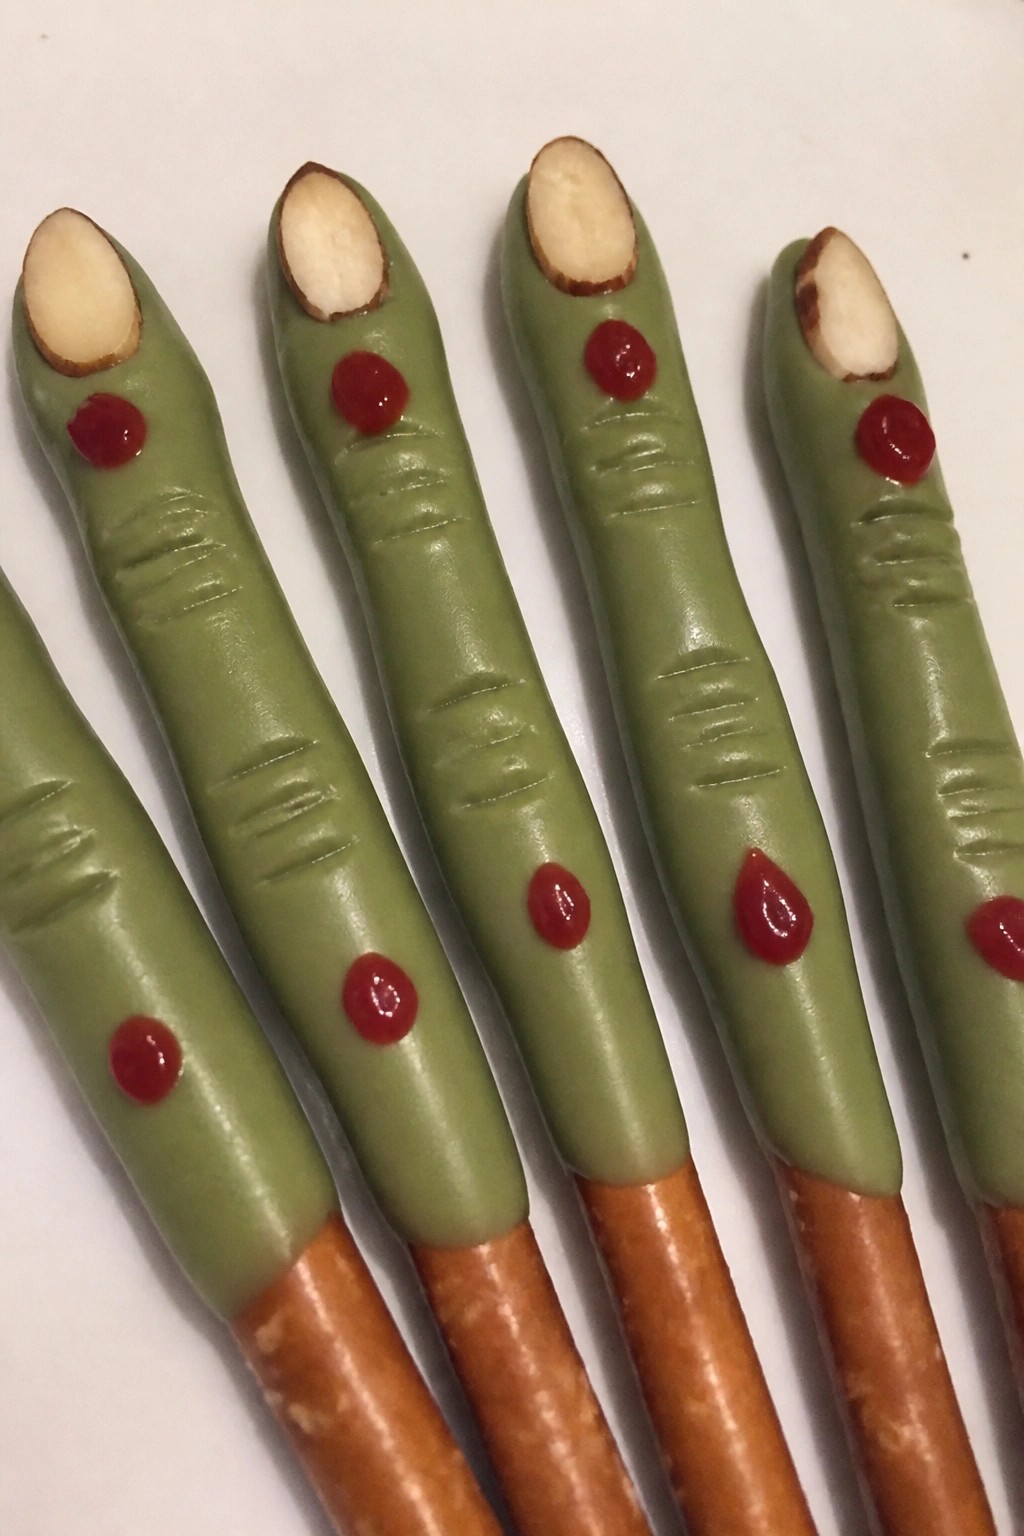
These Witch Finger Pretzel Rods add a quick spooky element to any Halloween potluck spread. They require little effort and use basic pantry items to create a fun finger shape that stands out on a shared table.
The finished rods give a salty crunch from the pretzel base with a sweet coating that sets firm. The almond pieces at the tips complete the look without extra steps.
Serves 4 people.
Ingredients
- 12 pretzel rods
- 1 cup green candy melts
- 12 sliced almonds
- 2 tablespoons red decorating gel
Instructions
- Line a baking sheet with parchment paper and set it aside.
- Place the green candy melts in a microwave-safe bowl and heat in 30-second intervals, stirring between each, until fully melted and smooth.
- Dip each pretzel rod into the melted candy, coating about three-quarters of the rod while leaving one end bare for the finger base.
- Press one sliced almond onto the coated tip of each rod to form the fingernail.
- Squeeze small amounts of red decorating gel near the uncoated end and along the rod to create knuckle and blood details.
- Lay each finished rod on the prepared baking sheet and let the coating harden at room temperature.
Extra Tips
Work with one rod at a time after melting so the candy stays fluid enough for even dipping. If the coating starts to set too quickly, warm it for 10 seconds and stir again. These rods travel well to a potluck when arranged on the same parchment-lined sheet and covered loosely with plastic wrap. Course: Appetizer Cuisine: American Equipment: Microwave-safe bowl, Baking sheet, Parchment paper
Bloody Mary Tomato Skewers
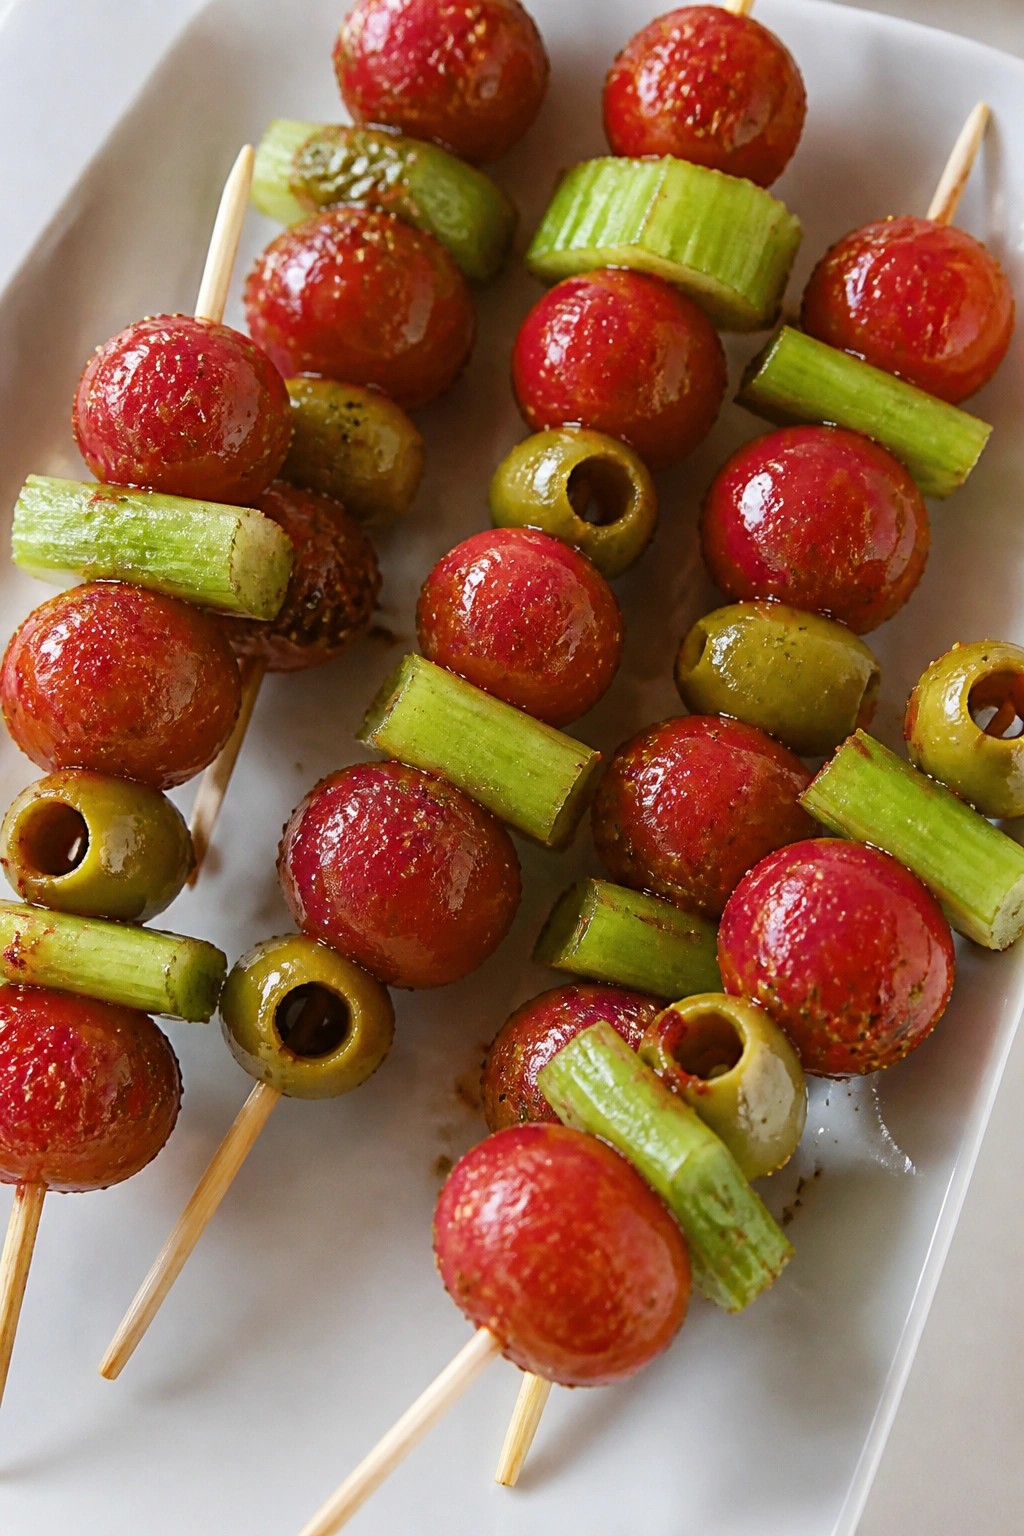
These Bloody Mary Tomato Skewers capture the bold, savory flavors of the classic cocktail in an easy finger food format. Juicy tomatoes get tossed in a quick spicy mix, then paired with crisp celery and briny olives on skewers. They require no cooking and travel well to any potluck.
The result is a tangy, slightly spicy bite that feels festive without extra effort. They work especially well when you need something red and eye-catching for a Halloween spread.
Serves 4 people.
Ingredients
- 1 pint cherry tomatoes
- 3 celery stalks
- 12 pitted green olives
- 2 tablespoons tomato juice
- 1 tablespoon prepared horseradish
- 2 teaspoons Worcestershire sauce
- 1 teaspoon hot sauce
- 1/2 teaspoon celery salt
- Wooden skewers
Instructions
- Cut each celery stalk into 1-inch pieces to create about 12 segments.
- In a mixing bowl, combine the tomato juice, horseradish, Worcestershire sauce, and hot sauce. Stir until smooth.
- Add the cherry tomatoes to the bowl and toss gently until each one is coated.
- Thread the skewers by alternating a coated tomato, a celery piece, and an olive. Repeat until each skewer has three tomatoes.
- Arrange the finished skewers on a platter and sprinkle lightly with celery salt.
Extra Tips
Make these up to a few hours ahead and keep them covered in the fridge so the tomatoes absorb more flavor. If the mix tastes too mild after tossing, add an extra dash of hot sauce before skewering. Serve them cold straight from the platter. Course: Appetizer Cuisine: American Equipment: Mixing bowl, cutting board, knife, skewers
Caramel Apple Nacho Board
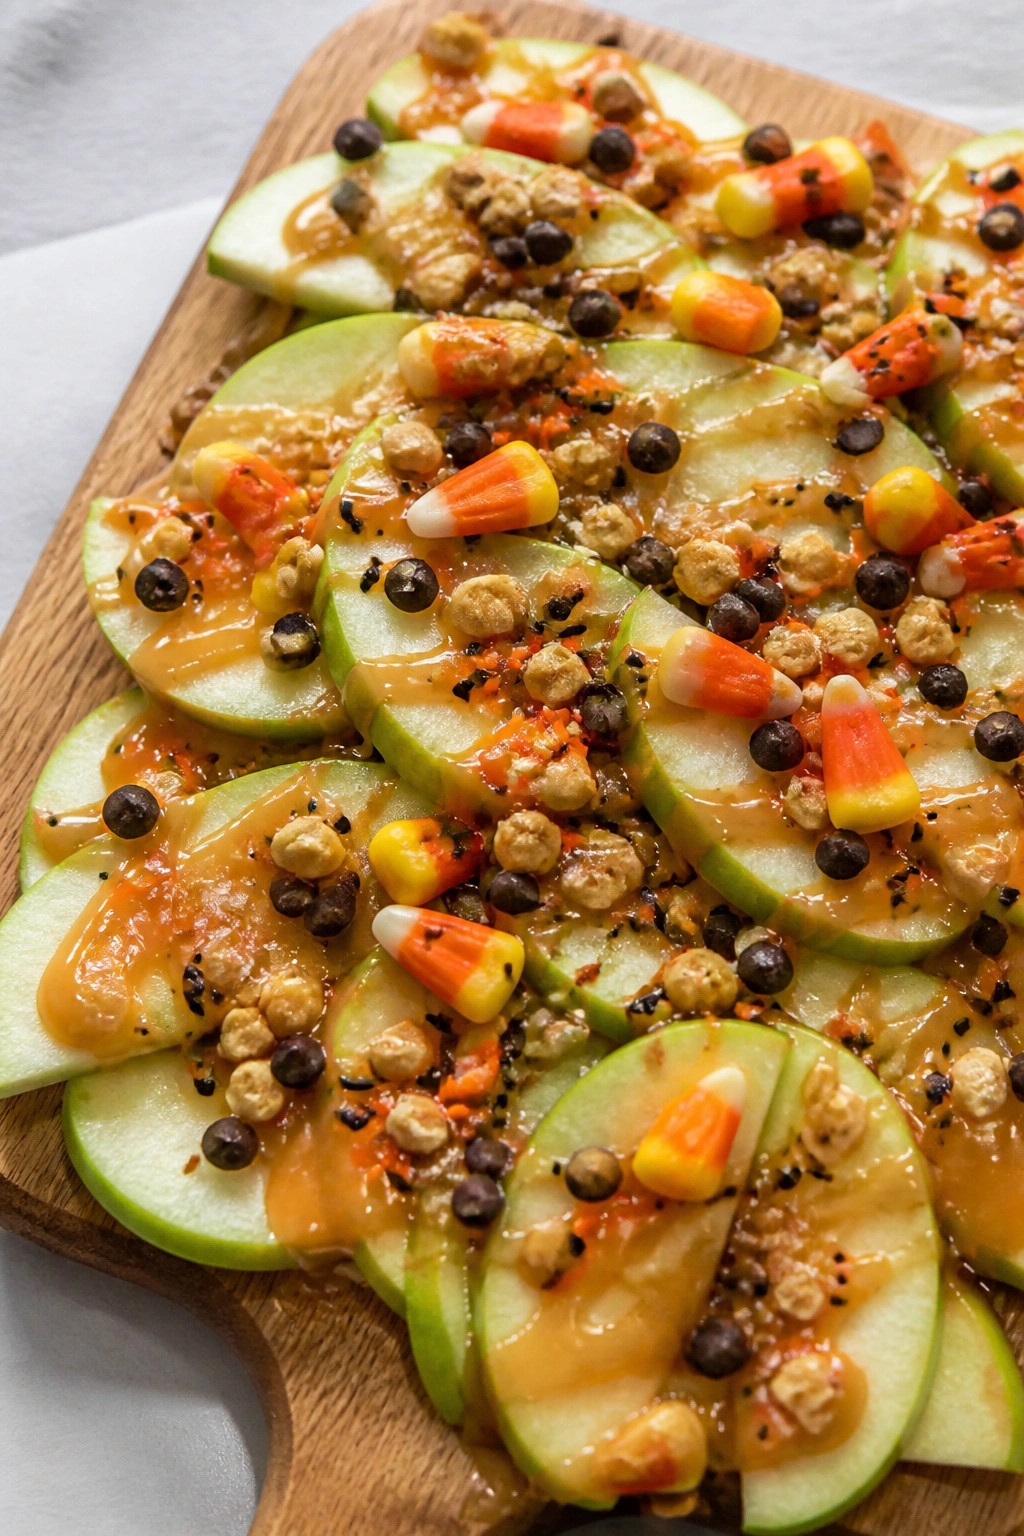
This Caramel Apple Nacho Board turns classic fall flavors into a fun, shareable treat. It works well for Halloween potlucks because it comes together in minutes with no oven time and travels easily to gatherings.
Tart apple slices form the base, then get drizzled with caramel and finished with crunchy and festive toppings for a balance of sweet, crisp, and chewy textures.
Serves 4 people.
Ingredients
- 4 large Granny Smith apples
- ½ cup caramel sauce
- ¼ cup mini chocolate chips
- ¼ cup chopped peanuts
- 2 tablespoons candy corn
- 1 tablespoon orange and black sprinkles
- ¼ teaspoon sea salt
Instructions
- Core the apples and cut them into thin wedges.
- Arrange the apple wedges in a single overlapping layer on a large serving board.
- Warm the caramel sauce in the microwave for 10 seconds if it is too thick, then drizzle it evenly over the apples.
- Scatter the mini chocolate chips, chopped peanuts, candy corn, and sprinkles across the top.
- Finish with a light sprinkle of sea salt before serving.
Extra Tips
Slice the apples right before the potluck so they stay crisp. Warm the caramel just enough to drizzle smoothly without making the apples soggy. Leftovers can be stored in the fridge, but the apples soften after a few hours. Course: Dessert Cuisine: American Equipment: Knife, serving board
Skeleton Veggie Pizza Bites
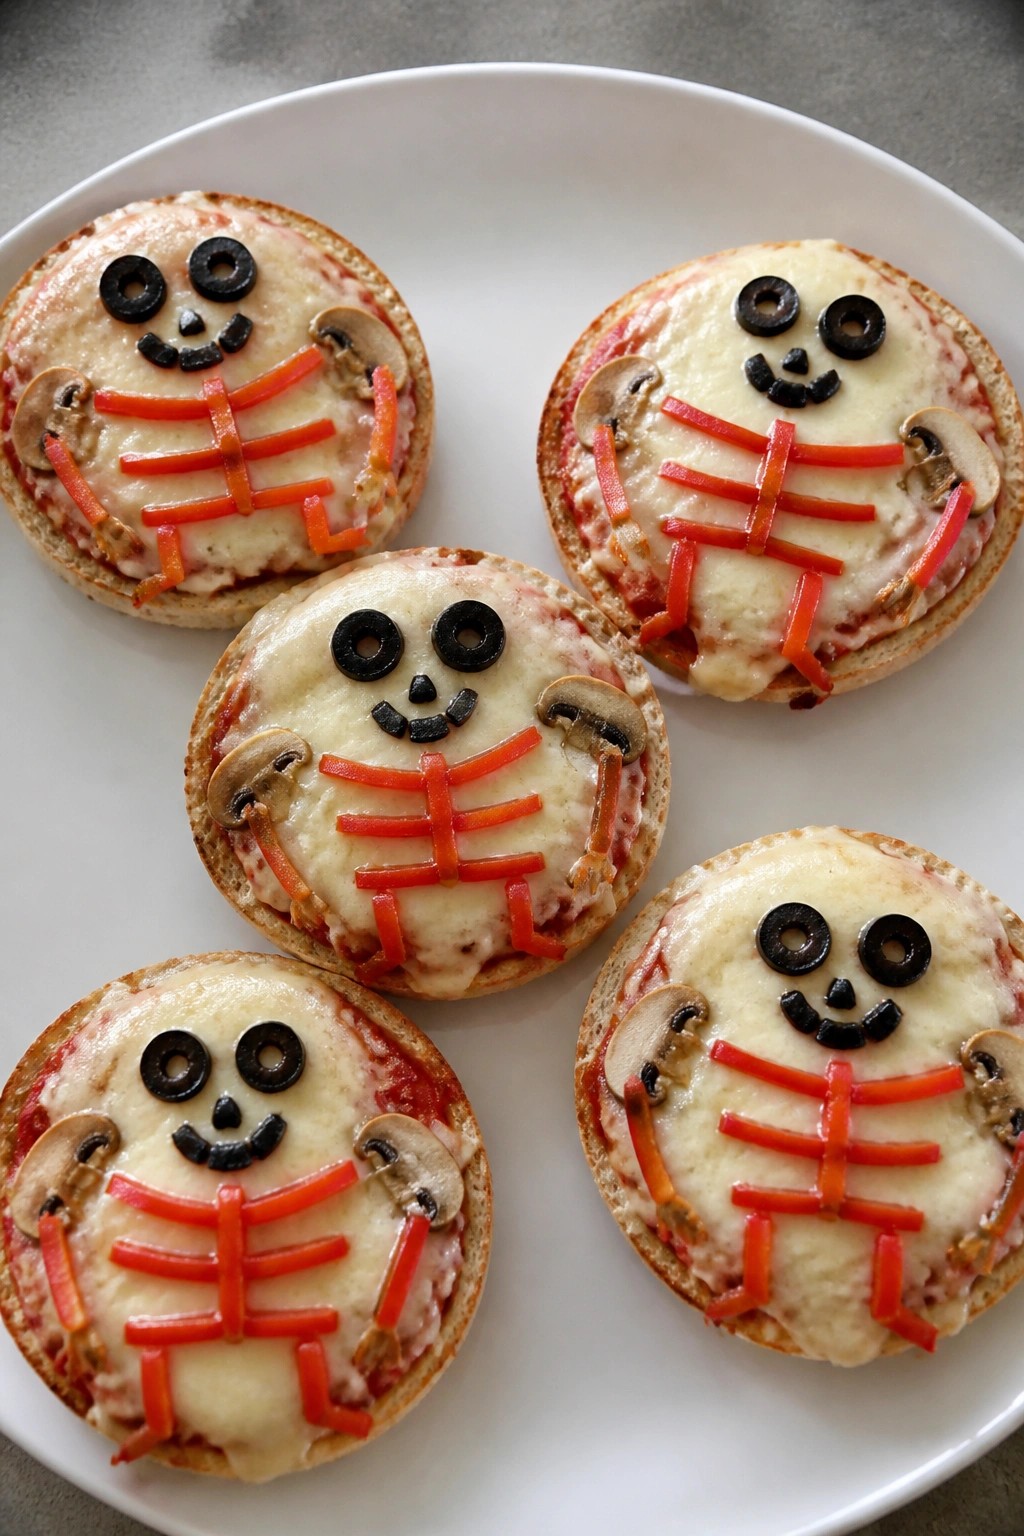
These Skeleton Veggie Pizza Bites bring a playful Halloween touch to any potluck spread. English muffin halves serve as the base for quick assembly and baking, while black olives and pepper strips form simple skeleton faces and bone shapes. The result is a light, cheesy snack with crisp veggies that feels festive without extra effort.
The bites taste savory from the melted mozzarella and tomato sauce, balanced by fresh crunch from the peppers and mushrooms. They travel well and hold up on a buffet table, making them a practical choice when you need something ready in under 30 minutes.
Serves 4 people.
Ingredients
- 4 English muffins, halved
- 1/2 cup pizza sauce
- 1 cup shredded mozzarella cheese
- 1/4 cup sliced black olives
- 1 small red bell pepper, cut into thin strips
- 1/2 cup sliced mushrooms
Instructions
- Preheat the oven to 400 degrees F and line a baking sheet with parchment paper.
- Place the English muffin halves cut side up on the baking sheet.
- Spread about 1 tablespoon of pizza sauce on each muffin half.
- Sprinkle 2 tablespoons of mozzarella cheese over the sauce on each half.
- Arrange two olive slices as eyes and a few smaller pieces to form a mouth on each muffin half to create a skeleton face.
- Add red bell pepper strips around the face to resemble bones and scatter a few mushroom slices on top.
- Bake for 8 to 10 minutes until the cheese melts and the edges turn golden.
- Remove from the oven and let cool for 2 minutes before transferring to a platter.
Extra Tips
Assemble the faces right after adding the cheese so the olives and peppers stay in place during baking. If you need to transport them, cover the cooled bites loosely with foil to keep the crust from softening. For a milder flavor, swap the red bell pepper for yellow or orange strips. Course: Appetizer Cuisine: American Equipment: Baking sheet, Oven, Knife, Cutting board
Bat Wing BBQ Meatball Sliders
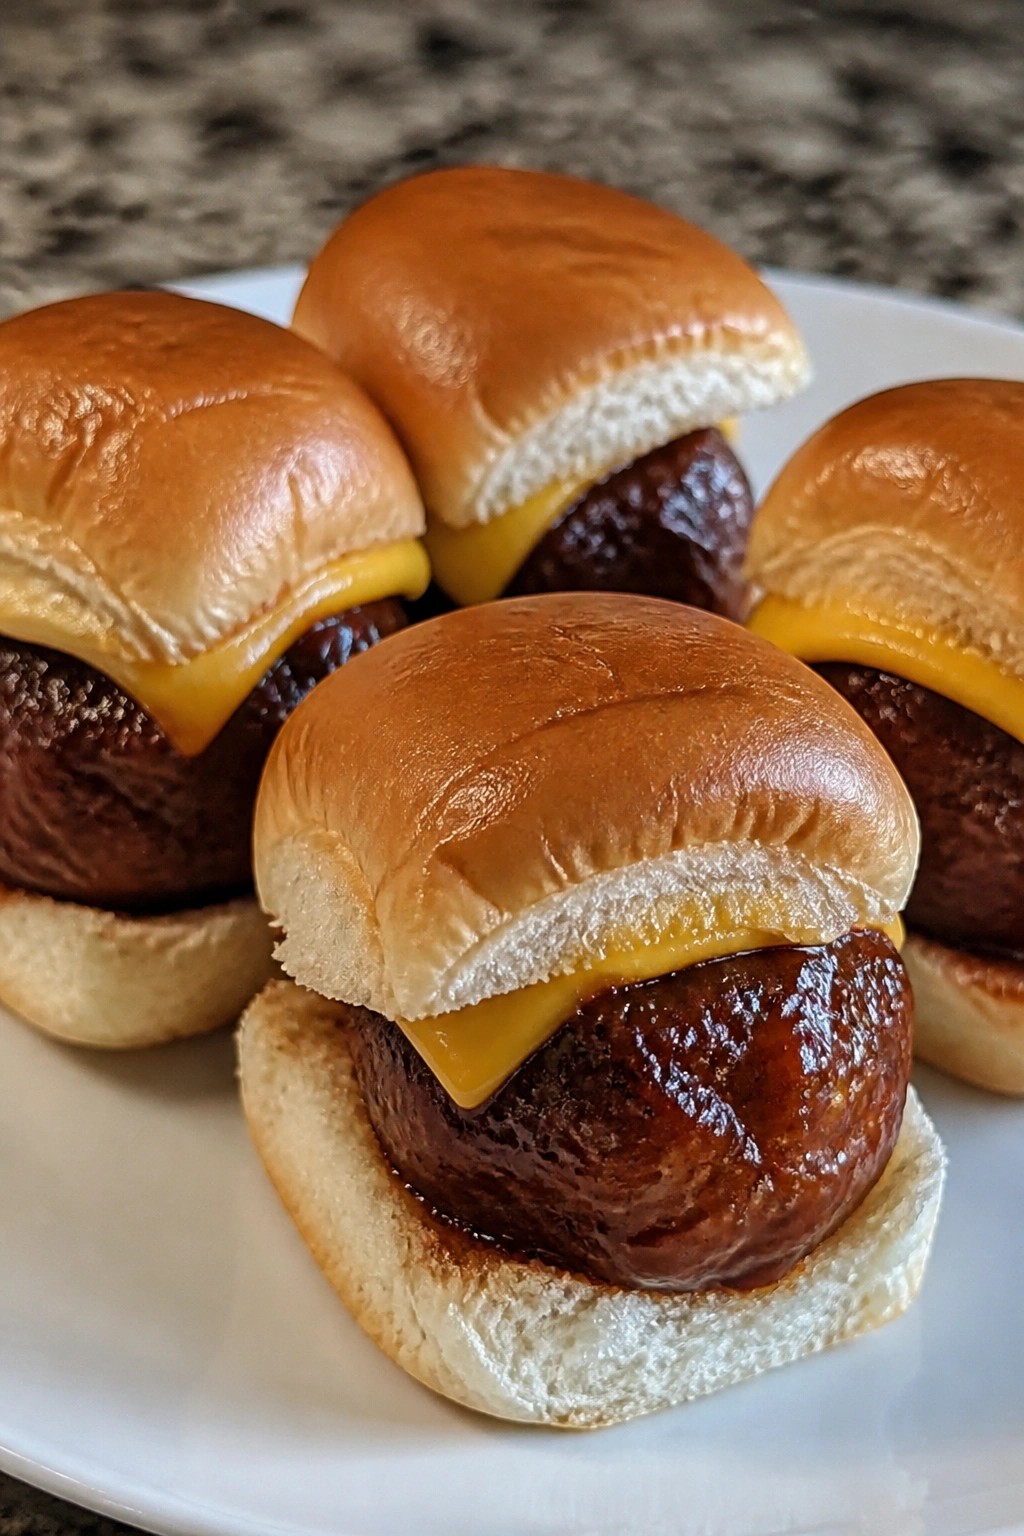
These sliders bring a fun Halloween touch to any potluck with their dark BBQ glaze and hearty meatballs tucked into soft buns. They come together quickly on the stove and travel well, making them a good choice when you need something warm and filling without much fuss. The meatballs stay juicy while the BBQ sauce adds a sweet and smoky bite that pairs nicely with the melted cheese.
Serves 4 people.
Ingredients
- 1 pound ground beef
- 1/4 cup breadcrumbs
- 1 egg
- 1 teaspoon salt
- 1/2 teaspoon black pepper
- 1 1/2 cups BBQ sauce
- 8 slider buns
- 4 slices American cheese
Instructions
- Combine the ground beef, breadcrumbs, egg, salt, and black pepper in a mixing bowl. Mix just until the ingredients hold together, then shape into 8 small meatballs.
- Heat a large skillet over medium heat. Add the meatballs and cook, turning occasionally, until browned on all sides and cooked through, about 8 to 10 minutes.
- Pour the BBQ sauce into the skillet with the meatballs. Stir gently to coat each meatball and let the sauce simmer for 3 to 4 minutes until it thickens slightly.
- Place one meatball into each slider bun. Top with half a slice of American cheese and close the bun. The heat from the meatballs will help the cheese melt.
Extra Tips
If the BBQ sauce thickens too much while simmering, add a splash of water to loosen it before assembling the sliders. For a make-ahead option, cook the meatballs and sauce the day before, then reheat on the stove and build the sliders right before serving so the buns stay soft. Course: Appetizer Cuisine: American Equipment: Mixing bowl, Large skillet
Haunted Brownie Graveyard Cups
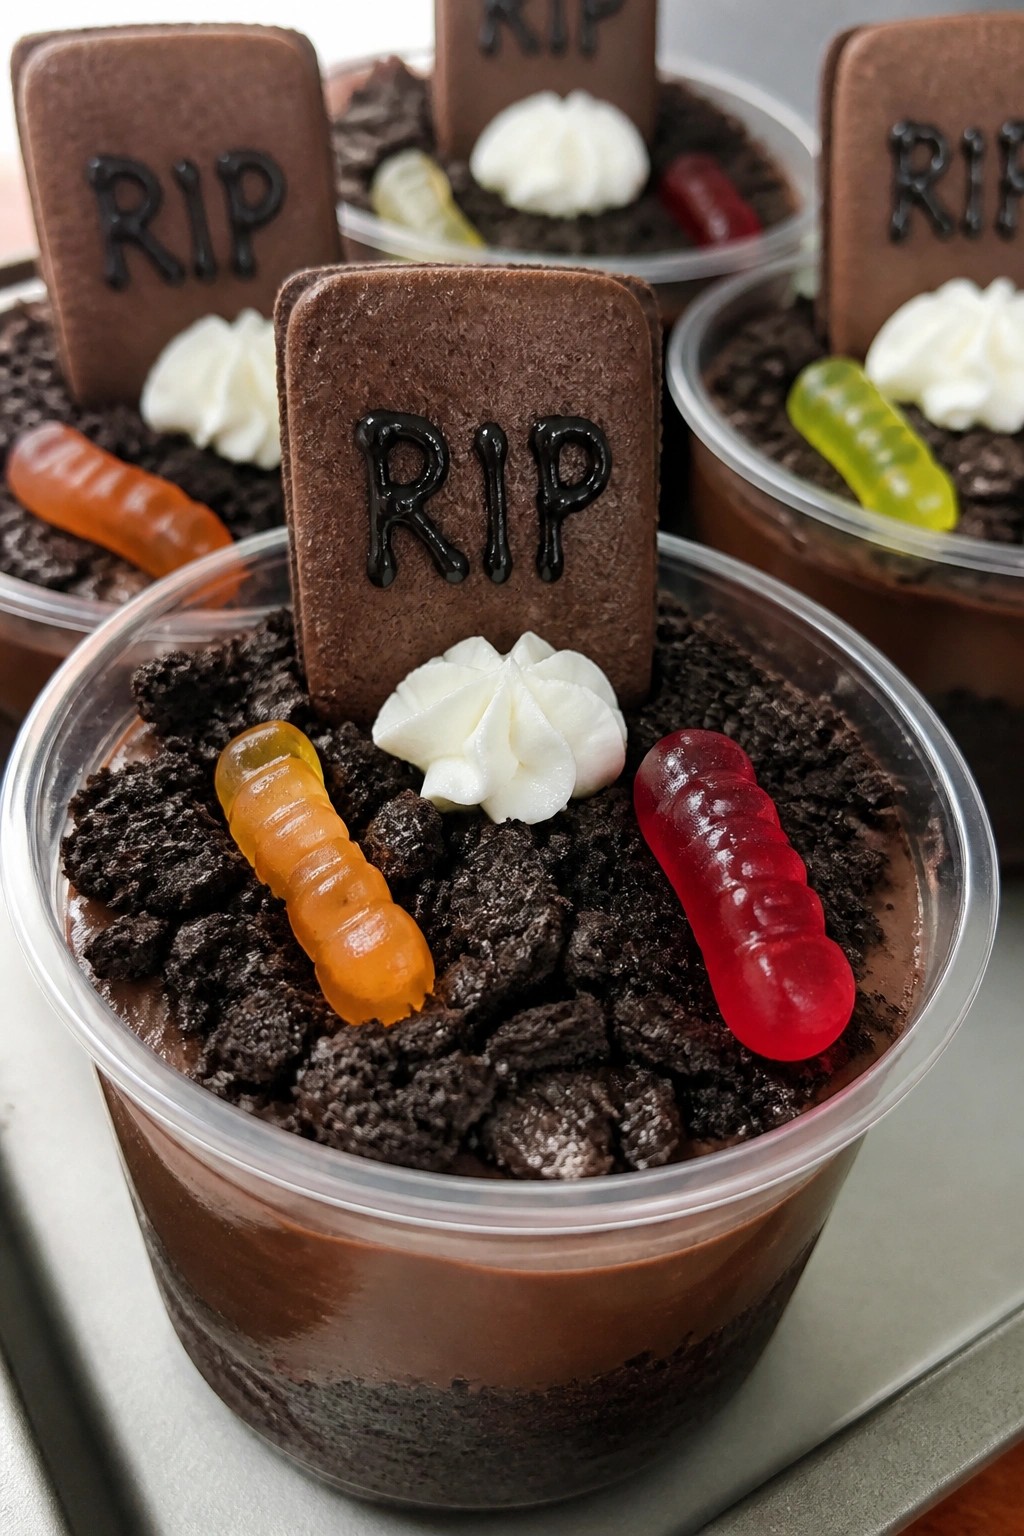
These cups bring a fun Halloween touch to any potluck without extra fuss. They work well for parties because you can assemble them ahead and they travel easily in a carrier. Each serving has a fudgy brownie base topped with creamy chocolate pudding and a crunchy cookie layer that gives the graveyard look.
Serves 4 people.
Ingredients
- 1 box (18 oz) brownie mix
- 2 large eggs
- 1/2 cup vegetable oil
- 1/4 cup water
- 1 package (3.9 oz) instant chocolate pudding mix
- 2 cups cold milk
- 12 chocolate sandwich cookies
- 4 gummy worms
- 4 rectangular chocolate cookies
- 1/2 cup whipped topping
Instructions
- Preheat the oven to 350°F and line a muffin tin with 4 paper liners. Mix the brownie mix with eggs, oil, and water according to package directions, then divide the batter among the liners. Bake for 20-22 minutes until a toothpick comes out with moist crumbs. Let the brownies cool completely in the liners.
- While the brownies cool, whisk the pudding mix with cold milk in a medium bowl for 2 minutes until it thickens. Place the bowl in the refrigerator for 5 minutes to set.
- Remove the cooled brownies from the liners and place one in the bottom of each of 4 clear cups. Spoon the chilled pudding evenly over each brownie.
- Place the chocolate sandwich cookies in a zip-top bag and crush them with a rolling pin until they resemble coarse dirt. Sprinkle the crushed cookies over the pudding layer in each cup.
- Press one rectangular chocolate cookie upright into the cookie crumbs at the back of each cup to stand as a tombstone. Add one gummy worm so it appears to crawl out of the crumbs. Finish with a small dollop of whipped topping near the base of each tombstone.
Extra Tips
Crush the cookies just before assembly so they stay crisp on top. If you need to transport these, cover each cup tightly with plastic wrap and add the gummy worms and tombstones right before serving to keep the decorations in place. Course: Dessert Cuisine: American Equipment: Muffin tin, Mixing bowls, Whisk