

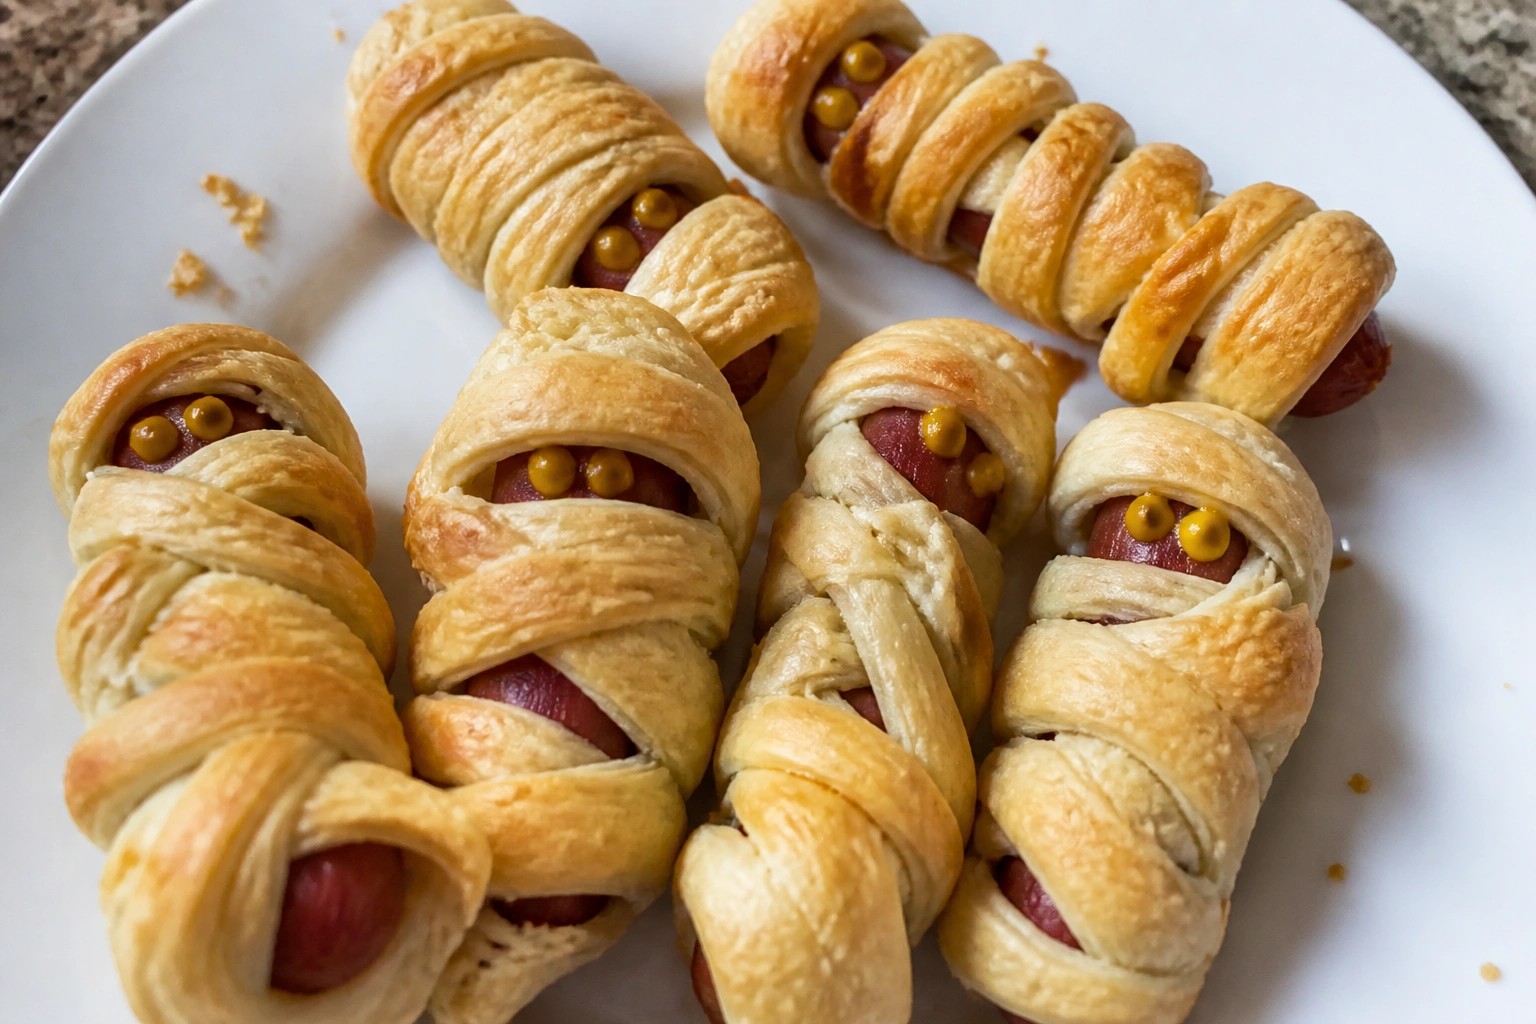
Halloween can sneak up on you when you have a busy schedule. You still want to put out some snacks for guests without spending hours in the kitchen. This list has ten simple snack ideas that use basic ingredients. Most of them can be put together in under 30 minutes. They are meant to be fun and easy for any host who needs quick options.
Helpful Tips Before You Start
These steps keep your Halloween snacks simple and low stress when time is tight.
Stock Overlapping Ingredients
Choose snacks that share items like pretzels, cheese, or chocolate so one shopping trip covers several recipes.
Prep Parts Ahead
Slice vegetables or mix spreads the day before so you only need to assemble on the day of the party.
Use Store Bought Bases
Start with ready items such as crackers, cookies, or mini waffles to skip extra baking steps.
Batch Similar Tasks
Cut all shapes or melt all chocolate at once instead of switching between different snacks.
Set Out Supplies First
Place bowls, spoons, and toppings on the counter before you begin to move through each snack faster.
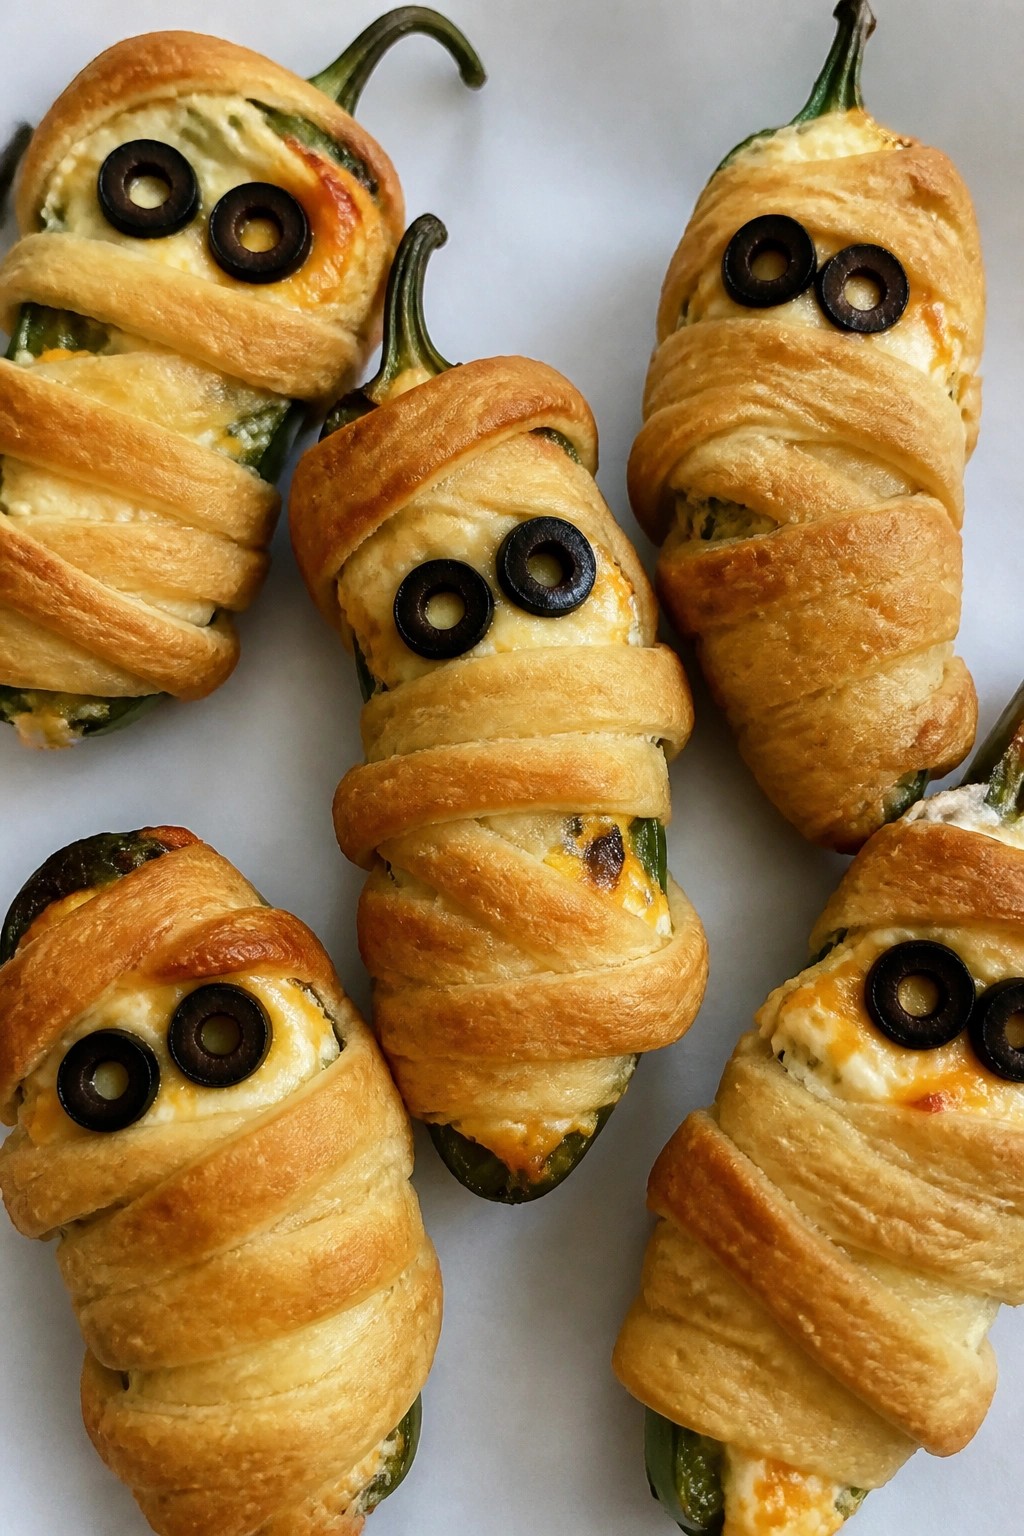
Mummy Jalapeño Poppers
These mummy jalapeño poppers give a simple appetizer a playful Halloween look that fits right into a busy hosting schedule. They come together fast with basic ingredients and bake while you finish other snacks.
The creamy cheese filling offers a cool contrast to the pepper heat, while the dough strips create a flaky outer layer. The result is a warm bite that works well for casual gatherings.
Serves 4 people.
Ingredients
- 8 large jalapeño peppers
- 8 ounces cream cheese, softened
- 1 cup shredded cheddar cheese
- 1 can refrigerated crescent roll dough
- 16 thin slices black olives
Instructions
- Preheat the oven to 375 degrees and line a baking sheet with parchment paper.
- Slice each jalapeño in half lengthwise and remove the seeds and membranes.
- Mix the softened cream cheese and shredded cheddar cheese in a bowl until evenly combined.
- Spoon the cheese mixture into each jalapeño half, filling them level with the edges.
- Unroll the crescent dough and cut it into thin strips. Wrap the strips around each stuffed jalapeño in a crisscross pattern to resemble mummy bandages, leaving space at one end for the face.
- Press two olive slices onto each popper to create eyes.
- Place the wrapped poppers on the prepared baking sheet and bake for 15 to 18 minutes until the dough turns golden.
- Remove from the oven and let them cool for a few minutes before serving.
Extra Tips
Use room temperature cream cheese so it mixes smoothly without lumps. If you prefer less heat, choose milder jalapeños or soak the halves in cold water for a few minutes after seeding. These poppers taste best served warm the same day, but leftovers can be reheated in a 350 degree oven for five minutes to restore crispness. Course: Appetizer Cuisine: American Equipment: Baking Sheet, Mixing Bowl, Knife
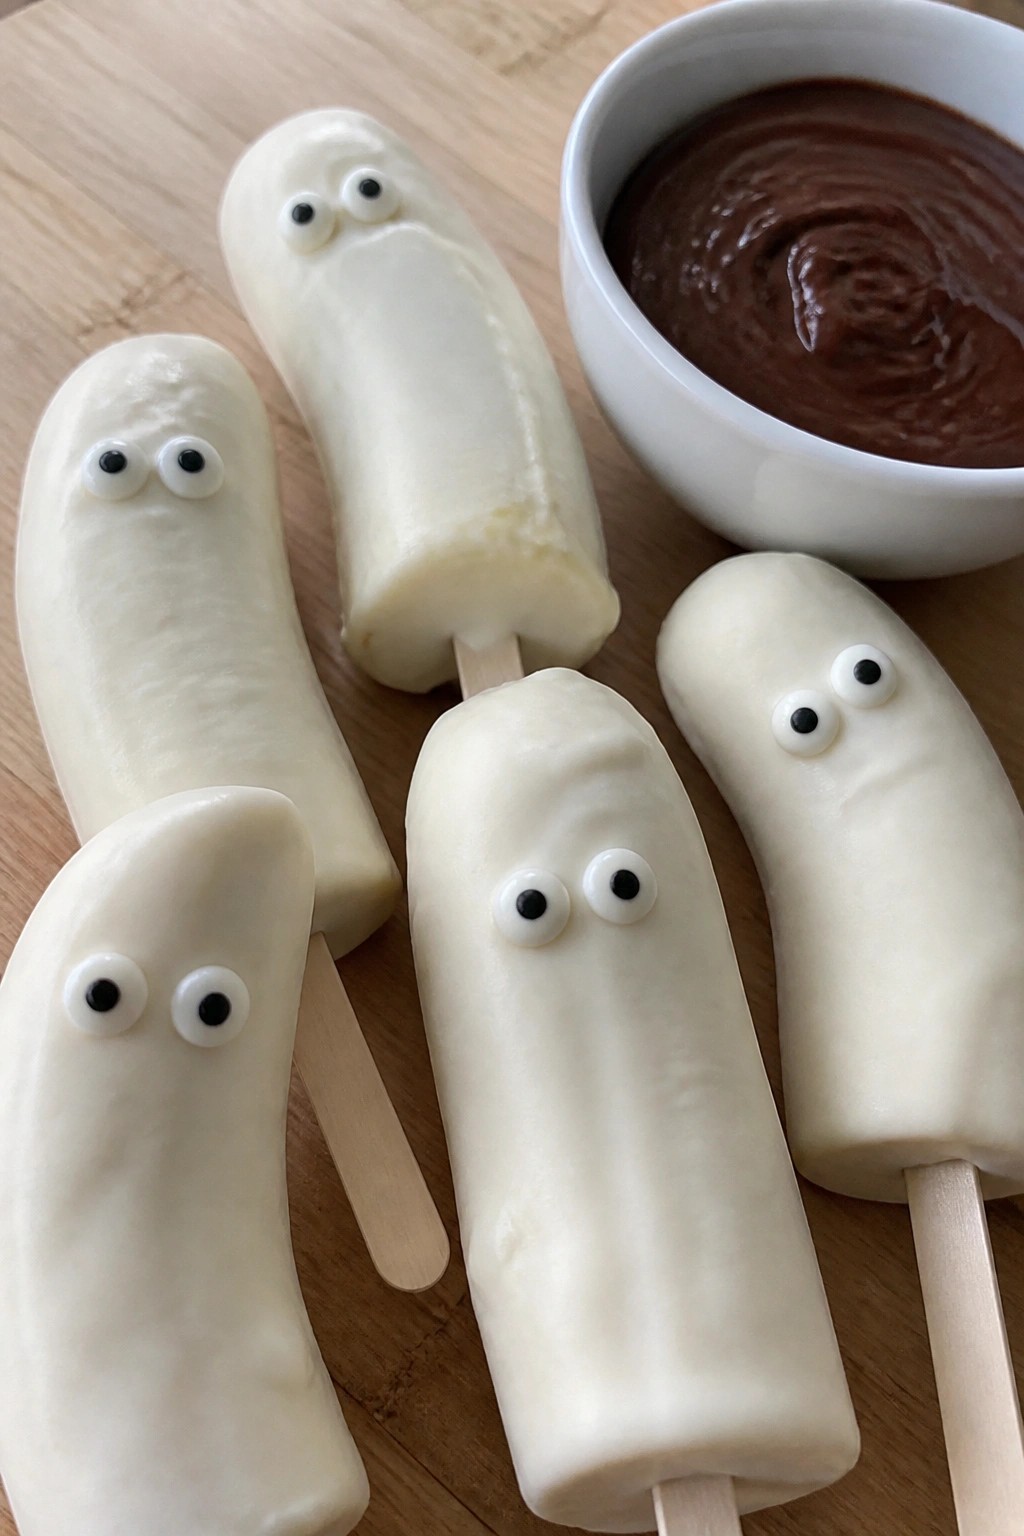
Ghost Banana Pops with Chocolate Dip
These banana pops give you a fun, no-bake Halloween snack that comes together quickly. Kids and adults both enjoy the creamy banana inside a crisp white chocolate shell, and the side of chocolate dip makes them feel a little more special without extra work. They work well for last-minute parties or after-school treats when you need something festive but simple.
The texture stays light because the banana stays cold and firm while the chocolate adds a smooth snap. The dark chocolate dip brings a richer flavor that balances the sweetness of the white chocolate coating.
Serves 4 people.
Ingredients
- 4 medium bananas
- 4 popsicle sticks
- 1 1/2 cups white chocolate chips
- 2 tablespoons coconut oil
- 1/2 cup dark chocolate chips
- 8 candy eyes
Instructions
- Peel the bananas and insert one popsicle stick into the cut end of each banana. Place the bananas on a parchment-lined baking sheet and freeze for 20 minutes so they hold their shape during dipping.
- Combine the white chocolate chips and 1 tablespoon of coconut oil in a microwave-safe bowl. Heat in 30-second intervals, stirring between each, until the mixture is smooth.
- Dip each frozen banana into the melted white chocolate, turning to coat evenly. Let excess chocolate drip off, then return the coated banana to the baking sheet.
- Immediately press two candy eyes onto each banana while the chocolate is still soft. Place the baking sheet back in the freezer for 10 minutes to set the coating.
- Melt the dark chocolate chips with the remaining tablespoon of coconut oil using the same microwave method until smooth. Pour into a small serving bowl.
- Serve the ghost pops with the bowl of melted dark chocolate on the side for dipping.
Extra Tips
Freeze the bananas just until firm but not rock hard so the chocolate coating does not crack when you bite into it. If the white chocolate thickens while you work, stir in a few drops of warm coconut oil to loosen it again. The dark chocolate dip can be made ahead and gently rewarmed before serving. Course: Snack Cuisine: American Equipment: Baking sheet, Microwave-safe bowl, Parchment paper
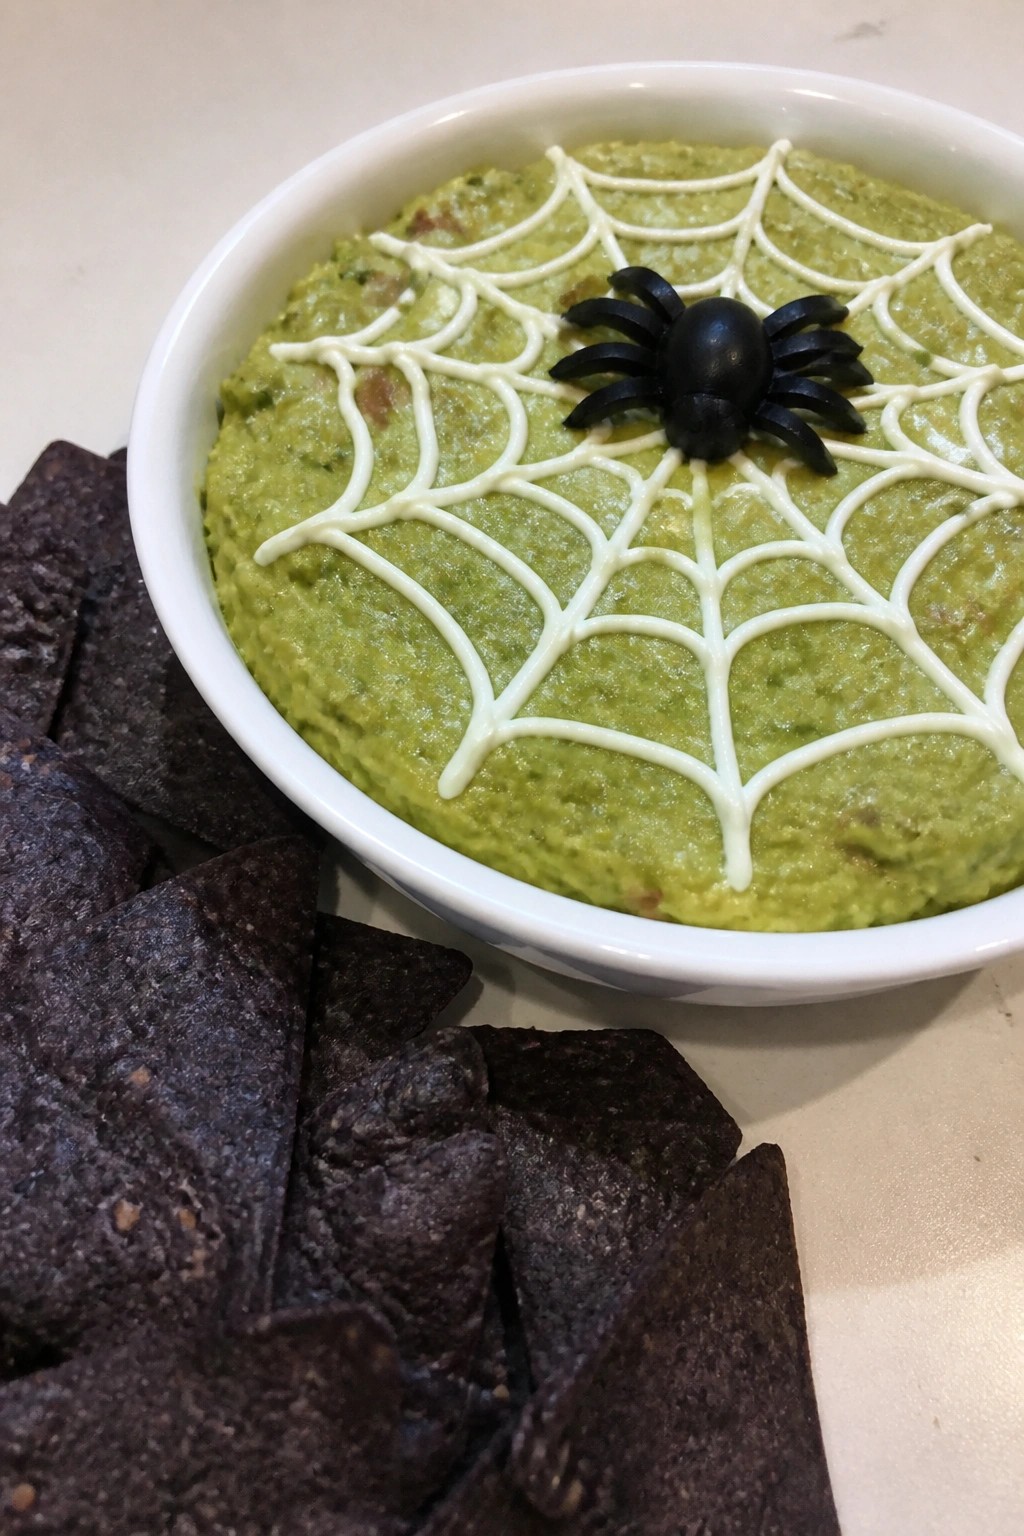
Spiderweb Guacamole with Black Tortilla Chips
This snack brings a simple Halloween touch to any gathering without extra work. The creamy guacamole gets a quick spiderweb design on top, and the black tortilla chips make the colors stand out. It comes together fast and travels well to parties or game nights.
The flavor stays bright from lime and fresh vegetables, while the chips add a solid crunch against the smooth dip. Busy hosts can prep the base ahead and finish the web right before serving.
Serves 4 people.
Ingredients
- 3 ripe avocados
- Juice of 1 lime
- 1/2 teaspoon salt
- 1/4 cup finely diced red onion
- 1 small tomato, diced
- 2 tablespoons chopped fresh cilantro
- 1/4 cup sour cream
- 2 black olives
- 8 ounces black tortilla chips
Instructions
- Cut the avocados in half, remove the pits, and scoop the flesh into a mixing bowl. Mash with a fork until mostly smooth with a few small chunks left.
- Stir in the lime juice and salt until evenly combined.
- Add the red onion, tomato, and cilantro. Mix gently so the pieces stay visible.
- Spoon the guacamole into a shallow serving bowl and smooth the top with the back of a spoon.
- Place the sour cream in a small plastic bag and snip off one corner. Pipe four concentric circles on the guacamole surface, then drag a knife from the center outward in eight lines to form the web.
- Slice one black olive in half for the spider body and cut the other into thin strips for legs. Arrange them in the center of the web.
- Set the bowl on a platter and surround it with the black tortilla chips for dipping.
Extra Tips
Pipe the sour cream web just before guests arrive so the lines stay sharp. If you run out of time, skip the olive spider and let the web stand alone. Leftovers keep in an airtight container for one day, though the web may blur. Swap red onion for green onion if you want a milder bite. Course: Appetizer Cuisine: Mexican Equipment: Mixing Bowl, Fork, Plastic Bag
Witch’s Broom Pretzel Sticks
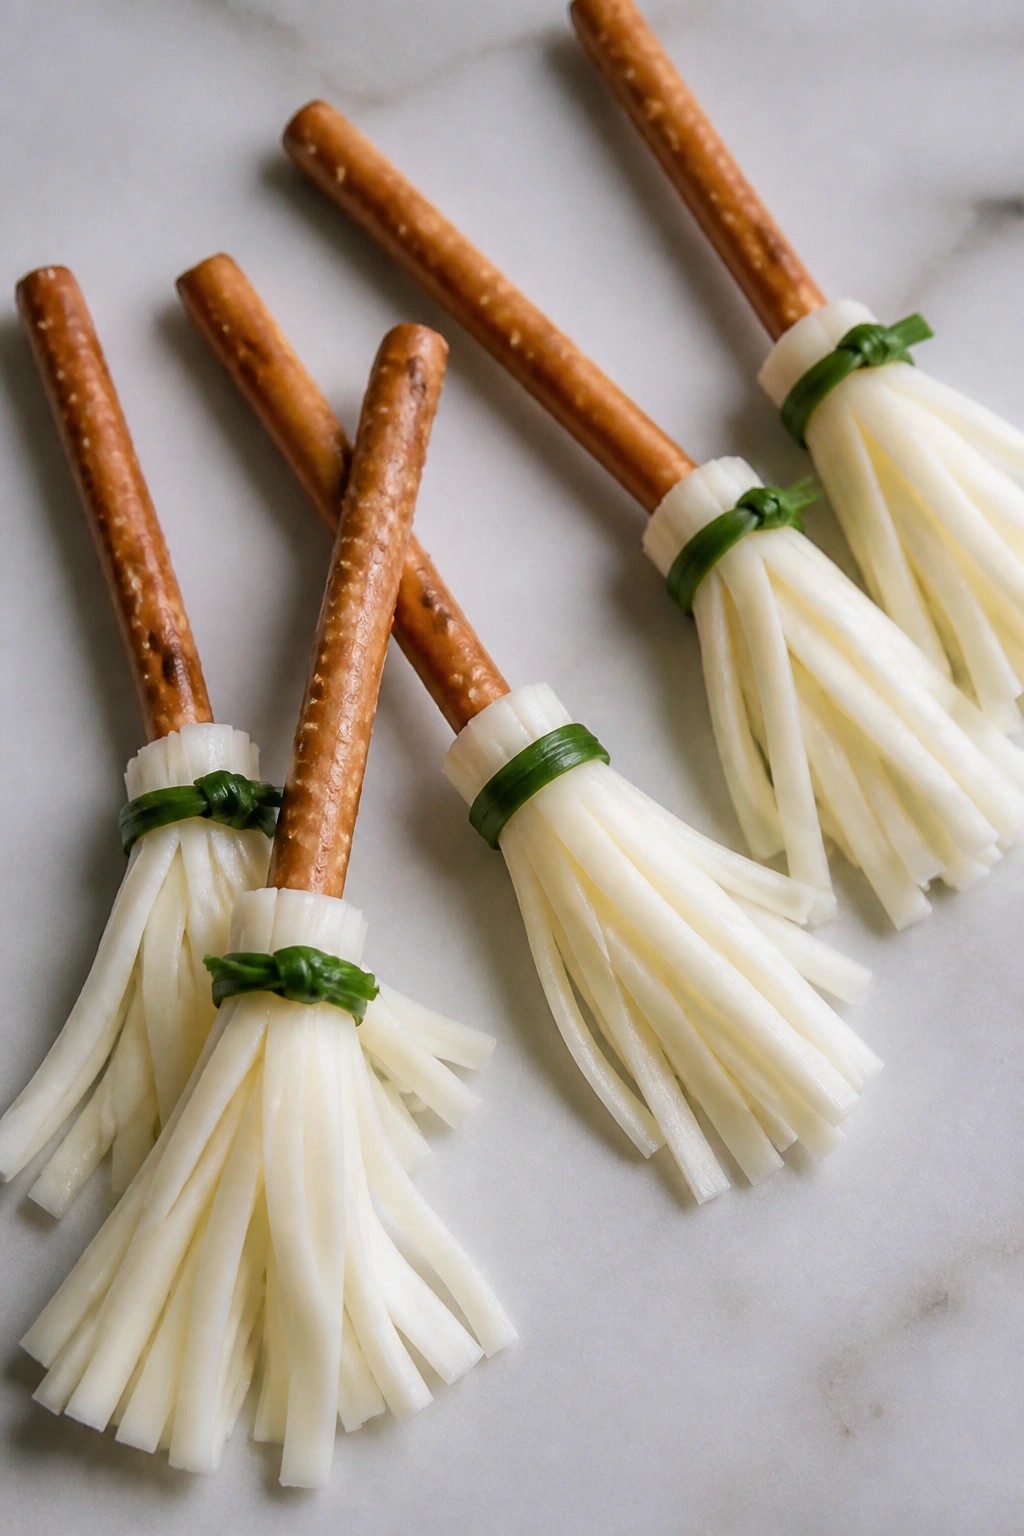
These Witch’s Broom Pretzel Sticks bring a fun shape to any snack table without extra effort. They combine a salty crunch with mild cheese in a way that feels festive but stays simple for busy hosts.
The recipe works well for last-minute party prep or school events. Kids enjoy the playful look while adults appreciate the straightforward assembly.
Serves 4 people.
Ingredients
- 8 pretzel rods
- 4 mozzarella string cheese sticks
- 8 fresh chives
Instructions
- Place the string cheese sticks on a cutting board and slice each one lengthwise into thin strips to form the broom bristles.
- Press the cheese strips onto one end of each pretzel rod so the strips fan out slightly.
- Wrap one chive around the top of the cheese strips on each pretzel rod and tie it gently to hold the bristles in place.
Extra Tips
Chill the string cheese for a few minutes before slicing to keep the strips neat. These brooms taste best when assembled right before serving so the pretzels stay crisp. You can prepare the cheese strips ahead and store them in a covered container in the fridge until assembly time. Course: Snack Cuisine: American Equipment: Cutting board, Knife
Pumpkin-Shaped Cheese Ball with Crackers
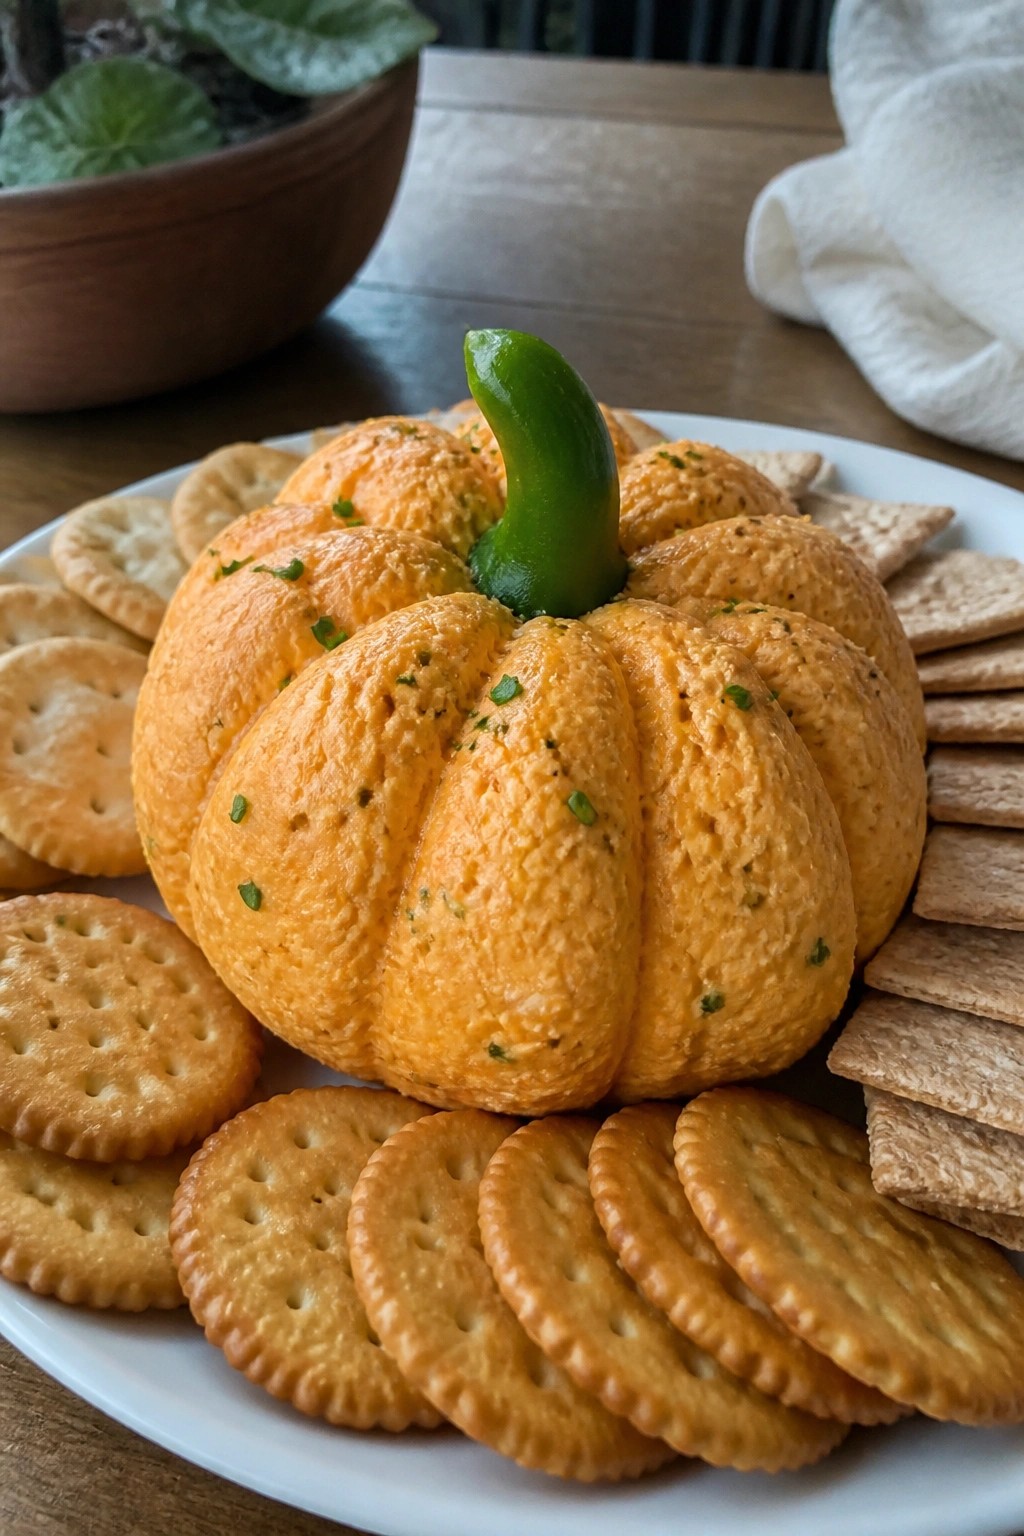
This cheese ball brings a simple festive element to any Halloween gathering. Busy hosts can prepare it ahead with minimal effort and still offer something guests enjoy spreading on crackers.
The mix of cream cheese and cheddar creates a smooth, spreadable base with a mild savory taste. Paprika adds color and a gentle warmth that fits the pumpkin theme without extra work.
Serves 4 people.
Ingredients
- 8 ounces cream cheese, softened
- 1 1/2 cups shredded orange cheddar cheese
- 1 teaspoon paprika
- 1/2 teaspoon onion powder
- 2 tablespoons chopped chives
- 1 green bell pepper stem
- Assorted crackers for serving
Instructions
- Place the softened cream cheese, shredded cheddar, paprika, and onion powder in a mixing bowl. Stir until the mixture is evenly combined and smooth.
- Fold the chopped chives into the cheese mixture until they are distributed throughout.
- Scoop the mixture onto a plate and shape it into a round ball. Use your hands or a spatula to press light ridges around the sides so it resembles a pumpkin.
- Set the green bell pepper stem upright in the center of the top to act as the stem.
- Arrange the finished cheese ball on a serving plate with the crackers alongside.
Extra Tips
Chill the shaped cheese ball for at least 30 minutes before serving so it firms up and holds its ridges. If the mixture feels too soft while shaping, add a small handful of extra shredded cheddar. Leftovers store well in an airtight container in the refrigerator for up to two days. Course: Appetizer Cuisine: American Equipment: Mixing Bowl, Spatula
Bat Wing Chicken Skewers
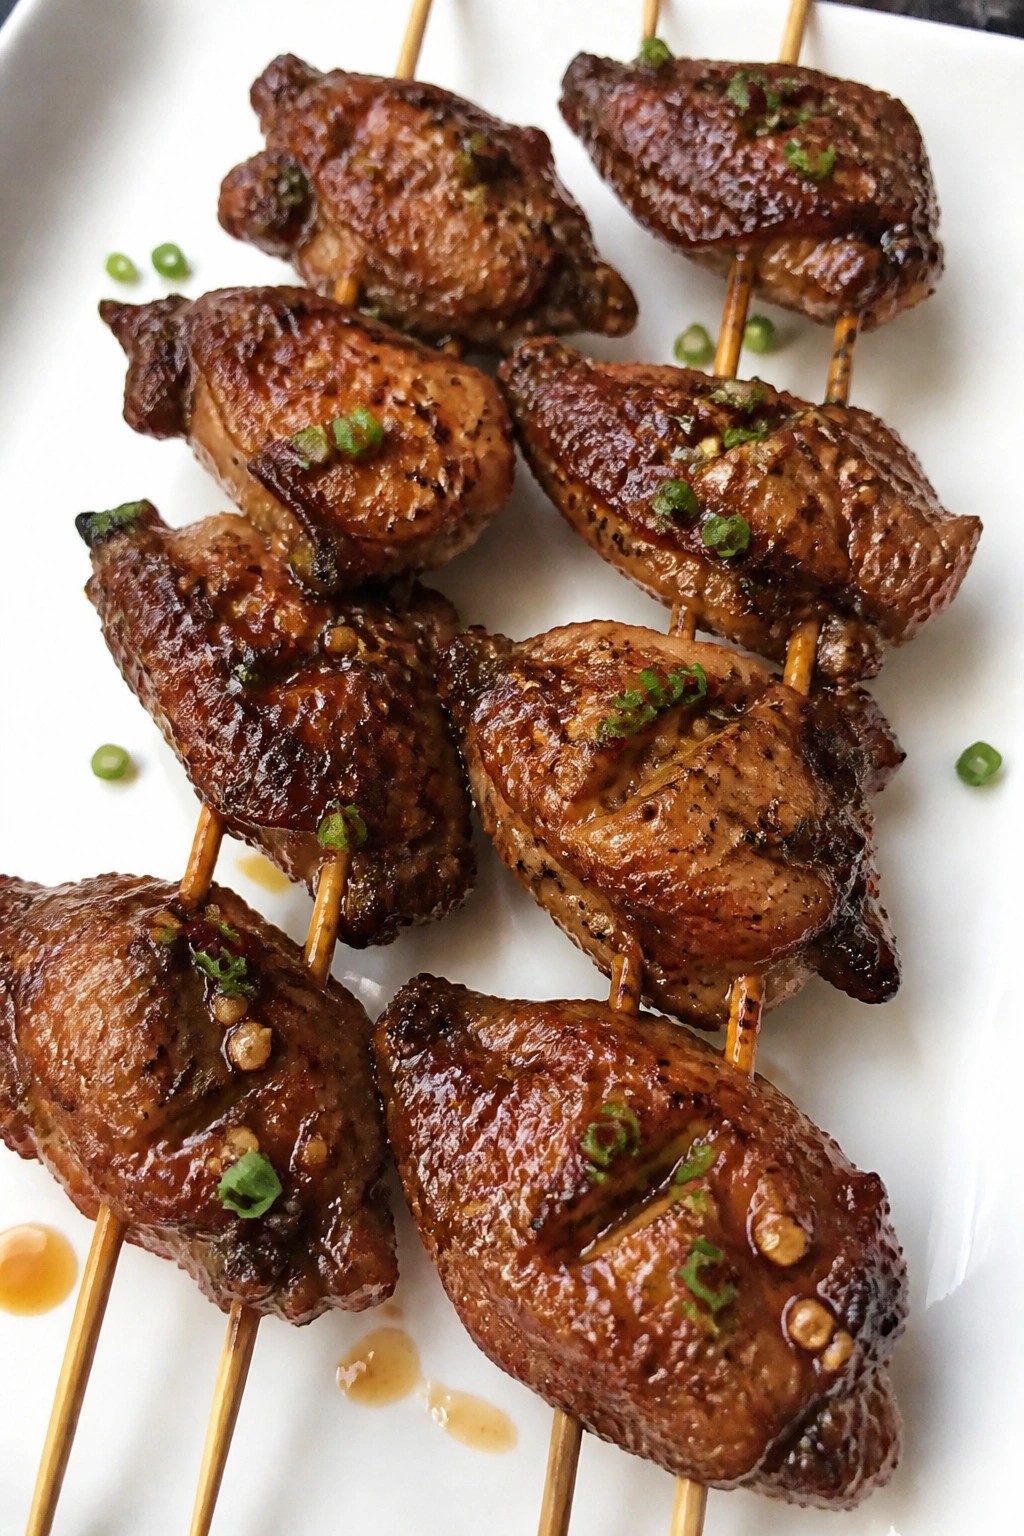
These bat wing chicken skewers bring a simple spooky touch to your Halloween spread without extra fuss. The dark marinade gives the wings a bold look that works well on a snack table, and the skewers make them easy for guests to grab while you handle other hosting tasks.
The flavor leans savory with a light sweet note from the honey and a touch of smokiness. They cook fast and hold up if you need to make them shortly before guests arrive.
Serves 4 people.
Ingredients
- 8 chicken wings
- 1/4 cup soy sauce
- 2 tablespoons honey
- 1 tablespoon olive oil
- 2 garlic cloves, minced
- 1 teaspoon paprika
- 8 wooden skewers
- Chopped green onions for serving
Instructions
- Soak the wooden skewers in water for 10 minutes while you prepare the marinade. This helps prevent burning during cooking.
- In a bowl, combine the soy sauce, honey, olive oil, minced garlic, and paprika. Stir until the honey dissolves.
- Add the chicken wings to the bowl and toss to coat them evenly in the marinade. Let them sit for 10 minutes at room temperature.
- Thread one chicken wing onto each skewer, piercing through the meaty part so the wing lies flat like a bat wing.
- Place the skewers on a baking sheet lined with foil. Bake at 400 degrees F for 25 minutes, turning once halfway through.
- Remove from the oven and sprinkle with chopped green onions before serving.
Extra Tips
For the darkest color, use regular soy sauce rather than low-sodium. If you want to prep ahead, marinate the wings in the fridge up to four hours, then thread and bake right before serving. Leftovers reheat well in a 350 degree F oven for 8 minutes to keep the skin crisp. Course: Appetizer Cuisine: American Equipment: Mixing Bowl, Baking Sheet, Wooden Skewers
Frankenstein Avocado Toast Bites
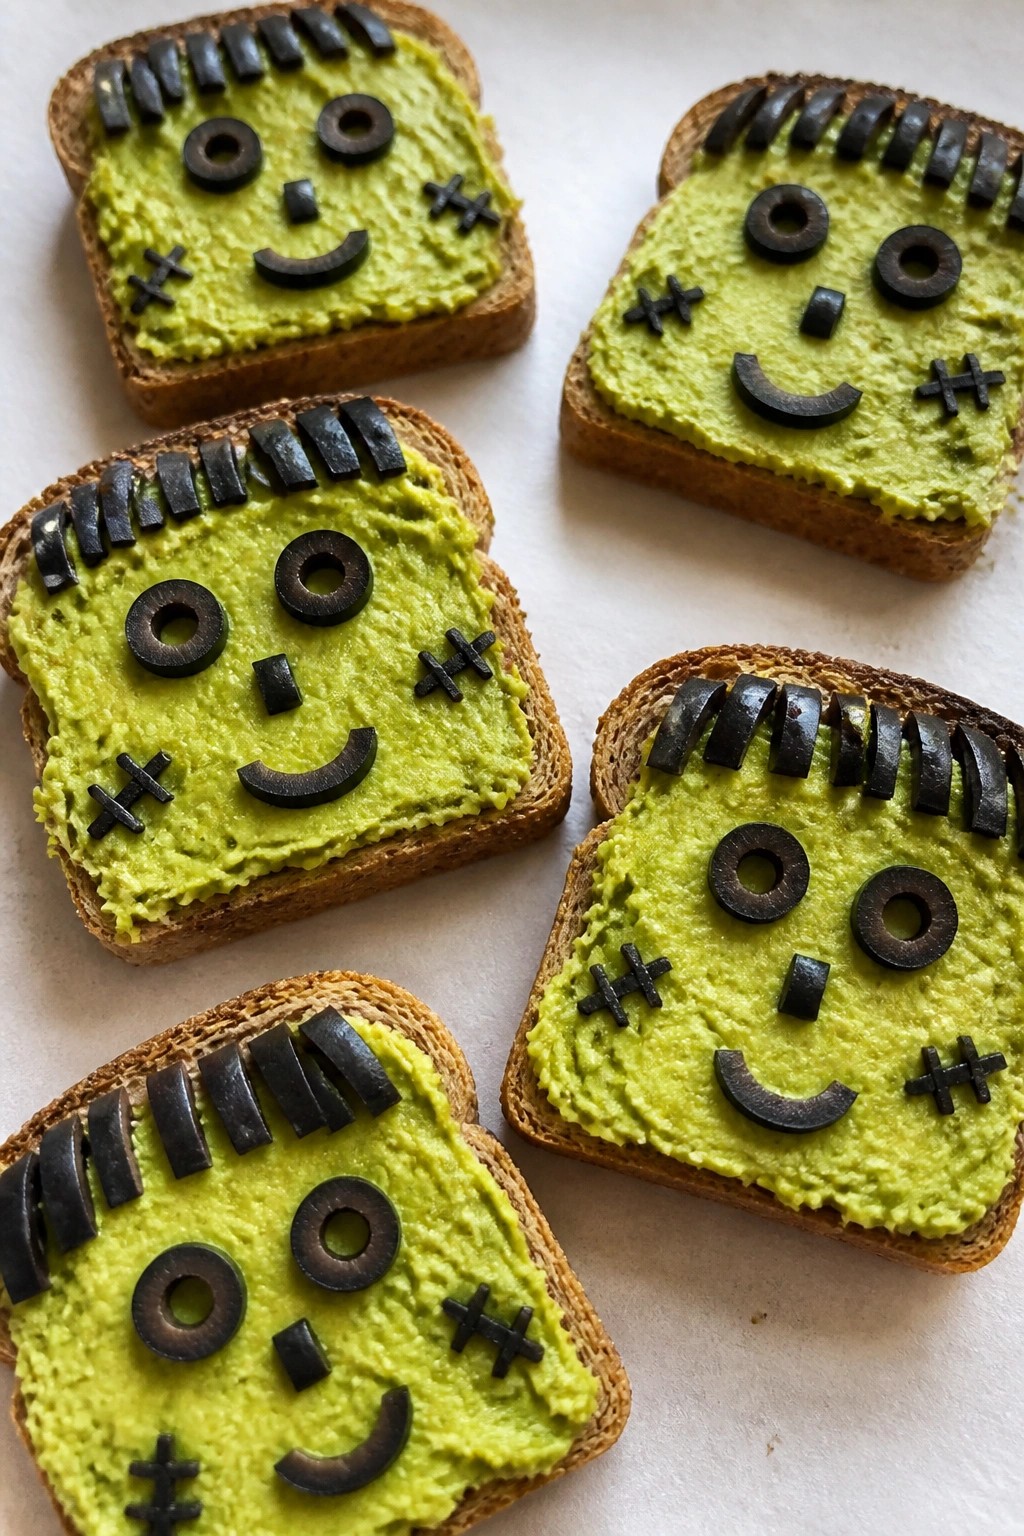
These Frankenstein Avocado Toast Bites give classic avocado toast a fun Halloween twist. The bright green mash sets the stage for simple olive faces that look like the classic monster. They work well for last-minute party prep when you need something quick that still feels festive.
The crispy toast base holds up to the creamy avocado while keeping each bite light and easy to eat. Kids and adults both enjoy assembling the faces, and the result looks great on a snack table.
Serves 4 people.
Ingredients
- 4 slices whole grain bread
- 2 ripe avocados
- 1 tablespoon lime juice
- 1/4 teaspoon salt
- 1/4 teaspoon black pepper
- 16 black olive slices
Instructions
- Toast the 4 slices of bread until golden and crisp, then let them cool slightly before cutting each slice into 2 rectangles to make 8 bites total.
- Cut the avocados in half, remove the pits, and scoop the flesh into a bowl. Add the lime juice, salt, and black pepper.
- Mash everything together with a fork until the mixture is mostly smooth but still has a few small chunks for texture.
- Spread a generous layer of the avocado mixture over each toast rectangle.
- Add two olive slices to each bite for eyes. Place two more olive slices on the sides of each bite to look like neck bolts.
Extra Tips
Cut the toast rectangles before adding the avocado so the spread stays neat. If your avocados are very ripe, the mash will spread easily without tearing the toast. Leftovers keep best when stored in an airtight container with the bites separated by parchment paper. Course: Snack Cuisine: American Equipment: Toaster, Mixing Bowl, Knife
Candy Corn Yogurt Parfait Cups
These Candy Corn Yogurt Parfait Cups bring a festive touch to any Halloween spread without extra work. The layered colors mimic classic candy corn while the yogurt keeps everything light and creamy. They come together quickly and look polished in clear cups.
They work well for last-minute party prep or as a fun afternoon snack for kids. The texture stays smooth from the yogurt with a bit of chew from the candy corn on top.
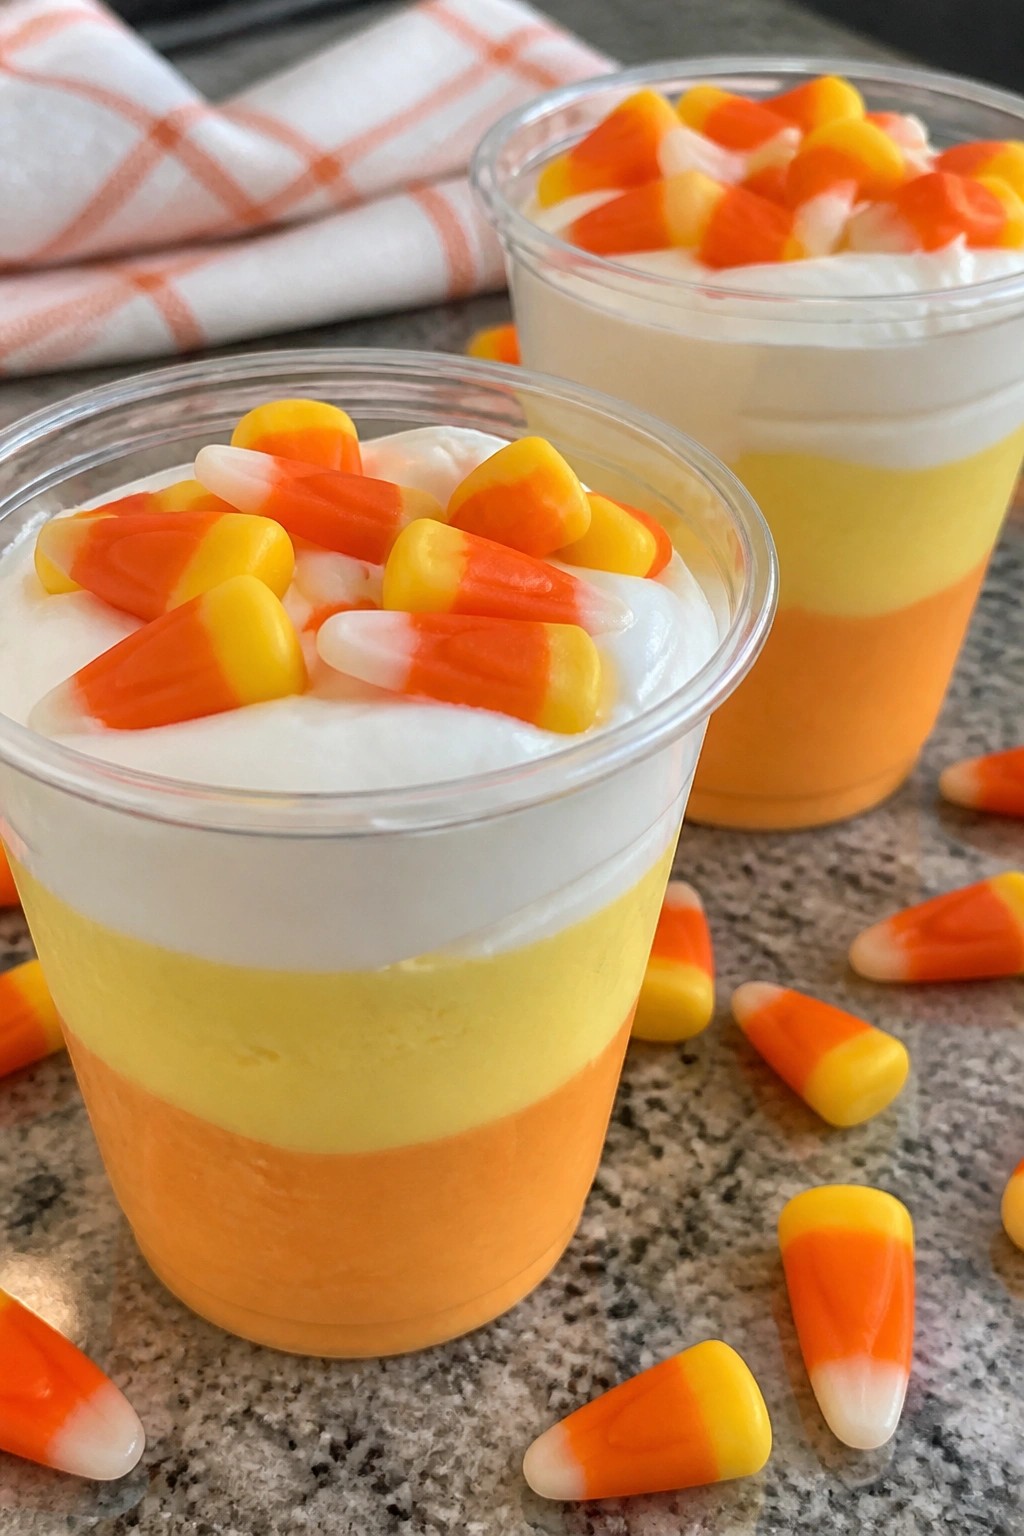
Serves 4 people.
Ingredients
- 3 cups vanilla Greek yogurt, divided
- 4 drops yellow food coloring
- 4 drops orange food coloring
- 1/2 cup candy corn
Instructions
- Divide the vanilla Greek yogurt evenly into three small bowls.
- Stir the yellow food coloring into the first bowl until the color looks even.
- Stir the orange food coloring into the second bowl until the color looks even. Leave the third bowl plain.
- Spoon the yellow yogurt into the bottom of four clear cups.
- Add a layer of the orange yogurt on top of the yellow layer in each cup.
- Finish with a layer of the plain yogurt.
- Top each cup with candy corn right before serving.
Extra Tips
Use clear plastic or glass cups so the three layers show clearly. Mix the colors right before assembling to keep the yogurt thick. Add the candy corn at the last minute so it stays firm instead of softening in the yogurt. Course: Snack Cuisine: American Equipment: Mixing bowls, spoons, clear cups
Bloody Mary Tomato and Mozzarella Skewers
These skewers capture the bold flavors of a Bloody Mary in an easy bite-sized snack. They work well for Halloween parties because they need no cooking and can be made ahead, leaving you free to handle other tasks. The red tomatoes stand out against the white cheese for a simple but striking look on any snack table.
The combination gives you juicy tomato, creamy mozzarella, and crisp celery in every bite. A light drizzle of the seasoned tomato mixture ties the flavors together without overpowering the fresh ingredients.
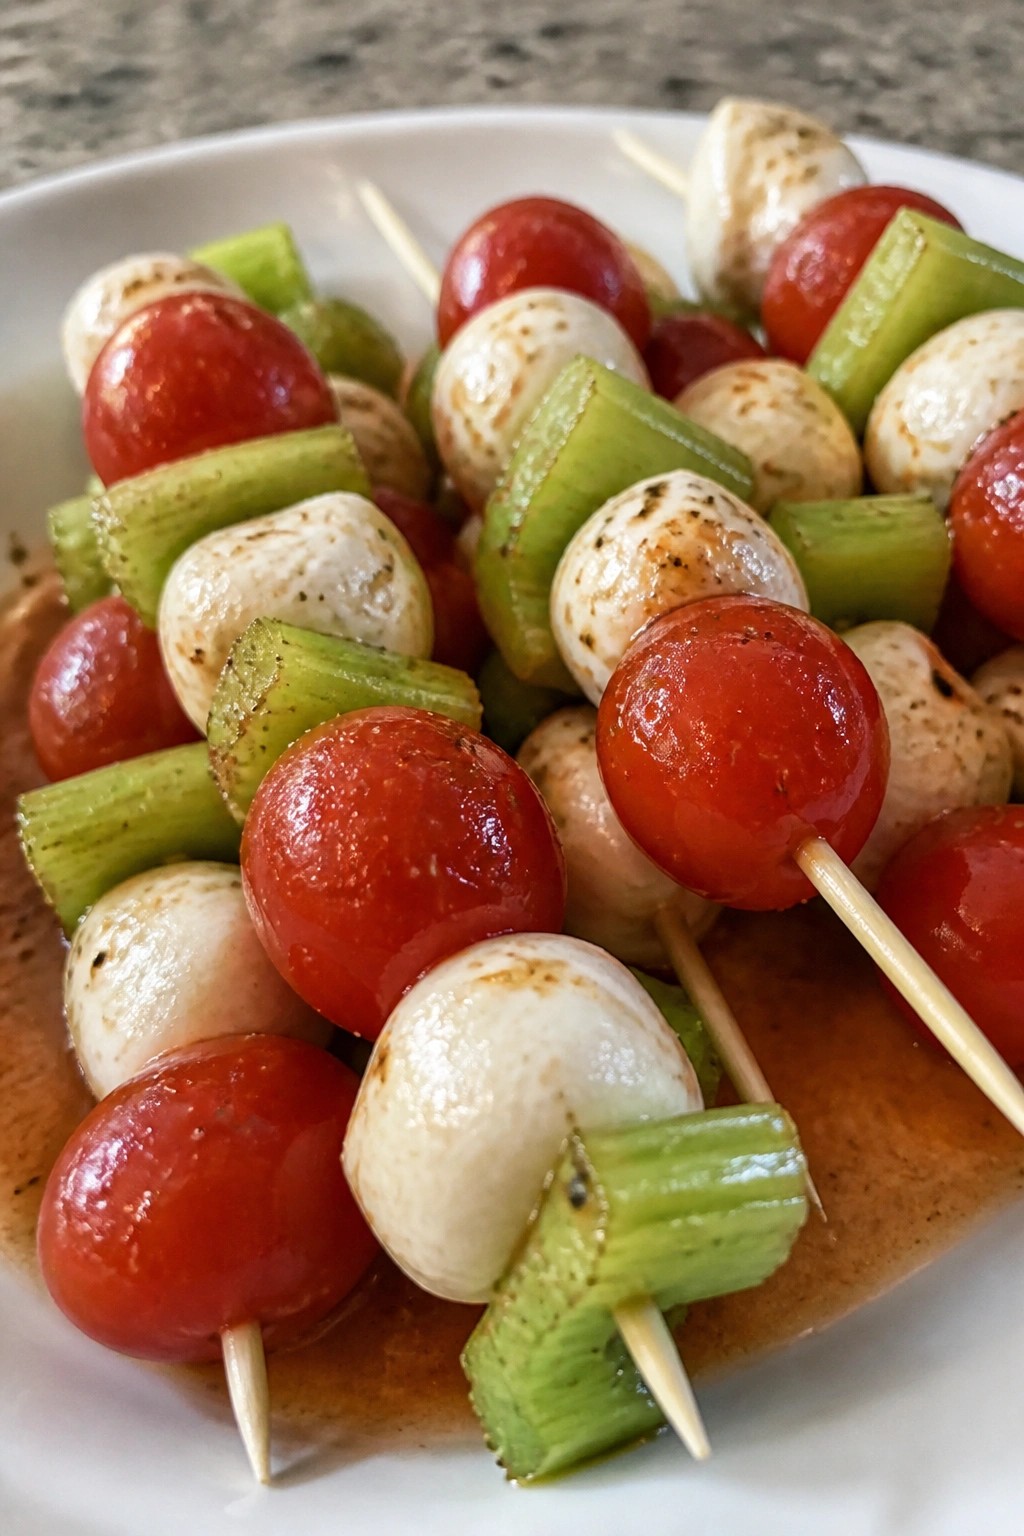
Serves 4 people.
Ingredients
- 2 cups cherry tomatoes
- 8 ounces fresh mozzarella balls
- 2 celery stalks, cut into 1-inch pieces
- 1/4 cup tomato juice
- 1 tablespoon Worcestershire sauce
- 1 teaspoon hot sauce
- 1/2 teaspoon celery salt
- 12 wooden skewers
Instructions
- Combine the tomato juice, Worcestershire sauce, hot sauce, and celery salt in a small bowl and stir until mixed.
- Thread cherry tomatoes, mozzarella balls, and celery pieces onto each skewer, alternating the items so every skewer has a balance of all three.
- Place the finished skewers on a serving plate.
- Drizzle the tomato juice mixture evenly over the skewers just before serving.
Extra Tips
Make the skewers up to two hours ahead and keep them covered in the fridge, then add the drizzle right before guests arrive so the mozzarella stays firm. If you want less heat, reduce the hot sauce to a few drops. Celery salt can be swapped for regular salt if needed, but the celery flavor will be milder. Course: Appetizer Cuisine: American Equipment: Mixing bowl, Wooden skewers
No-Bake Monster Trail Mix Cones
These cones come together in minutes with no oven required. They work well for last-minute Halloween parties or after-school snacks when time is short. The mix of crunchy, chewy, and sweet pieces inside a sturdy cone gives a fun handheld treat that feels festive without much effort.
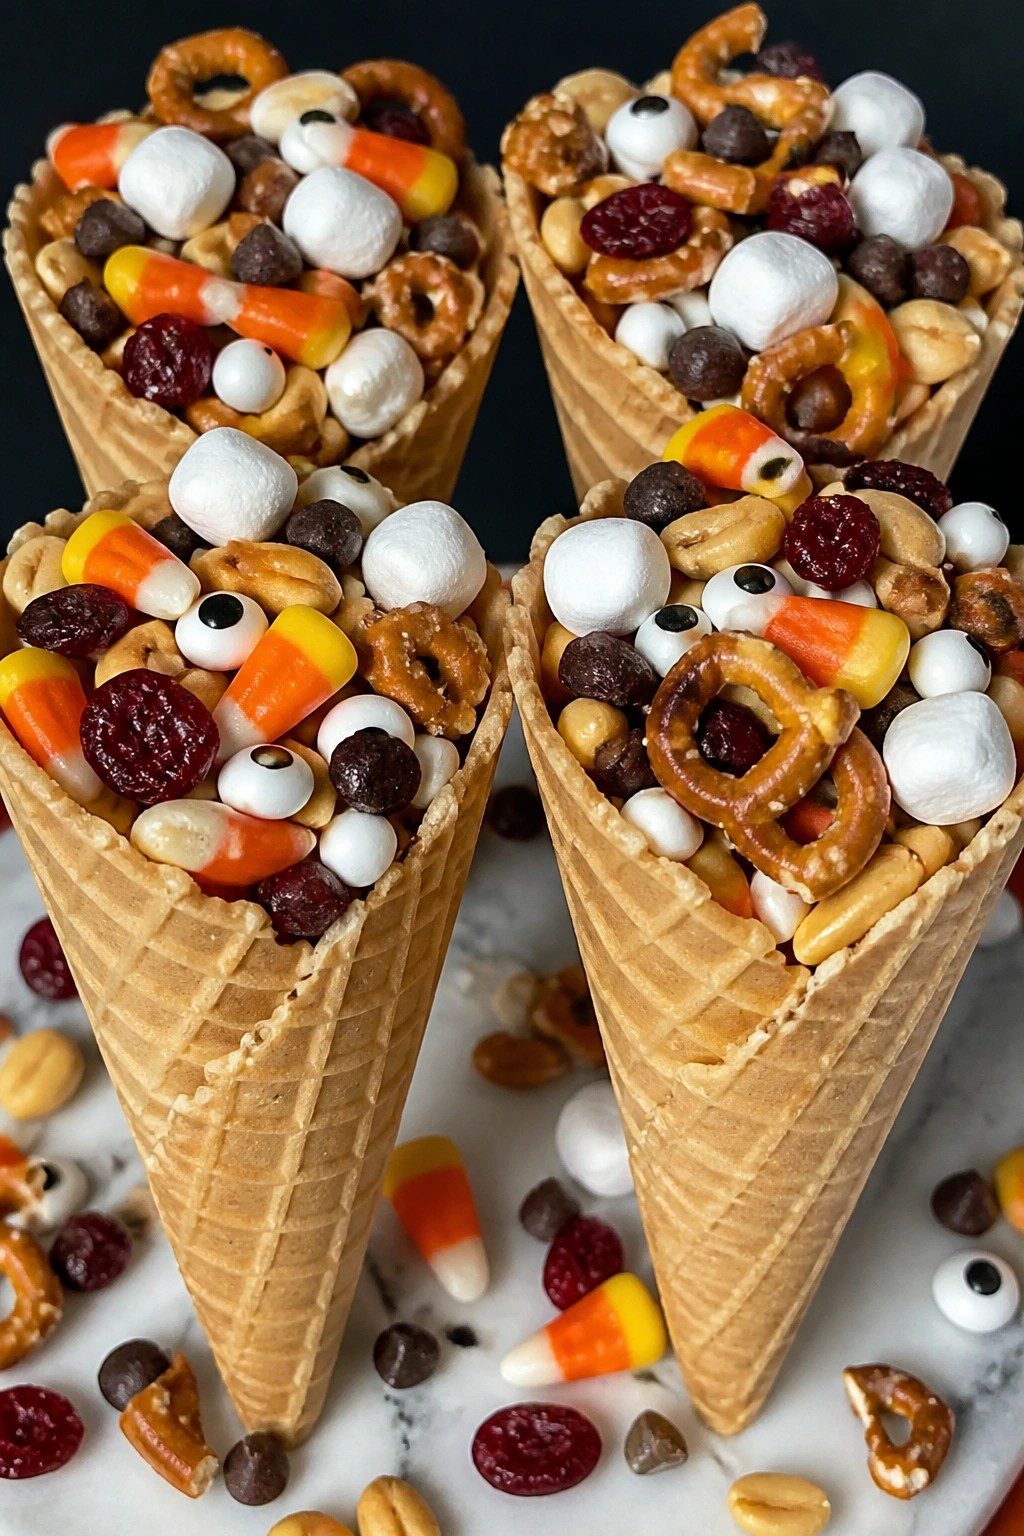
Serves 4 people.
Ingredients
- 4 waffle cones
- 1 cup mini pretzels, broken into pieces
- ½ cup candy corn
- ½ cup semisweet chocolate chips
- ¼ cup roasted peanuts
- ¼ cup dried cranberries
- ¼ cup mini marshmallows
- 2 tablespoons candy eyeballs
Instructions
- Place the broken pretzels, candy corn, chocolate chips, peanuts, cranberries, and mini marshmallows in a large mixing bowl.
- Stir the ingredients gently until they are evenly distributed.
- Spoon the trail mix into each waffle cone, pressing lightly so the cones are filled to the top.
- Press a few candy eyeballs into the surface of the mix on each cone.
Extra Tips
Assemble the cones right before serving so the waffles stay crisp. If you need to prep ahead, keep the trail mix in a sealed container and fill the cones at the last moment. Swap the peanuts for sunflower seeds if anyone has nut allergies. Course: Snack Cuisine: American Equipment: Mixing bowl