

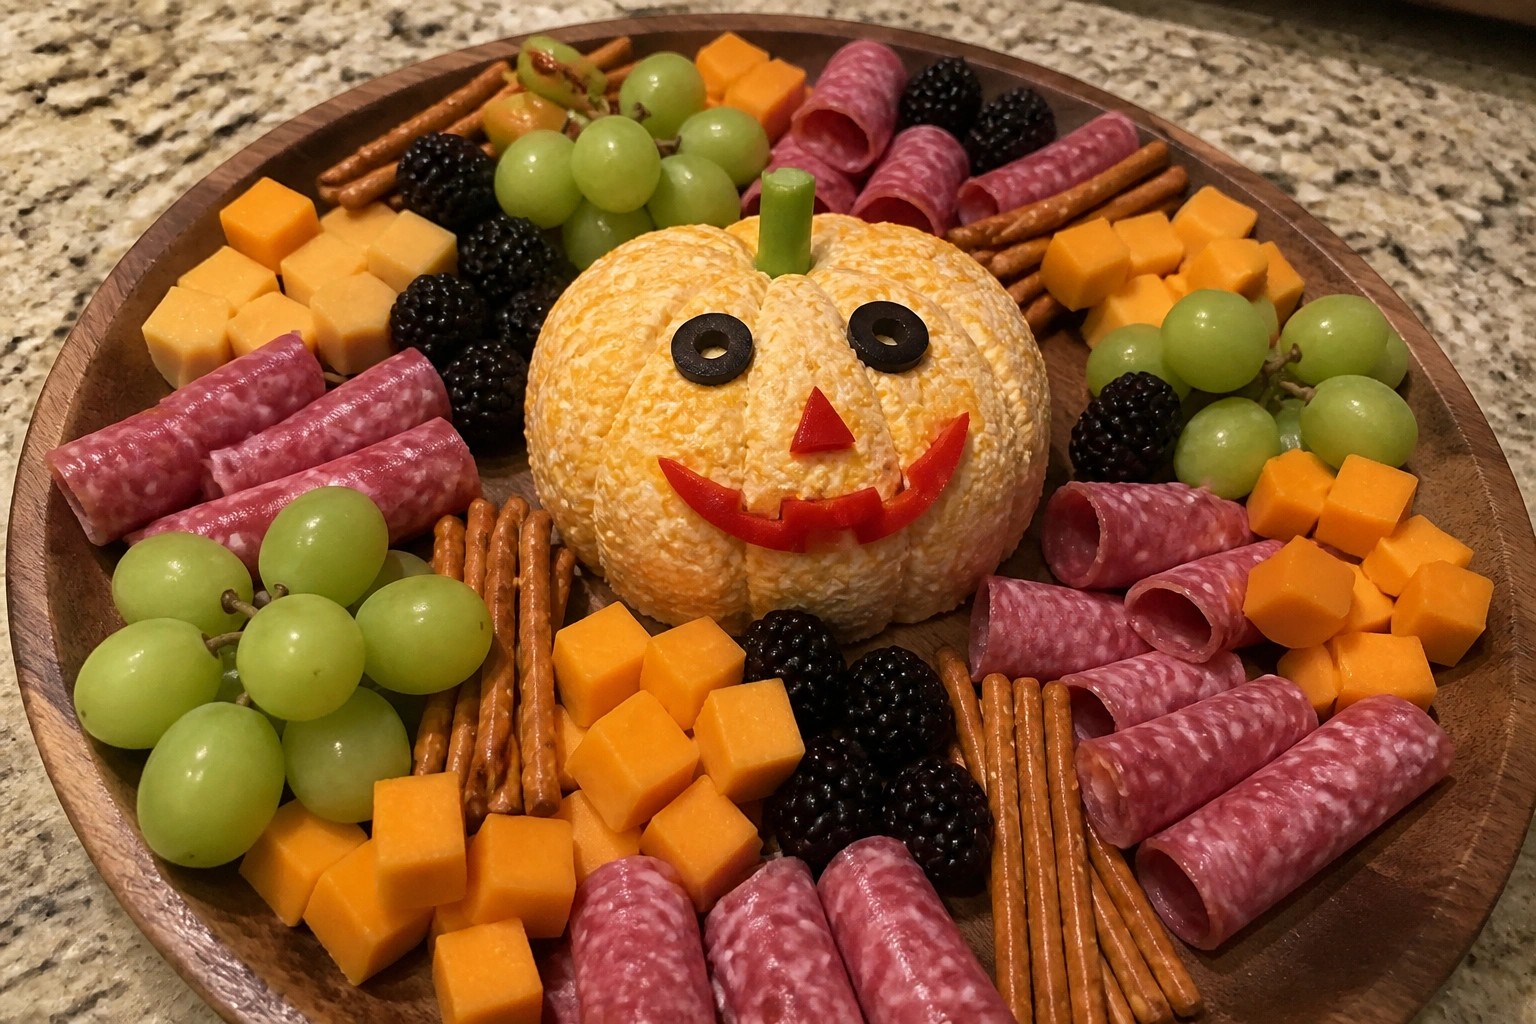
Halloween is a good time to make snacks that kids will actually eat. These charcuterie board ideas focus on foods most children like. You can find the ingredients at a regular grocery store. Each one takes only a few minutes to put together. They work well for parties or an afternoon at home.
Helpful Tips Before You Start
These boards work best when you keep the focus on easy grabs and playful shapes that appeal to kids.
Recommended Products

cheese, snacks, desserts and appetizers. The complete design adds festive style to party tables and holiday gatherings

Complete Gothic Halloween Charcuterie Kit: this all-in-one Halloween serving set comes with a coffin style wooden platter, 50 decorative picks, 2 skull ornaments, 8 black bat cutouts, 4 skeleton hand decorations, 20 spider accents and 1 full skeleton figure; This complete collection has all you need to craft a stunning spooky food display, ideal for creating a standout spread for holiday gatherings

【Hidden Skeleton Reveal – Surprise Every Guest】 Turn every gathering into an unforgettable experience. As cheeses, meats, desserts, and snacks disappear, a beautifully engraved skeleton slowly emerges beneath the food, creating a dramatic "hidden reveal" that surprises guests and becomes the centerpiece of Halloween parties, gothic dinners, and spooky celebrations.
Use cookie cutters for shapes
Cut cheese slices and melon into pumpkins, bats, or ghosts with small cutters. This adds instant Halloween fun without extra work.
Keep portions small and separate
Place items in little clusters or mini cups so kids can pick what they want. It also helps prevent mixing of flavors they might not like.
Add a few sweet touches
Include chocolate-covered pretzels or candy corn in one section. These balance the savory meats and cheeses while matching the holiday theme.
Prep components ahead
Slice fruits, wash veggies, and portion dips the day before. Store them in the fridge so assembly takes just a few minutes on party day.
Spooky Spiderweb Fruit and Cheese Charcuterie Board
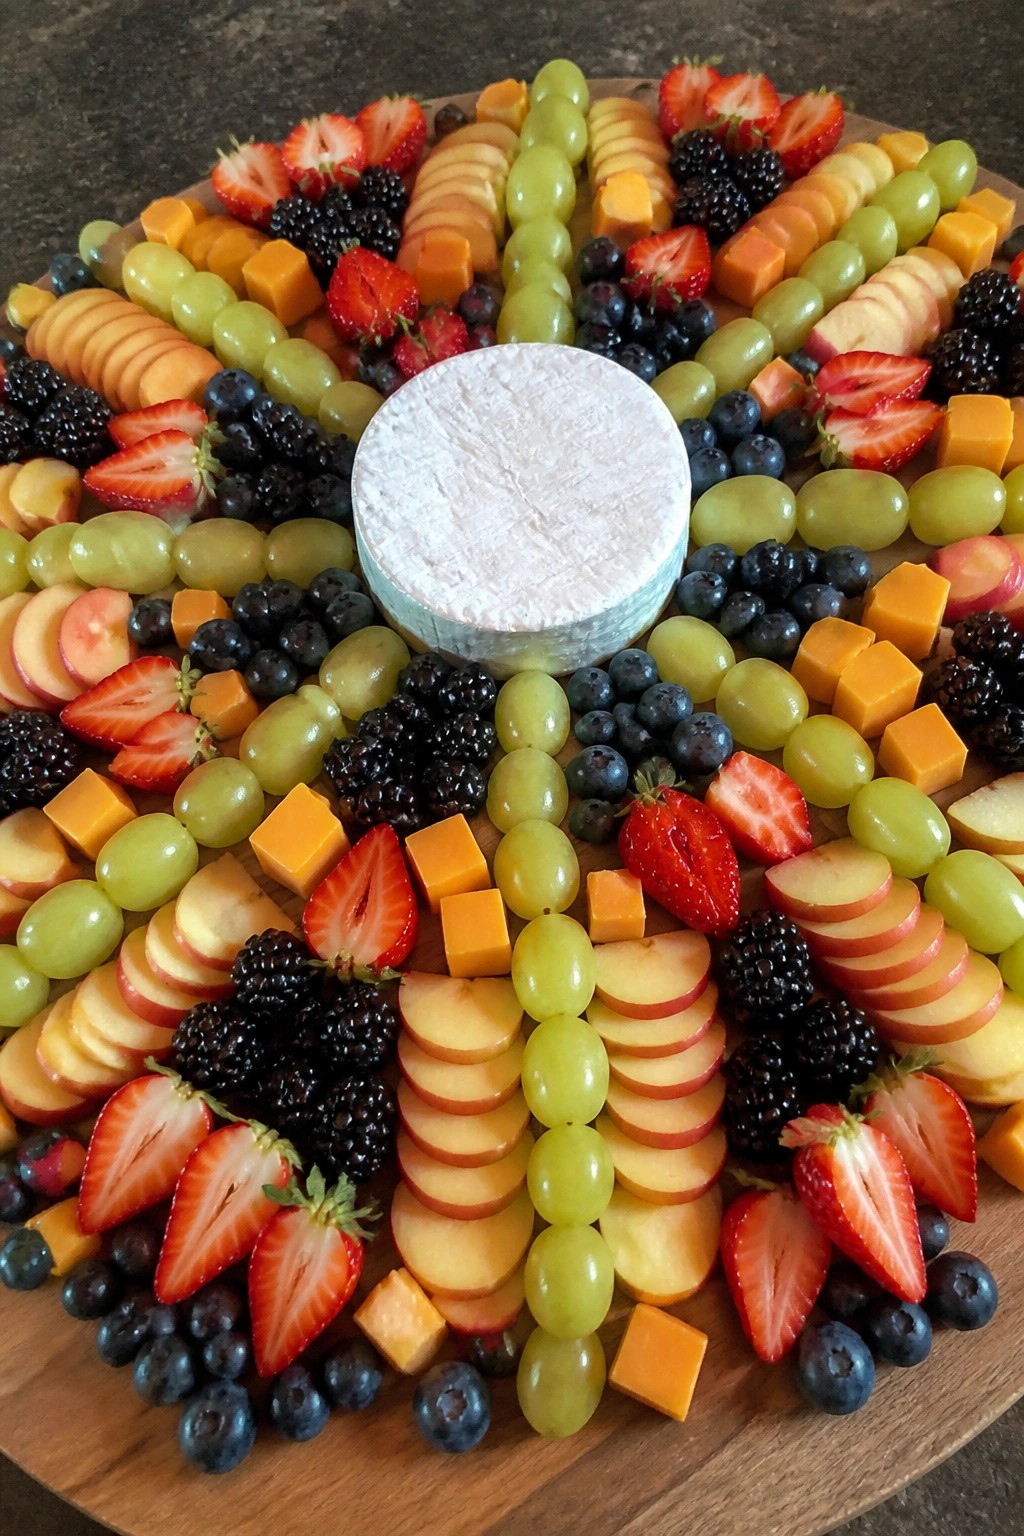
This board uses fruit lines to create a clear spiderweb shape that kids can recognize right away. The mix of creamy cheese and fresh fruit gives it a balance of smooth and juicy textures that works well at Halloween parties or family movie nights.
It keeps the focus on simple ingredients arranged in a fun pattern. The result feels playful without needing extra decorations or hard-to-find items.
Serves 4 people.
Recommended Products

Elevate your Halloween celebrations: Our marble Halloween ghost cheese board adds a gothic touch to your holiday; With a classic ghost shape design, it is both beautiful and practical, making it an ideal choice for Halloween celebrations

Halloween Wooden Serving Platter: the package includes 1 piece of Halloween wooden serving platter, each wood ghost shape tray is about 36 x 32 cm/14.17 x 12.6 inches(LW), and the thickness is 1.5 cm/0.59 inches, the funny ghost design and proper size can fully meet your needs of daily use and holiday decorations

What You Will Get: A large cheese board is contained in the set, the delicate design makes it suitable for daily and holiday use
Ingredients
- 8 ounces round brie cheese
- 1 cup cheddar cheese cubes
- 2 cups green grapes
- 1 cup blackberries
- 1 apple, thinly sliced
- 1 cup strawberries, halved
- 1/2 cup blueberries
Instructions
- Place the round brie cheese in the center of a large serving board.
- Arrange green grapes in eight straight lines radiating outward from the brie to form the spokes of the web.
- Add more green grapes in curved rows between the spokes to create the web’s concentric circles.
- Scatter the cheddar cheese cubes in the open spaces around the web.
- Fill remaining gaps with the sliced apple, halved strawberries, blackberries, and blueberries.
- Position a few blackberries at the ends of some web lines to act as spider accents.
Extra Tips
Slice the apple right before assembly so it stays crisp and does not brown. Keep extra grapes on hand in case any web lines need straightening after the other fruits are added. The board tastes best served within two hours of building so the fruit stays fresh. Course: Appetizer Cuisine: American Equipment: Large serving board, Sharp knife
Candy Corn Layered Savory Snack Board
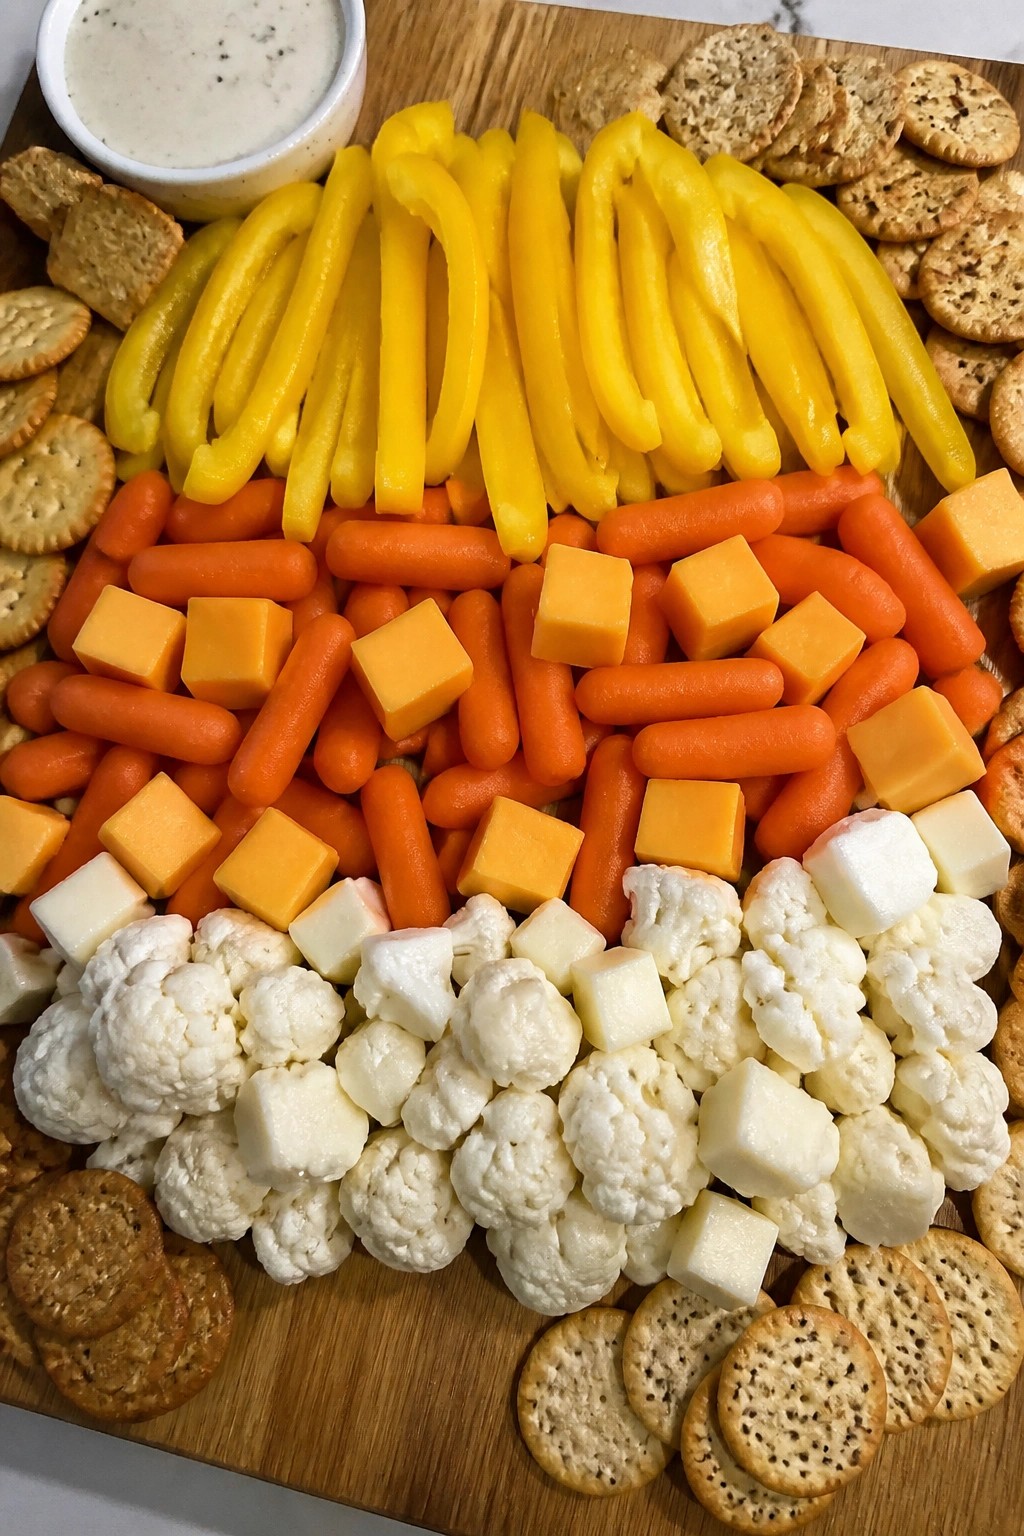
This board turns a classic candy corn look into a savory snack by stacking three horizontal bands of yellow, orange, and white items. Kids enjoy the bright colors and easy finger foods, while the mix of crisp vegetables and mild cheeses keeps the board light and approachable for parties or after-school gatherings.
The yellow section brings mild crunch, the orange section adds a bit of sharpness from the cheese, and the white section stays neutral and creamy. Everything sits on one board so little hands can reach in and grab what they like.
Serves 4 people.
Recommended Products

Perfect Size – 11.4 x 8.65 x 0.59 inches (29 x 22 x 1.5 cm): This pumpkin shaped tray offers ample room for holiday treats. Whether you're crafting a meat and cheese board for Thanksgiving or a festive kids snack board for Halloween, the size is perfect for a variety of seasonal delights

【Spooky BOO Design】 Bring the ultimate spooky season elements to your gothic home decor! This 3-piece halloween serving board set spells out "BOO" with intricate engravings of a cute ghost, bat, and spider web. It serves as an eye-catching table centerpiece for any witch party supplies or scary movie night.

Package Content: You will receive 3 pieces of halloween charcuterie boards in 2 shapes. Sufficient quantity will meet your daily use and replacement.
Ingredients
- 2 cups yellow bell pepper strips
- 8 ounces cheddar cheese, cubed
- 2 cups baby carrots
- 8 ounces mozzarella cheese, cubed
- 2 cups cauliflower florets
- 1 cup ranch dip
- 20 assorted crackers
Instructions
- Choose a rectangular board or platter that can hold three clear horizontal sections.
- Place the yellow bell pepper strips in a band along the bottom edge of the board to form the first layer.
- Next, arrange the cheddar cheese cubes and baby carrots side by side in the middle band to create the orange layer.
- Fill the top band with mozzarella cheese cubes and cauliflower florets to finish the white layer.
- Set a small bowl of ranch dip near the board and scatter the crackers around the edge for easy serving.
Extra Tips
Keep the vegetables cut into similar sizes so the layers look neat and balanced. If you need to make the board ahead, cover it tightly with plastic wrap and store it in the fridge for up to four hours; add the crackers and dip just before serving so they stay crisp. Course: Appetizer Cuisine: American Equipment: Large serving board, Sharp knife
Monster Face Veggie and Dip Charcuterie Board
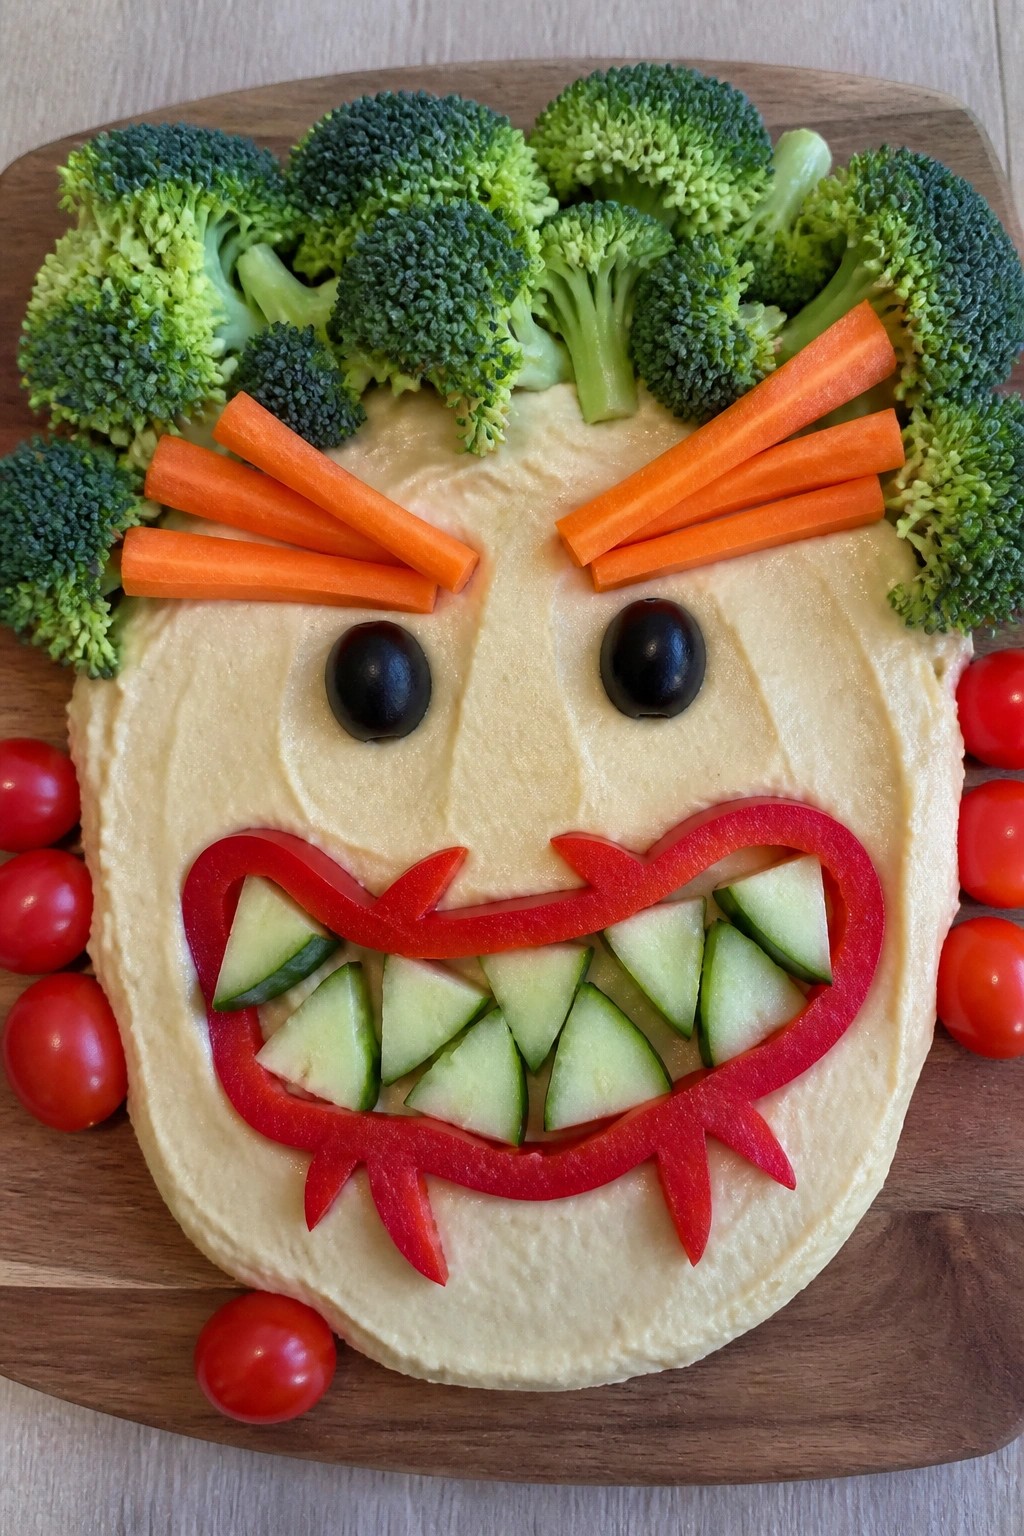
This board turns a simple mix of vegetables and hummus into a monster face that draws kids in at first glance. It suits Halloween parties, playdates, or any time you want a low-effort way to get children excited about eating more produce. The crisp vegetables contrast with the smooth hummus, giving a mild, fresh taste without strong flavors that might turn picky eaters away.
Serves 4 people.
Ingredients
- 2 cups plain hummus
- 4 large carrots
- 1 English cucumber
- 2 red bell peppers
- 1 cup broccoli florets
- 1/2 cup cherry tomatoes
- 4 black olives
Instructions
- Place the hummus in a round bowl and set it in the center of a large serving board to form the base of the monster face.
- Peel the carrots and cut them into thin sticks. Arrange the sticks around the top and sides of the hummus bowl to create spiky monster hair.
- Slice the cucumber into rounds. Position two rounds on the upper half of the hummus as eyes and press one black olive into the center of each round.
- Cut one red bell pepper into thin strips and use them to form a jagged mouth shape below the eyes on the hummus.
- Cut the second red bell pepper into small triangles and place them around the edge of the board as monster ears or horns.
- Scatter the broccoli florets and cherry tomatoes in open spaces on the board to fill out the design and add color.
Extra Tips
Slice the vegetables ahead of time and store them in separate containers so the board can be assembled in just a few minutes right before serving. If you need a dairy-free option, the plain hummus already works well. Keep any leftovers in an airtight container in the refrigerator for up to two days and refresh the vegetables under cold water before reusing. Course: Appetizer Cuisine: American Equipment: Serving board, Knife, Cutting board
Witch Hat Chocolate and Berry Board
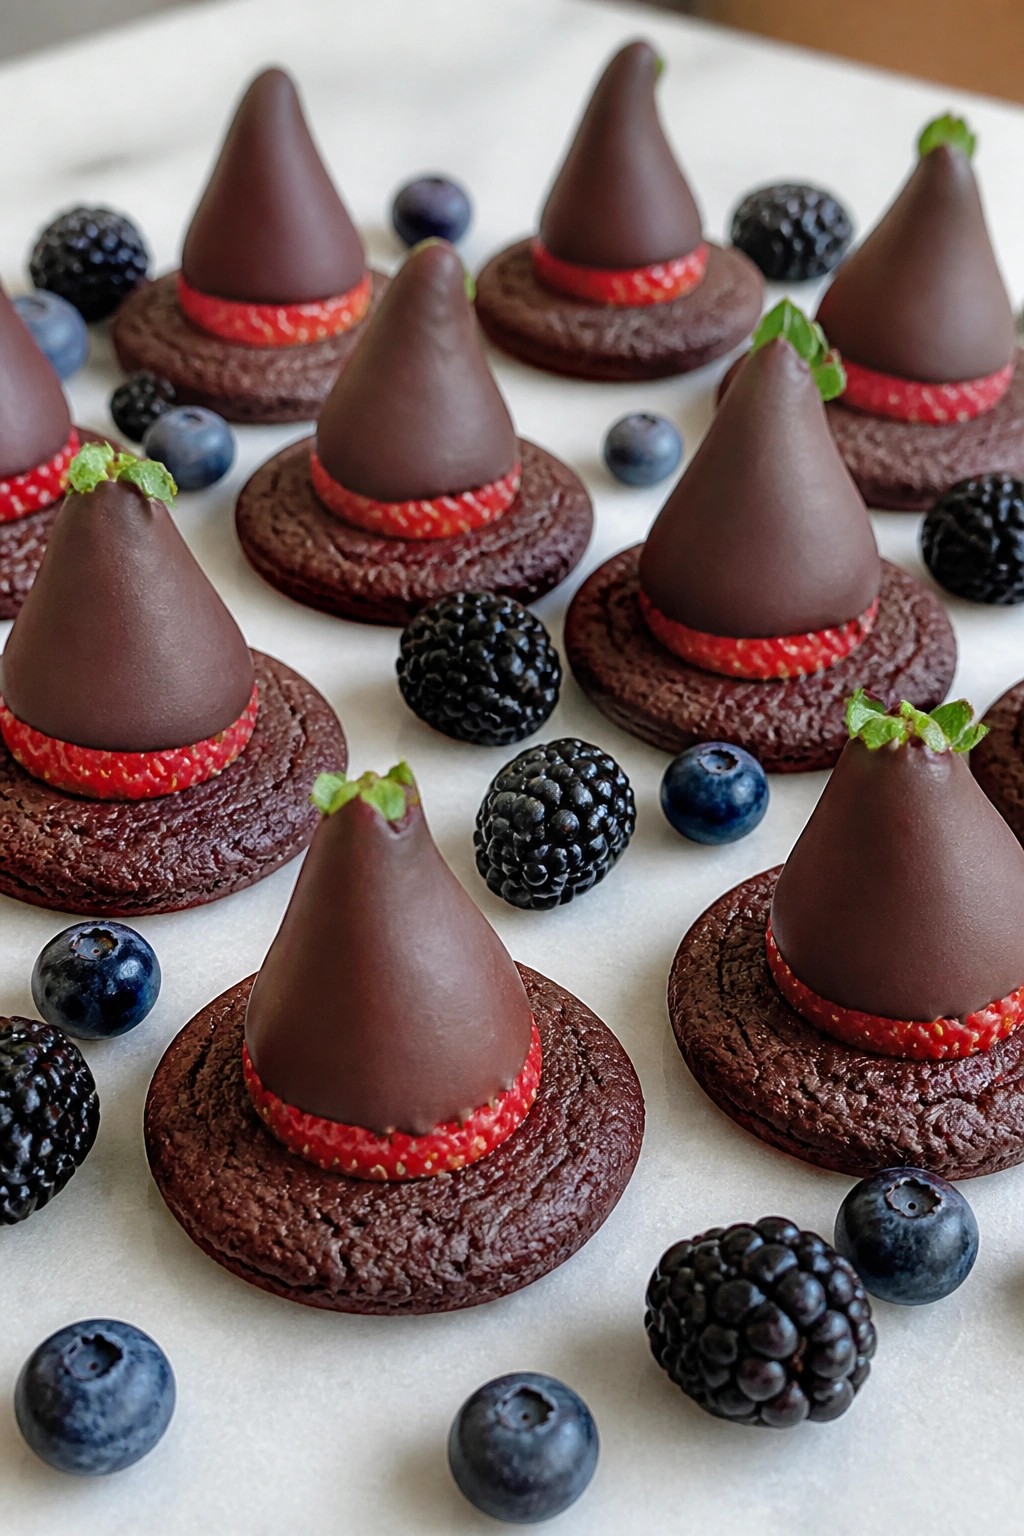
This board turns simple chocolate and berries into playful witch hats that kids can spot right away. It works well for Halloween parties or after-school snacks when you want something sweet without much fuss. The mix of crunchy cookie bases, smooth chocolate, and juicy berries gives a nice balance of textures.
Serves 4 people.
Ingredients
- 8 round chocolate cookies
- 1 cup semisweet chocolate chips
- 12 large strawberries
- 1 cup blackberries
- 1/2 cup blueberries
Instructions
- Line a baking sheet with parchment paper. Place the chocolate cookies on the sheet in a single layer.
- Melt the chocolate chips in a microwave-safe bowl in 30-second bursts, stirring between each until smooth. Dip the tip of each strawberry into the melted chocolate and set it point side up in the center of a cookie. This forms the hat shape.
- Spoon a small amount of melted chocolate around the base of each strawberry to help it stay in place. Let the chocolate set for a few minutes.
- Arrange the blackberries and blueberries around the cookies on a serving board to fill out the board and add color.
Extra Tips
Make the hats ahead and keep them on the baking sheet in the fridge until you are ready to arrange the board. If the chocolate starts to thicken while you work, warm it for 10 seconds to loosen it again. Use the darkest berries you can find so the witch hats stand out clearly against the chocolate. Course: Dessert Cuisine: American Equipment: Microwave-safe bowl, Baking sheet, Serving board
Mummy Wrapped Meat and Cheese Rollups Board
This board turns everyday rollups into a playful Halloween display. Kids like the mummy bandages and the simple task of spotting the olive eyes. The flavors stay mild with creamy spreads and familiar deli meats that most children already enjoy.
It works well for a party snack table or a quick lunch on Halloween day. The soft tortilla wraps hold everything together without needing any cooking.

Serves 4 people.
Ingredients
- 4 large flour tortillas
- 8 slices deli turkey
- 8 slices cheddar cheese
- 1/2 cup cream cheese, softened
- 8 black olive slices
- 1 cup assorted crackers
Instructions
- Spread a thin layer of cream cheese over each tortilla. Place two slices of turkey and two slices of cheddar cheese on top of the cream cheese on each tortilla. Roll each tortilla tightly from one end to the other.
- Cut one tortilla into thin strips about half an inch wide. Wrap the strips around each rollup in a crisscross pattern to look like mummy bandages, leaving small gaps to show the filling underneath. Press two black olive slices onto each rollup to create eyes.
- Slice each finished rollup in half and arrange the pieces on a platter with the crackers.
Extra Tips
Use the softest tortillas you can find so the strips wrap without cracking. If the cream cheese is too firm, let it sit at room temperature for ten minutes before spreading. The olive eyes stay in place best when pressed into a small dab of cream cheese. Course: Appetizer Cuisine: American Equipment: Cutting board, Sharp knife, Serving platter
Frankenstein Avocado Toast and Cracker Board
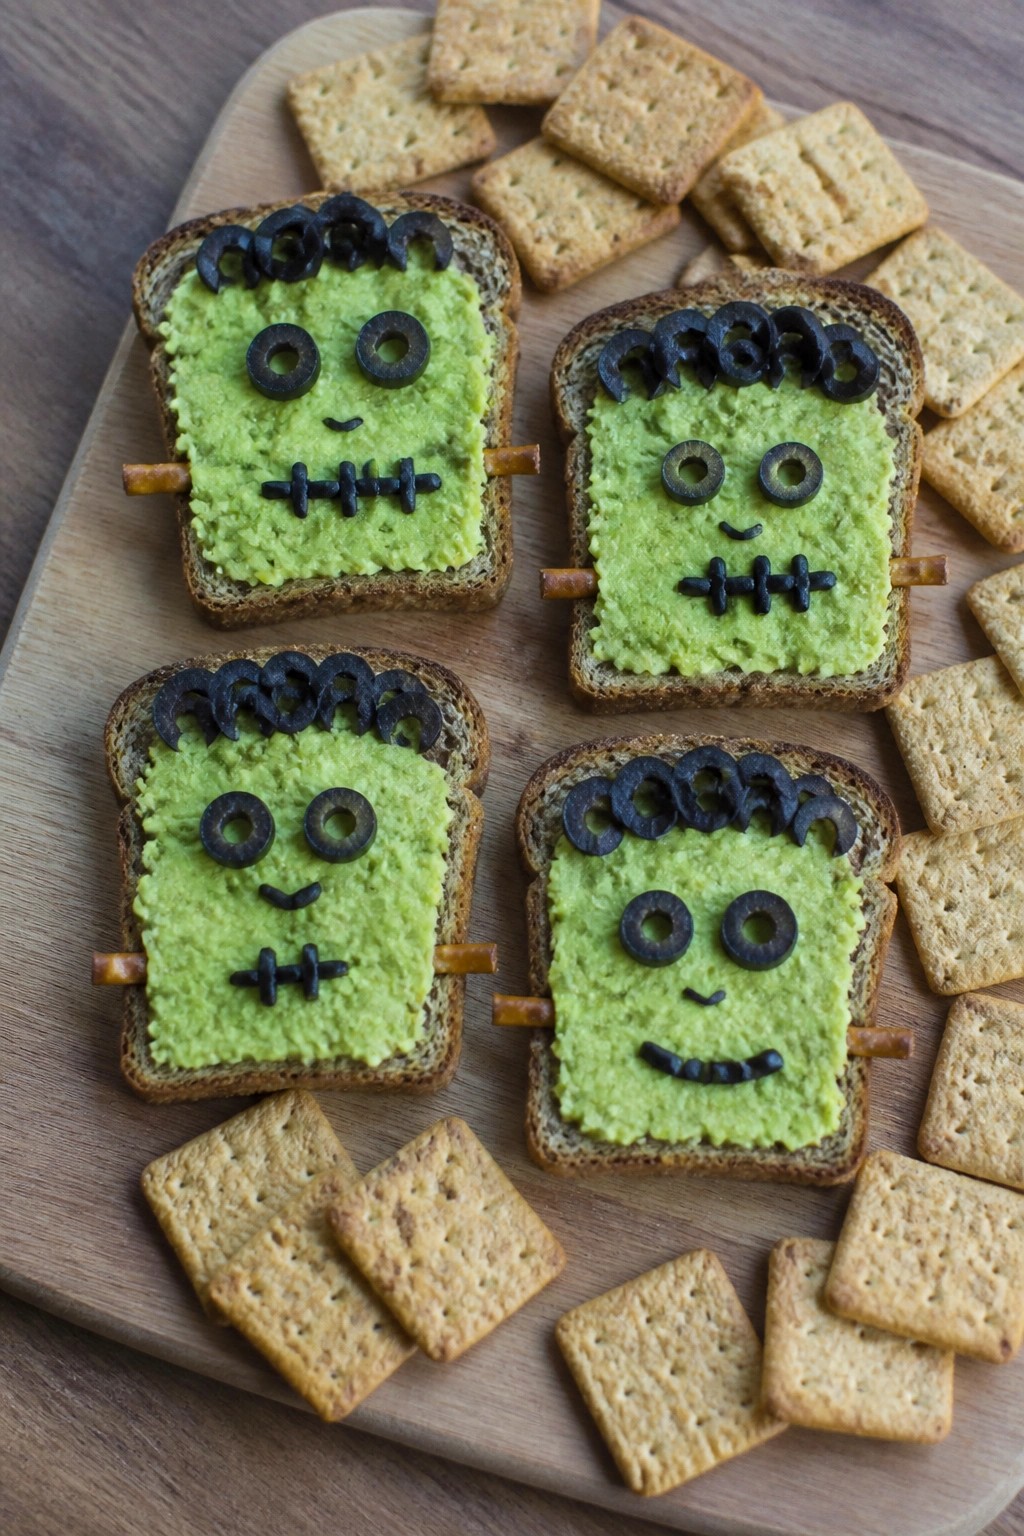
This board turns basic avocado toast into fun Frankenstein faces that kids enjoy assembling at Halloween gatherings. It suits after-school snacks or party spreads where children can add their own details before eating.
The result offers creamy avocado on toasted bread alongside crunchy crackers. Green tones and simple face decorations keep the theme light and playful without extra fuss.
Serves 4 people.
Ingredients
- 4 slices whole grain bread
- 2 ripe avocados
- 1 tablespoon lemon juice
- 1/4 teaspoon salt
- 20 whole grain crackers
- 8 black olives
- 4 pretzel sticks
Instructions
- Toast the four slices of bread until lightly golden and set them on a cutting board.
- Cut each avocado in half, remove the pits, and scoop the flesh into a mixing bowl.
- Add the lemon juice and salt to the avocado, then mash with a fork until mostly smooth but still slightly chunky.
- Spread the mashed avocado evenly over each slice of toast.
- Slice four black olives in half and use the halves to create eyes on each toast. Cut the remaining olives into thin strips for mouths.
- Break the pretzel sticks in half and press two pieces into the sides of each toast to form neck bolts.
- Arrange the finished toasts on a large board and fill the spaces with the crackers for dipping and crunch.
Extra Tips
Cut the toast into smaller rectangles before adding faces if you want bite-size portions for little hands. Use firmer avocados if you need the spread to hold shape longer on the board. Swap the pretzels for cucumber sticks if you prefer a milder flavor that still gives the bolt effect. Course: Appetizer Cuisine: American Equipment: Toaster, Mixing bowl, Knife
Bat Wing Dark Chocolate and Grape Board
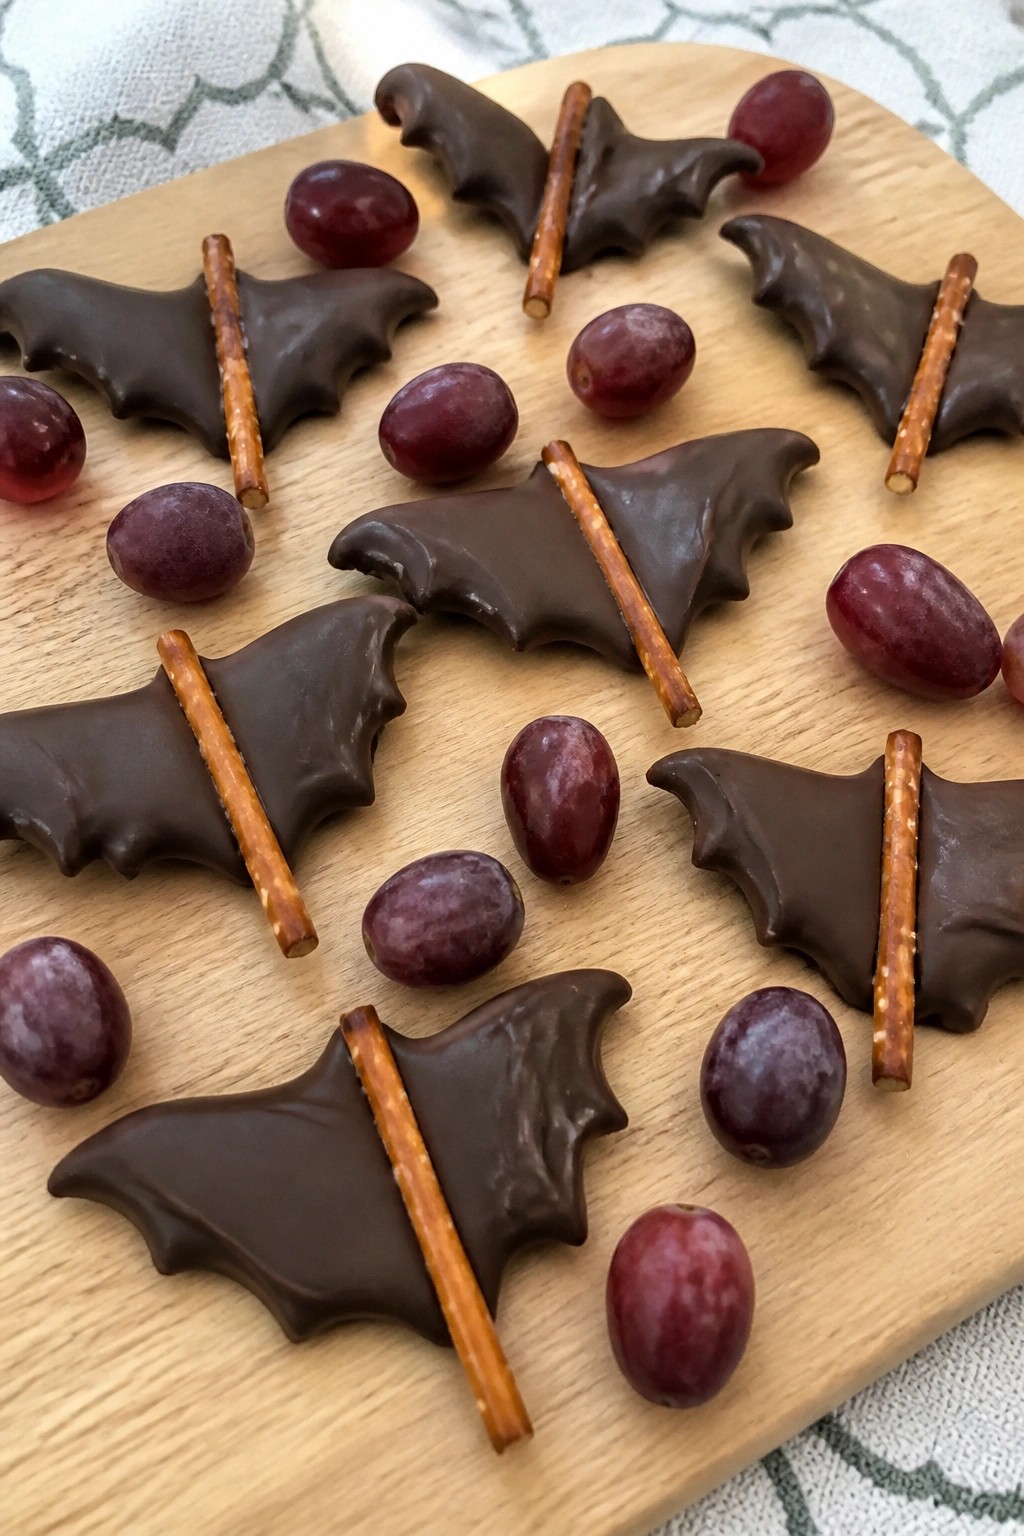
This board brings a playful Halloween twist to a simple sweet spread. Dark chocolate forms the bat wings while juicy grapes add a fresh contrast that kids enjoy picking at during parties or movie nights. The mix of rich chocolate and sweet-tart fruit keeps the board light enough for little hands yet satisfying.
It works well as an after-school treat or a low-effort addition to a Halloween gathering. The texture stays varied with smooth melted chocolate against crisp pretzels and plump grapes.
Serves 4 people.
Ingredients
- 8 ounces dark chocolate chips
- 20 pretzel sticks
- 3 cups purple seedless grapes
Instructions
- Line a baking sheet with parchment paper and set it aside.
- Place the dark chocolate chips in a microwave-safe bowl. Heat in 30-second bursts, stirring after each, until fully melted and smooth.
- Dip one end of each pretzel stick into the melted chocolate, then lay two sticks together on the parchment to form a V shape that resembles a bat wing. Repeat with the remaining sticks until you have 10 wings.
- Let the chocolate set at room temperature for 15 minutes until firm.
- Arrange the bat wings on a serving board and pile the purple grapes in the center or around the edges.
Extra Tips
Melt the chocolate slowly to avoid seizing, and work in small batches so the wings hold their shape. If the grapes are very cold from the fridge, let them sit out for 10 minutes before serving so the flavors come through better next to the chocolate. Course: Snack Cuisine: American Equipment: Microwave-safe bowl, Baking sheet, Parchment paper, Serving board
Skeleton Bone Pretzel and Hummus Board
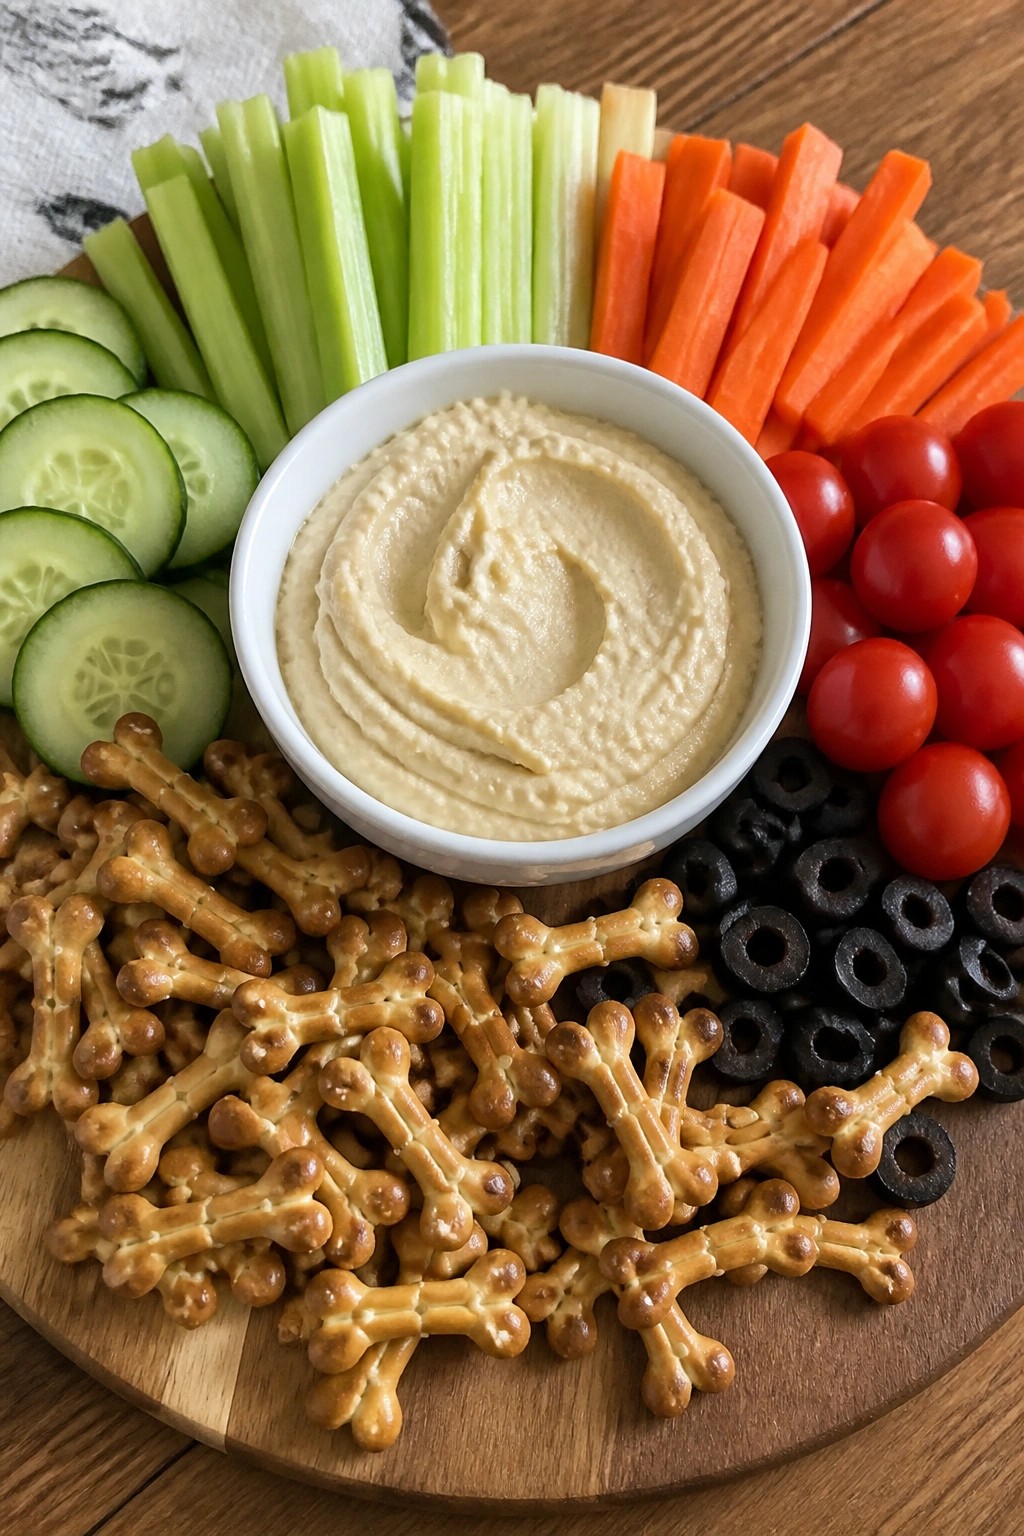
This skeleton bone pretzel and hummus board gives kids a playful way to enjoy a snack during Halloween gatherings. The bone-shaped pretzels stand out on the board and pair with a creamy dip plus fresh vegetables for easy grabbing.
The result combines the crunch of pretzels and raw veggies with the smooth texture of hummus. It fits well at parties or as an afternoon snack when children want something they can assemble themselves on their plates.
Serves 4 people.
Ingredients
- 24 bone-shaped pretzels
- 1 1/2 cups plain hummus
- 8 carrot sticks
- 8 celery sticks
- 1 cucumber, sliced into rounds
- 12 cherry tomatoes
- 1/4 cup sliced black olives
Instructions
- Place the hummus in a small bowl and set it in the center of a large serving board.
- Arrange the bone-shaped pretzels in rows or patterns around the bowl to create a skeleton effect.
- Add the carrot sticks and celery sticks on either side of the pretzels as extra dippers.
- Scatter the cucumber rounds near the vegetables for more color and crunch.
- Place the cherry tomatoes and sliced black olives in open spaces around the board to fill it out.
Extra Tips
Cut the vegetables into similar lengths so they lie flat next to the pretzels. Prepare the board up to two hours ahead and cover it with plastic wrap to keep the vegetables fresh. Swap plain hummus for roasted red pepper flavor if you want a brighter color without changing the dip texture. Course: Appetizer Cuisine: American Equipment: Large serving board, Small bowl
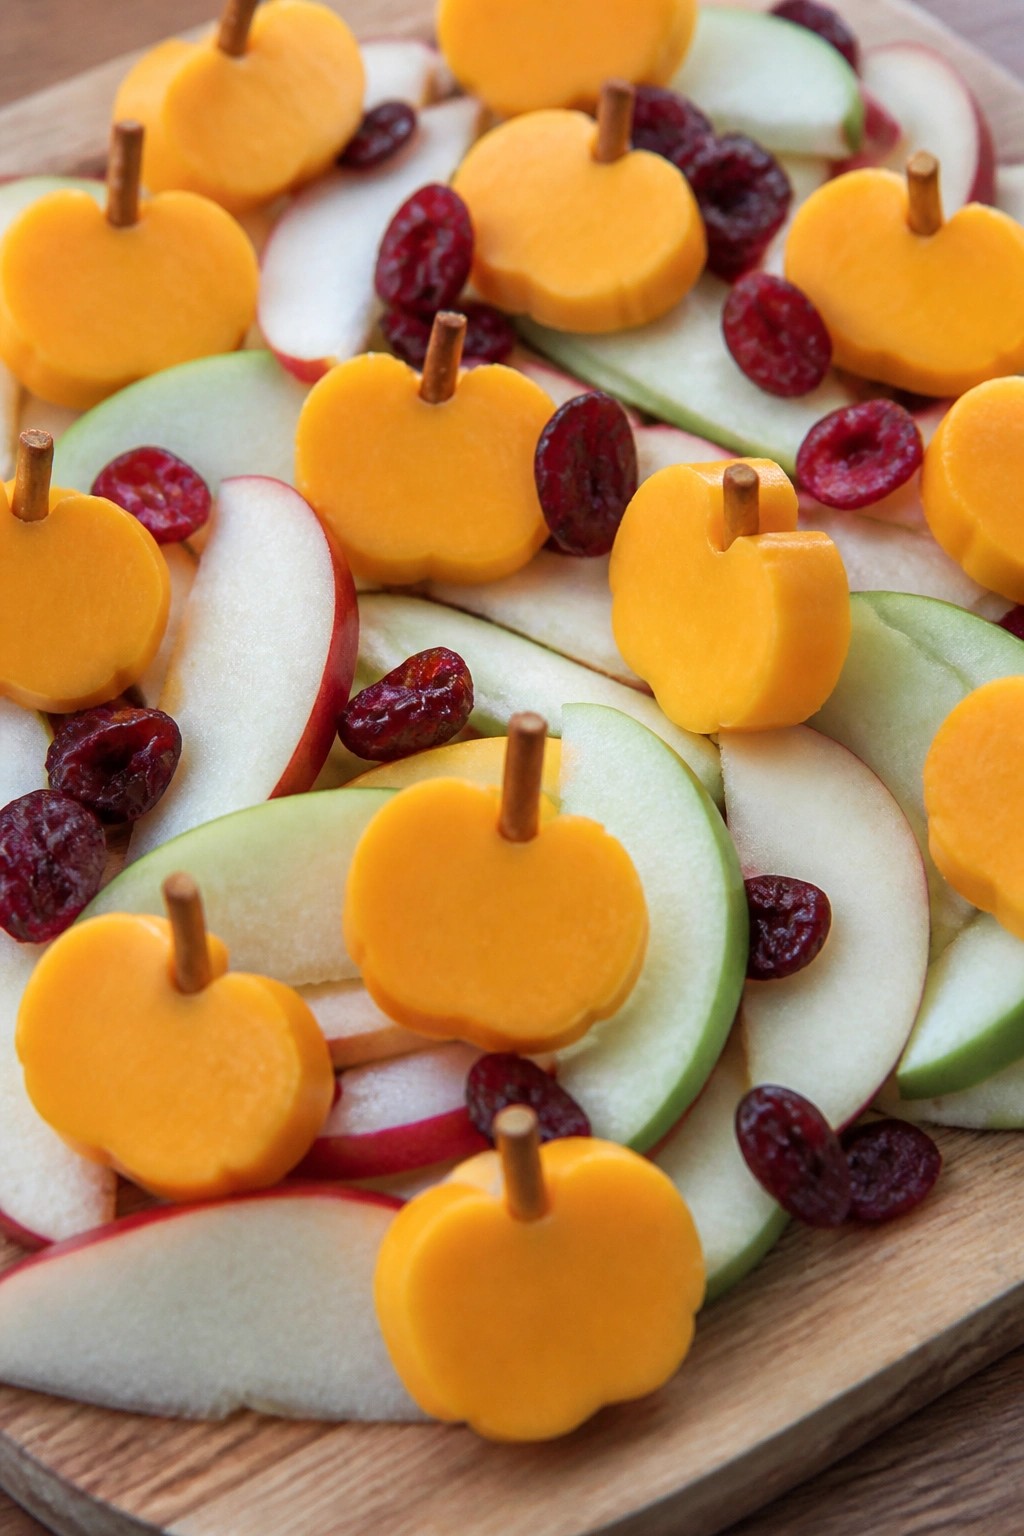
Pumpkin Patch Orange Cheese and Apple Board
This board turns basic orange cheddar and fresh apples into a simple pumpkin patch scene that kids can recognize right away. The bright cheese shapes stand out against the sliced apples, and the mix of sharp cheese with sweet, crisp fruit keeps the flavors balanced without overwhelming young tastes. It fits well for classroom parties, family movie nights, or quick weekend snacks.
The texture stays straightforward with firm cheese and juicy apple slices. A few pretzels and dried cranberries add just enough detail to complete the look while keeping assembly fast.
Serves 4 people.
Ingredients
- 8 ounces orange cheddar cheese
- 4 medium apples
- 12 pretzel sticks
- 1/2 cup dried cranberries
Instructions
- Core the apples and slice them into thin wedges. Set the slices aside on a plate to keep them from browning while you prepare the cheese.
- Slice the orange cheddar cheese into rounds about 1/2 inch thick. Use a small round cutter if you have one to create pumpkin shapes, or simply trim the edges by hand.
- Push one pretzel stick into the top edge of each cheese round to form a stem.
- Spread the apple slices across a board in an even layer to create the base of the patch.
- Set the cheese pumpkins on top of the apples and sprinkle the dried cranberries around them to fill in the spaces.
Extra Tips
Choose a firm orange cheddar so the shapes hold together when you add the pretzel stems. If you prepare the cheese pieces ahead, keep them in a sealed container in the fridge and add them to the board just before serving to avoid moisture on the apples. A mix of red and green apples gives more color contrast without changing the flavor profile. Course: Appetizer Cuisine: American Equipment: Serving board, knife, small round cutter (optional)
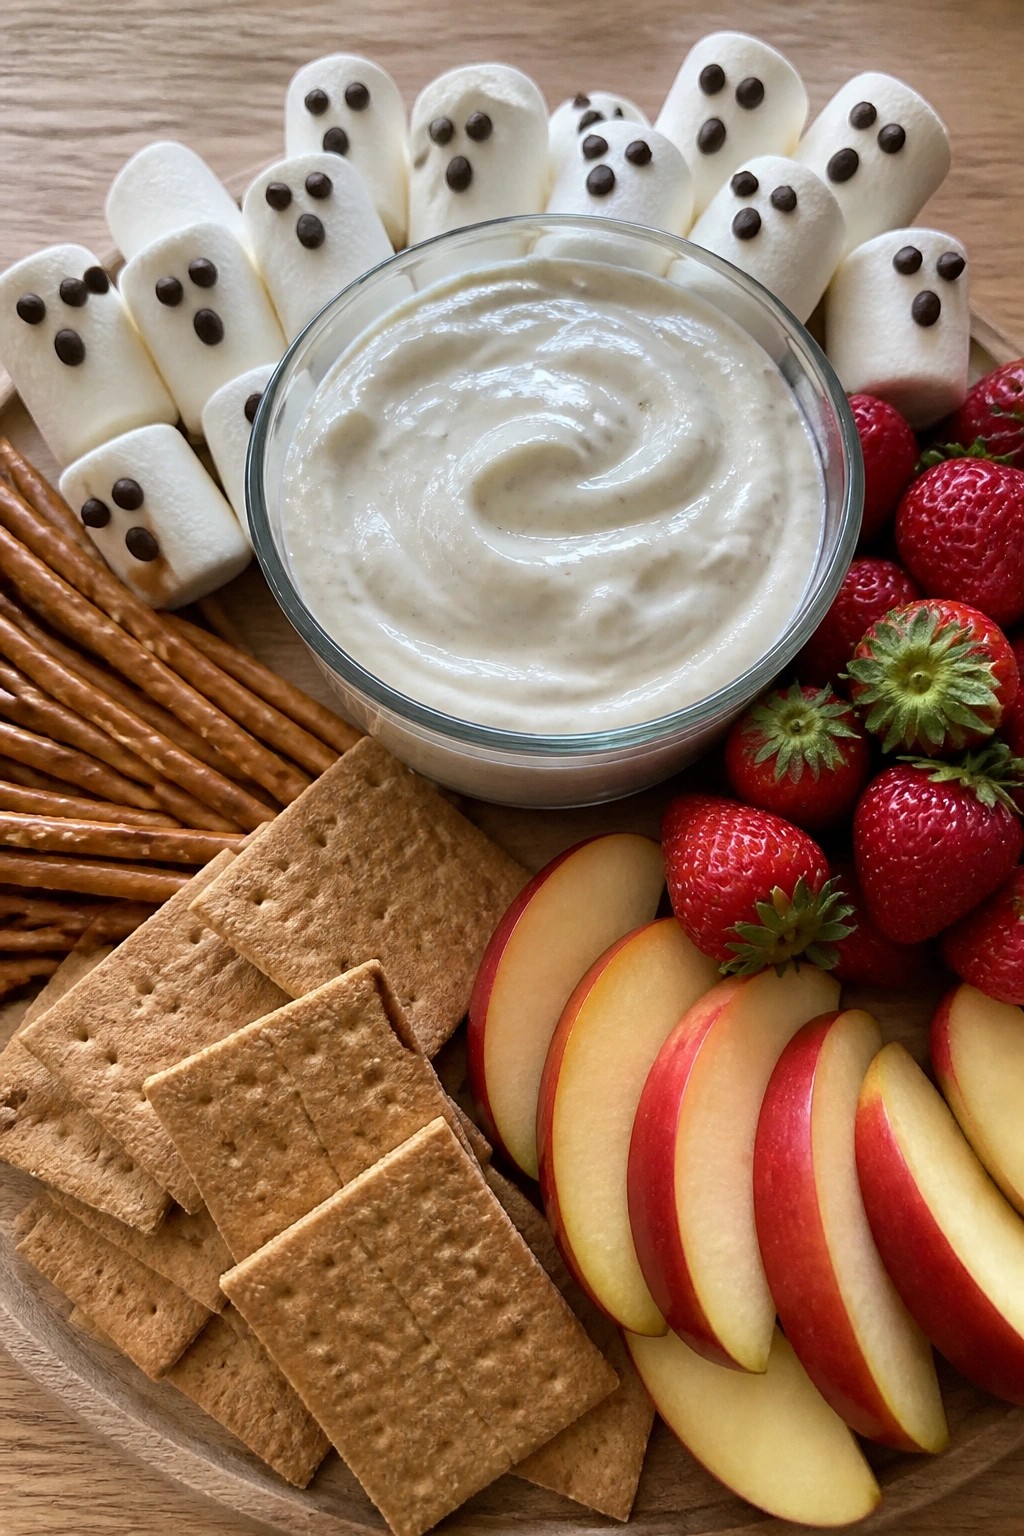
Ghostly Marshmallow Yogurt Dip Board
This board brings a light, creamy dip to the center of a Halloween spread. Kids can scoop it up with fruit and crackers while looking for the marshmallow ghosts scattered around the edges.
It suits after-school snacks or small party tables. The yogurt base stays mild and smooth, while the marshmallow element adds a soft sweetness that pairs well with crisp and juicy dippers.
Serves 4 people.
Ingredients
- 2 cups vanilla yogurt
- ¾ cup marshmallow fluff
- 12 large marshmallows
- 2 tablespoons mini chocolate chips
- 2 red apples, cored and sliced
- 1 pint strawberries
- 12 graham cracker squares
- 1 cup pretzel rods
Instructions
- Combine the vanilla yogurt and marshmallow fluff in a mixing bowl and stir until fully blended and smooth.
- Transfer the dip to a small bowl and set it in the middle of a large serving board.
- Press mini chocolate chips into eight of the large marshmallows to form simple ghost faces. Arrange these around the dip bowl.
- Place the apple slices, strawberries, graham cracker squares, and pretzel rods in sections on the rest of the board.
Extra Tips
Prepare the ghost faces on a separate plate first so the chocolate chips stay in place, then move them to the board just before serving. If the dip thickens after sitting, give it a quick stir to loosen the texture again. Keep extra apple slices in lemon water until ready to arrange so they stay bright. Course: Snack Cuisine: American Equipment: Mixing Bowl, Serving Board, Knife
Vampire Fang Strawberry and Cream Cheese Board
This board turns simple strawberries and cream cheese into a fun Halloween snack that kids can spot right away. The strawberry halves come together with a creamy filling to look like little vampire mouths, making it a light option for parties or afternoon treats.
The flavor stays bright and mildly sweet, with juicy fruit against the smooth cream cheese. It pairs well with crunchy graham crackers for a mix of textures that holds up on a shared platter.

Serves 4 people.
Ingredients
- 1 pound fresh strawberries
- 8 ounces cream cheese, softened
- 3 tablespoons powdered sugar
- 1 teaspoon vanilla extract
- 20 graham crackers
Instructions
- Place the softened cream cheese in a mixing bowl. Add the powdered sugar and vanilla extract, then beat until the mixture is smooth and spreadable.
- Rinse the strawberries and remove the green tops. Slice each berry in half lengthwise.
- Spread a small amount of the cream cheese mixture on the cut side of one strawberry half. Press the second half on top to form a sandwich that looks like an open mouth.
- Repeat with all the strawberries until the cream cheese filling shows like teeth between the halves.
- Arrange the strawberry sandwiches on a serving board in rows so the filled sides face up. Place the graham crackers around the edges for dipping.
Extra Tips
Prepare the cream cheese mixture a few hours ahead and keep it covered in the fridge so it firms up slightly before spreading. If the filling feels too thick after chilling, stir in a teaspoon of milk to loosen it. Slice the strawberries just before assembly to keep them from releasing extra juice onto the board. Course: Appetizer Cuisine: American Equipment: Mixing bowl, Serving board, Knife
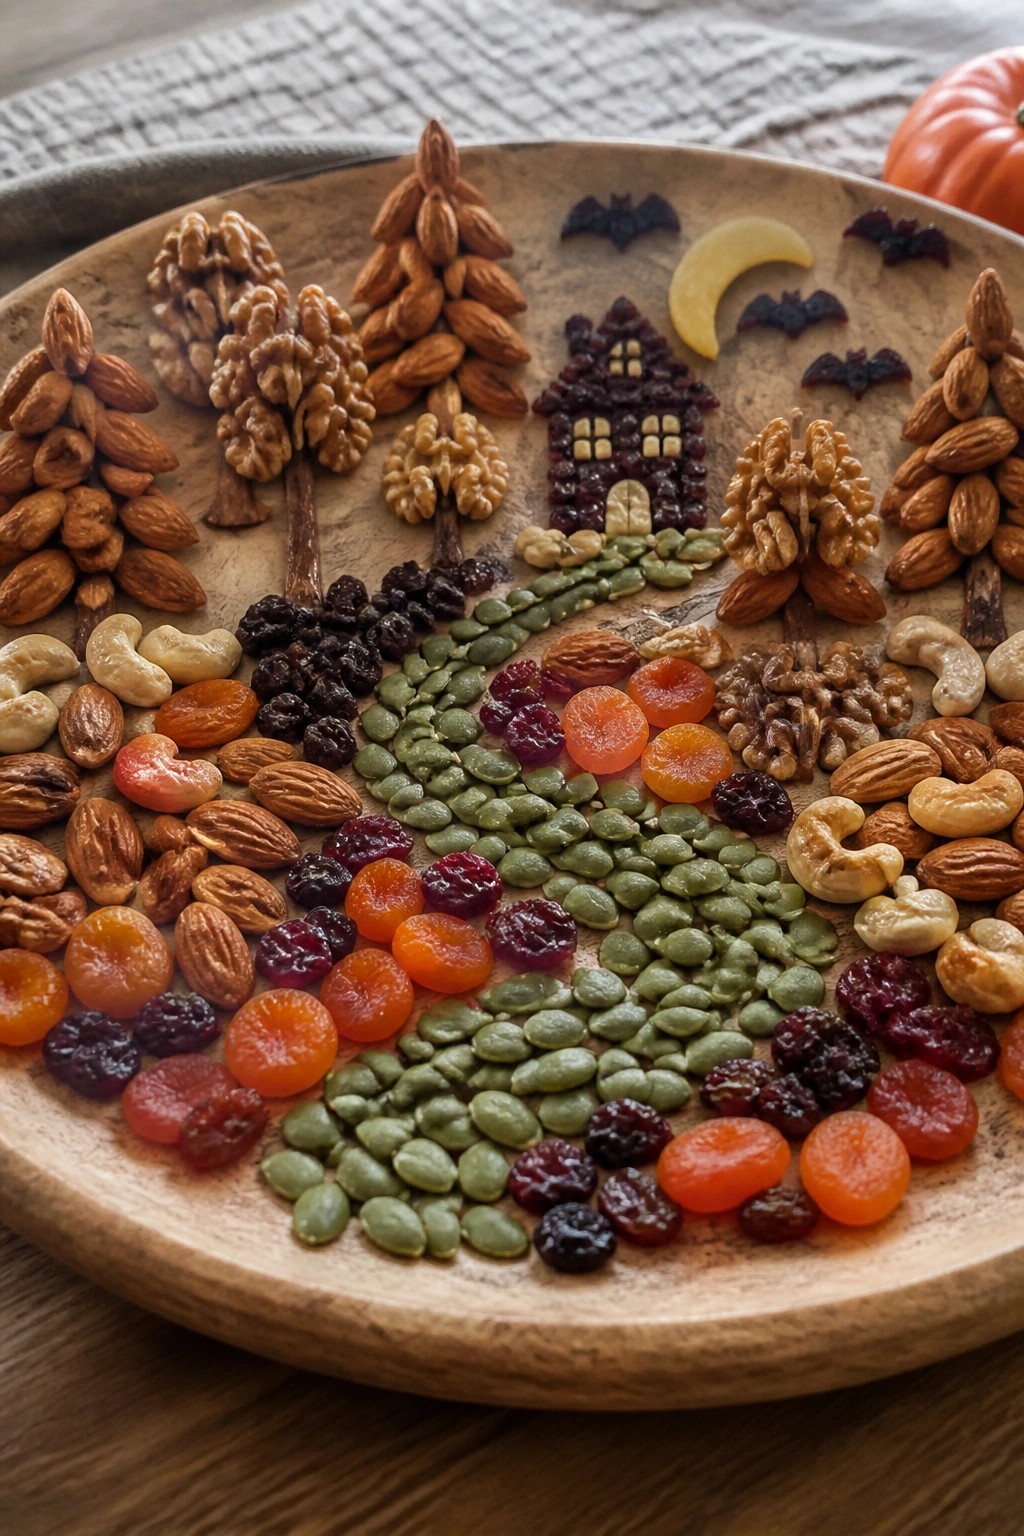
Haunted Forest Nut and Dried Fruit Board
This board turns simple nuts and dried fruit into a playful forest scene that kids can explore with their fingers. The mix of crunchy nuts and chewy fruit gives a satisfying contrast that works well at Halloween parties or as an after-school snack.
It comes together quickly on a single platter and encourages kids to try different combinations without any pressure.
Serves 4 people.
Ingredients
- 1 cup whole almonds
- 1 cup walnut halves
- 1/2 cup cashews
- 1 cup dried cranberries
- 1 cup dried apricots, halved
- 1/2 cup raisins
- 1/4 cup pumpkin seeds
Instructions
- Choose a large wooden board or platter and set it on the table where kids can reach it easily.
- Stand clusters of almonds and walnut halves upright in small groups to create the look of tree trunks and branches.
- Scatter the cashews around the base of the nut clusters to fill in the forest floor.
- Place the dried apricot halves and raisins in open spaces to act as fallen leaves and paths.
- Sprinkle the dried cranberries throughout the board for color and to represent berries in the woods.
- Finish by scattering the pumpkin seeds over the top like pine needles or small forest accents.
Extra Tips
Arrange the nuts first so they stay in place, then add the fruit around them to avoid shifting the trees. If kids prefer milder flavors, swap the cranberries for extra raisins. Leftovers keep best when stored in an airtight container at room temperature for up to three days. Course: Appetizer Cuisine: American Equipment: Large wooden board, Serving platter
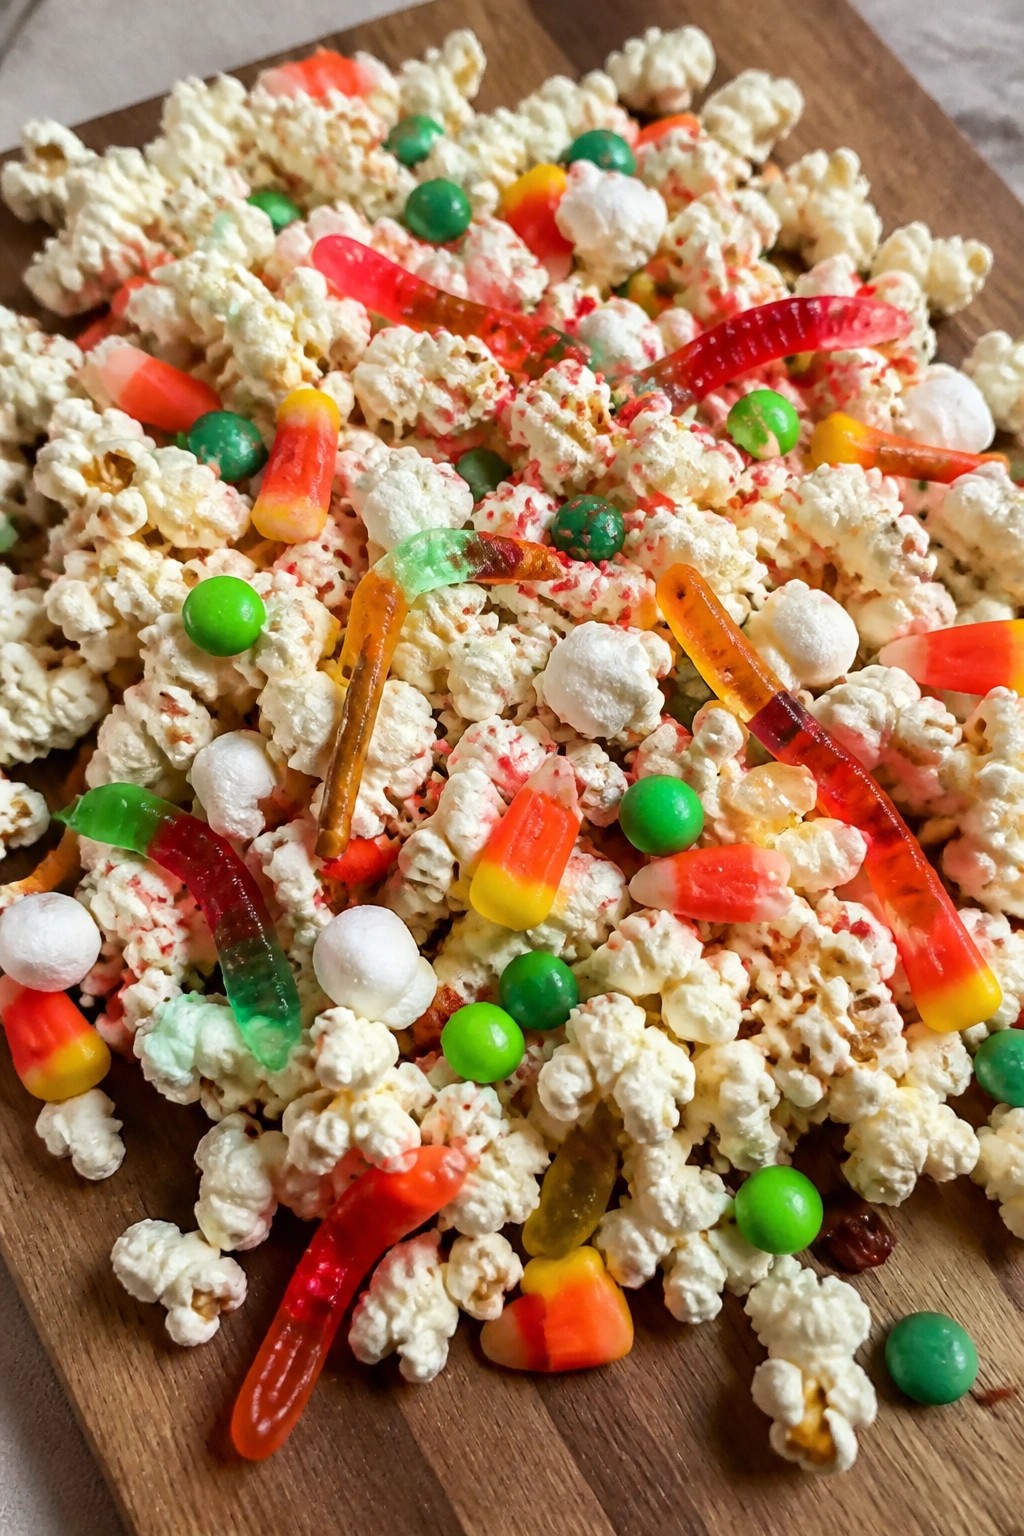
Zombie Popcorn and Candy Mix Board
This board mixes crunchy popcorn with bright candies for a simple Halloween snack that kids can grab by the handful. It comes together fast and gives a good balance of sweet and salty bites without much fuss. The mix works well for after-school treats or a quick party spread.
The popcorn stays light and crisp while the candies add chewy and crunchy spots throughout. Green and red colors give it a playful zombie twist that fits right into the rest of a kids’ charcuterie lineup.
Serves 4 people.
Ingredients
- 8 cups popped popcorn
- 1 cup candy corn
- 1 cup gummy worms
- 1 cup green M&Ms
- 1/2 cup mini marshmallows
- 1/2 cup pretzel rods
- 1/4 cup red sprinkles
Instructions
- Place the popped popcorn into a large mixing bowl.
- Add the candy corn, gummy worms, green M&Ms, mini marshmallows, and pretzel rods.
- Toss the mixture gently with a large spoon until the candies and pretzels are evenly scattered through the popcorn.
- Spread the mix across a serving board in a single layer.
- Sprinkle the red sprinkles over the top for color.
- Let the board sit for a few minutes so the sprinkles settle before serving.
Extra Tips
Keep the pretzel rods whole so kids can use them like sticks to scoop up smaller pieces. If the mix sits out too long the popcorn can soften, so cover the board loosely with plastic wrap until right before guests arrive. Swap the gummy worms for any other gummy shape you already have on hand. Course: Snack Cuisine: American Equipment: Large Mixing Bowl, Serving Board