


Halloween is coming up and it is nice to have some simple recipe ideas on hand. These recipes focus on treats that are easy to put together with ingredients you probably already have. You will find a mix of snacks, desserts, and finger foods that work for kids and adults. Each one is designed to be quick without needing special tools or skills. They should give you practical options for any Halloween gathering.
Helpful Tips Before You Start
A bit of planning keeps these Halloween recipes simple to make and fun to serve.
Choose sturdy bases
Pick cookie doughs or cake mixes that hold shape well after baking. This helps details like faces or designs stay intact.
Make ahead where possible
Prepare frostings, fillings, or cutout shapes the day before. Assembly on the day of the event goes faster.
Set up a decoration station
Lay out small bowls of sprinkles, candies, and icing colors before kids or guests join in. Everything stays organized and cleanup stays quick.
Check oven times for batches
Halloween recipes often need multiple trays. Rotate pans halfway through to avoid uneven browning.
Store finished items properly
Keep decorated treats in single layers in airtight containers. This prevents smudges on icing or fragile pieces.
Spooky Jack-o’-Lantern Stuffed Peppers
These stuffed peppers turn ordinary bell peppers into carved jack-o’-lanterns that fit right into a Halloween meal. They work well for a weeknight dinner or a small party because the steps are straightforward and the result looks festive without extra effort. The filling stays hearty with seasoned meat and rice, while the melted cheese on top adds a creamy finish.
This recipe serves 4 people.

Serves 4 people.
Ingredients
- 4 large orange bell peppers
- 1 lb ground turkey
- 1 cup cooked rice
- 1 small onion, diced
- 2 cloves garlic, minced
- 1 cup tomato sauce
- 1 cup shredded cheddar cheese
- 1 tsp salt
- 1/2 tsp black pepper
- 1 tsp paprika
Instructions
- Preheat the oven to 375°F. Cut the tops off each bell pepper and set them aside. Use a small knife to carve simple jack-o’-lantern faces into the front of each pepper.
- Remove the seeds and membranes from inside the peppers. Place the carved peppers in a baking dish that holds them upright.
- Heat a skillet over medium heat. Add the ground turkey, diced onion, and minced garlic. Cook until the turkey is browned and the onion softens.
- Stir in the cooked rice, tomato sauce, salt, black pepper, and paprika. Mix until everything is evenly combined and heated through.
- Spoon the filling into each carved pepper until full. Sprinkle shredded cheddar cheese over the top of each pepper and replace the pepper tops if desired.
- Bake for 25 to 30 minutes until the peppers are tender and the cheese is melted and bubbly.
Extra Tips
Choose peppers with flat bottoms so they stand steady in the dish. If the filling seems dry after mixing, add a splash of water to loosen it before stuffing. Leftovers reheat well in the microwave with a damp paper towel over the top to keep the peppers from drying out. Course: Main Course Cuisine: American Equipment: Baking dish, Skillet, Knife
Mummy-Wrapped Sausage Rolls with Mustard Dip
These sausage rolls get wrapped in thin strips of pastry to look like little mummies. They make a simple finger food that fits right into a Halloween spread without much extra effort.
The pastry bakes up flaky and golden while the sausages stay juicy inside. The mustard dip on the side brings a sharp contrast that balances the richness.

Serves 4 people.
Ingredients
- 8 link sausages
- 1 sheet puff pastry, thawed
- 1 large egg, beaten
- 1/4 cup prepared mustard
- 2 tablespoons mayonnaise
Instructions
- Heat the oven to 400°F and line a baking sheet with parchment paper.
- Cut the puff pastry sheet into long, thin strips about 1/2 inch wide.
- Wrap the strips around each sausage in a loose, overlapping pattern, leaving small gaps so the sausage shows through like mummy bandages.
- Place the wrapped sausages on the baking sheet and brush the pastry lightly with the beaten egg.
- Bake for 20 to 25 minutes until the pastry is puffed and golden brown.
- While the rolls bake, stir the mustard and mayonnaise together in a small bowl until smooth.
- Let the rolls cool for a few minutes, then serve with the mustard dip on the side.
Extra Tips
Leave even gaps when wrapping so the mummy look stays clear after baking. The dip can be made a day ahead and kept in the fridge. If the pastry feels too warm while you work, chill the wrapped sausages for 10 minutes before baking to help the strips hold their shape. Course: Appetizer Cuisine: American Equipment: Baking sheet, Oven, Small bowl
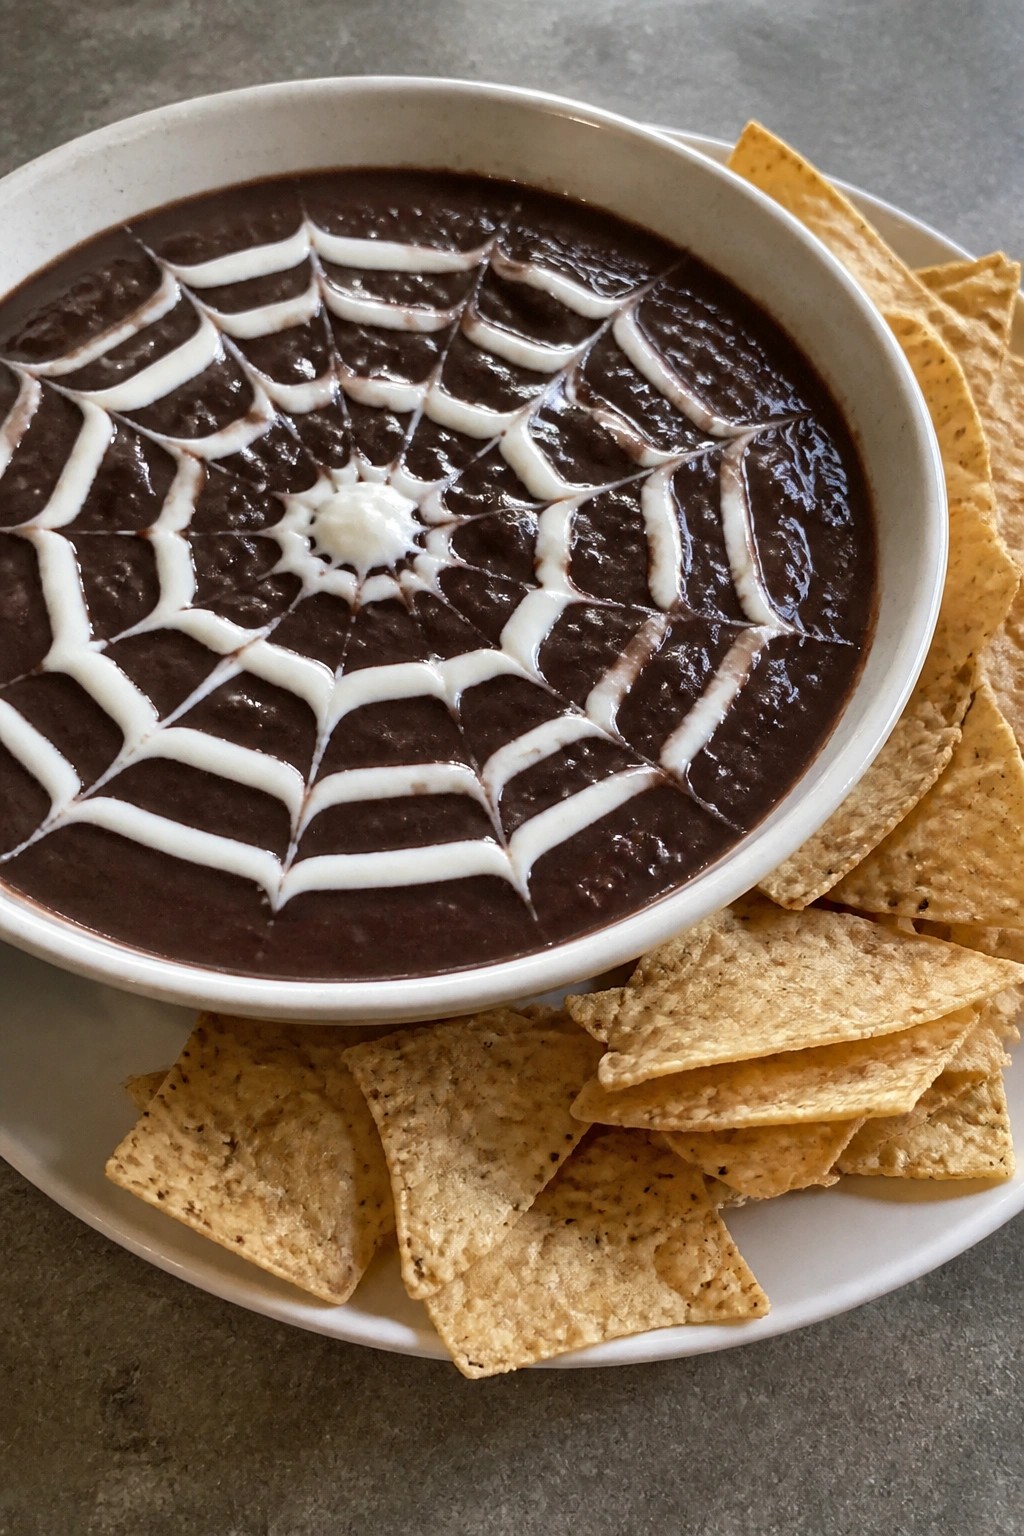
Spiderweb Black Bean Dip with Tortilla Chips
This spiderweb black bean dip adds a simple Halloween touch to any gathering. It works well for parties or movie nights when you need a quick appetizer that still feels themed. The dip comes together fast and looks striking on the table.
The base offers a creamy, smoky bean flavor with a bit of spice. Crispy tortilla chips provide contrast and make it easy to scoop.
Serves 4 people.
Ingredients
- 2 (15 oz) cans black beans, drained and rinsed
- 1 tablespoon olive oil
- 1 small onion, chopped
- 2 cloves garlic, minced
- 1 teaspoon cumin
- 1/2 teaspoon chili powder
- 1 lime, juiced
- 1/2 teaspoon salt
- 1/2 cup sour cream
- Tortilla chips, for serving
Instructions
- Heat the olive oil in a skillet over medium heat. Add the onion and garlic. Cook for 3 to 4 minutes until the onion softens.
- Add the black beans, cumin, chili powder, lime juice, and salt to the skillet. Stir and cook for 2 minutes until heated through.
- Transfer the mixture to a food processor. Blend until mostly smooth but still slightly chunky.
- Spread the bean dip evenly on a round plate or shallow dish.
- Spoon the sour cream into a zip-top bag and snip off one corner. Pipe the sour cream in circles starting from the center, then drag a toothpick through the lines to form a web pattern.
- Serve right away with tortilla chips on the side.
Extra Tips
Pipe the sour cream web just before serving so it stays bright and defined. If you make the dip ahead, keep it covered in the fridge and add the web right before guests arrive. A bit more lime juice can brighten the flavor if the beans taste too earthy. Course: Appetizer Cuisine: American Equipment: Skillet, Food processor, Plate, Zip-top bag
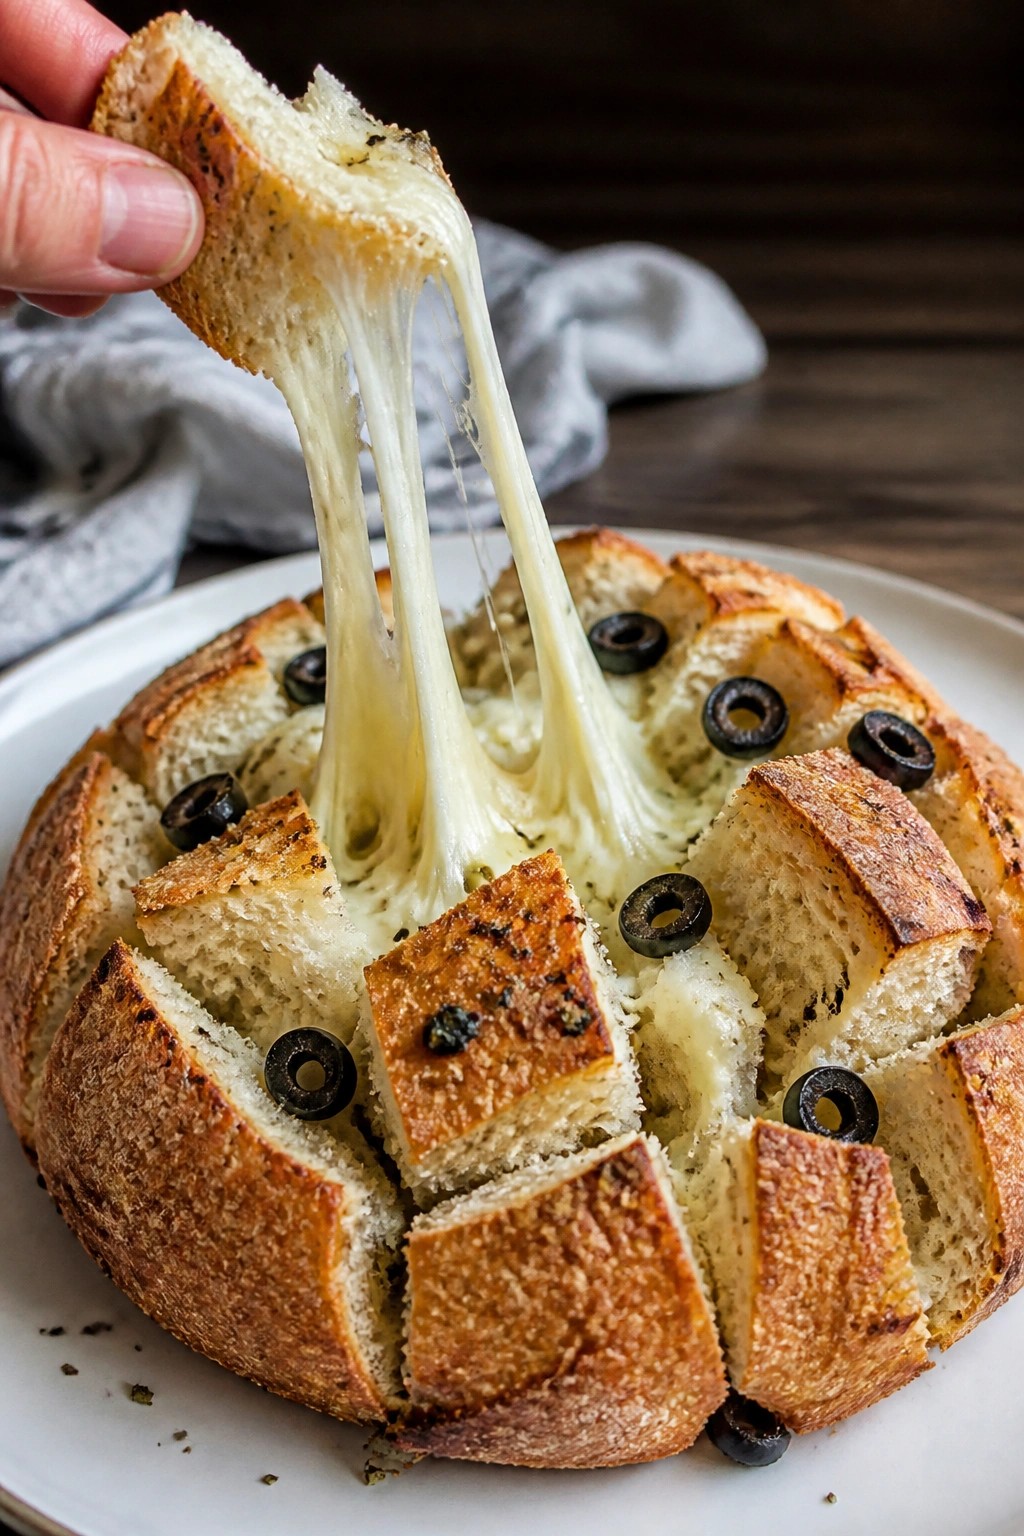
Ghostly Cheese Pull-Apart Bread
This pull-apart bread makes a simple Halloween snack that guests can tear into right at the table. The melted mozzarella creates long cheese strands that look like little ghosts rising from the loaf. It works well as a starter for a party or a casual dinner before trick-or-treating.
The bread stays soft inside with golden edges, while garlic and oregano give it a savory flavor that pairs nicely with the mild cheese.
Serves 4 people.
Ingredients
- 1 round sourdough bread loaf
- 2 cups shredded mozzarella cheese
- 1/4 cup butter, melted
- 2 garlic cloves, minced
- 1 teaspoon dried oregano
- 1/2 teaspoon salt
- Sliced black olives, for topping
Instructions
- Preheat the oven to 350 degrees F and line a baking sheet with parchment paper.
- Place the sourdough loaf on the sheet. Cut a grid pattern into the top of the loaf, stopping about half an inch from the bottom so the loaf stays intact.
- Gently pull the sections apart and stuff the shredded mozzarella cheese into the cuts, filling them as evenly as possible.
- In a small bowl, stir together the melted butter, minced garlic, dried oregano, and salt.
- Pour the butter mixture over the loaf, letting it seep into the cuts.
- Bake for 20 minutes, or until the cheese is fully melted and the bread edges are golden.
- Remove from the oven and press sliced black olives onto the top to create simple ghost faces.
Extra Tips
Assemble the loaf up to a few hours ahead and keep it covered in the fridge, then bake just before serving. If the cheese starts to firm up after cooling, a quick 5-minute reheat in a 300-degree oven brings back the stretchy texture. Skip the olives if you want a milder look, or add an extra pinch of salt to the butter mixture if you prefer a stronger savory taste. Course: Appetizer Cuisine: American Equipment: Baking sheet, Knife, Mixing bowl
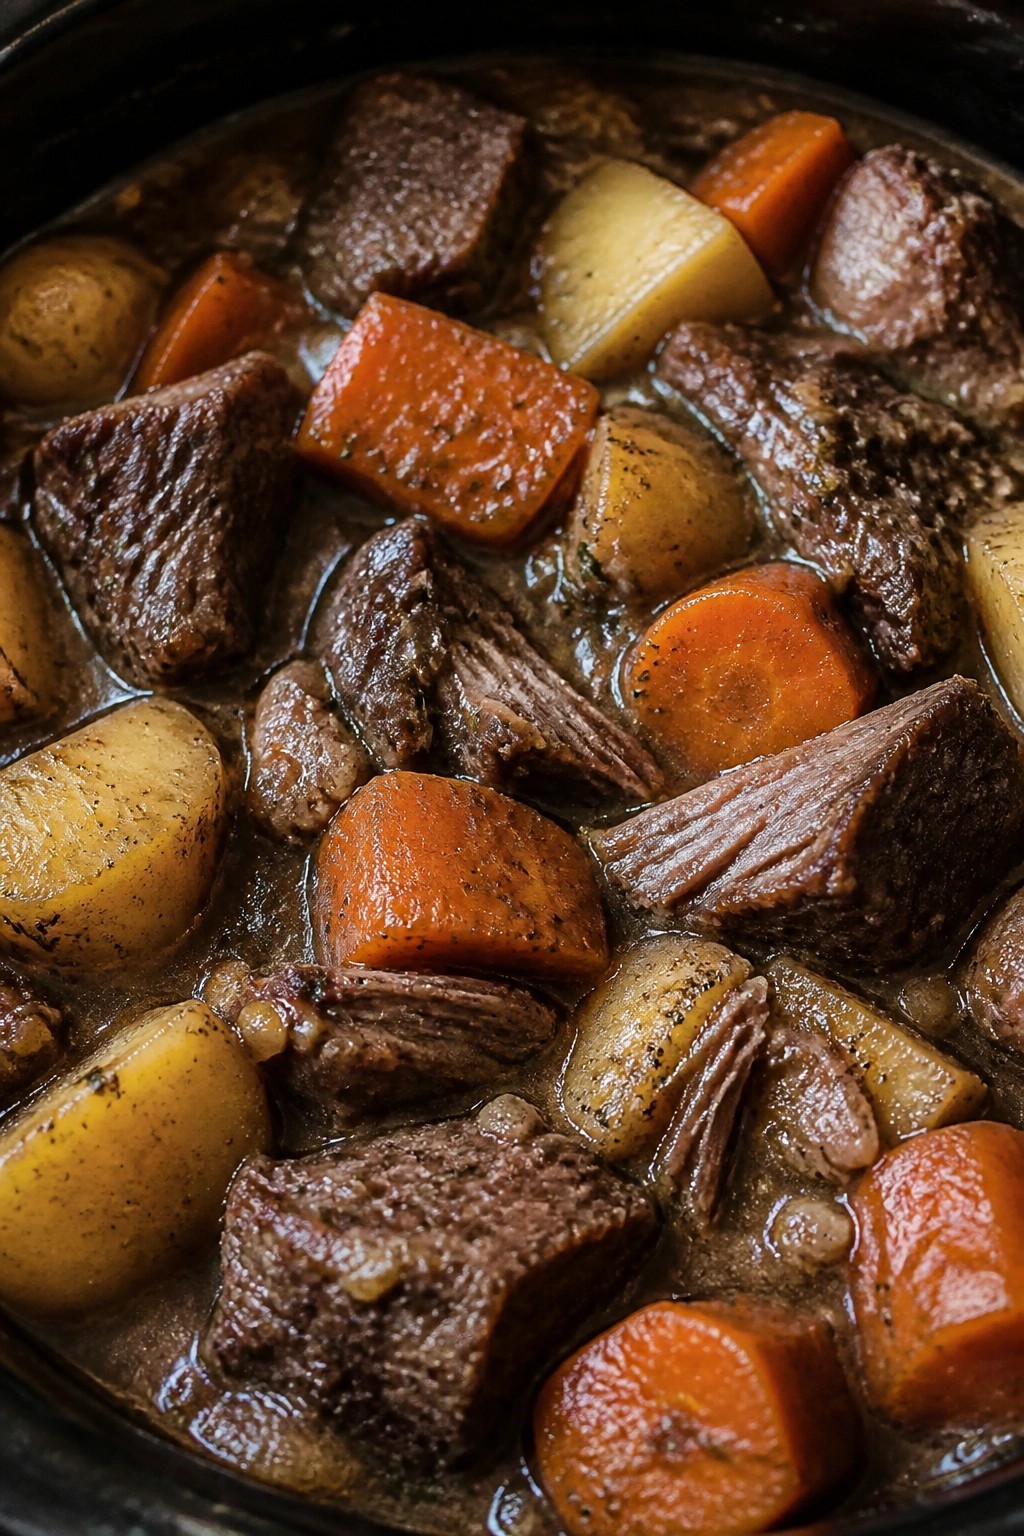
Witch’s Cauldron Beef Stew with Root Vegetables
This beef stew brings together tender chunks of beef and hearty root vegetables in a thick, savory broth. It works well for cool fall evenings or small Halloween gatherings when you want something warming and filling.
The dish has a rich, earthy flavor from slow simmering, with soft vegetables and meat that falls apart easily. Serve it straight from the pot for a simple, no-fuss meal.
Serves 4 people.
Ingredients
- 1.5 pounds beef chuck, cut into 1-inch cubes
- 2 tablespoons olive oil
- 1 large onion, diced
- 3 carrots, peeled and cut into 1-inch pieces
- 2 parsnips, peeled and cut into 1-inch pieces
- 3 medium potatoes, cut into 1-inch cubes
- 4 cups beef broth
- 2 cloves garlic, minced
- 2 bay leaves
- 1 teaspoon dried thyme
- 2 tablespoons all-purpose flour
- Salt and black pepper to taste
- 2 tablespoons chopped fresh parsley
Instructions
- Heat the olive oil in a large pot over medium-high heat. Add the beef cubes and brown them on all sides for about 5 minutes. Remove the beef and set it aside.
- Add the diced onion to the same pot and cook for 3 minutes until it softens. Stir in the garlic and cook for 1 more minute.
- Sprinkle the flour over the onions and stir for 1 minute to coat everything. Slowly pour in the beef broth while stirring to avoid lumps.
- Return the browned beef to the pot. Add the carrots, parsnips, potatoes, bay leaves, thyme, salt, and pepper. Bring the mixture to a boil.
- Reduce the heat to low, cover the pot, and simmer for 1 hour and 30 minutes. Stir occasionally until the beef is tender and the vegetables are soft.
- Remove the bay leaves. Ladle the stew into bowls and sprinkle with the chopped parsley before serving.
Extra Tips
Simmer the stew a little longer if you prefer thicker broth, or add a splash more broth if it gets too reduced. Leftovers keep well in the fridge for up to three days and reheat easily on the stove with a little extra broth to loosen the texture. Skip the parsley if you want a simpler finish. Course: Soup Cuisine: American Equipment: Large Pot, Cutting Board, Knife, Wooden Spoon
Bloody Finger Hot Dogs in a Blanket
These hot dogs turn a simple snack into a playful Halloween treat. Kids and adults both enjoy the finger shape and the flaky wrap around a savory sausage. The dish works well for parties or casual gatherings where you want something easy yet themed.
The texture combines crisp pastry with juicy hot dog inside. Ketchup adds a bright, tangy finish that ties into the bloody look without overpowering the flavors.

Serves 4 people.
Ingredients
- 8 all-beef hot dogs
- 1 can (8 oz) refrigerated crescent roll dough
- 8 blanched almond slices
- 1/4 cup ketchup
Instructions
- Preheat the oven to 375 degrees and line a baking sheet with parchment paper.
- Use a small knife to cut a shallow slit near one end of each hot dog to create a nail bed.
- Press one almond slice into each slit so it stays in place as the fingernail.
- Unroll the crescent dough and separate it into 8 triangles. Wrap one triangle around each prepared hot dog, leaving the almond end exposed.
- Place the wrapped hot dogs on the baking sheet with the seam side down.
- Bake for 12 to 15 minutes until the dough turns golden brown.
- Arrange the hot dogs on a plate and drizzle or serve with ketchup as the bloody element.
Extra Tips
Assemble the fingers ahead of time and keep them covered in the fridge until you are ready to bake. If the almond slices slip during wrapping, secure them with a tiny dab of ketchup before the dough goes on. Leftovers reheat best in a 350-degree oven for a few minutes to restore crispness. Course: Appetizer Cuisine: American Equipment: Baking Sheet, Knife
Pumpkin Patch Mac and Cheese Skillet
This skillet mac and cheese brings pumpkin right into the center of the dish for a creamy, lightly spiced version that feels right at home on a Halloween table. The pumpkin adds body and a soft orange color while the cheese keeps it rich and familiar. It works well for weeknight dinners in October or as a warm side when friends gather.
It comes together in one skillet after the pasta cooks, so cleanup stays simple. The finished texture is thick and velvety with a light savory-sweet balance from the nutmeg and paprika.

Serves 4 people.
Ingredients
- 12 oz elbow pasta
- 3 tablespoons butter
- 3 tablespoons all-purpose flour
- 2 cups whole milk
- 1 1/2 cups pumpkin puree
- 2 1/2 cups shredded sharp cheddar cheese
- 1 teaspoon smoked paprika
- 1/2 teaspoon ground nutmeg
- Salt and black pepper to taste
- 2 tablespoons chopped fresh parsley
- 1/4 cup roasted pumpkin seeds
Instructions
- Bring a large pot of salted water to a boil and cook the elbow pasta until al dente. Drain and set aside.
- In a large skillet over medium heat, melt the butter. Whisk in the flour and cook for one minute until it bubbles but does not brown.
- Slowly pour in the milk while whisking to avoid lumps. Continue whisking until the mixture thickens enough to coat the back of a spoon.
- Stir in the pumpkin puree, smoked paprika, nutmeg, salt, and pepper. Cook for two minutes until the sauce is smooth and heated through.
- Reduce the heat to low and add the shredded cheddar a handful at a time, stirring until fully melted before adding more.
- Add the drained pasta to the skillet and stir until every piece is coated with the pumpkin cheese sauce.
- Remove from heat, sprinkle with chopped parsley and roasted pumpkin seeds, and serve straight from the skillet.
Extra Tips
If the sauce thickens too much after sitting, stir in a splash of warm milk right before serving to loosen it. The parsley and pumpkin seeds add a nice contrast in color and crunch, so add them just before bringing the skillet to the table. Leftovers reheat well in a covered skillet over low heat with a little extra milk stirred in to restore creaminess. Course: Side Dish Cuisine: American Equipment: Large Pot, Large Skillet, Whisk, Colander
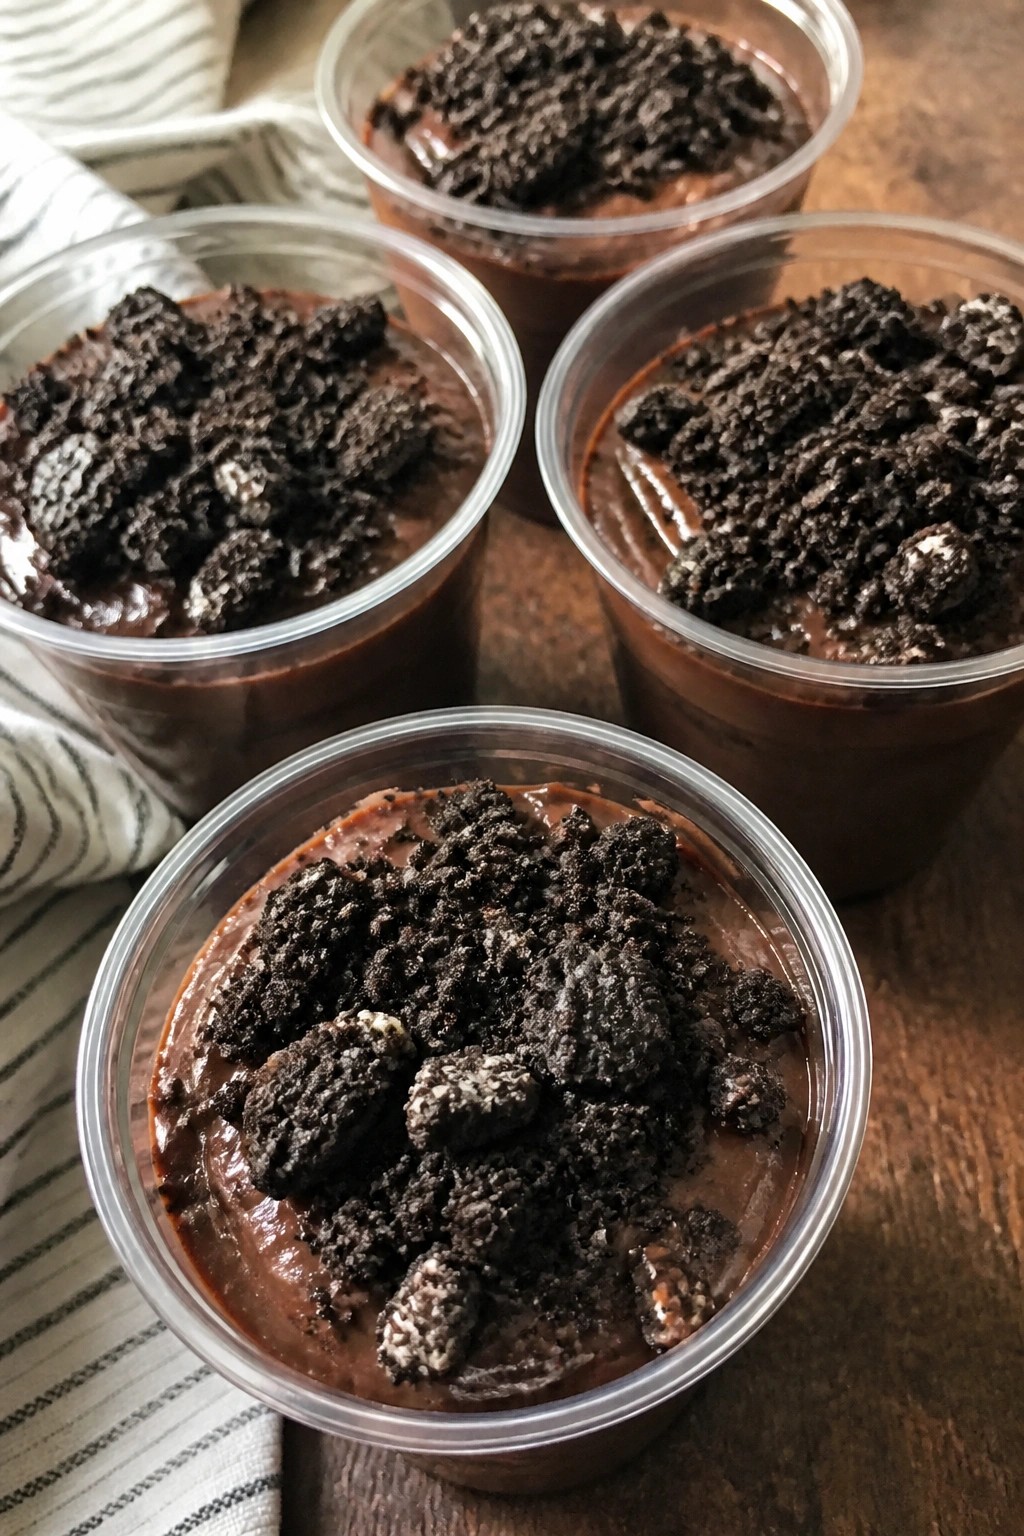
Graveyard Dirt Pudding Cups with Cookie Crumbs
These pudding cups give kids and adults a simple way to enjoy a chocolate treat that looks like fresh dirt. They work well for Halloween parties or after-school snacks because they need little hands-on time and can be made ahead. The texture combines smooth pudding with crunchy cookie pieces on top for a satisfying bite.
Serves 4 people.
Ingredients
- 2 cups cold milk
- 1 (3.9 oz) package instant chocolate pudding mix
- 12 chocolate sandwich cookies, crushed
- 1 cup thawed whipped topping
Instructions
- Pour the cold milk into a mixing bowl and add the instant chocolate pudding mix. Whisk for two minutes until the mixture thickens.
- Divide the prepared pudding evenly among four small cups.
- Sprinkle the crushed cookie crumbs over the top of each pudding cup to create the dirt layer.
- Add a spoonful of whipped topping to each cup just before serving.
Extra Tips
Crush the cookies right before assembly so they stay crisp on top. If you make the cups in advance, add the cookie crumbs and whipped topping at the last minute to keep the texture right. Store any leftovers in the refrigerator for up to one day. Course: Dessert Cuisine: American Equipment: Mixing Bowl, Whisk, Serving Cups
Vampire Garlic Breadstick Bites
These Vampire Garlic Breadstick Bites turn a basic dough into a savory snack that fits right into a Halloween spread. The garlic butter coating gives each piece a bold flavor, while the small size makes them easy to serve at a party or family meal.
The finished bites have a crisp edge from baking and a soft center, with Parmesan adding a light salty note. They pair naturally with a simple marinara dip that echoes the vampire theme without extra effort.

Serves 4 people.
Ingredients
- 1 can (13.8 oz) refrigerated pizza dough
- 4 tablespoons unsalted butter, melted
- 3 cloves garlic, minced
- 1 teaspoon dried parsley
- 1/2 cup grated Parmesan cheese
- 1/2 cup marinara sauce
- 1/4 teaspoon salt
Instructions
- Heat the oven to 400 degrees and line a baking sheet with parchment paper.
- Open the pizza dough and roll it into a rectangle about 1/2 inch thick on a lightly floured surface.
- Cut the dough into 1-inch squares and place them on the prepared baking sheet.
- Stir the melted butter, minced garlic, dried parsley, and salt together in a small bowl.
- Brush the garlic butter mixture over the top of each dough square.
- Sprinkle the grated Parmesan cheese evenly over the brushed dough pieces.
- Bake for 12 to 15 minutes until the edges turn golden brown.
- Warm the marinara sauce in a small saucepan or microwave and serve it alongside the bites for dipping.
Extra Tips
Cut the dough squares as evenly as possible so they bake at the same rate. If the bites cool before serving, place them back in a 350-degree oven for three minutes to restore crispness. The marinara can be swapped for a roasted red pepper sauce if you want a slightly sweeter dip without changing the overall method. Course: Appetizer Cuisine: American Equipment: Baking sheet, Mixing bowl, Pastry brush, Rolling pin
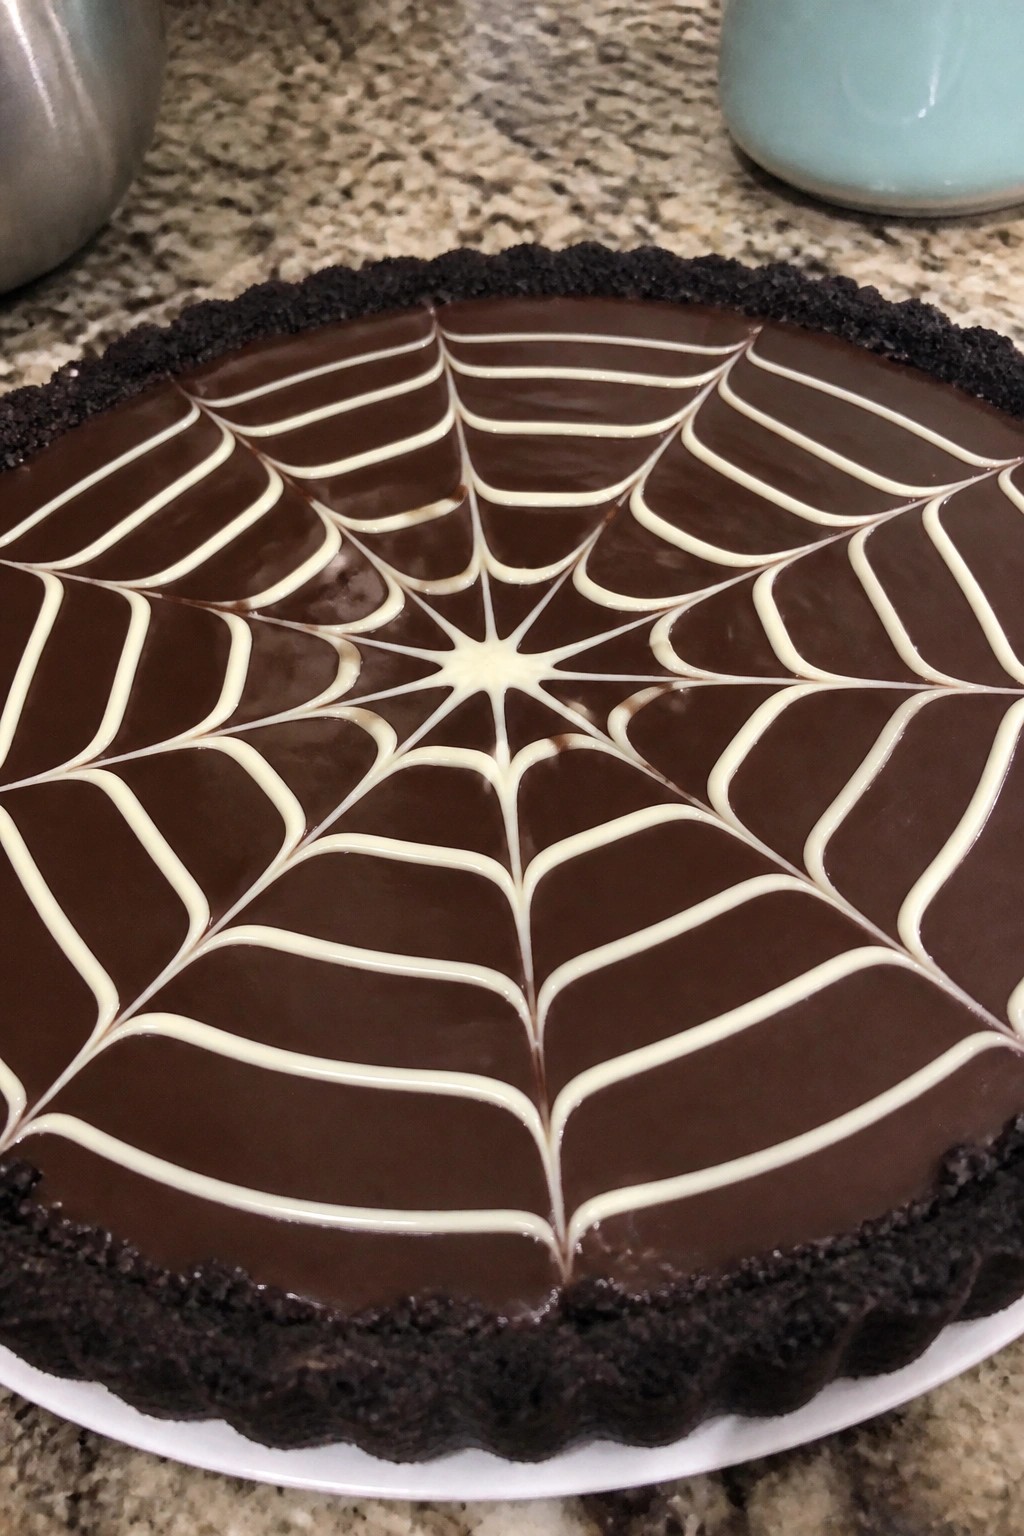
Chocolate Spiderweb Tart with Oreo Crust
This chocolate tart features a crisp Oreo crust filled with smooth ganache. A white chocolate spiderweb on top adds a simple Halloween detail without extra fuss.
It works well for small gatherings or as a make-ahead dessert. The crunchy cookie base balances the rich chocolate center for an easy yet festive finish.
Serves 4 people.
Ingredients
- 12 Oreo cookies
- 3 tablespoons butter, melted
- 4 ounces semi-sweet chocolate, chopped
- 1/2 cup heavy cream
- 1/4 teaspoon salt
- 2 ounces white chocolate
Instructions
- Preheat the oven to 350°F. Crush the Oreo cookies into fine crumbs and stir them with the melted butter until evenly combined.
- Press the crumb mixture firmly into the bottom and sides of a 6-inch tart pan. Bake for 8 minutes, then set the crust aside to cool completely.
- Place the semi-sweet chocolate and salt in a heatproof bowl. Heat the heavy cream in a small saucepan until it just begins to simmer, then pour it over the chocolate.
- Let the mixture sit for one minute, then stir until the ganache is smooth and glossy. Pour it into the cooled crust and spread evenly.
- Melt the white chocolate in short bursts in the microwave, stirring between each. Spoon it into a small zip-top bag, snip off one corner, and pipe a spiderweb pattern over the ganache.
- Refrigerate the tart for at least two hours until the filling is firm. Slice and serve cold.
Extra Tips
Pipe the white chocolate web while the ganache is still soft so the lines settle slightly into the surface. A zip-top bag works well for piping if a piping tip is not available. Store leftovers covered in the fridge for up to three days. Course: Dessert Cuisine: American Equipment: Tart pan, Mixing bowl, Saucepan, Microwave-safe bowl
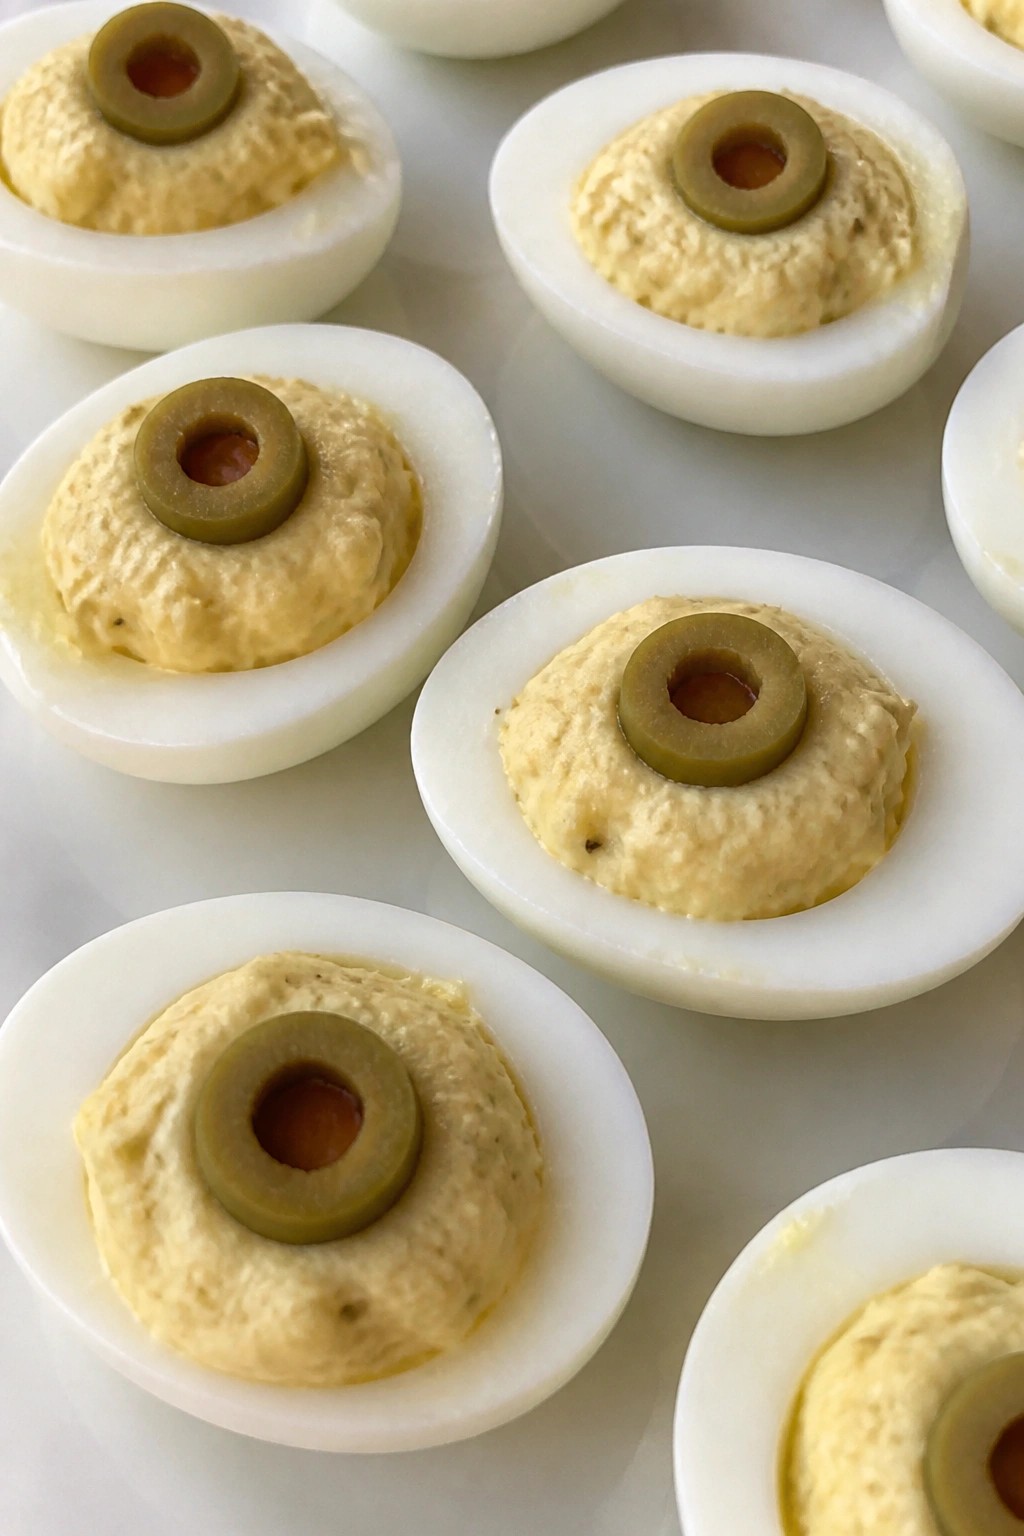
Monster Eyeball Deviled Eggs with Olive Slices
These deviled eggs turn a classic snack into a simple Halloween treat. The olive slices on top create an eyeball look that fits right in at any party spread. They stay creamy inside with a light tangy taste from the filling.
This version works well for small gatherings or as a quick starter before a bigger meal. The contrast of smooth egg white and salty olive gives a nice bite without extra fuss.
Serves 4 people.
Ingredients
- 4 large eggs
- 2 tablespoons mayonnaise
- 1 teaspoon yellow mustard
- 1/4 teaspoon salt
- 1/8 teaspoon black pepper
- 8 green olive slices
Instructions
- Place the eggs in a saucepan and cover them with cold water. Bring the water to a boil over medium heat, then remove the pan from the heat, cover it, and let the eggs sit for 12 minutes.
- Drain the hot water and run cold water over the eggs until they cool enough to handle. Peel the eggs and slice each one in half lengthwise.
- Scoop the yolks into a small bowl. Add the mayonnaise, mustard, salt, and black pepper. Mash everything together until the mixture is smooth.
- Spoon or pipe the yolk mixture back into the egg white halves. Place one green olive slice in the center of each filled egg.
Extra Tips
Make the eggs a day ahead and store them covered in the fridge, then add the olive slices right before serving so they stay bright. If you want a bit more color on the plate, dust the edges lightly with paprika after the olives are in place. These hold up best on a flat platter rather than stacked. Course: Appetizer Cuisine: American Equipment: Saucepan, Mixing bowl, Knife