

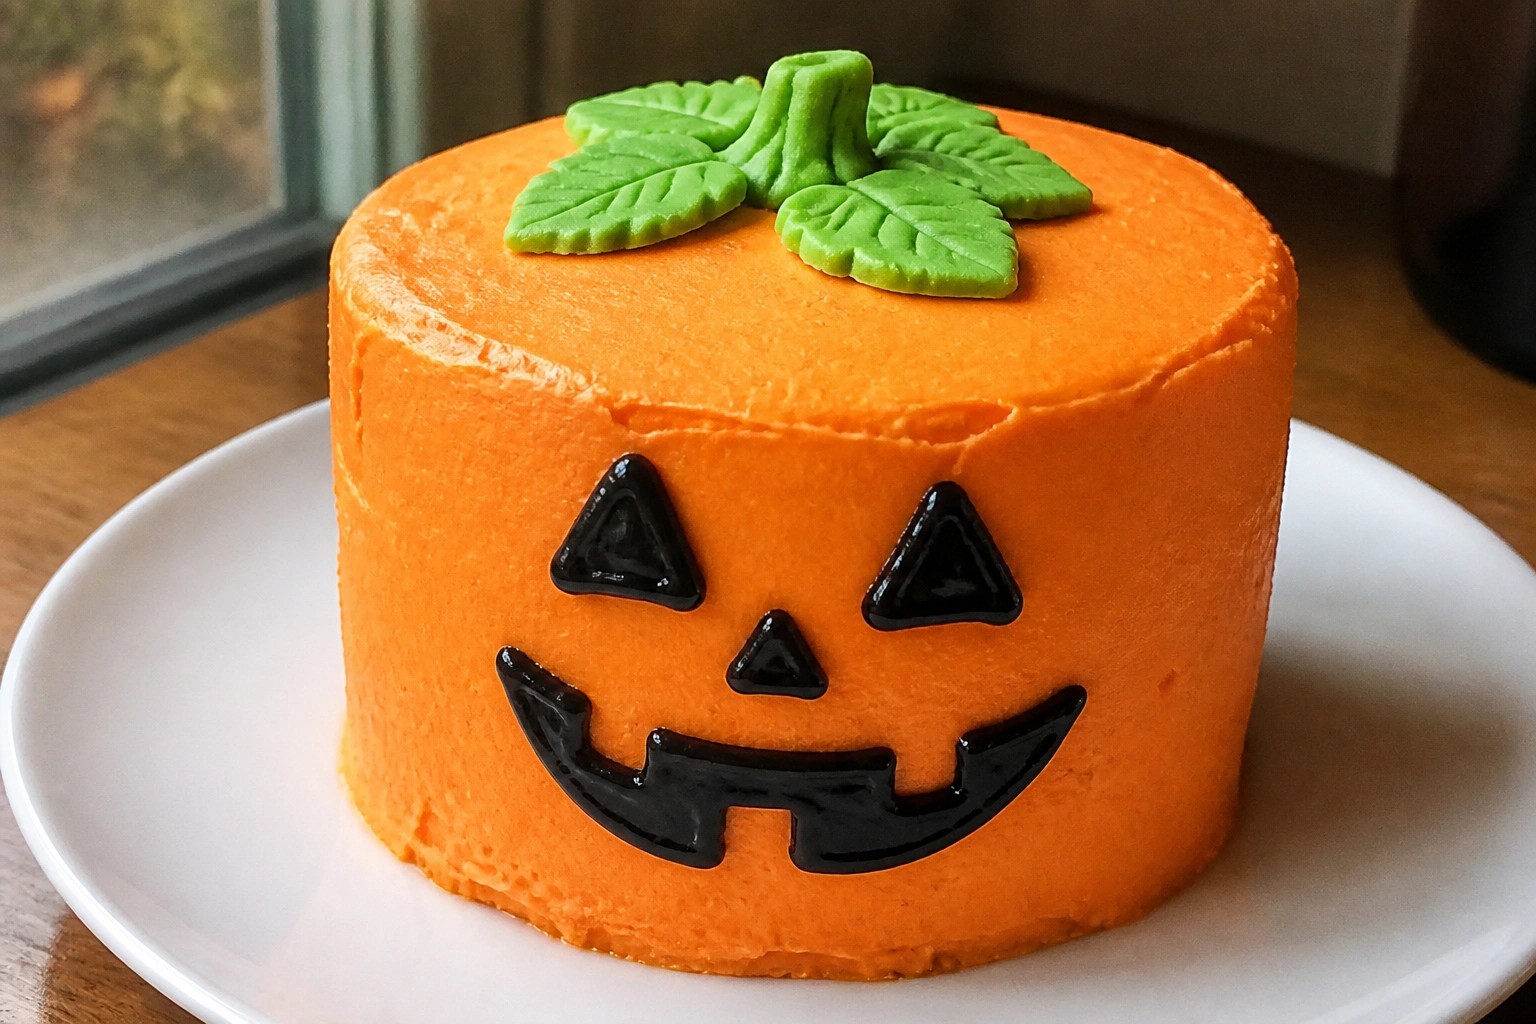
Halloween is a fun time to bake something special for the kids. These cake ideas focus on cute designs that most home bakers can handle without too much stress. Each recipe includes straightforward steps and common ingredients. You will find a mix of simple and slightly more detailed options to match what you need. I hope they make your holiday planning easier.
Helpful Tips Before You Start
A bit of planning makes it easier to create cute Halloween cakes that kids will enjoy.
Recommended Products
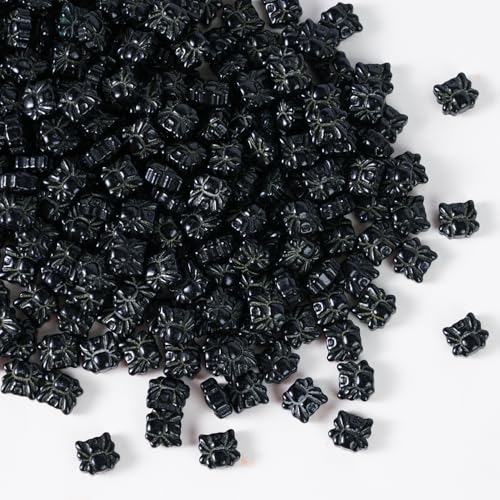
Spooky Spider Sprinkles –Create creepy-crawly desserts with these black edible spider sprinkles! Ideal for Halloween cakes, cupcakes, cookies, and more – instantly transforms treats into spooktacular masterpieces!

🕷️Premium Material: These Halloween Spider cupcake picks are made of wafer rice paper, it is completely edible ,eco-friendly but not delicious, They are virtually tasteless, not sweet at all and are sugar free, very safe to put them on cakes, cupcakes, ice cream, fruits, pie, dessert, cheese or any dish and food appetizer you want to decorate with this creepy spider cupcake decoration.

Spider Cake Topper: Level up your festive desserts with Oasis Supply's spider-design round cake topper! Easy-to-use and delicious icing sheets help you create mouth-watering personalized baked goods.
Pick Easy Shapes
Start with simple forms like pumpkins or ghosts. These cut cleanly and look clear to young eyes.
Involve the Kids
Let them add candy eyes or sprinkles while you handle the frosting. Small jobs keep them engaged without slowing you down.
Stick to Edible Decor
Use only food-safe items like chocolate chips or colored icing. This avoids any risk with small pieces.
Bake One Day Early
Make the cakes ahead so they cool fully before decorating. This keeps the process calm and gives better results.
Adorable Ghost Vanilla Layer Cake with Marshmallow Frosting
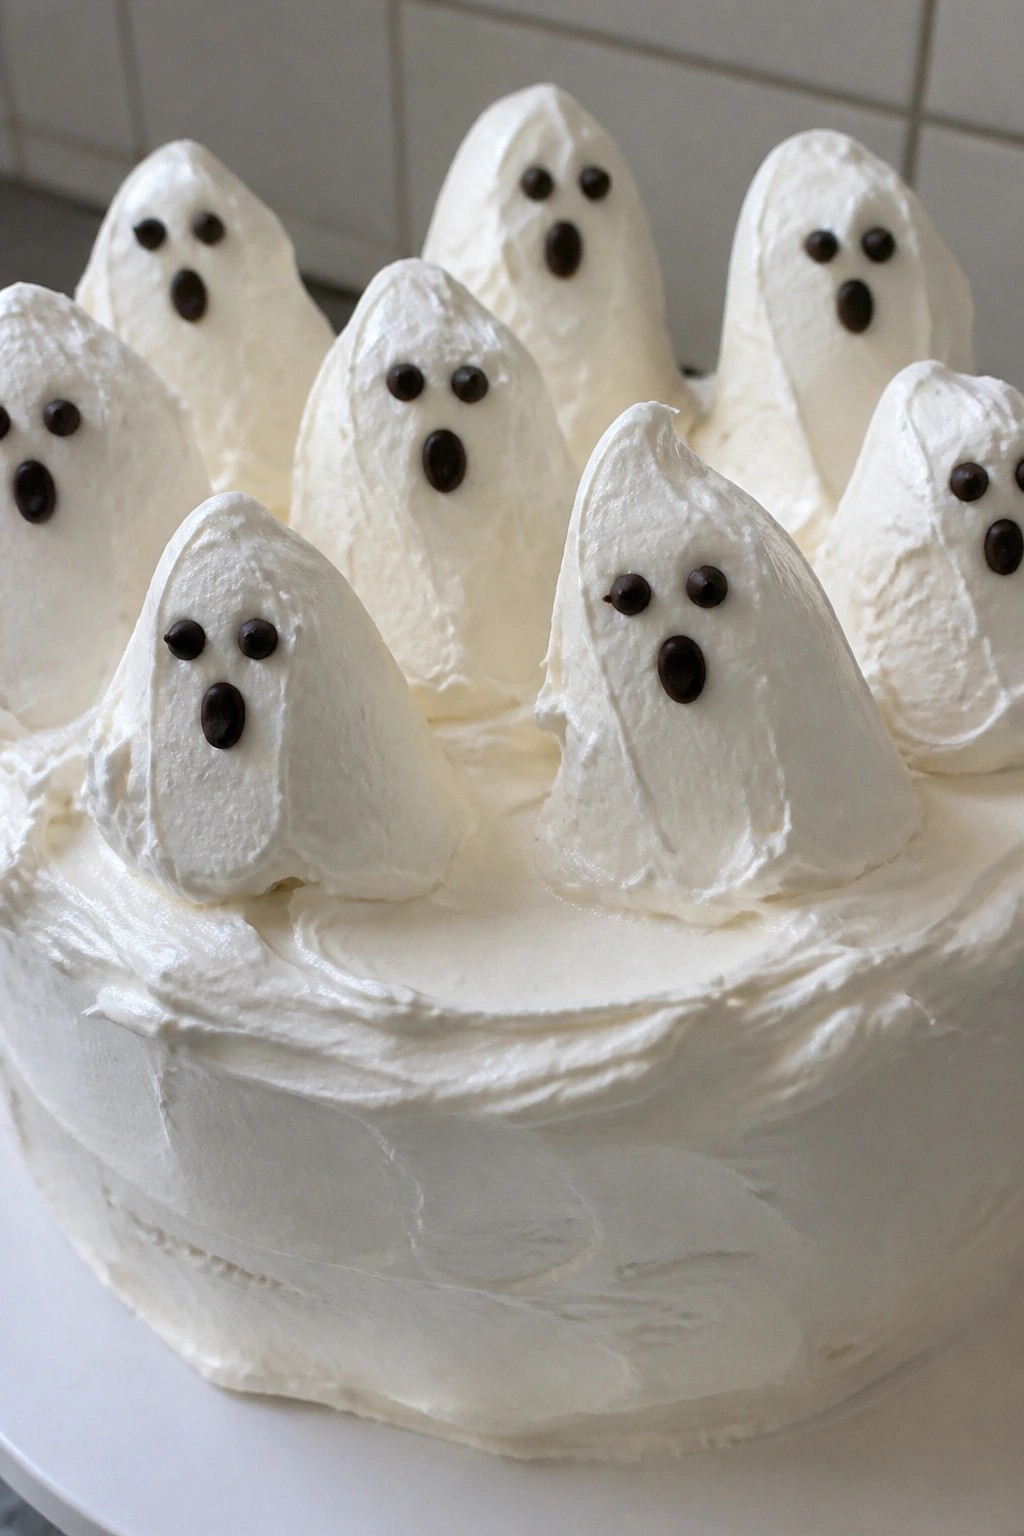
This cake brings a simple Halloween touch to any kids table. The vanilla layers stay soft and light while the marshmallow frosting holds its shape for easy ghost decorations.
It suits small family gatherings or classroom parties. The flavor stays mild and sweet without being heavy, and the white frosting makes ghost faces stand out clearly.
Serves 4 people.
Recommended Products

11.31 oz Complete Decorating Kit – Everything you need in one box: 3 squeeze frosting tubes (3 oz each in Orange, Black, White), 4 decorating nozzles, and a 2 oz Halloween sprinkle mix with candy eyeballs.

Variety of Designs: Includes 64 paper cupcake wrappers and 100 cupcake toppers, featuring 8 wrapper designs and 10 unique Halloween-themed topper designs

Use Date: You can see Production Date and Expiration date at the bottom of the bottle/ After open the seal of the bottle, its better to use them in 1 month/ Store in cool dry place
Ingredients
- 1 1/4 cups all-purpose flour
- 3/4 cup granulated sugar
- 1/2 cup unsalted butter, softened
- 2 large eggs
- 2 teaspoons vanilla extract
- 1 1/2 teaspoons baking powder
- 1/2 cup milk
- 20 large marshmallows
- 3 tablespoons unsalted butter
- 2 cups powdered sugar
- Mini chocolate chips
Instructions
- Preheat the oven to 350°F and grease two 6-inch round cake pans.
- In a mixing bowl, cream the softened butter and granulated sugar until light. Add the eggs one at a time, then stir in 1 teaspoon of the vanilla extract.
- In a separate bowl, whisk the flour with the baking powder. Add half the dry mixture to the butter mixture, then pour in the milk. Add the remaining dry mixture and stir until smooth.
- Divide the batter between the prepared pans and bake for 22 to 25 minutes, or until a toothpick comes out clean. Cool the layers completely on a wire rack.
- For the frosting, melt the marshmallows and 3 tablespoons butter in a saucepan over low heat, stirring until smooth. Remove from heat and beat in the powdered sugar and remaining teaspoon of vanilla until thick and spreadable.
- Place one cooled cake layer on a plate and spread a thin layer of frosting on top. Add the second layer and cover the entire cake with the rest of the frosting.
- Spoon small mounds of extra frosting around the cake to form ghost shapes. Press two mini chocolate chips into each mound for eyes.
Extra Tips
Use the leftover frosting right away because it firms up quickly. If the frosting feels too stiff after cooling, warm it for a few seconds in the microwave and stir before shaping the ghosts. Store any leftovers in an airtight container at room temperature for up to two days. Course: Dessert Cuisine: American Equipment: Mixing Bowls, Cake Pans, Saucepan, Electric Mixer, Wire Rack
Cute Pumpkin Spice Bundt Cake with Candy Eyes
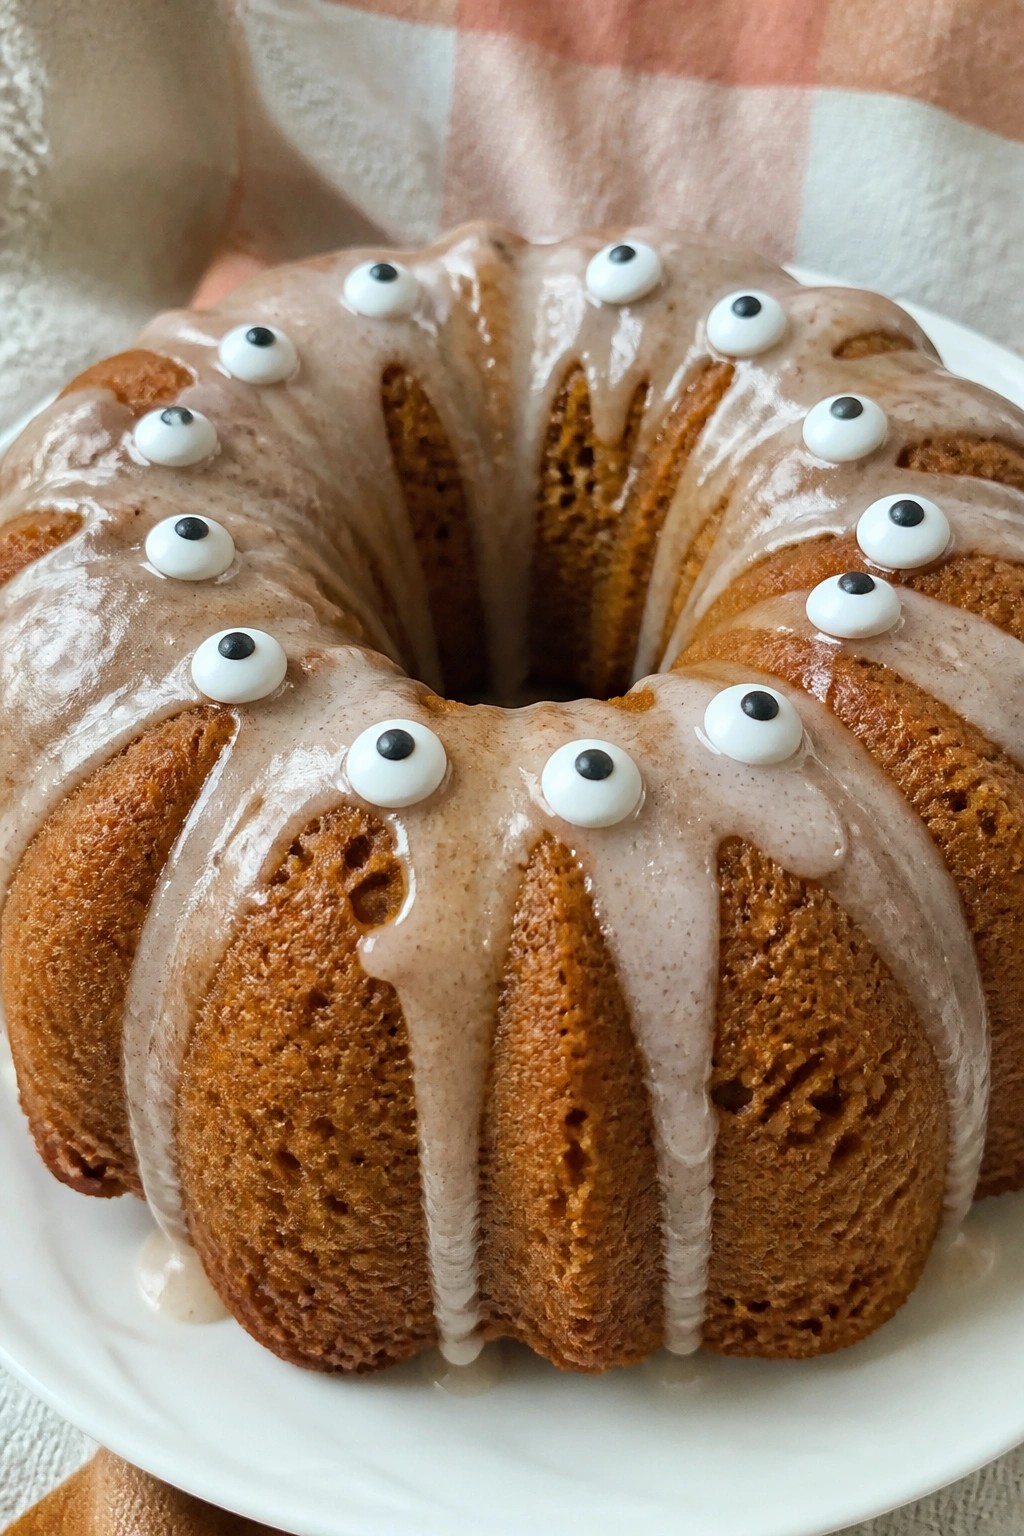
This bundt cake gives kids a fun way to enjoy pumpkin spice at Halloween. The candy eyes add a playful touch that fits right into parties or after-school treats. It bakes up moist with warm spices and a light sweet glaze on top.
The cake stays soft thanks to the pumpkin and bakes evenly in a small bundt pan. A simple glaze holds the candy eyes in place without extra fuss.
Serves 4 people.
Ingredients
- 1 cup all-purpose flour
- ¾ cup granulated sugar
- ½ cup pumpkin puree
- ¼ cup vegetable oil
- 1 large egg
- 1 teaspoon pumpkin pie spice
- ½ teaspoon baking soda
- ¼ teaspoon salt
- ½ teaspoon vanilla extract
- ½ cup powdered sugar
- 1 tablespoon milk
- 12 candy eyes
Instructions
- Preheat the oven to 350°F and grease a small 6-inch bundt pan.
- In a medium bowl, whisk together the flour, granulated sugar, pumpkin pie spice, baking soda, and salt.
- In another bowl, mix the pumpkin puree, vegetable oil, egg, and vanilla extract until smooth.
- Pour the wet mixture into the dry ingredients and stir until just combined.
- Spoon the batter into the prepared pan and smooth the top.
- Bake for 30 to 35 minutes until a toothpick comes out clean. Let the cake cool in the pan for 10 minutes, then turn it out onto a rack to cool completely.
- Stir the powdered sugar and milk together to make a thin glaze. Drizzle it over the cooled cake.
- Press the candy eyes into the glaze while it is still wet.
Extra Tips
Drizzle the glaze right after the cake cools so the candy eyes stay put without sliding. If the glaze thickens, add a drop more milk to loosen it. Leftovers keep well in an airtight container for two days at room temperature. Course: Dessert Cuisine: American Equipment: Bundt pan, Mixing bowls, Whisk, Oven
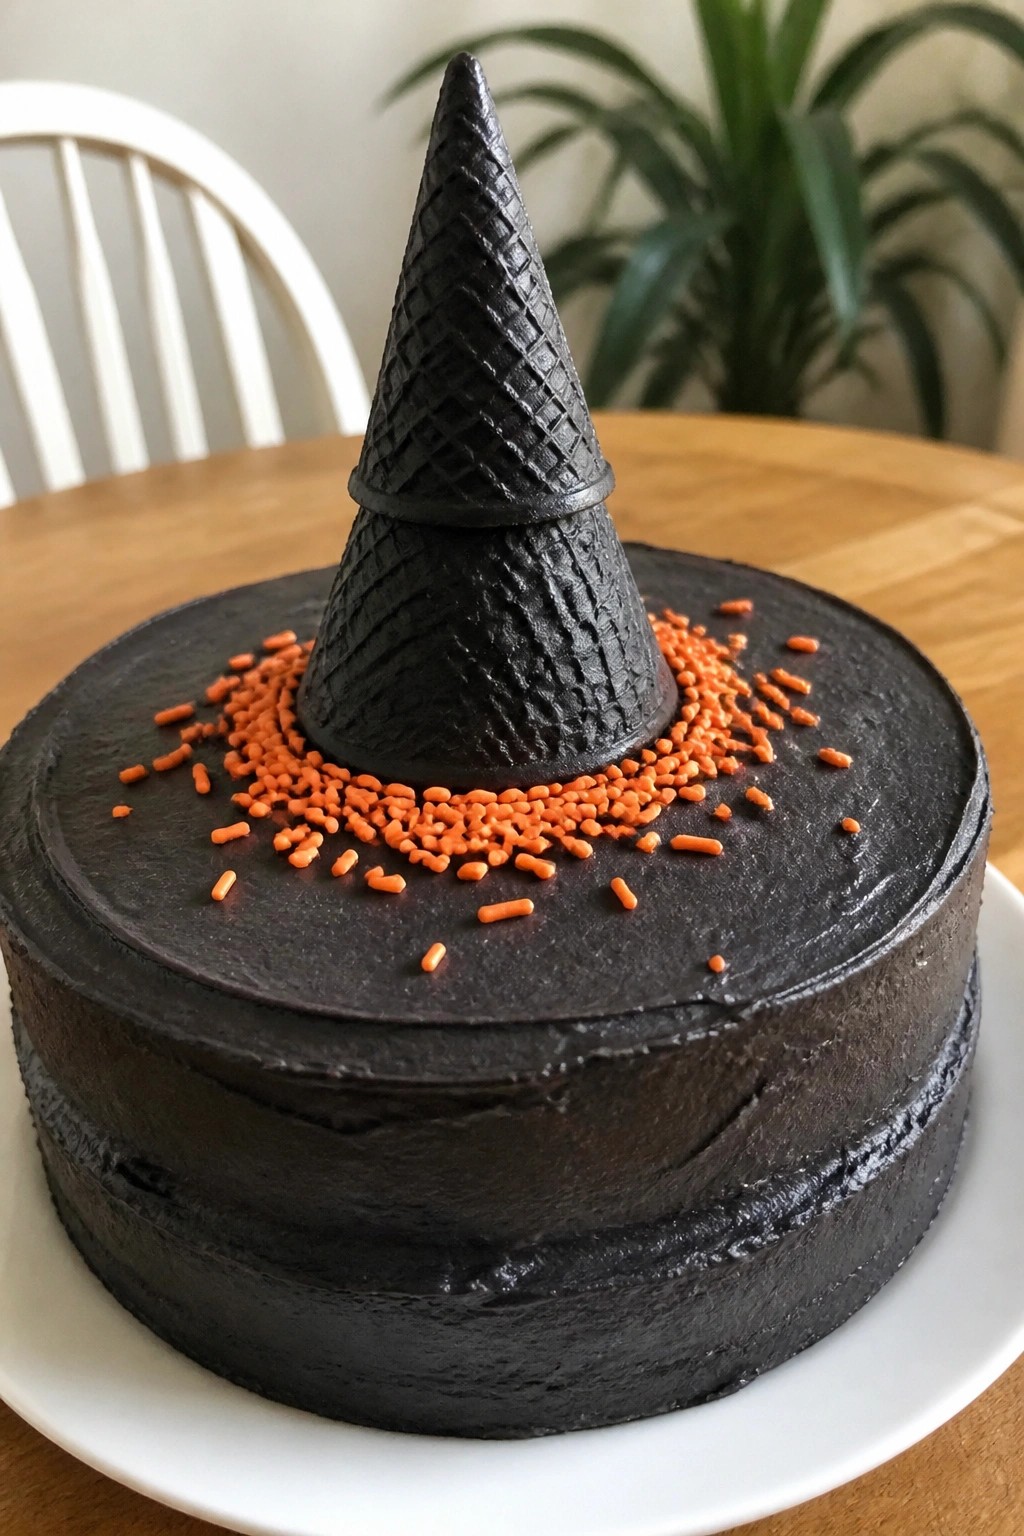
Witch Hat Chocolate Layer Cake
This witch hat chocolate layer cake brings a playful touch to your Halloween spread. Kids love spotting the pointed hat on top while enjoying the moist chocolate layers underneath. It works well for small gatherings or as a centerpiece at a kids’ party.
The cake has a deep cocoa flavor balanced by sweet buttercream frosting. Two simple layers stack with frosting in between and on top, then finish with a cone hat and orange accents for a clear witch theme.
Serves 4 people.
Recommended Products

🎁Complete Halloween Cake Pop Mold Set – All-in-one kit includes pumpkin cake pop mold, ghost cake pop mold, a silicone fondant mold, 100 lollipop sticks, 100 clear wrappers and 100 twist ties; full supplies for your Halloween cake pop making, no extra purchase needed.

Complete All-In-One Kit (2 Molds + 100 Lollipop Sticks): This pumpkin cake pop set includes two pumpkin silicone molds with 100 Lollipop Sticks. the pupmkin chocolate mold made from 100% BPA-free food grade silicone, non-toxic and odorless. It withstands temperatures from -40℃ up to 230℃, safe for freezers, ovens, microwaves and dishwashers.

Ingredients
- 1 cup all-purpose flour
- ¾ cup granulated sugar
- ⅓ cup unsweetened cocoa powder
- 1 tsp baking powder
- ½ tsp baking soda
- ½ tsp salt
- ½ cup milk
- ¼ cup vegetable oil
- 1 large egg
- 1 tsp vanilla extract
- ½ cup boiling water
- ½ cup unsalted butter, softened
- 1 ½ cups powdered sugar
- 2 tbsp milk
- Black food coloring
- 2 sugar cones
- Orange sprinkles
Instructions
- Preheat the oven to 350°F and grease two 6-inch round cake pans. Line the bottoms with parchment paper.
- In a large bowl, whisk together the flour, granulated sugar, cocoa powder, baking powder, baking soda, and salt.
- Add the milk, oil, egg, and vanilla extract to the dry ingredients. Stir until smooth, then slowly mix in the boiling water until the batter is thin but uniform.
- Divide the batter evenly between the two pans. Bake for 22 to 25 minutes, or until a toothpick inserted in the center comes out clean. Cool the cakes in the pans for 10 minutes, then turn them out onto a wire rack to cool completely.
- Beat the butter with an electric mixer until creamy. Gradually add the powdered sugar and cocoa powder, then mix in the 2 tablespoons of milk until the frosting reaches a spreadable consistency. Tint the frosting black with food coloring.
- Place one cake layer on a plate and spread a thin layer of black frosting on top. Add the second layer and frost the top and sides evenly. Dip the tips of the sugar cones in a small amount of frosting and press them onto the center of the cake to form the hat shape. Scatter orange sprinkles around the base of the cones.
Extra Tips
Make the cake layers a day ahead and wrap them tightly so assembly stays quick on party day. If the black frosting looks too stiff after coloring, add a teaspoon of milk at a time until it spreads smoothly. The sugar cones stay crisp when added just before serving. Course: Dessert Cuisine: American Equipment: Mixing Bowl, Cake Pans, Electric Mixer, Oven, Wire Rack
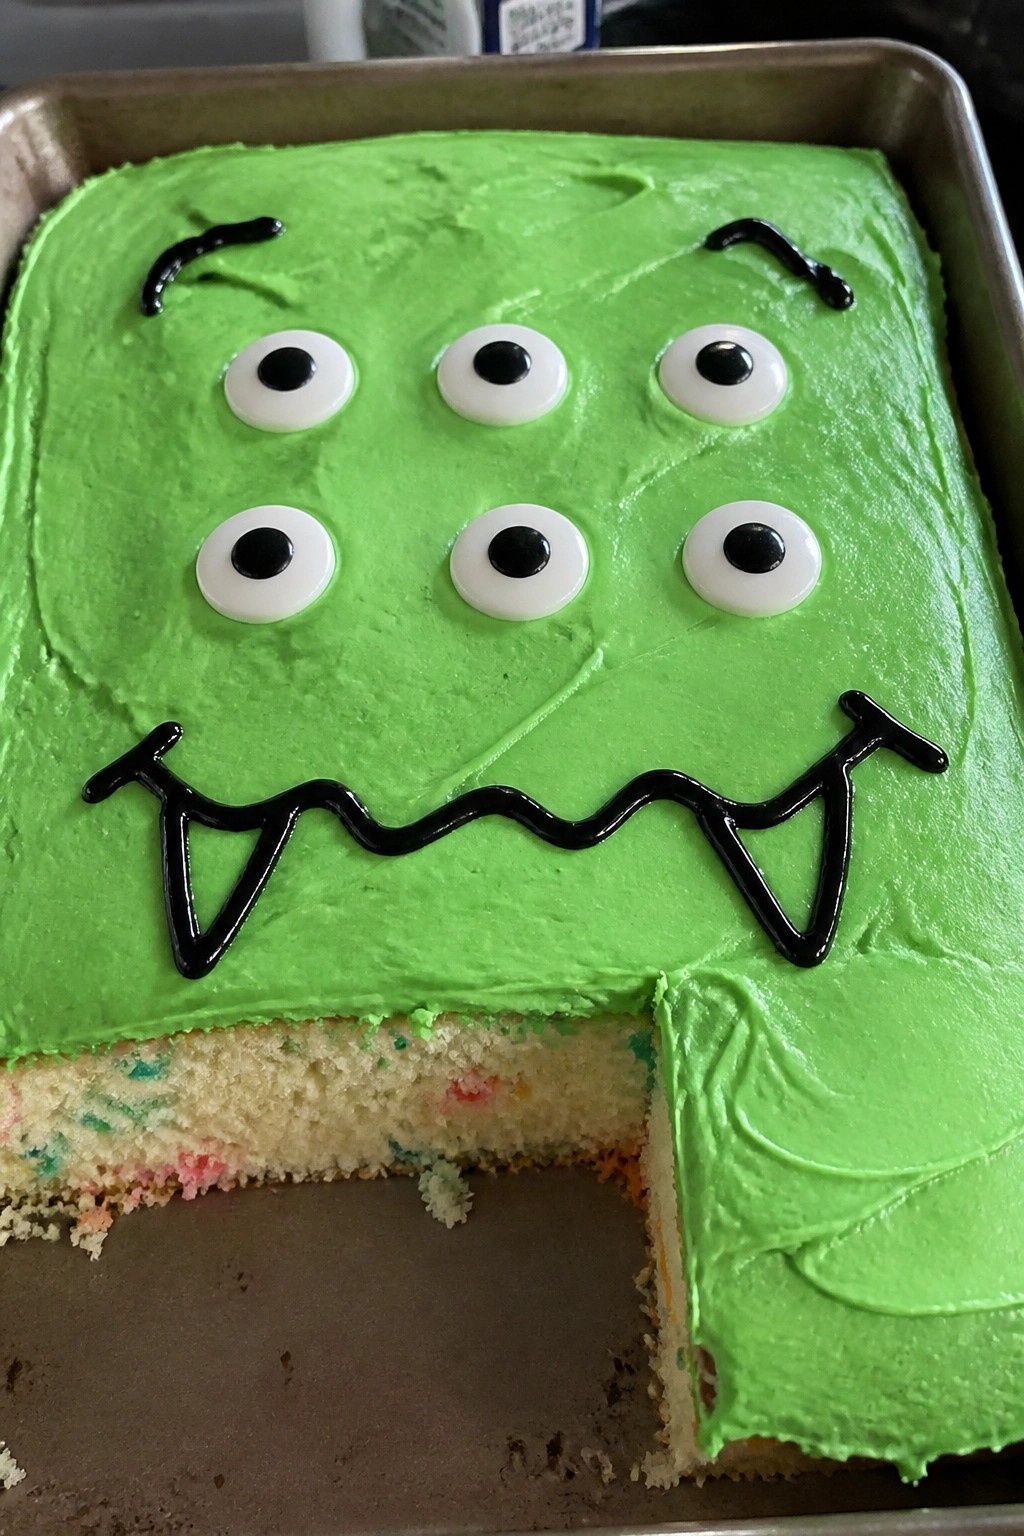
Friendly Monster Funfetti Sheet Cake
This cake brings bright colors and a playful monster face to your Halloween table. Kids love the sweet vanilla flavor with pops of sprinkles in every bite.
It works well for small gatherings or as a fun baking project with children. The soft crumb and creamy frosting make it a hit without being too complicated.
Serves 4 people.
Ingredients
- 1 1/4 cups all-purpose flour
- 3/4 cup granulated sugar
- 1 1/2 teaspoons baking powder
- 1/4 teaspoon salt
- 1/4 cup unsalted butter, softened
- 1 large egg
- 1/2 cup milk
- 1 teaspoon vanilla extract
- 2 tablespoons rainbow sprinkles
- 1 cup vanilla frosting
- Green food coloring
- 6 candy eyeballs
- Black decorating gel
Instructions
- Preheat the oven to 350°F and grease an 8×8 inch baking pan.
- In a mixing bowl, stir together the flour, sugar, baking powder, and salt.
- Add the softened butter, egg, milk, and vanilla extract to the dry ingredients. Beat until smooth.
- Gently fold in the rainbow sprinkles until evenly distributed.
- Pour the batter into the prepared pan and smooth the top.
- Bake for 25 to 30 minutes, or until a toothpick inserted in the center comes out clean.
- Let the cake cool completely in the pan.
- In a small bowl, tint the vanilla frosting with green food coloring until it reaches a bright shade.
- Spread the green frosting evenly over the cooled cake.
- Press the candy eyeballs into the frosting and use the black decorating gel to draw a friendly mouth.
Extra Tips
Tint the frosting right before spreading so the green stays vivid. Add the candy eyeballs while the frosting is still soft for a secure hold. Leftovers keep well covered at room temperature for two days. Course: Dessert Cuisine: American Equipment: Mixing Bowl, 8×8 Baking Pan, Electric Mixer
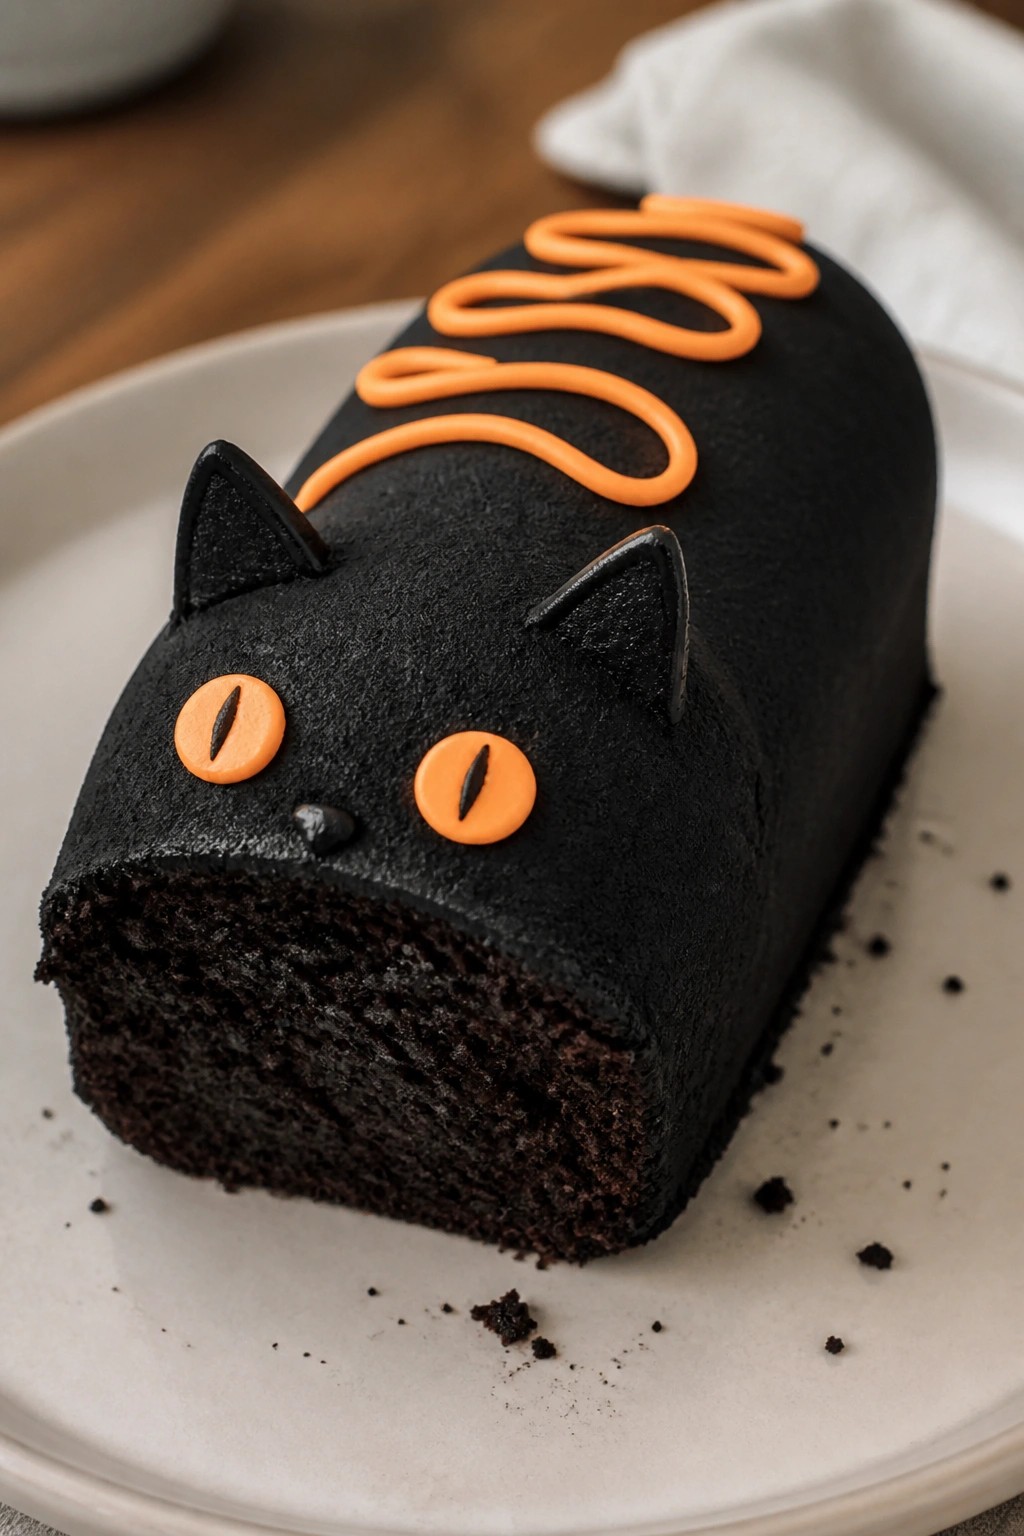
Black Cat Black Cocoa Cake with Orange Accents
This cake uses black cocoa powder to create a dark, rich base that looks like a sleek black cat on the plate. The orange accents add a bright pop that appeals to kids and fits right into Halloween gatherings. It stays moist with a deep chocolate taste that is not too sweet.
It works well for small family parties or school events where you want something cute but simple to put together. The orange details can be kept minimal with a few swirls or eyes.
Serves 4 people.
Ingredients
- ¾ cup all-purpose flour
- ½ cup black cocoa powder
- ¾ cup granulated sugar
- ½ teaspoon baking soda
- ¼ teaspoon salt
- ½ cup buttermilk
- ¼ cup vegetable oil
- 1 large egg
- 1 teaspoon vanilla extract
- 2 tablespoons butter, softened
- ½ cup powdered sugar
- Orange food coloring
Instructions
- Preheat the oven to 350°F and line a small 8-inch round cake pan with parchment paper.
- In a mixing bowl, whisk together the flour, black cocoa powder, granulated sugar, baking soda, and salt.
- In a second bowl, beat the buttermilk, vegetable oil, egg, and vanilla extract until smooth.
- Pour the wet mixture into the dry ingredients and stir until just combined with no large lumps.
- Transfer the batter to the prepared pan and bake for 25 to 28 minutes, or until a toothpick inserted in the center comes out clean.
- Let the cake cool completely in the pan before removing it.
- In a clean bowl, beat the softened butter with the powdered sugar until creamy.
- Add a few drops of orange food coloring to the frosting and mix until the color is even.
- Spread or pipe the orange frosting on top of the cooled cake to create simple accents such as eyes or a collar.
Extra Tips
Use a small piping bag for the orange frosting so the accents stay neat against the dark cake surface. If you want a stronger chocolate note, add an extra tablespoon of black cocoa to the dry mix before baking. Store any leftovers in an airtight container at room temperature for up to two days. Course: Dessert Cuisine: American Equipment: Mixing Bowls, Cake Pan, Whisk, Oven
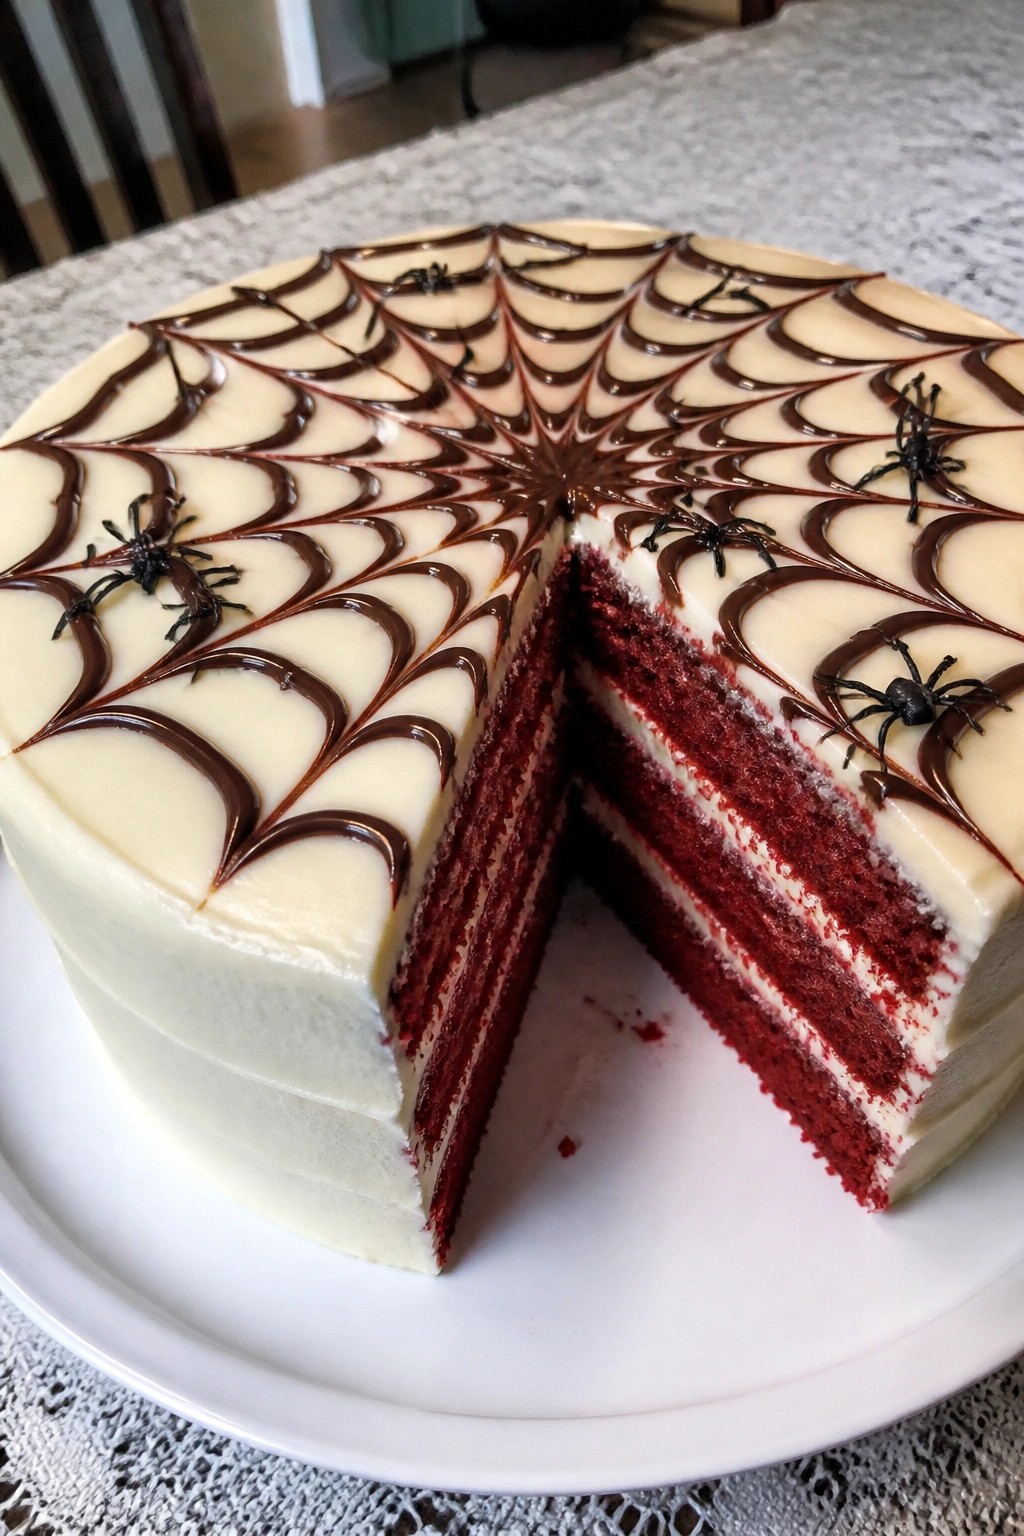
Spiderweb Red Velvet Layer Cake
This red velvet layer cake brings a fun Halloween twist with a piped spiderweb on top. It works well for kid parties or small family gatherings where you want something festive without too much fuss. The cake has a mild cocoa flavor and soft crumb, balanced by tangy cream cheese frosting.
The spiderweb adds a simple visual detail that kids enjoy spotting on their slice.
Serves 4 people.
Ingredients
- 1 1/4 cups all-purpose flour
- 1/4 cup unsweetened cocoa powder
- 1 cup granulated sugar
- 1/2 cup buttermilk
- 1/4 cup unsalted butter, softened
- 1 large egg
- 1 tablespoon red food coloring
- 1/2 teaspoon baking soda
- 1 teaspoon white vinegar
- 1 teaspoon vanilla extract
- 8 ounces cream cheese, softened
- 1/4 cup unsalted butter, softened
- 2 cups powdered sugar
- 1/4 cup dark chocolate chips, melted
- Edible spiders for decoration
Instructions
- Preheat the oven to 350 degrees. Grease two 6-inch round cake pans and line the bottoms with parchment.
- In a bowl, whisk together the flour, cocoa powder, and baking soda.
- In another bowl, beat the softened butter and granulated sugar until light. Add the egg, red food coloring, and vanilla extract, then mix well.
- Alternate adding the dry ingredients and buttermilk to the wet mixture, stirring until just combined.
- Stir in the white vinegar last. Divide the batter evenly between the pans and bake for 22 to 25 minutes, until a toothpick comes out clean.
- Cool the cakes in the pans for 10 minutes, then remove to a rack to cool completely.
- For the frosting, beat the cream cheese and softened butter until smooth. Gradually mix in the powdered sugar until creamy.
- Place one cake layer on a plate and spread a thin layer of frosting on top. Add the second layer and frost the top and sides.
- Pipe the melted dark chocolate in a spiral on the frosted top, then drag a toothpick outward to form the web pattern.
- Add edible spiders as decoration before serving.
Extra Tips
Make the cakes a day ahead and store them wrapped in the fridge so they stay moist for easy frosting. If the melted chocolate thickens while piping, warm it briefly in the microwave for a few seconds. Skip the edible spiders if serving very young kids and use a simple chocolate web instead. Course: Dessert Cuisine: American Equipment: Mixing Bowls, Cake Pans, Electric Mixer, Piping Bag
Mummy Wrapped White Chocolate Sheet Cake
This white chocolate sheet cake gets a fun Halloween makeover with simple frosting bandages and candy eyes. It works well for small family gatherings or classroom parties where you want something festive without too much fuss. The cake stays soft and moist with a mild sweet flavor that kids tend to like.
The white buttercream adds a creamy layer that helps the piped strips stand out as mummy wraps. You only need basic pantry items plus a few decorating extras to pull it together.
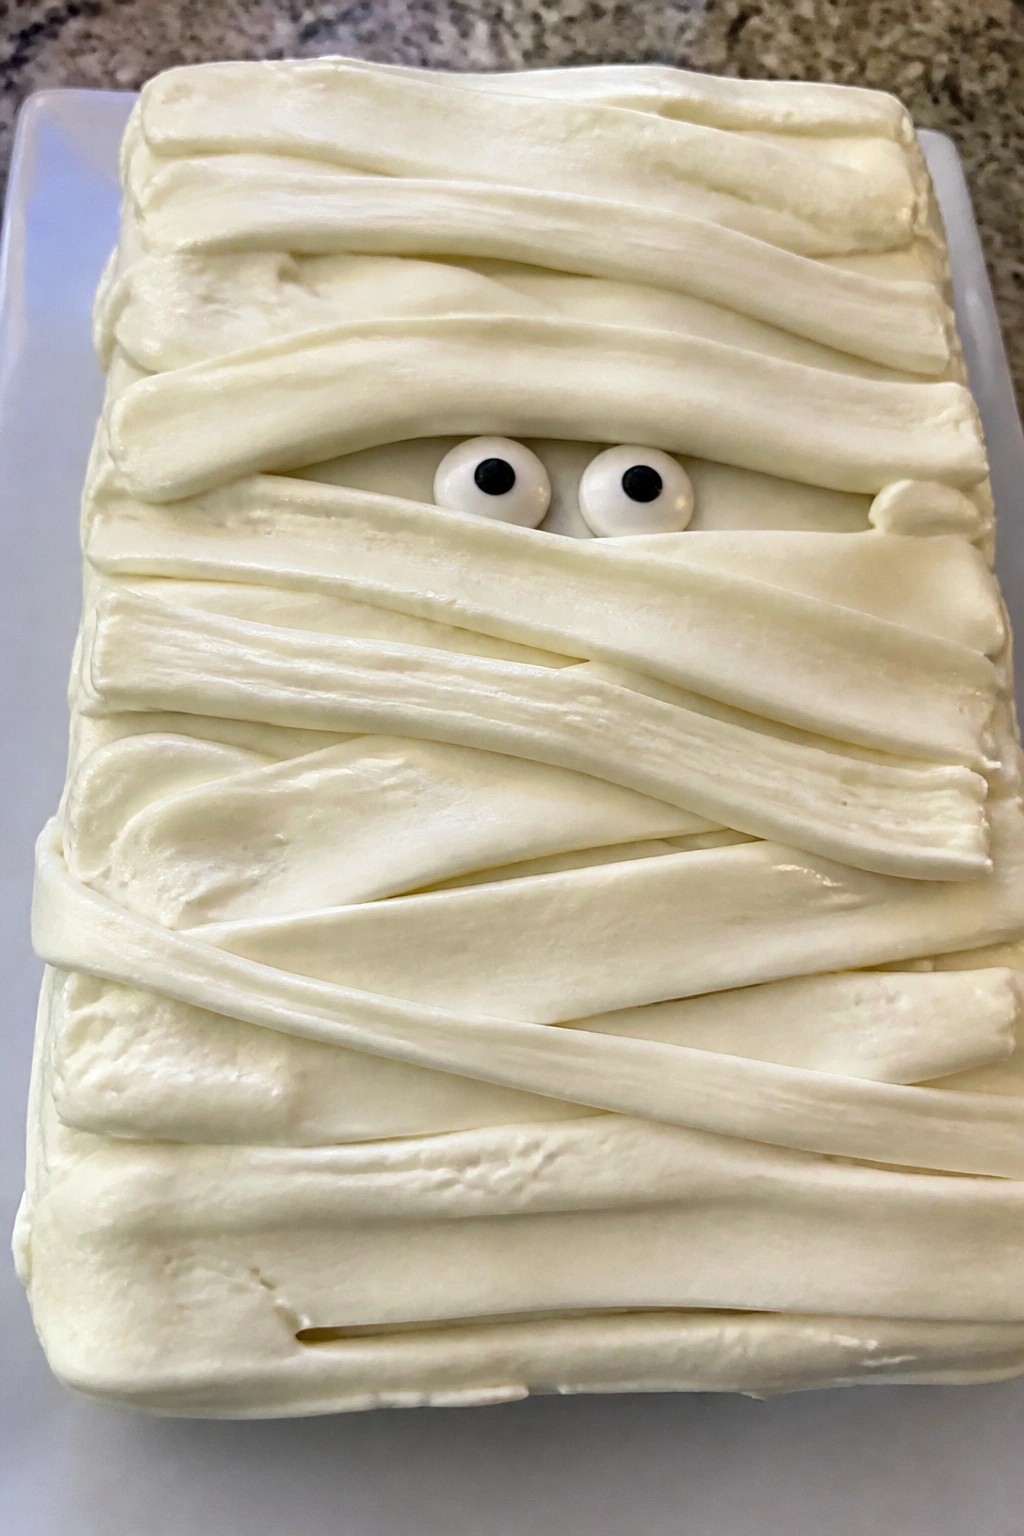
Serves 4 people.
Ingredients
- ¾ cup all-purpose flour
- ½ cup granulated sugar
- 2 ounces white chocolate, chopped
- ¼ cup unsalted butter
- 1 large egg
- ½ teaspoon baking powder
- ¼ cup milk
- 1 cup white buttercream frosting
- 2 candy eyeballs
Instructions
- Preheat the oven to 350°F and line a small 8×8 baking pan with parchment paper.
- Melt the white chocolate and butter together in a microwave-safe bowl, stirring until smooth. Let the mixture cool slightly.
- In a mixing bowl, whisk the flour, sugar, and baking powder. Add the egg and milk, then stir in the cooled white chocolate mixture until the batter is just combined.
- Pour the batter into the prepared pan and bake for 18 to 20 minutes, or until a toothpick comes out clean. Let the cake cool completely in the pan.
- Spread half the white buttercream frosting evenly over the cooled cake.
- Spoon the remaining frosting into a piping bag or zip-top bag with a small corner cut off. Pipe overlapping strips across the cake to create the mummy wrap look.
- Press the two candy eyeballs into the frosting near the top of the cake.
Extra Tips
Let the cake cool fully before frosting so the buttercream does not melt or slide. If the white chocolate seizes during melting, add a teaspoon of milk to loosen it. Store leftovers in an airtight container at room temperature for up to two days. Course: Dessert Cuisine: American Equipment: Baking Pan, Mixing Bowl, Microwave-Safe Bowl
Frankenstein Green Velvet Cake with Bolt Details
This green velvet cake brings a fun twist to classic velvet texture with its bright color and mild cocoa flavor. Kids enjoy the soft crumb and cream cheese frosting, while the bolt accents give it a playful Frankenstein look. It works well for small Halloween gatherings or as a hands-on dessert project with children.
The cake bakes up moist thanks to buttermilk and a quick vinegar reaction. Frosting covers the sides for a clean base, and simple chocolate bolts add the signature detail without extra tools.
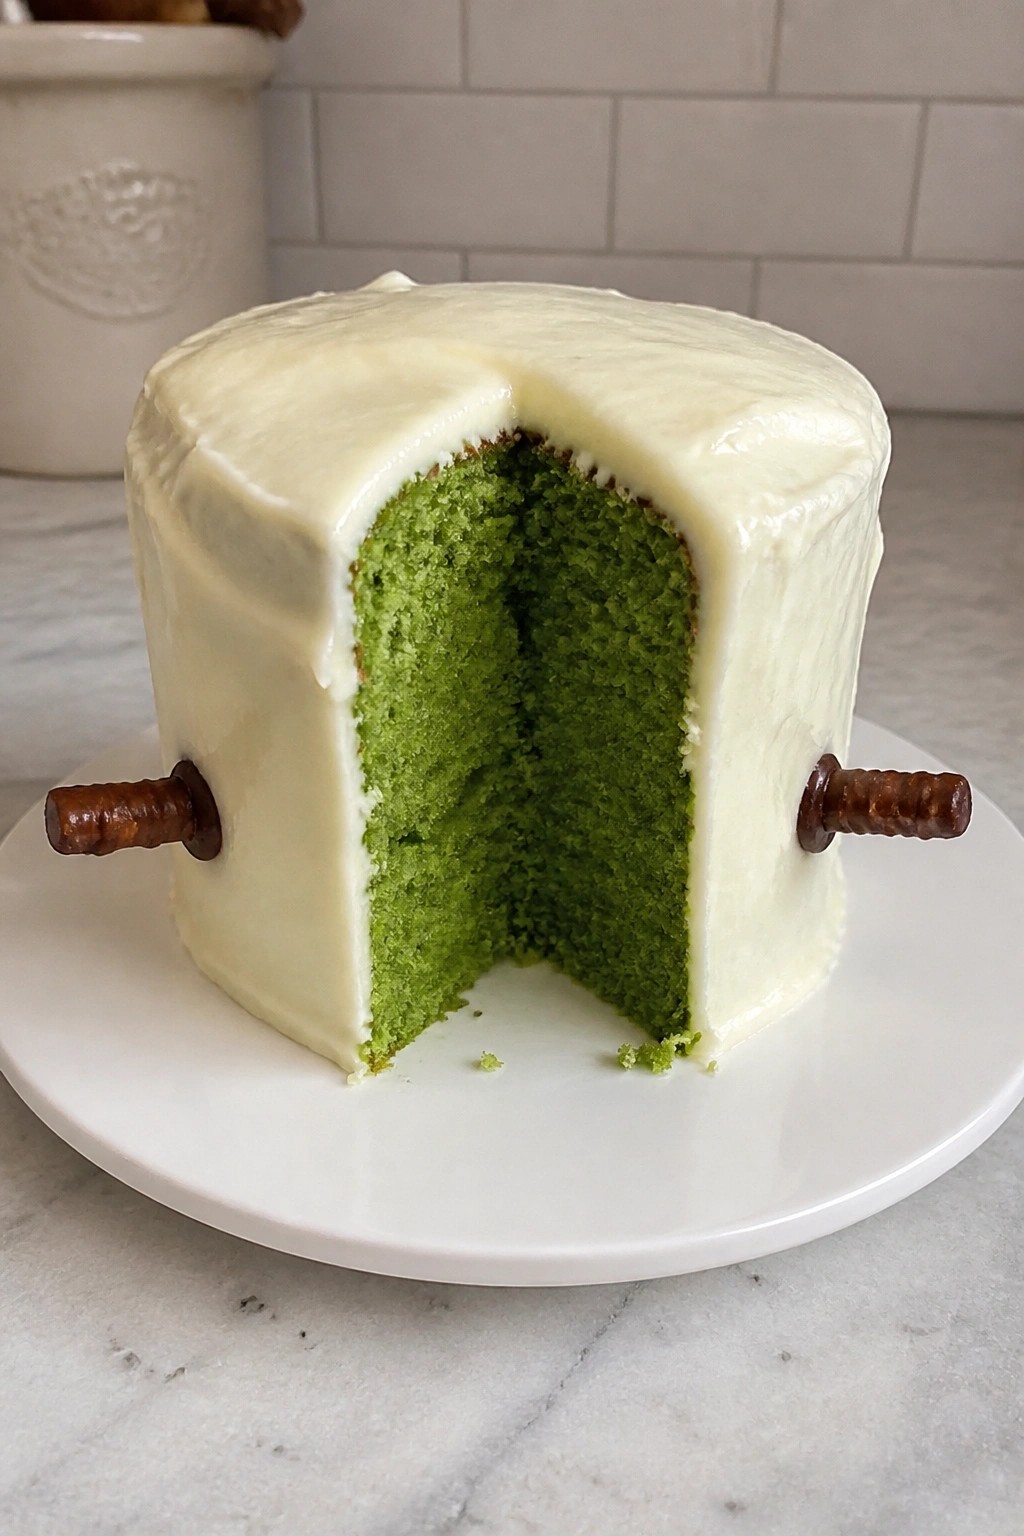
Serves 4 people.
Ingredients
- 1 cup all-purpose flour
- 3/4 cup granulated sugar
- 1/4 cup unsalted butter, softened
- 1 large egg
- 1/2 cup buttermilk
- 1 tablespoon unsweetened cocoa powder
- 1 teaspoon green food coloring
- 1/2 teaspoon baking soda
- 1 teaspoon white vinegar
- 4 ounces cream cheese, softened
- 1 cup powdered sugar
- 1/4 cup semisweet chocolate chips
- 2 pretzel sticks
Instructions
- Preheat the oven to 350 degrees F and grease a 6-inch round cake pan. Line the bottom with parchment paper.
- In a medium bowl, whisk together the flour and cocoa powder. Set aside.
- In a separate bowl, beat the butter and granulated sugar until light. Add the egg and mix until combined.
- Stir the green food coloring into the buttermilk. Alternate adding the flour mixture and the buttermilk to the butter mixture, starting and ending with flour.
- In a small cup, mix the baking soda and vinegar until it foams. Quickly fold this into the batter.
- Pour the batter into the prepared pan and bake for 25 to 28 minutes, until a toothpick comes out clean. Cool the cake in the pan for 10 minutes, then turn it out onto a wire rack to cool completely.
- Beat the cream cheese and powdered sugar until smooth. Spread the frosting evenly over the top and sides of the cooled cake.
- Melt the chocolate chips in the microwave in 20-second bursts. Dip the ends of each pretzel stick into the melted chocolate to form bolts. Press the bolts into the sides of the cake near the base.
Extra Tips
Melt only enough chocolate to coat the pretzel ends so the bolts stay sturdy. If the frosting feels too thick, add a teaspoon of buttermilk to loosen it. Store leftovers in an airtight container in the refrigerator for up to two days. Bring slices to room temperature before serving so the frosting softens. Course: Dessert Cuisine: American Equipment: Mixing Bowls, 6-inch Cake Pan, Electric Mixer, Oven
Bat-Shaped Chocolate Cake with Purple Buttercream
This chocolate cake works well for a small Halloween gathering with kids. The bat shape adds a fun touch without much fuss, and the purple buttercream gives it a bright, playful look. The cake itself stays moist from the oil and hot water, while the frosting adds a light sweetness on top.
The flavor stays straightforward with cocoa and vanilla coming through clearly. Kids enjoy the color contrast and the simple shape that feels special for the holiday.
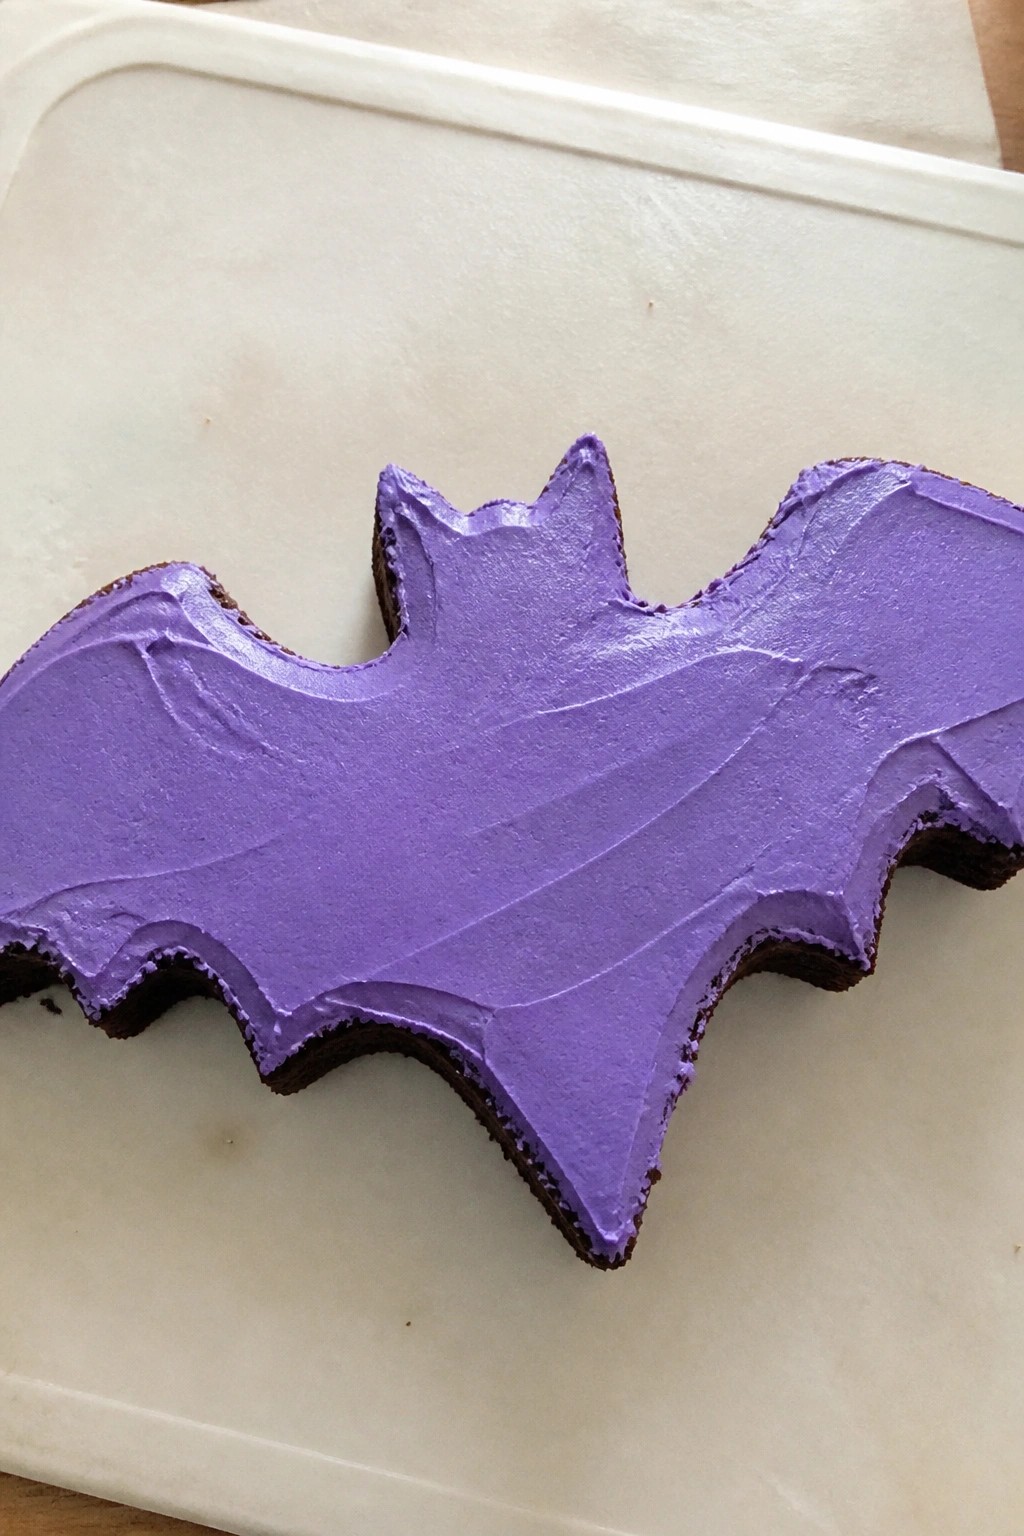
Serves 4 people.
Ingredients
- ¾ cup all-purpose flour
- ½ cup granulated sugar
- ¼ cup unsweetened cocoa powder
- ½ teaspoon baking soda
- ¼ teaspoon salt
- 1 large egg
- ⅓ cup milk
- ¼ cup vegetable oil
- ½ teaspoon vanilla extract
- ⅓ cup boiling water
- ½ cup unsalted butter, softened
- 2 cups powdered sugar
- 2 tablespoons milk
- Purple food coloring
Instructions
- Preheat the oven to 350°F and grease an 8×8 inch cake pan. Line the bottom with parchment paper.
- In a mixing bowl, whisk together the flour, granulated sugar, cocoa powder, baking soda, and salt.
- Add the egg, ⅓ cup milk, vegetable oil, and vanilla extract to the dry ingredients. Stir until smooth.
- Pour in the boiling water and mix until the batter thins out evenly.
- Pour the batter into the prepared pan and bake for 25 to 28 minutes, or until a toothpick comes out clean. Let the cake cool completely in the pan.
- While the cake cools, beat the butter in a bowl until creamy. Gradually add the powdered sugar and 2 tablespoons milk, then mix in purple food coloring until the color looks even.
- Turn the cooled cake out onto a board. Use a knife to cut a simple bat shape from the square cake.
- Spread the purple buttercream over the entire bat-shaped cake, covering the top and sides.
Extra Tips
Cut the bat shape slowly so the wings stay even on both sides. If the buttercream feels too thick, add a teaspoon more milk at a time until it spreads easily. Store leftovers in an airtight container at room temperature for one day or in the fridge for up to three days. Course: Dessert Cuisine: American Equipment: Mixing Bowl, Cake Pan, Oven, Electric Mixer
Candy Corn Swirl Rainbow Layer Cake
This cake stacks thin rainbow layers in bright colors that appeal to kids at Halloween parties. The vanilla cake stays moist and light while a simple frosting gets swirled with candy corn shades on top and finished with whole candy corn pieces.
It works well for small gatherings or as a festive dessert after trick-or-treating.
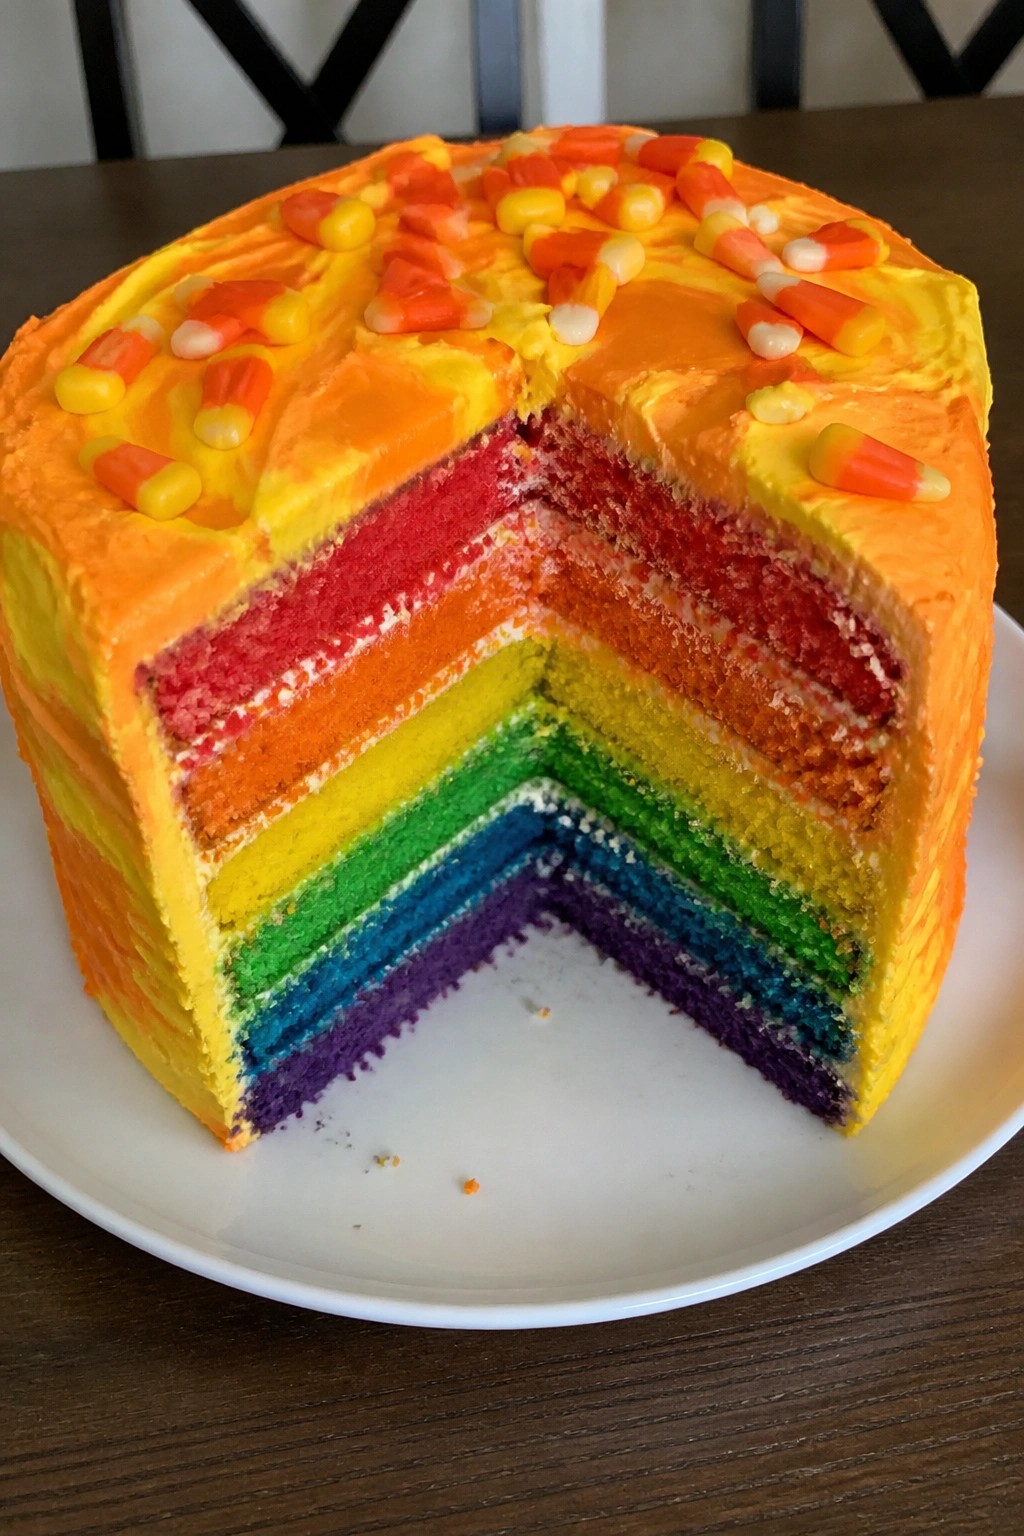
Serves 4 people.
Ingredients
- 1 1/2 cups all-purpose flour
- 3/4 cup granulated sugar
- 1/2 cup unsalted butter, softened
- 2 large eggs
- 1/2 cup whole milk
- 2 teaspoons baking powder
- 1 teaspoon vanilla extract
- Gel food coloring (red, orange, yellow, green, blue, purple)
- 1 1/2 cups powdered sugar
- 1/4 cup unsalted butter, softened
- 2 tablespoons whole milk
- 1/2 cup candy corn
Instructions
- Preheat the oven to 350 degrees F and grease three 6-inch round cake pans.
- In a large bowl, beat the softened butter and granulated sugar until light. Add the eggs one at a time, then mix in the vanilla extract.
- Stir together the flour and baking powder in a separate bowl. Add half the dry mixture to the butter mixture, then pour in half the milk. Repeat with the remaining dry mixture and milk until just combined.
- Divide the batter into six small bowls. Tint each bowl a different color using the gel food coloring to create red, orange, yellow, green, blue, and purple layers.
- Spread a thin layer of each colored batter into the prepared pans, using two colors per pan so the baked layers show stripes. Bake for 12 to 14 minutes until a toothpick comes out clean. Cool the layers completely.
- Beat the powdered sugar with the remaining softened butter and milk until smooth. Divide the frosting into three portions and tint two of them orange and yellow.
- Place one cooled cake layer on a plate and spread plain white frosting on top. Repeat with the second and third layers.
- Use a spatula to swirl the orange and yellow frostings over the top and sides of the cake. Scatter the candy corn across the top.
Extra Tips
Let the cake sit at room temperature for 30 minutes before slicing so the frosting softens and the layers cut cleanly. If you want less sweetness, reduce the powdered sugar by 1/4 cup and add a pinch of salt to the frosting. Store leftovers in an airtight container in the fridge for up to two days and bring slices back to room temperature before serving. Course: Dessert Cuisine: American Equipment: Mixing Bowls, Electric Mixer, Cake Pans, Oven, Spatula
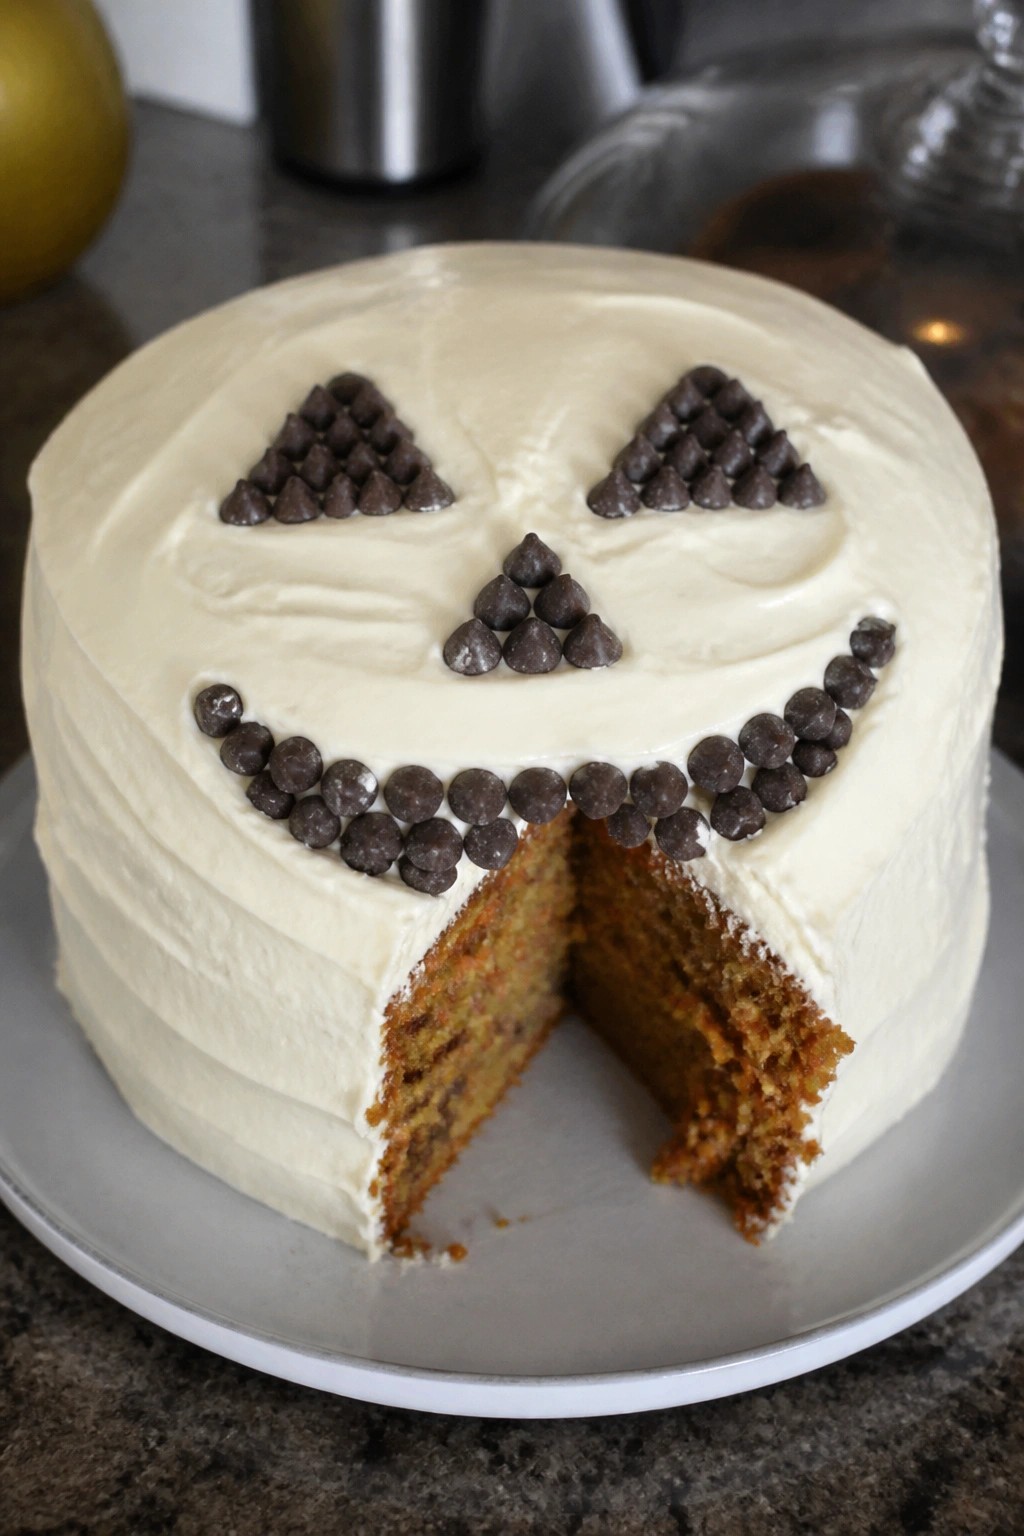
Jack-o’-Lantern Carrot Cake with Cream Cheese Frosting
This carrot cake turns a classic fall flavor into a playful Halloween treat. The natural orange color from the carrots makes it easy to shape into a jack-o’-lantern face that kids will enjoy. It stays moist from the oil and carries warm spice notes that balance the tangy frosting.
The recipe works well for small gatherings or after-school baking. Each slice delivers soft crumb, gentle sweetness, and a smooth cream cheese topping that holds simple chocolate chip features without extra fuss.
Serves 4 people.
Ingredients
- 1 1/2 cups grated carrots
- 3/4 cup all-purpose flour
- 1/2 cup granulated sugar
- 1 large egg
- 1/4 cup vegetable oil
- 1/2 teaspoon baking powder
- 1/2 teaspoon ground cinnamon
- 1/4 teaspoon salt
- 4 ounces cream cheese, softened
- 2 tablespoons unsalted butter, softened
- 1 cup powdered sugar
- 1/2 teaspoon vanilla extract
- 2 tablespoons chocolate chips
Instructions
- Preheat the oven to 350°F and line a 6-inch round cake pan with parchment paper.
- In a medium bowl, whisk together the flour, baking powder, cinnamon, and salt.
- In a separate bowl, beat the egg, granulated sugar, and oil until smooth. Stir in the grated carrots.
- Add the dry ingredients to the wet mixture and stir just until combined. Pour the batter into the prepared pan.
- Bake for 25 to 28 minutes, until a toothpick inserted in the center comes out clean. Cool the cake completely in the pan.
- While the cake cools, beat the cream cheese and butter until creamy. Gradually mix in the powdered sugar and vanilla until the frosting is smooth.
- Spread the frosting evenly over the cooled cake. Use the chocolate chips to create simple jack-o’-lantern eyes, nose, and mouth.
Extra Tips
Grate the carrots finely so they blend evenly into the small cake. If the frosting feels too soft after mixing, chill it for 10 minutes before spreading. Leftovers keep covered in the refrigerator for two days and taste best at room temperature. Course: Dessert Cuisine: American Equipment: Mixing bowls, 6-inch cake pan, Electric mixer, Oven
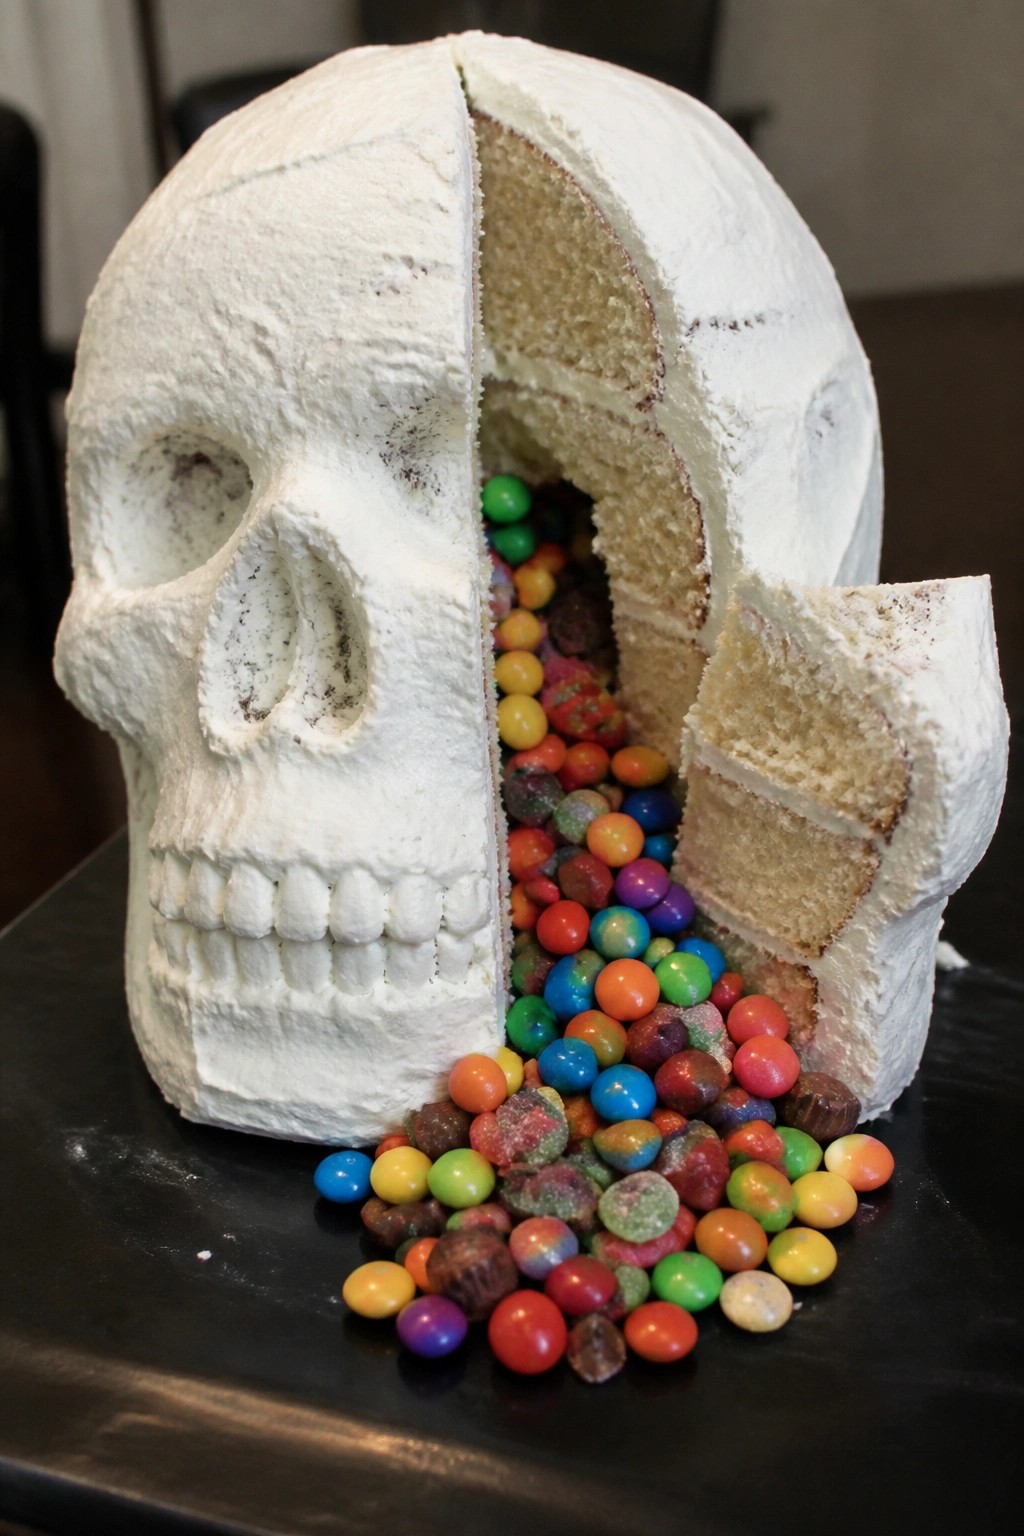
Skull Piñata Surprise Cake with Candy Filling
This cake hides a fun surprise inside a skull-shaped treat. Kids enjoy watching the candy spill out when the cake is sliced at a Halloween party. The vanilla layers stay soft while the filling adds a crunchy sweet contrast under simple white frosting.
It works well for small gatherings or classroom events where you want a hands-on dessert without too much fuss.
Serves 4 people.
Ingredients
- 1 1/2 cups all-purpose flour
- 3/4 cup granulated sugar
- 1/2 cup unsalted butter, softened
- 2 large eggs
- 3/4 cup milk
- 2 teaspoons baking powder
- 1 teaspoon vanilla extract
- 1/2 teaspoon salt
- 1 cup assorted small candies
- 2 cups powdered sugar
- 2 tablespoons milk
- Black food coloring
Instructions
- Preheat the oven to 350°F and grease two 6-inch round cake pans.
- In a large bowl, beat the softened butter and granulated sugar until light. Add the eggs one at a time, then mix in the vanilla.
- In a separate bowl, whisk together the flour, baking powder, and salt. Alternate adding the dry mixture and the 3/4 cup milk to the butter mixture until just combined.
- Divide the batter between the pans and bake for 22-25 minutes until a toothpick comes out clean. Cool the cakes completely.
- Place one cake layer on a plate. Use a small round cutter to remove a center section, leaving a border. Fill the hollow with the assorted candies.
- Set the second cake layer on top and press gently to seal the filling inside.
- Beat the powdered sugar with 2 tablespoons milk until smooth. Tint a small portion black with food coloring. Spread the white frosting over the entire cake and pipe simple skull features with the black frosting.
Extra Tips
Cut the cake slowly at the table so the candy spills out in front of the kids. If your candies include chocolate pieces, chill the filled cake for 20 minutes before frosting to keep the center firm. Leftovers store in an airtight container at room temperature for one day. Course: Dessert Cuisine: American Equipment: Mixing bowls, Electric mixer, Two 6-inch cake pans, Oven
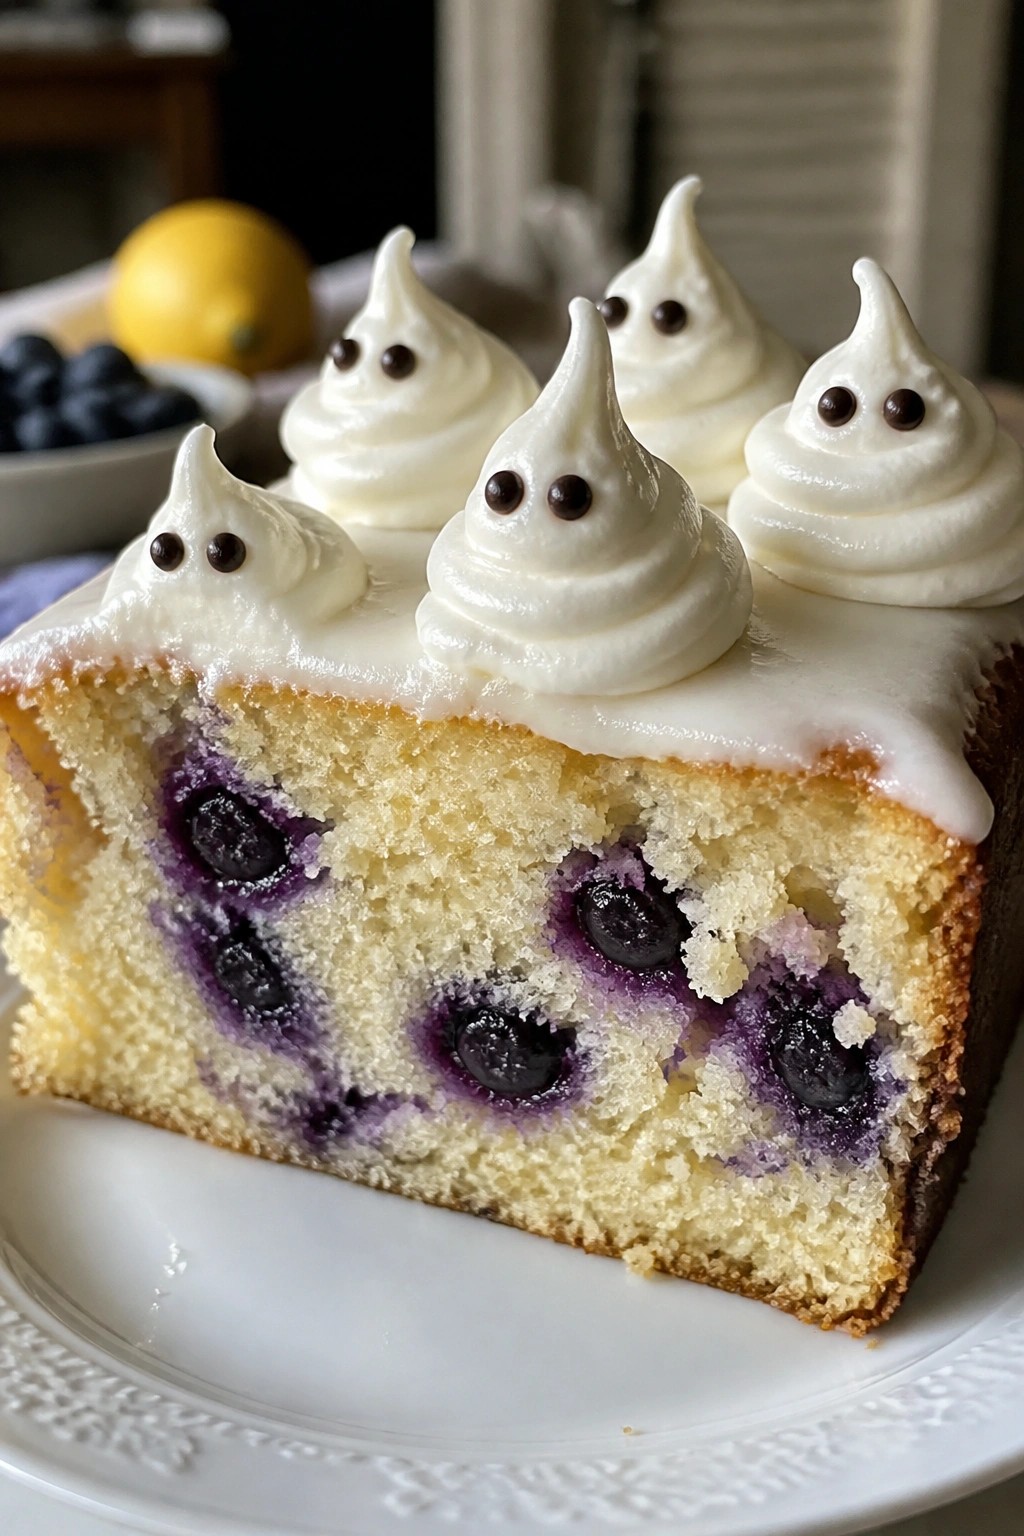
Boo Berry Lemon Cake with Ghost Toppers
This lemon blueberry cake brings a bright, tangy flavor that balances the sweetness of the berry swirl inside. The ghost toppers add a playful Halloween touch that kids enjoy spotting on their slices. It works well for an afternoon treat or a small party dessert without needing fancy decorating skills.
The cake stays moist from the blueberries while the meringue ghosts give a light, crisp contrast on top. Kids can help place the chocolate chip eyes once the ghosts are piped.
Serves 4 people.
Ingredients
- 1 cup all-purpose flour
- 1/2 cup granulated sugar
- 1/4 cup unsalted butter, softened
- 1 large egg
- 2 tablespoons lemon juice
- 1 teaspoon lemon zest
- 1/2 cup fresh blueberries
- 1 egg white
- 2 tablespoons granulated sugar (for meringue)
- 8 mini chocolate chips
Instructions
- Preheat the oven to 350°F and line a 6-inch round cake pan with parchment paper.
- In a mixing bowl, cream the butter and 1/2 cup sugar until light. Add the egg, lemon juice, and lemon zest, then mix until smooth.
- Stir in the flour until just combined. Fold the blueberries into the batter gently.
- Pour the batter into the prepared pan and bake for 25 minutes, or until a toothpick comes out clean. Let the cake cool in the pan for 10 minutes before turning it out onto a wire rack.
- While the cake cools, make the ghost toppers. Beat the egg white with 2 tablespoons sugar until stiff peaks form. Spoon the mixture into a piping bag and pipe four small ghost shapes onto a parchment-lined baking sheet. Add two mini chocolate chips to each ghost for eyes.
- Bake the ghosts at 200°F for 45 minutes, then turn off the oven and leave them inside to dry for another 30 minutes. Place the cooled ghosts on top of the cake before serving.
Extra Tips
Pipe the meringue ghosts slightly thicker at the base so they stand upright once baked. If the blueberries are very juicy, toss them in a teaspoon of flour before folding them in to prevent color streaks in the batter. Store any leftover ghosts in an airtight container at room temperature to keep them crisp. Course: Dessert Cuisine: American Equipment: Mixing bowl, Electric mixer, 6-inch cake pan, Piping bag, Baking sheet
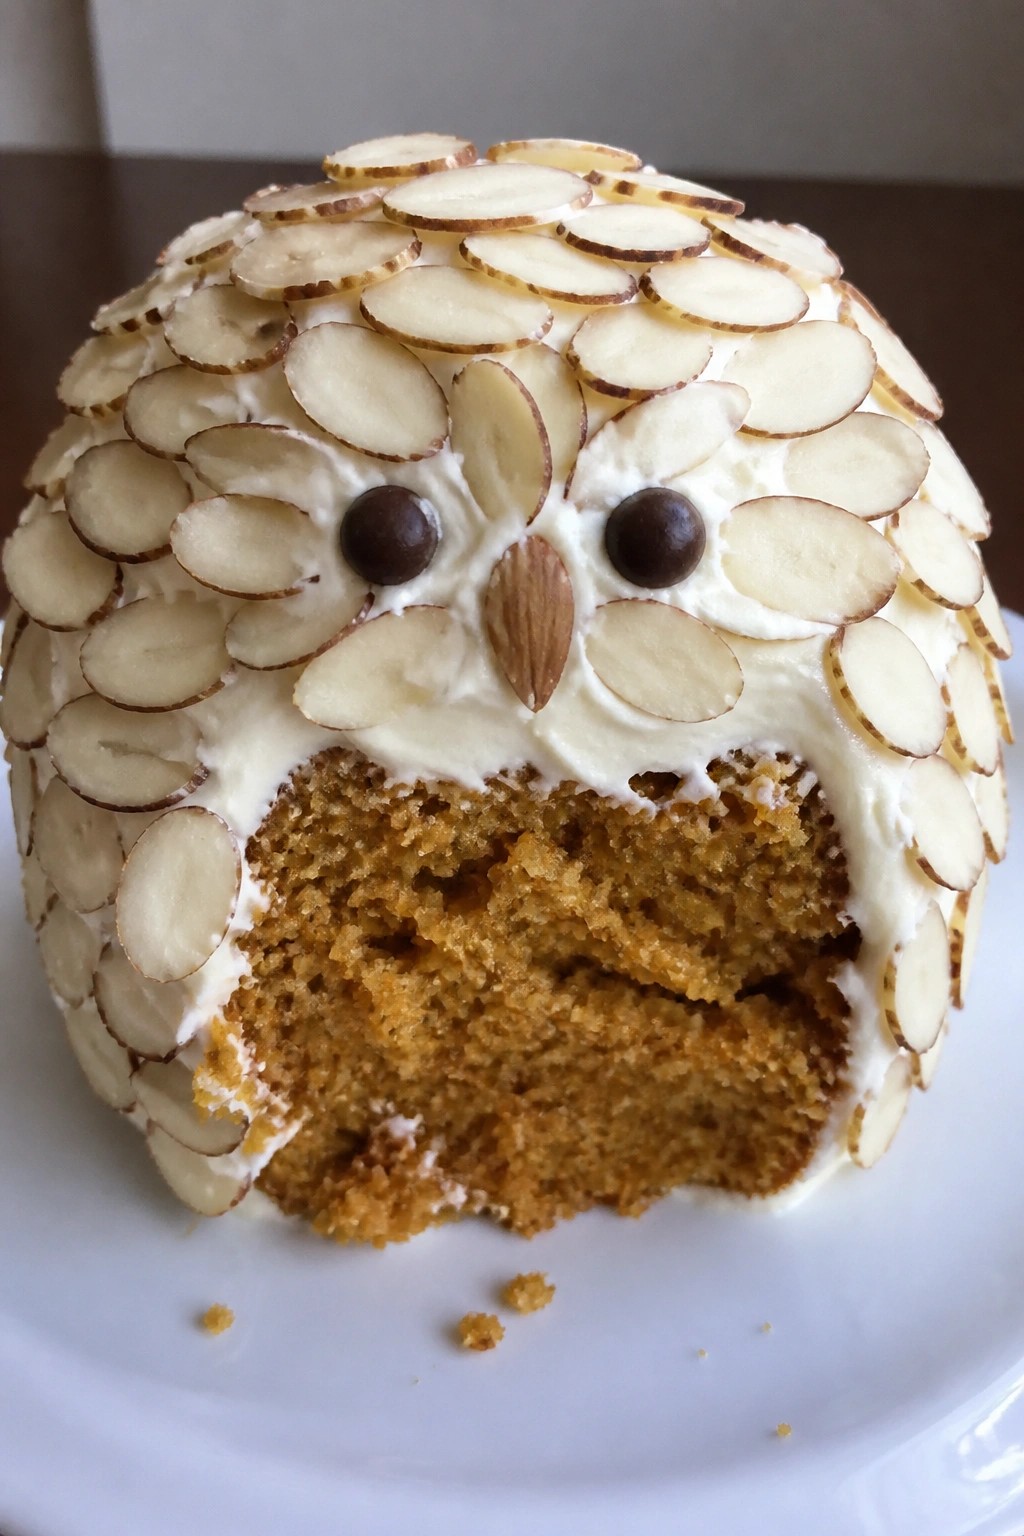
Haunted Owl Pumpkin Cake with Feathered Details
This owl-shaped pumpkin cake gives kids a fun Halloween treat with its feathered look. The design uses simple sliced almonds to create texture around the face and body.
The cake stays moist from the pumpkin and bakes in one small pan. Cream cheese frosting holds the almond feathers in place while chocolate chips form the eyes.
Serves 4 people.
Ingredients
- 1 cup all-purpose flour
- 1/2 cup pumpkin puree
- 1/2 cup granulated sugar
- 1 large egg
- 1/4 cup vegetable oil
- 1 teaspoon baking powder
- 1 teaspoon pumpkin pie spice
- 1 cup cream cheese frosting
- 1/4 cup sliced almonds
- 2 chocolate chips
Instructions
- Preheat the oven to 350 degrees and grease a small round cake pan.
- In a mixing bowl, stir together the flour, sugar, baking powder, and pumpkin pie spice.
- Add the pumpkin puree, egg, and oil to the dry ingredients and mix until smooth.
- Pour the batter into the prepared pan and bake for 25 minutes or until a toothpick comes out clean.
- Let the cake cool completely before removing it from the pan.
- Spread the cream cheese frosting evenly over the top and sides.
- Press the sliced almonds into the frosting in rows to form feather patterns around the sides and top.
- Place the two chocolate chips near the front to make the eyes.
Extra Tips
Press the almonds firmly into the frosting right after spreading so they stay in place. If the frosting feels too soft, chill the cake for 10 minutes before adding the almonds. Store leftovers in an airtight container in the fridge for up to two days. Course: Dessert Cuisine: American Equipment: Mixing Bowl, Cake Pan, Oven