

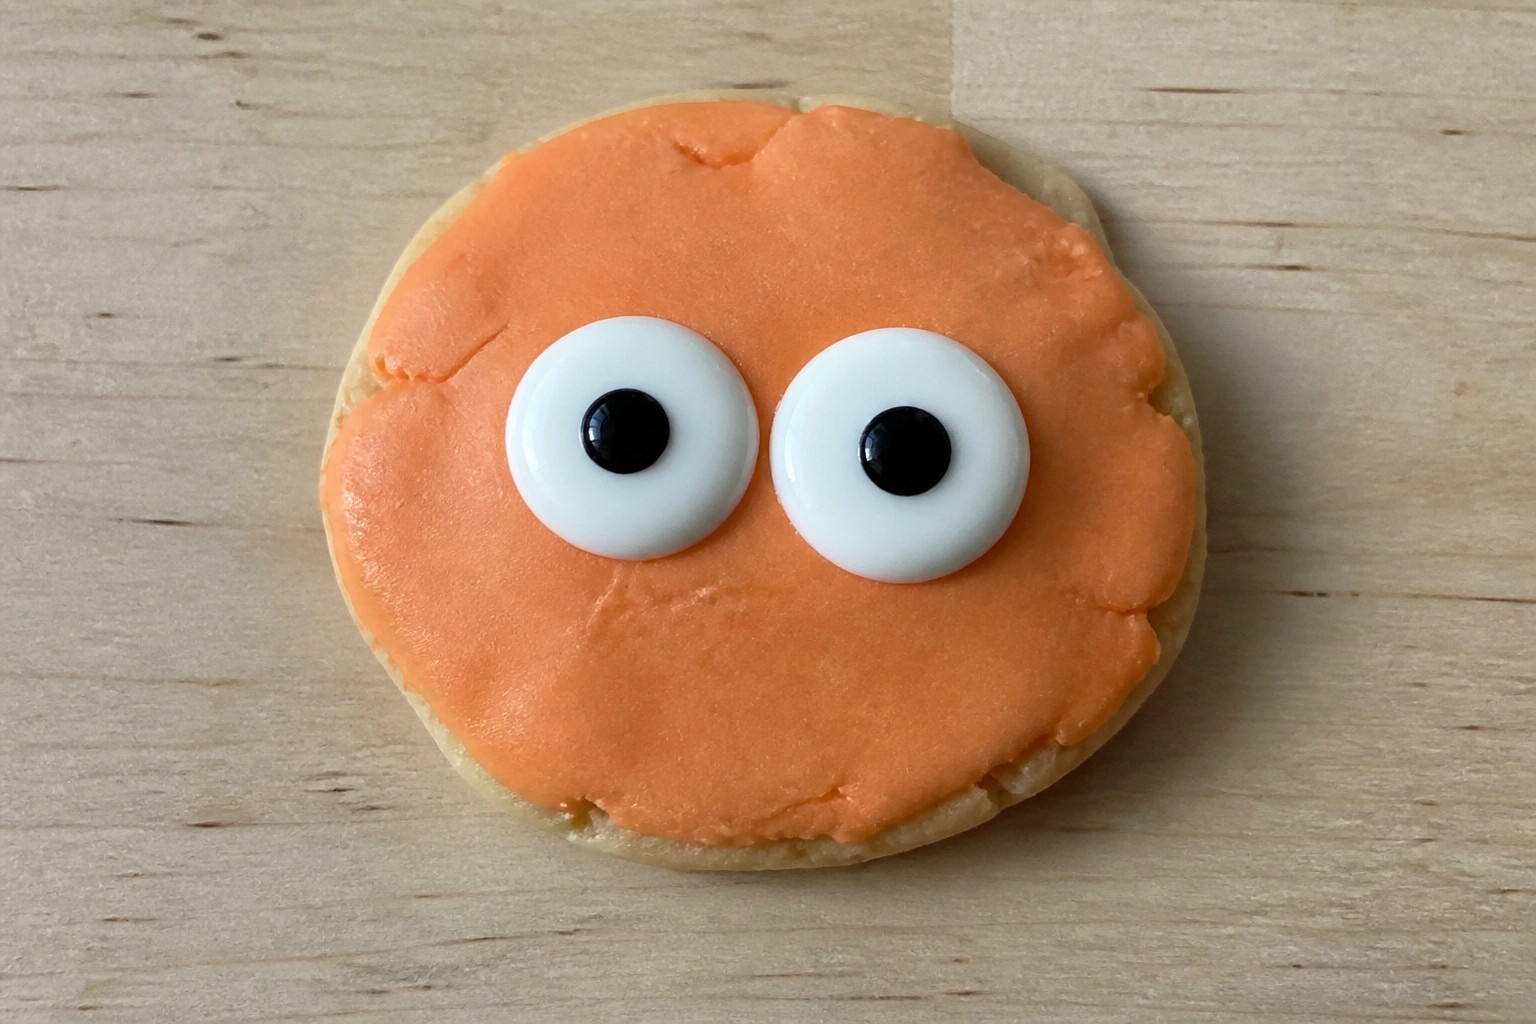
These Halloween cookies make a fun addition to any party spread or bake sale.
Each recipe includes eyes that stare back for a playful touch.
The ideas use ingredients most people keep on hand.
Some come together quickly while others give you room to customize.
Pick the ones that match the time you have this season.
Helpful Tips Before You Start
These tips will help the eyes on your cookies look consistent and stay attached.
Recommended Products

Complete Halloween Cookie Decorating Kit – Includes everything you need: 1 Oreo mold, spooky sprinkle mix, 18 candy eyeballs, 12 candy triangles, 6 candy monster teeth, and piping bags for easy decorating.

Small Halloween Gingerbread Cookie House Kit
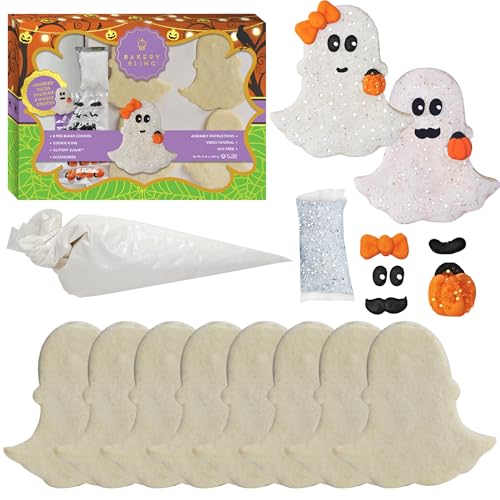
Complete Halloween Cookie Decorating Kit – Everything you need for a fun and festive activity in one box. Includes 8 pre-baked ghost-shaped vanilla sugar cookies, one 4.5 oz pre-filled royal icing decorating bag, 2 oz Diamond Glittery Sugar, and royal icing accessories. A must-have Halloween decorating kit for kids, families, and party hosts.
Pick Candy Eyes in Multiple Sizes
Use a mix of small and large candy eyes on each cookie. This creates more natural variation and makes the stare more noticeable.
Press Eyes Into Wet Icing
Place the eyes while the base icing is still soft. Waiting too long causes them to sit on top instead of settling in.
Angle the Pupils for Direction
Turn all the pupils slightly to one side so the cookies appear to look at the same point. This gives the staring effect without extra work.
Let Cookies Dry Flat
Place finished cookies on a flat surface to dry completely before moving them. Shifting them too soon can tilt the eyes out of position.
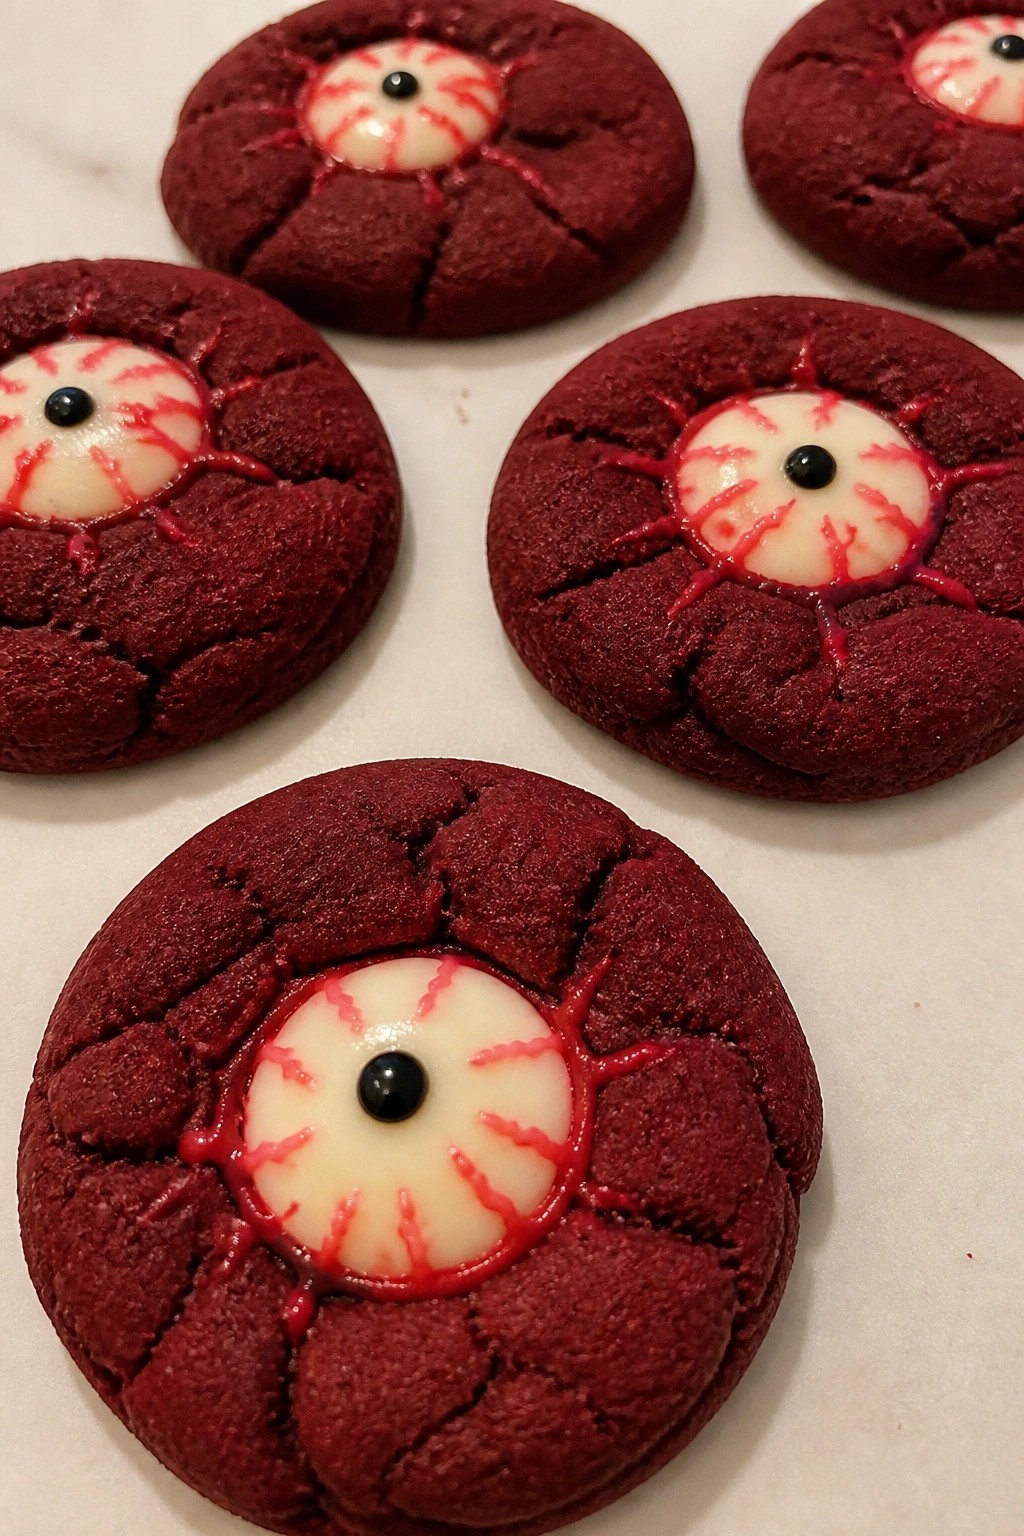
Bloodshot Red Velvet Eyeball Cookies
These red velvet cookies stand out at any Halloween gathering because the deep red color and simple eyeball decorations make them fun to serve. They work well for parties or movie nights when you want a treat that looks themed without much fuss. The cookies have a soft, chewy texture with a mild cocoa flavor that pairs nicely with the sweet white chocolate topping.
Serves 4 people.
Ingredients
- 1 1/4 cups all-purpose flour
- 2 tablespoons unsweetened cocoa powder
- 1/2 teaspoon baking soda
- 1/4 teaspoon salt
- 1/2 cup unsalted butter, softened
- 3/4 cup granulated sugar
- 1 large egg
- 1 tablespoon red food coloring
- 1 teaspoon vanilla extract
- 1/2 cup white chocolate chips
- Red gel icing
- Black gel icing
Instructions
- Preheat the oven to 350 degrees and line a baking sheet with parchment paper.
- In a mixing bowl, whisk together the flour, cocoa powder, baking soda, and salt.
- In a second bowl, beat the butter and sugar until light and fluffy. Add the egg, red food coloring, and vanilla extract, then mix until combined.
- Slowly add the dry ingredients to the wet mixture and stir until a dough forms.
- Scoop the dough into 8 small balls and place them on the baking sheet. Flatten each ball slightly with your hand.
- Bake for 10 to 12 minutes until the edges are set. Let the cookies cool on the sheet for 5 minutes before moving them to a wire rack.
- Melt the white chocolate chips in a microwave-safe bowl in 20-second bursts, stirring between each until smooth.
- Spoon a small circle of melted white chocolate onto each cooled cookie to form the eyeball base. Let it set for a few minutes.
- Use the red gel icing to draw thin lines across the white chocolate for a bloodshot effect. Add a small dot of black gel icing in the center for the pupil.
Extra Tips
Melt the white chocolate in short bursts to avoid overheating it. If the red gel icing feels too thick to draw fine lines, warm the tube briefly in your hands. Store the finished cookies in an airtight container at room temperature for up to three days to keep the icing from softening. Course: Dessert Cuisine: American Equipment: Mixing Bowl, Baking Sheet, Oven, Wire Rack
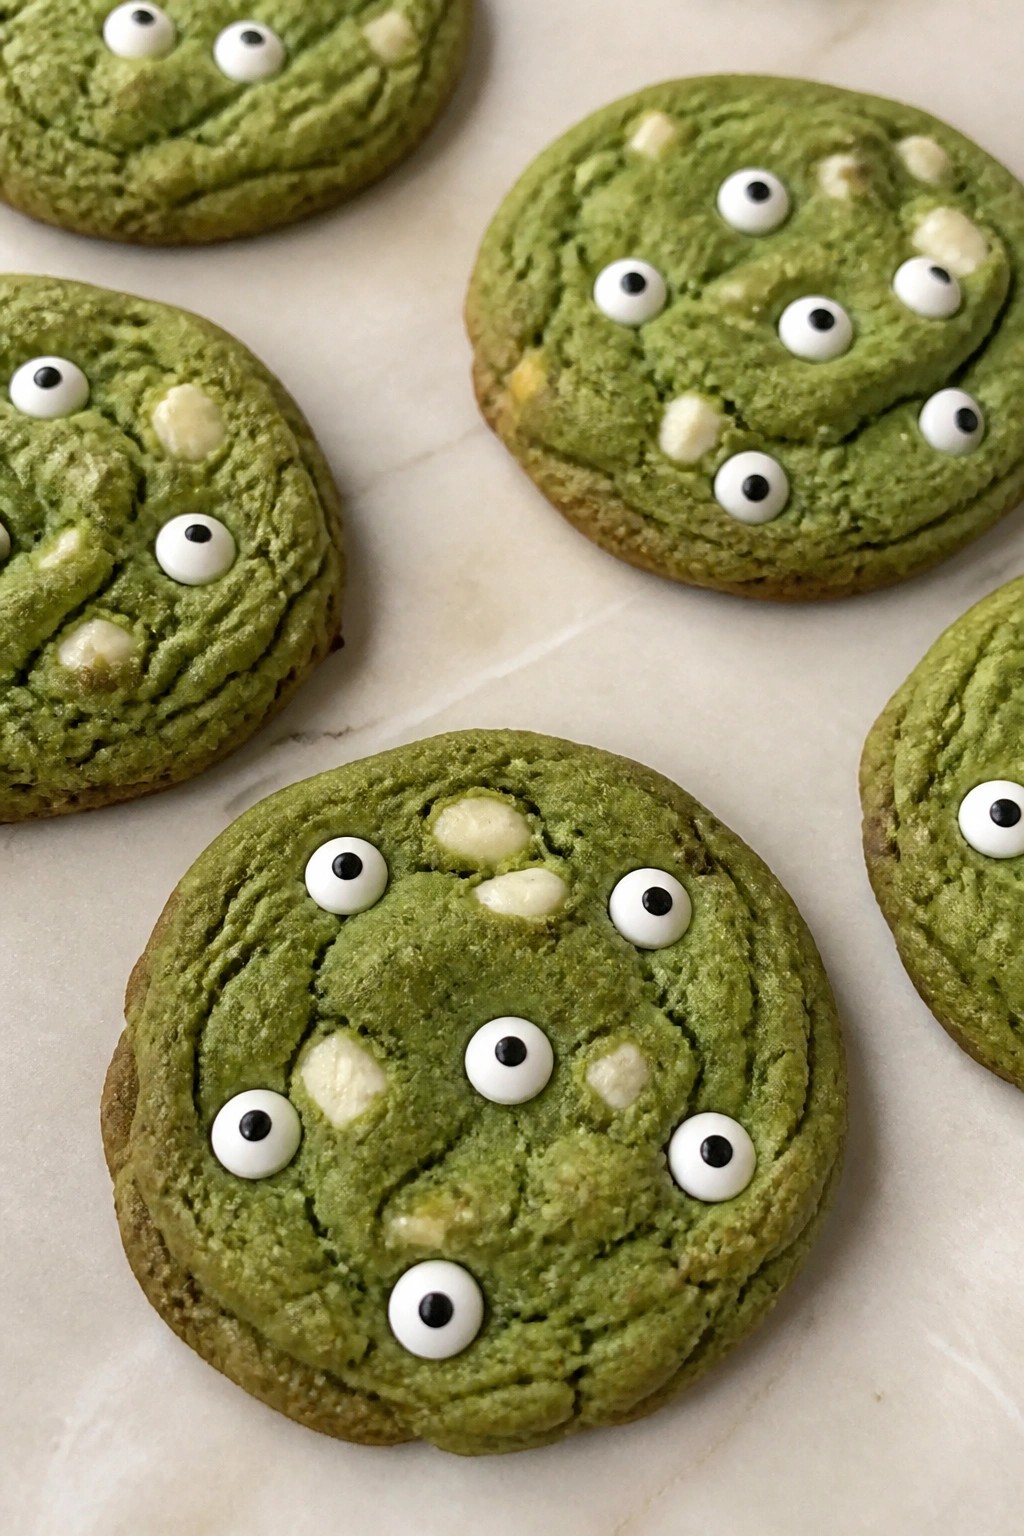
Creepy Matcha Monster Cookies with Multiple Staring Eyes
These matcha cookies bring a bright green color and subtle earthy flavor that fits right into a Halloween spread. The multiple candy eyes on each cookie give them a fun, staring look that works well for parties or after-school treats. The texture stays soft in the center with slightly crisp edges.
The recipe uses simple pantry items plus matcha powder for color and taste. Kids and adults both enjoy decorating them with the eyes while the cookies are still warm.
Serves 4 people.
Recommended Products

Halloween Candy Eyeballs: Edible eye sprinkles instantly add a spooky finishing touch to Halloween cookies, cupcakes, cakes, brownies, cake pops, and party desserts.

Use Date: You can see Production Date and Expiration date at the bottom of the bottle/ After open the seal of the bottle, its better to use them in 1 month/ Store in cool dry place
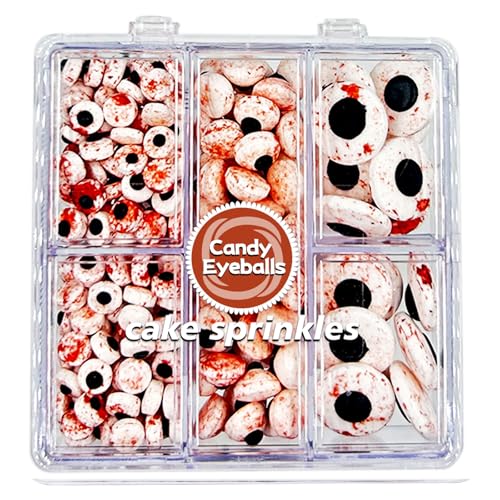
Spooky Bloodshot Eye Design: Our Halloween sprinkles features creepy bloodshot eyes, perfect for adding a spooky touch to your Halloween celebrations
Ingredients
- 1 1/2 cups all-purpose flour
- 1 tablespoon matcha powder
- 1/2 teaspoon baking soda
- 1/4 teaspoon salt
- 1/2 cup unsalted butter, softened
- 3/4 cup granulated sugar
- 1 large egg
- 1 teaspoon vanilla extract
- 24 small candy eyes
Instructions
- Preheat the oven to 350 degrees Fahrenheit and line a baking sheet with parchment paper.
- In a medium bowl, whisk together the flour, matcha powder, baking soda, and salt.
- In a large bowl, beat the softened butter and sugar until light and fluffy. Add the egg and vanilla extract and mix until combined.
- Gradually stir the dry ingredients into the wet ingredients until a dough forms.
- Scoop tablespoon-sized portions of dough onto the prepared baking sheet, spacing them 2 inches apart. Gently flatten each ball slightly with your fingers.
- Bake for 10 to 12 minutes until the edges are set but the centers still look soft.
- Remove the baking sheet from the oven and immediately press 3 to 4 candy eyes onto each cookie while they are still warm. Let the cookies cool on the sheet for 5 minutes before moving them to a wire rack.
Extra Tips
Place the candy eyes close together or at different angles on each cookie to create varied staring expressions. The matcha flavor pairs nicely with a glass of milk. Store cooled cookies in an airtight container at room temperature for up to 4 days. If the dough feels too soft after mixing, chill it for 15 minutes before scooping. Course: Dessert Cuisine: American Equipment: Mixing Bowl, Baking Sheet, Parchment Paper
Black Cocoa Brownie Cookies with Glowing White Chocolate Eyes
These cookies use black cocoa to create a deep, dark base that sets off the white chocolate eyes. They make a strong visual choice for Halloween spreads and work well when you want something fudgy rather than cakey.
The finished cookies have a chewy center, crisp edges, and a bold chocolate taste balanced by sweet white chocolate. The eyes sit on top so each cookie looks back at whoever picks it up.

Serves 4 people.
Recommended Products

4 Fun Designs - Delicious Fresh Vanilla Frosted Coloring Cookies + 3 edible markers Packed in a Cute Bucket


10 cookies to a kit
Ingredients
- ½ cup unsalted butter, softened
- ¾ cup granulated sugar
- 1 large egg
- 1 teaspoon vanilla extract
- ⅓ cup black cocoa powder
- 1 cup all-purpose flour
- ½ teaspoon baking powder
- ¼ teaspoon salt
- ½ cup white chocolate chips
- 2 tablespoons mini dark chocolate chips
Instructions
- Heat the oven to 350°F and line a baking sheet with parchment paper.
- In a mixing bowl, beat the softened butter and sugar until smooth and light.
- Add the egg and vanilla extract and mix until fully combined.
- Stir in the black cocoa powder, flour, baking powder, and salt until a thick dough forms.
- Scoop the dough into 8 portions and place them on the baking sheet, spacing them a few inches apart.
- Bake for 10 to 12 minutes until the edges look set.
- Remove the sheet from the oven and immediately press three white chocolate chips into each cookie to form eyes.
- Add a mini dark chocolate chip to the center of each white chocolate piece to create pupils.
- Let the cookies cool on the sheet for 5 minutes before moving them to a rack.
Extra Tips
Press the white chocolate chips in while the cookies are still warm so they soften and stick without fully melting. If the dough feels too soft to scoop, chill it for 15 minutes. Store cooled cookies in an airtight container at room temperature for up to three days to keep the chewy texture. Course: Dessert Cuisine: American Equipment: Mixing Bowl, Baking Sheet, Oven
Pumpkin Spice Thumbprint Cookies with Candy Eye Centers
These pumpkin spice thumbprint cookies add a playful touch to Halloween spreads. The spiced dough bakes up soft and fragrant, while the centers hold candy eyes that give each cookie a fun staring effect. They work well for parties, school treats, or an easy weekend bake with kids.
The flavor leans warm and cozy with notes of cinnamon and nutmeg. A simple thumbprint method keeps the process straightforward and reliable for home ovens.

Serves 4 people.
Ingredients
- 1 cup all-purpose flour
- 1/2 cup unsalted butter, softened
- 1/4 cup granulated sugar
- 1 teaspoon pumpkin pie spice
- 1/2 teaspoon vanilla extract
- 1/4 teaspoon salt
- 12 candy eyes
Instructions
- Heat the oven to 350 degrees and line a baking sheet with parchment paper.
- In a mixing bowl, beat the softened butter and sugar until light and fluffy.
- Stir in the vanilla extract and pumpkin pie spice until evenly combined.
- Add the flour and salt to the bowl and mix until a soft dough forms.
- Scoop the dough into 12 small balls and place them on the prepared baking sheet.
- Use your thumb or the back of a spoon to press a shallow indent into the center of each ball.
- Bake for 10 to 12 minutes until the edges turn lightly golden.
- Remove the cookies from the oven and immediately press one candy eye into the center of each indent while the cookies are still warm.
Extra Tips
Press the candy eyes in right after baking so they stick without extra frosting. If the indents close slightly during baking, gently reopen them with a spoon before adding the eyes. Store cooled cookies in an airtight container at room temperature for up to three days. Course: Dessert Cuisine: American Equipment: Mixing Bowl, Baking Sheet, Oven
Vampire Fang Sugar Cookies with Single Bloodshot Pupils
These cookies combine a buttery vanilla base with crisp edges and a tender center. The single candy eye on each one gets a quick bloodshot effect from red gel, while sliced almonds form the fangs. They suit Halloween parties or casual family baking sessions.
The flavor stays mild and sweet, so the decorations stand out without extra fuss. Shape the dough into simple ovals to keep the focus on the staring pupil and fang details.

Serves 4 people.
Ingredients
- 1 1/2 cups all-purpose flour
- 1/2 cup unsalted butter, softened
- 3/4 cup granulated sugar
- 1 large egg
- 1 teaspoon vanilla extract
- 1/2 teaspoon baking powder
- 1/4 teaspoon salt
- Red gel food coloring
- 8 candy eyes
- 16 sliced almonds
- 1/2 cup powdered sugar
Instructions
- Preheat the oven to 350 degrees and line a baking sheet with parchment paper.
- In a mixing bowl, beat the softened butter and granulated sugar until light and fluffy.
- Add the egg and vanilla extract, then mix until combined.
- Stir in the flour, baking powder, and salt until a dough forms.
- Roll the dough into 8 small ovals and place them on the baking sheet.
- Bake for 10 to 12 minutes until the edges turn lightly golden.
- Let the cookies cool completely on the sheet.
- Mix the powdered sugar with a few drops of water to make a thin icing.
- Attach one candy eye to the center of each cookie with a dab of icing.
- Use a toothpick to draw thin red gel lines around each eye for the bloodshot look.
- Press two sliced almonds into the bottom edge of each cookie to create fangs.
Extra Tips
Make the icing slightly thicker if you want cleaner fang lines. Store cooled cookies in an airtight container at room temperature for up to three days. Swap the almonds for white chocolate pieces if anyone has nut concerns. Course: Dessert Cuisine: American Equipment: Mixing Bowl, Baking Sheet, Electric Mixer, Oven
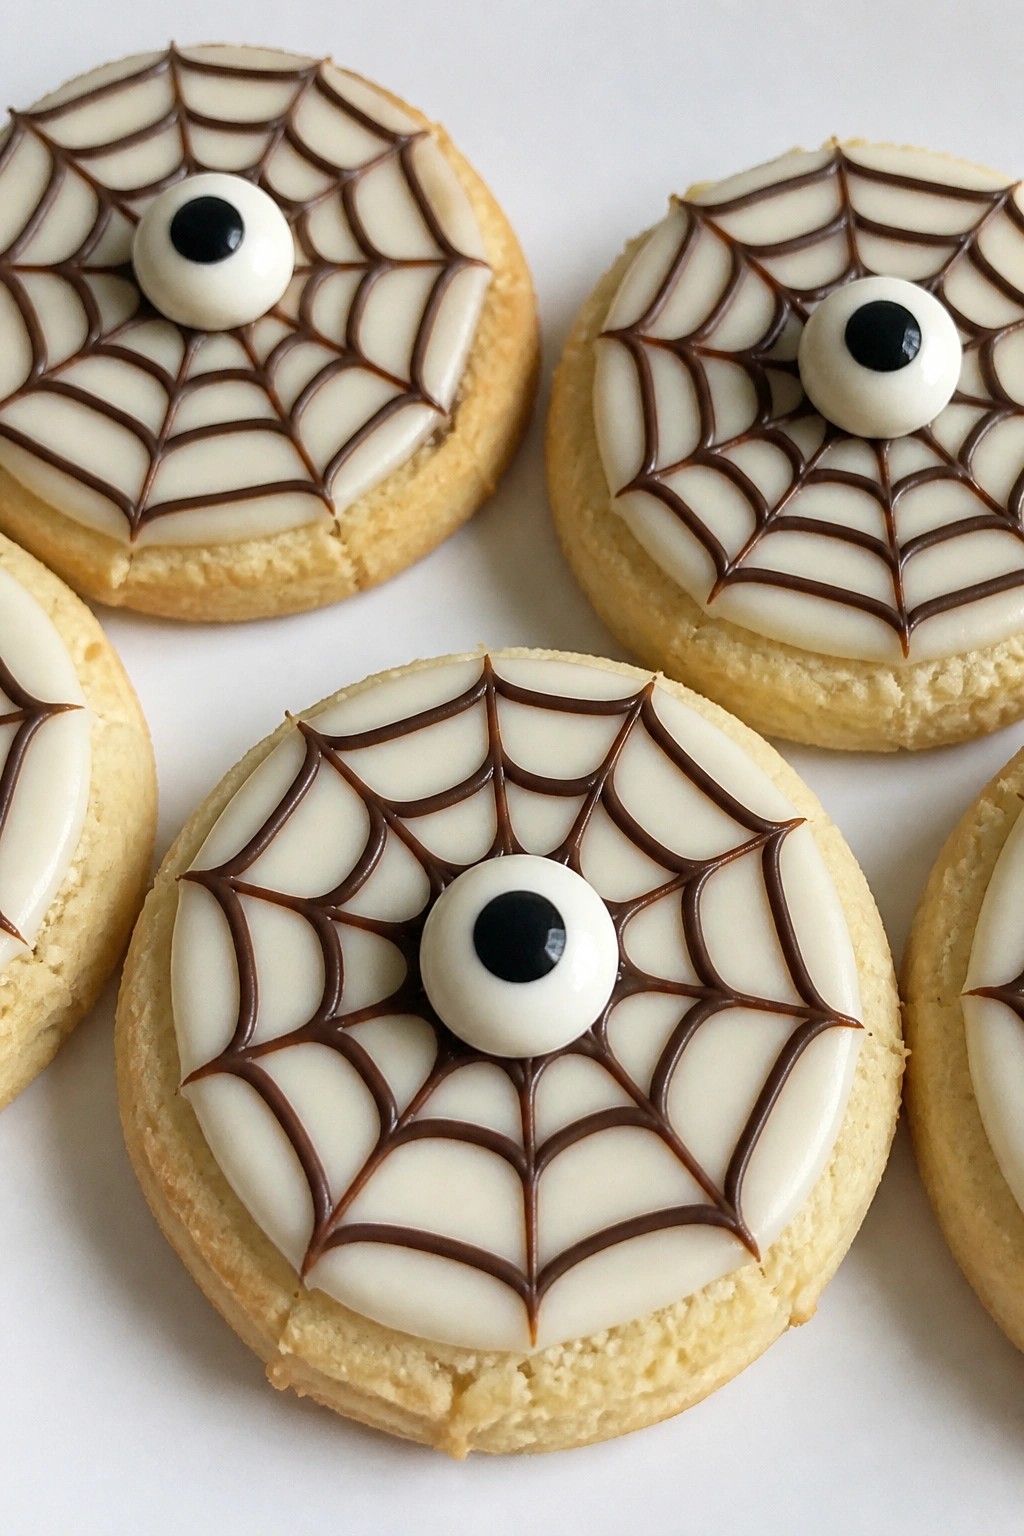
Spiderweb Shortbread Cookies with Central Staring Eyeballs
These cookies combine crisp, buttery shortbread with a simple chocolate spiderweb design and a single large candy eyeball in the center. They work well for Halloween gatherings or as a quick themed treat when you want something that looks detailed without much fuss. The texture stays tender and crumbly while the chocolate adds a mild sweetness that pairs with the plain shortbread base.
Serves 4 people.
Ingredients
- 1 cup all-purpose flour
- ½ cup unsalted butter, softened
- ¼ cup powdered sugar
- 1 teaspoon vanilla extract
- ½ cup white chocolate, melted
- ¼ cup dark chocolate, melted
- 4 large candy eyeballs
Instructions
- Preheat the oven to 350°F and line a baking sheet with parchment paper.
- In a mixing bowl, cream the softened butter and powdered sugar until smooth.
- Stir in the vanilla extract, then gradually mix in the flour until a soft dough forms.
- Divide the dough into four equal portions and shape each into a round cookie about 3 inches wide. Place them on the prepared baking sheet.
- Bake for 12 to 15 minutes until the edges turn lightly golden. Let the cookies cool completely on the sheet.
- Spoon the melted white chocolate into a small zip-top bag and snip a tiny corner. Pipe a spiral on each cooled cookie.
- Spoon the melted dark chocolate into another zip-top bag, snip a corner, and pipe straight lines from the center outward to create the web effect.
- Press one large candy eyeball into the center of each cookie while the chocolate is still soft.
Extra Tips
Melt the chocolates in short 20-second bursts in the microwave and stir well between each to avoid overheating. Pipe the white chocolate first so the dark lines stand out clearly on top. Store finished cookies in a single layer in an airtight container at room temperature for up to three days to keep the web design intact. Course: Dessert Cuisine: American Equipment: Mixing bowl, Baking sheet, Parchment paper, Microwave-safe bowls, Zip-top bags
Peanut Butter Eyeball Sandwich Cookies
These sandwich cookies bring peanut butter flavor to a Halloween treat with a playful twist. The chewy cookies hold a creamy peanut butter filling, and candy eyeballs on top give them a staring effect that fits the season. They work well for parties or as a simple make-at-home project with kids.
The texture stays soft in the center with a light crunch at the edges. The filling adds richness without overpowering the peanut butter taste.

Serves 4 people.
Ingredients
- 1/2 cup creamy peanut butter
- 1/4 cup unsalted butter, softened
- 1/2 cup granulated sugar
- 1 large egg
- 1 teaspoon vanilla extract
- 1 cup all-purpose flour
- 1/2 teaspoon baking soda
- 1/4 teaspoon salt
- 2 tablespoons creamy peanut butter (for filling)
- 1/4 cup powdered sugar
- 8 candy eyeballs
Instructions
- Preheat the oven to 350 degrees F and line a baking sheet with parchment paper.
- In a mixing bowl, cream together the 1/2 cup peanut butter, softened butter, and granulated sugar until smooth.
- Add the egg and vanilla extract, then mix until combined.
- Stir in the flour, baking soda, and salt until a dough forms.
- Roll the dough into 8 small balls and place them on the baking sheet. Flatten each slightly with a fork.
- Bake for 8 to 10 minutes until the edges turn light golden. Cool the cookies completely on a wire rack.
- In a small bowl, mix the 2 tablespoons peanut butter with the powdered sugar to create the filling.
- Spread the filling on the flat side of 4 cookies. Top each with a second cookie to form sandwiches.
- Press 2 candy eyeballs onto the top of each sandwich cookie.
Extra Tips
Make the cookies a day ahead and store them in an airtight container at room temperature so the filling stays firm. If the dough feels too sticky, chill it for 15 minutes before shaping. Use only creamy peanut butter in the filling to avoid grainy texture. Course: Dessert Cuisine: American Equipment: Mixing Bowl, Baking Sheet, Wire Rack, Oven
Ghostly Meringue Cookies with Hidden Candy Eyes
These meringue cookies form light, crisp ghosts that hide candy eyes inside the piped shapes. They work well for Halloween parties or as a simple make-ahead treat that kids can help pipe. The texture stays airy and slightly sweet with a subtle vanilla note.
The hidden eyes peek out just enough to create the staring effect once the cookies bake and set. This approach keeps the meringue pure white while adding a fun surprise without extra decorations.

Serves 4 people.
Ingredients
- 2 large egg whites
- 1/2 cup granulated sugar
- 1/4 teaspoon cream of tartar
- 1 teaspoon vanilla extract
- 12 candy eyes
Instructions
- Preheat the oven to 200 degrees Fahrenheit and line a baking sheet with parchment paper. Place the candy eyes on the paper in small clusters of three, spacing them apart to allow room for piping.
- In a clean mixing bowl, beat the egg whites and cream of tartar on medium speed until soft peaks form. Gradually add the sugar while beating on high speed until stiff, glossy peaks develop.
- Mix in the vanilla extract on low speed until just combined. Transfer the meringue to a piping bag fitted with a round tip.
- Pipe the meringue over each cluster of candy eyes to form small ghost shapes, leaving the eyes partially visible at the base so they stare outward.
- Bake for 90 minutes, then turn off the oven and let the cookies cool inside for one hour to finish drying.
Extra Tips
Pipe the meringue in one steady motion to avoid deflating the peaks, and store the cooled cookies in an airtight container at room temperature for up to three days to maintain their crisp texture. If the humidity is high, add an extra 15 minutes to the drying time in the turned-off oven. Course: Dessert Cuisine: American Equipment: Mixing bowl, Electric mixer, Piping bag, Baking sheet
Lemon Poppy Seed Cookies with Blueberry Eye Designs
These lemon poppy seed cookies add a bright citrus note to a Halloween cookie tray. The poppy seeds give a light crunch against the soft, tender crumb while the lemon keeps every bite fresh and tangy. They suit October parties or a simple weekend bake when you want something playful yet easy.
Each cookie gets topped with blueberry pairs that form staring eyes. The fruit softens slightly during baking and creates a natural contrast against the pale dough. The finished cookies stay simple to make yet stand out on a dessert table.

Serves 4 people.
Ingredients
- 1 cup all-purpose flour
- ½ cup unsalted butter, softened
- ⅓ cup granulated sugar
- 1 tablespoon poppy seeds
- Zest of 1 lemon
- 1 tablespoon lemon juice
- ½ teaspoon baking powder
- ¼ teaspoon salt
- ½ cup fresh blueberries
Instructions
- Heat the oven to 350°F and line a baking sheet with parchment paper.
- In a mixing bowl, beat the softened butter and sugar until smooth and creamy.
- Stir in the lemon zest and lemon juice until fully combined.
- In a separate bowl, whisk together the flour, poppy seeds, baking powder, and salt.
- Add the dry mixture to the butter mixture and stir until a soft dough forms.
- Scoop the dough into 8 equal portions and roll each into a ball. Place the balls on the prepared baking sheet and flatten them slightly into rounds.
- Press two blueberries side by side near the top of each round to create eyes. Add a single blueberry lower down if you want a third staring eye on some cookies.
- Bake for 12 to 14 minutes until the edges turn light golden. Cool the cookies on the sheet for 5 minutes before moving them to a rack.
Extra Tips
Arrange the blueberries close together so the eyes look focused straight ahead. If the dough feels too soft to hold its shape, chill the formed cookies for 15 minutes before adding the fruit. Store cooled cookies in an airtight container at room temperature for up to three days to keep the poppy seed texture intact. Course: Dessert Cuisine: American Equipment: Mixing Bowl, Baking Sheet, Oven
Gingerbread Haunted Cookies with Window Pane Eyes
These cookies bring a fun twist to classic gingerbread with their cut-out eyes filled by melted hard candy. The result is a batch of spiced treats that look like they are watching from the plate. They work well for Halloween gatherings or as a hands-on baking project with kids.
The flavor combines warm ginger and molasses with a sweet, glassy candy center. The cookies stay crisp at the edges while the candy adds a slight chew. They hold their shape nicely once cooled.

Serves 4 people.
Ingredients
- 2 cups all-purpose flour
- 1 teaspoon ground ginger
- 1 teaspoon ground cinnamon
- 1/2 teaspoon baking soda
- 1/4 teaspoon salt
- 1/2 cup unsalted butter, softened
- 1/2 cup brown sugar
- 1/4 cup molasses
- 1 large egg
- 12 red hard candies
Instructions
- Preheat the oven to 350 degrees and line a baking sheet with parchment paper.
- In a mixing bowl, whisk together the flour, ginger, cinnamon, baking soda, and salt.
- In a separate bowl, beat the butter and brown sugar until light. Add the molasses and egg, then mix until smooth.
- Gradually stir the dry ingredients into the wet mixture until a dough forms.
- Roll the dough to 1/4-inch thickness on a lightly floured surface. Use a round or ghost-shaped cutter to form cookies and place them on the baking sheet.
- Cut two small eye shapes from each cookie. Crush the hard candies and fill each eye opening with a few pieces of crushed candy.
- Bake for 10 to 12 minutes until the edges are firm and the candy has melted into clear panes. Cool completely on the sheet before moving.
Extra Tips
Crush the candies just before filling the eyes so they melt evenly without clumping. If the dough feels sticky during rolling, chill it for 15 minutes. Store cooled cookies in a single layer in an airtight container to keep the candy windows from sticking together. Course: Dessert Cuisine: American Equipment: Mixing Bowl, Baking Sheet, Rolling Pin, Cookie Cutters
Dark Chocolate Truffle Cookies with Red Vein Icing and Eyes
These cookies bring a spooky touch to any Halloween spread. The dark chocolate base stays rich and fudgy while the red vein icing and candy eyes give each one a staring effect that fits the theme.
They work well for parties or as a simple make-at-home treat. The flavor stays deep and chocolate-forward with a light sweet finish from the icing.

Serves 4 people.
Ingredients
- 1 cup all-purpose flour
- 1/2 cup dark cocoa powder
- 1/2 teaspoon baking soda
- 1/4 teaspoon salt
- 1/2 cup unsalted butter, softened
- 3/4 cup granulated sugar
- 1 large egg
- 1 teaspoon vanilla extract
- 1 cup powdered sugar
- 2 tablespoons milk
- Red food coloring
- 12 candy eyes
Instructions
- Preheat the oven to 350 degrees and line a baking sheet with parchment paper.
- Stir together the flour, dark cocoa powder, baking soda, and salt in a bowl.
- In a separate bowl, beat the softened butter and granulated sugar until light and fluffy.
- Add the egg and vanilla extract to the butter mixture and mix until combined.
- Gradually add the dry ingredients to the wet ingredients and stir until a dough forms.
- Scoop the dough into 8 balls and place them on the baking sheet.
- Bake for 10 to 12 minutes until the edges set. Let the cookies cool completely on the sheet.
- Mix the powdered sugar and milk in a small bowl until smooth. Add a few drops of red food coloring and stir gently to create thin red streaks.
- Drizzle or pipe the red-streaked icing over each cooled cookie in a vein pattern.
- Press two candy eyes onto the icing on each cookie before the icing sets.
Extra Tips
Use a toothpick to drag the red streaks into finer veins if the icing starts to blend. Store leftovers in an airtight container at room temperature for up to three days. The candy eyes hold best when added while the icing is still slightly tacky. Course: Dessert Cuisine: American Equipment: Mixing Bowl, Baking Sheet, Piping Bag
Oatmeal Caramel Cookies Topped with Clustered Candy Eyes
These oatmeal caramel cookies offer a chewy base with pockets of sweet caramel throughout. The clustered candy eyes on top give them a playful Halloween touch that fits right into parties or family baking sessions. The texture stays soft in the center with lightly crisp edges.
The flavor balances nutty oats and buttery caramel notes. They come together quickly and make a simple addition to any fall dessert spread.

Serves 4 people.
Ingredients
- 1 cup old-fashioned oats
- 3/4 cup all-purpose flour
- 1/2 cup unsalted butter, softened
- 1/2 cup brown sugar
- 1/4 cup granulated sugar
- 1 large egg
- 1 teaspoon vanilla extract
- 1/2 teaspoon baking soda
- 1/4 teaspoon salt
- 1/2 cup caramel bits
- 24 candy eyes
Instructions
- Preheat the oven to 350 degrees and line a baking sheet with parchment paper.
- In a mixing bowl, beat the softened butter with the brown sugar and granulated sugar until smooth and creamy.
- Add the egg and vanilla extract to the butter mixture and stir until fully combined.
- In a separate bowl, whisk together the flour, baking soda, and salt.
- Gradually mix the dry ingredients into the wet ingredients until a dough forms.
- Stir in the oats and caramel bits until evenly distributed.
- Scoop rounded tablespoons of dough onto the prepared baking sheet, spacing them a few inches apart.
- Bake for 10 to 12 minutes until the edges turn golden.
- Remove the cookies from the oven and immediately press clusters of three candy eyes onto each warm cookie.
- Let the cookies cool on the baking sheet for 5 minutes before moving them to a wire rack.
Extra Tips
Press the candy eyes in place while the cookies are still warm so they adhere without extra frosting. If the caramel bits feel too firm, chop them smaller before mixing to help them melt evenly inside each cookie. Store cooled cookies in an airtight container at room temperature to maintain their soft chew for up to three days. Course: Dessert Cuisine: American Equipment: Mixing Bowl, Baking Sheet, Whisk
Almond Joy Macaroon Eyeballs
These macaroons bring the classic Almond Joy combo of coconut, chocolate, and almonds into a simple cookie shape. They work well for Halloween parties because the finished treats look like small eyeballs with a direct stare. The texture stays chewy from the coconut while the chocolate shell adds a crisp bite.
The flavor balances sweet coconut with mild almond notes and a rich chocolate coating. Candy eyes on top complete the spooky detail without extra work.

Serves 4 people.
Ingredients
- 2 cups shredded sweetened coconut
- 1/2 cup sweetened condensed milk
- 1 teaspoon vanilla extract
- 1/4 teaspoon salt
- 1/3 cup chopped almonds
- 1 cup semisweet chocolate chips
- 12 candy eyeballs
Instructions
- Preheat the oven to 325 degrees and line a baking sheet with parchment paper.
- In a mixing bowl, stir together the shredded coconut, sweetened condensed milk, vanilla extract, salt, and chopped almonds until the mixture holds together.
- Scoop the mixture into 12 small balls and place them on the prepared baking sheet.
- Bake for 18 to 20 minutes until the edges turn golden. Let the macaroons cool completely on the sheet.
- Melt the chocolate chips in a microwave-safe bowl in 30-second bursts, stirring between each burst until smooth.
- Dip the bottom half of each cooled macaroon into the melted chocolate and return it to the parchment paper.
- Press two candy eyeballs onto the top of each macaroon while the chocolate is still soft. Let the chocolate set at room temperature.
Extra Tips
Chill the macaroons for 10 minutes after dipping if your kitchen runs warm so the chocolate firms up faster and holds the eyes in place. You can swap the semisweet chips for milk chocolate if you prefer a sweeter coating. Store leftovers in an airtight container at room temperature for up to three days. Course: Dessert Cuisine: American Equipment: Mixing Bowl, Baking Sheet, Microwave-safe Bowl
Spiced Molasses Cookies with Drizzled Eyeball Faces
These spiced molasses cookies bring a warm, chewy texture with deep ginger and cinnamon notes that pair well with the sweet icing faces on top. They work nicely for Halloween gatherings or as a simple treat to make with kids when you want something festive but straightforward.
The drizzled icing creates the staring eyeball effect without needing fancy tools, keeping the focus on the cookie’s soft center and crisp edges.

Serves 4 people.
Ingredients
- 1 1/2 cups all-purpose flour
- 1 teaspoon baking soda
- 1 teaspoon ground cinnamon
- 1 teaspoon ground ginger
- 1/4 teaspoon ground cloves
- 1/4 teaspoon salt
- 1/2 cup unsalted butter, softened
- 1/2 cup brown sugar
- 1/4 cup molasses
- 1 large egg
- 1 cup powdered sugar
- 2 tablespoons milk
- 2 tablespoons melted chocolate
Instructions
- Preheat the oven to 350 degrees and line a baking sheet with parchment paper.
- Whisk together the flour, baking soda, cinnamon, ginger, cloves, and salt in a mixing bowl.
- Cream the butter and brown sugar in a separate bowl until light and fluffy, then stir in the molasses and egg.
- Combine the wet and dry mixtures until a dough forms. Scoop rounded tablespoons onto the baking sheet and flatten slightly.
- Bake for 10 to 12 minutes until the edges are set. Cool the cookies completely on a wire rack.
- Stir the powdered sugar and milk together until smooth. Drizzle the icing over each cookie in small circles to form eyes.
- Add dots of melted chocolate in the center of each icing circle to finish the eyeballs.
Extra Tips
Chill the dough for 20 minutes before baking if it feels too soft, which helps the cookies keep their round shape. Adjust the icing thickness with a little extra milk if it runs too thin during drizzling. Store cooled cookies in an airtight container at room temperature for up to three days. Course: Dessert Cuisine: American Equipment: Mixing Bowl, Baking Sheet, Whisk, Wire Rack