

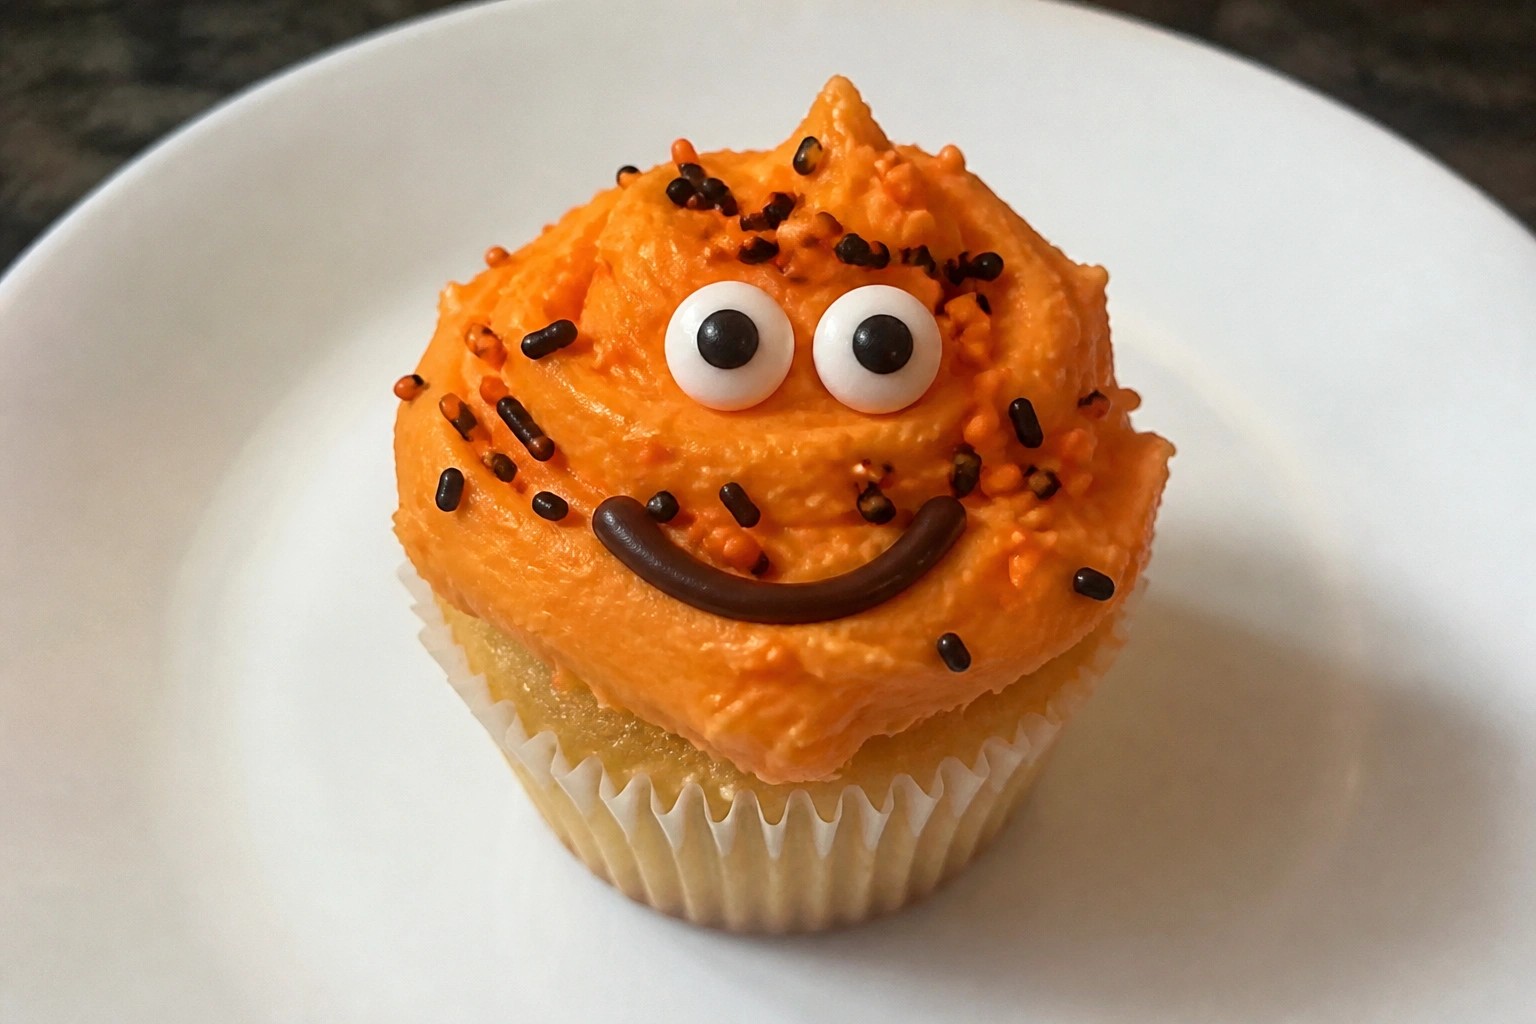
Halloween cupcakes are a great way to get kids involved in the kitchen. The recipes here focus on simple designs that do not require special tools. You will find ideas made with everyday ingredients and basic steps. These options work well for school parties or family events. They come together fast enough to keep things easy on busy days.
Tips Before Baking Your Halloween Cupcakes
These ideas help the baking go smoothly when kids are involved.
Use a Boxed Mix
A simple cake mix cuts down on prep time. You can spend more time on the decorations instead.
Set Up Stations
Place frosting, sprinkles, and candy in separate bowls. Kids can reach what they need without crowding one spot.
Keep Decorations Simple
Choose larger candies or easy shapes like eyes and bats. Small pieces are hard for little hands to handle.
Make Extras
Bake a few plain cupcakes as backups. Kids often want to try different designs on the same treat.
Ghostly Vanilla Cupcakes with Marshmallow Frosting
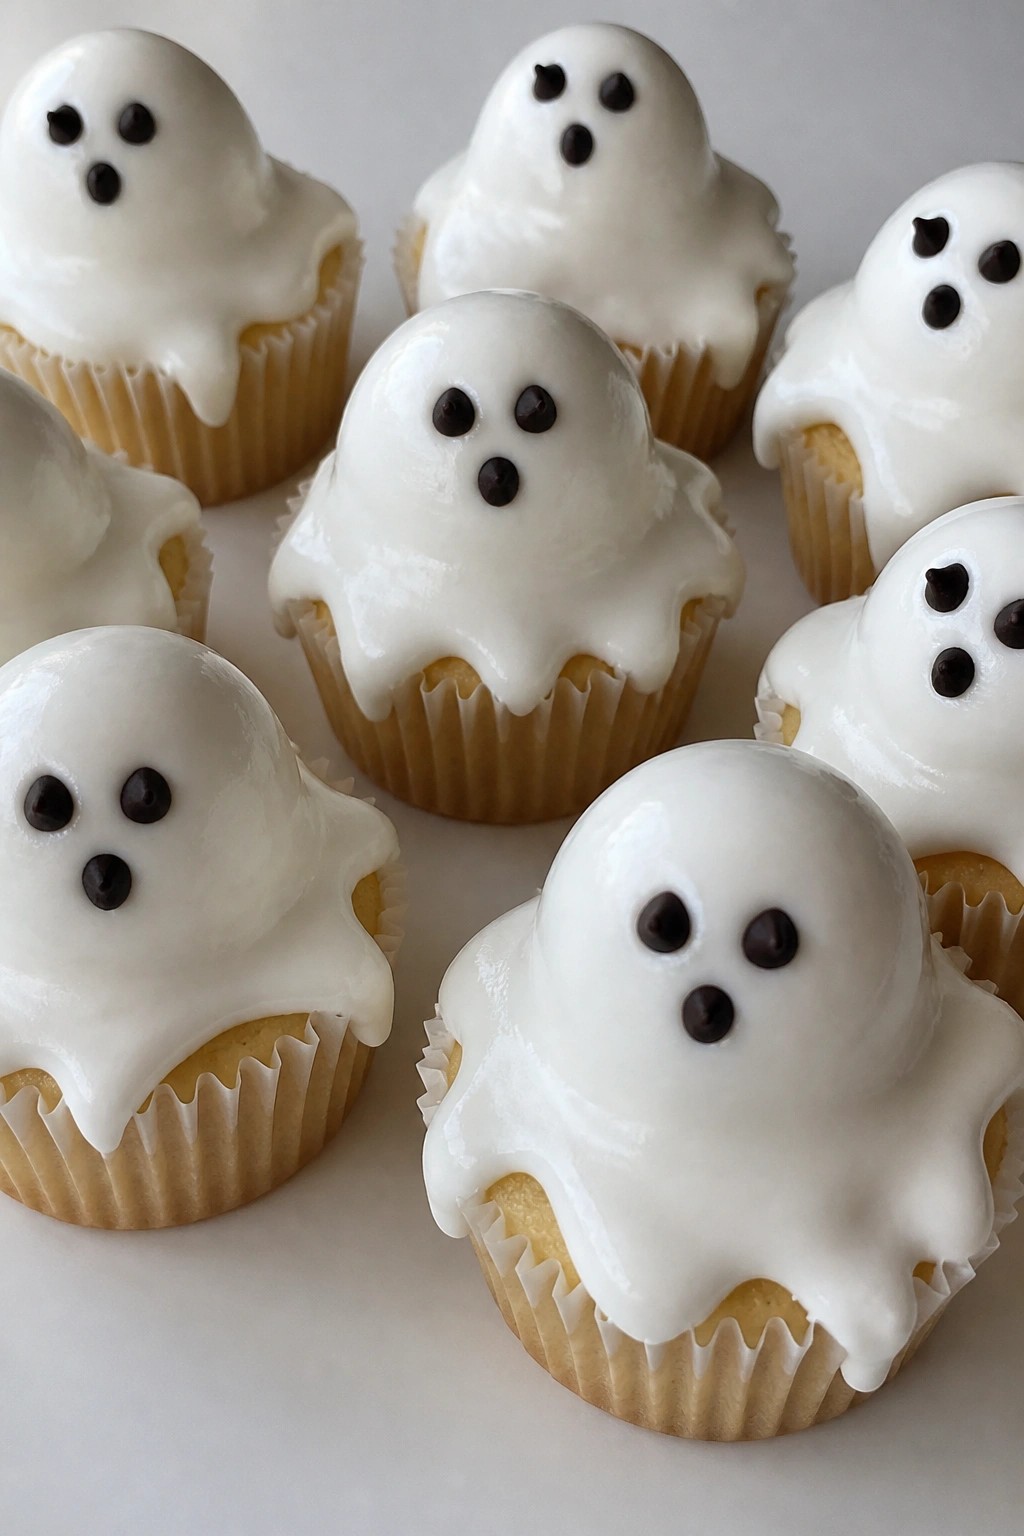
These cupcakes bring a simple ghost theme to any Halloween gathering. Kids enjoy the soft vanilla base topped with fluffy marshmallow frosting shaped into friendly ghosts. The flavor stays mild and sweet, with a light cake texture that pairs well with the creamy topping.
The recipe keeps steps straightforward so parents can make them with minimal fuss. It works for after-school treats or a small party table.
Serves 4 people.
Ingredients
- ½ cup all-purpose flour
- ¼ cup granulated sugar
- 1 large egg
- ¼ cup milk
- 2 tablespoons unsalted butter, melted
- 1 teaspoon vanilla extract
- ½ teaspoon baking powder
- ¼ teaspoon salt
- 1 cup mini marshmallows
- 2 tablespoons unsalted butter
- 1 cup powdered sugar
- Mini chocolate chips
Instructions
- Preheat the oven to 350 degrees Fahrenheit. Line a muffin tin with four paper liners.
- In a bowl, stir together the flour, granulated sugar, baking powder, and salt. Add the egg, milk, melted butter, and vanilla extract. Mix until the batter is smooth.
- Divide the batter evenly among the four liners. Bake for 15 to 18 minutes, until a toothpick comes out clean. Let the cupcakes cool completely on a wire rack.
- In a small saucepan over low heat, melt the mini marshmallows with the remaining 2 tablespoons of butter, stirring until smooth. Remove from heat and stir in the powdered sugar until the frosting thickens.
- Spoon the frosting into a piping bag fitted with a round tip. Pipe tall, wavy mounds on each cooled cupcake to form ghost shapes. Press two mini chocolate chips into each mound to create eyes.
Extra Tips
Pipe the frosting while it is still slightly warm so the ghost shapes hold their form without spreading. If the frosting firms up too much, warm it gently for a few seconds before piping again. Store leftovers in an airtight container at room temperature for up to two days. Course: Dessert Cuisine: American Equipment: Mixing bowl, muffin tin, saucepan, piping bag
Jack-o’-Lantern Pumpkin Spice Cupcakes with Caramel Drizzle
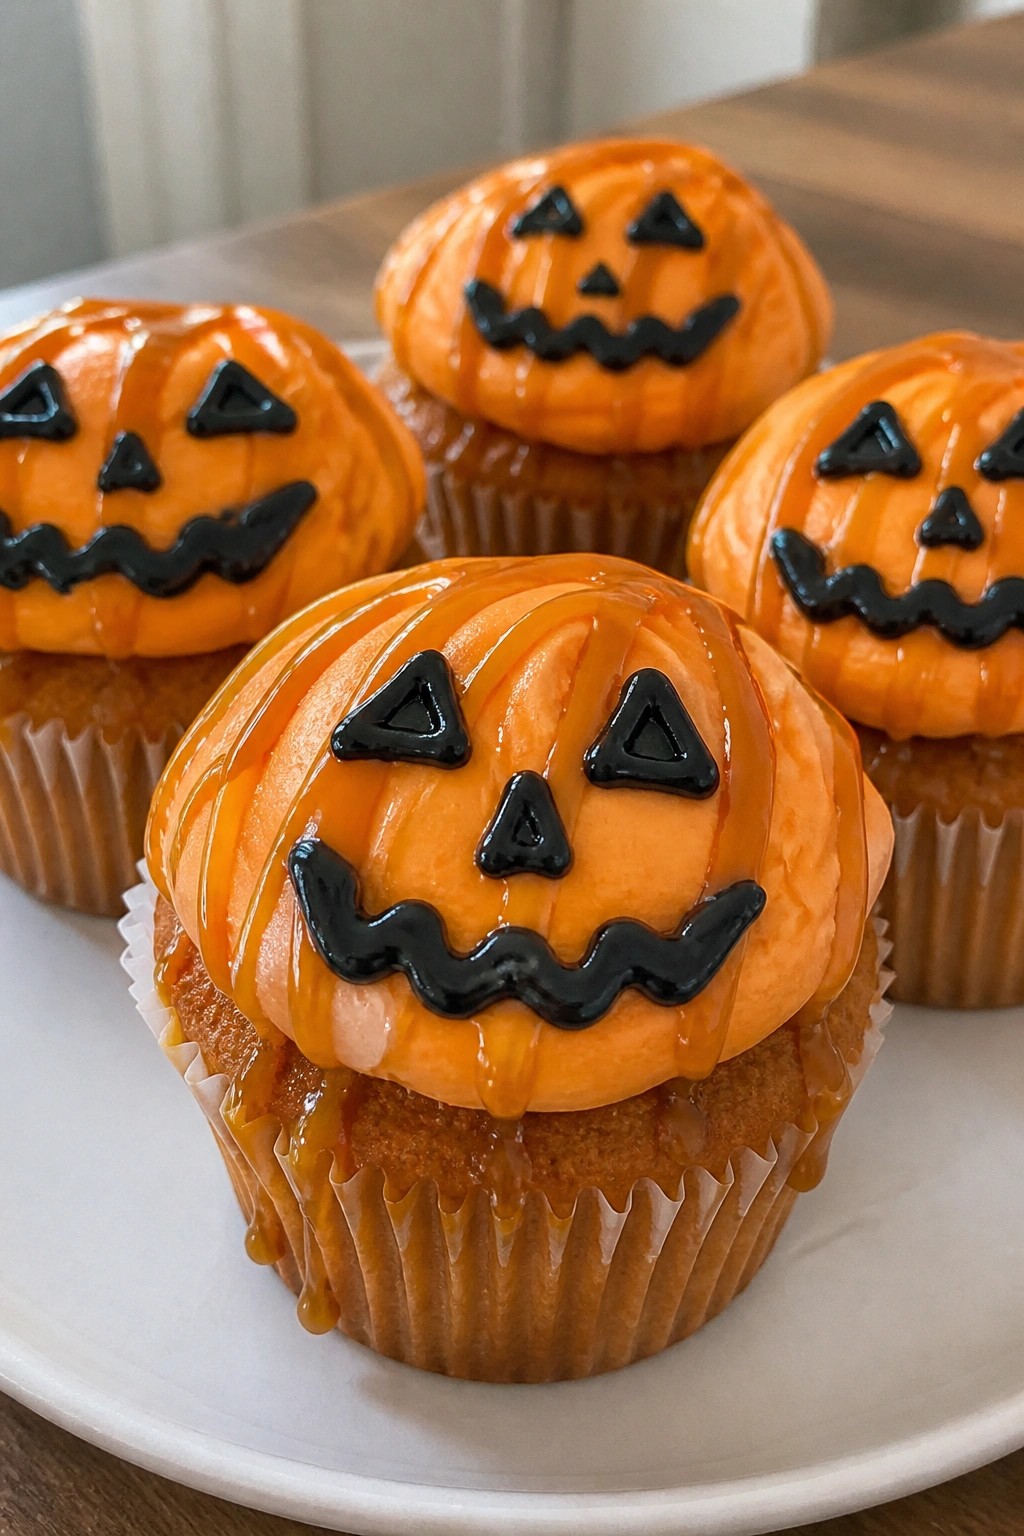
These pumpkin spice cupcakes bring a fun Halloween twist that kids can help decorate. The moist crumb pairs with warm spices, while the orange frosting lets little hands create jack-o’-lantern faces before the caramel drizzle adds a sweet finish. They work well for an afternoon baking project or a classroom treat.
The flavor stays cozy with pumpkin and spice notes, and the texture stays soft without being heavy. Caramel on top gives just enough shine to make the faces stand out.
Serves 4 people.
Ingredients
- ¾ cup all-purpose flour
- ½ cup brown sugar
- ½ cup pumpkin puree
- 1 large egg
- ¼ cup vegetable oil
- 1 teaspoon pumpkin pie spice
- 1 teaspoon baking powder
- ¼ teaspoon baking soda
- ¼ teaspoon salt
- ½ cup powdered sugar
- 2 tablespoons unsalted butter, softened
- 2 drops orange food coloring
- 2 tablespoons black decorating icing
- ¼ cup caramel sauce
Instructions
- Heat the oven to 350°F and line a muffin tin with four paper liners.
- In a medium bowl, whisk the flour, brown sugar, pumpkin pie spice, baking powder, baking soda, and salt.
- In another bowl, mix the pumpkin puree, egg, and vegetable oil until smooth.
- Pour the wet mixture into the dry ingredients and stir just until combined.
- Divide the batter evenly among the four liners and bake for 18 minutes, or until a toothpick comes out clean.
- Let the cupcakes cool in the tin for five minutes, then move them to a rack to cool completely.
- Beat the powdered sugar, softened butter, and orange food coloring together until creamy.
- Spread the orange frosting over each cooled cupcake.
- Use the black decorating icing to draw jack-o’-lantern eyes and mouths on the frosting.
- Drizzle caramel sauce over the top of each cupcake just before serving.
Extra Tips
Let the cupcakes cool fully before frosting so the orange layer stays smooth and the faces stay neat. Warm the caramel slightly for easier drizzling, but keep it at room temperature so it does not melt the frosting. Kids can help pipe the faces with the black icing once the frosting has set for a few minutes. Course: Dessert Cuisine: American Equipment: Mixing bowls, muffin tin, whisk, oven, cooling rack
Creepy Spiderweb Black Cocoa Cupcakes
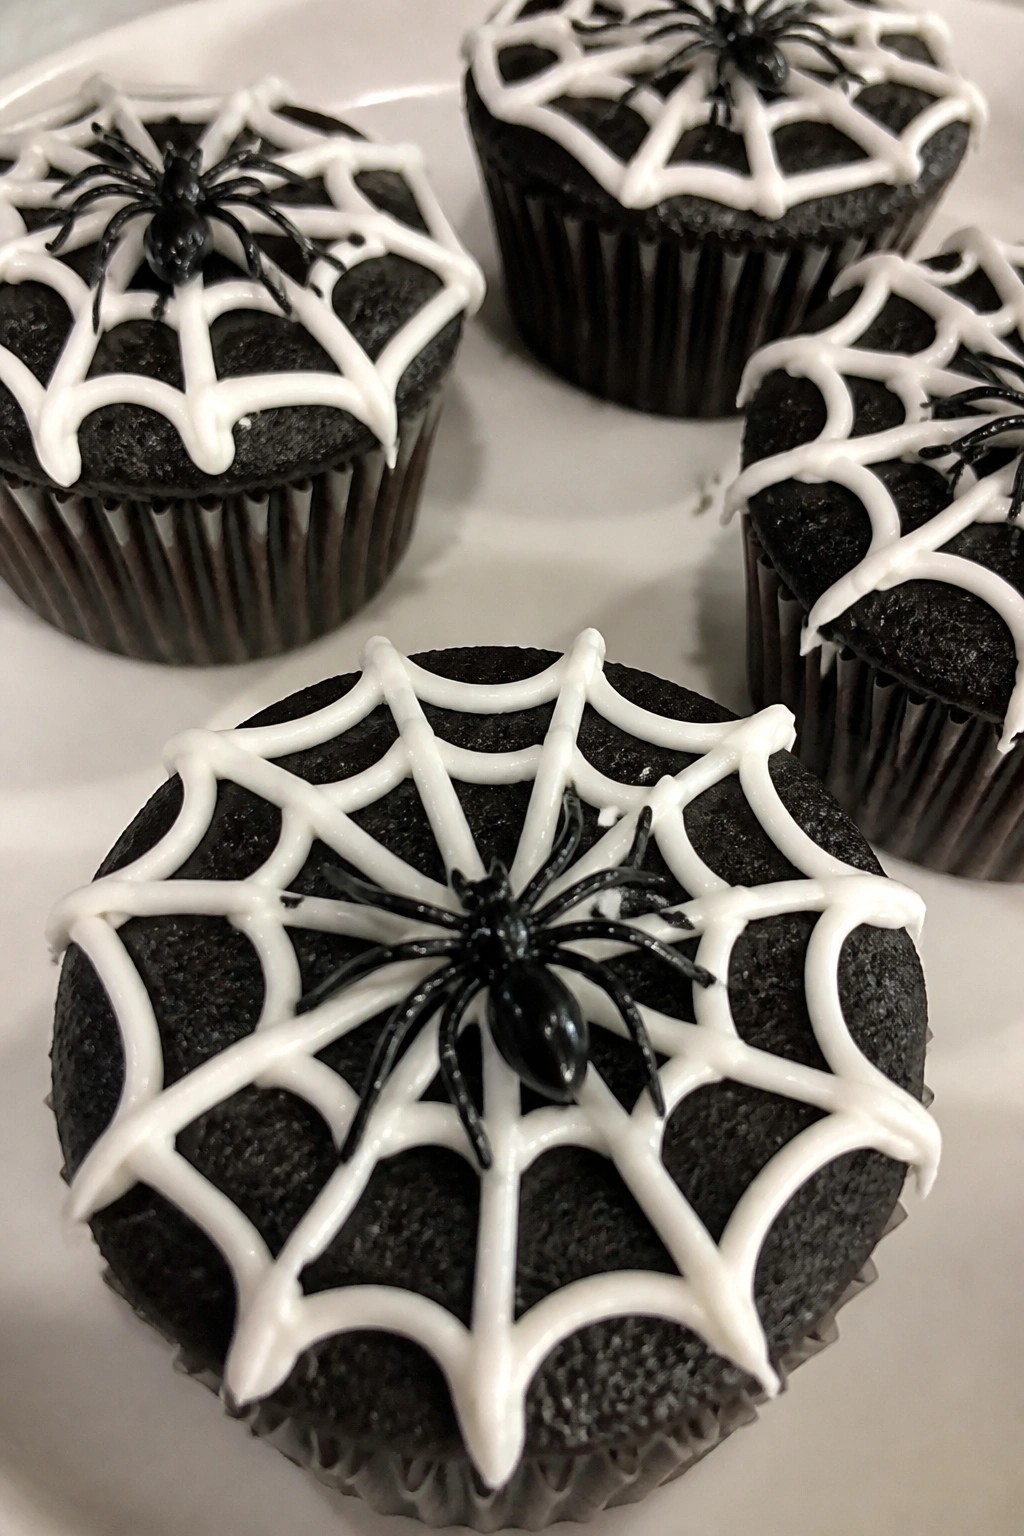
These cupcakes get their dark color from black cocoa powder, which makes the spiderweb design stand out. They work well for Halloween parties or school events where kids want something fun but still chocolatey.
The texture stays moist with a straightforward chocolate taste. A simple white icing creates the web pattern on each one without much fuss.
Serves 4 people.
Ingredients
- ½ cup all-purpose flour
- ¼ cup black cocoa powder
- ½ cup granulated sugar
- ½ teaspoon baking soda
- ¼ teaspoon salt
- 1 large egg
- ¼ cup vegetable oil
- ½ cup milk
- 1 teaspoon vanilla extract
- ¾ cup powdered sugar
- 2 tablespoons milk
- 4 candy spiders
Instructions
- Preheat the oven to 350°F and line a cupcake pan with 4 paper liners.
- In a medium bowl, whisk together the flour, black cocoa powder, granulated sugar, baking soda, and salt.
- In a separate bowl, beat the egg with the vegetable oil, milk, and vanilla extract until smooth.
- Pour the wet mixture into the dry ingredients and stir until just combined.
- Divide the batter evenly among the 4 liners. Bake for 18 to 20 minutes, or until a toothpick inserted in the center comes out clean. Cool the cupcakes completely on a wire rack.
- In a small bowl, stir the powdered sugar with 2 tablespoons milk until the icing reaches a thick but pipeable consistency.
- Transfer the icing to a piping bag or zip-top bag with one corner snipped. Pipe three concentric circles on each cupcake, then drag a toothpick from the center outward in several spots to form the web.
- Place one candy spider on each cupcake.
Extra Tips
Buttermilk can replace the milk if you want a slightly tangier crumb. Pipe the webs right after the cupcakes cool so the icing sets without running. Store leftovers in an airtight container at room temperature for up to two days. Course: Dessert Cuisine: American Equipment: Mixing Bowls, Cupcake Pan, Whisk, Piping Bag
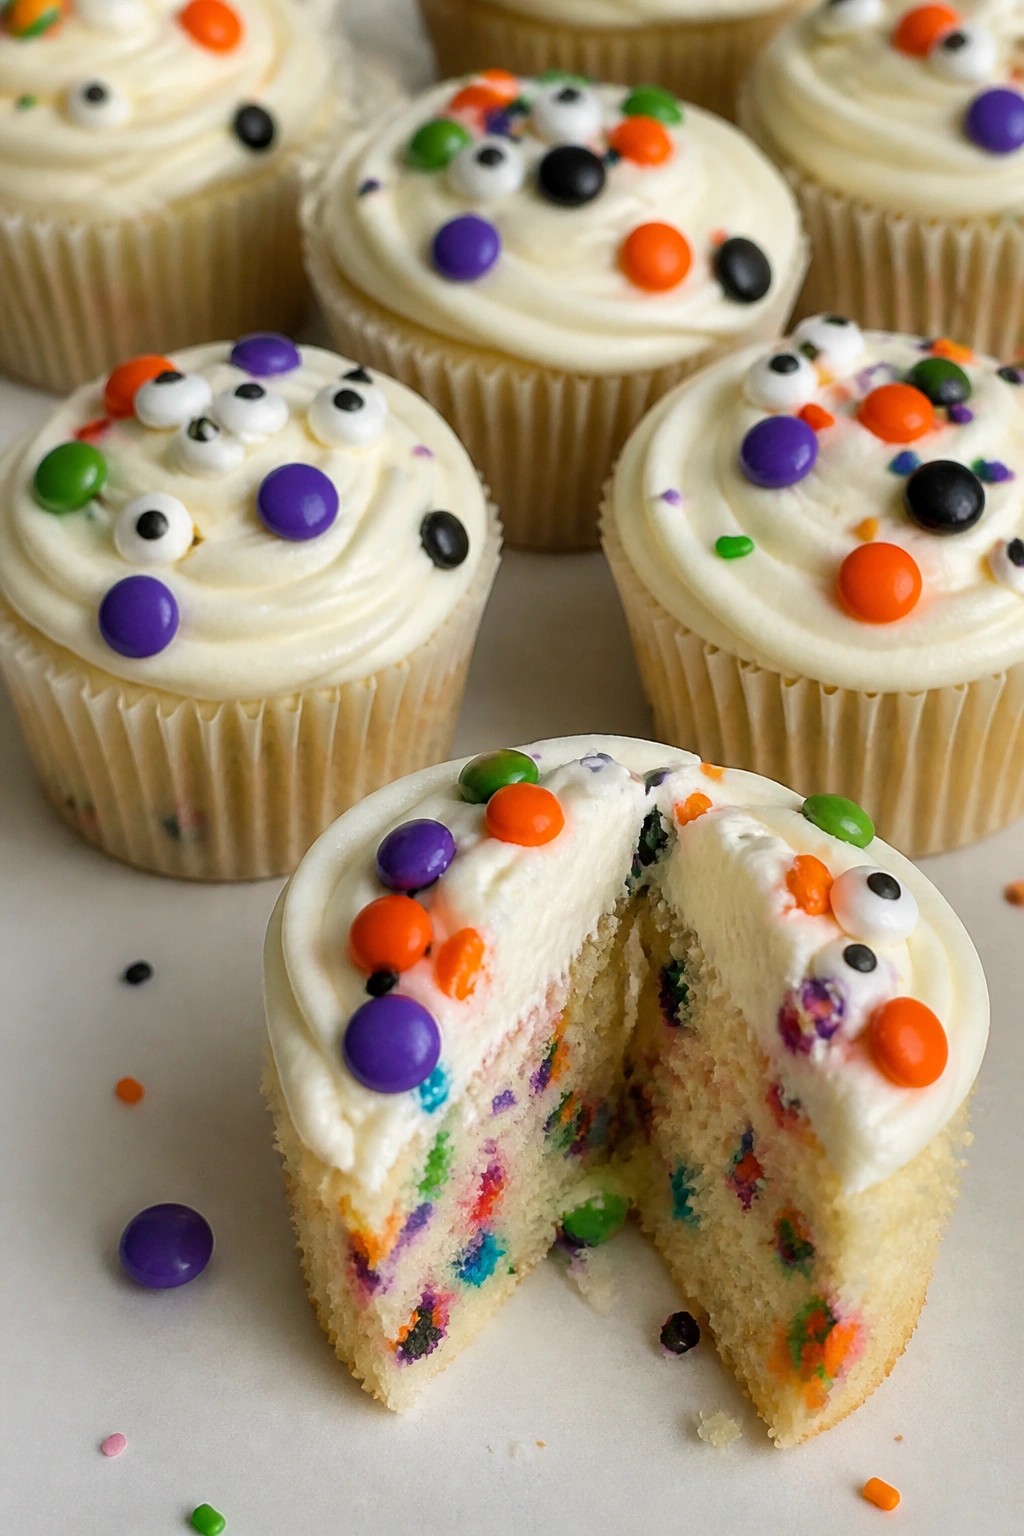
Monster Eye Funfetti Cupcakes with Candy Decorations
These cupcakes bring bright color and playful candy eyes to any Halloween party. Kids enjoy spotting the sprinkles inside the cake and the candy decorations on top. The soft vanilla crumb pairs with sweet frosting for a treat that feels festive without much fuss.
They work well for after-school snacks or small gatherings where you want something quick to assemble. The funfetti base stays light while the candy adds crunch and chew.
Serves 4 people.
Ingredients
- 1/2 cup all-purpose flour
- 1/4 cup granulated sugar
- 1/4 cup unsalted butter, softened
- 1 large egg
- 1/4 cup milk
- 1 teaspoon vanilla extract
- 2 tablespoons rainbow sprinkles
- 1/2 cup powdered sugar
- 2 tablespoons unsalted butter, softened
- 8 candy eyes
- 1/4 cup assorted candy decorations
Instructions
- Preheat the oven to 350°F and line a cupcake pan with 4 paper liners.
- In a mixing bowl, cream the 1/4 cup softened butter with the granulated sugar until light. Add the egg and vanilla extract, then mix until smooth.
- Stir in the flour and milk alternately until a thick batter forms. Fold in the rainbow sprinkles.
- Divide the batter evenly among the 4 liners. Bake for 18 minutes or until a toothpick comes out clean. Let the cupcakes cool completely on a wire rack.
- While the cupcakes cool, beat the powdered sugar with the remaining 2 tablespoons softened butter to make the frosting. Spread the frosting over each cooled cupcake.
- Press 2 candy eyes into the frosting on each cupcake. Scatter the assorted candy decorations around the eyes.
Extra Tips
Make the cupcakes a day ahead and store them unfrosted in an airtight container at room temperature. Add the frosting and candy eyes right before serving so the decorations stay bright and the eyes do not soften. Course: Dessert Cuisine: American Equipment: Mixing Bowl, Cupcake Pan, Oven, Wire Rack
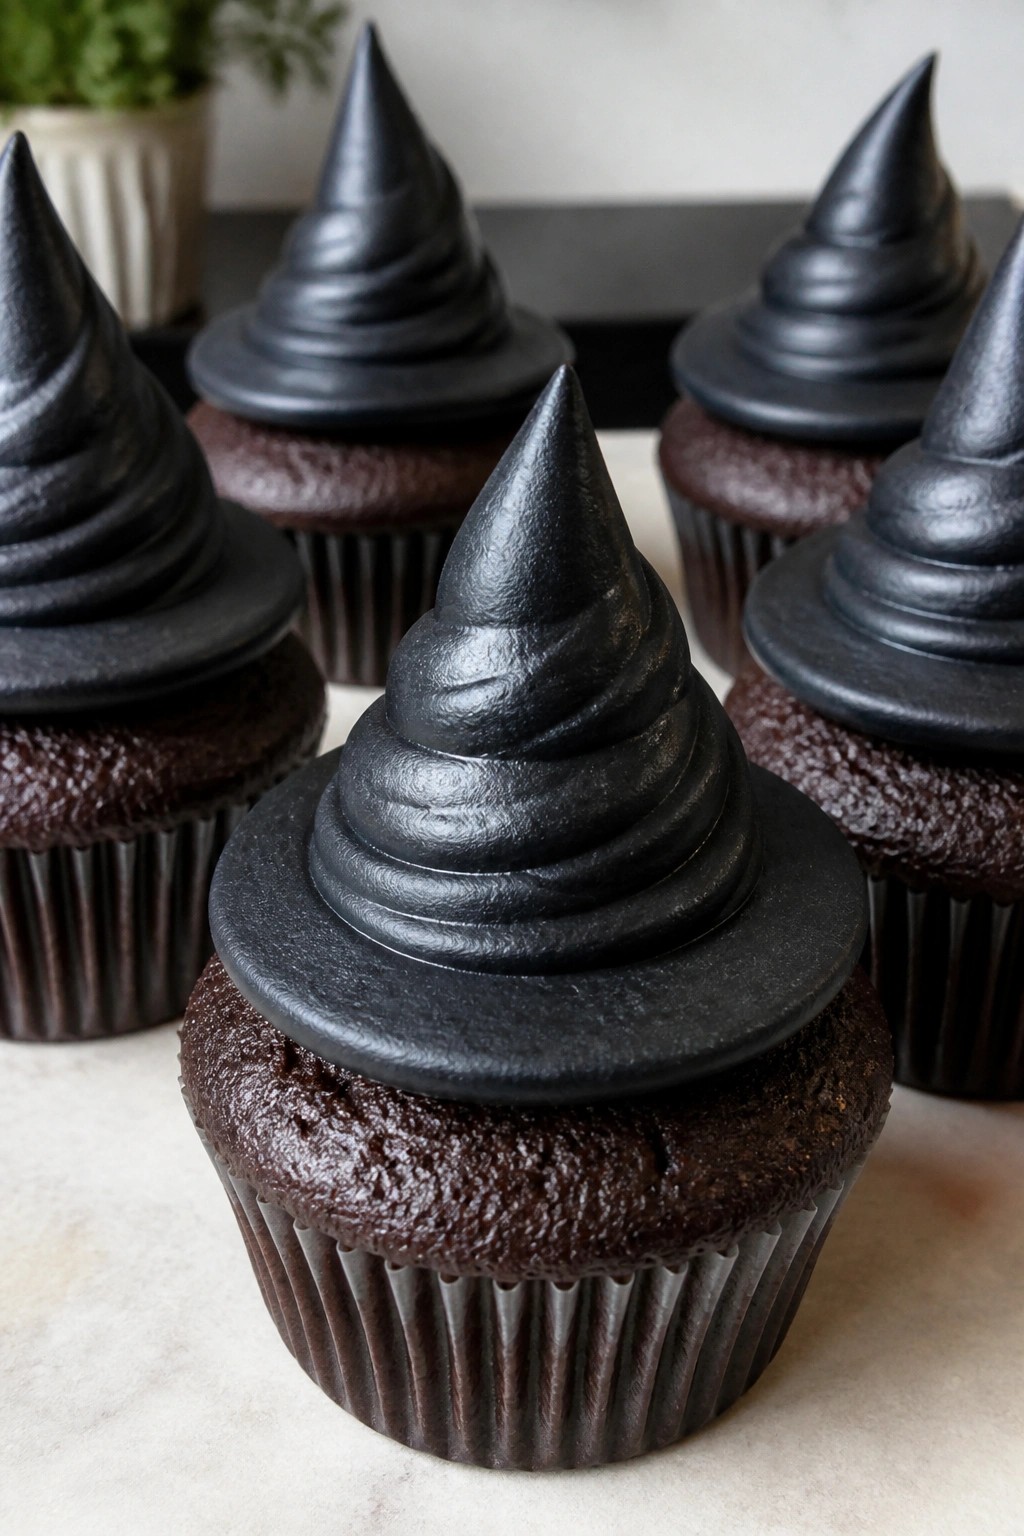
Witch Hat Chocolate Cupcakes with Pointed Frosting
These cupcakes give kids a simple chocolate treat shaped like a witch hat. They work well for Halloween parties or classroom snacks because the pointed frosting creates a clear visual that feels festive without much extra work.
The base stays moist from the oil and egg while the cocoa gives a mild chocolate taste. The frosting is firm enough to hold a tall point when piped, which completes the hat look.
Serves 4 people.
Ingredients
- ½ cup all-purpose flour
- ¼ cup unsweetened cocoa powder
- ½ cup granulated sugar
- ½ teaspoon baking powder
- ¼ teaspoon salt
- ½ cup milk
- ¼ cup vegetable oil
- 1 large egg
- 1 teaspoon vanilla extract
- ½ cup unsalted butter, softened
- 2 cups powdered sugar
- 2 tablespoons milk
- Black food coloring
Instructions
- Preheat the oven to 350°F and line a cupcake pan with four paper liners.
- In a mixing bowl, whisk together the flour, cocoa powder, sugar, baking powder, and salt.
- Add the milk, oil, egg, and vanilla extract to the dry ingredients and stir until the batter is smooth.
- Divide the batter evenly among the four liners and bake for 18 minutes, or until a toothpick inserted in the center comes out clean.
- Remove the cupcakes from the oven and let them cool completely on a wire rack.
- While the cupcakes cool, beat the softened butter in a clean mixing bowl until creamy.
- Gradually add the powdered sugar, the remaining two tablespoons of milk, and a few drops of black food coloring, then beat until the frosting is thick and holds stiff peaks.
- Spoon the frosting into a piping bag fitted with a star tip and pipe a tall, pointed swirl on each cooled cupcake to form the witch hat shape.
Extra Tips
Pipe the frosting in a steady upward motion so the point stays sharp. If the frosting feels too soft, chill it for ten minutes before piping. These cupcakes store best in an airtight container at room temperature for up to two days. Course: Dessert Cuisine: American Equipment: Mixing Bowl, Cupcake Pan, Piping Bag
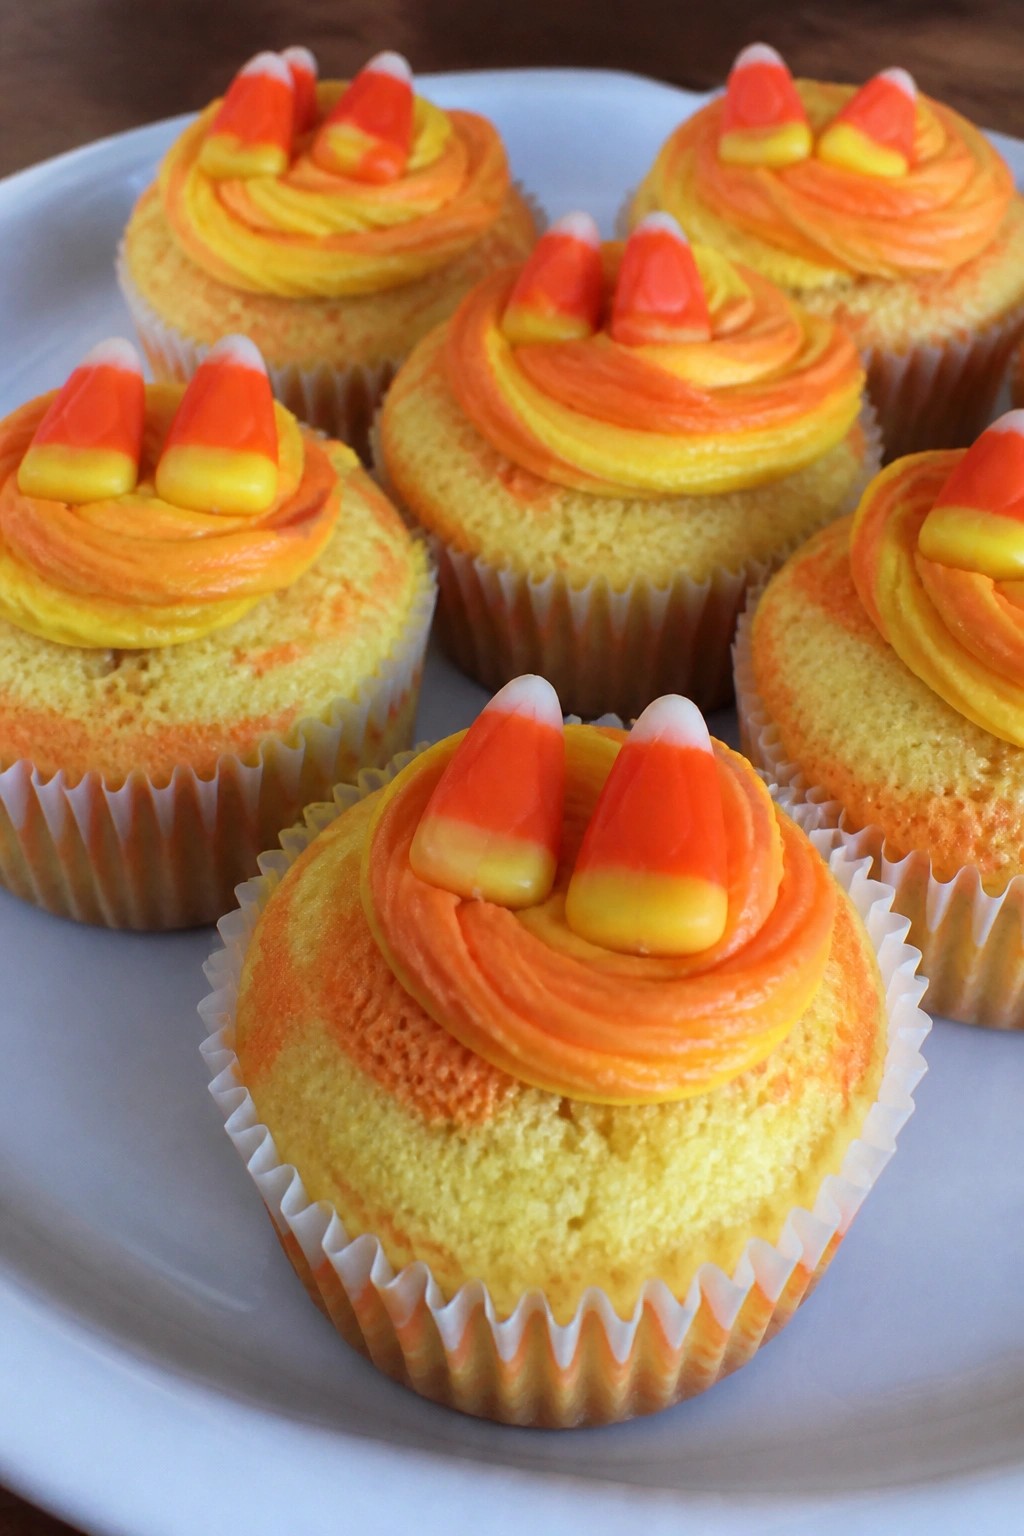
Candy Corn Swirled Yellow and Orange Cupcakes
These cupcakes bring the look of candy corn right into the batter with simple yellow and orange swirls. Kids enjoy spotting the colors before they even taste the vanilla cake underneath, and the candy corn pieces on top add a chewy finish that feels festive without extra work. They fit well for classroom parties or a quick weekend bake during the fall season.
The texture stays light and tender from a basic butter cake base, while the flavors stay mild and sweet so they appeal to young palates. The swirls stay distinct after baking when the batter is handled gently.
Serves 4 people.
Ingredients
- 1/2 cup all-purpose flour
- 1/4 cup granulated sugar
- 2 tablespoons unsalted butter, softened
- 1 large egg
- 1/4 cup milk
- 1 teaspoon baking powder
- 1/2 teaspoon vanilla extract
- 4 drops yellow food coloring
- 4 drops orange food coloring
- 12 candy corn pieces
Instructions
- Preheat the oven to 350 degrees F and line a muffin tin with 4 paper liners.
- In a small bowl, whisk together the flour and baking powder until evenly combined.
- In a separate bowl, beat the softened butter and sugar until creamy, then add the egg and vanilla extract and mix until smooth.
- Pour in the milk and stir until the wet mixture looks uniform.
- Add the dry ingredients to the wet ingredients and stir just until no dry streaks remain.
- Divide the batter evenly into two small bowls.
- Stir the yellow food coloring into one bowl and the orange food coloring into the other until each color looks even.
- Spoon alternating dollops of yellow and orange batter into each liner, then use a toothpick to swirl the colors lightly once or twice.
- Bake for 18 to 20 minutes until a toothpick inserted in the center comes out clean.
- Let the cupcakes cool completely, then press three candy corn pieces onto the top of each one.
Extra Tips
Swirl the two colored batters only once or twice so the yellow and orange stay visible in distinct sections after baking. If the candy corn feels too firm, press the pieces on while the cupcakes are still slightly warm so they stick without melting. Store any leftovers in an airtight container at room temperature for up to two days to keep the cake soft. Course: Dessert Cuisine: American Equipment: Mixing bowls, Whisk, Muffin tin, Toothpick
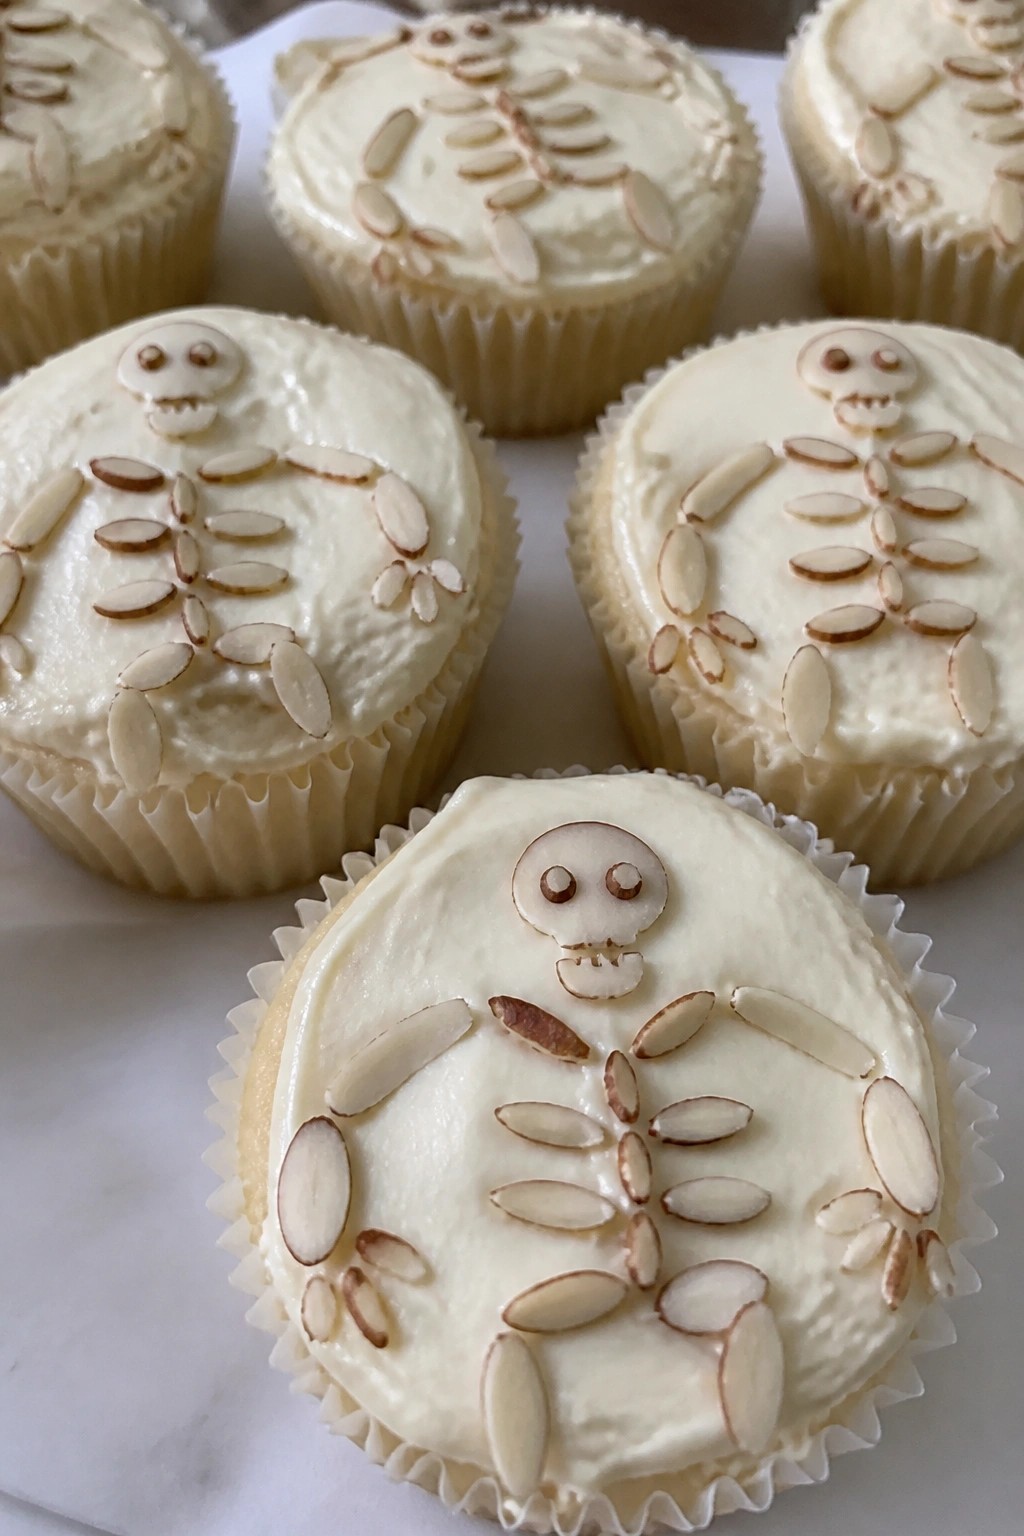
Skeleton Bone White Chocolate Cupcakes with Almond Slivers
These cupcakes bring a simple skeleton theme to Halloween with their pale color and almond slivers arranged like bones. They work well for kids parties or school events where you want something easy to make ahead. The white chocolate keeps the crumb soft and sweet while the almonds add a light crunch on top.
The flavor stays mild and creamy with just a hint of vanilla. Kids enjoy the playful look without any strong flavors getting in the way.
Serves 4 people.
Ingredients
- 1 cup all-purpose flour
- 1/2 cup granulated sugar
- 1/4 cup unsalted butter, softened
- 1 large egg
- 1/2 cup white chocolate chips, divided
- 1/4 cup milk
- 1 tsp baking powder
- 1/2 tsp vanilla extract
- 1/4 tsp salt
- 1/4 cup almond slivers
Instructions
- Preheat the oven to 350 degrees and line a cupcake pan with four paper liners.
- In a mixing bowl, whisk together the flour, baking powder, and salt.
- In a second bowl, beat the softened butter and sugar until light. Add the egg and vanilla extract, then stir in 1/4 cup of the melted white chocolate chips along with the milk.
- Combine the wet and dry mixtures until just smooth. Spoon the batter evenly into the prepared liners.
- Bake for 18 to 20 minutes until a toothpick comes out clean. Let the cupcakes cool completely on a rack.
- Melt the remaining 1/4 cup white chocolate chips. Spread a thin layer over each cooled cupcake.
- Press almond slivers into the white chocolate topping to form simple bone shapes.
Extra Tips
Melt the white chocolate slowly over low heat or in short microwave bursts so it stays smooth for spreading. Arrange the almond slivers right after you add the topping while it is still soft. Store any leftovers in a single layer in an airtight container at room temperature to keep the almonds crisp. Course: Dessert Cuisine: American Equipment: Mixing bowls, Whisk, Cupcake pan, Oven, Cooling rack
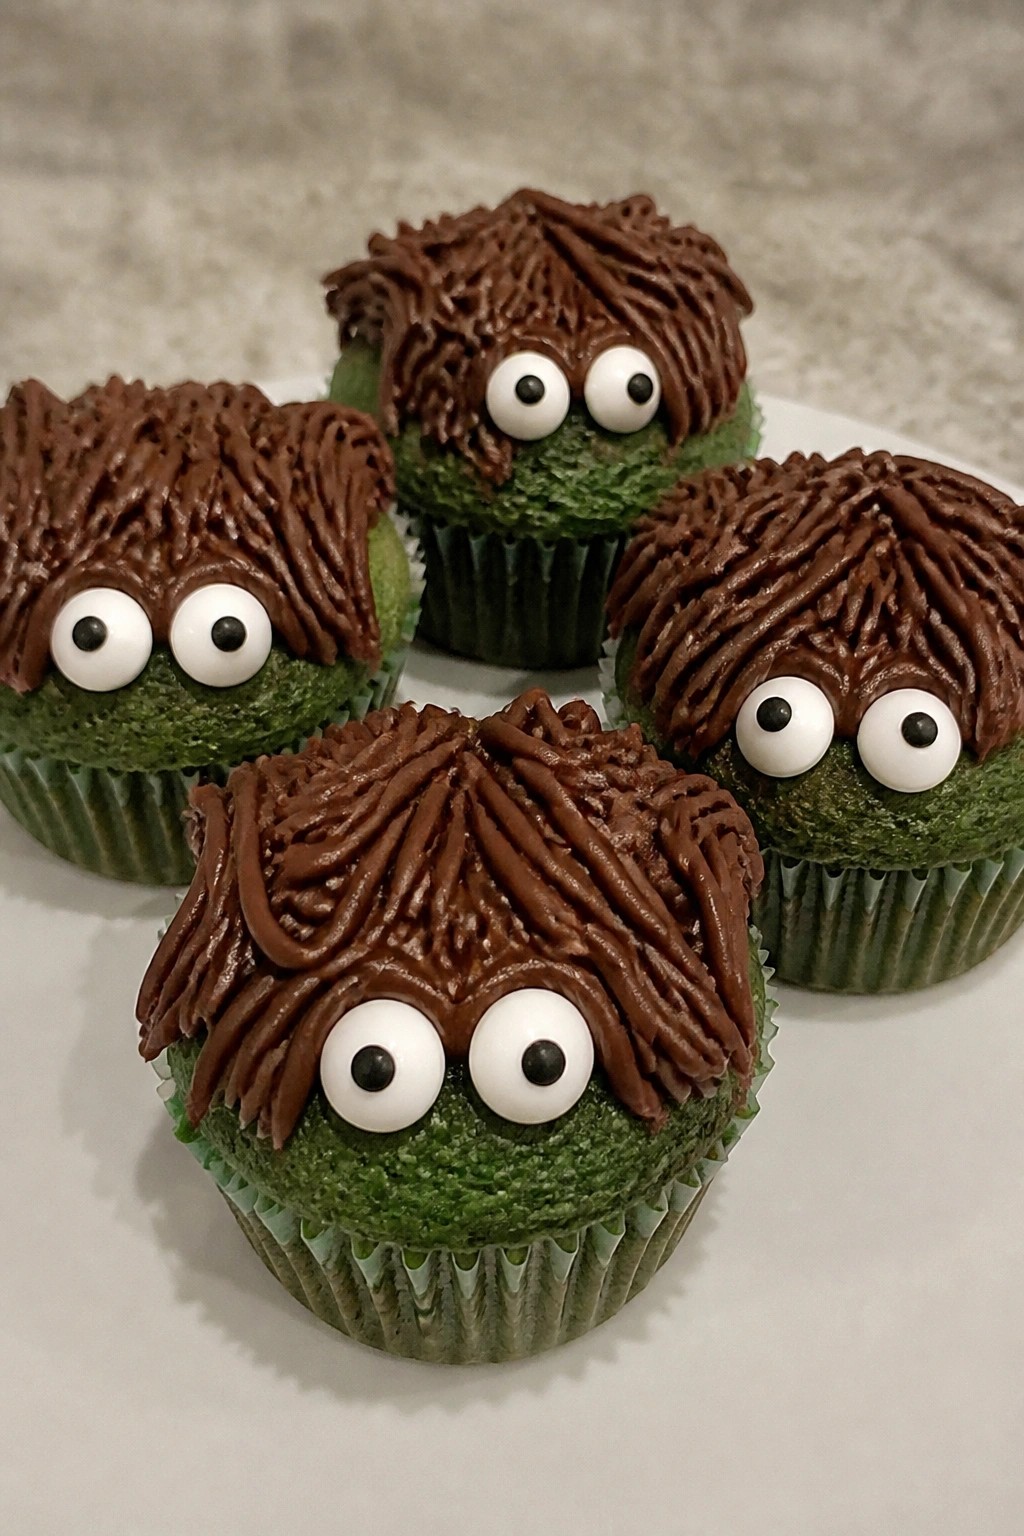
Frankenstein Green Velvet Cupcakes with Chocolate Hair
These cupcakes turn a simple velvet batter into a kid-friendly Halloween treat with their vivid green color and playful chocolate hair on top. They suit after-school snacks or small party trays where you want something quick but themed. The crumb stays moist with a light cocoa taste that pairs well with the sweet frosting.
This recipe serves 4 people. – ½ cup all-purpose flour – ¼ cup granulated sugar – 1 tablespoon cocoa powder – ¼ teaspoon baking soda – ⅛ teaspoon salt – ¼ cup buttermilk – 2 tablespoons vegetable oil – 1 egg – 1 teaspoon green food coloring – ½ teaspoon vanilla extract – ½ cup chocolate frosting – 8 candy eyes
### Instructions 1. Preheat the oven to 350°F and line a cupcake pan with four paper liners. 2. In a medium bowl, whisk together the flour, sugar, cocoa powder, baking soda, and salt until evenly combined. 3. Add the buttermilk, vegetable oil, egg, green food coloring, and vanilla extract to the dry ingredients. Stir until the batter is smooth and uniform in color. 4. Divide the batter evenly among the four liners, filling each about two-thirds full. 5. Bake for 15 to 18 minutes, or until a toothpick inserted in the center comes out clean. Cool the cupcakes completely on a wire rack. 6. Spread or pipe the chocolate frosting on top of each cooled cupcake to form the hair, leaving space for the face. Press two candy eyes into the frosting on each cupcake.
### Extra Tips Pipe the chocolate frosting in short downward strokes to create a shaggy hair effect that stays in place once set. If the frosting feels too stiff, warm it slightly in the microwave for five seconds before piping. Store finished cupcakes in an airtight container at room temperature for up to two days.
Course: Dessert Cuisine: American Equipment: Mixing bowl, cupcake pan, oven, wire rack
Serves 4 people.
Instructions
- Preheat the oven to 350°F and line a cupcake pan with four paper liners.
- In a medium bowl, whisk together the flour, sugar, cocoa powder, baking soda, and salt until evenly combined.
- Add the buttermilk, vegetable oil, egg, green food coloring, and vanilla extract to the dry ingredients. Stir until the batter is smooth and uniform in color.
- Divide the batter evenly among the four liners, filling each about two-thirds full.
- Bake for 15 to 18 minutes, or until a toothpick inserted in the center comes out clean. Cool the cupcakes completely on a wire rack.
- Spread or pipe the chocolate frosting on top of each cooled cupcake to form the hair, leaving space for the face. Press two candy eyes into the frosting on each cupcake.
Extra Tips
Pipe the chocolate frosting in short downward strokes to create a shaggy hair effect that stays in place once set. If the frosting feels too stiff, warm it slightly in the microwave for five seconds before piping. Store finished cupcakes in an airtight container at room temperature for up to two days. Course: Dessert Cuisine: American Equipment: Mixing bowl, cupcake pan, oven, wire rack
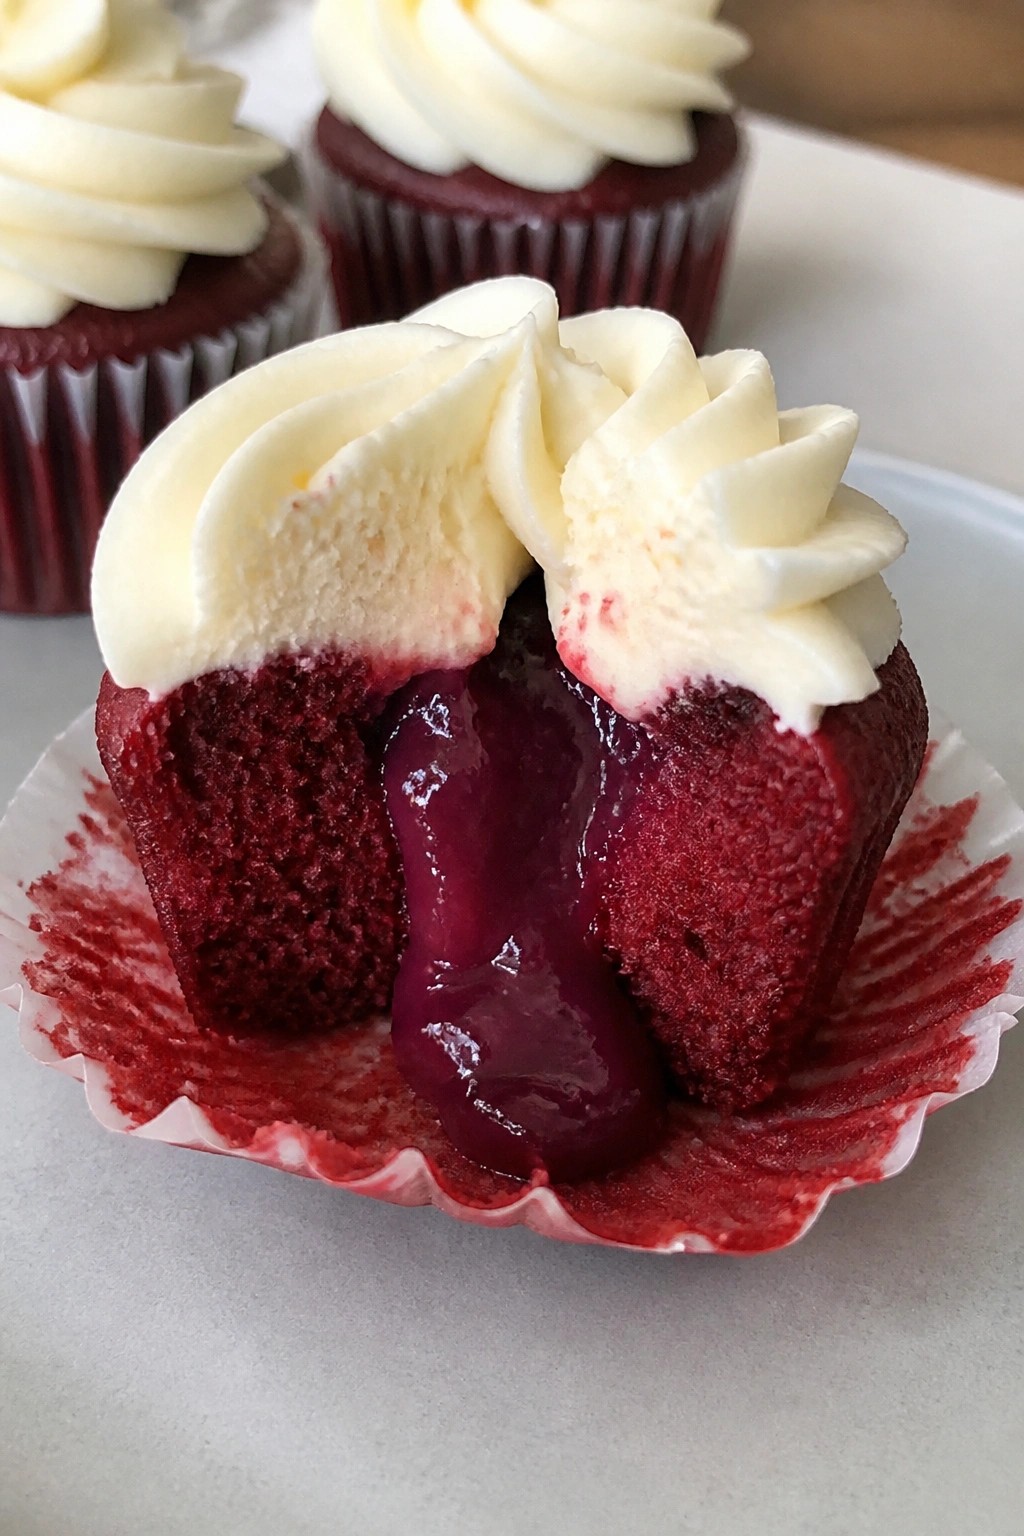
Bloody Red Velvet Cupcakes with Berry Filling
These cupcakes bring a fun surprise to Halloween parties. The red velvet base hides a berry center that spills out when kids take a bite, adding a playful touch without being too messy. The flavor combines mild chocolate with a bright berry note and a light cream cheese finish.
They work well for school events or at-home baking sessions where you want something themed but simple to prepare.
Serves 4 people.
Ingredients
- 1 cup all-purpose flour
- 1/2 cup sugar
- 1 tablespoon cocoa powder
- 1/2 teaspoon baking soda
- 1/4 teaspoon salt
- 1/2 cup buttermilk
- 1/4 cup vegetable oil
- 1 large egg
- 1 teaspoon red food coloring
- 1/2 teaspoon vanilla extract
- 1/2 cup fresh raspberries
- 1 tablespoon sugar
- 1 cup cream cheese frosting
Instructions
- Preheat the oven to 350 degrees and line a muffin tin with four cupcake liners.
- In a mixing bowl, whisk together the flour, sugar, cocoa powder, baking soda, and salt.
- In a separate bowl, mix the buttermilk, vegetable oil, egg, red food coloring, and vanilla extract until smooth.
- Pour the wet mixture into the dry ingredients and stir until just combined.
- Spoon a small amount of batter into each liner, add a few raspberries mixed with the tablespoon of sugar in the center, then cover with the remaining batter.
- Bake for 18 to 20 minutes until a toothpick comes out clean from the cake portion.
- Let the cupcakes cool completely before spreading the cream cheese frosting on top.
Extra Tips
Mash the raspberries lightly before adding them if you want the filling to spread more like a sauce inside the cupcake. Store any leftovers in an airtight container in the fridge for up to two days, and let them sit at room temperature for ten minutes before serving so the frosting softens. Course: Dessert Cuisine: American Equipment: Mixing Bowl, Muffin Tin, Whisk, Oven
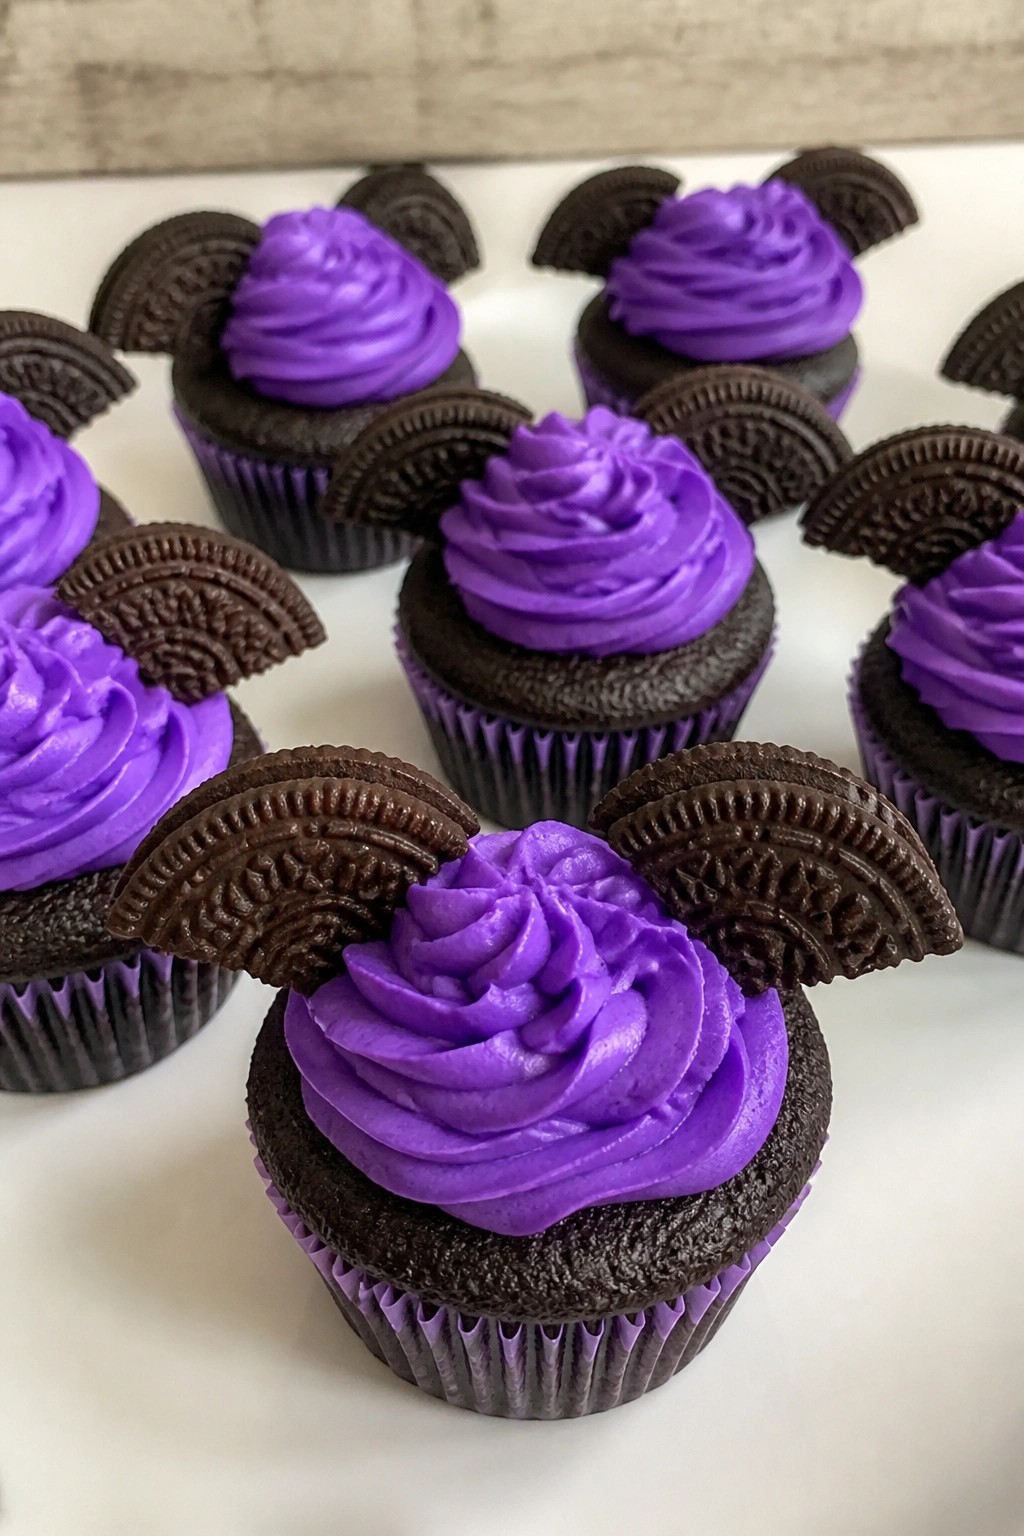
Bat Wing Dark Chocolate Cupcakes with Purple Buttercream
These cupcakes bring a spooky touch to Halloween parties with their dark chocolate base and bright purple frosting. Kids enjoy the fun bat wing decorations while the rich chocolate pairs well with the sweet, creamy topping. They work well for small gatherings or classroom treats.
The texture stays moist from the oil and egg, and the frosting pipes smoothly for easy decorating. The wings add a playful element without extra fuss.
Serves 4 people.
Ingredients
- ½ cup all-purpose flour
- ¼ cup unsweetened cocoa powder
- ½ cup granulated sugar
- ½ teaspoon baking soda
- 1 large egg
- ¼ cup milk
- ¼ cup vegetable oil
- 1 teaspoon vanilla extract
- ½ cup unsalted butter, softened
- 1 cup powdered sugar
- Purple food coloring
- 2 tablespoons milk
- 8 chocolate cookie halves
Instructions
- Preheat the oven to 350°F and line a cupcake pan with 4 paper liners.
- In a mixing bowl, whisk together the flour, cocoa powder, sugar, and baking soda.
- Add the egg, ¼ cup milk, vegetable oil, and vanilla extract to the dry ingredients. Stir until the batter is smooth.
- Divide the batter evenly among the 4 liners and bake for 18 to 20 minutes until a toothpick comes out clean. Cool the cupcakes completely on a wire rack.
- In a separate bowl, beat the softened butter with an electric mixer until creamy. Gradually add the powdered sugar, then mix in the remaining 2 tablespoons milk until the frosting reaches a spreadable consistency.
- Add purple food coloring a drop at a time and beat until the color is even.
- Pipe or spread the purple buttercream on each cooled cupcake. Press two chocolate cookie halves into the sides of each cupcake to form bat wings.
Extra Tips
Make the frosting a day ahead and store it in the fridge, then let it soften before piping. If the cookie halves feel loose on the frosting, press them in gently right after piping while the surface is still soft. For a deeper chocolate flavor, use Dutch-processed cocoa powder in the batter. Course: Dessert Cuisine: American Equipment: Mixing bowls, Cupcake pan, Electric mixer, Wire rack, Piping bag