


Halloween dinner does not have to be complicated when you have kids to feed. These ideas focus on meals that are easy to prepare and still feel special for the holiday. You can use common ingredients to create dishes that appeal to picky eaters. Each recipe includes steps that fit into a regular weeknight routine. This way you get some variety without spending extra time in the kitchen.
Helpful Tips Before You Start
A few small adjustments make these dinners easier and more appealing for kids.
Let Kids Help Assemble
Give them simple tasks like placing toppings or arranging items on their plate. This builds excitement without adding much time.
Reach for Cookie Cutters
Use them on sandwiches, cheese slices, or melon to create pumpkins, ghosts, or bats. Kids notice the shapes right away.
Keep Bases Familiar
Start with foods your children already eat and add one themed element. This raises the chance they will finish the meal.
Prep Components Ahead
Chop vegetables or mix sauces earlier in the day. Quick assembly at dinner time reduces stress when kids are eager to eat.
Mummy-Wrapped Hot Dogs with Graveyard Mashed Potatoes
This recipe turns a simple weeknight dinner into a playful Halloween meal that kids enjoy helping to assemble. The hot dogs come out with a golden, flaky crust while the mashed potatoes provide a creamy base that can be decorated to look like a small graveyard scene.
It works well for family dinners in October or small Halloween parties. The flavors stay familiar with savory hot dogs and buttery potatoes that most kids already like.

Serves 4 people.
Ingredients
- 8 hot dogs
- 1 can crescent roll dough
- 4 large potatoes, peeled and cubed
- ½ cup milk
- 4 tablespoons butter
- ½ teaspoon salt
- ¼ teaspoon black pepper
- 2 tablespoons chopped chives
- 4 slices cheddar cheese
- 1 teaspoon mustard
Instructions
- Preheat the oven to 375°F. Unroll the crescent roll dough and cut it into thin strips. Wrap the strips around each hot dog to create a mummy look, leaving small gaps for the face. Place the wrapped hot dogs on a baking sheet.
- Bake for 12 to 15 minutes until the dough is golden. While the hot dogs bake, place the cubed potatoes in a pot of water and boil until tender, about 15 minutes. Drain the potatoes and return them to the pot.
- Add the milk, butter, salt, and pepper. Mash until smooth. Stir in the chopped chives. Cut the cheddar cheese slices into small rectangle shapes to resemble tombstones and press them gently into the mashed potatoes. Use the mustard to draw small eyes on each hot dog mummy.
Extra Tips
Serve the mashed potatoes in a shallow dish so the cheese tombstones stand upright and stay visible. If the crescent dough feels too sticky while wrapping, chill it for a few minutes first. Leftovers reheat well in a 350°F oven for 8 minutes to keep the dough crisp. Course: Main Course Cuisine: American Equipment: Baking sheet, Large pot, Potato masher
Jack-O’-Lantern Stuffed Peppers with Turkey and Rice
These stuffed peppers turn a regular dinner into a Halloween activity that kids can help with. Carving simple faces into the peppers gives them a jack-o’-lantern look that makes the meal feel festive without extra decorations. The filling stays mild and familiar, so even picky eaters are more likely to try it.
The turkey and rice mixture cooks up soft with a light tomato flavor and melts into the cheese on top. It works well for weeknight dinners in October or for small Halloween parties when you want something warm and filling that still fits the theme.

Serves 4 people.
Ingredients
- 4 large orange bell peppers
- 1 tablespoon olive oil
- 1 pound ground turkey
- 1 small onion, finely chopped
- 2 cloves garlic, minced
- 1 teaspoon dried oregano
- 1 can (15 ounces) tomato sauce
- 2 cups cooked white rice
- 1 cup shredded mozzarella cheese
- Salt and black pepper to taste
Instructions
- Preheat the oven to 375°F. Cut the tops off each bell pepper and remove the seeds and membranes. Use a small knife to carve simple jack-o’-lantern faces on the front of each pepper.
- Heat the olive oil in a large skillet over medium heat. Add the ground turkey and cook until no longer pink, breaking it up with a spoon as it browns.
- Add the onion and garlic to the skillet. Cook for 3 minutes until the onion softens. Stir in the oregano, salt, and pepper.
- Pour in the tomato sauce and cooked rice. Stir everything together and let it simmer for 2 minutes. Remove from heat and mix in half of the mozzarella cheese.
- Stand the carved peppers upright in a baking dish. Spoon the turkey and rice mixture evenly into each pepper. Sprinkle the remaining cheese on top.
- Bake for 25 minutes until the peppers are tender and the cheese is melted and lightly browned. Let them rest for 5 minutes before serving.
Extra Tips
Carve the faces after removing the seeds so the peppers stay sturdy. If your kids want to help, let them draw the faces with a marker first. Leftovers reheat well in the microwave with a damp paper towel over the top to keep the rice from drying out. Use orange peppers only for the strongest jack-o’-lantern effect. Course: Main Course Cuisine: American Equipment: Large skillet, Baking dish, Cutting board, Sharp knife
Monster Green Chicken Enchiladas with Avocado Crema
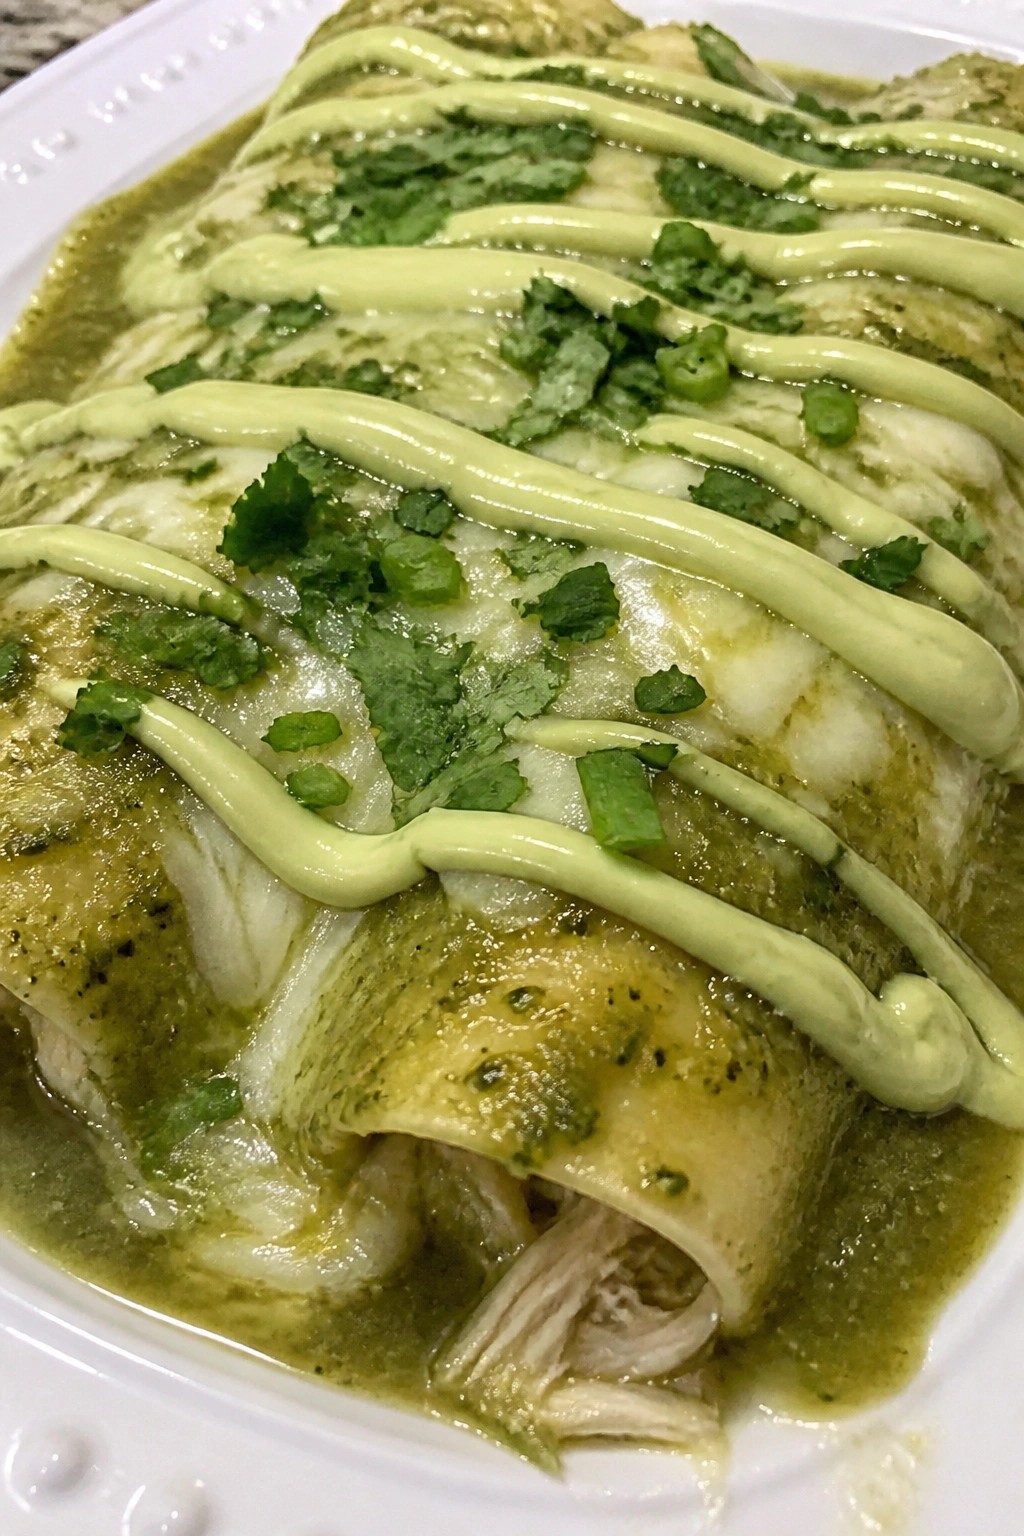
These Monster Green Chicken Enchiladas give dinner a bright green twist that appeals to kids. Blending spinach into the sauce creates the color while keeping the flavor mild and familiar. The dish works well for Halloween because it feels festive without extra work.
The chicken stays juicy inside the tortillas, and the avocado crema adds a cool, creamy finish on top. Families can serve this on busy weeknights or special occasions when they want something simple yet themed.
Serves 4 people.
Ingredients
- 2 cups shredded cooked chicken
- 8 small corn tortillas
- 1 (10-ounce) can green enchilada sauce
- 2 cups fresh spinach
- 1 cup shredded Monterey Jack cheese
- 1 ripe avocado
- 1/2 cup sour cream
- 1 tablespoon lime juice
- 1/4 teaspoon salt
- Chopped cilantro for garnish
- Sliced green onions for garnish
Instructions
- Preheat the oven to 375 degrees and lightly grease a baking dish.
- Place the green enchilada sauce and spinach in a blender. Blend until smooth and bright green.
- Warm the tortillas briefly so they stay flexible.
- Mix the shredded chicken with half of the green sauce in a bowl.
- Spoon the chicken mixture into each tortilla, roll them up, and place them seam-side down in the baking dish.
- Pour the remaining green sauce over the rolled tortillas and sprinkle the Monterey Jack cheese on top.
- Bake for 20 minutes until the cheese melts and the edges bubble.
- While the enchiladas bake, mash the avocado in a medium bowl. Stir in the sour cream, lime juice, and salt until smooth.
- Remove the enchiladas from the oven and let them rest for a few minutes.
- Drizzle or dollop the avocado crema over the enchiladas and add cilantro and green onions before serving.
Extra Tips
Blend the spinach fully so no pieces remain and the sauce stays smooth for kids. The avocado crema thickens as it sits, so stir it again right before serving if needed. Leftovers reheat well in the oven at 350 degrees with a splash of extra sauce to keep the tortillas from drying out. Course: Main Course Cuisine: Mexican Equipment: Baking dish, Blender, Medium bowl
Witch’s Cauldron Beef Chili with Cornbread Skulls
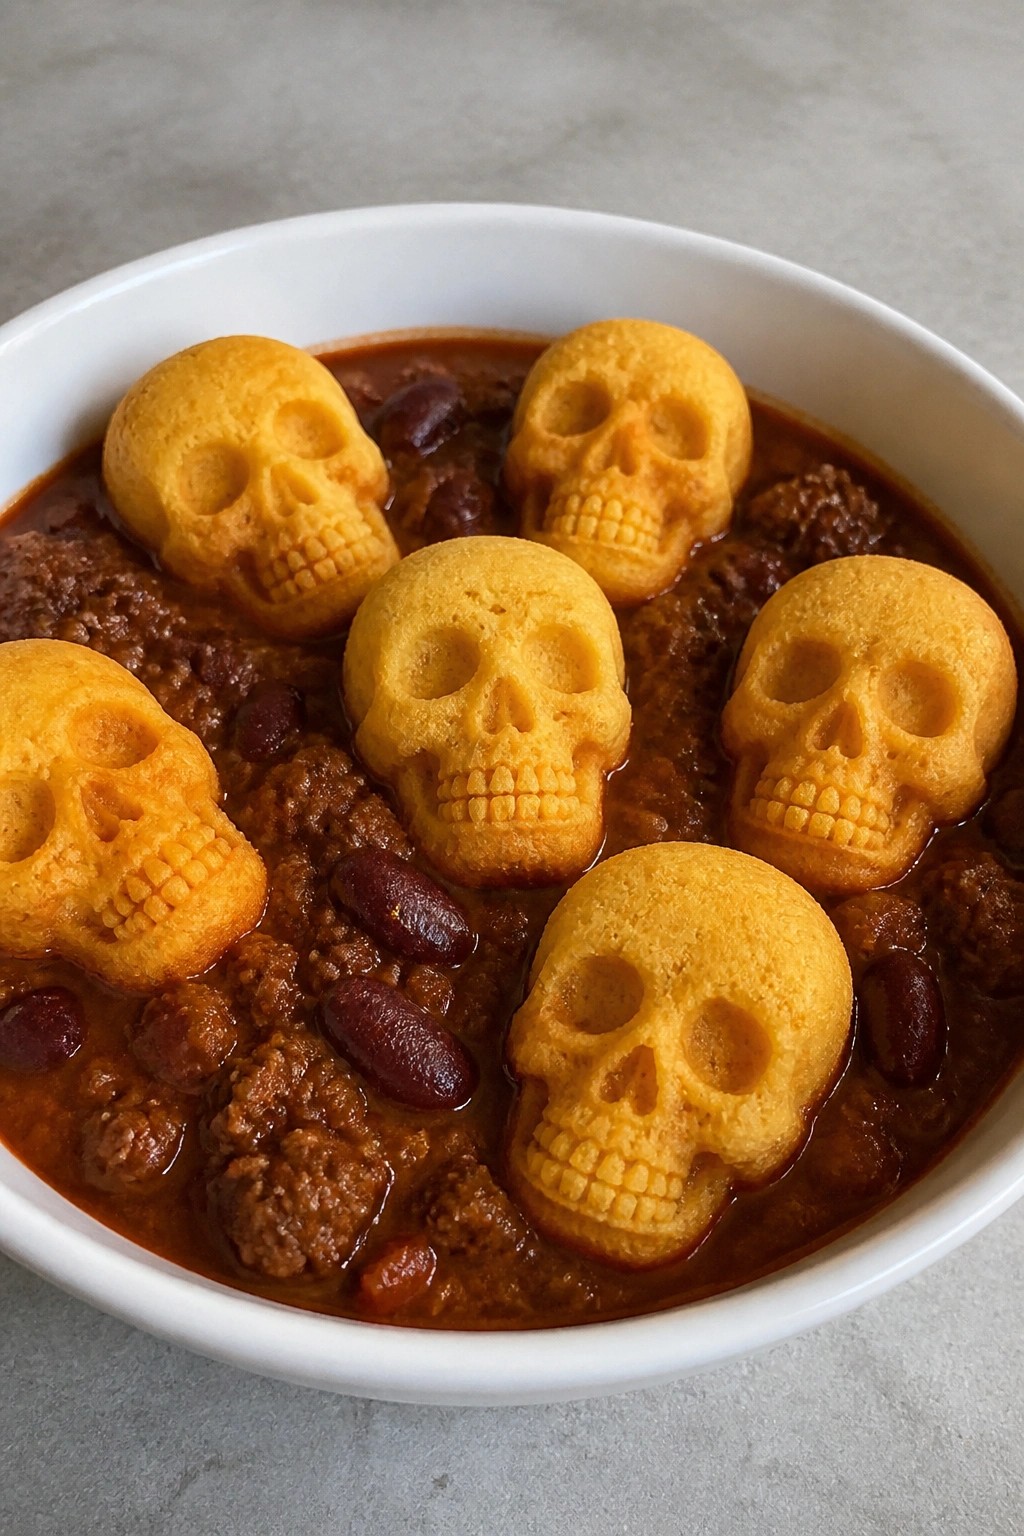
This chili turns a simple weeknight meal into a Halloween dinner that kids actually look forward to. The beef simmers into a thick, mild stew that gets ladled into bowls like a cauldron, then topped with golden cornbread skulls baked in a fun mold. The texture stays hearty from the beans and beef while the cornbread adds a lightly sweet contrast that balances the spices.
It works best for family meals in October when you want something warm and filling without extra fuss. The recipe keeps the heat level low so children can enjoy it, and the skulls make the plate feel festive without any extra decorating.
Serves 4 people.
Ingredients
- 1 pound ground beef
- 1 medium onion, chopped
- 2 cloves garlic, minced
- 1 red bell pepper, diced
- 1 can (15 oz) kidney beans, drained and rinsed
- 1 can (14.5 oz) diced tomatoes
- 2 tablespoons mild chili powder
- 1 teaspoon ground cumin
- 1 cup cornmeal
- 1 cup all-purpose flour
- 1 tablespoon baking powder
- 1 cup milk
- 1 large egg
- 1/4 cup vegetable oil
- 1/2 teaspoon salt
Instructions
- Brown the ground beef in a large pot over medium heat, breaking it up as it cooks. Add the chopped onion, minced garlic, and diced red bell pepper, then cook until the onion softens.
- Stir in the drained kidney beans, diced tomatoes, mild chili powder, and cumin. Add a pinch of salt and pepper. Bring the mixture to a simmer, then reduce the heat and let it cook gently for 20 minutes, stirring occasionally.
- While the chili simmers, heat the oven to 400 degrees and grease a skull-shaped silicone mold or muffin tin. In a mixing bowl, whisk together the cornmeal, flour, baking powder, and salt. In a separate bowl, beat the milk, egg, and vegetable oil until combined. Pour the wet mixture into the dry ingredients and stir just until a batter forms.
- Spoon the batter into the prepared mold, filling each skull shape about three-quarters full. Bake for 15 to 18 minutes until the tops turn golden and a toothpick comes out clean. Let the cornbread skulls cool for a few minutes before removing them from the mold.
- Ladle the chili into bowls and place one or two cornbread skulls on top or beside each serving.
Extra Tips
Make the cornbread skulls a day ahead and store them in an airtight container at room temperature, then warm them briefly in the oven before placing on the hot chili. If you do not have a skull mold, bake the batter in a regular muffin tin and use a small knife to carve simple face details after baking. Leftovers keep well in the fridge for two days and reheat easily on the stovetop with a splash of water to loosen the chili. Course: Main Course Cuisine: American Equipment: Large pot, Mixing bowl, Skull mold or muffin tin, Oven
Bat-Wing Chicken Tacos with Black Bean Salsa
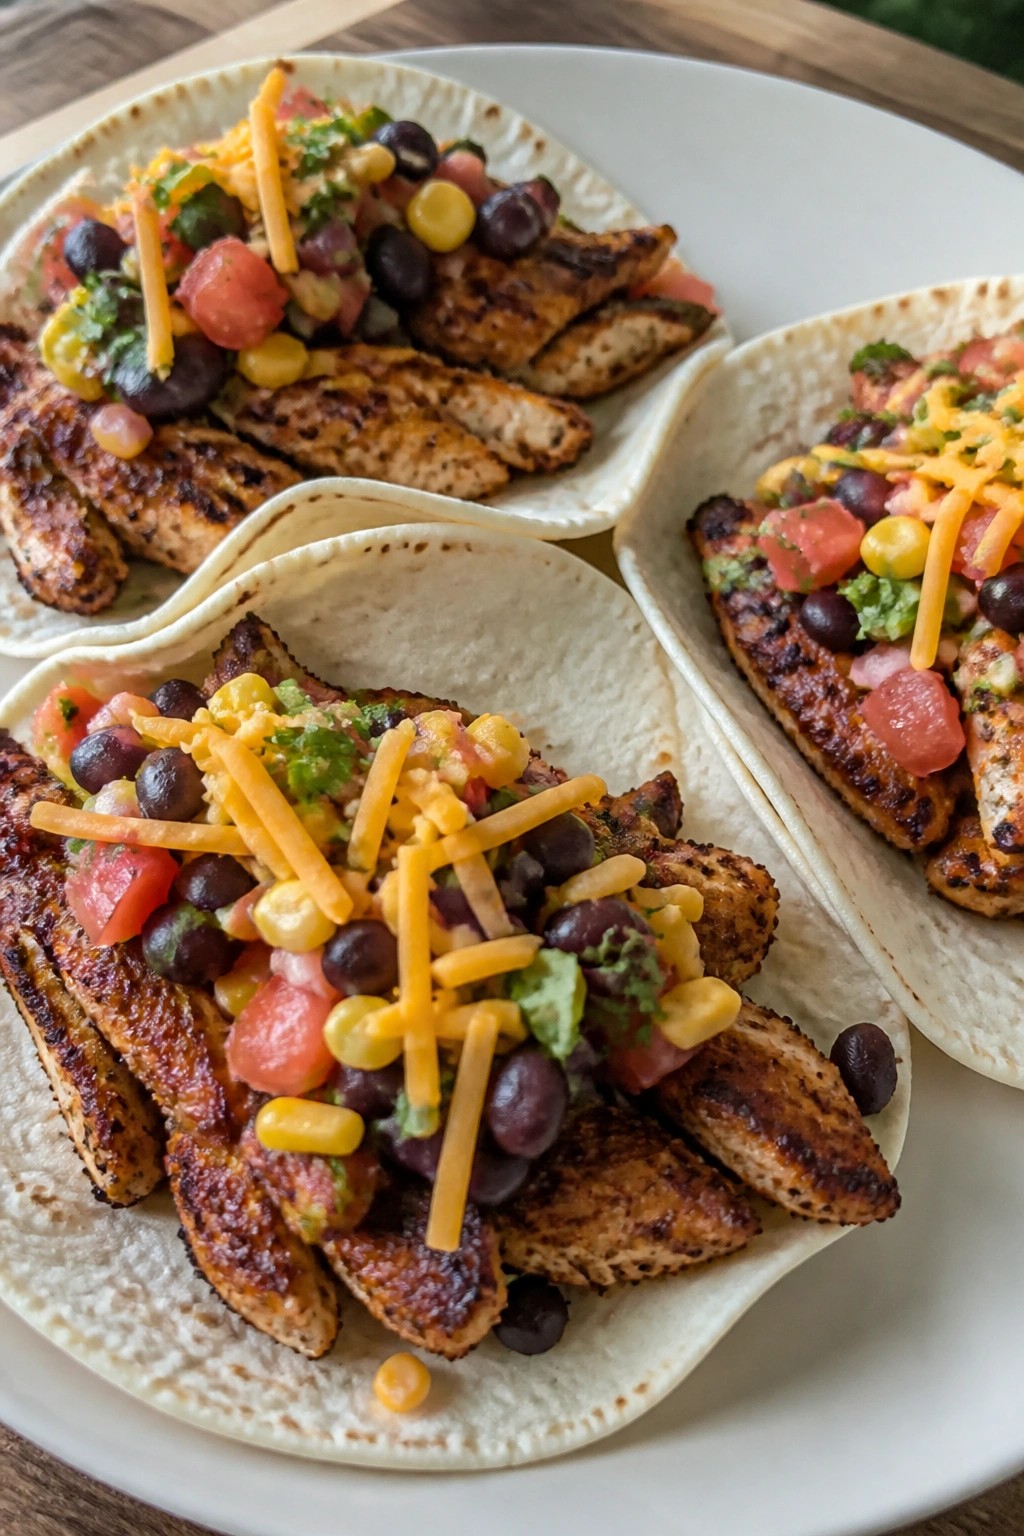
These tacos give chicken a playful bat-wing shape that fits right into a Halloween meal. Kids enjoy the hands-on look while the black bean salsa brings color and freshness to each bite. The result is a mild taco with juicy chicken and a crunchy, tangy salsa that feels special but stays simple.
This works well for weeknight dinners when you want something quick that still matches the holiday theme. The spices stay light so younger eaters stay happy, and the salsa can be made while the chicken cooks.
Serves 4 people.
Ingredients
- 1 pound boneless skinless chicken breasts
- 2 tablespoons taco seasoning
- 1 tablespoon olive oil
- 8 small flour tortillas
- 1 can (15 ounces) black beans, drained and rinsed
- 1 cup corn kernels
- 1 medium tomato, diced
- 1/4 cup finely chopped red onion
- 2 tablespoons chopped fresh cilantro
- Juice of 1 lime
- 1/2 cup shredded cheddar cheese
- Salt and pepper to taste
Instructions
- Place the chicken breasts on a cutting board and slice each one into thin strips, then fan the strips slightly to form a bat-wing shape. Sprinkle both sides evenly with taco seasoning, salt, and pepper.
- Heat the olive oil in a large skillet over medium heat. Add the shaped chicken pieces and cook for 5 to 6 minutes per side until golden and cooked through.
- While the chicken cooks, combine the black beans, corn, tomato, red onion, cilantro, and lime juice in a mixing bowl. Stir gently and season with a pinch of salt and pepper.
- Warm the flour tortillas in a dry skillet or microwave for 20 seconds until soft.
- Place two bat-wing chicken pieces on each tortilla. Spoon the black bean salsa over the chicken and finish with a sprinkle of shredded cheddar cheese.
Extra Tips
Make the salsa first so the flavors can sit while the chicken cooks. If the chicken strips do not hold their shape well, press them gently with a spatula during the first minute in the skillet. Leftovers keep in the fridge for two days; reheat the chicken in a skillet to keep it from drying out and add fresh salsa just before serving. Course: Main Course Cuisine: Mexican Equipment: Large skillet, Mixing bowl, Cutting board
Ghostly White Lasagna with Spinach and Ricotta
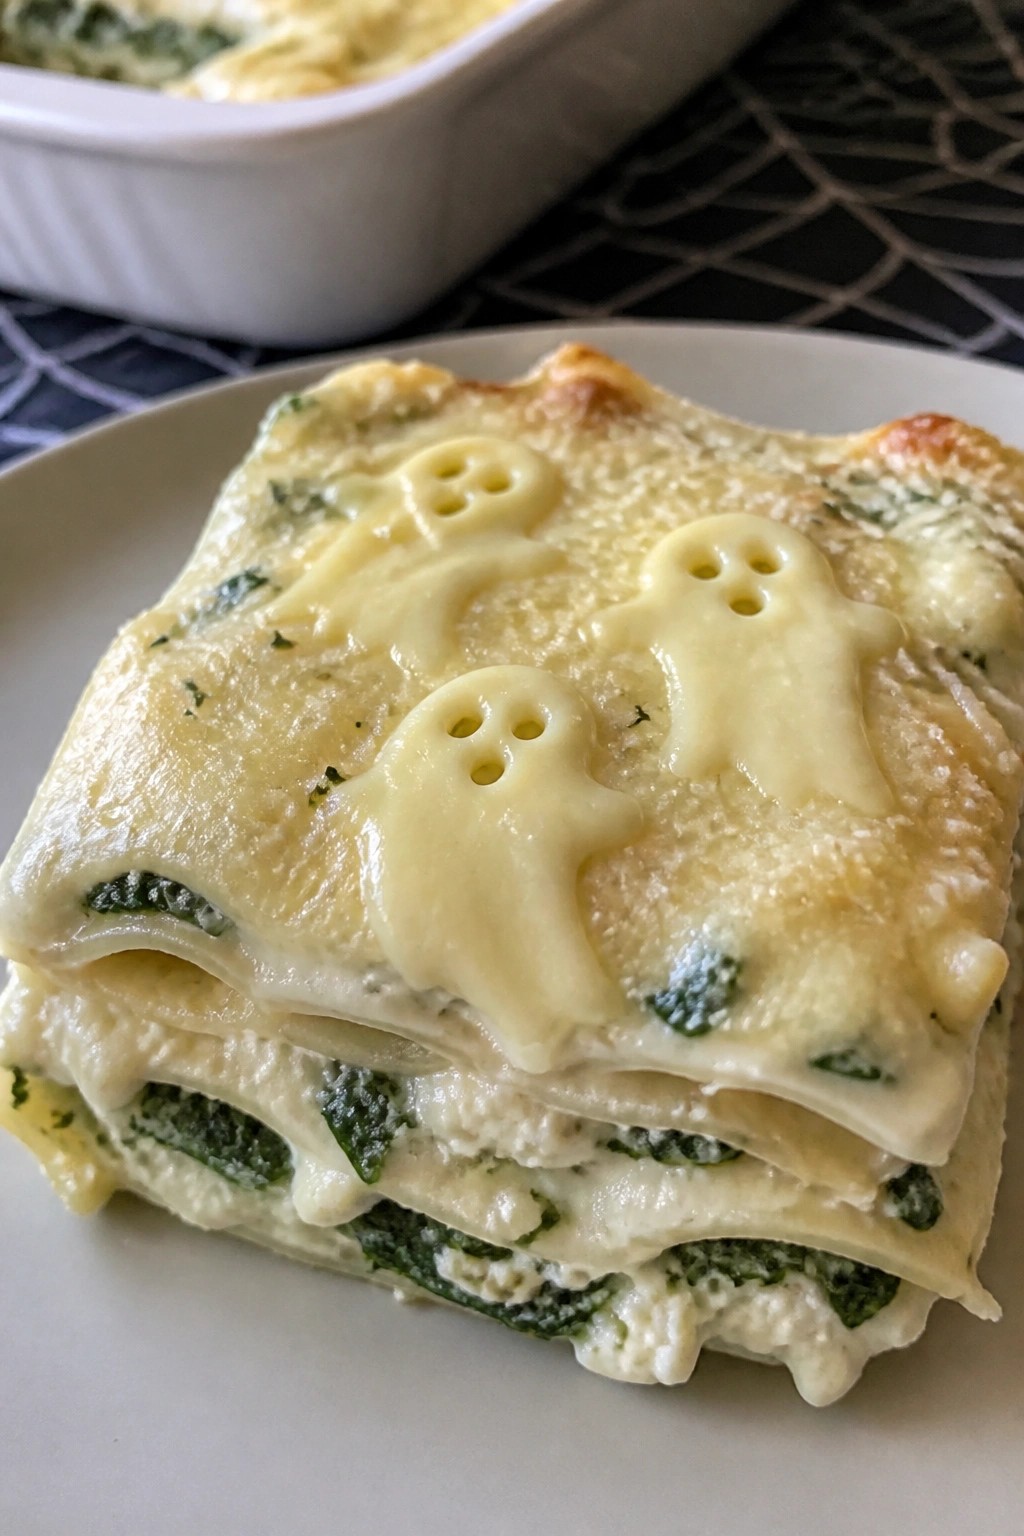
This Ghostly White Lasagna turns a classic creamy pasta bake into a fun Halloween dinner. The all-white layers hide chopped spinach while the top gets a playful ghost detail from extra cheese. Kids enjoy the mild cheesy taste and soft texture, and it fits easily into a busy evening before trick-or-treating.
The dish stays rich from a simple white sauce and ricotta, with tender noodles and just enough spinach for color without strong flavor. It makes a filling main that still feels light enough for an evening meal.
Serves 4 people.
Ingredients
- 8 oven-ready lasagna noodles
- 16 ounces ricotta cheese
- 1 pound fresh spinach, chopped
- 4 cups shredded mozzarella cheese, divided
- 1 cup grated Parmesan cheese
- 3 tablespoons butter
- 3 tablespoons all-purpose flour
- 3 cups milk
- 3 garlic cloves, minced
- 1 teaspoon salt
- 1/2 teaspoon black pepper
Instructions
- Preheat the oven to 375°F. Lightly grease an 8×8 baking dish.
- Melt the butter in a saucepan over medium heat. Add the minced garlic and cook for one minute until fragrant.
- Whisk in the flour and cook for another minute. Slowly pour in the milk while whisking to avoid lumps. Add 1/2 teaspoon of the salt and bring the sauce to a gentle simmer until it thickens slightly. Remove from heat.
- In a mixing bowl, combine the ricotta, chopped spinach, Parmesan, remaining salt, and black pepper.
- Spread a thin layer of white sauce on the bottom of the baking dish. Add a layer of oven-ready noodles, then half the ricotta-spinach mixture, then one cup of mozzarella. Repeat the layers once more, ending with noodles and the remaining white sauce on top.
- Cover with foil and bake for 30 minutes. Remove the foil, sprinkle the remaining two cups of mozzarella over the surface, and bake uncovered for 10 more minutes until the cheese melts and bubbles.
- Let the lasagna rest for 5 minutes. Use a small ghost-shaped cutter or knife to shape a few mozzarella pieces and place them on top before slicing.
Extra Tips
Press excess moisture from the spinach before mixing so the layers stay firm rather than watery. Leftovers reheat well in a 350°F oven with a splash of milk added to keep the sauce creamy. If you want milder spinach flavor, swap half the fresh leaves for baby spinach. Course: Main Course Cuisine: Italian Equipment: Saucepan, Mixing bowl, 8×8 baking dish, Whisk
Skeleton Ribs with Roasted Pumpkin Wedges
This skeleton ribs recipe turns a simple barbecue meal into a lighthearted Halloween dinner. Kids enjoy the visual of the ribs arranged like bones next to bright orange pumpkin wedges that fit the season.
The ribs bake up tender under a sticky glaze while the pumpkin wedges turn soft inside with crisp edges. The flavors stay mild and familiar so children will actually eat it.

Serves 4 people.
Ingredients
- 2 racks baby back ribs (about 3 pounds total)
- ¾ cup barbecue sauce
- 1 medium pumpkin (about 3 pounds)
- 2 tablespoons olive oil
- 1 teaspoon salt
- ½ teaspoon black pepper
- 1 teaspoon garlic powder
- 1 teaspoon paprika
Instructions
- Preheat the oven to 350°F and line two baking sheets with foil.
- Pat the ribs dry and remove the thin membrane from the back of each rack.
- Mix the salt, pepper, garlic powder, and paprika in a small bowl. Rub the seasoning evenly over both sides of the ribs.
- Brush the ribs with half the barbecue sauce and set them on one baking sheet.
- Cut the pumpkin in half, scoop out the seeds, and slice it into wedges. Place the wedges in a mixing bowl and toss with the olive oil and any leftover seasoning.
- Spread the pumpkin wedges on the second baking sheet.
- Bake both sheets for 1 hour and 30 minutes. Halfway through, brush the ribs with the remaining barbecue sauce.
- Remove from the oven and let the ribs rest for 5 minutes before slicing between the bones. Arrange the rib pieces on a platter to look like a skeleton and add the pumpkin wedges alongside.
Extra Tips
Cut the pumpkin wedges into similar sizes so they finish roasting at the same time as the ribs. If the barbecue sauce is very sweet, reduce the amount slightly on the second brushing to keep the flavor balanced. Leftovers reheat well in a 300°F oven for 10 minutes to keep the pumpkin from getting soggy. Course: Main Course Cuisine: American Equipment: Baking sheets, Oven, Mixing bowl, Pastry brush
Frankenstein Zucchini Boats with Sausage and Quinoa
These zucchini boats bring a playful Halloween twist to dinner. Kids can help build the monster faces on top, which makes them more likely to try the meal. The dish works well for weeknight dinners or small parties because it combines protein, grains, and vegetables in one pan.
The filling tastes savory from the sausage and slightly nutty from the quinoa. Tender zucchini holds everything together without getting soggy after baking.

Serves 4 people.
Ingredients
- 4 medium zucchinis
- 1 pound Italian sausage
- 1 cup quinoa
- 2 cups chicken broth
- 1 small onion, finely chopped
- 2 garlic cloves, minced
- 1 1/2 cups shredded mozzarella cheese
- 1/4 cup sliced black olives
- Salt and black pepper to taste
Instructions
- Preheat the oven to 375 degrees. Cut each zucchini in half lengthwise and scoop out the center flesh with a spoon to form boats. Place them cut side up on a baking sheet.
- Rinse the quinoa under cold water. Combine it with the chicken broth in a medium saucepan. Bring to a boil, then reduce heat, cover, and simmer for 15 minutes until the liquid is absorbed.
- While the quinoa cooks, heat a large skillet over medium heat. Add the Italian sausage, onion, and garlic. Cook until the sausage browns and the onion softens, breaking up the meat as it cooks. Season with salt and pepper.
- Fluff the cooked quinoa and stir it into the sausage mixture until evenly combined. Spoon the filling into the zucchini boats, packing it gently.
- Sprinkle mozzarella cheese over each boat. Bake for 20 minutes until the zucchini softens and the cheese melts and turns lightly golden.
- Remove from the oven and let cool for a few minutes. Arrange sliced black olives on the cheese to form eyes and bolts for the Frankenstein faces.
Extra Tips
Add the olive decorations right after baking while the cheese is still soft so they stay in place. Leftovers reheat well in a 350-degree oven for 10 minutes to keep the zucchini from turning mushy. If your kids prefer milder flavors, use sweet Italian sausage instead of spicy. The quinoa absorbs the sausage juices during mixing, so taste the filling before stuffing and adjust salt as needed. Course: Main Course Cuisine: American Equipment: Baking sheet, Large skillet, Medium saucepan, Spoon
Spiderweb Black Bean Quesadillas with Sweet Potato Fries
These quesadillas turn a simple bean and cheese filling into a fun Halloween dinner by adding sour cream spiderwebs on top. The sweet potato fries on the side add color and crunch that kids enjoy. The meal comes together with basic ingredients and works well for weeknight dinners or small Halloween gatherings.
The quesadillas taste savory and mildly spiced with melted cheese binding the black beans. The fries bring natural sweetness and a crispy edge from the oven. Together they create a balanced plate that feels festive without extra work.

Serves 4 people.
Ingredients
- 8 large flour tortillas
- 1 (15-ounce) can black beans, drained and rinsed
- 2 cups shredded cheddar cheese
- 1/2 cup sour cream
- 3 medium sweet potatoes, cut into 1/2-inch fries
- 2 tablespoons olive oil
- 1 teaspoon chili powder
- 1/2 teaspoon salt
- 8 black olives, sliced (optional)
Instructions
- Preheat the oven to 425°F. Toss the sweet potato fries with olive oil, chili powder, and salt on a baking sheet. Spread them in a single layer and bake for 25 minutes, flipping once halfway through.
- While the fries bake, mash the black beans lightly in a bowl. Place four tortillas on a work surface and divide the beans and cheddar cheese evenly among them. Top each with a second tortilla.
- Heat a large skillet over medium heat. Cook each quesadilla for 2 to 3 minutes per side until the tortillas are golden and the cheese melts.
- Transfer the cooked quesadillas to a cutting board. Spoon the sour cream into a zip-top bag, snip a small corner, and pipe concentric circles on each quesadilla. Drag a knife from the center outward in several lines to create a spiderweb pattern.
- Slice the olives and place one in the center of each web if using. Serve the quesadillas with the sweet potato fries on the side.
Extra Tips
Pipe the sour cream while the quesadillas are still warm so the lines stay defined. For extra crisp fries, avoid crowding the baking sheet and use a second sheet if needed. Leftovers reheat best in a skillet over low heat to keep the tortillas from turning soggy. Course: Main Course Cuisine: Mexican Equipment: Baking sheet, Large skillet, Zip-top bag
Pumpkin Patch Turkey Meatballs with Apple Slaw
These turkey meatballs bring a light pumpkin flavor that feels seasonal without overpowering the dish. The apple slaw adds a crisp, slightly sweet contrast that kids enjoy. It works well for weeknight dinners in October when you want something a little festive but still simple to put on the table.
The meatballs stay moist from the pumpkin and cook up with a gentle cinnamon note. The slaw stays fresh and crunchy, giving the plate color and texture that makes the meal feel playful.

Serves 4 people.
Ingredients
- 1 pound ground turkey
- ¾ cup canned pumpkin puree
- ½ cup breadcrumbs
- 1 large egg
- 1 teaspoon ground cinnamon
- ½ teaspoon salt
- 2 tablespoons olive oil
- 2 medium apples, thinly sliced
- 2 cups shredded green cabbage
- ¼ cup plain yogurt
- 1 tablespoon apple cider vinegar
- 1 teaspoon honey
Instructions
- Mix the ground turkey, pumpkin puree, breadcrumbs, egg, cinnamon, and salt in a large bowl until evenly combined. Form the mixture into 16 small meatballs.
- Heat the olive oil in a large skillet over medium heat. Add the meatballs and cook for 10 to 12 minutes, turning them every few minutes until browned on all sides and cooked through.
- While the meatballs cook, combine the sliced apples, shredded cabbage, yogurt, apple cider vinegar, and honey in a separate bowl. Toss until the cabbage and apples are lightly coated.
- Divide the apple slaw among four plates. Arrange four meatballs on top of each portion of slaw.
Extra Tips
The meatballs can be mixed and shaped earlier in the day and kept covered in the refrigerator until you are ready to cook them. If the slaw sits too long it softens, so mix it right before serving. Leftovers reheat well in a covered skillet over low heat with a splash of water to keep the meatballs moist. Course: Main Course Cuisine: American Equipment: Large Bowl, Large Skillet, Knife
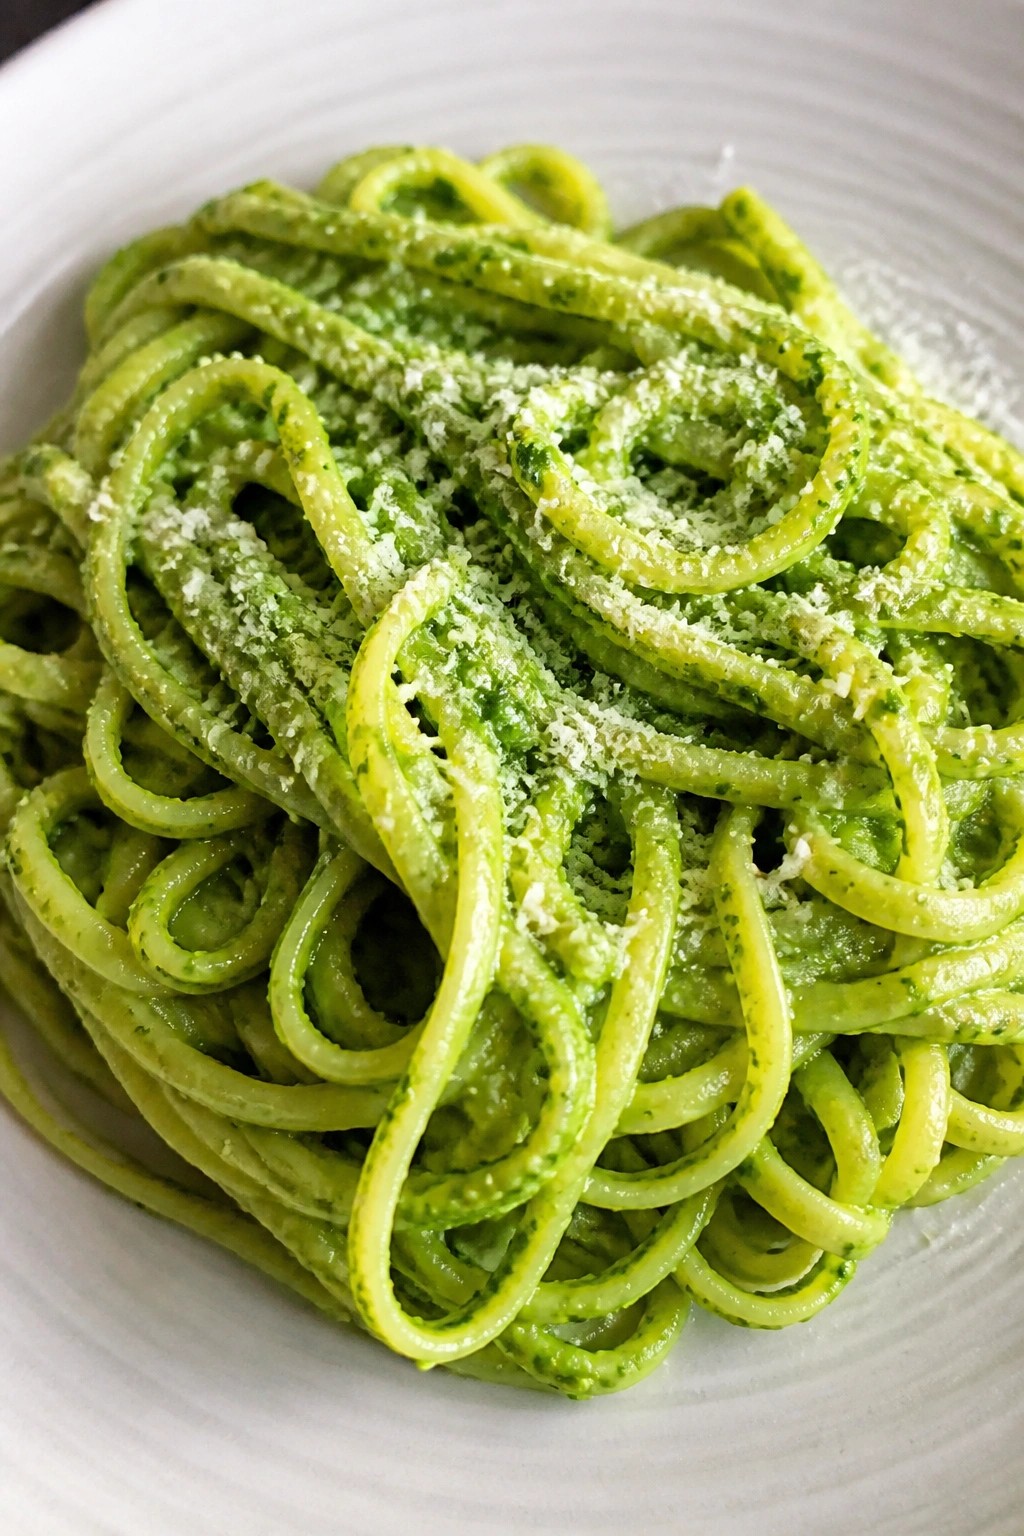
Creepy Crawly Pesto Pasta with Hidden Veggies
This pasta turns a classic green pesto into a fun Halloween dinner by blending in spinach and broccoli for extra color and nutrition. Kids enjoy the bright green hue and twisty noodles while parents like that the vegetables stay hidden in the sauce. The flavor stays bright and garlicky with a light cheesy finish.
The texture comes out smooth from the blended vegetables and slightly al dente from the pasta. It works well on busy weeknights when you want something quick that still feels festive.
Serves 4 people.
Ingredients
- 12 ounces linguine
- 2 cups fresh spinach
- 1 cup steamed broccoli florets
- 1 cup fresh basil leaves
- 1/2 cup grated Parmesan cheese
- 1/3 cup olive oil
- 2 garlic cloves
- Juice of 1 lemon
- 1/2 teaspoon salt
- 1/4 teaspoon black pepper
- Extra grated Parmesan for serving
Instructions
- Bring a large pot of salted water to a boil and cook the linguine until al dente. Drain and set aside.
- Add the spinach, steamed broccoli, basil, Parmesan, olive oil, garlic cloves, lemon juice, salt, and pepper to a food processor.
- Blend the mixture until it forms a smooth pesto sauce.
- Return the drained pasta to the pot over low heat and pour the pesto over it.
- Toss the pasta gently until every strand is coated with the green sauce.
- Divide into bowls and top each serving with extra grated Parmesan.
Extra Tips
Steam the broccoli just until tender before blending so the pesto stays bright green without a bitter taste. If the sauce thickens after sitting, stir in a splash of the pasta cooking water to loosen it before tossing. Leftovers keep in the fridge for two days and reheat well with a little extra olive oil stirred in. Course: Main Course Cuisine: Italian Equipment: Large Pot, Food Processor, Colander
Vampire Bite Sliders with Roasted Carrot “Fangs”
These sliders turn a basic weeknight meal into something kids look forward to on Halloween. The roasted carrot wedges act as fangs that stick out from the buns, giving the dish a playful look while adding a sweet, tender vegetable side. The beef patties stay juicy inside soft buns with melted cheese for a familiar flavor kids already enjoy.

Serves 4 people.
Ingredients
- 1 pound ground beef
- 1 teaspoon garlic powder
- ½ teaspoon salt
- ¼ teaspoon black pepper
- 8 slider buns
- 4 slices cheddar cheese
- 4 medium carrots, cut into thin wedges
- 1 tablespoon olive oil
- ¼ teaspoon paprika
- Ketchup for serving
Instructions
- Preheat the oven to 425°F. Toss the carrot wedges with olive oil, paprika, and a pinch of salt on a baking sheet. Spread them in a single layer and roast for 20 minutes until the edges start to brown and the carrots soften.
- While the carrots roast, mix the ground beef with garlic powder, salt, and black pepper in a bowl. Divide the mixture into 8 small patties. Heat a skillet over medium heat and cook the patties for 3 to 4 minutes per side until they reach an internal temperature of 160°F. Place half a slice of cheddar on each patty during the last minute of cooking so it melts.
- Split the slider buns and place a cooked patty on each bottom half. Add a small dot of ketchup on either side of the patty to create the bite marks. Set the top bun in place. Insert two roasted carrot wedges into the front of each slider so they stick out like fangs.
Extra Tips
Roast the carrots a little longer if you want them crisp enough to hold their shape when tucked into the buns. Use a mild cheddar so the cheese does not overpower the beef for younger kids. These sliders are best eaten right after assembly while the buns stay soft and the carrots keep their bite. Course: Main Course Cuisine: American Equipment: Baking sheet, Skillet, Mixing bowl
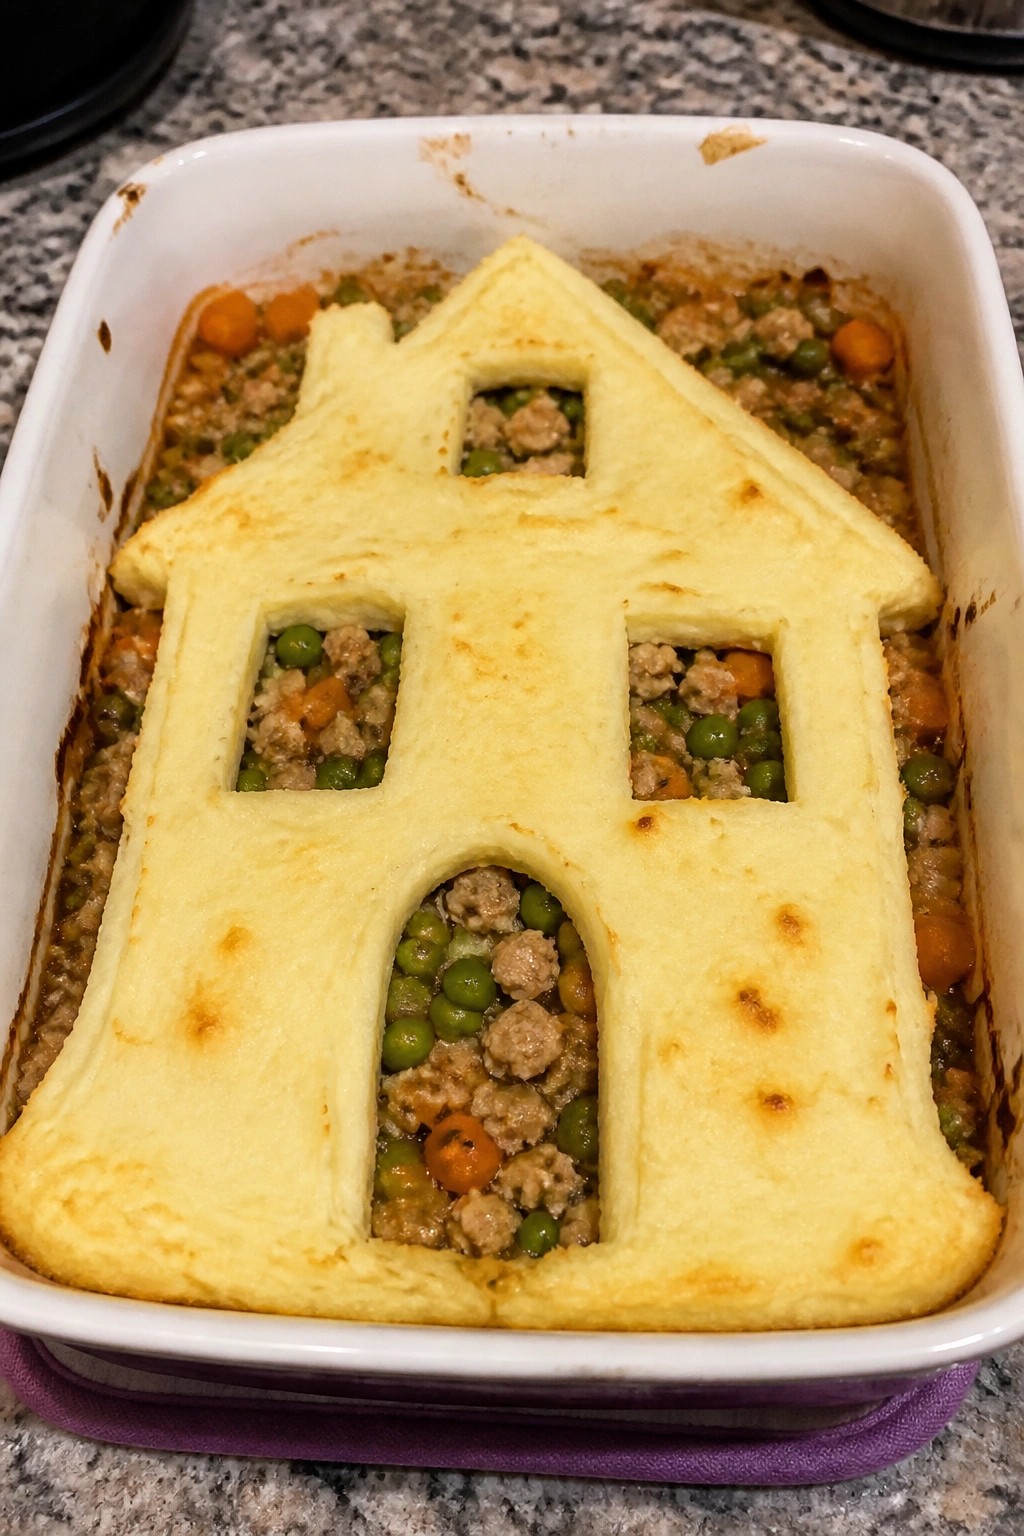
Haunted House Shepherd’s Pie with Cauliflower Mash
This shepherd’s pie turns a classic family dinner into a playful Halloween meal. Kids enjoy the savory meat and vegetable filling topped with a smooth cauliflower mash that can be shaped into a simple house outline before baking. The result is a mild, creamy dish that feels special without extra work on busy October evenings.
The filling stays hearty with ground turkey and familiar vegetables, while the cauliflower mash keeps the top light and easy to portion. It works well for weeknight dinners when you want something warm and filling that still fits a festive theme.
Serves 4 people.
Ingredients
- 1 pound ground turkey
- 1 small onion, chopped
- 2 carrots, peeled and diced
- 1 cup frozen peas
- 3 tablespoons tomato paste
- 1 large head cauliflower, cut into florets
- 2 tablespoons butter
- 1/4 cup milk
- Salt and black pepper to taste
Instructions
- Heat a large skillet over medium heat and cook the ground turkey until it is no longer pink, breaking it up as it browns.
- Add the chopped onion and diced carrots to the skillet and cook for 5 minutes until the vegetables begin to soften.
- Stir in the tomato paste and frozen peas, then season with salt and black pepper. Cook for 2 more minutes until everything is combined and heated through.
- While the filling simmers, bring a pot of water to a boil and add the cauliflower florets. Cook for 10 minutes until the cauliflower is very tender.
- Drain the cauliflower well, then return it to the pot. Add the butter and milk, and mash until smooth. Season with salt and black pepper.
- Spread the meat filling evenly in a baking dish. Spoon the cauliflower mash over the top and use the back of a spoon to shape it into a simple house outline.
- Bake at 375°F for 15 minutes until the edges of the mash start to turn light golden.
Extra Tips
Shape the cauliflower mash while it is still warm so it holds the house outline without cracking. Leftovers reheat well in the oven at 350°F for 10 minutes to keep the top from drying out. If the mash seems too thick after cooking, add an extra splash of milk before spreading it on the filling. Course: Main Course Cuisine: American Equipment: Large skillet, Pot, Baking dish, Potato masher
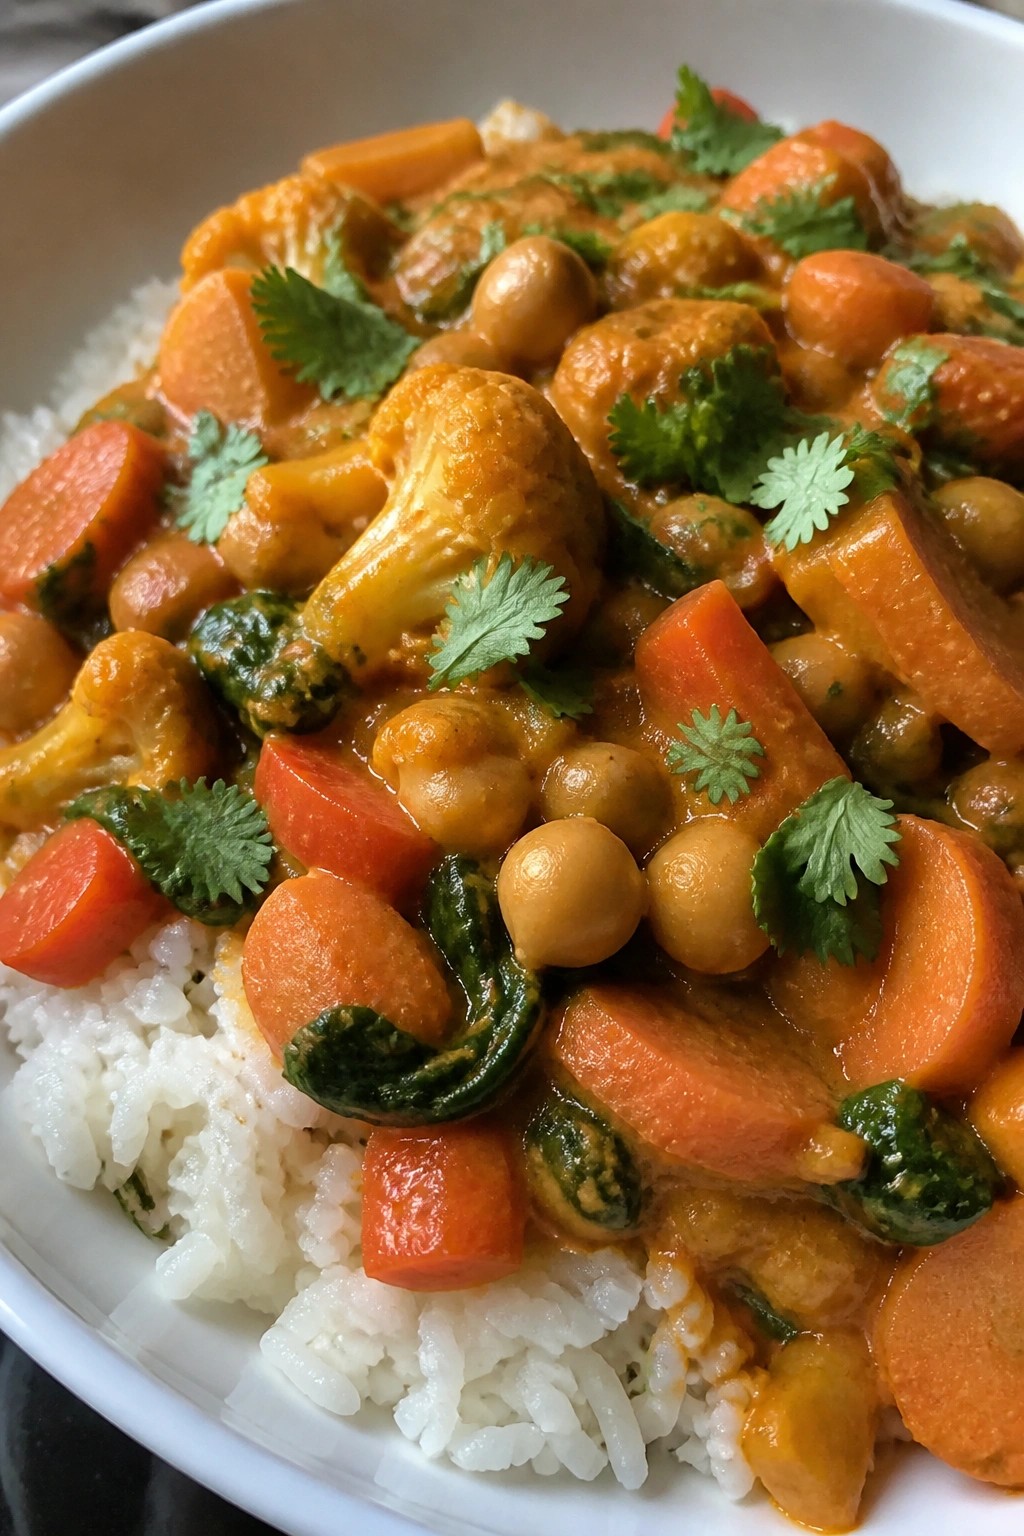
Cauldron Vegetable Curry with Coconut Rice
This dish brings a fun twist to dinner with its bright orange and green colors that kids enjoy. The mild curry sauce coats tender vegetables and chickpeas, while the coconut rice adds a creamy base that balances the spices. It works well for weeknight meals when you want something warming but not heavy.
Serves 4 people.
Ingredients
- 1 cup jasmine rice
- 1 can (14 oz) coconut milk, divided
- 1 cup water
- 1/2 teaspoon salt
- 1 tablespoon vegetable oil
- 1 onion, diced
- 2 cloves garlic, minced
- 1 tablespoon curry powder
- 1 teaspoon turmeric
- 2 carrots, sliced
- 1 red bell pepper, chopped
- 1 cup cauliflower florets
- 1 can (15 oz) chickpeas, drained
- 1 cup spinach
- Fresh cilantro for garnish
Instructions
- Combine the jasmine rice, half the coconut milk, water, and salt in a medium saucepan. Bring to a boil, then reduce heat to low, cover, and simmer for 15 minutes until the rice is tender.
- Heat the vegetable oil in a large pot over medium heat. Add the diced onion and cook for 3 minutes until softened.
- Stir in the minced garlic, curry powder, and turmeric. Cook for 1 minute until fragrant.
- Add the sliced carrots, chopped red bell pepper, and cauliflower florets to the pot. Stir to coat with the spices.
- Pour in the remaining coconut milk and add the drained chickpeas. Bring to a simmer and cook for 12 minutes until the vegetables are tender.
- Stir in the spinach and cook for 2 minutes until wilted. Remove from heat.
- Fluff the coconut rice with a fork and divide it among four bowls. Spoon the curry over the rice and top with fresh cilantro.
Extra Tips
Cook the rice first so it stays warm while the curry simmers. If your kids prefer milder flavors, start with half the curry powder and add more at the end. Leftovers keep well in the fridge for two days and reheat easily on the stove with a splash of water to loosen the sauce. Course: Main Course Cuisine: Asian Equipment: Large Pot, Medium Saucepan, Cutting Board, Knife
Spooky Skull Calzones with Pepperoni and Mozzarella
These skull-shaped calzones give kids a playful way to enjoy a classic cheese and pepperoni meal on Halloween. The dough forms a golden crust around gooey mozzarella and savory pepperoni slices. They fit easily into family dinners or small gatherings without much extra effort.
The finished calzones come out crisp on the outside with a warm, melty center. Kids like the fun shape, and the simple fillings keep the flavor familiar.

Serves 4 people.
Ingredients
- 1 pound pizza dough
- 1 cup marinara sauce
- 2 cups shredded mozzarella cheese
- 24 pepperoni slices
- 1 large egg
- 2 tablespoons water
Instructions
- Preheat the oven to 400°F and line a baking sheet with parchment paper. Divide the pizza dough into 8 equal pieces and roll each into a thin circle about 6 inches across.
- Use a skull-shaped cookie cutter to cut a skull outline from 4 of the dough circles if desired, or leave them plain for the tops.
- Spread 2 tablespoons of marinara sauce on the center of each plain dough circle. Add 1/2 cup shredded mozzarella and 6 pepperoni slices to each.
- Whisk the egg with the water to make an egg wash. Brush the edges of the filled circles with the egg wash.
- Place a second dough circle on top of each filled one and press the edges firmly to seal. Transfer the calzones to the baking sheet.
- Brush the tops with the remaining egg wash. Bake for 15 to 18 minutes until the crust turns golden brown.
Extra Tips
Cut small slits in the top crust before baking if you want steam to escape and avoid any bursting. Serve the calzones with extra marinara on the side for dipping. Leftovers reheat well in a 350°F oven for 8 minutes to restore crispness. You can assemble them ahead and keep them covered in the fridge for up to 4 hours before baking. Course: Main Course Cuisine: Italian Equipment: Baking sheet, Rolling pin, Mixing bowl, Pastry brush