


Halloween parties often call for finger foods that feel a bit more grown up than the usual options.
These recipes use flavors and ingredients that appeal to adults while staying simple to make.
You will find ten ideas that work for small gatherings or larger events.
Each one includes straightforward steps and common ingredients.
They can be prepared ahead or put together quickly on the day.
Helpful Tips Before You Start
These tips will help your Halloween finger foods stay tasty and easy to serve at a party.
Prep Components Ahead
Make dips, fillings, and doughs the day before. This keeps assembly quick and reduces last minute stress.
Focus on Savory Options
Adults often want bites that lean cheesy, spicy, or meaty rather than overly sweet. Mix in options like stuffed mushrooms or spiced nuts alongside any sweeter treats.
Keep Portions Small
Cut everything into true one or two bite sizes. Larger pieces become messy when guests are standing and chatting.
Use Sturdy Bases
Choose crackers, skewers, or toasted bread that hold up for an hour or two on the table. Avoid soft items that turn soggy fast.
Prosciutto-Wrapped Figs with Goat Cheese and Balsamic Drizzle
This appetizer pairs sweet fresh figs with creamy goat cheese and salty prosciutto for a simple bite that feels special at an adult Halloween party. The balsamic drizzle brings a tangy note that balances the richness and keeps guests reaching for more. It works well on a grazing table or passed around during cocktails.
The soft fig center contrasts nicely with the thin wrap of prosciutto, while the goat cheese adds a smooth finish. Prepare them ahead so you can focus on the rest of the spread.

Serves 4 people.
Ingredients
- 8 fresh figs
- 4 ounces goat cheese, softened
- 8 thin slices prosciutto
- 2 tablespoons balsamic glaze
Instructions
- Preheat the oven to 375 degrees F and line a baking sheet with parchment paper.
- Slice a small slit into the top of each fig and gently open it slightly.
- Spoon about a teaspoon of goat cheese into the center of each fig.
- Wrap one slice of prosciutto around each stuffed fig and place them seam side down on the baking sheet.
- Bake for 5 to 7 minutes until the prosciutto firms slightly and the cheese softens.
- Transfer to a serving plate and drizzle with balsamic glaze before serving.
Extra Tips
Use room temperature goat cheese so it spreads easily into the figs without tearing the fruit. If the balsamic glaze is too thick, warm it briefly in the microwave for a smoother pour. These taste best served warm or at room temperature and do not hold up well once refrigerated. Course: Appetizer Cuisine: Italian Equipment: Baking sheet, Oven
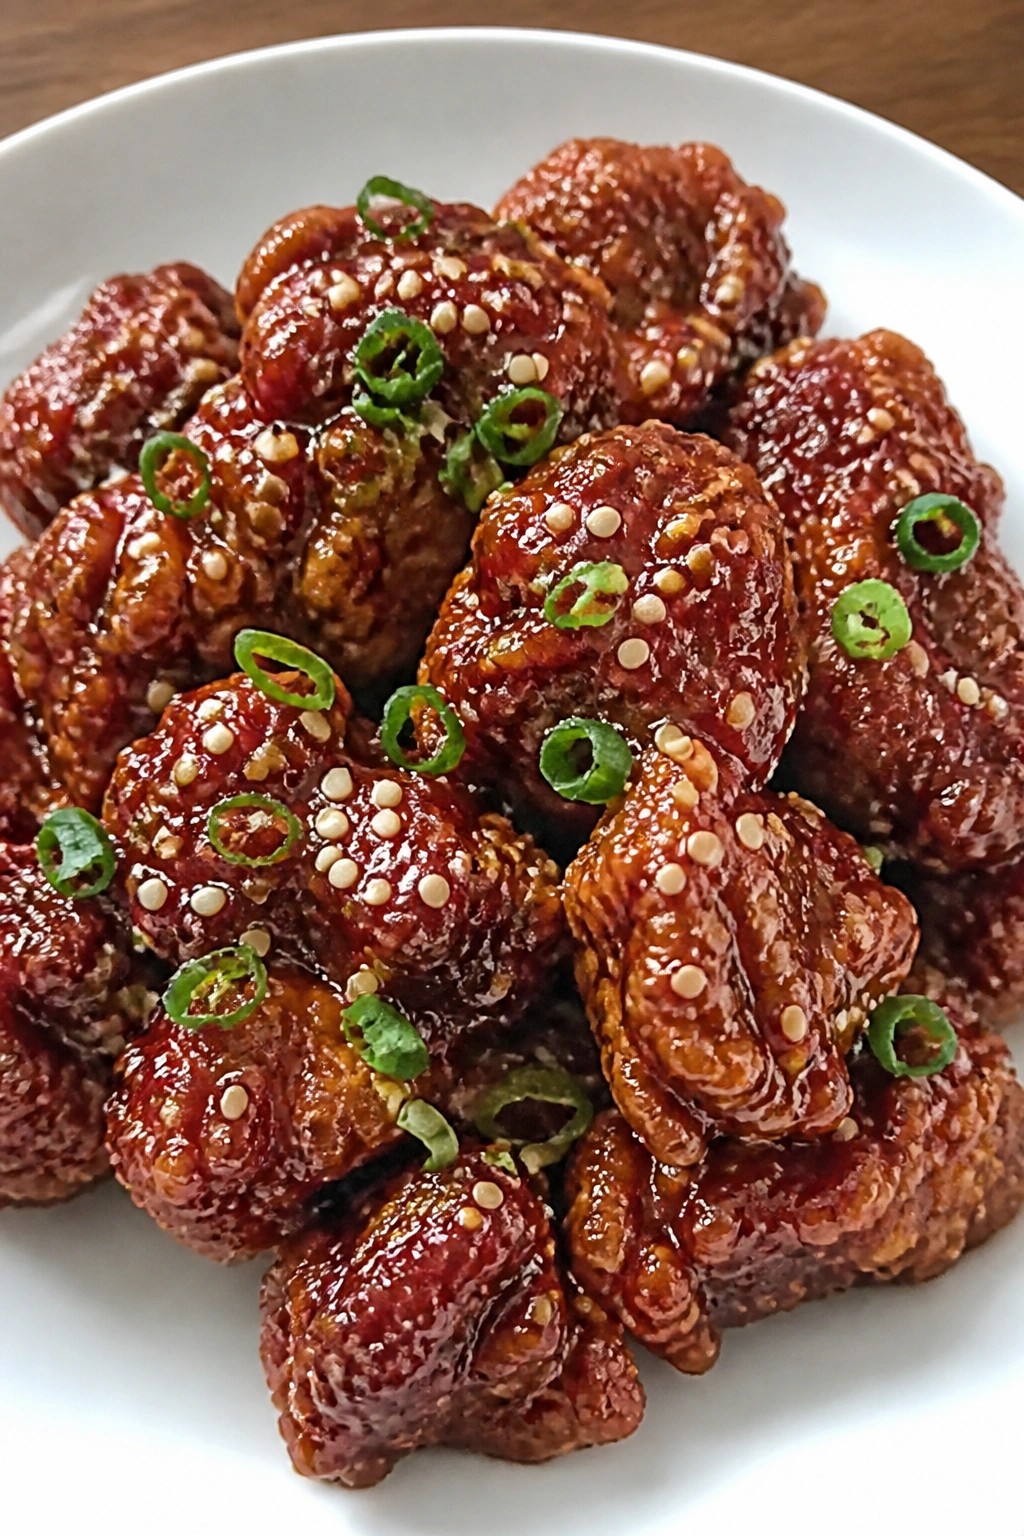
Korean Fried Chicken Bites with Gochujang Glaze
These crispy chicken bites bring a bold spicy-sweet kick that pairs well with cocktails at an adult Halloween gathering. The double-crust frying method keeps them crunchy even after they sit out for a bit, and the gochujang glaze adds just enough heat without overwhelming the palate. They work as a shareable finger food that feels a little more grown-up than standard party snacks.
The texture stays light and crisp on the outside while the inside stays juicy. The glaze clings nicely without making the bites soggy, so they hold up on a platter through the evening.
Serves 4 people.
Ingredients
- 1 lb boneless skinless chicken thighs, cut into 1-inch pieces
- 1 cup all-purpose flour
- ½ cup cornstarch
- 1 tsp baking powder
- 1 tsp salt
- ½ tsp black pepper
- Vegetable oil for frying
- 3 tbsp gochujang
- 2 tbsp honey
- 1 tbsp soy sauce
- 1 tbsp sesame oil
- 2 garlic cloves, minced
- 1 tsp fresh ginger, grated
- 1 tbsp sesame seeds
- 2 green onions, thinly sliced
Instructions
- In a large bowl, toss the chicken pieces with salt and black pepper until evenly coated.
- In a separate bowl, whisk together the flour, cornstarch, and baking powder.
- Dredge each chicken piece in the flour mixture, pressing lightly so the coating sticks, then set aside on a plate.
- Heat 2 inches of vegetable oil in a deep skillet or pot to 350°F. Fry the chicken in batches for 5 to 6 minutes until golden and cooked through. Remove to a wire rack.
- While the chicken fries, combine gochujang, honey, soy sauce, sesame oil, minced garlic, and grated ginger in a small saucepan. Warm over low heat for 2 minutes, stirring until smooth.
- Toss the hot fried chicken in the glaze until every piece is coated.
- Sprinkle with sesame seeds and sliced green onions before serving.
Extra Tips
Fry the chicken in small batches so the oil temperature stays steady and the crust stays crisp. If you want less heat, start with 2 tablespoons of gochujang and add more after tasting the glaze. Leftovers reheat best in a 375°F oven for 8 minutes rather than the microwave. Course: Appetizer Cuisine: Korean Equipment: Deep skillet, Mixing bowls, Wire rack
Truffle Mac and Cheese Arancini with Parmesan Crust
These arancini turn leftover mac and cheese into a crisp, handheld bite with earthy truffle notes. The parmesan crust adds a salty crunch that pairs well with drinks at an adult Halloween party.
They work best when you need something warm and satisfying that still feels a little special. The creamy center stays rich while the outside stays light and golden.

Serves 4 people.
Ingredients
- 8 ounces elbow macaroni, cooked and cooled
- 1 1/2 cups shredded sharp cheddar cheese
- 3 tablespoons truffle oil
- 1/2 teaspoon salt
- 2 large eggs, beaten
- 1 cup panko breadcrumbs
- 1/2 cup grated Parmesan cheese
- Vegetable oil for frying
Instructions
- In a large bowl, combine the cooled macaroni with the cheddar cheese, truffle oil, and salt. Mix until the cheese begins to melt into the pasta.
- Scoop the mixture into 12 equal portions and roll each into a compact ball. Place the balls on a plate and chill for 15 minutes so they hold their shape.
- Set up two bowls, one with the beaten eggs and one with the panko mixed with the Parmesan. Dip each chilled ball first in the egg, then roll it in the breadcrumb mixture until fully coated.
- Heat 2 inches of vegetable oil in a deep skillet over medium heat until it reaches 350 degrees. Fry the arancini in batches for 3 to 4 minutes, turning once, until deep golden brown.
- Remove with a slotted spoon and drain briefly on paper towels before serving.
Extra Tips
Chill the formed balls thoroughly before breading so they do not fall apart in the oil. If the truffle flavor tastes mild after frying, drizzle a little extra truffle oil over the hot arancini right before serving. Leftovers reheat well in a 375-degree oven for 8 minutes to restore crispness. Course: Appetizer Cuisine: Italian Equipment: Large Pot, Mixing Bowl, Deep Skillet
Grilled Shrimp and Pineapple Skewers with Chili-Lime Sauce
These skewers bring a bright, slightly spicy bite that stands out at an adult Halloween gathering. The sweet pineapple caramelizes on the grill while the shrimp stay tender, and the chili-lime sauce ties everything together with a quick kick of heat and citrus.
They work well as a passed appetizer or a light main at a party table. Guests can grab a skewer and keep mingling without needing plates or forks.

Serves 4 people.
Ingredients
- 1 pound large shrimp, peeled and deveined
- 2 cups fresh pineapple chunks
- 2 tablespoons olive oil
- 2 tablespoons lime juice
- 1 teaspoon chili powder
- 1 teaspoon honey
- 2 cloves garlic, minced
- 1/2 teaspoon salt
- 1/4 teaspoon black pepper
- 2 tablespoons chopped fresh cilantro
Instructions
- Soak wooden skewers in water for 15 minutes if using them.
- In a bowl, stir together olive oil, lime juice, chili powder, honey, minced garlic, salt, and black pepper. Add the shrimp and toss until coated. Let them sit for 10 minutes.
- Thread the shrimp and pineapple chunks onto the skewers, alternating pieces.
- Heat a grill to medium-high. Place the skewers on the grates and cook for 2 to 3 minutes per side until the shrimp turn pink and the pineapple edges begin to brown.
- Remove the skewers from the grill and sprinkle with chopped cilantro before serving.
Extra Tips
Brush any leftover sauce on the skewers during the last minute of grilling for extra flavor without making them soggy. If you want less heat, cut the chili powder in half and add an extra teaspoon of honey. These skewers taste best right after grilling, but you can prep the shrimp and sauce a few hours ahead and keep them covered in the fridge until you thread and cook them. Course: Appetizer Cuisine: American Equipment: Grill, Mixing Bowl, Skewers, Basting Brush
Mini Beef Wellington Bites with Mushroom Duxelles
These bites turn the classic Beef Wellington into a handheld option that suits adult Halloween gatherings. They offer a satisfying savory bite without requiring utensils or plates. The flaky pastry holds a rich filling that feels substantial enough for a party spread.
The beef stays tender inside while the mushroom duxelles add deep earthy notes. Each piece finishes with a golden crust that contrasts the soft center.

Serves 4 people.
Ingredients
- 1 pound beef tenderloin, cut into 1-inch cubes
- 8 ounces cremini mushrooms, finely chopped
- 1 shallot, minced
- 2 cloves garlic, minced
- 1 tablespoon fresh thyme leaves
- 2 sheets puff pastry, thawed
- 2 tablespoons Dijon mustard
- 1 egg, beaten
- 2 tablespoons olive oil
- Salt and pepper to taste
Instructions
- Heat 1 tablespoon olive oil in a skillet over medium-high heat. Season the beef cubes with salt and pepper, then sear them in batches for 1 minute per side until browned on the outside. Remove the beef and set it aside.
- In the same skillet, add the remaining tablespoon of olive oil. Cook the mushrooms, shallot, and garlic for 5 to 7 minutes until the mixture is dry and fragrant. Stir in the thyme and a pinch of salt, then remove from heat.
- Cut each puff pastry sheet into 9 squares. Place a small spoonful of mushroom mixture in the center of each square, top with one beef cube, and add a dab of Dijon mustard. Fold the pastry over the filling and pinch the edges to seal.
- Place the bites seam-side down on a parchment-lined baking sheet. Brush the tops with the beaten egg. Bake at 400 degrees for 15 to 18 minutes until the pastry is golden and puffed.
Extra Tips
Make the mushroom mixture a day ahead and store it in the fridge to speed up assembly. If the pastry feels too soft while working, chill the assembled bites for 10 minutes before baking to help them hold their shape. Serve them warm with a small bowl of extra Dijon on the side for dipping. Course: Appetizer Cuisine: French Equipment: Skillet, Baking Sheet, Knife, Mixing Bowl
Chorizo and Smoked Gouda Stuffed Mushroom Caps
These stuffed mushrooms bring bold, savory flavors to any Halloween spread. The spicy chorizo pairs with the smoky depth of Gouda for a filling bite that feels more substantial than typical party snacks. They work well at adult gatherings where guests want something warm and handheld without needing utensils.
The texture combines tender mushroom caps with a slightly crisp top and juicy, cheesy filling inside. This recipe keeps things simple while delivering a grown-up taste that stands out from sweeter Halloween options.

Serves 4 people.
Ingredients
- 16 large cremini mushrooms
- 8 oz fresh chorizo sausage, casings removed
- 1 cup shredded smoked Gouda cheese
- 1/2 cup plain breadcrumbs
- 1 small onion, finely diced
- 2 garlic cloves, minced
- 2 tbsp olive oil
- 2 tbsp fresh parsley, chopped
- 1/4 tsp salt
- 1/4 tsp black pepper
Instructions
- Preheat the oven to 375 degrees. Wipe the mushrooms clean with a damp cloth and remove the stems. Use a small spoon to hollow out the caps slightly, then place them on a baking sheet.
- Heat 1 tablespoon of olive oil in a skillet over medium heat. Add the chorizo and break it up with a spoon. Cook until browned, about 5 minutes, then transfer to a plate.
- In the same skillet, add the remaining tablespoon of olive oil along with the onion and garlic. Cook until the onion softens, about 3 minutes.
- Return the chorizo to the skillet. Stir in the breadcrumbs, salt, and pepper. Remove from heat and let the mixture cool for 2 minutes.
- Mix the shredded smoked Gouda and parsley into the chorizo mixture until evenly combined.
- Spoon the filling into each mushroom cap, pressing gently so it stays in place. Bake for 18 to 20 minutes until the mushrooms are tender and the tops turn golden.
Extra Tips
Use cremini mushrooms because they hold their shape better than white buttons during baking. If the filling seems dry after mixing, add a teaspoon of the rendered chorizo fat back in for extra moisture. These taste best served right after baking while the cheese is still stretchy. Course: Appetizer Cuisine: Spanish Equipment: Baking Sheet, Skillet, Mixing Bowl
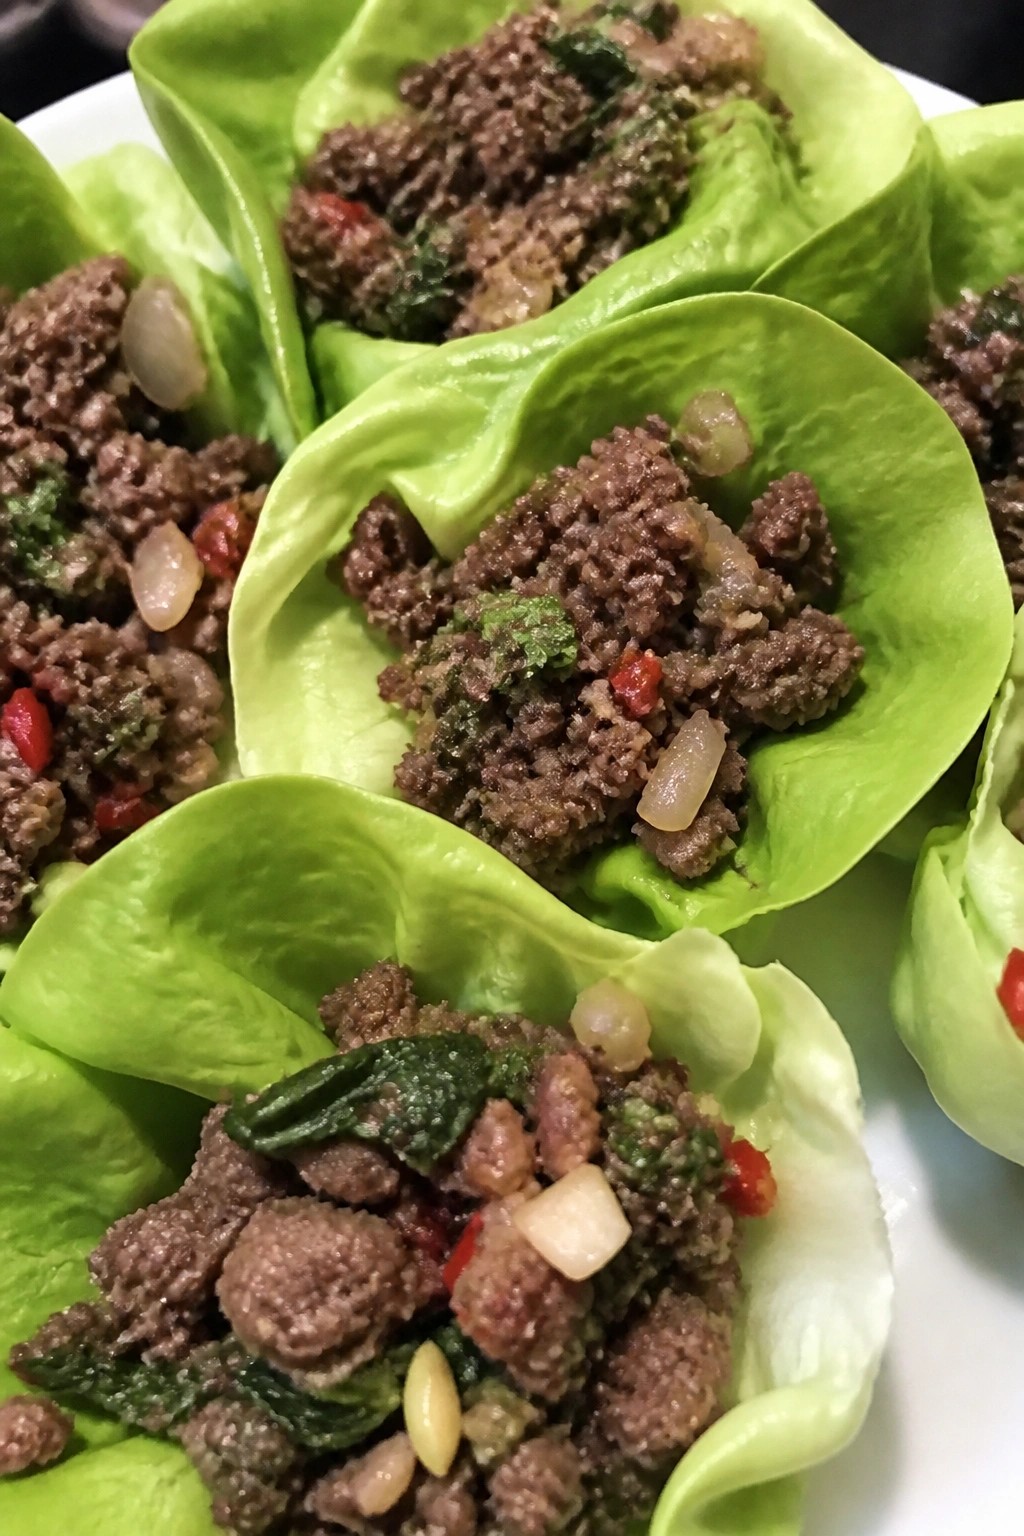
Thai Basil Beef Lettuce Wrap Cups
These lettuce wrap cups bring bold Thai flavors to a party spread. The savory beef filling has garlic, chili, and fresh basil that stand up well next to cocktails. They work as handheld bites that guests can grab without plates or forks.
The dish offers a nice mix of tender meat and crisp lettuce. It feels substantial enough for adults yet stays light and easy to eat during a long evening.
Serves 4 people.
Ingredients
- 1 pound ground beef
- 3 garlic cloves, minced
- 2 Thai chilies, finely chopped
- 1 small onion, diced
- 2 tablespoons fish sauce
- 1 tablespoon oyster sauce
- 1 teaspoon soy sauce
- 1 cup fresh Thai basil leaves
- 12 butter lettuce leaves
- Lime wedges for serving
Instructions
- Heat a large skillet over medium heat. Add the ground beef and cook until it browns and breaks into small pieces.
- Stir in the diced onion, minced garlic, and chopped chilies. Cook for 2 minutes until the onion softens.
- Pour in the fish sauce, oyster sauce, and soy sauce. Stir everything together and let it simmer for 3 minutes.
- Remove the skillet from the heat. Add the Thai basil leaves and stir until they wilt.
- Spoon the beef mixture into the butter lettuce leaves. Serve with lime wedges on the side.
Extra Tips
Use the largest outer lettuce leaves for sturdier cups that hold the filling without tearing. If the beef mixture tastes too salty, a quick squeeze of lime before serving balances it out. Leftovers keep in the fridge for two days and reheat well in a skillet before you refill fresh lettuce leaves. Course: Appetizer Cuisine: Thai Equipment: Large Skillet, Knife
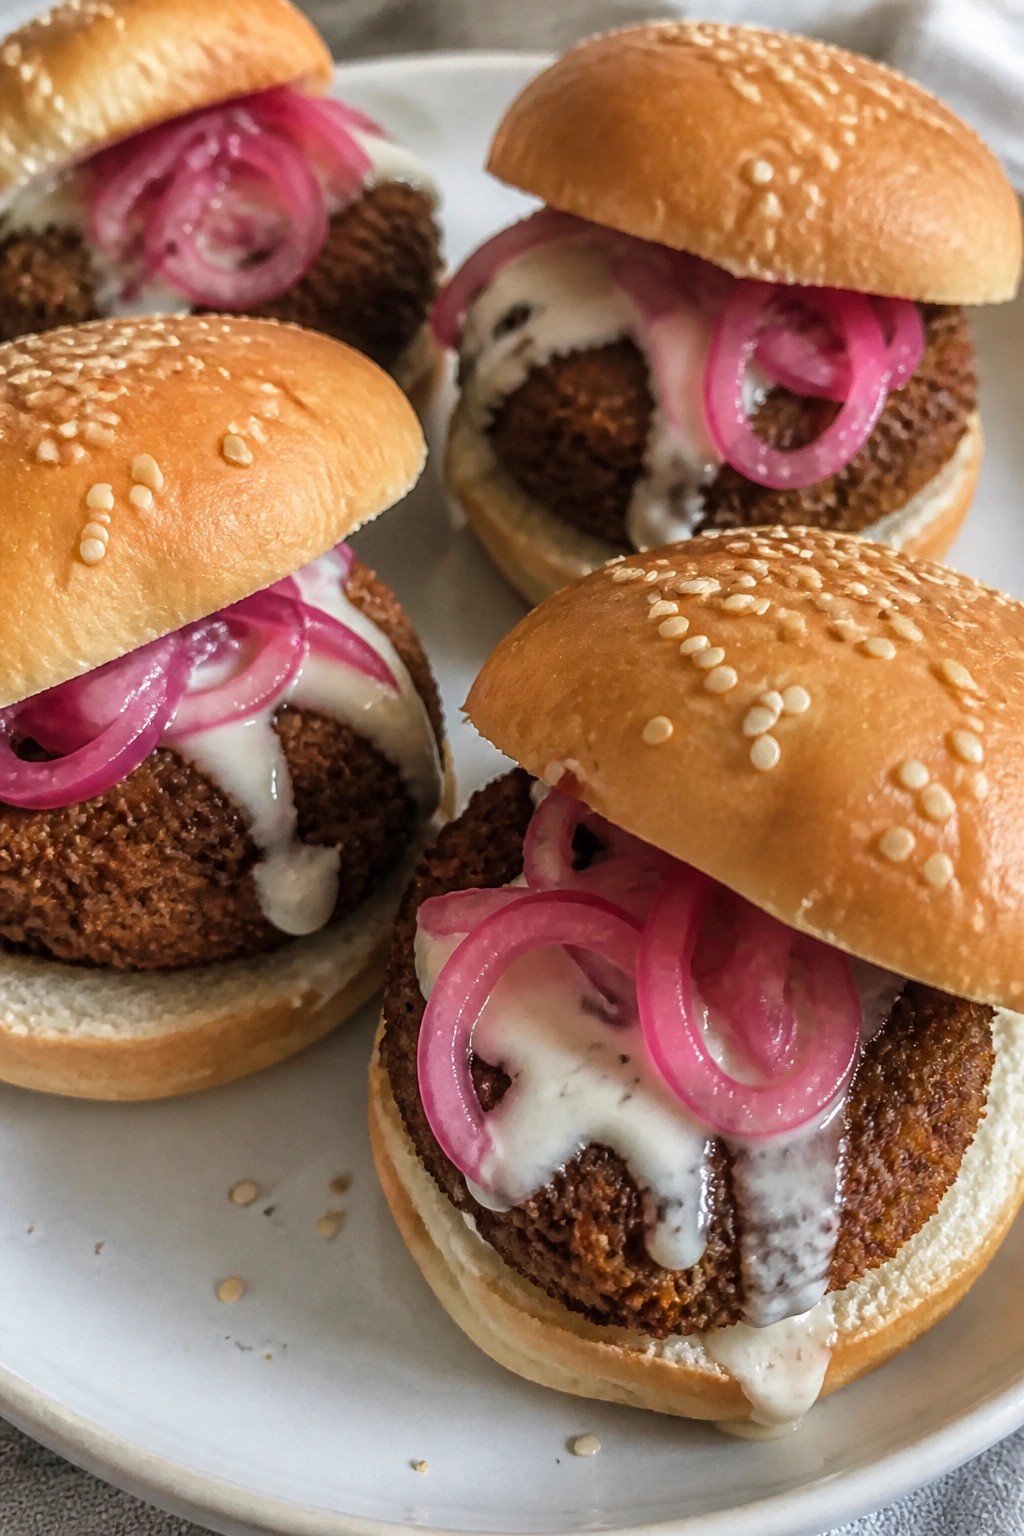
Crispy Falafel Sliders with Tahini and Pickled Onions
These sliders bring a satisfying crunch from the falafel patties paired with creamy tahini and sharp pickled onions. They work well for adult Halloween gatherings where guests want something handheld and flavorful without being overly heavy. The mix of crispy texture and tangy toppings makes them a reliable choice for parties.
The recipe keeps things simple by using pantry staples to build the falafel base and quick-pickling the onions while the patties cook. Each slider delivers a balance of earthy spices and bright acidity that stands out among typical finger foods.
Serves 4 people.
Ingredients
- 1 (15 oz) can chickpeas, drained and rinsed
- 1/2 cup fresh parsley leaves
- 2 garlic cloves
- 1 teaspoon ground cumin
- 1/2 teaspoon salt
- 1/4 cup all-purpose flour
- Vegetable oil for frying
- 8 slider buns
- 1/4 cup tahini
- 2 tablespoons lemon juice
- 1 small red onion, thinly sliced
- 1/2 cup apple cider vinegar
- 1 tablespoon sugar
Instructions
- Drain and rinse the chickpeas, then add them to a food processor with the parsley, garlic, cumin, and salt. Pulse until the mixture is coarse but holds together when pressed.
- Transfer the mixture to a bowl and stir in the flour until evenly combined. Shape into 8 small patties about 2 inches wide.
- Heat a thin layer of vegetable oil in a large skillet over medium heat. Fry the patties in batches for 3 to 4 minutes per side until golden and crisp on the outside. Drain on paper towels.
- While the patties cook, combine the sliced red onion, apple cider vinegar, and sugar in a small bowl. Let them sit for at least 10 minutes to soften.
- Mix the tahini with the lemon juice in another small bowl until smooth. Add a splash of water if needed to reach a drizzle consistency.
- Split the slider buns and place one falafel patty on each bottom half. Top with a spoonful of pickled onions and a drizzle of tahini sauce, then add the bun tops.
Extra Tips
Make the pickled onions first so they have time to soften while you shape and fry the patties. If the falafel mixture feels too wet, add an extra tablespoon of flour. Leftovers store well in the fridge for up to two days, and the patties reheat best in a skillet to keep their crisp edges. Course: Appetizer Cuisine: Mediterranean Equipment: Food processor, Large skillet, Mixing bowls
Bacon-Wrapped Medjool Dates with Manchego
These bacon-wrapped dates make an easy finger food for adult Halloween gatherings. The combination of sweet dates, salty bacon, and sharp cheese creates a bite that feels a little special without much effort. They work well on a snack table alongside drinks or as part of a larger spread of savory bites.
The finished dates offer a mix of chewy texture from the fruit, crisp bacon on the outside, and a creamy center from the melted Manchego. They hold up well once cooked and stay warm for a while on a serving tray.

Serves 4 people.
Ingredients
- 12 large Medjool dates
- 6 ounces Manchego cheese
- 12 slices bacon
Instructions
- Preheat the oven to 400 degrees F and line a baking sheet with parchment paper.
- Slice each date open lengthwise and remove the pit.
- Cut the Manchego into 12 small sticks that will fit inside the dates.
- Place one cheese stick inside each date and press the date closed around it.
- Wrap one slice of bacon around each stuffed date and place it seam-side down on the prepared baking sheet.
- Bake for 20 to 25 minutes until the bacon is crisp and browned.
- Remove from the oven and let the dates cool for a few minutes before serving.
Extra Tips
Secure the bacon with a toothpick before baking if it tends to unwind in your oven. These can be assembled up to a day ahead and kept covered in the fridge until ready to bake. For a slightly milder flavor, choose a younger Manchego that melts more smoothly. Course: Appetizer Cuisine: American Equipment: Baking Sheet, Oven
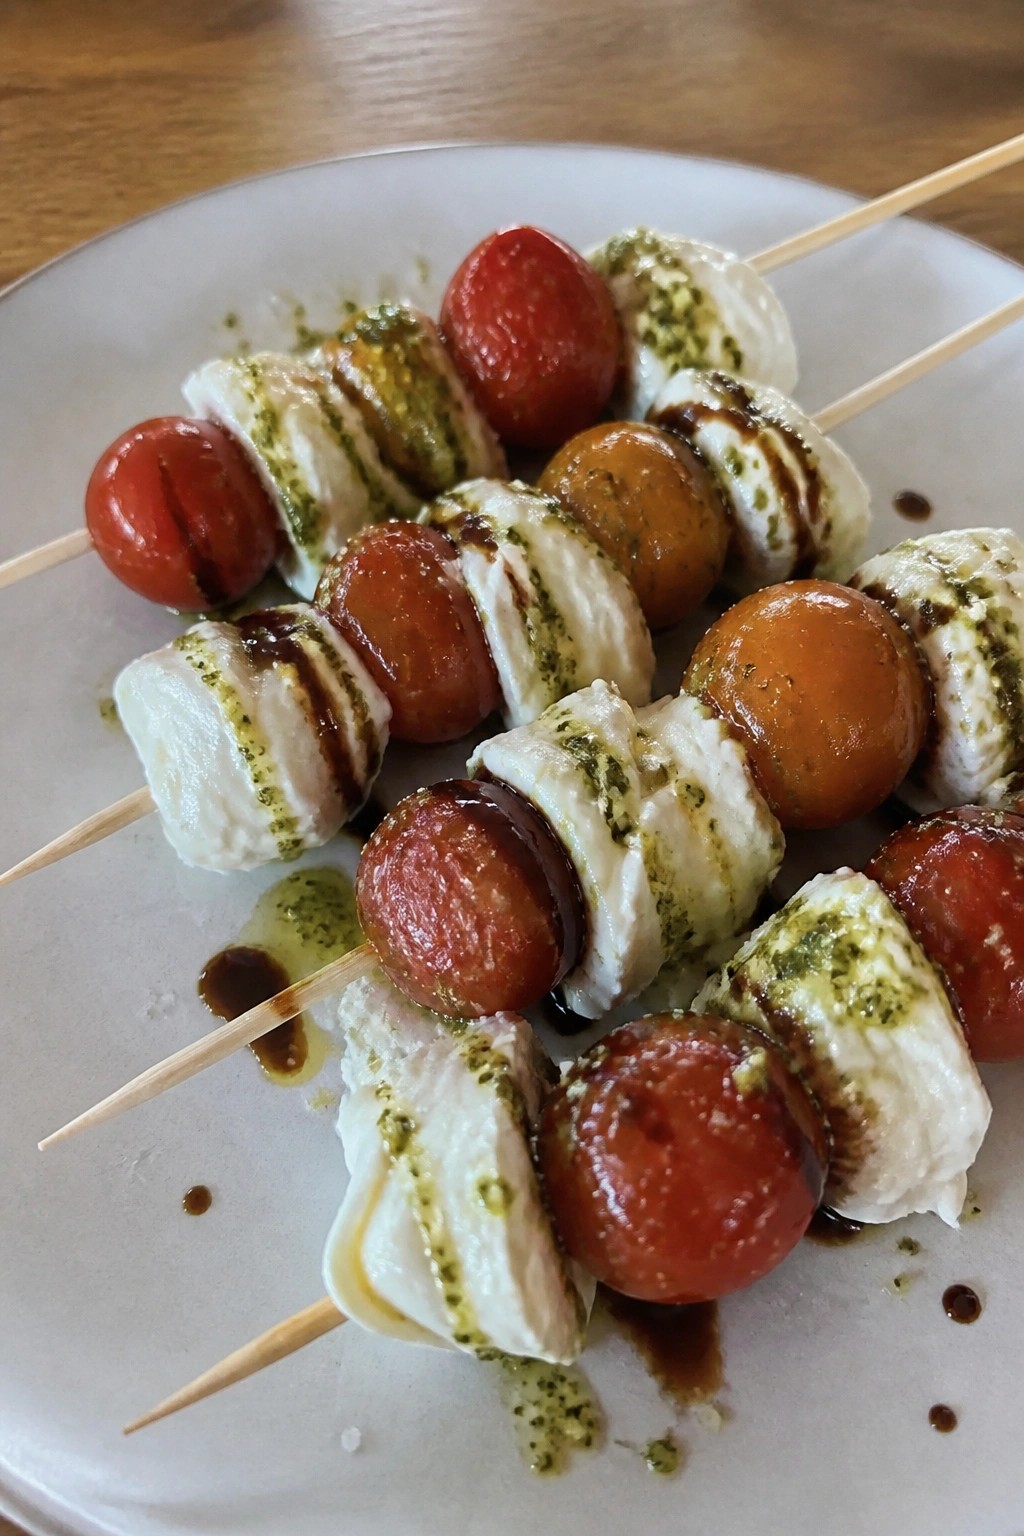
Caprese Skewers with Burrata, Pesto, and Aged Balsamic
These skewers offer a fresh, creamy option that stands out at adult Halloween parties. The juicy tomatoes pair with rich burrata while pesto adds herbal depth and aged balsamic brings a sweet tang. They feel elevated yet simple to put together for a crowd.
They suit cocktail hours or mingling before dinner since they need no utensils. The mix of soft cheese and firm tomato gives a nice contrast in each bite.
Serves 4 people.
Ingredients
- 1 pint cherry tomatoes
- 8 ounces burrata
- 1/4 cup pesto
- 3 tablespoons aged balsamic vinegar
- 12 wooden skewers
- Salt, to taste
Instructions
- Tear the burrata into bite-sized pieces with your hands or a spoon.
- Thread one cherry tomato and one piece of burrata onto each wooden skewer.
- Arrange all the skewers on a serving platter.
- Drizzle the pesto evenly across the skewers.
- Drizzle the aged balsamic vinegar over the skewers.
- Sprinkle lightly with salt before serving.
Extra Tips
Room-temperature burrata spreads its creaminess better across each bite. A thick aged balsamic clings without turning the skewers soggy during a party. Assemble right before guests arrive so the drizzle stays fresh and visible. Course: Appetizer Cuisine: Italian Equipment: Wooden skewers, Serving platter