


Halloween is a fun time to make snacks that kids will actually want to eat. I rounded up some easy recipes that use ingredients most of us already have. These ideas are simple to put together and do not require special tools. You can pick a few that fit what you have on hand this week.
Helpful Tips Before You Start
A bit of planning keeps these Halloween snacks simple and fun for kids.
Get Kids Involved in Assembly
Let them add toppings or arrange items on the plate. This step builds excitement without needing sharp tools.
Prepare Ingredients the Day Before
Wash fruit, cut cheese into shapes, or mix dips ahead of time. It cuts down on last-minute work.
Stick to Kid-Sized Portions
Use small plates or muffin tins for each treat. Kids finish more when servings feel manageable.
Have Backup Supplies Ready
Keep extra crackers or fruit on hand for quick fixes. Some pieces may break during decorating.
Mummy Wrapped Hot Dogs
These mummy hot dogs turn a simple weeknight item into a quick Halloween snack that kids can help assemble. The dough bakes up golden and crisp while the hot dogs stay juicy inside, making them easy to hold at parties or after-school gatherings.
The look comes from thin strips of dough wrapped around each frank, with small dots of mustard for eyes. The result is a savory, mildly salty bite that feels festive without extra work.
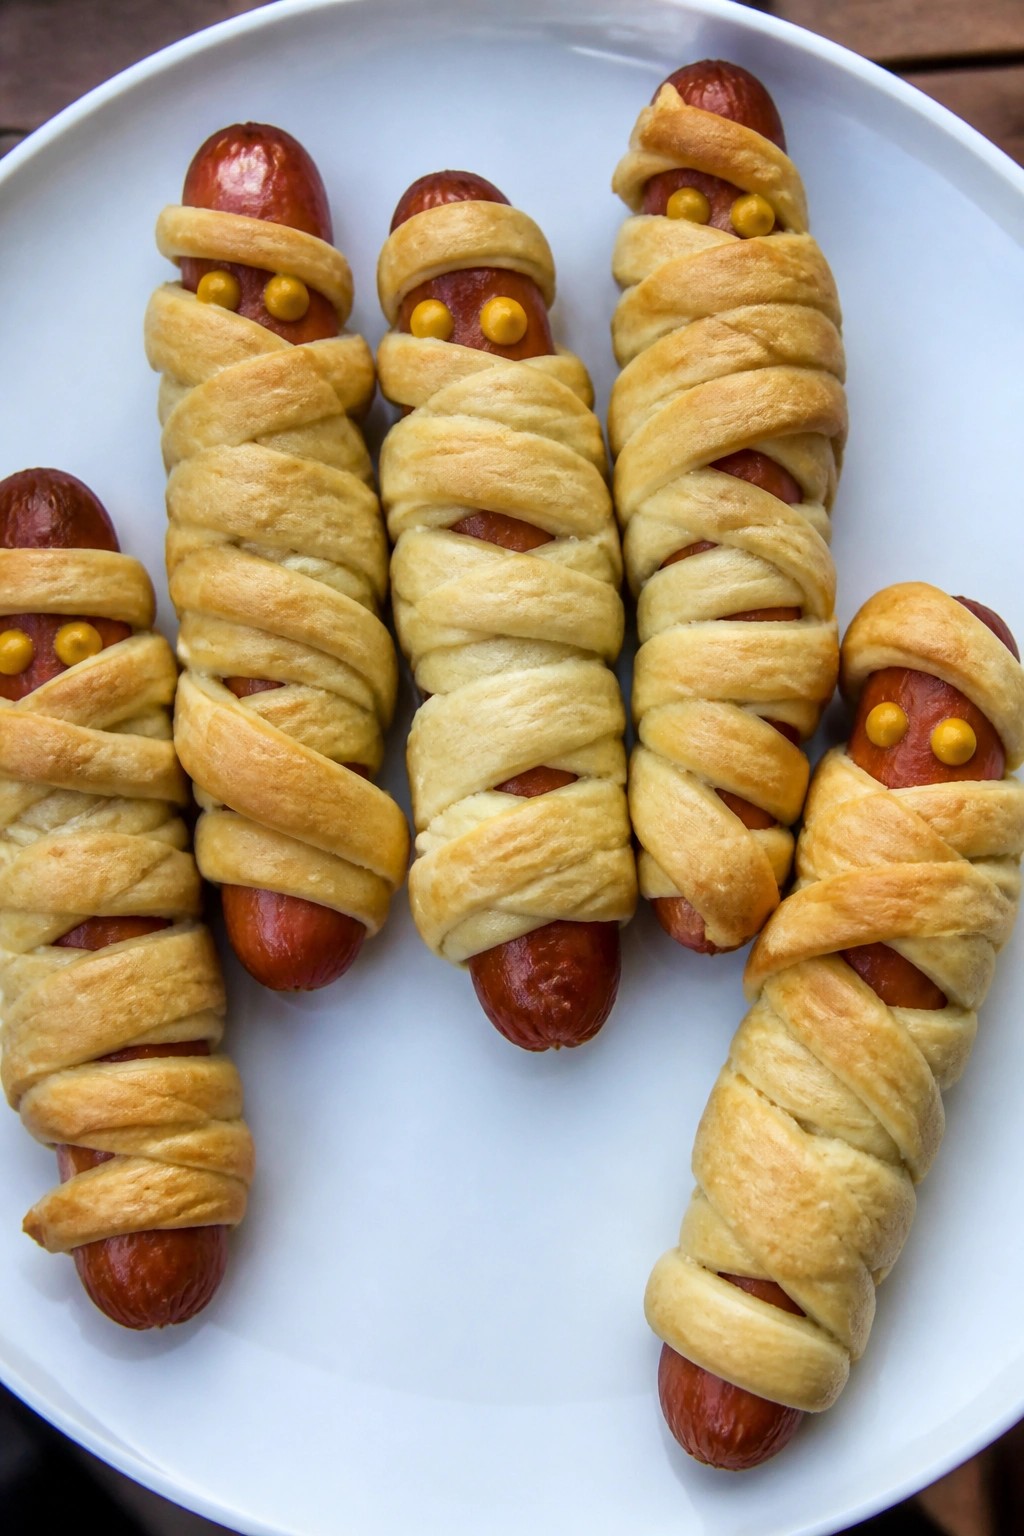
Serves 4 people.
Ingredients
- 4 hot dogs
- 1 can (8 oz) refrigerated crescent rolls
- 2 teaspoons yellow mustard
Instructions
- Heat the oven to 375°F and line a baking sheet with parchment paper.
- Unroll the crescent dough on a cutting board and slice it into thin strips about ¼ inch wide.
- Wrap the strips around each hot dog, leaving small gaps near the top for the eyes and overlapping slightly so the dough stays in place.
- Set the wrapped hot dogs on the prepared sheet and bake for 12 to 15 minutes until the dough is golden.
- Remove from the oven and let cool for 2 minutes, then use a toothpick or the tip of a knife to add two small dots of mustard for eyes on each hot dog.
Extra Tips
If the dough starts to slide while wrapping, chill the hot dogs for 10 minutes first so they stay firm. Leftovers reheat well in a 350°F oven for 5 minutes to keep the crust crisp. For a milder look, swap the mustard eyes for small pieces of cheese pressed on right after baking. Course: Appetizer Cuisine: American Equipment: Baking Sheet, Knife
Jack-o’-Lantern Stuffed Bell Peppers
These stuffed peppers turn ordinary bell peppers into cute jack-o-lanterns that kids enjoy helping create. They work well for a simple weeknight meal or a festive Halloween dinner that still feels like regular food.
The filling combines savory beef with rice and cheese for a soft, hearty texture that most kids accept without complaint.
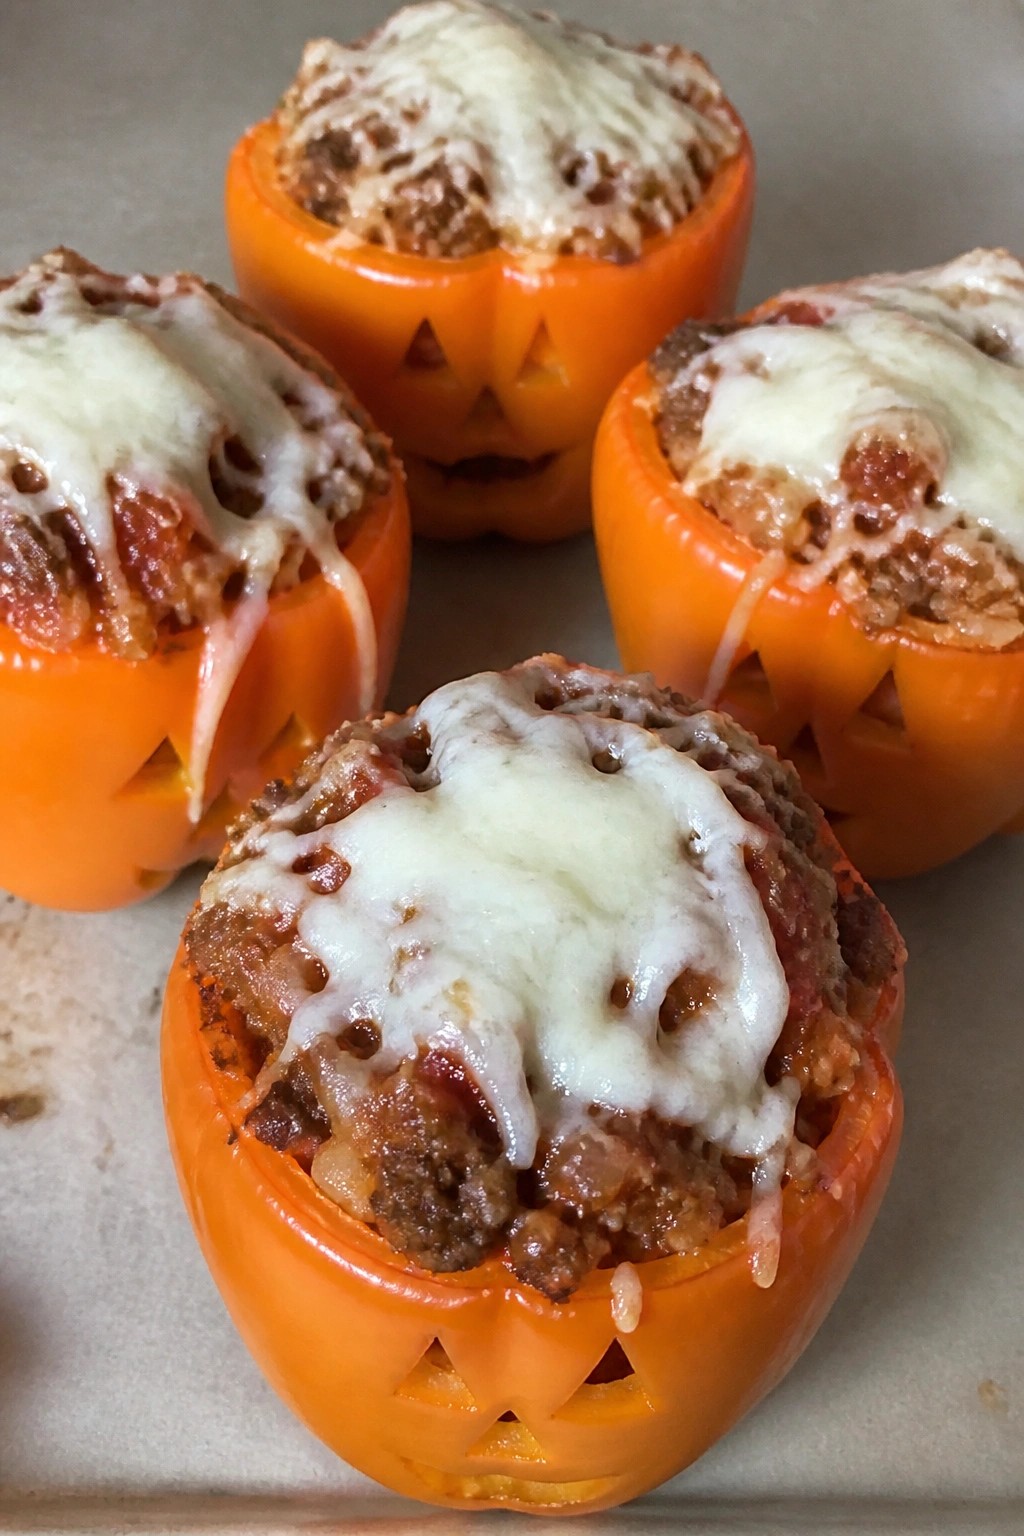
Serves 4 people.
Recommended Products

Halloween cookie cutters:ghost cookie cutter,halloween baking,halloween decorations,halloween party favors,halloween goodie bags.

Cheesecloth Ghosts Halloween Decor: this Halloween ghost mason jar made suit contains three PET material mason jar and silver aluminum cover, 1 roll of tape, 1 roll of white gauze, 6 black eyes felt stickers, 10 white latex balloons, 3 lamps series, 10 white twisting, sticks, 1 hat, two mini bubble pumpkin, one wishing bottle, two purple bowknot hairpin, 1 mini broom; All the accessories are packaged together and can be assembled right after opening the box

What You Get: this Halloween serving set includes 4 uniquely shaped wooden trays: pumpkin, ghost, obat and cat, 4 spooky skull ghost decorations and 2 pairs of gothic skeleton hands; These charcuterie boards give you everything needed for a creepy yet stylish buffet; Perfect for serving cheese, meats, fruits, and snacks, the set ensures your Halloween table stands out with both variety and quantity
Ingredients
- 4 large orange bell peppers
- 1 pound lean ground beef
- 1 cup cooked white rice
- 1/2 cup diced onion
- 1 cup marinara sauce
- 1 cup shredded mozzarella cheese
- 1 teaspoon garlic powder
- Salt and black pepper to taste
Instructions
- Preheat the oven to 375 degrees. Cut the tops off each bell pepper and set them aside. Remove the seeds and membranes from inside the peppers.
- Use a small knife to carve simple jack-o-lantern faces into the front of each pepper.
- Heat a large skillet over medium heat. Add the ground beef and diced onion. Cook until the beef is browned and the onion is soft. Drain any excess fat.
- Stir in the cooked rice, marinara sauce, garlic powder, salt, and black pepper. Cook for 2 minutes until everything is heated through.
- Place the carved peppers in a baking dish. Spoon the beef mixture evenly into each pepper.
- Sprinkle the shredded mozzarella cheese over the top of each filled pepper. Replace the pepper tops if desired.
- Bake for 25 minutes until the peppers are tender and the cheese is melted.
Extra Tips
Carve the faces after removing the seeds so the peppers stay stable on the cutting board. Use a mild marinara sauce if your kids prefer less tang. Leftovers reheat well in the microwave with the tops removed to keep the cheese from getting too chewy. Course: Main Course Cuisine: American Equipment: Large Skillet, Baking Dish, Sharp Knife
Spiderweb Pancakes with Berry Sauce
These pancakes turn breakfast into a quick Halloween activity that kids enjoy helping with. The plain batter cooks up light and fluffy, while a small batch of cocoa batter creates the web design right on the griddle. A simple berry sauce adds bright color and a tart-sweet finish that balances the cocoa.
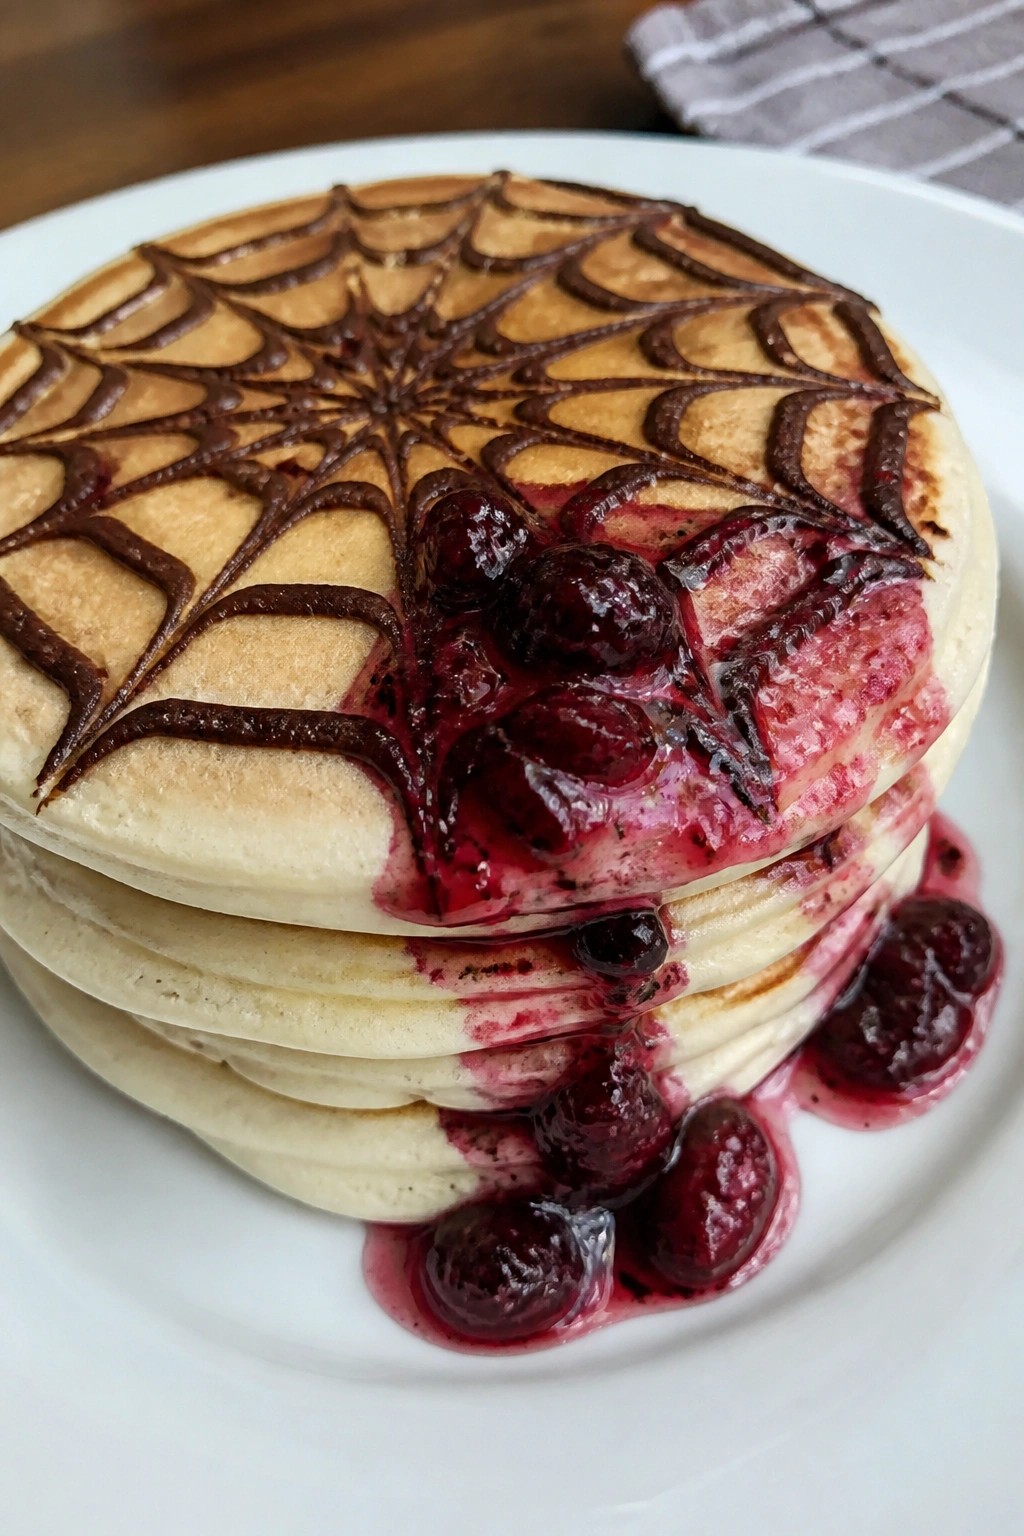
Serves 4 people.
Recommended Products
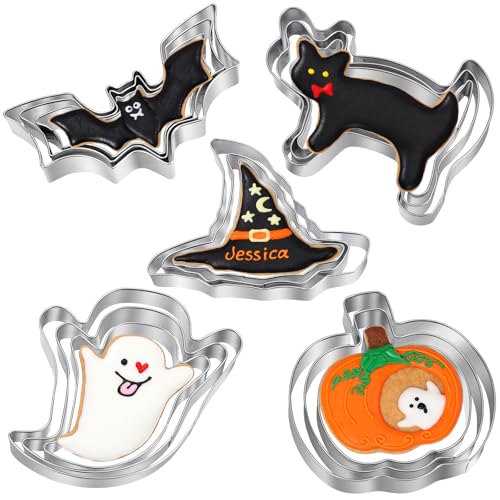
15-Piece Halloween Cookie Cutter Set (Baking & Decorating Kit): If you are looking for some Halloween cookie cutters, and this set of cookie molds basically meets all your needs, their size and details are good, you can make delicious Halloween cookies and then have a great holiday with your family.

【TIP】: Before first use, please thoroughly wash off the food-grade mineral protective oil on the surface of the mold with warm soapy water and let it dry before safe use

10 cookies to a kit
Ingredients
- 1 1/2 cups all-purpose flour
- 3 1/2 teaspoons baking powder
- 1 tablespoon sugar
- 1/4 teaspoon salt
- 1 1/4 cups milk
- 1 egg
- 3 tablespoons butter, melted
- 2 tablespoons cocoa powder
- 2 tablespoons milk (for cocoa batter)
- 2 cups mixed berries (fresh or frozen)
- 2 tablespoons sugar (for sauce)
- 1 teaspoon lemon juice
Instructions
- Whisk together the flour, baking powder, sugar, and salt in a large bowl. In a separate bowl, mix the 1 1/4 cups milk, egg, and melted butter. Pour the wet ingredients into the dry and stir just until combined. Do not overmix.
- Scoop out 1/3 cup of the plain batter into a small bowl. Stir in the cocoa powder and the extra 2 tablespoons milk until smooth. Transfer this cocoa batter to a squeeze bottle or small zip-top bag with one corner snipped.
- Place the berries, 2 tablespoons sugar, and lemon juice in a small saucepan. Cook over medium heat for 5-7 minutes, stirring occasionally, until the berries break down and the sauce thickens slightly. Remove from heat and set aside.
- Heat a griddle or skillet over medium heat and lightly grease it. Pour 1/4-cup portions of plain batter onto the griddle. While the pancakes cook, use the squeeze bottle to pipe a spiral of cocoa batter on top, then drag a toothpick from the center outward to form a web pattern.
- Cook until bubbles form on the surface and the edges look set, then flip and cook the other side for 1-2 minutes. Repeat with the remaining batter. Serve the pancakes warm with the berry sauce spooned over or on the side.
Extra Tips
Make the berry sauce first so it can cool while you cook the pancakes. If the cocoa batter feels too thick to pipe, add a splash more milk. Leftovers keep in the fridge for two days and reheat well in a toaster. Course: Breakfast Cuisine: American Equipment: Mixing bowls, Griddle or skillet, Squeeze bottle, Small saucepan
Ghostly Cheese Pizza Bagels
These Ghostly Cheese Pizza Bagels turn a simple snack into a Halloween activity kids can help with. The bagels get topped with sauce and plenty of cheese, then finished with ghost shapes that stand out after baking. They work well for an after-school treat, a party platter, or a quick dinner before trick-or-treating.
The result is a crisp bagel base with gooey melted cheese and a milder flavor from the fresh mozzarella ghosts. Black olive pieces add a small salty touch that balances the mild cheese and sauce.
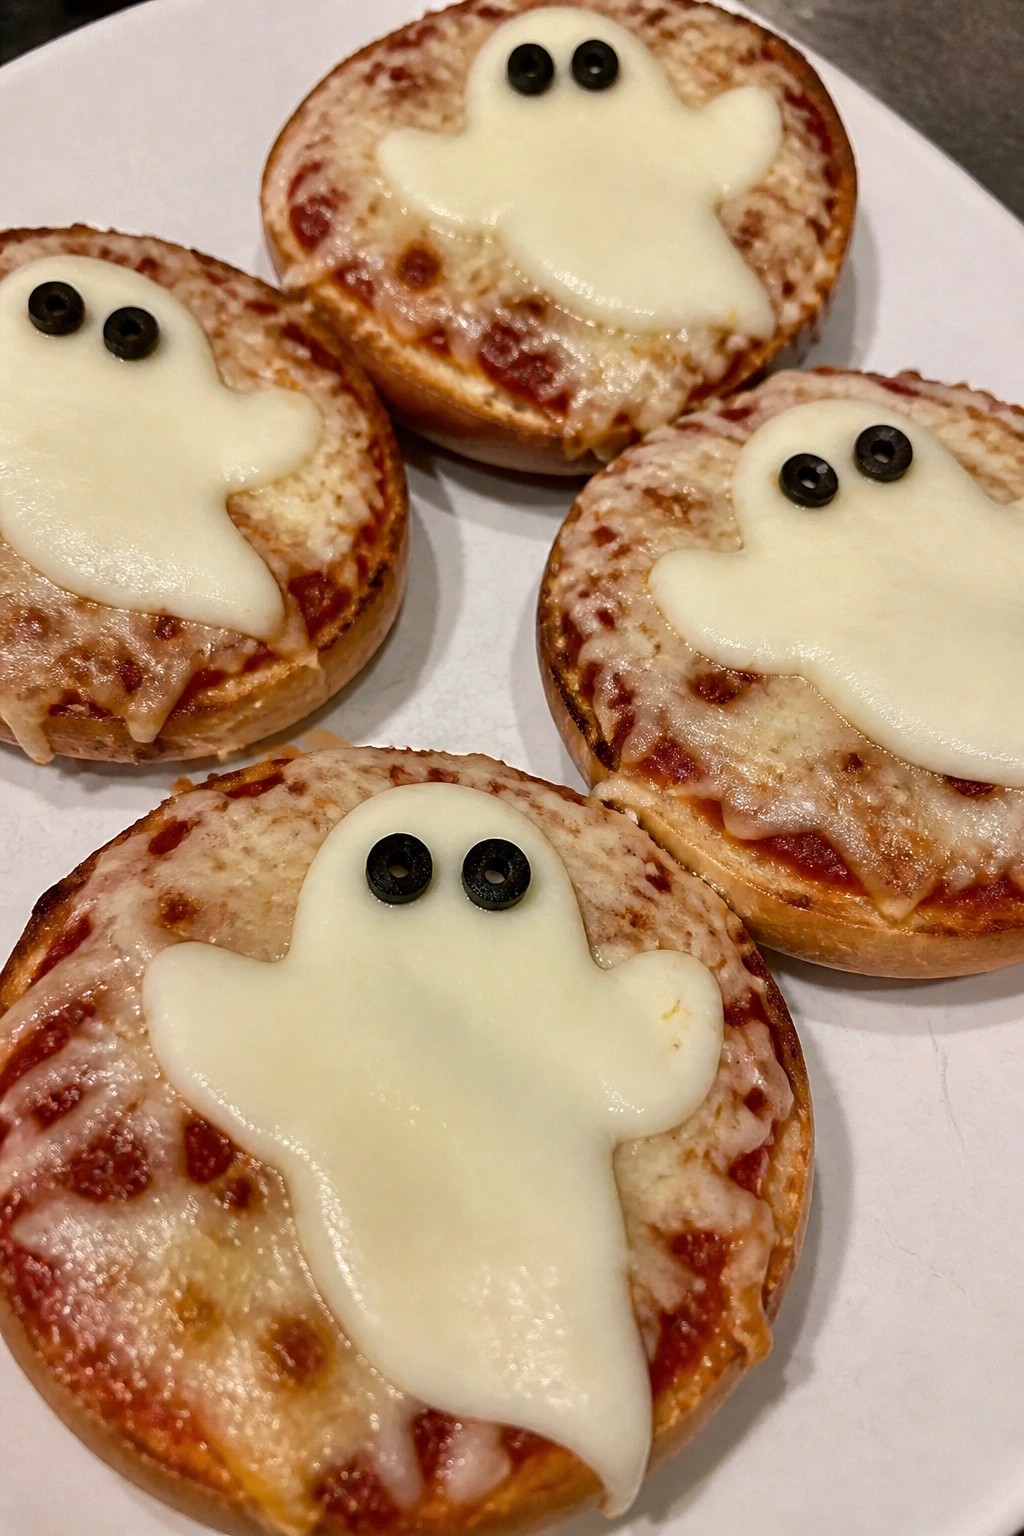
Serves 4 people.
Ingredients
- 4 plain bagels, split in half
- ½ cup pizza sauce
- 2 cups shredded mozzarella cheese
- 8 slices mozzarella cheese
- 3 tablespoons sliced black olives
Instructions
- Preheat the oven to 400°F and line a baking sheet with parchment paper.
- Arrange the bagel halves cut side up on the baking sheet.
- Spread about 1 tablespoon of pizza sauce on each bagel half.
- Sprinkle ¼ cup of shredded mozzarella cheese evenly over the sauce on each half.
- Use a small ghost-shaped cutter or knife to cut ghost shapes from the mozzarella slices and place one on top of each bagel.
- Add two small pieces of black olive to each ghost for eyes.
- Bake for 8 to 10 minutes until the shredded cheese is melted and bubbly and the bagels are lightly toasted.
Extra Tips
Cut the ghost shapes before the bagels go into the oven so they keep their form as the cheese melts. If the ghosts slide, press them lightly into the shredded cheese layer. Leftovers can be wrapped and refrigerated, then reheated in a toaster oven to restore crispness without making the ghosts soggy. Course: Snack Cuisine: American Equipment: Baking sheet, Oven, Small cookie cutter or knife
Frankenstein Avocado Toast
This Frankenstein Avocado Toast turns a simple breakfast into a playful Halloween snack that kids will enjoy making. The bright green avocado spread creates a fun monster face on crisp toast, with simple toppings that bring the character to life without much effort. It offers a creamy texture against the crunch of toasted bread and works well for an after-school treat or party snack.
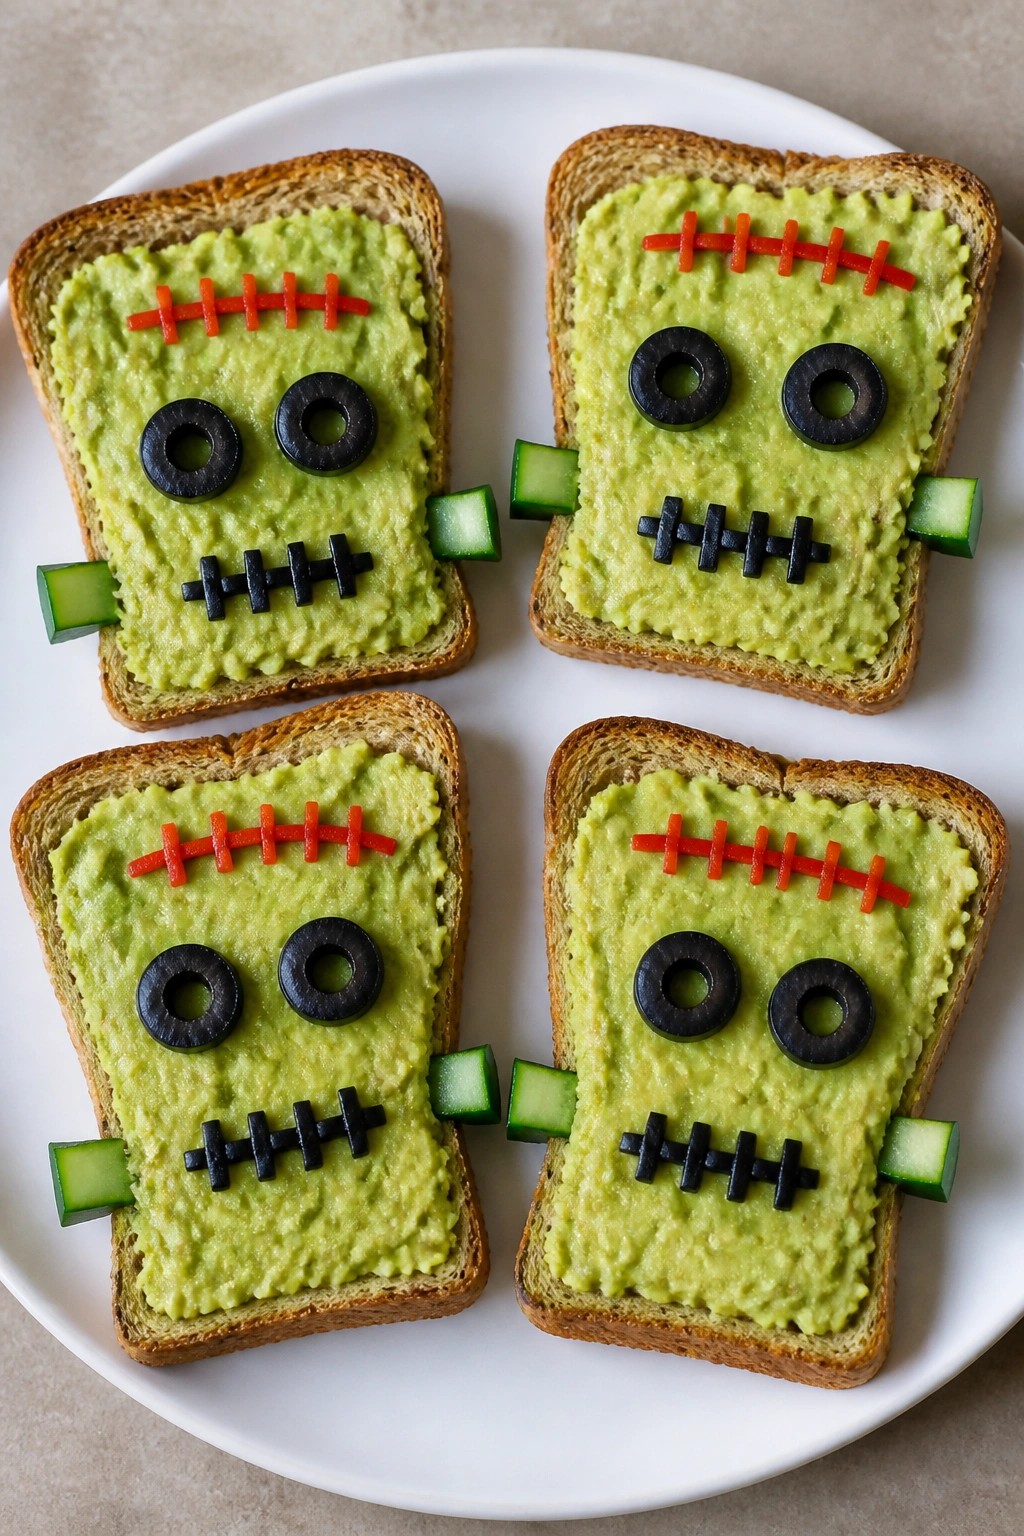
Serves 4 people.
Ingredients
- 4 slices whole grain bread
- 2 ripe avocados
- 1 tablespoon lemon juice
- 1/4 teaspoon salt
- 8 black olives, sliced
- 1 small cucumber, cut into 8 small rectangles
- 1 red bell pepper, cut into 4 thin strips
Instructions
- Toast the 4 slices of bread until golden and crisp.
- Cut the avocados in half, remove the pits, and scoop the flesh into a bowl.
- Add the lemon juice and salt to the avocado, then mash with a fork until mostly smooth.
- Spread the mashed avocado evenly over each slice of toast.
- Place two sliced black olives on each toast to form eyes.
- Add two cucumber rectangles to the sides of each toast to create bolts.
- Lay one red bell pepper strip across each toast to form a mouth.
Extra Tips
Use slightly underripe avocados if you want the spread to hold its shape better on the toast. The cucumber bolts add a fresh crunch that pairs nicely with the creamy avocado, but you can swap them for small cheese rectangles if your kids prefer milder flavors. Make the faces right before serving so the toast stays crisp. Course: Snack Cuisine: American Equipment: Toaster, Mixing bowl, Knife
Bat-shaped Chocolate Chip Cookies
These cookies give kids a simple way to join in the Halloween fun. Cutting the dough into bat shapes turns a basic treat into something they will enjoy making and eating. The cookies stay soft in the center with crisp edges and plenty of chocolate in every bite.
The recipe uses a small batch that works well for an afternoon activity or a quick dessert before trick-or-treating. Kids can help roll and cut the dough, then watch the bats take shape on the baking sheet.
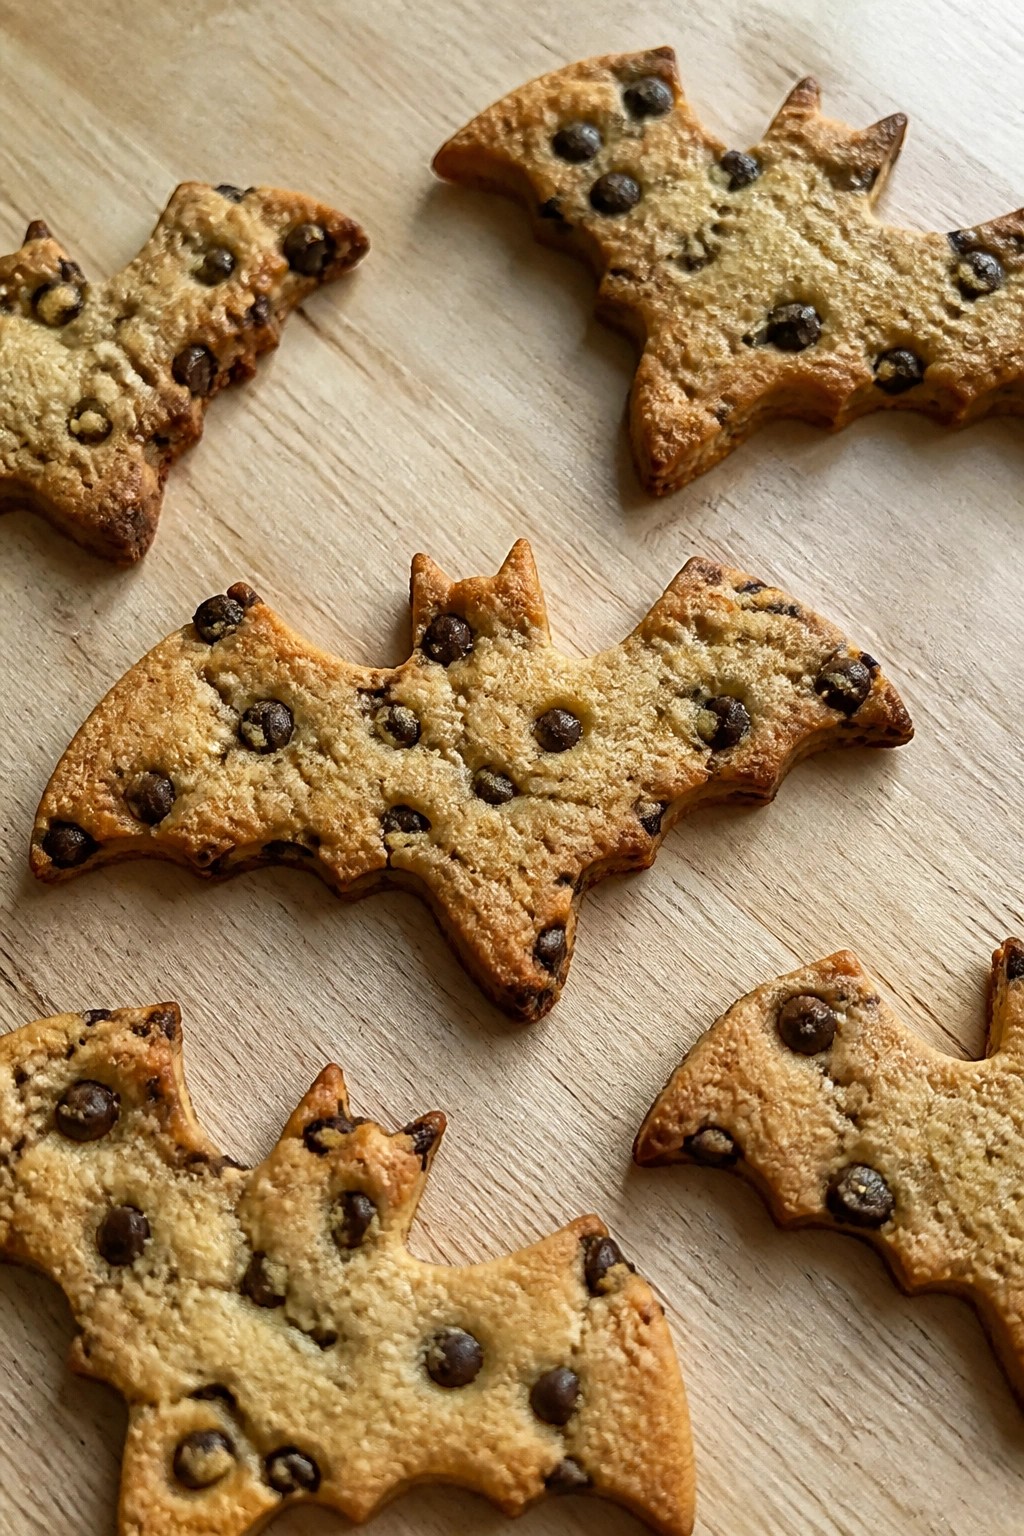
Serves 4 people.
Ingredients
- 1 cup all-purpose flour
- 1/2 cup unsalted butter, softened
- 1/4 cup granulated sugar
- 1/4 cup brown sugar
- 1 large egg yolk
- 1/2 teaspoon vanilla extract
- 1/2 teaspoon baking soda
- 1/4 teaspoon salt
- 1/2 cup semisweet chocolate chips
- Bat-shaped cookie cutter
Instructions
- Heat the oven to 350 degrees and line a baking sheet with parchment paper.
- In a mixing bowl, beat the softened butter with the granulated sugar and brown sugar until smooth.
- Add the egg yolk and vanilla extract, then mix until combined.
- Stir in the flour, baking soda, and salt until a soft dough forms.
- Fold in the chocolate chips.
- Roll the dough to about 1/4-inch thickness on a lightly floured surface.
- Press the bat-shaped cookie cutter into the dough and place the cutouts on the prepared baking sheet.
- Bake for 8 to 10 minutes until the edges turn light golden.
- Let the cookies cool on the baking sheet for 5 minutes before moving them to a wire rack.
Extra Tips
Chill the cut dough shapes for 10 minutes before baking if the kitchen feels warm, which helps the bats hold their wings. Store cooled cookies in an airtight container at room temperature for up to three days. For a darker look that fits the theme, swap half the chocolate chips for mini dark chocolate pieces. Course: Dessert Cuisine: American Equipment: Mixing Bowl, Baking Sheet, Oven, Bat-shaped cookie cutter, Wire rack
Witch Broom Pretzel Sticks with Cheese
These witch broom snacks give kids a fun way to play with their food at a Halloween party. They work well as a quick savory bite during a movie night or classroom celebration. The salty crunch of the pretzel pairs with mild, creamy cheese for a simple flavor that most children enjoy.
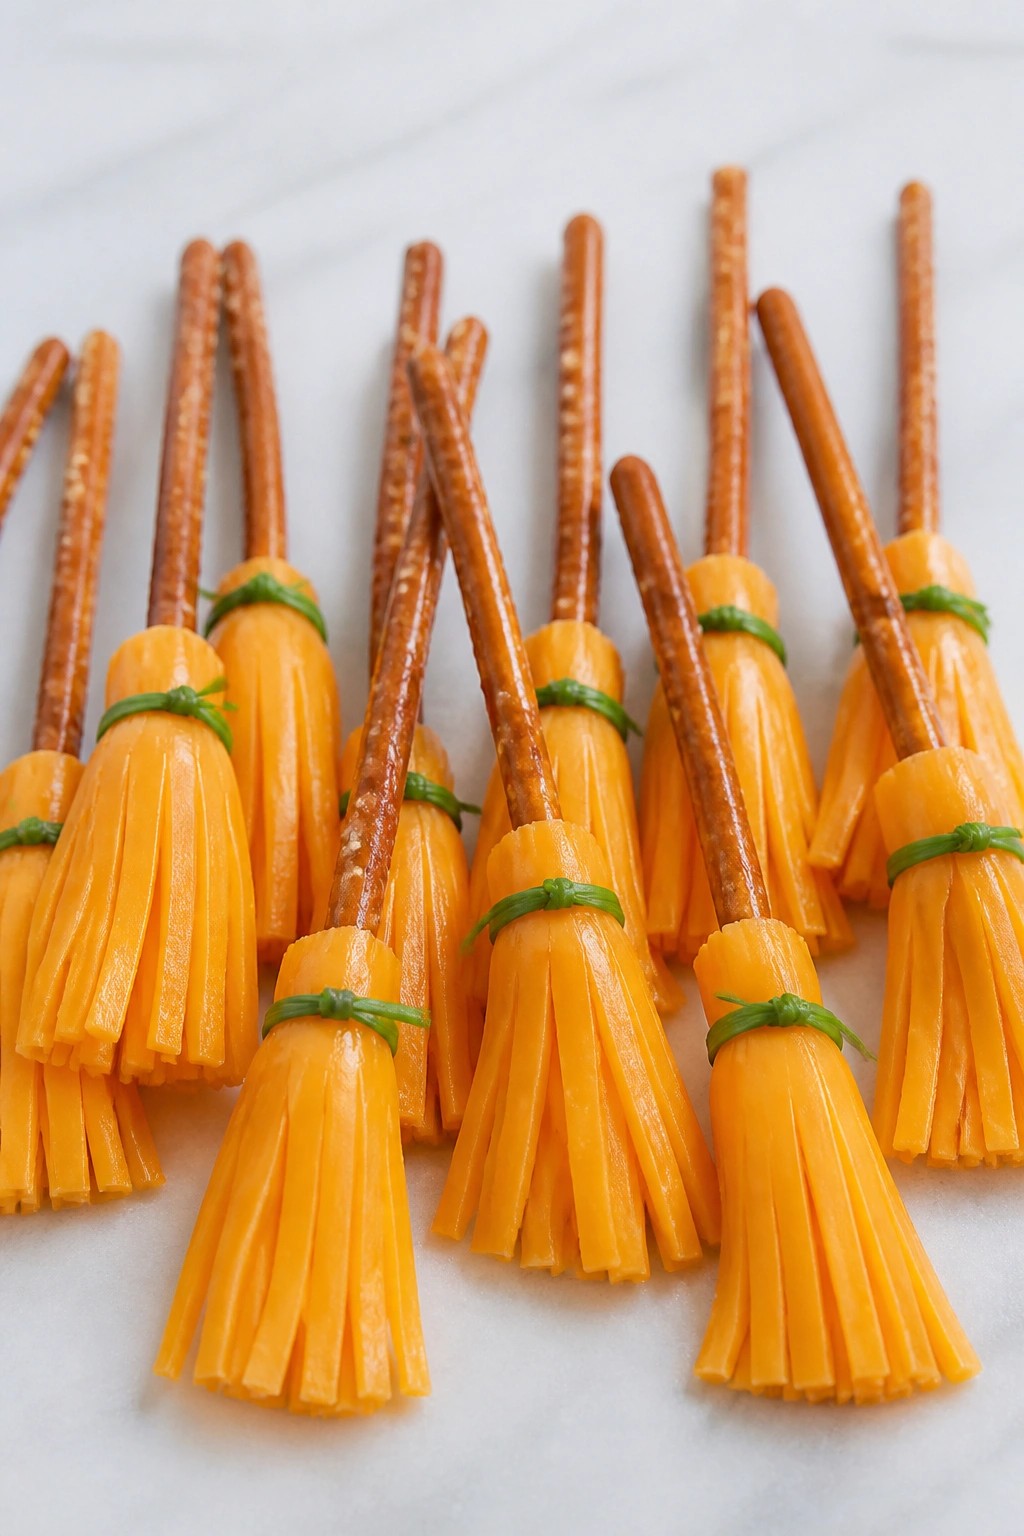
Serves 4 people.
Ingredients
- 12 pretzel sticks
- 4 slices cheddar cheese
- 4 chives
Instructions
- Place the pretzel sticks on a clean work surface with the thicker ends facing you. These will become the broom handles.
- Lay one slice of cheddar cheese flat. Use a knife to make several thin cuts across the slice, stopping about half an inch from the top edge so the strips stay connected.
- Position the fringed cheese at the thicker end of a pretzel stick so the fringe hangs down like broom bristles.
- Wrap one chive around the top of the cheese and pretzel. Tie it gently to hold the cheese in place.
- Repeat steps two through four with the remaining pretzel sticks, cheese slices, and chives.
Extra Tips
Cut the cheese while it is still cold so the strips stay neat instead of tearing. Serve the brooms right after assembly so the pretzels do not soften. If you need to make them ahead, keep the cheese and pretzels separate and assemble just before serving. Course: Snack Cuisine: American Equipment: Knife, Cutting board
Eyeball Meatball Sliders
These Eyeball Meatball Sliders turn a simple meatball sandwich into a fun Halloween snack. Kids enjoy spotting the olive and cheese "eyes" on top, and the sliders stay easy to hold at parties or after-school get-togethers.
The meatballs stay juicy inside soft buns while the marinara adds bright flavor and the melted cheese gives a mild creamy note. The finished sliders feel hearty without being heavy.
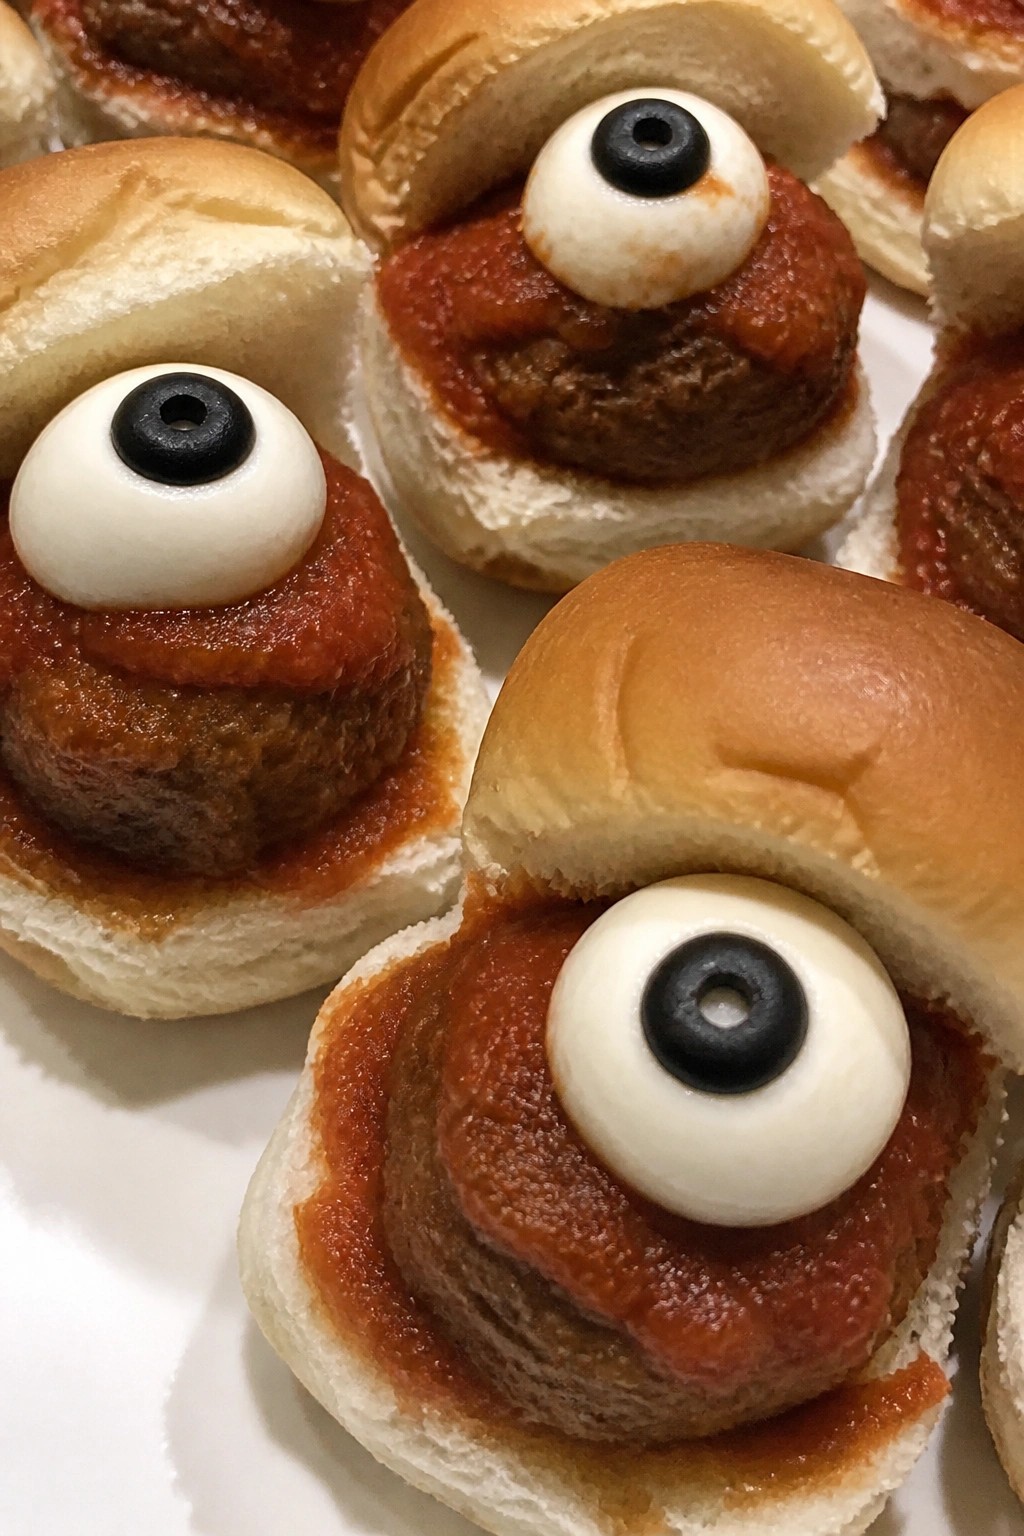
Serves 4 people.
Ingredients
- 1 pound ground beef
- 1/2 cup plain breadcrumbs
- 1 egg
- 1 teaspoon garlic powder
- 1 teaspoon dried oregano
- 1/2 teaspoon salt
- 1/4 teaspoon black pepper
- 8 slider buns
- 1 cup marinara sauce
- 8 small mozzarella balls
- 8 black olives
Instructions
- Heat the oven to 400 degrees. In a mixing bowl combine the ground beef, breadcrumbs, egg, garlic powder, oregano, salt, and black pepper. Mix until evenly blended, then shape the mixture into 8 meatballs of equal size.
- Place the meatballs on a baking sheet and bake for 18 to 20 minutes until they reach an internal temperature of 160 degrees.
- While the meatballs cook, warm the marinara sauce in a small skillet over low heat. Slice each black olive into thin rounds to create pupils.
- Split the slider buns and spoon a little marinara onto the bottom half of each bun. Set one cooked meatball on the sauce.
- Top each meatball with a mozzarella ball, then press one olive slice into the center of the cheese to form an eye. Add the bun tops and serve right away.
Extra Tips
Bake the meatballs a day ahead and reheat them in the sauce so the cheese melts smoothly when you assemble the sliders. If the mozzarella balls feel too large, halve them before placing them on the meatballs. Store leftover assembled sliders in the refrigerator for one day and reheat briefly in a 350-degree oven to keep the buns from getting soggy. Course: Appetizer Cuisine: American Equipment: Mixing Bowl, Baking Sheet, Skillet
Graveyard Chocolate Pudding Cups
These Graveyard Chocolate Pudding Cups give kids a hands-on Halloween dessert they can help assemble. The chocolate base stays simple while the cookie details create a playful graveyard scene that feels festive without extra fuss.
The pudding turns out creamy and cool, balanced by the crunch of crushed cookies on top. Gummy worms add a bit of chew that kids notice right away.
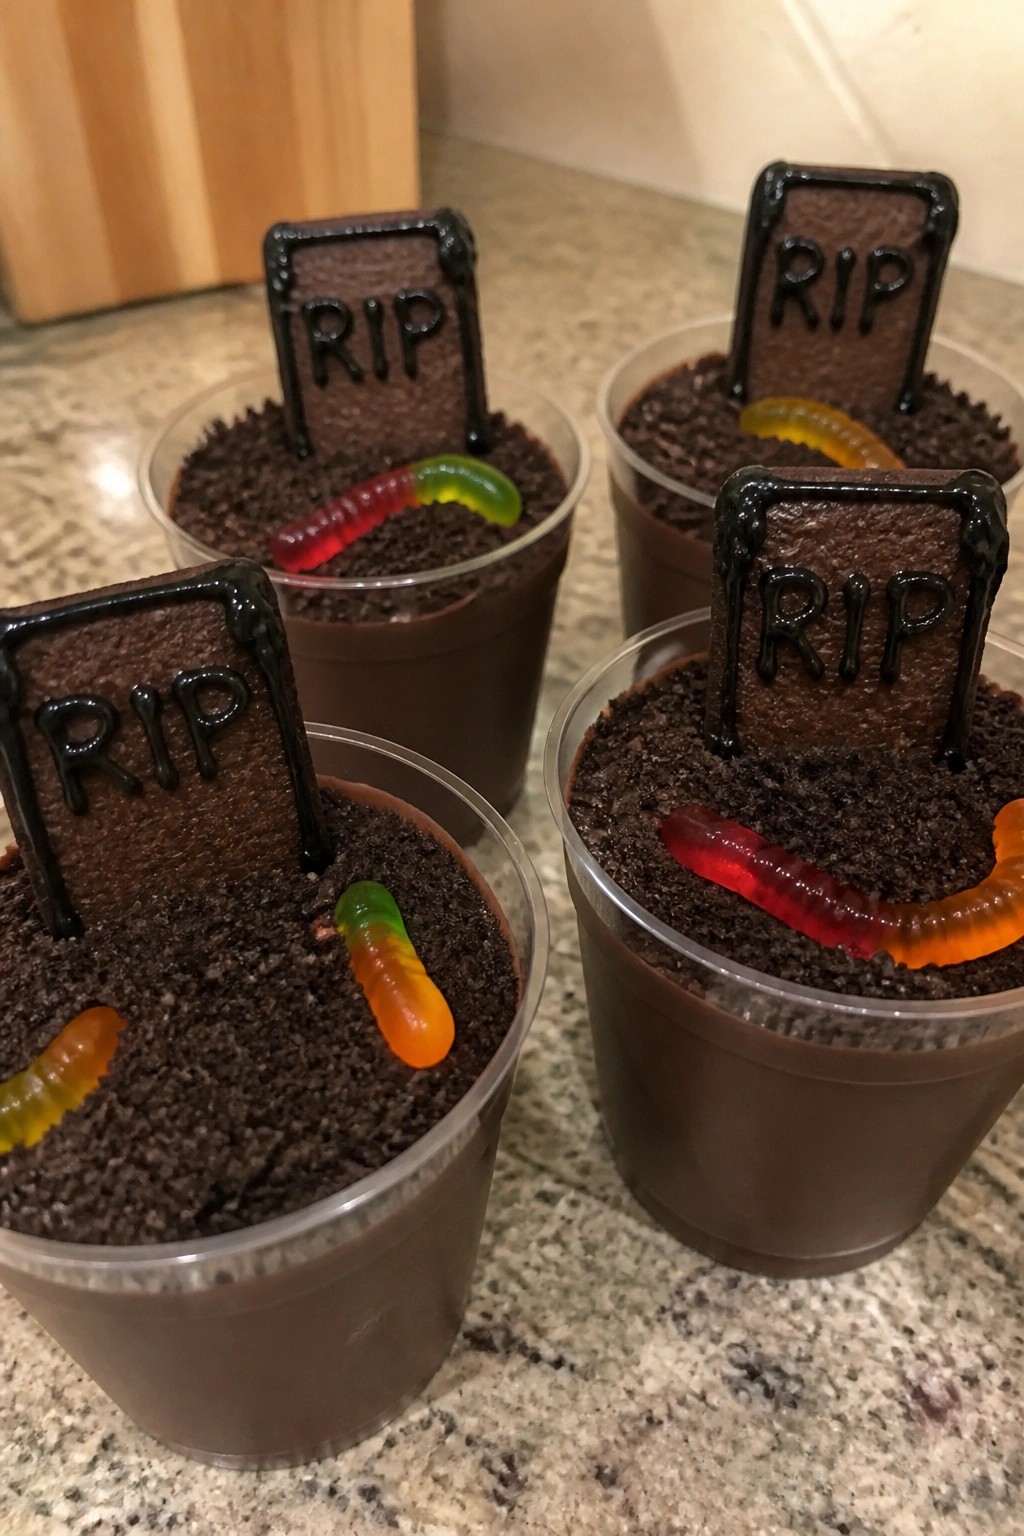
Serves 4 people.
Ingredients
- 1 box (3.9 oz) instant chocolate pudding mix
- 2 cups cold milk
- 12 chocolate sandwich cookies
- 4 rectangular cookies
- Black decorating gel
- 4 gummy worms
Instructions
- Whisk the instant chocolate pudding mix and cold milk in a mixing bowl until the mixture thickens, about two minutes.
- Crush eight chocolate sandwich cookies into fine crumbs for the dirt layer.
- Spoon the pudding evenly into four small cups.
- Sprinkle the crushed cookie crumbs over the pudding in each cup.
- Write "RIP" on each rectangular cookie with black decorating gel, then stand one cookie upright in the pudding of each cup.
- Tuck one gummy worm into the cookie crumbs in each cup. Break the remaining four chocolate sandwich cookies in half and press the pieces partway into the crumbs around the gravestones.
Extra Tips
Prepare the pudding cups up to two hours ahead and keep them chilled, but add the cookie gravestones and gummy worms right before serving so the cookies stay crisp. If the decorating gel feels too thick to write with, warm the tube briefly in your hands first. Course: Dessert Cuisine: American Equipment: Mixing Bowl, Whisk, 4 Small Cups, Spoon
Skeleton Banana Popsicles
These frozen treats turn simple bananas into playful skeletons that fit right into a Halloween snack table. Kids enjoy the process of adding the faces, and the result is a cold, sweet bite that feels like dessert without much effort.
The bananas stay firm after freezing while the white chocolate shell adds a creamy layer. A few lines of dark chocolate create the skeleton look on each pop.
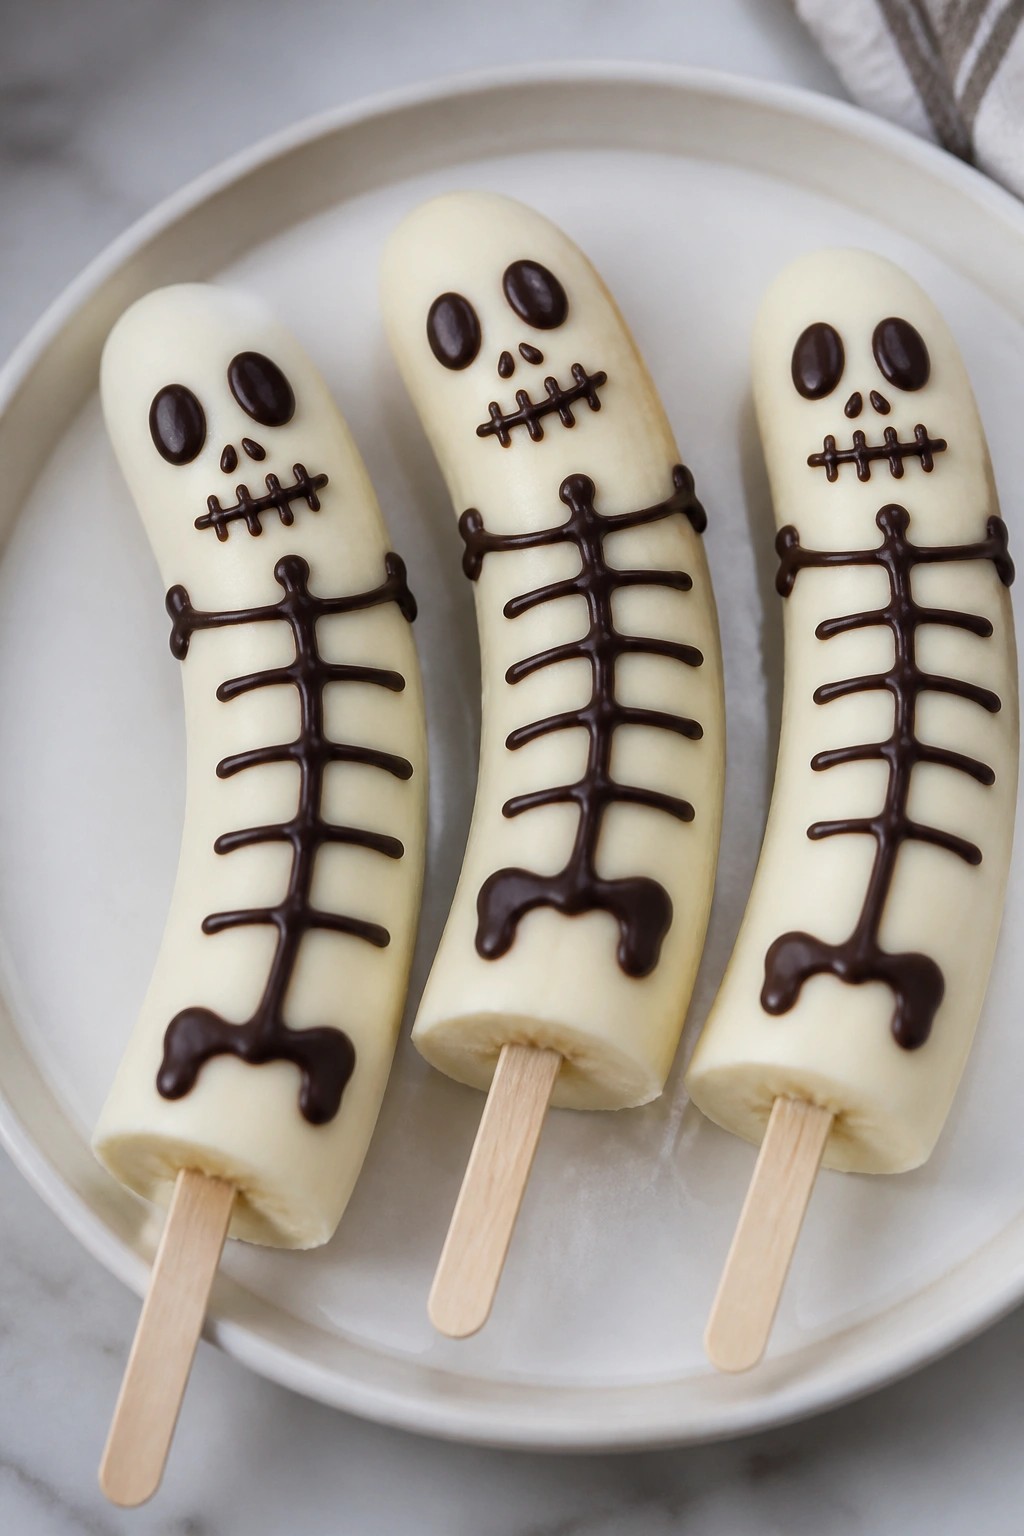
Serves 4 people.
Recommended Products

1. 🎃 Halloween-Themed 5 Unique Shapes Create spooky and fun cake pops with 5 exclusive 3D printed shapes: Pumpkin, Candy, Skull, Tombstone, and Ghost. Perfect for Halloween parties, haunted houses, or festive home baking. The set also includes a pumpkin-shaped storage box and tray for easy organization and serving.

Halloween Candy Eyeballs: Edible eye decorations make it easy to create spooky monsters, ghosts, creatures, and playful characters on your favorite Halloween treats.
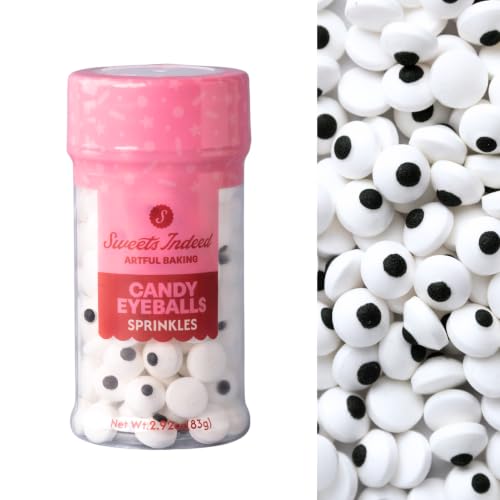
Halloween Candy Eyeballs: Edible eye sprinkles instantly add a spooky finishing touch to Halloween cookies, cupcakes, cakes, brownies, cake pops, and party desserts.
Ingredients
- 4 medium bananas
- 4 popsicle sticks
- 1 cup white chocolate chips
- 1/4 cup dark chocolate chips
- 1 tablespoon coconut oil
Instructions
- Peel the bananas and insert one popsicle stick into the cut end of each banana. Place them on a parchment-lined baking sheet and freeze for at least two hours until firm.
- Combine the white chocolate chips and coconut oil in a microwave-safe bowl. Heat in 20-second bursts, stirring between each, until smooth.
- Dip each frozen banana into the melted white chocolate, turning to coat evenly. Return the coated bananas to the parchment-lined sheet.
- Melt the dark chocolate chips in a separate small bowl using the same microwave method. Spoon the melted dark chocolate into a zip-top bag, snip a tiny corner, and pipe simple skeleton faces and bone lines onto each white-coated banana.
- Place the sheet back in the freezer for 15 minutes to set the chocolate before serving.
Extra Tips
If the white chocolate thickens while dipping, warm it for a few seconds and stir again. Store finished pops in a freezer bag for up to three days. Use a slightly underripe banana so it holds its shape better after freezing. Course: Dessert Cuisine: American Equipment: Baking sheet, Parchment paper, Microwave-safe bowl, Popsicle sticks
Monster Mouth Apple Slices with Peanut Butter
These apple slices turn into silly monster mouths that kids enjoy putting together themselves. They work well for a quick Halloween snack or party activity because they need no baking and come together fast. The crisp apple gives a fresh bite while the peanut butter adds creaminess and the marshmallows create a chewy contrast.
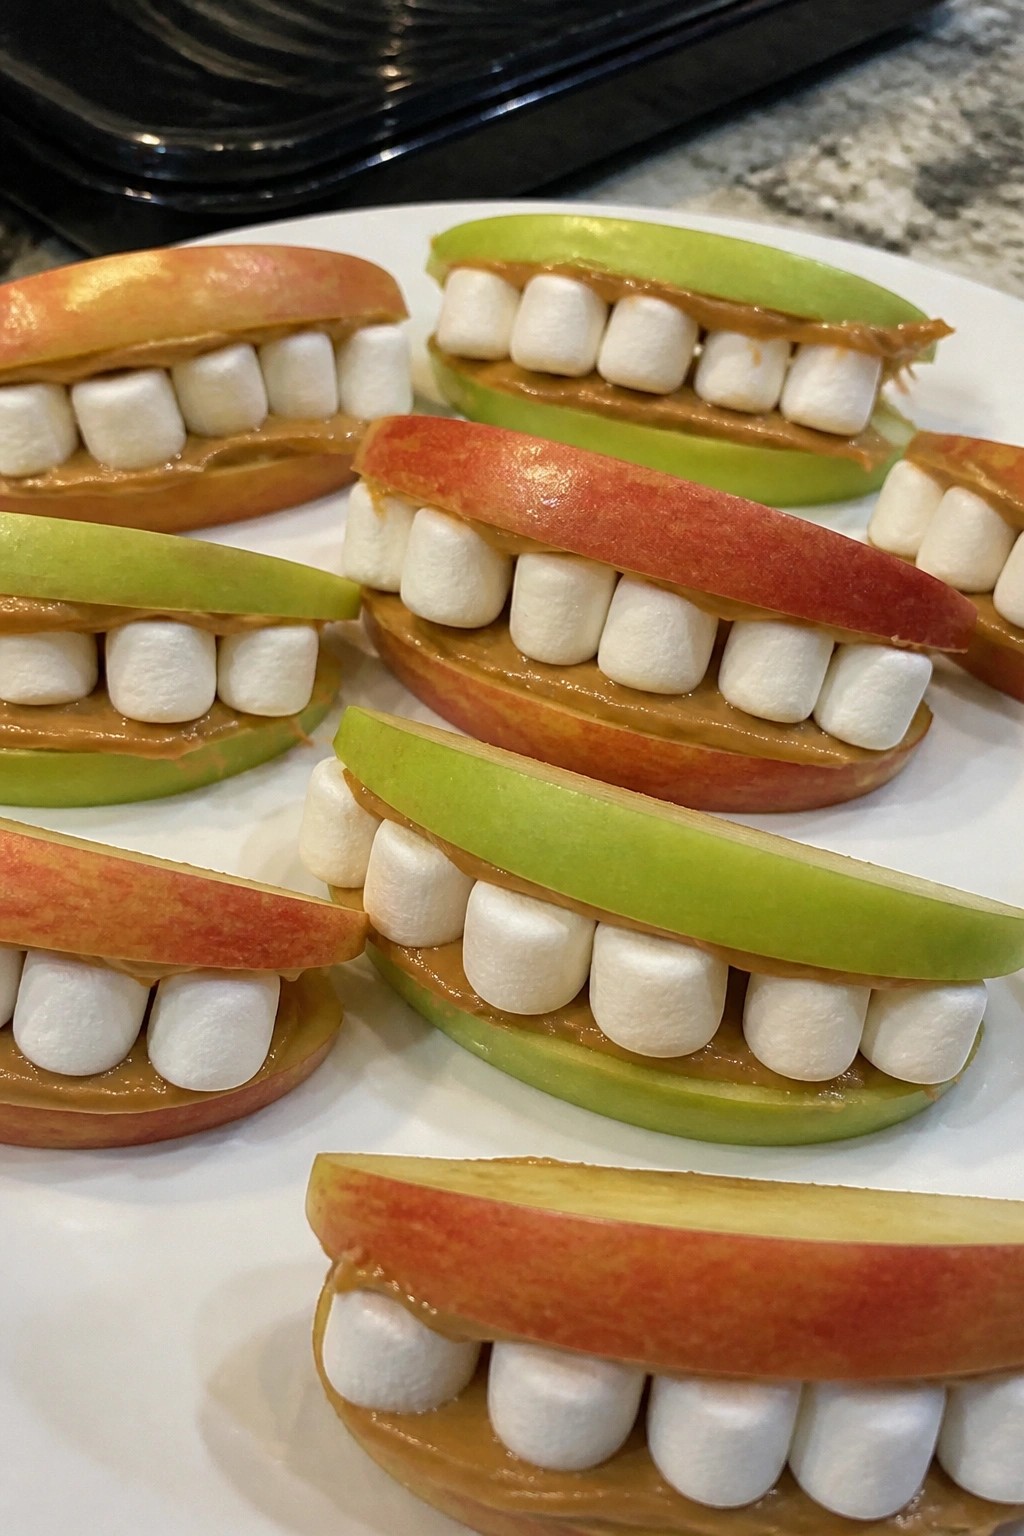
Serves 4 people.
Ingredients
- 4 medium apples
- 1/2 cup creamy peanut butter
- 1/2 cup mini marshmallows
Instructions
- Core each apple and cut it into 8 wedges. You will need two wedges per mouth.
- Spread a thin layer of peanut butter on the cut side of 16 wedges.
- Arrange mini marshmallows along the peanut butter edge of each prepared wedge to form teeth.
- Press a plain wedge on top of each decorated one to close the mouth.
Extra Tips
Choose crisp apples that hold their shape after slicing so the mouths stay intact. If the peanut butter is too thick, warm it slightly for easier spreading. Assemble right before serving to keep the apples from browning and the marshmallows from softening. Course: Snack Cuisine: American Equipment: Knife, Cutting board, Spoon
Pumpkin Patch Veggie Cups with Ranch Dip
These pumpkin patch veggie cups give kids a fun way to eat their vegetables at a Halloween party or after-school snack time. The orange bell peppers act as the base for the patch while the surrounding veggies create a simple garden scene. The result is a fresh, crunchy bite with cool ranch that feels light rather than heavy.
The dish works well when you need something quick to assemble ahead of time. It keeps the focus on raw vegetables and a familiar dip without extra cooking steps.
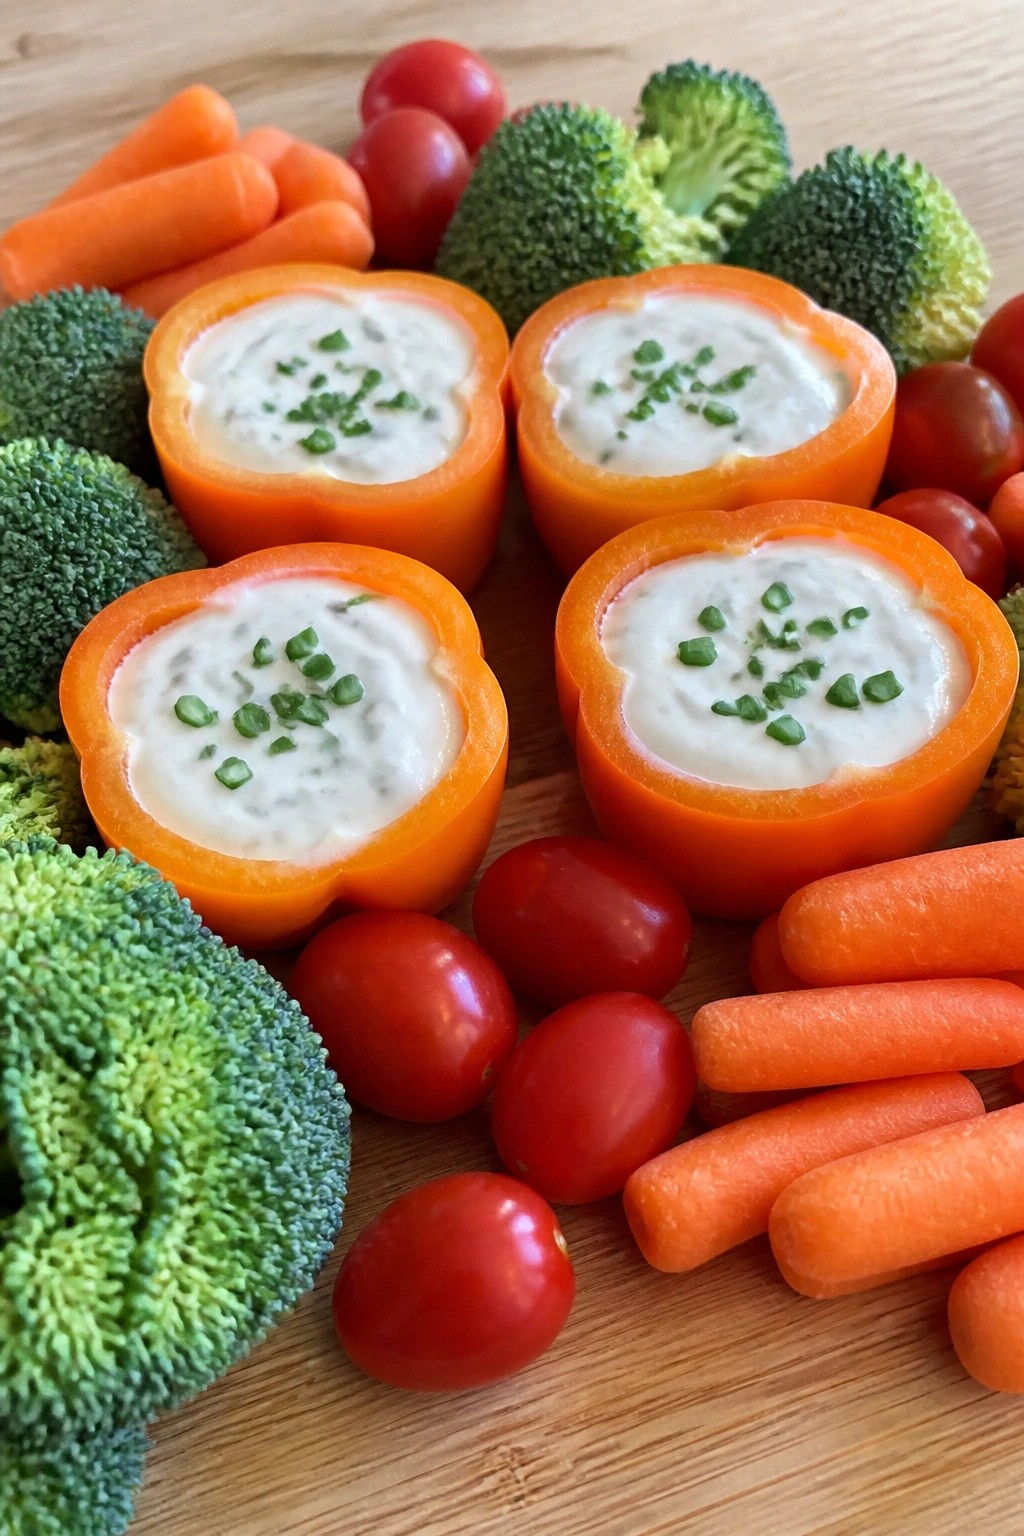
Serves 4 people.
Ingredients
- 4 small orange bell peppers
- 1 cup ranch dip
- 8 broccoli florets
- 12 baby carrots
- 8 cherry tomatoes
- 2 tablespoons chopped chives
Instructions
- Slice the tops off each orange bell pepper and scoop out the seeds and white ribs to form four hollow cups.
- Spoon 1/4 cup of ranch dip into the bottom of each prepared pepper cup.
- Set the filled cups on a serving platter with a little space between them.
- Tuck the broccoli florets and baby carrots around the cups so they stand upright like plants in a patch.
- Scatter the cherry tomatoes among the other vegetables, then sprinkle the chopped chives over the tops for a final touch of color.
Extra Tips
Fill the pepper cups just before serving so the ranch stays thick and the vegetables remain crisp. If you need to prep earlier, store the cut vegetables and filled cups separately in the fridge and assemble right before guests arrive. The chives add a mild onion note that pairs well with the ranch without overpowering the fresh vegetables. Course: Appetizer Cuisine: American Equipment: Sharp knife, Cutting board, Spoon, Serving platter
Candy Corn Popcorn Snack Mix
This snack mix brings together buttery popcorn and colorful candy corn for a quick Halloween treat that kids enjoy. It works well for after-school snacks, lunchbox additions, or small party bags. The result is a light and crunchy mix with sweet and salty bites.
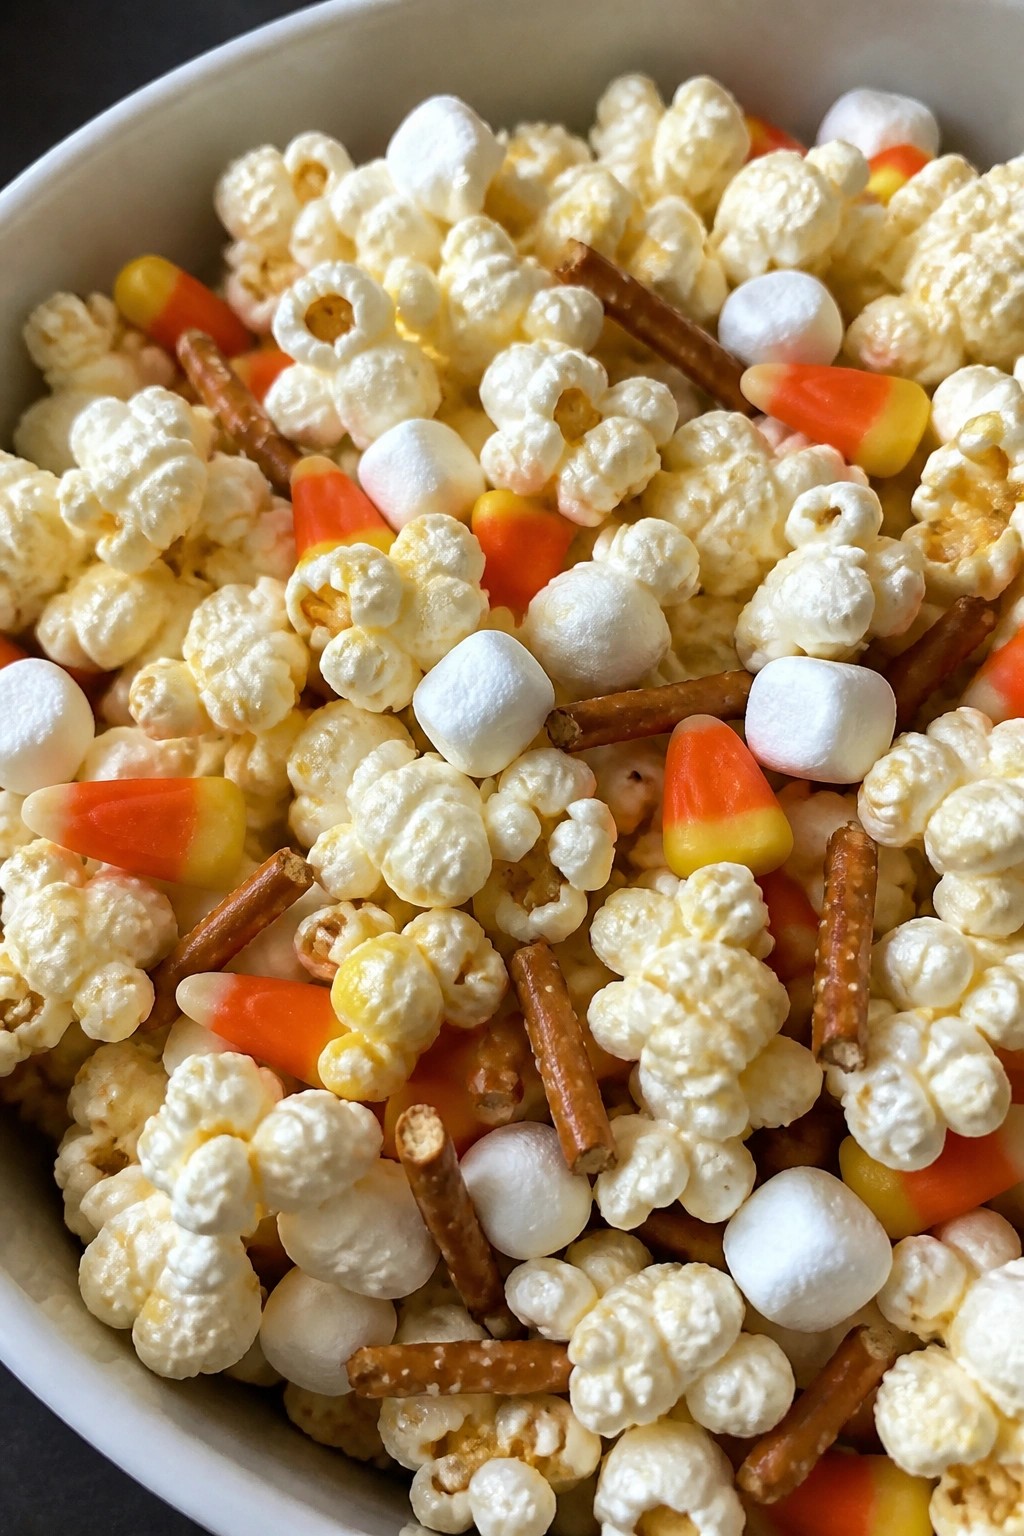
Serves 4 people.
Ingredients
- 8 cups popped popcorn
- 1 cup candy corn
- 1 cup pretzel sticks, broken into pieces
- 1/2 cup mini marshmallows
- 2 tablespoons unsalted butter, melted
- 1/4 teaspoon sea salt
Instructions
- Place the popped popcorn in a large bowl.
- Drizzle the melted butter over the popcorn and toss gently until evenly coated. Sprinkle the sea salt over the top and toss again.
- Add the candy corn, pretzel pieces, and mini marshmallows to the bowl.
- Mix everything together with a large spoon until the ingredients are well distributed.
Extra Tips
Use freshly popped popcorn so the mix stays light instead of dense. Add the candy corn right before serving to keep it from softening. Leftovers store in an airtight container at room temperature for one day. Course: Snack Cuisine: American Equipment: Large bowl, Microwave