

Halloween work parties often call for food that feels special without taking too much time. These recipes use everyday ingredients and basic steps so you can prepare them quickly. You will see a range of sweet and savory options that hold up well on a shared table. Each one is designed to look put together while staying realistic for a busy schedule. They should give you solid choices that coworkers will enjoy and remember.
Helpful Tips Before You Start
These tips will help your Halloween recipes stay practical for the office while still looking impressive.
Choose Make Ahead Options
Pick recipes you can assemble the night before. This reduces stress on the day of the party and keeps flavors fresh.
Focus on Easy Transport
Select items that travel well in containers without needing extra cooling. Finger foods and sturdy dips hold up best on the commute.
Keep Portions Office Friendly
Aim for bite sized servings that do not require plates or utensils. This makes sharing simpler in a work setting.
Add One Themed Detail
Use a quick garnish like colored sprinkles or shaped cookies to tie in the Halloween theme. One small touch is enough to stand out without extra work.
Mummy Hot Dogs in Crescent Roll Coffins
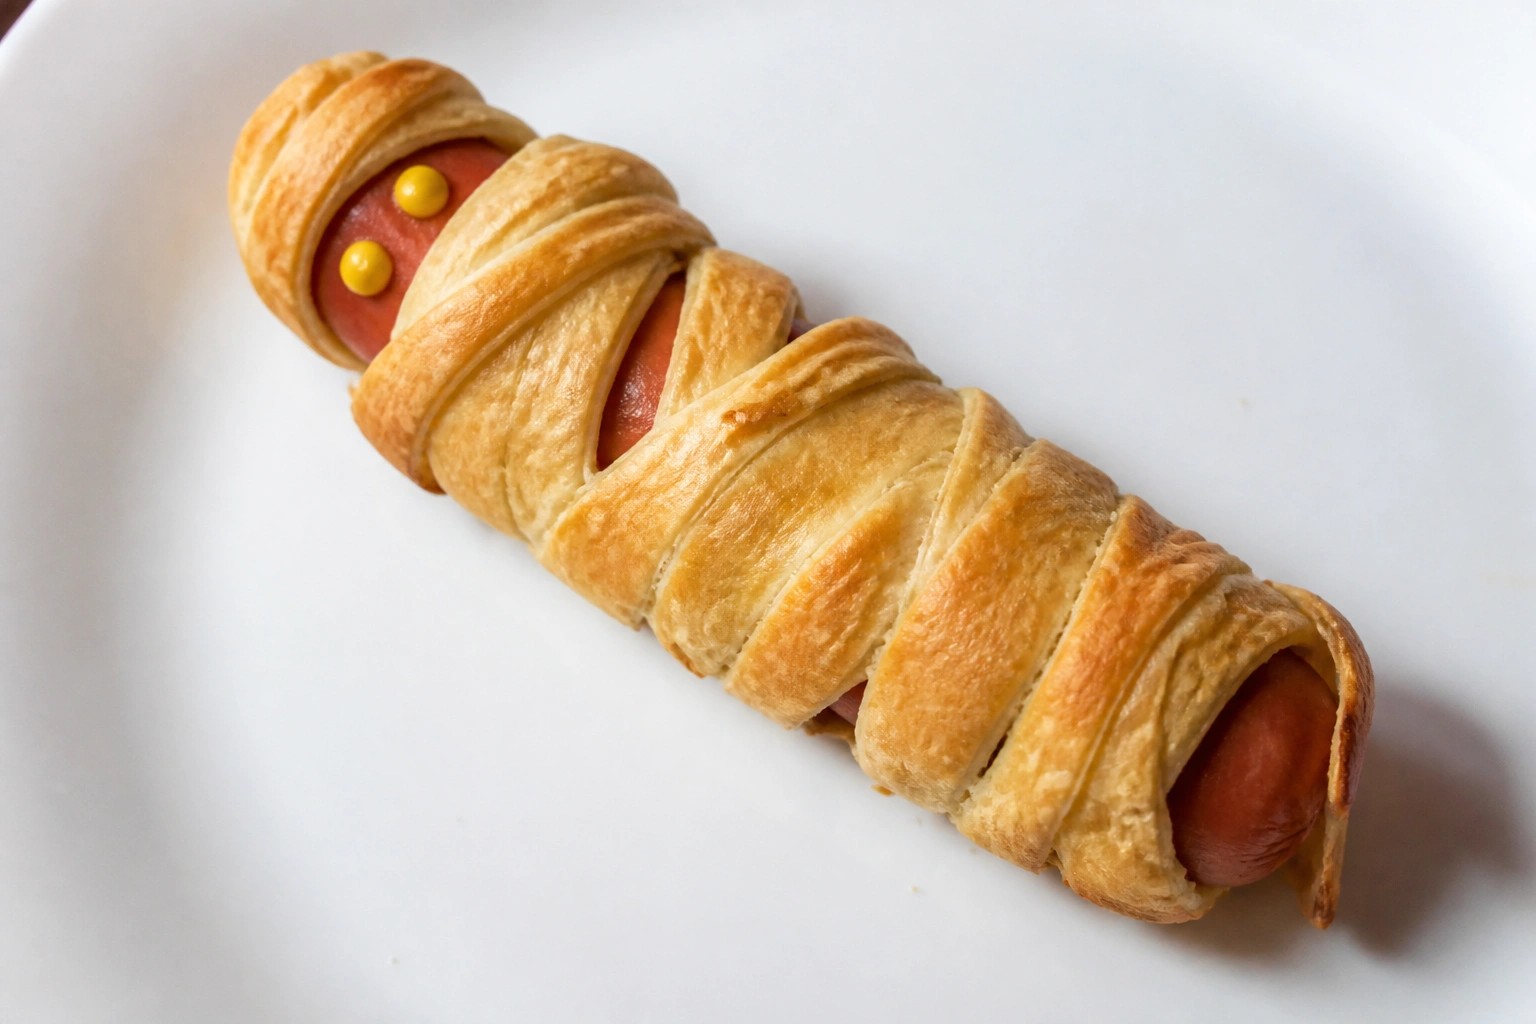
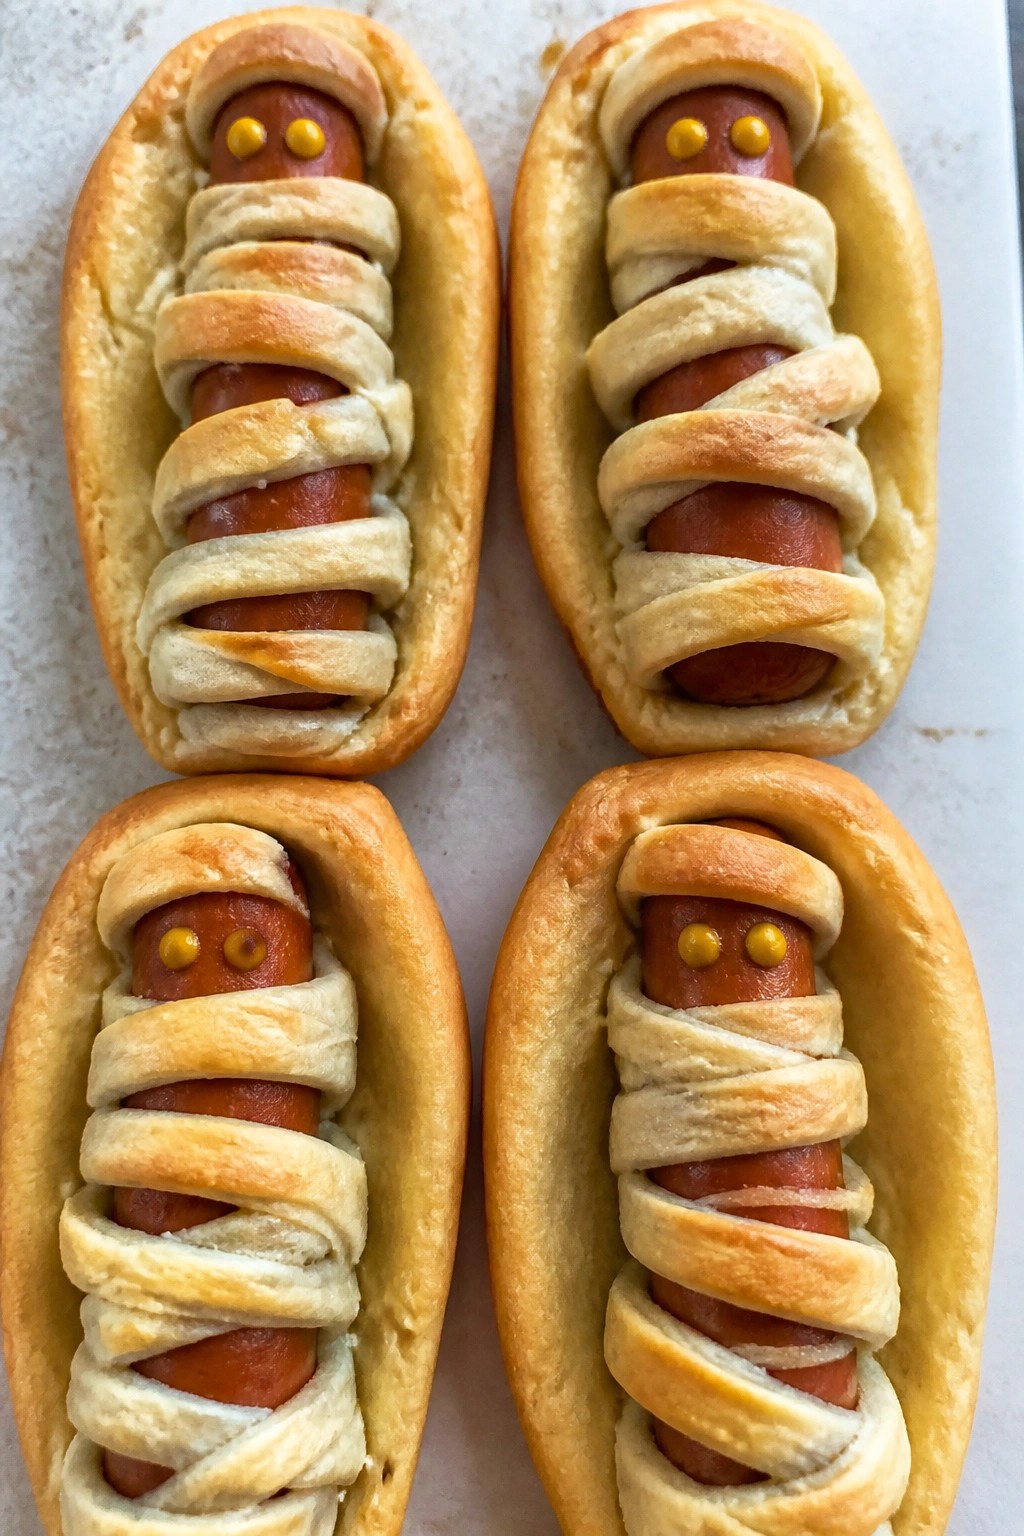
These mummy hot dogs wrapped in strips of dough and tucked into their own crescent roll coffins bring a playful touch to any office spread. They work well for a work party because they travel easily and require only basic kitchen tools. The finished bites offer a crisp outer layer around a savory, juicy hot dog with just a touch of tangy mustard.
Serves 4 people.
Ingredients
- 4 all-beef hot dogs
- 2 cans refrigerated crescent roll dough
- 2 teaspoons yellow mustard
Instructions
- Preheat the oven to 375 degrees and line a baking sheet with parchment paper. Unroll one can of crescent roll dough and cut it into thin strips. Wrap the strips around each hot dog, leaving small gaps for the mummy face. Place the wrapped hot dogs on the baking sheet.
- Unroll the second can of dough and cut it into four coffin shapes using a knife or pizza cutter. Transfer the shapes to the same baking sheet. Bake everything for 12 to 15 minutes until the dough is golden. Remove from the oven and let cool slightly. Add two small dots of mustard to each hot dog for eyes, then set one mummy into each coffin.
Extra Tips
Cut the coffin shapes a little larger than the hot dogs so they fit without crowding. If the dough starts to brown too quickly, tent the sheet loosely with foil for the last few minutes. Leftovers reheat best in a 300-degree oven for five minutes to keep the crust crisp. Course: Appetizer Cuisine: American Equipment: Baking sheet, Parchment paper, Knife
Jack-O’-Lantern Stuffed Bell Peppers with Rice and Sausage
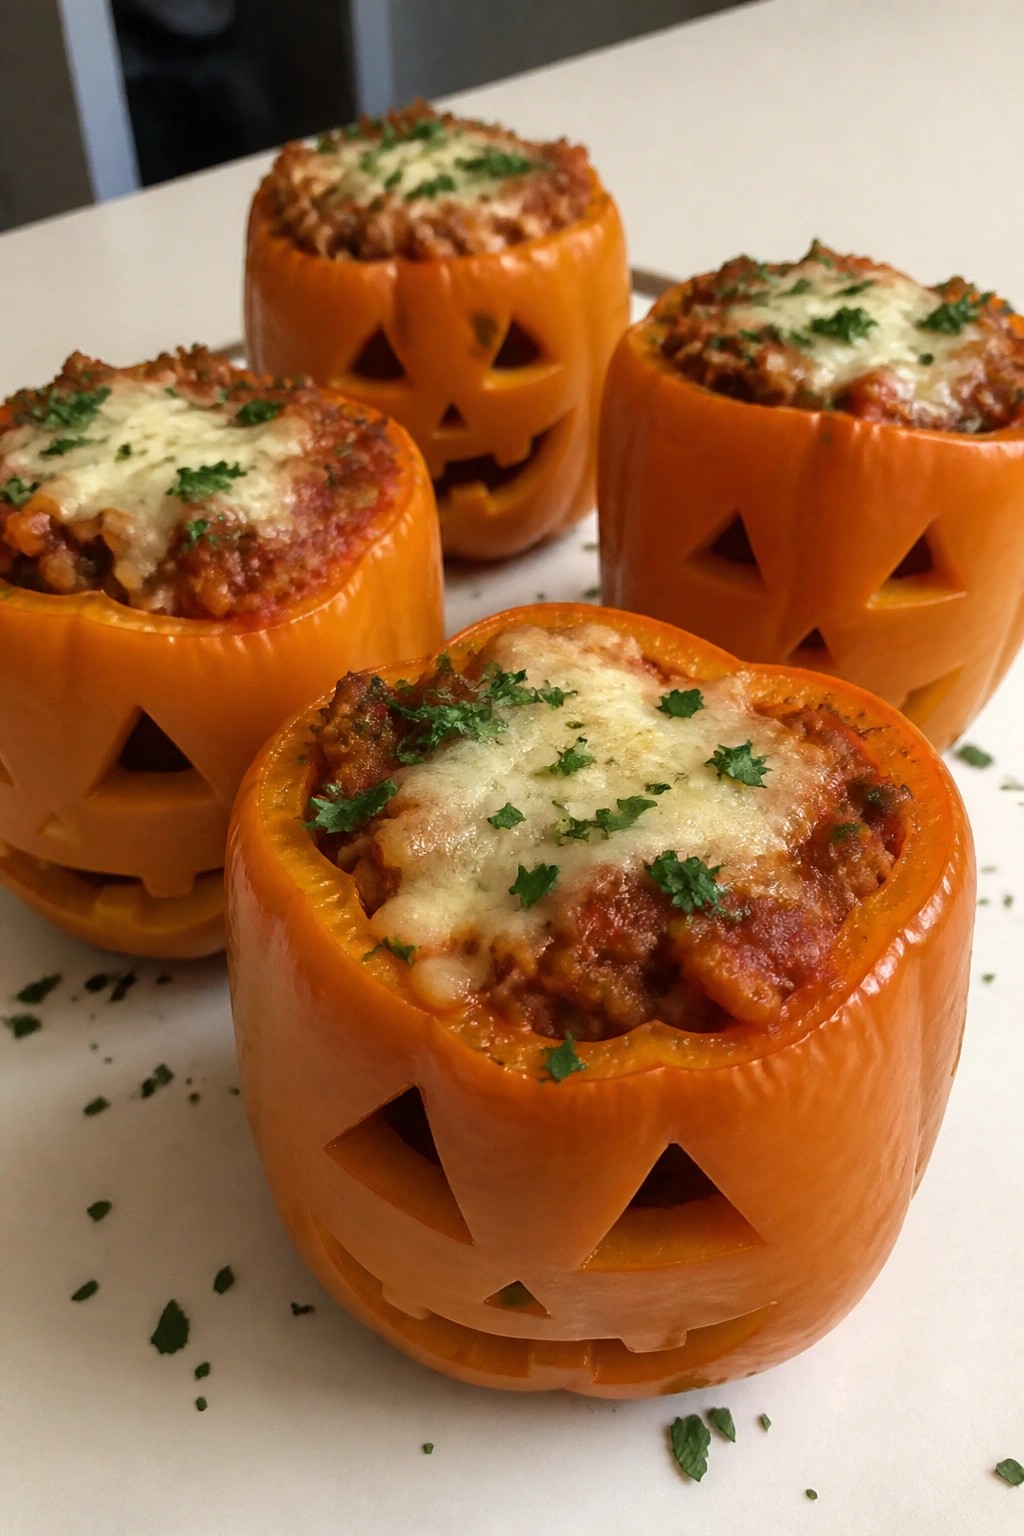
These jack-o’-lantern stuffed peppers add a simple Halloween detail to a work party table. The carved faces turn ordinary bell peppers into something festive without extra effort.
The filling combines savory sausage with rice and cheese for a filling bite that holds up well at room temperature. It offers a balanced mix of meaty texture and mild tomato flavor.
Serves 4 people.
Ingredients
- 4 medium orange bell peppers
- 1 pound ground Italian sausage
- 1 small onion, finely chopped
- 2 garlic cloves, minced
- 1 cup cooked white rice
- 1 cup marinara sauce
- 1 cup shredded mozzarella cheese
- 1 tablespoon olive oil
- Salt and black pepper to taste
- Fresh parsley for garnish
Instructions
- Preheat the oven to 375 degrees. Slice the tops off each bell pepper and remove the seeds and membranes. Use a small knife to carve simple jack-o’-lantern faces on the front of each pepper.
- Heat the olive oil in a large skillet over medium heat. Add the ground Italian sausage and cook until browned, breaking it up with a spoon as it cooks.
- Add the chopped onion and minced garlic to the skillet. Cook for 3 to 4 minutes until the onion softens.
- Stir in the cooked white rice, marinara sauce, and half of the shredded mozzarella cheese. Season with salt and black pepper. Remove the skillet from the heat and mix until combined.
- Place the carved peppers upright in a baking dish. Spoon the sausage mixture evenly into each pepper. Sprinkle the remaining mozzarella cheese over the tops.
- Bake for 25 to 30 minutes until the peppers soften and the cheese melts and browns slightly. Remove from the oven and let rest for 5 minutes before garnishing with fresh parsley.
Extra Tips
Carve the faces after removing the seeds so the peppers stay sturdy during baking. The dish reheats well in a 350-degree oven for 10 minutes if you prepare it the night before the party. Skip the parsley if you want a cleaner look for an office setting. Course: Main Course Cuisine: American Equipment: Baking dish, Large skillet, Cutting board
Spiderweb Black Bean and Corn Dip with Tortilla Chips
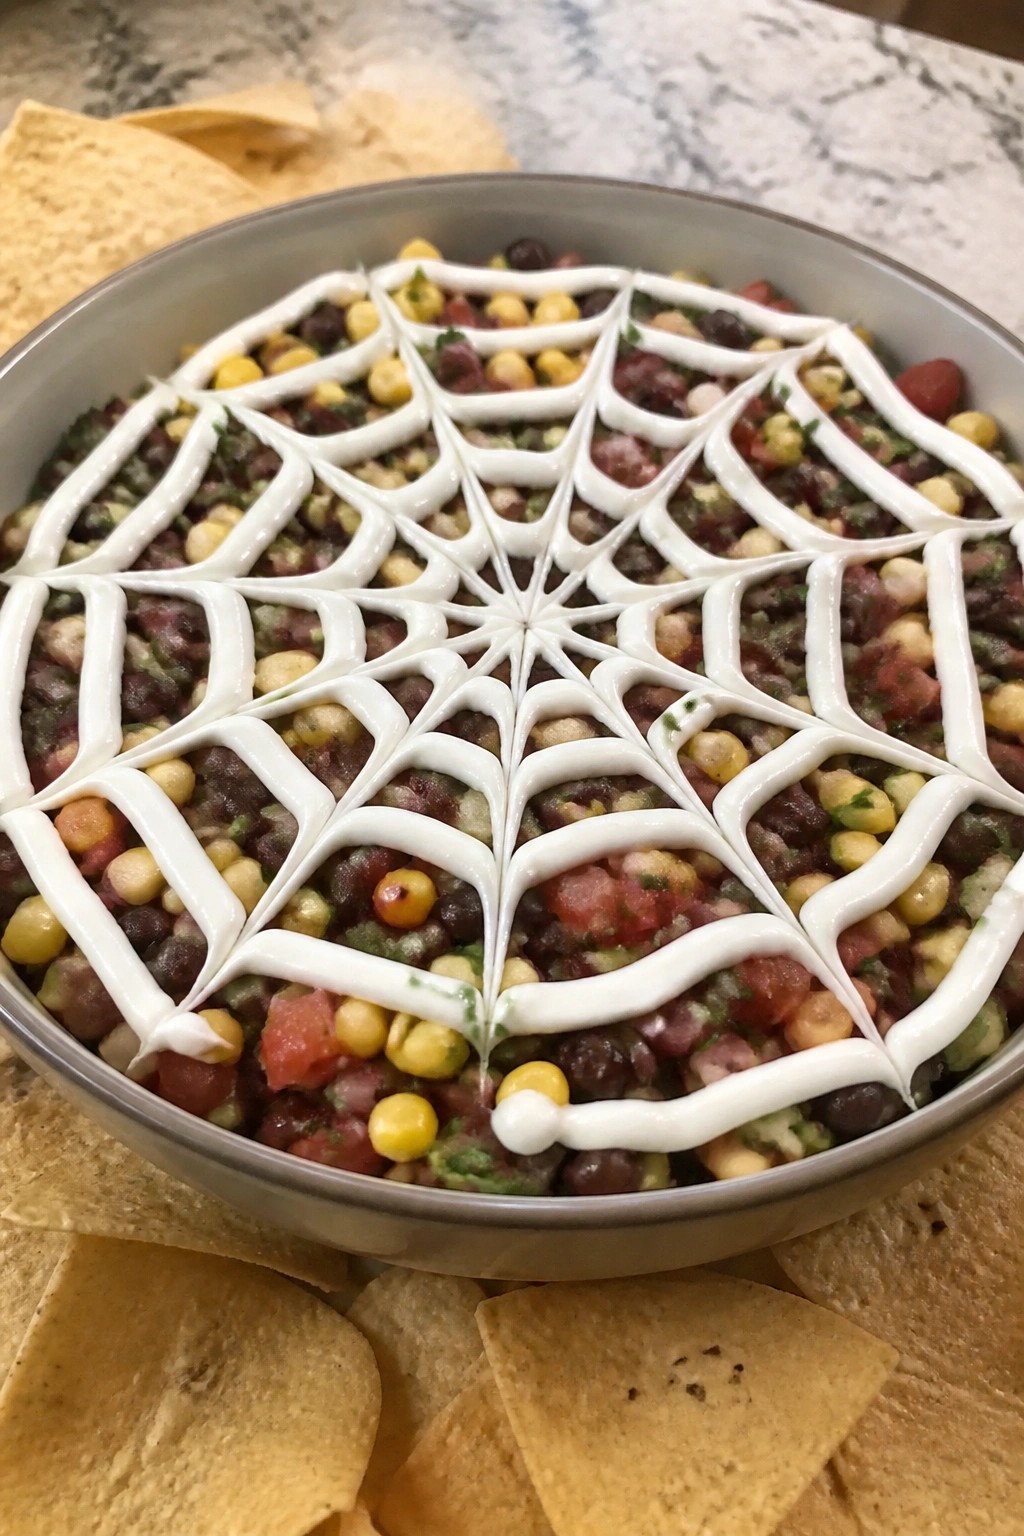
This black bean and corn dip brings a simple Halloween touch to any work party table. The spiderweb design on top makes it stand out without extra effort. It has a fresh mix of beans, corn, and bright flavors that pair well with crunchy tortilla chips.
The dip works best as a make-ahead appetizer that holds up during a long event. It stays cool and scoopable for hours.
Serves 4 people.
Ingredients
- 1 (15 oz) can black beans, rinsed and drained
- 1 cup corn kernels, thawed if frozen
- 1/2 cup diced tomatoes
- 1/4 cup diced red onion
- 2 tablespoons chopped cilantro
- Juice of 1 lime
- 1 teaspoon chili powder
- 1/2 teaspoon cumin
- 1/4 teaspoon salt
- 1/4 cup sour cream
- Tortilla chips for serving
Instructions
- Combine the black beans, corn, tomatoes, red onion, cilantro, lime juice, chili powder, cumin, and salt in a mixing bowl. Stir until evenly mixed.
- Transfer the mixture to a shallow serving dish and spread it into an even layer.
- Place the sour cream in a small zip-top bag and snip off one corner to create a piping tip. Pipe the sour cream in three concentric circles over the dip.
- Drag a toothpick from the center outward through the circles in several spots to form a web pattern.
- Serve with tortilla chips on the side.
Extra Tips
Make this dip the night before and add the sour cream web right before serving so the pattern stays sharp. If you need more servings, simply double the bean and corn amounts but keep the sour cream portion the same to avoid a thick topping layer. Course: Appetizer Cuisine: Mexican Equipment: Mixing Bowl, Can Opener, Shallow Serving Dish
Ghostly Caprese Skewers with Balsamic Glaze Eyes
These skewers bring a playful Halloween touch to a classic Caprese combination. They work well for a work party because they require no cooking and can be assembled quickly ahead of time. The fresh flavors stay light and bright, with creamy mozzarella, juicy tomatoes, and a tangy balsamic finish.
The ghostly look comes from drawing simple eyes on the mozzarella with balsamic glaze. Each bite delivers the familiar mix of creamy, sweet, and herbal notes without any heaviness.

Serves 4 people.
Ingredients
- 12 cherry tomatoes
- 12 bocconcini mozzarella balls
- 24 fresh basil leaves
- 1/4 cup balsamic glaze
- 12 wooden skewers
Instructions
- Lay out all the skewers and thread one basil leaf onto each skewer followed by a cherry tomato and another basil leaf.
- Add one bocconcini mozzarella ball to the end of each skewer so it sits at the top.
- Pour the balsamic glaze into a small bowl. Use a toothpick to draw two small eyes on the front of each mozzarella ball.
- Arrange the finished skewers on a platter and chill until ready to serve.
Extra Tips
Chill the assembled skewers for at least 30 minutes so the mozzarella firms up and holds the eyes better. If the balsamic glaze is too thick to draw with, warm it slightly in the microwave for five seconds. Skip the olive oil drizzle to keep the eyes sharp and prevent the mozzarella from sliding. Course: Appetizer Cuisine: Italian Equipment: Wooden skewers, Toothpick, Platter
Witch Hat Puff Pastry Turnovers with Spinach and Feta
These turnovers bring a fun Halloween touch to a work party spread. The puff pastry gets shaped into simple witch hats that hold a savory spinach and feta filling. They bake up golden and flaky with a creamy, lightly garlicky center that feels satisfying without being heavy.
They work well as a make-ahead appetizer that travels easily and reheats without losing texture. The contrast between crisp pastry and the soft, salty filling keeps people coming back for another one.

Serves 4 people.
Ingredients
- 2 sheets puff pastry, thawed
- 1 tablespoon olive oil
- 2 garlic cloves, minced
- 10 ounces fresh spinach, chopped
- 5 ounces feta cheese, crumbled
- 1 large egg
- 1/4 teaspoon black pepper
Instructions
- Preheat the oven to 400°F and line a baking sheet with parchment paper.
- Heat the olive oil in a skillet over medium heat. Add the minced garlic and cook for 30 seconds until fragrant.
- Add the chopped spinach and cook until wilted, about 3 minutes. Remove from heat and stir in the crumbled feta and black pepper. Let the mixture cool slightly.
- Unroll the puff pastry sheets on a lightly floured surface. Cut each sheet into four triangles roughly 5 inches on each side to form the witch hat shape.
- Place a heaping tablespoon of the spinach filling in the center of each triangle. Fold one corner over to meet the opposite side and press the edges firmly with a fork to seal.
- Beat the egg with 1 tablespoon water. Brush the tops of each turnover with the egg wash.
- Transfer the turnovers to the prepared baking sheet and bake for 18 to 20 minutes until deep golden brown. Cool on the sheet for 5 minutes before serving.
Extra Tips
Cool the spinach mixture fully before filling so the pastry stays crisp during baking. If the feta is very salty, skip extra salt and rely on the pepper for seasoning. These reheat well in a 350°F oven for 8 minutes, which restores the flaky texture better than a microwave. Course: Appetizer Cuisine: Mediterranean Equipment: Baking sheet, Skillet, Mixing bowl
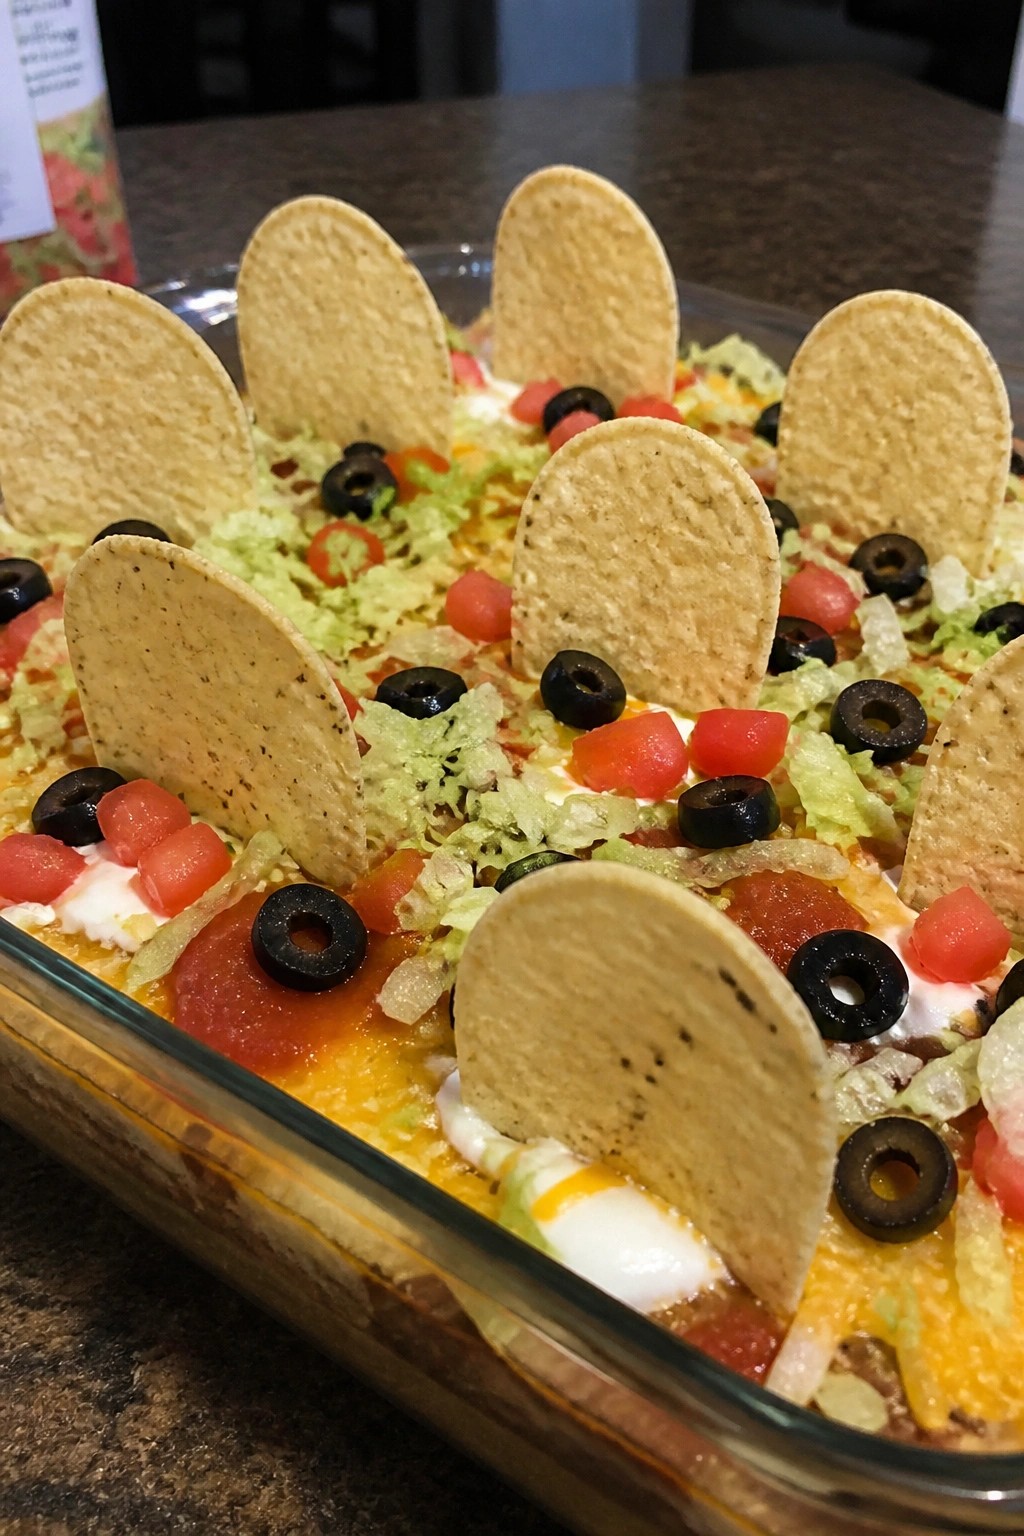
Graveyard Taco Salad Layered Dip with Tortilla Chip Tombstones
This layered dip turns classic taco salad into a shareable party dish with a graveyard twist. It works well for office gatherings because it travels easily and feeds a small group without much last-minute work. The flavors stay bright and savory with seasoned beef, creamy toppings, and crisp chips that stand in as tombstones.
Serves 4 people.
Ingredients
- 1 can (16 oz) refried beans
- 1/2 lb ground beef
- 1 packet taco seasoning
- 1 cup shredded cheddar cheese
- 1/2 cup sour cream
- 1 cup salsa
- 1 cup shredded lettuce
- 1/2 cup diced tomatoes
- 1/4 cup sliced black olives
- 8 large tortilla chips
Instructions
- Brown the ground beef in a skillet over medium heat. Drain any excess fat, then stir in the taco seasoning and cook for one minute. Add the refried beans and mix until combined and heated through. Spread the bean and beef mixture evenly into a small baking dish. Sprinkle the shredded cheddar cheese over the top and place the dish under the broiler for two minutes until the cheese melts. Remove from heat and let it cool slightly. Spread the sour cream in an even layer over the melted cheese. Spoon the salsa over the sour cream. Scatter the shredded lettuce, diced tomatoes, and sliced black olives across the surface. Stand the tortilla chips upright in the dip to resemble tombstones.
Extra Tips
Make the base layer of beans and beef ahead of time and refrigerate it, then add the cheese and finish the cold toppings right before serving so the lettuce stays crisp. If you need to stretch the recipe for more people, double the beef and beans but keep the same dish size for thicker layers. Use sturdy restaurant-style tortilla chips that can stand without breaking. Course: Appetizer Cuisine: Mexican Equipment: Skillet, Baking Dish, Mixing Bowl
Caramel Apple Nacho Platter with Halloween Toppings
This platter turns classic caramel apples into an easy shareable treat for a work party. Guests can pick up a few slices without needing utensils, and the mix of toppings makes it feel festive without much effort.
The crisp apple slices hold a layer of caramel and get topped with sweet and crunchy Halloween candies. Each bite gives a balance of tart fruit, rich caramel, and chewy or crisp add-ins.

Serves 4 people.
Ingredients
- 4 large apples, cored and sliced
- 1/2 cup caramel sauce
- 1/4 cup mini chocolate chips
- 1/4 cup candy corn
- 2 tablespoons Halloween sprinkles
- 1/4 cup chopped roasted peanuts
Instructions
- Core and slice the apples into thin wedges. Arrange the slices in a single overlapping layer on a large serving platter.
- Warm the caramel sauce slightly if it is too thick to drizzle. Pour it evenly over the apple slices in a back-and-forth motion.
- Scatter the mini chocolate chips across the caramel-covered apples.
- Add the candy corn in small clusters around the platter.
- Sprinkle the Halloween sprinkles and chopped roasted peanuts over the top.
Extra Tips
Use firm apples like Granny Smith or Honeycrisp so the slices stay crisp under the caramel. If the platter sits out for more than 30 minutes, the apples can soften, so assemble it right before guests arrive. The peanuts add a salty crunch that balances the sweet toppings. Course: Snack Cuisine: American Equipment: Serving platter, Sharp knife, Cutting board
Bat Wing Chicken Wings with Smoky BBQ Glaze
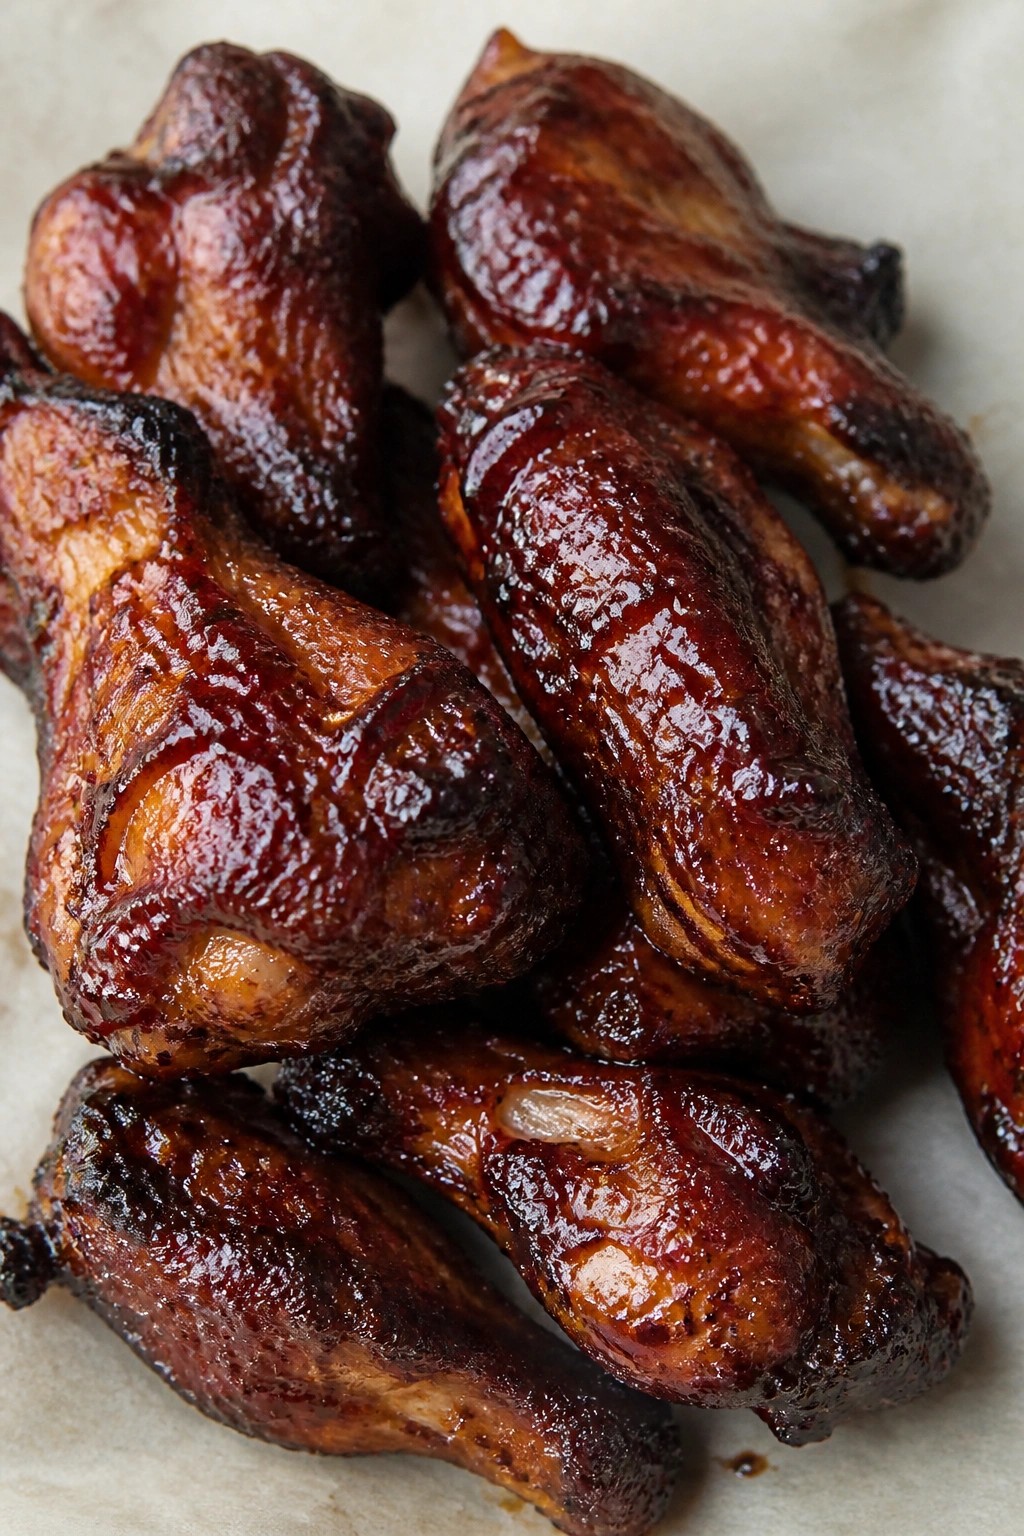
These bat wing chicken wings add a simple Halloween touch to a work party table. The wings bake up crispy on the outside while the smoky BBQ glaze brings sweet heat and rich flavor. They hold up well on a platter and require little last-minute work once you get them in the oven.
The finished wings have tender meat under a sticky coating that clings nicely to each piece. The dark glaze gives them a bold look that fits the theme without needing extra decorations.
Serves 4 people.
Ingredients
- 2 pounds chicken wings
- 2 tablespoons olive oil
- 1 teaspoon salt
- 1/2 teaspoon black pepper
- 1 cup BBQ sauce
- 1 tablespoon smoked paprika
- 2 tablespoons honey
- 1 teaspoon garlic powder
Instructions
- Preheat the oven to 400°F. Place the chicken wings in a large bowl and toss them with the olive oil, salt, and black pepper until evenly coated.
- Spread the wings in a single layer on a baking sheet lined with parchment paper. Bake for 20 minutes, then flip each wing and bake for another 20 minutes until the skin is crisp and golden.
- While the wings bake, stir together the BBQ sauce, smoked paprika, honey, and garlic powder in a mixing bowl until the glaze is smooth.
- Remove the wings from the oven and transfer them to the bowl with the glaze. Toss until every wing is fully coated.
- Return the glazed wings to the baking sheet and bake for 5 more minutes so the glaze sets and becomes sticky.
Extra Tips
For a deeper smoky taste, use a hickory or mesquite BBQ sauce as your base. If the glaze thickens while sitting, stir in a teaspoon of warm water before tossing. These wings reheat well in a 350°F oven for 8 minutes if you make them the night before. Course: Appetizer Cuisine: American Equipment: Baking sheet, Mixing bowl, Oven
Pumpkin Patch Deviled Eggs with Chive Stems
These deviled eggs bring a simple Halloween touch to any work party spread. The orange tint from paprika turns each egg half into a mini pumpkin, while the chives stand in as stems. The result is creamy and lightly smoky with a fresh herbal note that keeps them light enough for a midday office event.
They work well on a shared table because they hold up at room temperature for a couple of hours and travel easily in a covered container.

Serves 4 people.
Ingredients
- 6 large eggs
- 3 tablespoons mayonnaise
- 1 teaspoon yellow mustard
- 1 teaspoon paprika, plus extra for dusting
- 1/4 teaspoon salt
- 1/8 teaspoon black pepper
- 12 fresh chives
Instructions
- Place the eggs in a large pot and cover with cold water by one inch. Bring the water to a boil over medium-high heat, then remove the pot from the heat, cover, and let the eggs sit for 12 minutes.
- Drain the eggs and transfer them to a bowl of ice water. Once cool, peel the eggs and slice each one in half lengthwise. Scoop the yolks into a mixing bowl and set the whites aside on a serving plate.
- Mash the yolks with a fork until smooth. Add the mayonnaise, mustard, paprika, salt, and black pepper. Stir until the mixture is creamy and evenly colored.
- Spoon or pipe the yolk mixture back into the egg white halves. Lightly dust the tops with extra paprika to deepen the orange color.
- Insert one chive into the center of each filled egg half to create the stem.
Extra Tips
Pipe the filling with a small star tip for a ridged pumpkin look. The chives soften after a few hours, so add them right before serving. If you need to make the eggs ahead, store the filled halves covered in the fridge and add the chives and final paprika dusting just before the party. Course: Appetizer Cuisine: American Equipment: Large pot, Mixing bowl, Fork, Serving plate
Skeleton Bone Breadsticks with Roasted Red Pepper Dip
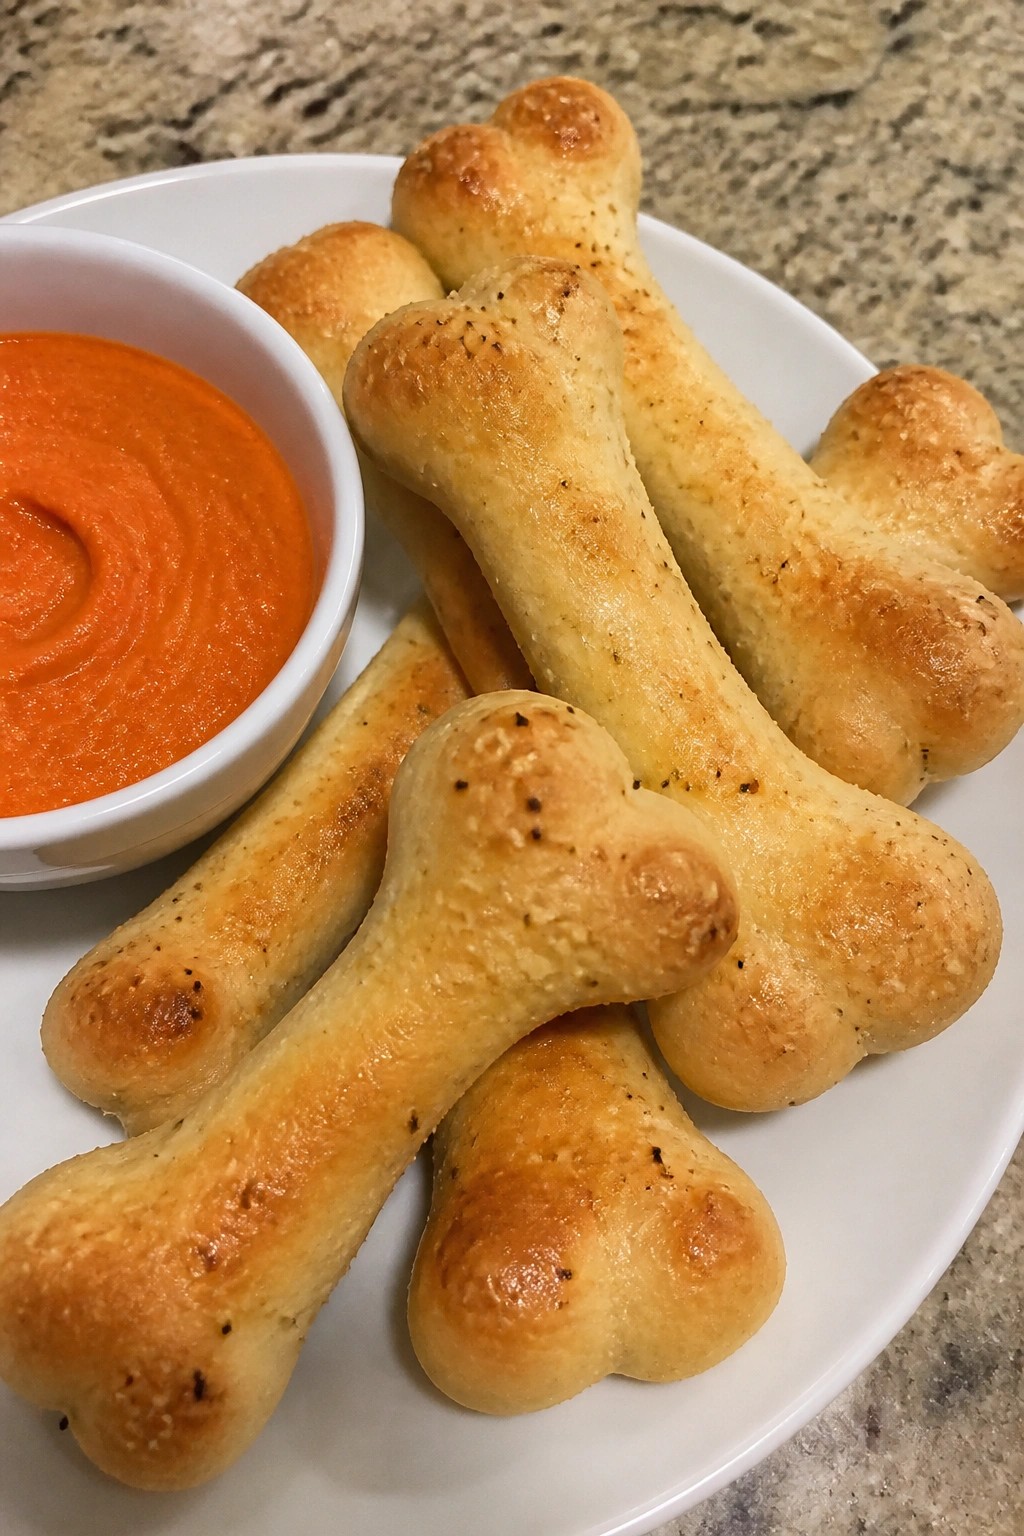
These breadsticks bring a light spooky touch to a work party spread without going overboard. Shaped like bones and paired with a smoky red dip, they look festive on a platter and taste like classic garlic breadsticks. The dip adds a sweet roasted flavor that balances the savory crust.
They work well as a shared appetizer because they travel easily and hold up at room temperature for a couple of hours. The texture stays crisp on the outside with a soft center, making them simple to eat while mingling.
Serves 4 people.
Ingredients
- 1 package refrigerated pizza dough (13.8 oz)
- 1 tablespoon olive oil
- 1 teaspoon garlic powder
- 1/2 teaspoon salt
- 2 roasted red peppers, drained
- 2 tablespoons cream cheese
- 1 tablespoon lemon juice
- 1/4 teaspoon black pepper
Instructions
- Heat the oven to 400 degrees and line a baking sheet with parchment paper.
- Roll the pizza dough into a rectangle on a lightly floured surface, then cut it into 8 strips about 6 inches long.
- Shape each strip into a bone by gently rolling and pinching both ends to create wider knobs.
- Place the shaped dough on the baking sheet, brush with olive oil, and sprinkle evenly with garlic powder and salt.
- Bake for 12 to 14 minutes until the breadsticks turn golden.
- While the breadsticks bake, combine the roasted red peppers, cream cheese, lemon juice, and black pepper in a food processor.
- Blend the dip mixture until smooth, then transfer it to a small serving bowl.
- Let the breadsticks cool for a few minutes before serving alongside the dip.
Extra Tips
Shape the dough ends a bit thicker before baking so they keep their bone look after rising. If the dip seems too thick after blending, add a teaspoon of water to loosen it. Leftovers store well in an airtight container for one day, and the breadsticks reheat best in a 300-degree oven for five minutes to restore crispness. Course: Appetizer Cuisine: American Equipment: Baking sheet, Food processor, Mixing bowl
Frankenstein Avocado Hummus with Veggie Stick Dippers
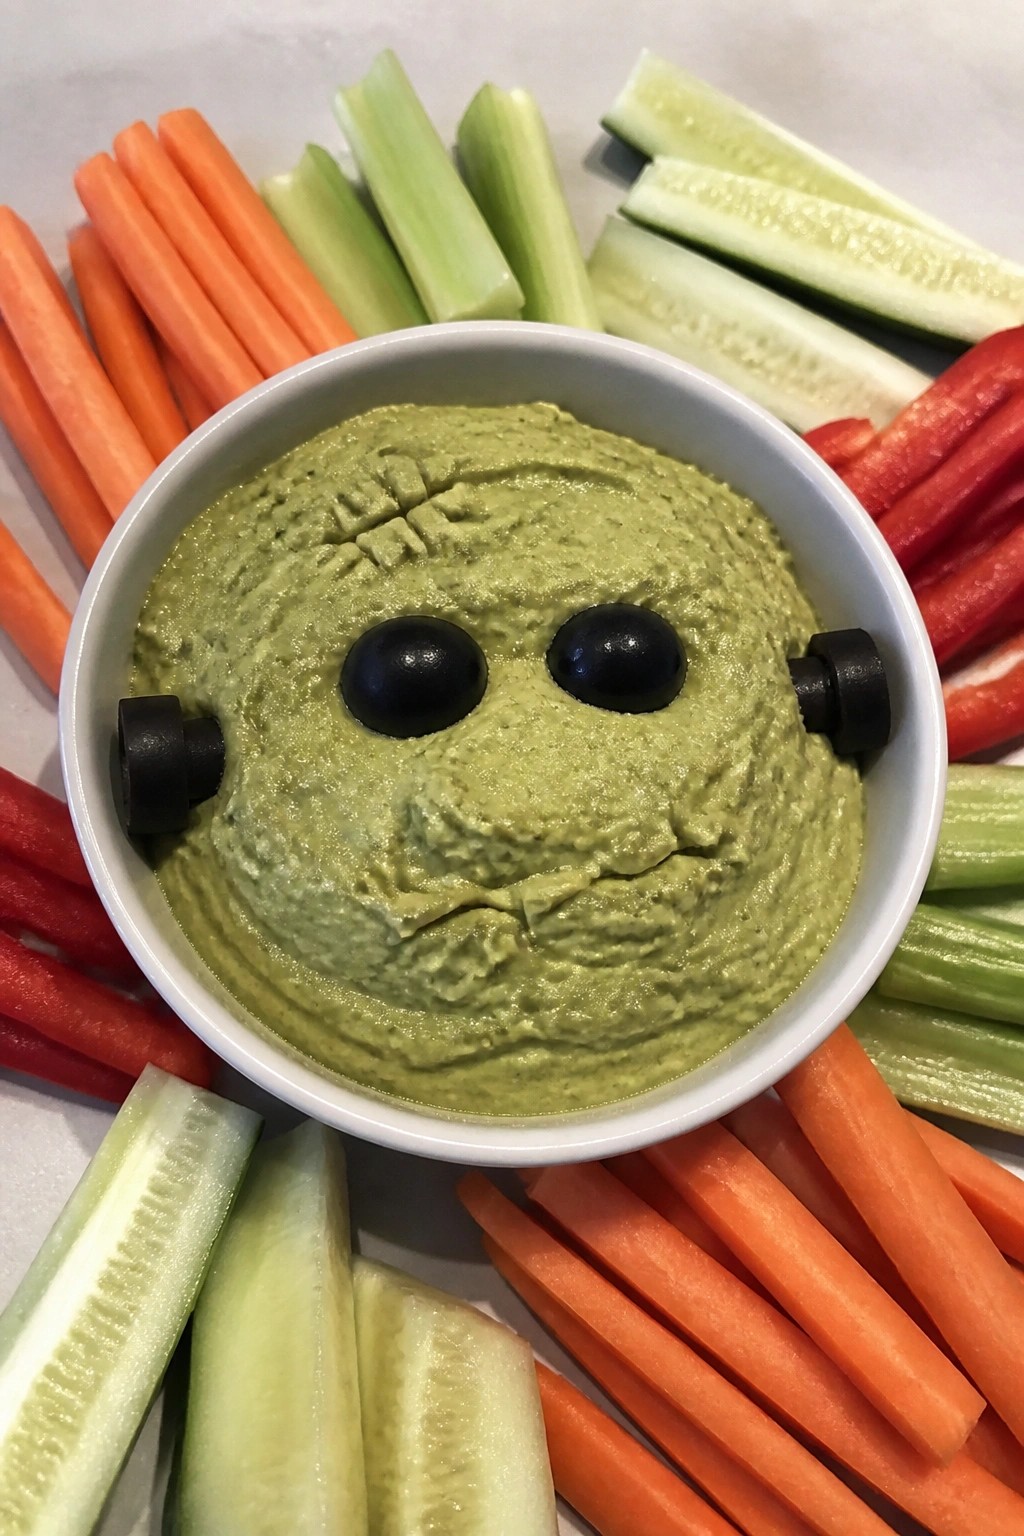
This green avocado hummus adds a playful Frankenstein touch to any work party table. The bright color stands out next to typical snacks, and the veggie sticks make it easy for coworkers to grab a quick bite without plates or utensils.
The dip has a smooth, creamy texture with a light garlic and lemon flavor that stays fresh for hours. It travels well in a sealed container and holds its color better than many other green dips.
Serves 4 people.
Ingredients
- 2 ripe avocados, pitted and peeled
- 1 (15 oz) can chickpeas, drained and rinsed
- 2 tablespoons tahini
- 1 lemon, juiced
- 1 garlic clove, minced
- 3 tablespoons olive oil
- 1/2 teaspoon salt
- 2 carrots, cut into sticks
- 2 celery stalks, cut into sticks
- 1 cucumber, cut into sticks
- 1 red bell pepper, cut into sticks
- 4 black olives
Instructions
- Add the avocados, chickpeas, tahini, lemon juice, garlic, olive oil, and salt to a food processor.
- Blend until the mixture is smooth and creamy, stopping once to scrape down the sides if needed.
- Spoon the hummus into a serving bowl and smooth the top with the back of a spoon.
- Arrange the carrot, celery, cucumber, and red bell pepper sticks around the bowl.
- Slice two black olives in half and place them on the hummus to form eyes. Cut the remaining two olives into thin strips and arrange them to create a simple mouth and stitch lines across the surface.
Extra Tips
Make the hummus the night before and store it in an airtight container in the fridge to let the flavors settle. If the dip thickens overnight, stir in a teaspoon of olive oil before serving. Skip the cumin if you want a milder taste that lets the avocado shine through. Course: Appetizer Cuisine: American Equipment: Food processor, Mixing bowl, Knife, Cutting board
Spooky Stuffed Mini Pumpkins with Quinoa and Cranberries
These mini pumpkins make a festive addition to a work party spread. Each one serves as its own portion and holds a filling that feels hearty without being heavy. The dish travels well and holds up at room temperature for a couple of hours.
The quinoa base offers a nutty chew while the cranberries add bright pops of sweetness. Savory onion and garlic keep the flavor balanced, and a sprinkle of cheese on top brings a creamy finish that contrasts with the soft pumpkin flesh.
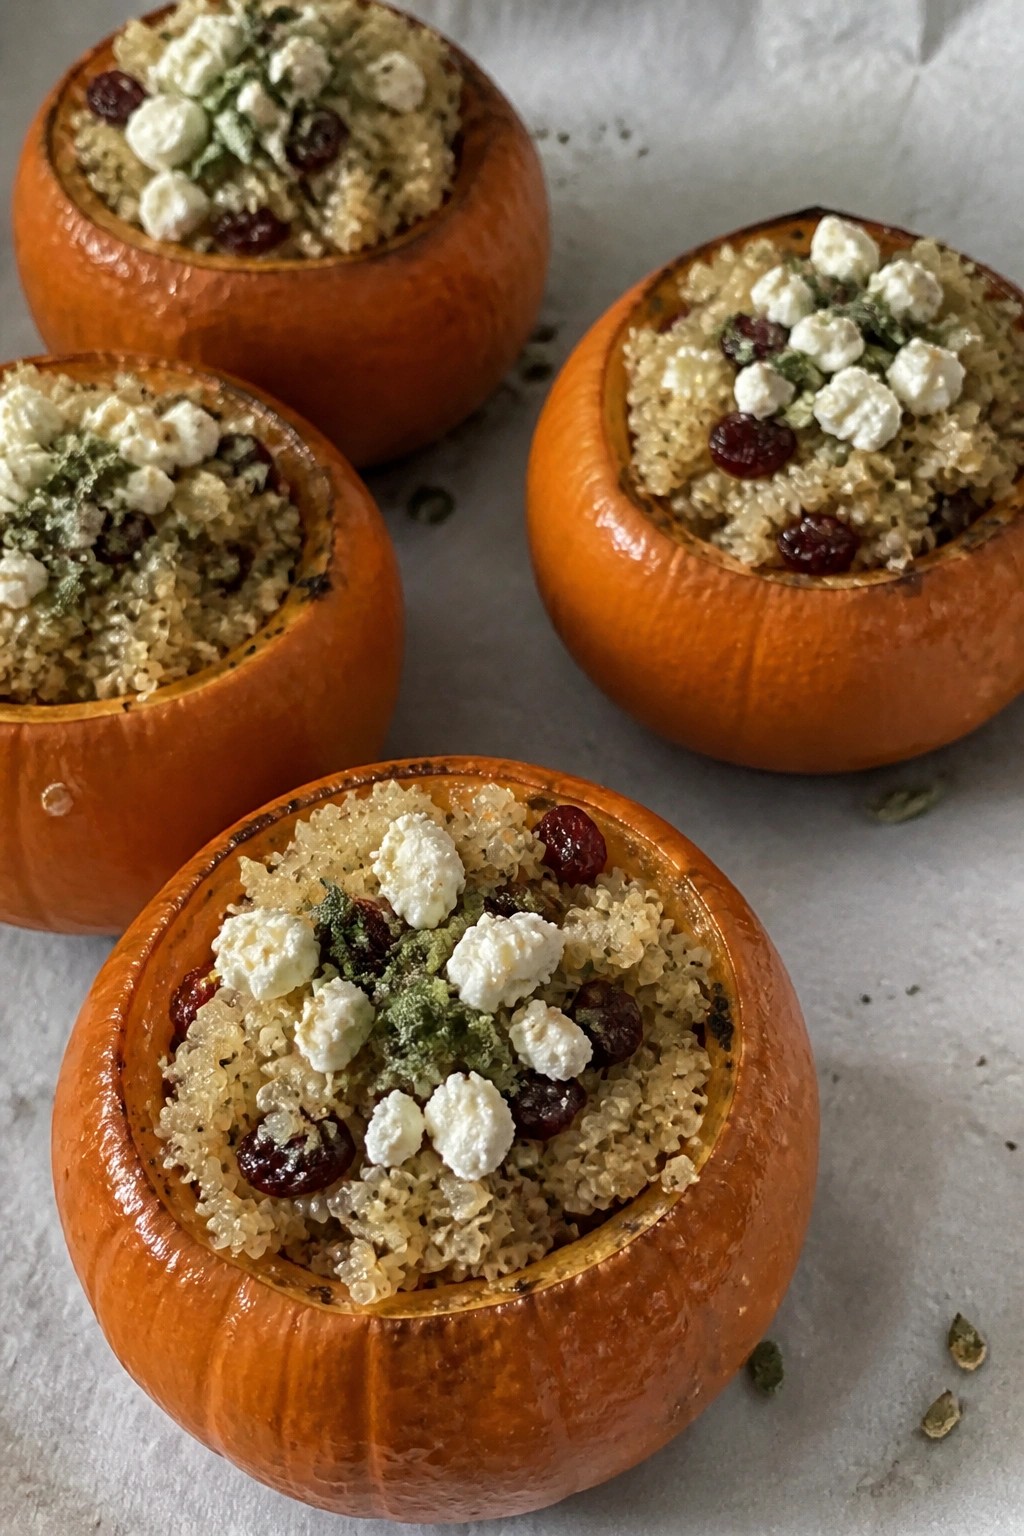
Serves 4 people.
Ingredients
- 4 mini pumpkins (4-5 inches wide)
- 1 cup quinoa
- 2 cups vegetable broth
- 1/2 cup dried cranberries
- 1 small onion, finely chopped
- 2 garlic cloves, minced
- 1 tablespoon olive oil
- 1/4 cup crumbled feta cheese
- 2 tablespoons chopped fresh sage
- Salt and black pepper to taste
Instructions
- Preheat the oven to 375°F. Cut the tops off each mini pumpkin and scoop out the seeds and strings. Place the pumpkins cut side up on a baking sheet.
- Rub the inside of each pumpkin with a light coating of olive oil and season with salt and pepper. Roast for 20 minutes until the flesh starts to soften but still holds its shape.
- While the pumpkins roast, rinse the quinoa under cold water. Combine it with the vegetable broth in a saucepan and bring to a boil. Reduce to a simmer, cover, and cook for 15 minutes until the liquid is absorbed.
- Heat the remaining olive oil in a skillet over medium heat. Add the onion and cook for 3 minutes until translucent. Stir in the garlic and cook for 1 minute more.
- Fluff the cooked quinoa and mix it into the skillet with the onion and garlic. Add the dried cranberries and chopped sage. Season with salt and pepper and stir to combine.
- Remove the pumpkins from the oven. Spoon the quinoa mixture into each pumpkin until filled. Top each one with crumbled feta cheese.
- Return the stuffed pumpkins to the oven for 10 minutes until the cheese softens and the filling is heated through. Serve warm or at room temperature.
Extra Tips
Roast the pumpkins just until tender so they stay sturdy when moved to a platter. If the quinoa mixture seems dry after mixing, add a splash of extra broth before stuffing. The feta can be swapped for goat cheese if you prefer a milder tang. Leftovers reheat well in a 350°F oven for 10 minutes to restore texture. Course: Appetizer Cuisine: American Equipment: Baking sheet, Oven, Saucepan, Skillet