

Halloween snacks do not have to be all candy. Fruit works well for spooky treats that kids will still enjoy. I put together some easy ideas that use fresh fruit and simple steps. These snacks are quick to make and look fun for any party. You will find recipes that are both healthy and themed for the holiday.
Helpful Tips Before You Start
A little prep makes these fruit snacks easier to assemble and keeps them looking fresh.
Recommended Products


THE GHOULISH GRAB WUZZLER: One generous 2-pound bag filled with spooky gummy pumpkins, bats and ghosts for Halloween parties, candy bowls and seasonal sharing.

This funny banana and funny ghoul costume is perfect halloween costume for boys, girls, or kids halloween outfit during trick or treating and Halloween party. Cute ghost decor this spooky season as a simple halloween decoration or lazy halloween costume.
Pick firm produce
Choose apples, melons, and firm pears. They hold cut shapes without turning mushy.
Keep tools simple
Have a melon baller and small cookie cutters on hand. These create eyes, bats, and ghost shapes quickly.
Stop browning early
Toss sliced apples or pears in lemon water right after cutting. This keeps the fruit bright until serving time.
Add details last
Draw faces or attach small fruit pieces just before guests arrive. This prevents pieces from sliding or drying out.
Spooky Strawberry Eyeball Skewers
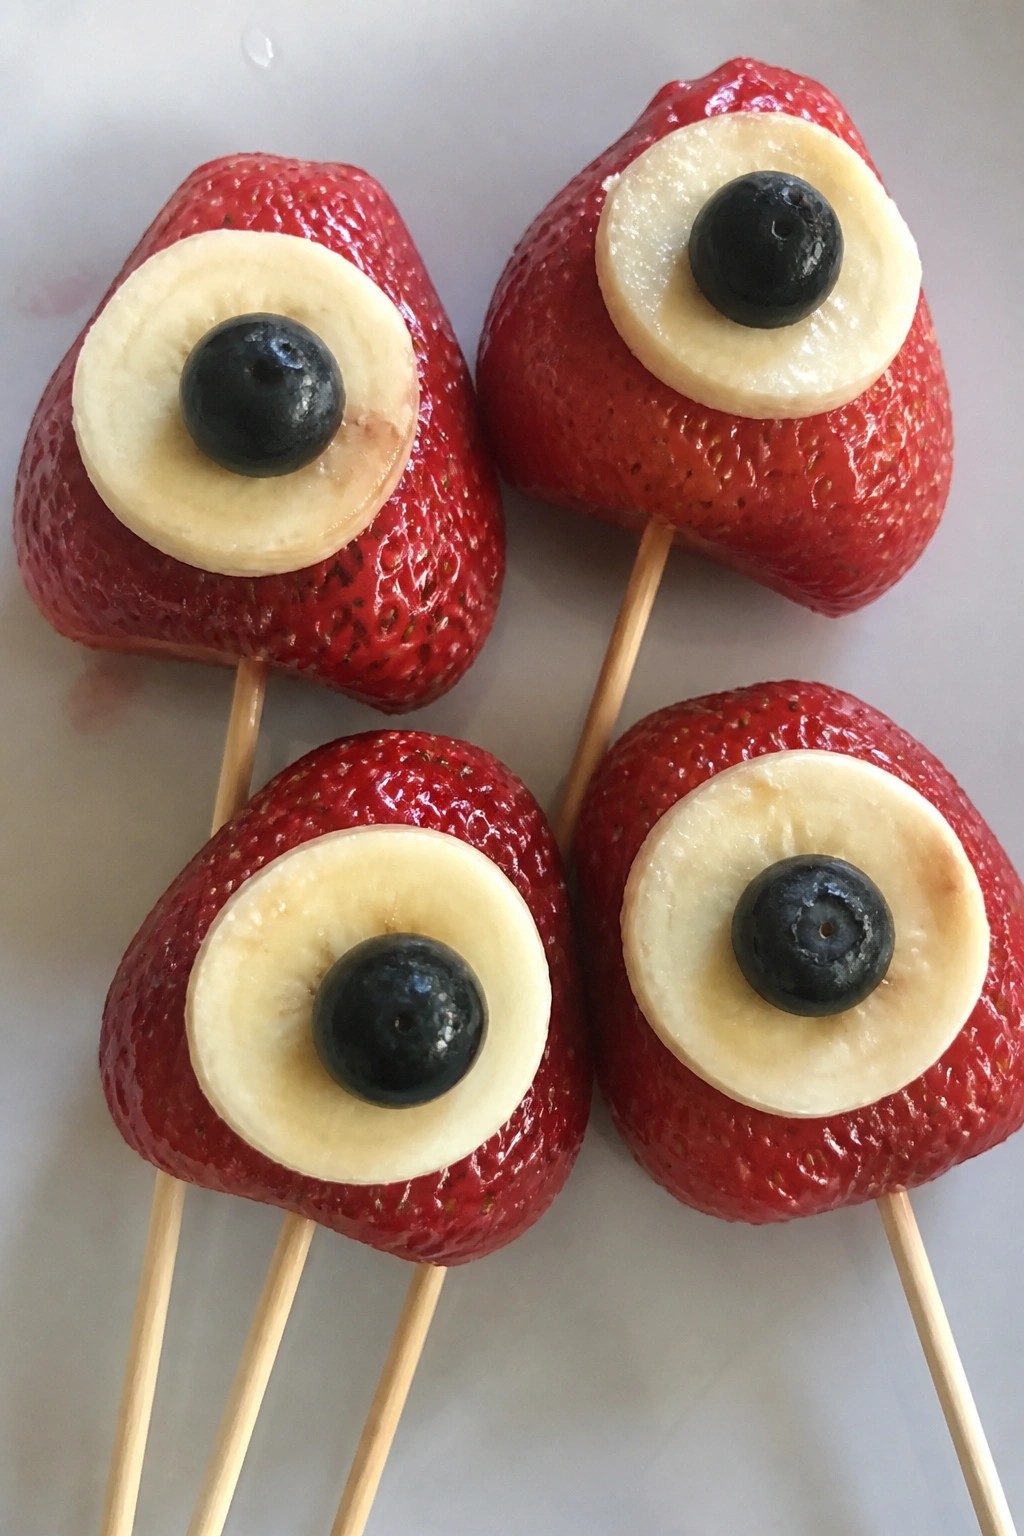
These skewers turn simple fruit into a fun Halloween snack. The bright red strawberries stand out as eyeballs, while the banana and blueberry details add a quick spooky touch without any extra work. They come together fast and work well for parties or after-school treats.
The flavor stays light and fresh, with sweet berries and creamy banana in every bite. Kids and adults both enjoy assembling them, and the finished skewers look playful on a platter.
Serves 4 people.
Recommended Products

CLASSIC CREEPY HALLOWEEN TREAT - Each oozing watermelon flavored candy blood bag comes with plastic glow in the dark vampire fangs!


Ingredients
- 12 large strawberries
- 1 large banana
- 12 fresh blueberries
- 4 wooden skewers
Instructions
- Rinse the strawberries and pat them dry. Leave the green tops on for easier handling.
- Peel the banana and slice it into 12 even rounds.
- Thread three strawberries onto each skewer, spacing them evenly.
- Slide one banana round onto the skewer so it sits flat against the front of each strawberry.
- Press one blueberry gently into the center of each banana round to form the pupil.
- Arrange the finished skewers on a plate and serve right away.
Extra Tips
Keep the banana slices thick so they stay in place on the skewer. If you need to prepare them a bit ahead, assemble the strawberries and blueberries first and add the banana rounds just before serving to avoid browning. These skewers pair nicely with other fruit snacks on the same platter. Course: Snack Cuisine: American Equipment: Wooden skewers, Knife, Cutting board
Banana Ghost Pops with Chocolate Eyes
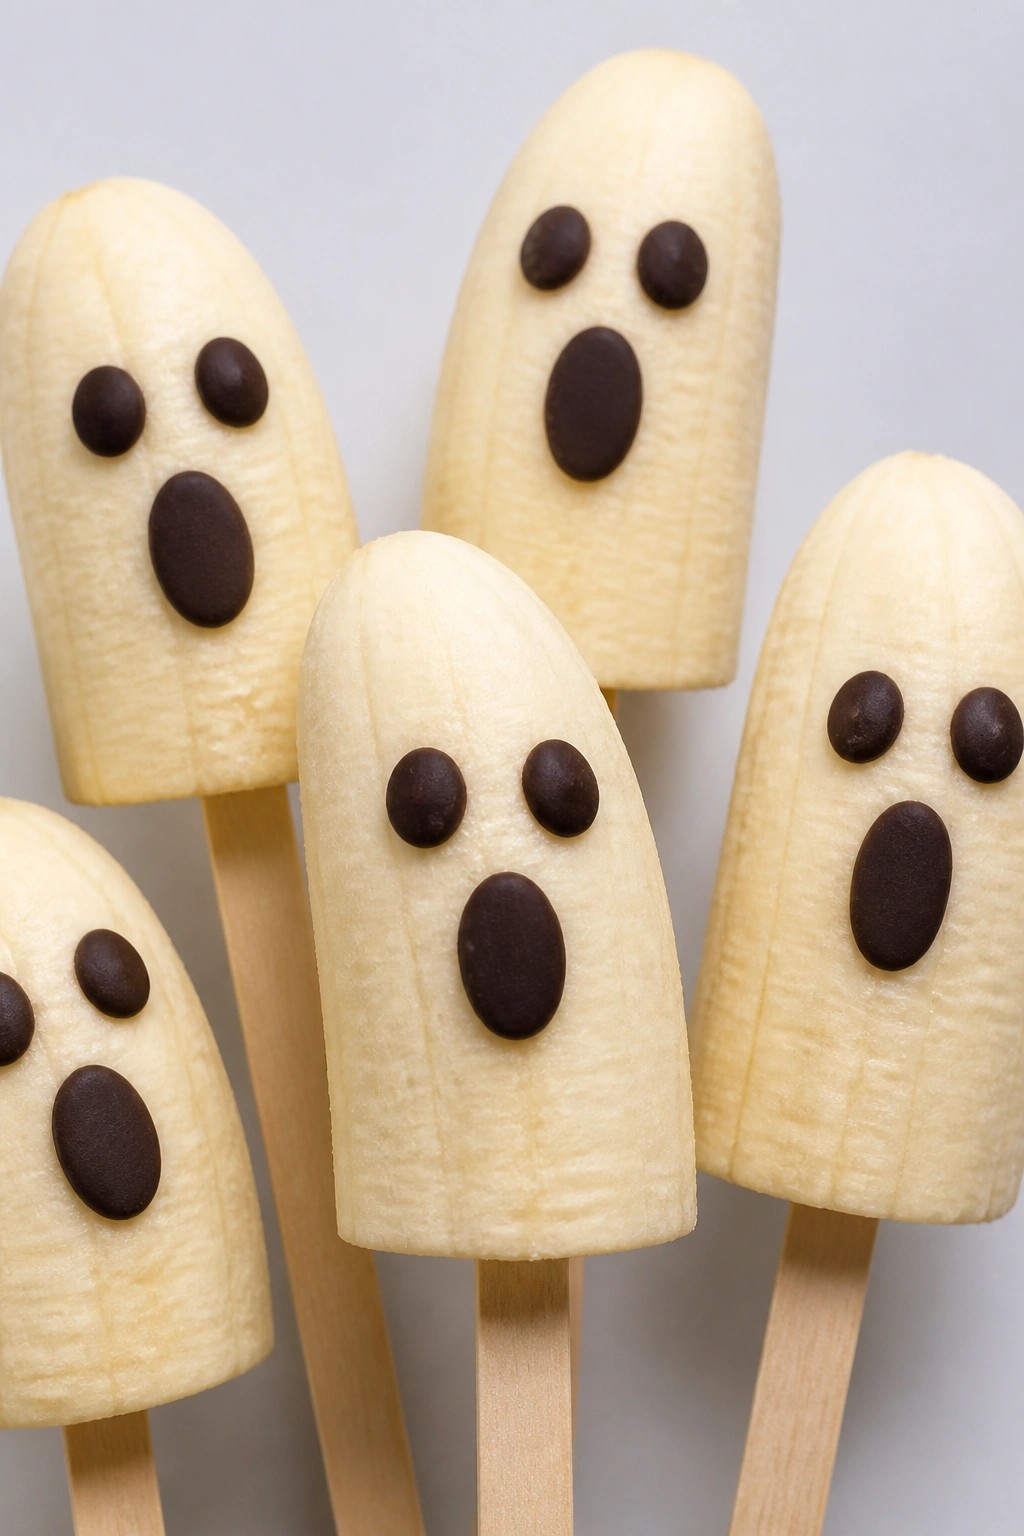
These banana ghost pops turn a simple fruit into a quick Halloween snack. Kids enjoy helping with the chocolate eyes, and the treat fits well at parties or after-school gatherings. The bananas stay soft and creamy while the chocolate adds a little crunch and bitterness to balance the sweetness.
This recipe works best when the bananas are ripe but still firm. Each pop feels light and fresh, with just enough chocolate to create a spooky face without overpowering the fruit.
Serves 4 people.
Ingredients
- 4 bananas
- 8 wooden popsicle sticks
- ½ cup semisweet chocolate chips
Instructions
- Peel the bananas and cut each one in half crosswise.
- Insert one wooden popsicle stick into the cut end of every banana half.
- Place the chocolate chips in a microwave-safe bowl and heat them in 20-second bursts, stirring between each burst until smooth.
- Dip a toothpick into the melted chocolate and dot two small eyes on each banana half.
Extra Tips
Freeze the assembled pops for 20 minutes before adding the chocolate eyes if you want the bananas to hold their shape better at room temperature. Use a very small amount of chocolate for each eye so the dots stay neat and do not run down the sides. Course: Snack Cuisine: American Equipment: Microwave-safe bowl, Baking sheet, Toothpicks
Watermelon Brain Carving Platter
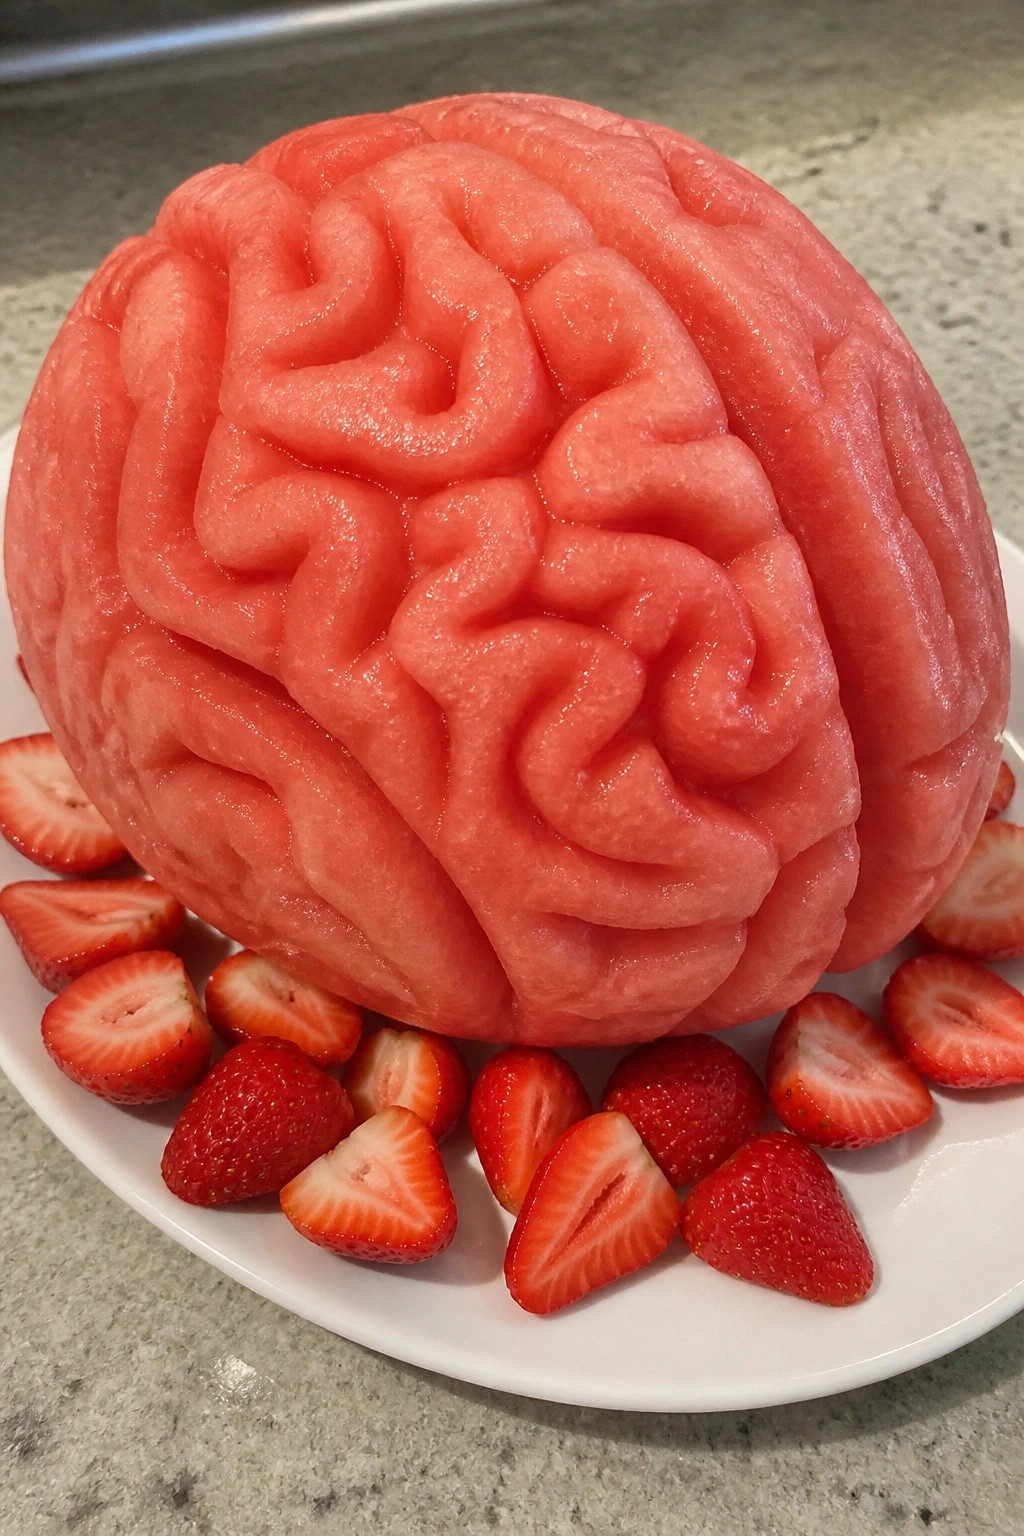
This watermelon brain carving turns a simple fruit into a striking Halloween snack. The fresh, juicy slices offer a crisp bite that balances the spooky presentation. It works well as a light option at parties or family gatherings where you want something thematic without much effort.
The carving creates visible folds across the surface for a brain effect. Chilled watermelon stays firm and refreshing when served this way.
Serves 4 people.
Recommended Products

【10 Professional Pumpkin Carving Kit】 The package includes Pumpkin scooper X 1, Small saw X 2, Pumpkin drill X 1, Etching tool X 1, Double-sided saw X 1, Carving Knife X 1, Small Knife X 1, Carving Tools X 2. The different specifications of craving kits will create interesting Halloween pumpkin designs. Tools can be neatly organized and stored in the sturdy zippered nylon carrying case after use.

13-PIECE ALL-IN-ONE PROFESSIONAL SET: Dominate any pumpkin carving contest with 13 master-grade tools! This heavy-duty kit includes 6 double-sided stainless steel detail sculptors,2 sharp heavy duty stainless steel pumpkin scoop tool with scraper, 2 sturdy tooth saws, 2 precision hole punches, and 1 detail engraving pen. This kit has everything you need.
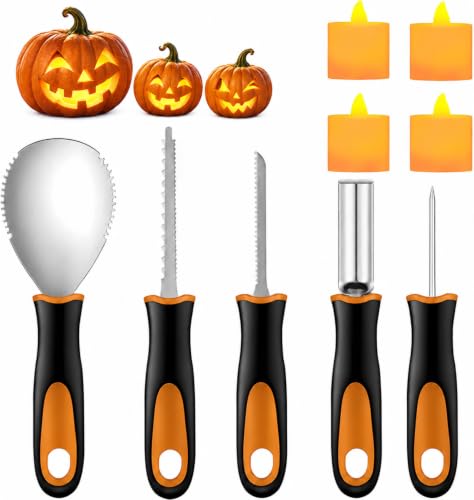
【5PCS Pumpkin Carving Kits】: The complete kit includes ( 1 × Pumpkin Scooper, 1 × Fine-toothed Saw, 1 × Pumpkin Drills, 1 × Etching tool, 4× LED Pumpkin Candles ). Good enough to carving all kinds of items, meet all your pumpkin carving needs.
Ingredients
- 1 large seedless watermelon
- 8 ounces fresh strawberries, hulled and halved
Instructions
- Wash the watermelon under cool water and pat it dry with a clean towel.
- Place the watermelon on a cutting board. Use a sharp knife to score shallow, winding grooves across the top and sides to form brain-like folds. Keep the cuts about 1/4 inch deep so the rind stays intact.
- Set the carved watermelon on a large serving platter. Arrange the halved strawberries around the base of the watermelon.
- Slice the watermelon into wedges just before serving so the pieces stay cold and crisp.
Extra Tips
Carve the watermelon a few hours ahead and keep it in the fridge so the grooves hold their shape. A serrated knife helps create cleaner lines without slipping on the rind. Skip any added sweeteners since the berries already bring enough sweetness to the platter. Course: Snack Cuisine: American Equipment: Sharp knife, Cutting board, Large platter
Mandarin Orange Pumpkin Bites with Celery Stems
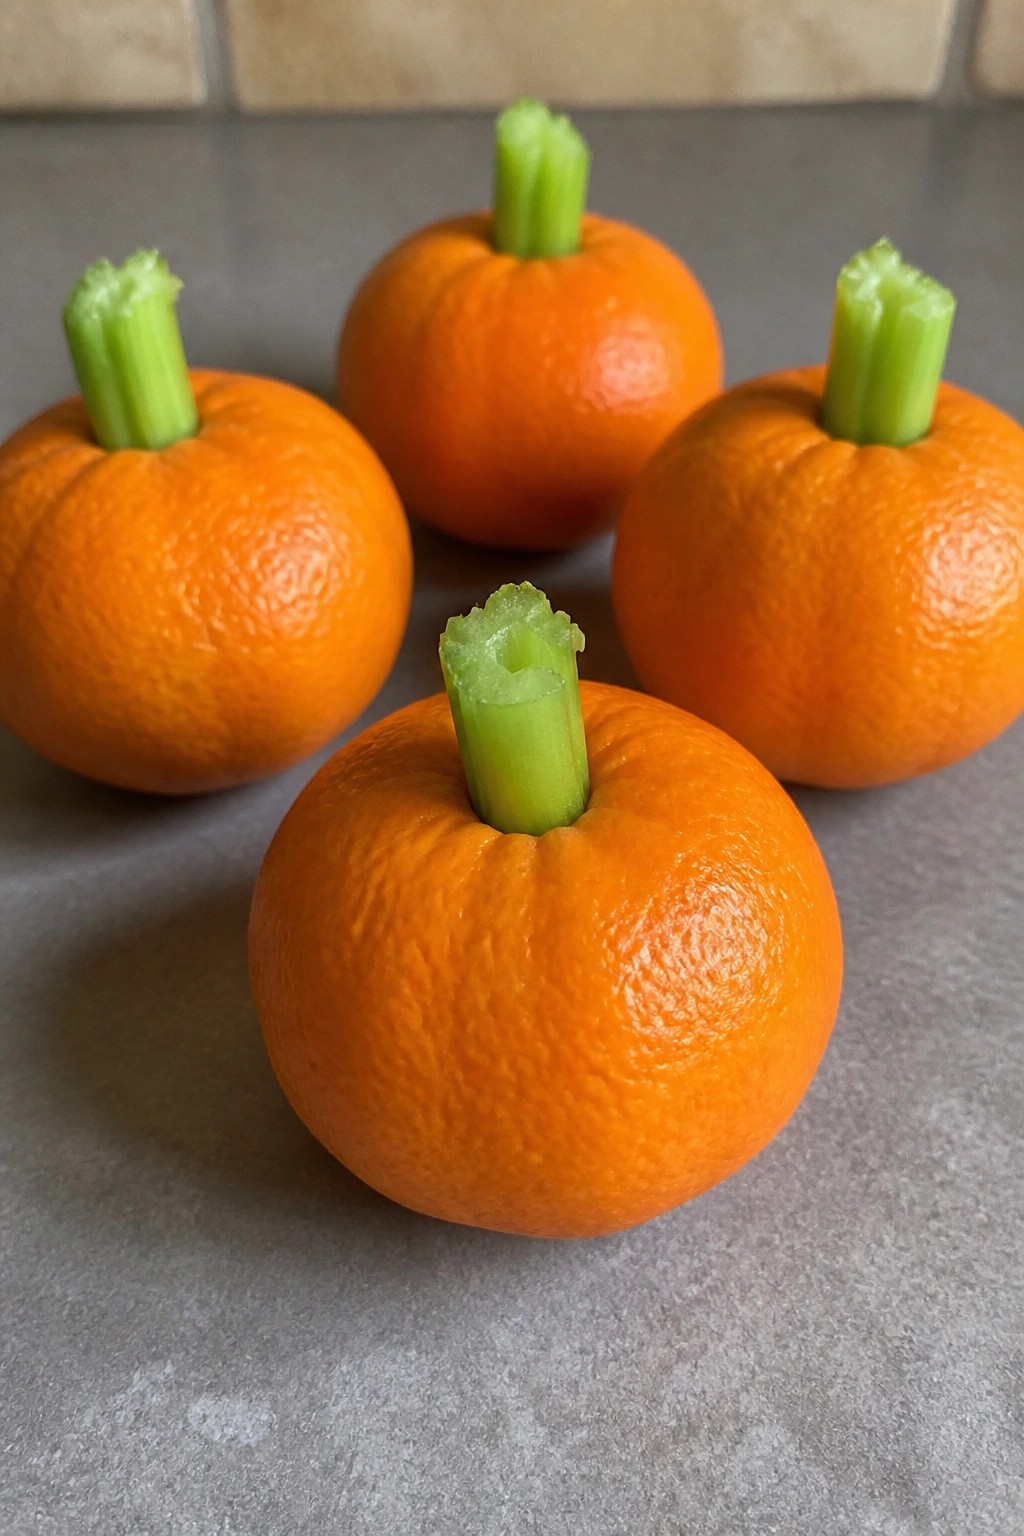
These bites turn simple mandarins into tiny pumpkins by adding celery stems on top. They work well for Halloween parties, after-school snacks, or lunchbox surprises when you want something quick and fruit-based. The flavor is bright and sweet from the oranges, balanced by the fresh crunch of celery.
Serves 4 people.
Ingredients
- 4 mandarin oranges
- 1 large celery stalk
Instructions
- Peel each mandarin orange gently so the fruit stays whole and round.
- Trim the celery stalk and cut it into four short sticks, each about 1 inch long.
- Push one celery stick into the top center of each peeled mandarin to form the stem.
- Place the finished bites on a plate and serve right away.
Extra Tips
Choose firm mandarins so they hold their shape once the celery is added. Cut the celery sticks just before assembly to keep them crisp. These bites travel well in a sealed container for a few hours without losing texture. Course: Snack Cuisine: American Equipment: Knife, Cutting Board
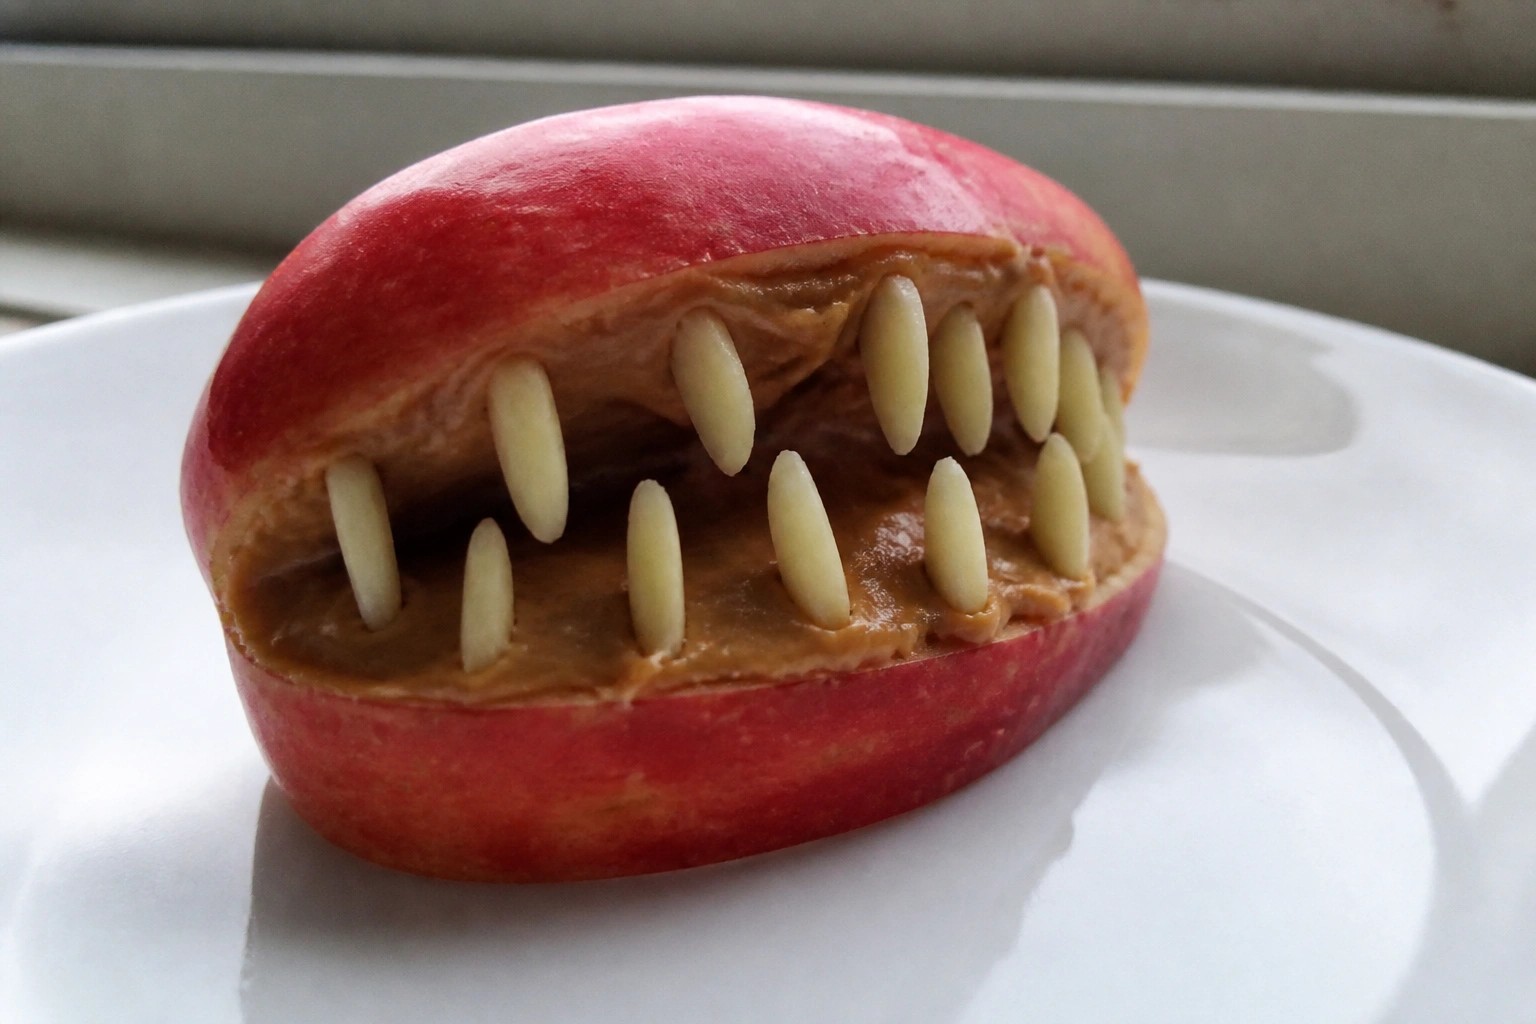
Apple Monster Mouths with Almond Teeth
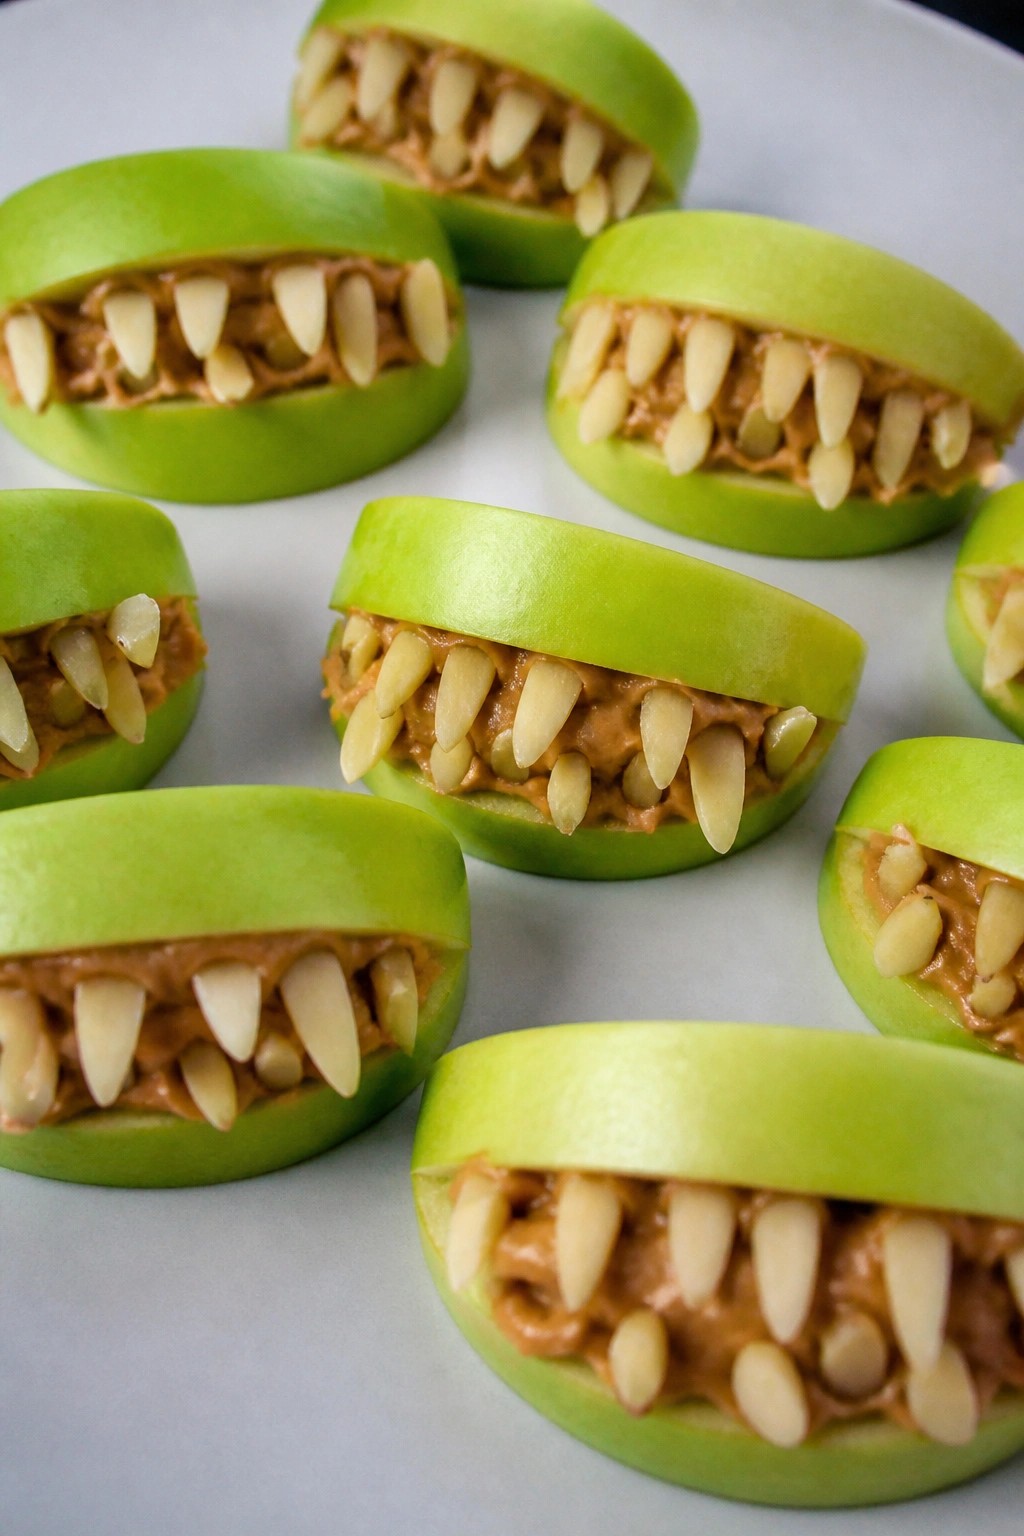
These apple mouths come together quickly with just a few ingredients and make a fun addition to any Halloween spread. Kids and adults both enjoy assembling them, and the crisp apple pairs nicely with the creamy filling and crunchy almond pieces. They work well for after-school snacks, party platters, or a simple fruit-based treat before trick-or-treating.
The texture stays fresh and satisfying, with the slight tartness of the apple balancing the rich peanut butter and the mild crunch of the almonds.
Serves 4 people.
Ingredients
- 4 medium green apples
- ½ cup creamy peanut butter
- ½ cup slivered almonds
Instructions
- Wash and dry the apples. Cut each apple in half from stem to base.
- Use a small knife or melon baller to remove the core from each half, creating a clean center space.
- Slice a thin wedge out of the center of each apple half to form an open-mouth shape.
- Spread a thin layer of peanut butter inside the cut wedge of each apple half.
- Press slivered almonds into the peanut butter along the top and bottom edges to create teeth.
Extra Tips
Use firm apples so the slices hold their shape after cutting. If the peanut butter is too thick to spread easily, warm it slightly in the microwave for a few seconds. These are best assembled right before serving to keep the apples from browning. Course: Snack Cuisine: American Equipment: Knife, Cutting board, Spoon
Kiwi Monster Face Slices
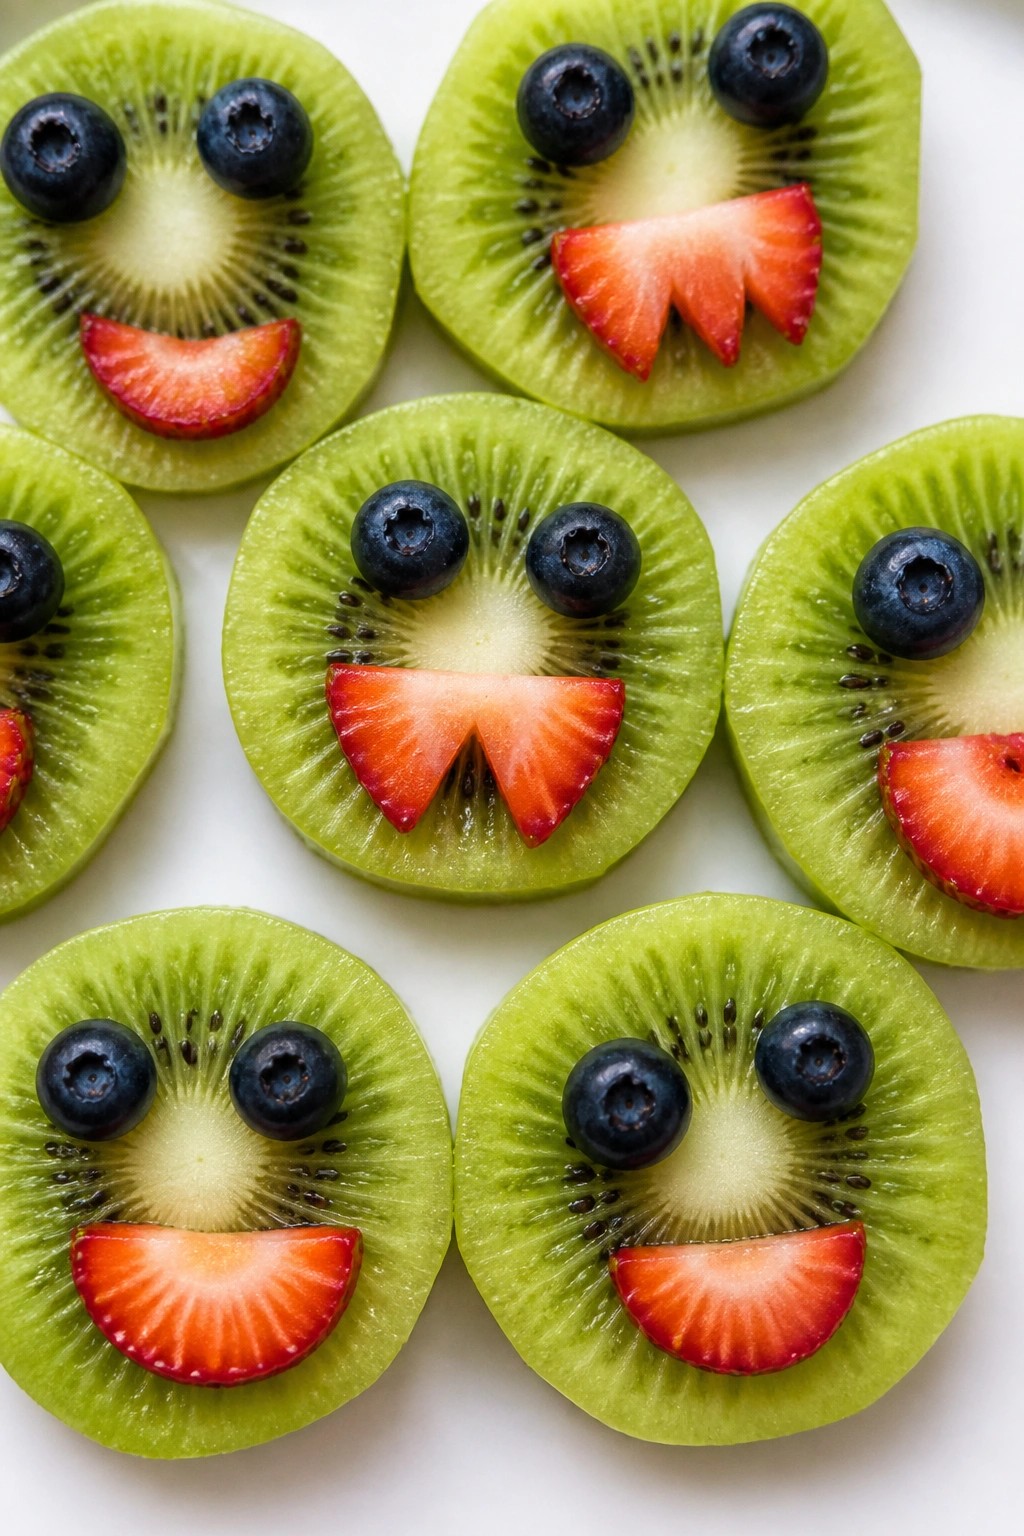
These kiwi slices turn into quick monster faces with just a few pieces of fruit. They make a fresh option for Halloween snack trays and work well when you need something simple that still feels themed. The kiwi stays firm and slightly tart while the berries add juicy sweetness.
Serves 4 people.
Ingredients
- 4 large kiwis
- ½ cup blueberries
- 4 strawberries
Instructions
- Peel the kiwis and slice each one into three thick rounds.
- Arrange the rounds on a serving plate, leaving space between each slice.
- Press two blueberries into the top half of every kiwi round to form eyes.
- Slice each strawberry lengthwise into thin strips and place one strip near the bottom of each kiwi round to form a mouth.
Extra Tips
Choose firm kiwis so the slices hold their shape once the berries are added. If strawberries are very ripe, pat them dry before slicing to keep the faces neat. These slices are best assembled right before serving so the fruit stays crisp. Course: Snack Cuisine: American Equipment: Knife, Cutting Board, Serving Plate
Grape Spider Web Clusters
These grape clusters turn a simple fruit into a fun Halloween snack with a web design that looks spooky without much effort. They work well for after-school treats or party platters when you need something quick that kids can help assemble.
The texture stays juicy from the grapes while the thin white chocolate lines add a light crunch. The flavor stays mild and sweet, making it easy to eat several at once.
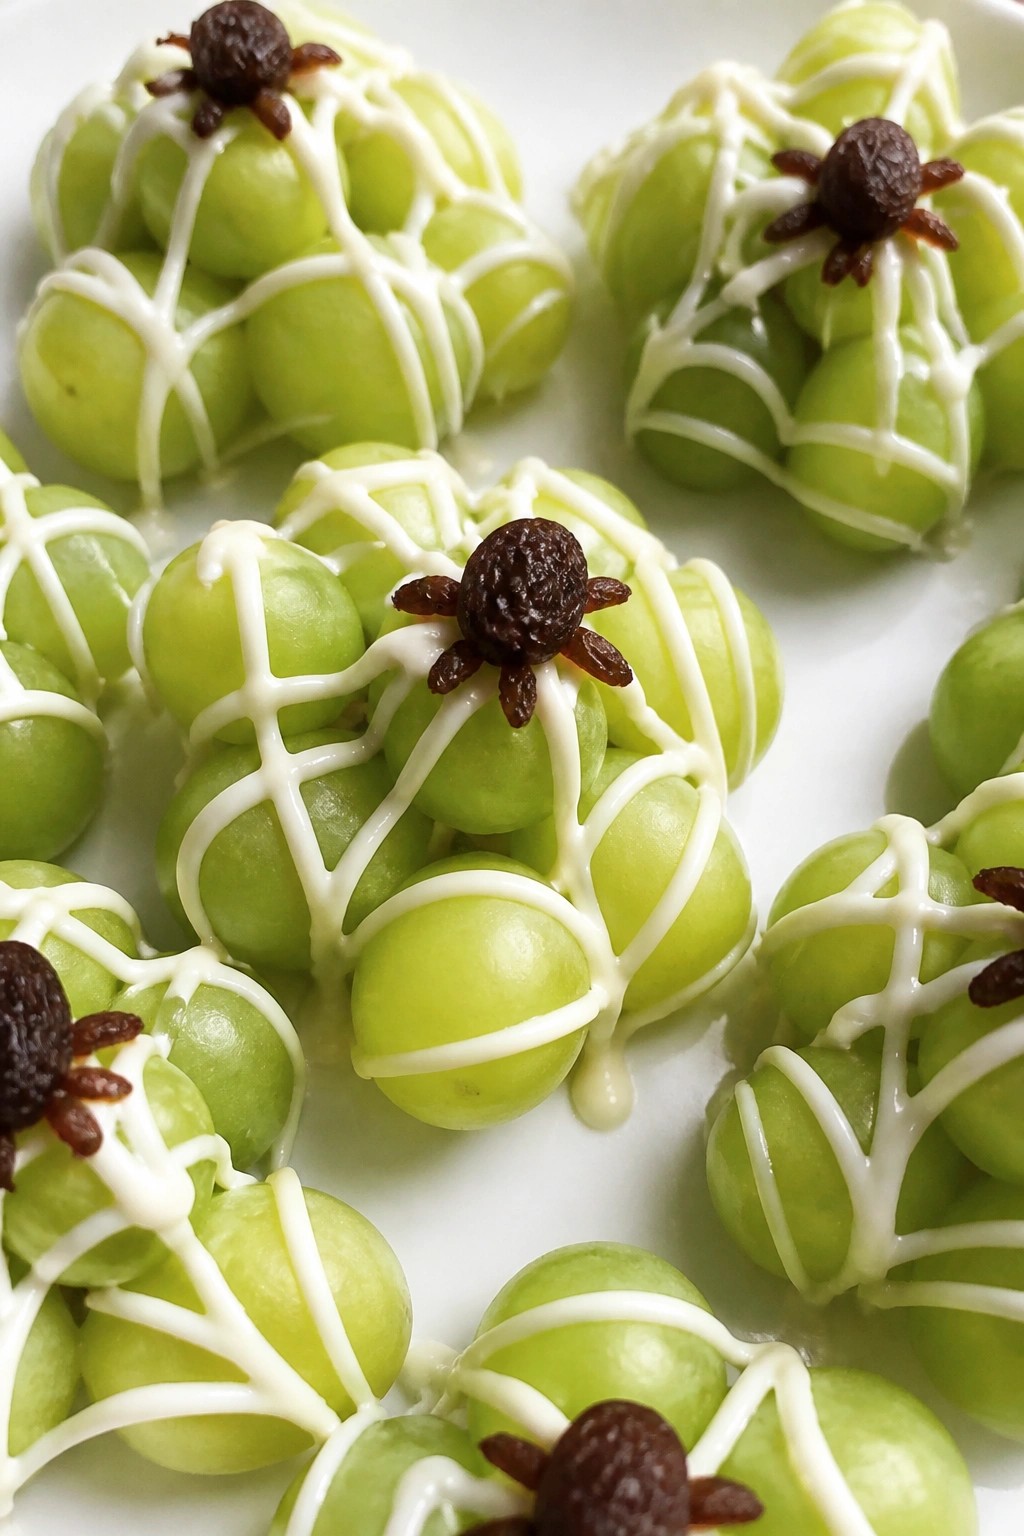
Serves 4 people.
Ingredients
- 2 cups green seedless grapes
- 1/2 cup white chocolate chips
- 1 tablespoon coconut oil
- 1/4 cup raisins
Instructions
- Line a baking sheet with parchment paper and set it aside.
- Place the white chocolate chips and coconut oil in a microwave-safe bowl. Heat in 20-second bursts, stirring after each, until fully melted and smooth.
- Spoon the melted chocolate into a small zip-top bag and snip off one corner to create a piping tip.
- Pipe thin web shapes onto the parchment paper, making four separate webs about 4 inches wide each.
- While the chocolate is still soft, press small bunches of green grapes onto each web so they stick in place.
- Add two or three raisins to each cluster to form spider shapes on the web.
- Let the chocolate set at room temperature for 10 minutes before serving.
Extra Tips
Pipe the chocolate webs a little thicker than you think you need so the grapes hold without sliding. If the chocolate starts to firm up while you work, warm the bag in your hands for a few seconds. These keep best in a single layer in the fridge for up to one day. Course: Snack Cuisine: American Equipment: Microwave-safe bowl, Parchment paper, Baking sheet
Blood Orange Vampire Wedge Bites
These blood orange wedges bring a bright citrus bite to any Halloween spread. The deep red flesh gives them a natural spooky look that fits right into a fruit-focused snack table. They come together quickly and offer a juicy contrast to richer treats.
The flavor stays tart and sweet with a hint of berry from a simple raspberry mash. The wedges hold their shape well, making them easy to pick up and eat by hand.
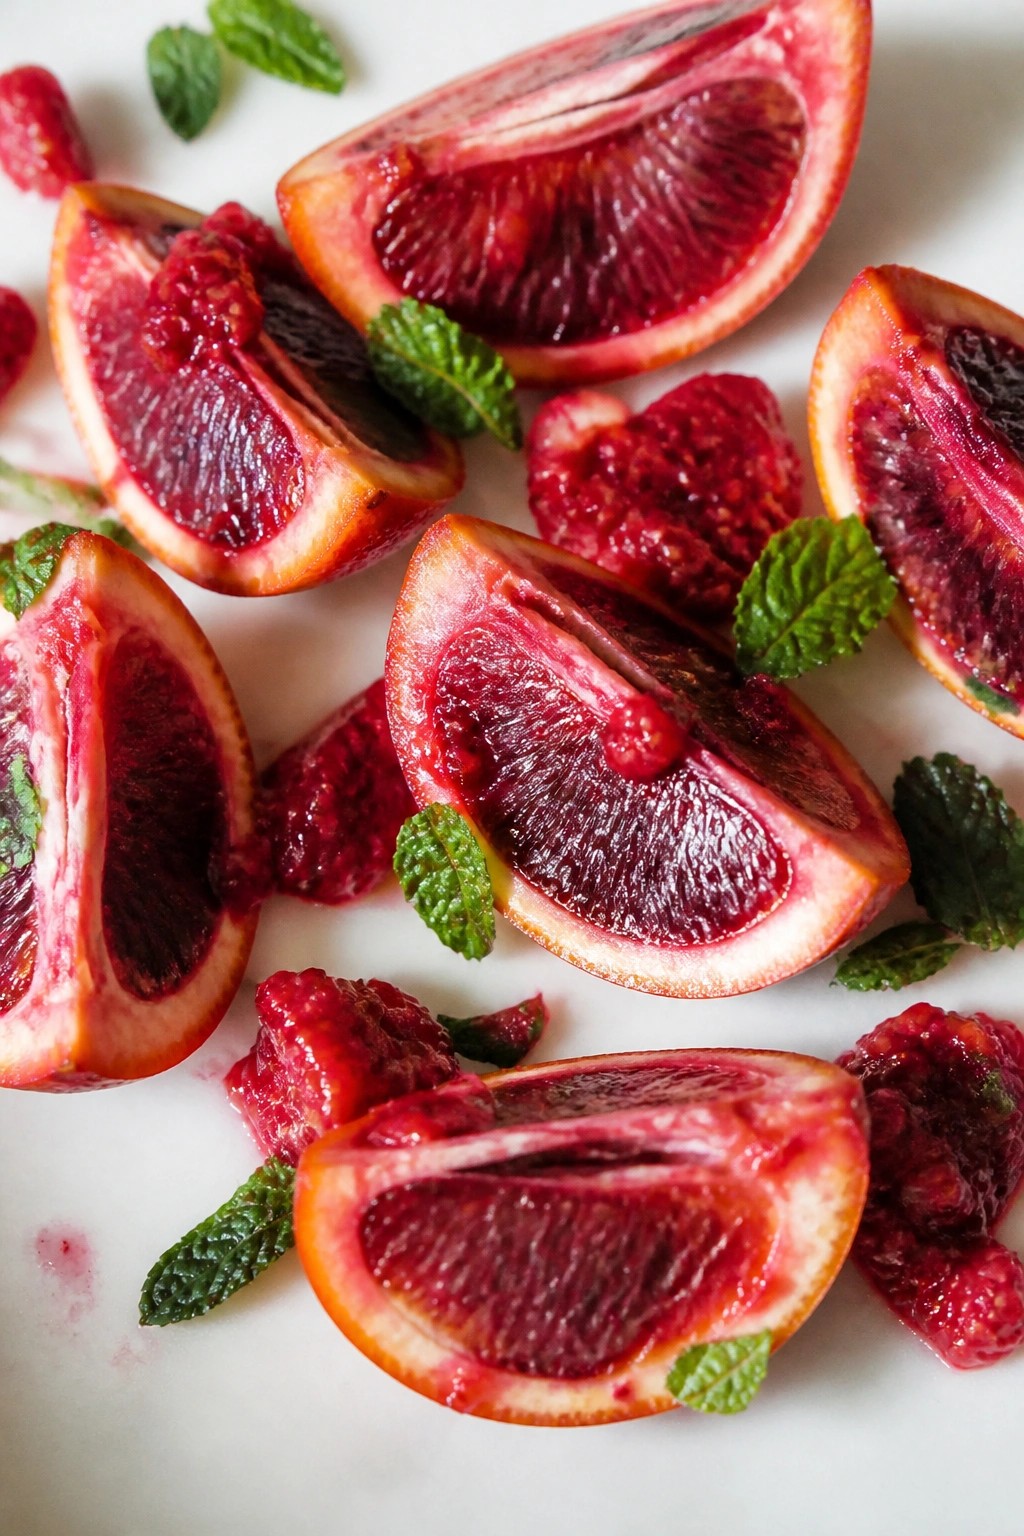
Serves 4 people.
Ingredients
- 4 blood oranges
- 1 cup fresh raspberries
- 1 tablespoon lemon juice
- 2 tablespoons maple syrup
- 8 fresh mint leaves
Instructions
- Slice each blood orange into 8 wedges and remove any seeds. Arrange the wedges on a serving plate with the cut sides facing up.
- Place the raspberries in a small bowl and mash them with a fork until they form a chunky sauce.
- Stir the lemon juice and maple syrup into the mashed raspberries until evenly combined.
- Spoon a small amount of the raspberry mixture over the center of each orange wedge.
- Top each wedge with one mint leaf before serving.
Extra Tips
Mash the raspberries just before serving so the sauce stays bright. If the oranges taste very sweet, add an extra squeeze of lemon to the raspberry mix for balance. These wedges soften if stored, so prepare them right before guests arrive. Course: Snack Cuisine: American Equipment: Cutting board, Knife, Mixing bowl, Fork, Serving plate
Pineapple Jack-o’-Lantern Rings
These pineapple rings make a bright and simple snack for Halloween parties. Kids can help cut the faces, and the fresh fruit keeps things light amid heavier treats. The sweet-tart pineapple pairs with a touch of rich chocolate for contrast.
The rings stay crisp and juicy, while the carved details give them a playful spooky look without any extra coloring or dyes.
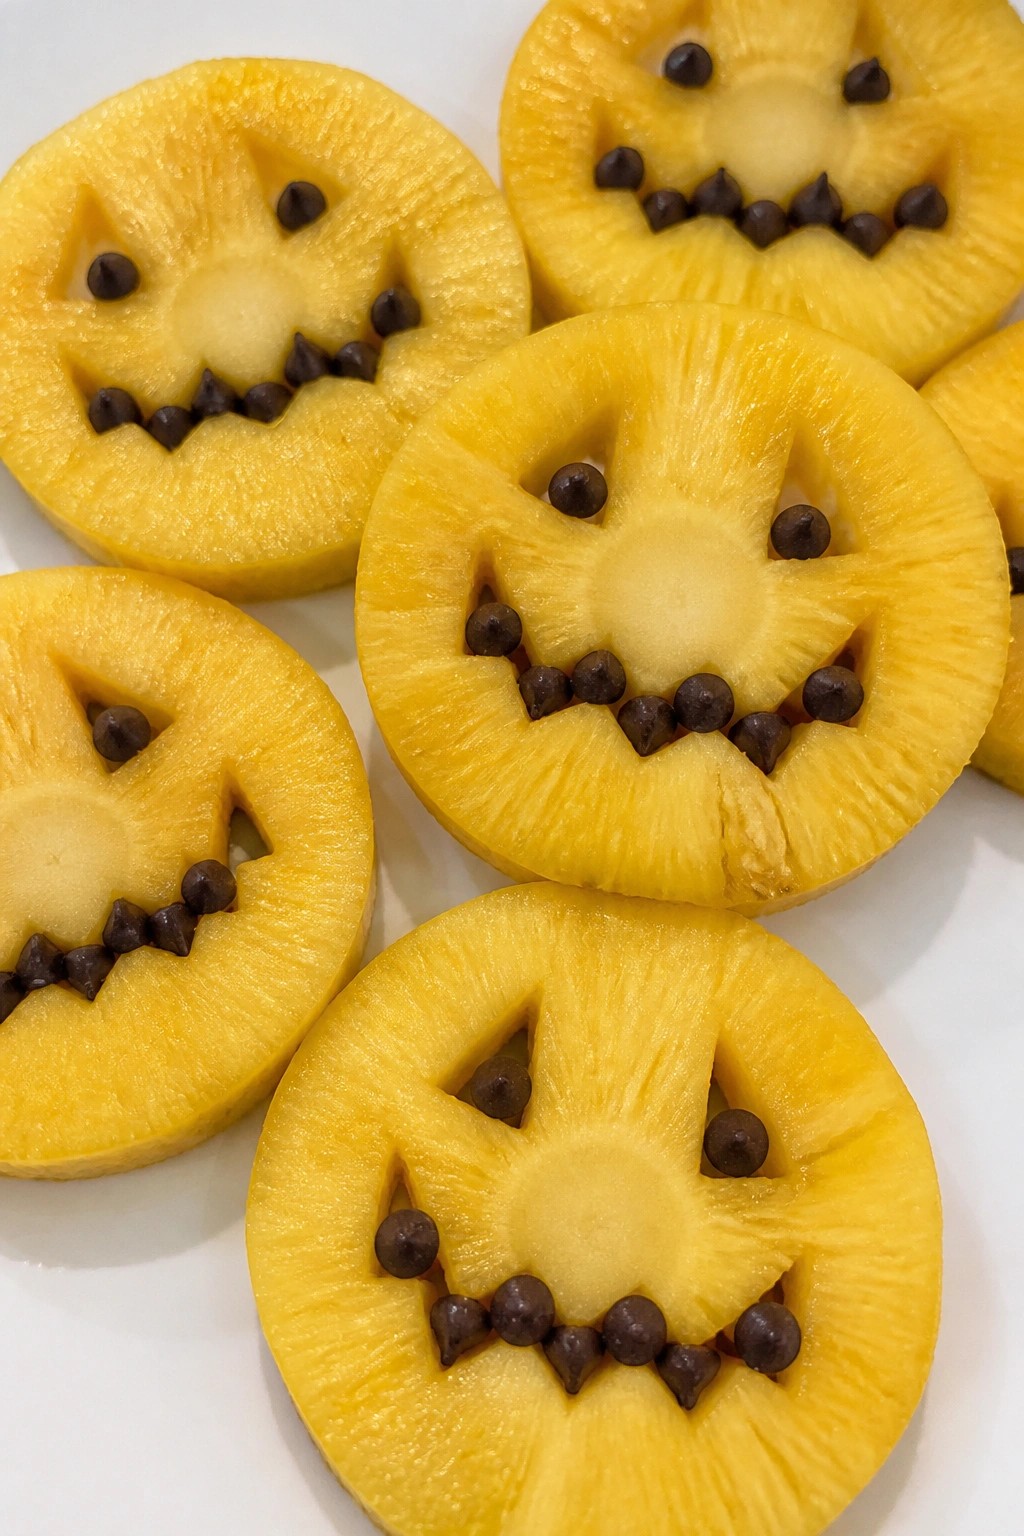
Serves 4 people.
Ingredients
- 1 large pineapple
- 1/2 cup dark chocolate chips
Instructions
- Peel the pineapple, remove the core, and slice it into 8 even rings.
- Lay each ring flat and use a small paring knife to cut out two eyes, a nose, and a jagged mouth so the rings look like jack-o’-lanterns.
- Place the dark chocolate chips in a microwave-safe bowl and heat in 20-second bursts, stirring between each, until fully melted.
- Spoon the melted chocolate into a small zip-top bag, snip off one corner, and pipe the chocolate into the carved facial features on each ring.
- Let the chocolate set for about 5 minutes at room temperature before serving the rings.
Extra Tips
Chill the carved rings for 30 minutes before adding chocolate if you want extra-crisp texture. Store any leftovers in an airtight container in the fridge for up to one day; the chocolate may soften slightly but the pineapple stays fresh. Course: Snack Cuisine: American Equipment: Paring knife, Microwave-safe bowl, Cutting board
Pear Ghost Shapes with Raisin Faces
This snack turns ordinary pears into simple ghost shapes that fit right into a Halloween spread. It works well for parties or quick after-school treats because it needs no cooking and comes together fast. The pears stay crisp and juicy while the raisins give a chewy contrast that balances the fruit.
The flavor stays mild and sweet with no added sugar. Kids can help press on the faces, which makes the task fun without much mess.
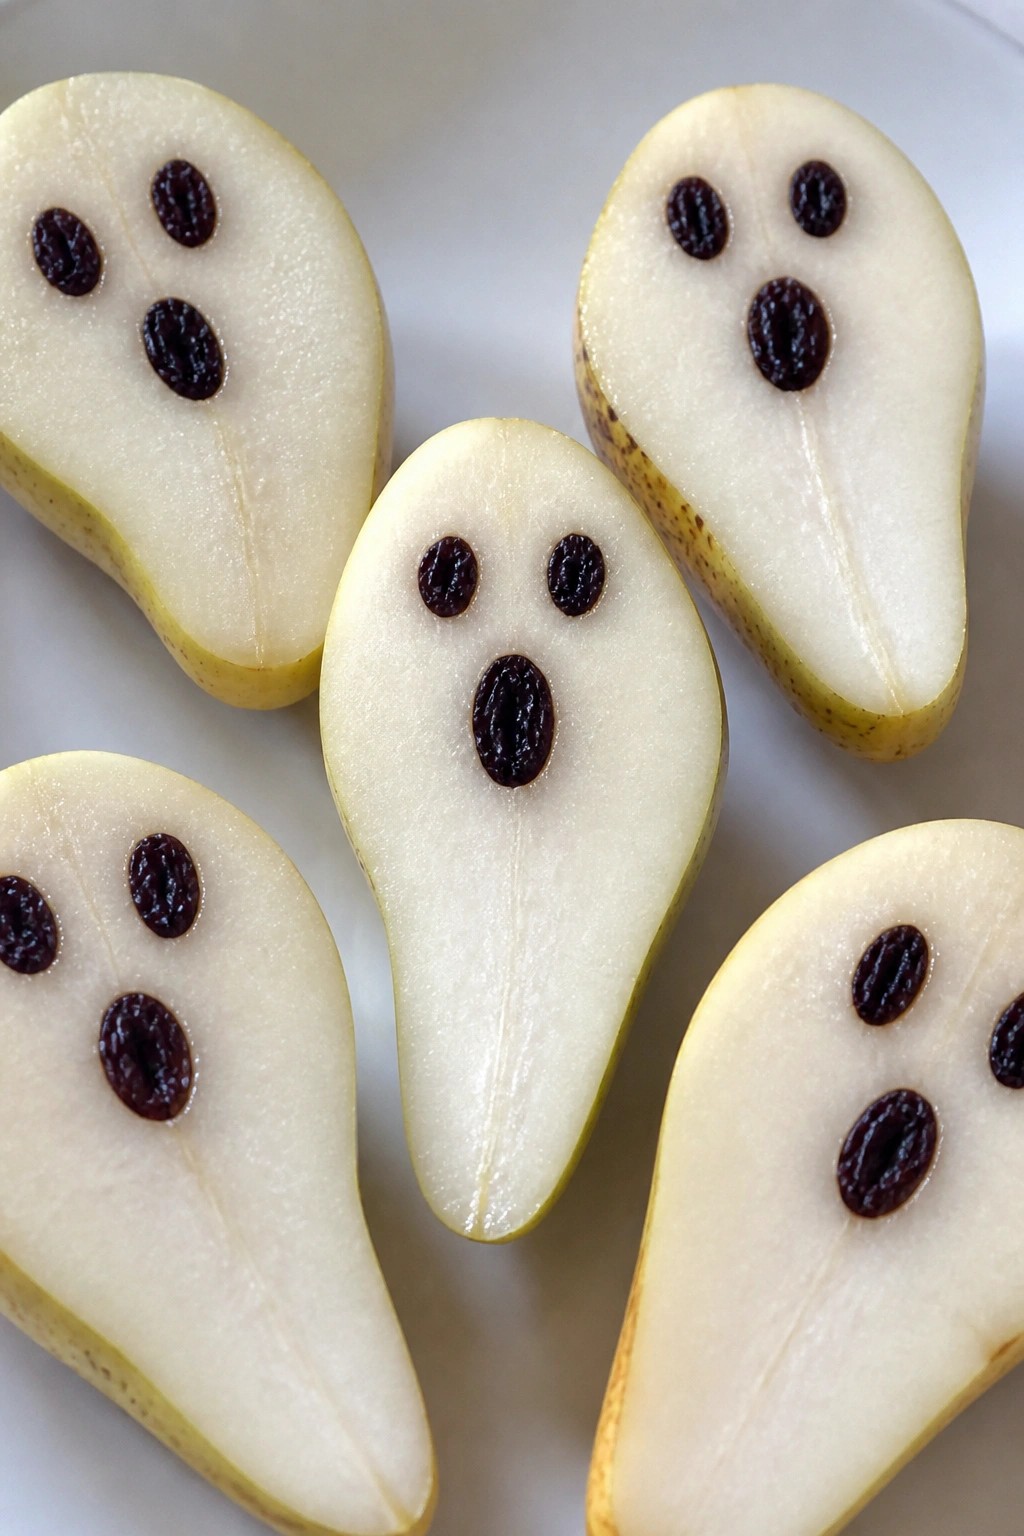
Serves 4 people.
Ingredients
- 4 medium firm pears
- 1/2 cup raisins
Instructions
- Wash the pears under cool water and pat them dry.
- Place one pear on a cutting board. Use a sharp knife to trim it into a ghost shape by cutting a rounded top and tapering the bottom into a wavy tail. Repeat with the remaining pears.
- Lay the shaped pears on a serving plate. Press two raisins into the upper part of each pear to make eyes.
- Add one or two more raisins below the eyes to form a mouth on each ghost.
Extra Tips
Choose the firmest pears you can find so the shapes hold up without falling apart. If you make these ahead, cover the plate tightly and keep it in the fridge for up to four hours. The raisins stay in place best when pressed firmly right before serving. Course: Snack Cuisine: American Equipment: Sharp knife, Cutting board, Serving plate
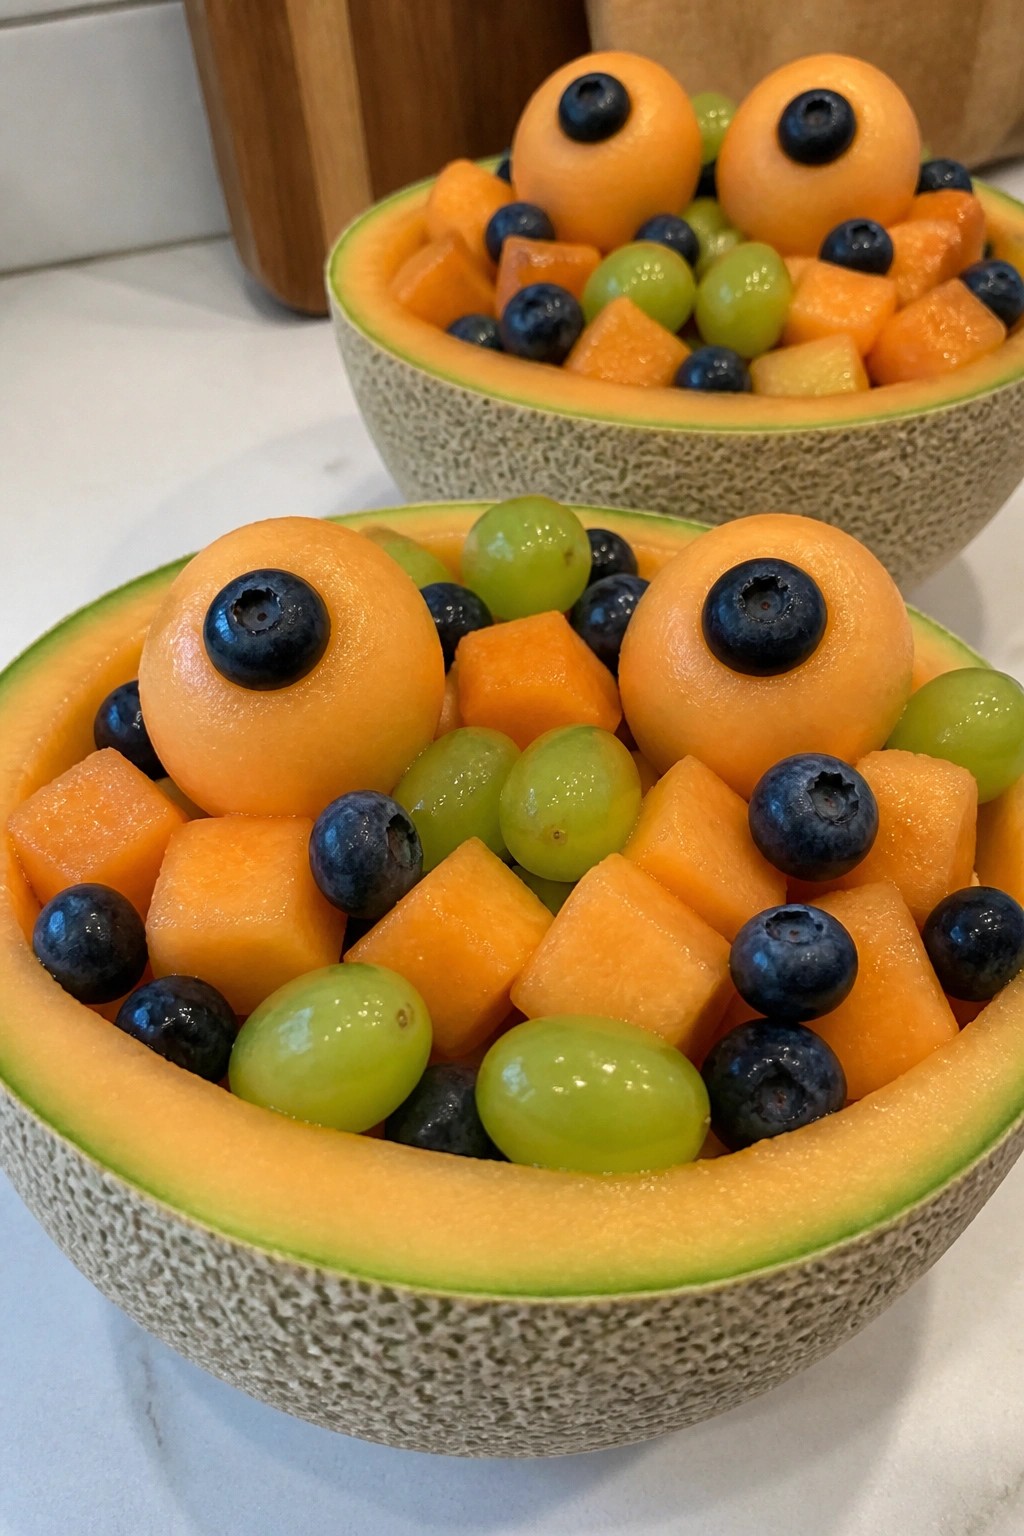
Cantaloupe Monster Eyeball Bowls
These cantaloupe bowls turn fresh fruit into a fun Halloween snack. Halved melons hold a mix of juicy pieces while a few blueberry-studded balls sit on top like monster eyes. The result is sweet, refreshing, and easy to serve at a party.
The texture stays crisp and cool, with bursts of berry flavor against the mild cantaloupe. Kids and adults both enjoy the playful look without any added sugar.
Serves 4 people.
Ingredients
- 2 cantaloupes
- 1 1/2 cups blueberries
- 1 cup seedless green grapes
Instructions
- Slice each cantaloupe in half crosswise and scoop out the seeds with a spoon.
- Use a melon baller to scoop 12 small balls from the cantaloupe flesh. Set the hollowed halves aside as bowls.
- Gently press one blueberry into the center of each cantaloupe ball to create the eyeballs.
- Divide the remaining blueberries and the green grapes evenly among the four cantaloupe bowls.
- Place three eyeball cantaloupe balls on top of the fruit in each bowl before serving.
Extra Tips
Choose ripe but firm cantaloupes so the bowls hold their shape. If the fruit mix looks too full, simply eat a few grapes first to make room for the eyeballs on top. Leftovers keep well in the refrigerator for one day if covered tightly with plastic wrap. Course: Snack Cuisine: American Equipment: Sharp knife, Melon baller, Spoon, Mixing bowl
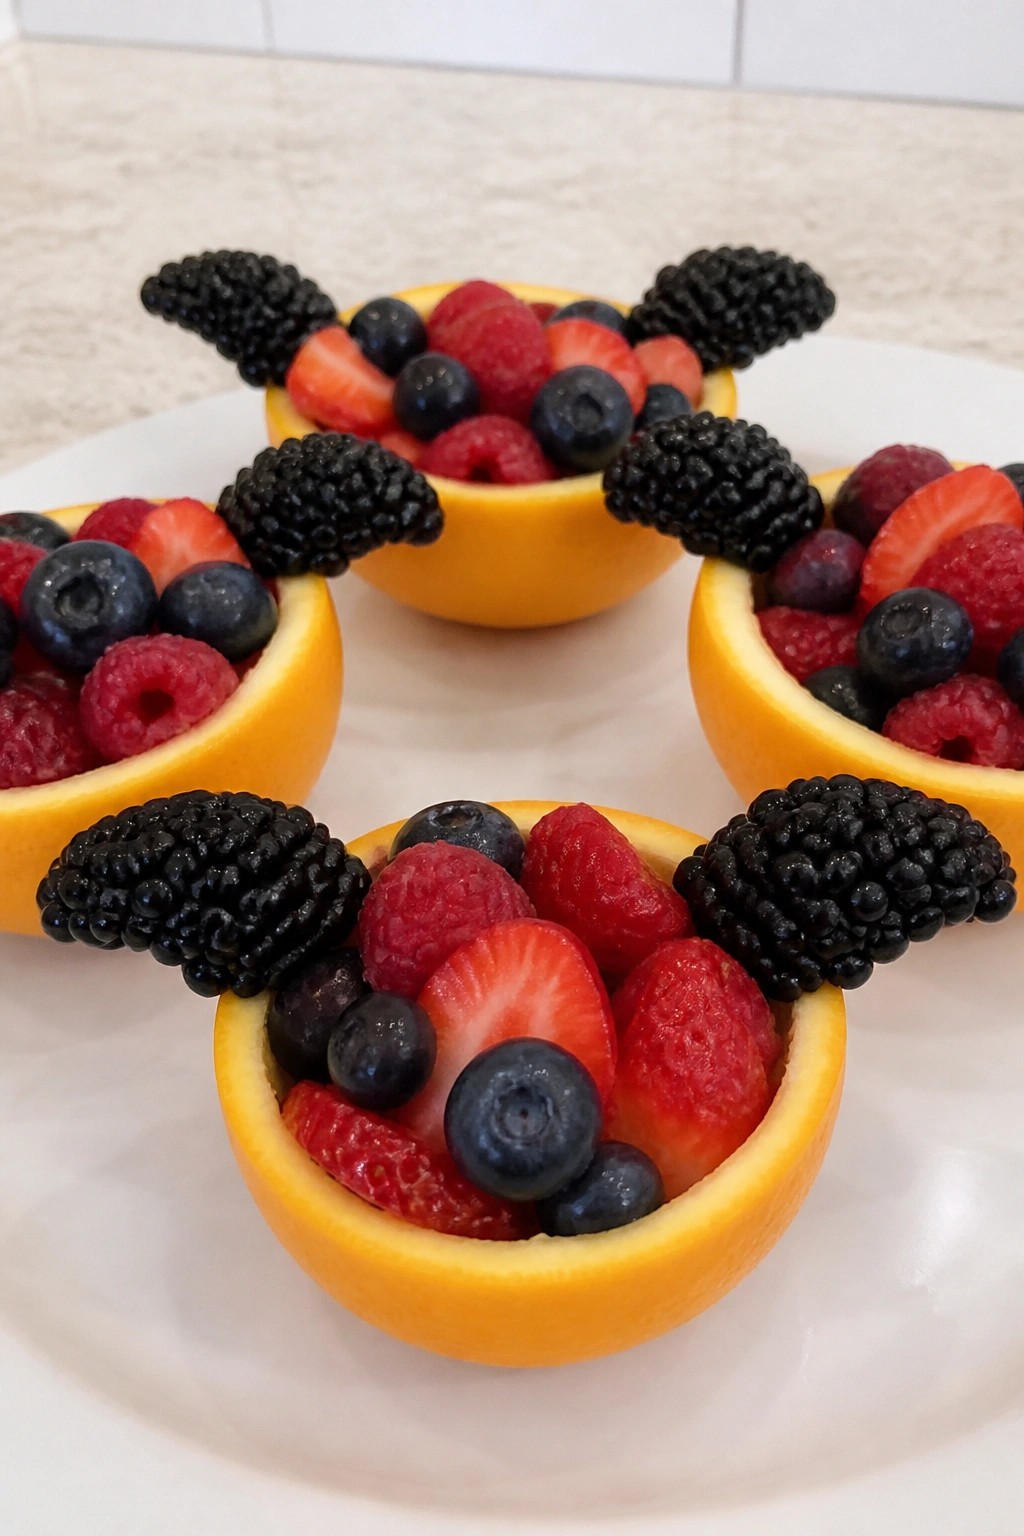
Blackberry Bat Wing Fruit Cups
These blackberry bat wing fruit cups turn basic fruit into a fun Halloween snack. They work well for parties or family nights when you want something light and fresh. The sweet orange base holds a mix of berries that stay juicy without getting soggy.
Serves 4 people.
Ingredients
- 4 large oranges
- 2 cups mixed fresh fruit (strawberries, blueberries, raspberries)
- 1 cup blackberries
- 1 teaspoon lime juice
Instructions
- Cut the top off each orange and scoop out the flesh with a spoon. Set the hollowed orange shells aside to use as cups.
- Chop the scooped orange flesh into small pieces and place them in a mixing bowl.
- Add the mixed fresh fruit and lime juice to the bowl. Stir gently to combine all the fruit.
- Spoon the fruit mixture evenly into the four orange shells.
- Place two blackberries on opposite sides of each filled orange to form bat wings.
Extra Tips
Choose firm blackberries so the wings hold their shape on the fruit cups. If the oranges feel too tart, add a few extra blueberries to balance the flavor. These cups taste best when assembled right before serving since the fruit releases juice over time. Course: Snack Cuisine: American Equipment: Knife, Spoon, Mixing Bowl