

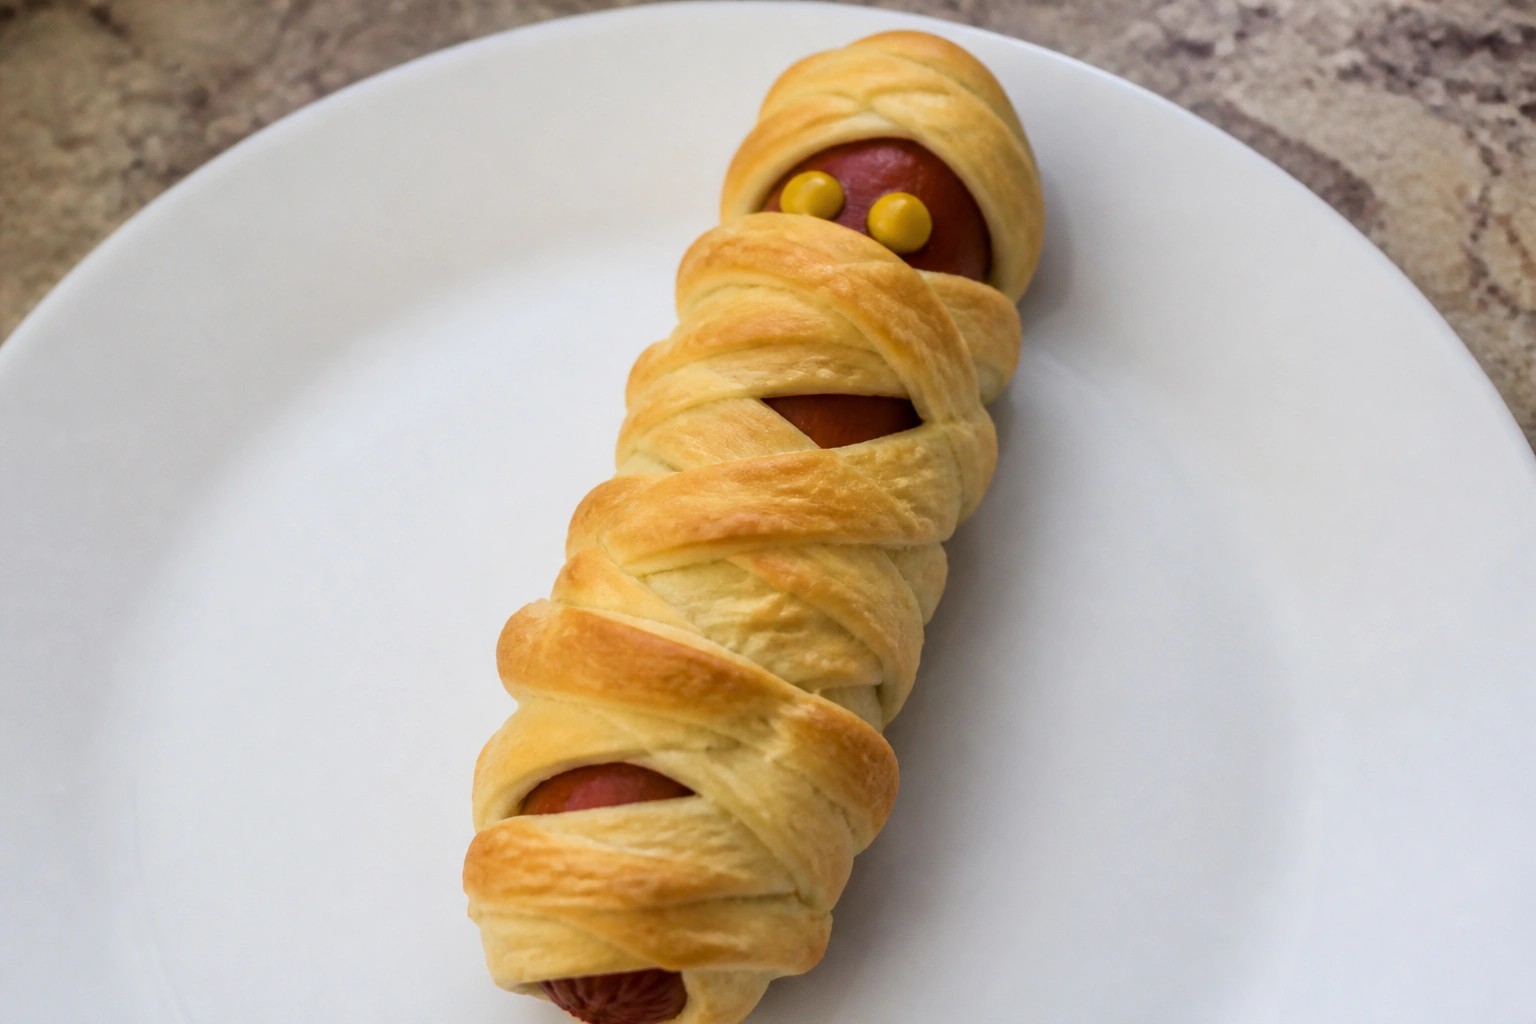
Halloween parties with kids often need food that looks fun but stays simple to make.
I gathered some recipes that use basic ingredients and don’t require special tools.
These options focus on things children usually like, like snacks and small treats that can be prepared ahead.
You can mix and match them based on what you already have at home.
The list below gives ten practical ideas to help with your planning.
Helpful Tips Before You Start
A little planning keeps the fun going and the mess under control.
Get Kids Involved Early
Let them pick shapes or colors for the snacks. Small tasks like sprinkling toppings keep them interested from the start.
Prep the Night Before
Chop ingredients and set out tools ahead of time. This cuts down on last minute rushing once the party starts.
Watch for Common Allergies
Ask about nut or dairy issues before you shop. Simple swaps like using sunflower butter work well for most kids.
Choose Sturdy Serving Pieces
Use trays or plates that handle sticky hands without tipping. This saves clean up during the event.
Baked Mummy Hot Dogs with Mustard Eyes
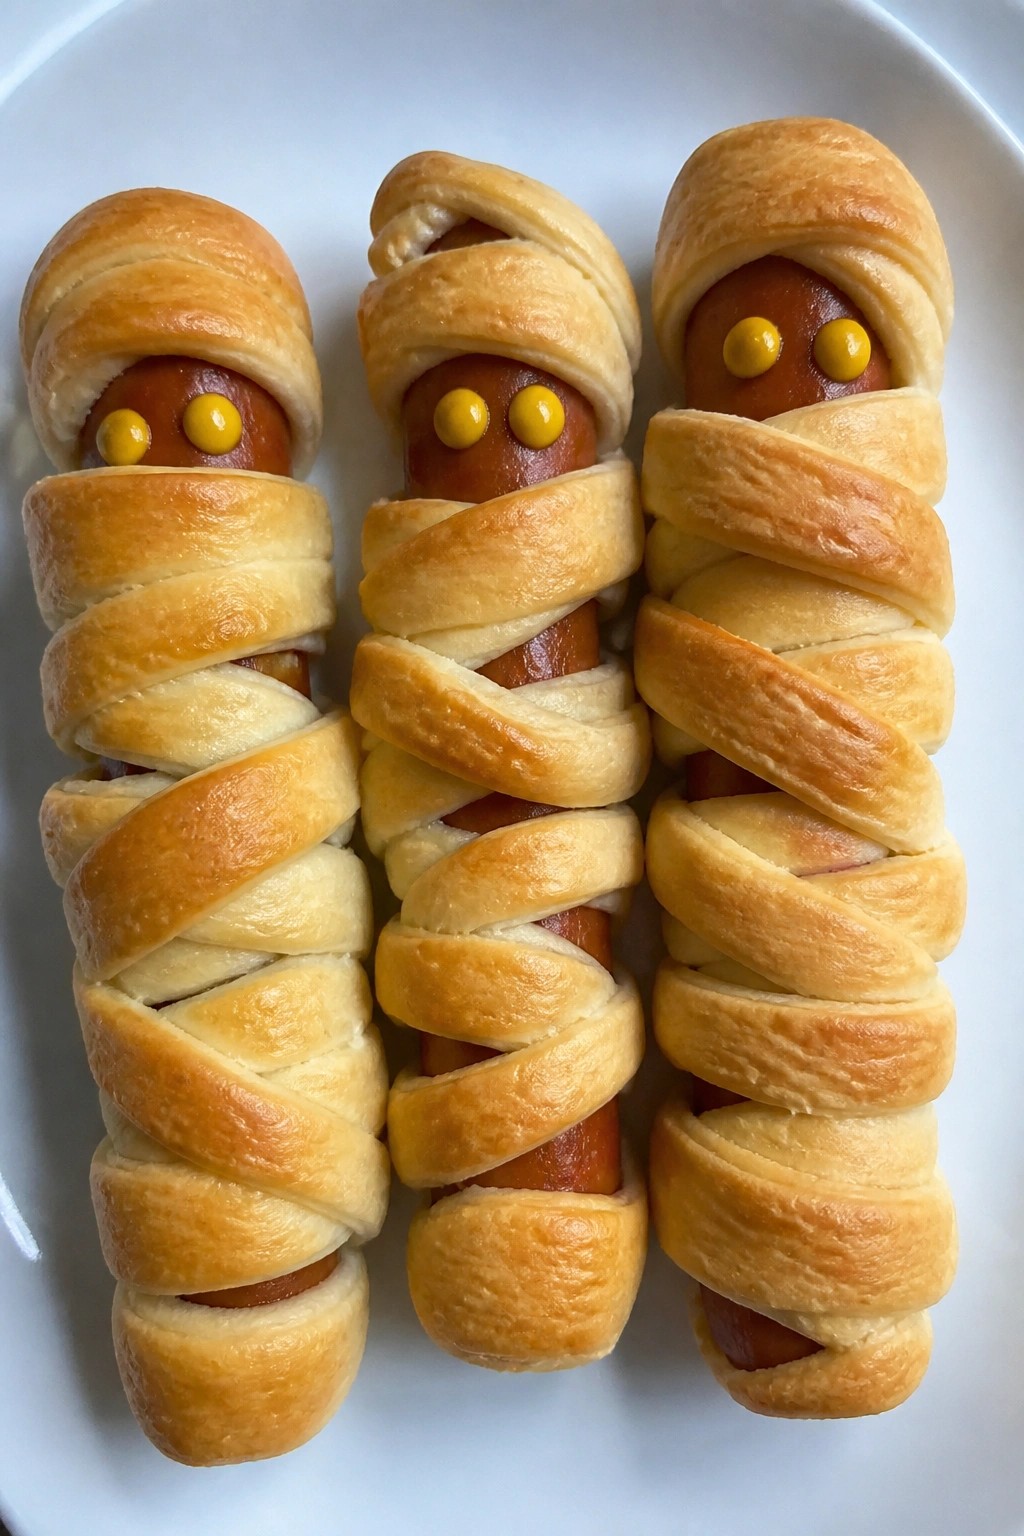
Kids enjoy finding the little mustard faces on these wrapped hot dogs. The dough bakes up flaky on the outside while the hot dogs stay juicy inside.
This recipe fits well on a Halloween party table. It uses basic ingredients and comes together without much fuss.
Serves 4 people.
Ingredients
- 4 all-beef hot dogs
- 1 package (8 ounces) refrigerated crescent roll dough
- 2 tablespoons yellow mustard
Instructions
- Heat the oven to 375 degrees and line a baking sheet with parchment paper.
- Unroll the crescent roll dough on a lightly floured surface and press the seams together to form one sheet.
- Cut the dough into thin strips about half an inch wide.
- Wrap the strips around each hot dog in a crisscross pattern, leaving small gaps near the top for the eyes.
- Place the wrapped hot dogs on the prepared baking sheet.
- Bake for 12 to 15 minutes until the dough turns golden brown.
- Remove from the oven and let them cool for two minutes.
- Use a small spoon or squeeze bottle to add two dots of yellow mustard in the gaps for eyes.
Extra Tips
Wrap the dough strips loosely so they do not overlap too much and bake evenly. If the hot dogs are very cold, let them sit out for five minutes before wrapping to help the dough stick better. Serve them right after baking while the crust stays crisp. Course: Appetizer Cuisine: American Equipment: Baking sheet, Oven, Knife
Jack-o’-Lantern Stuffed Bell Peppers
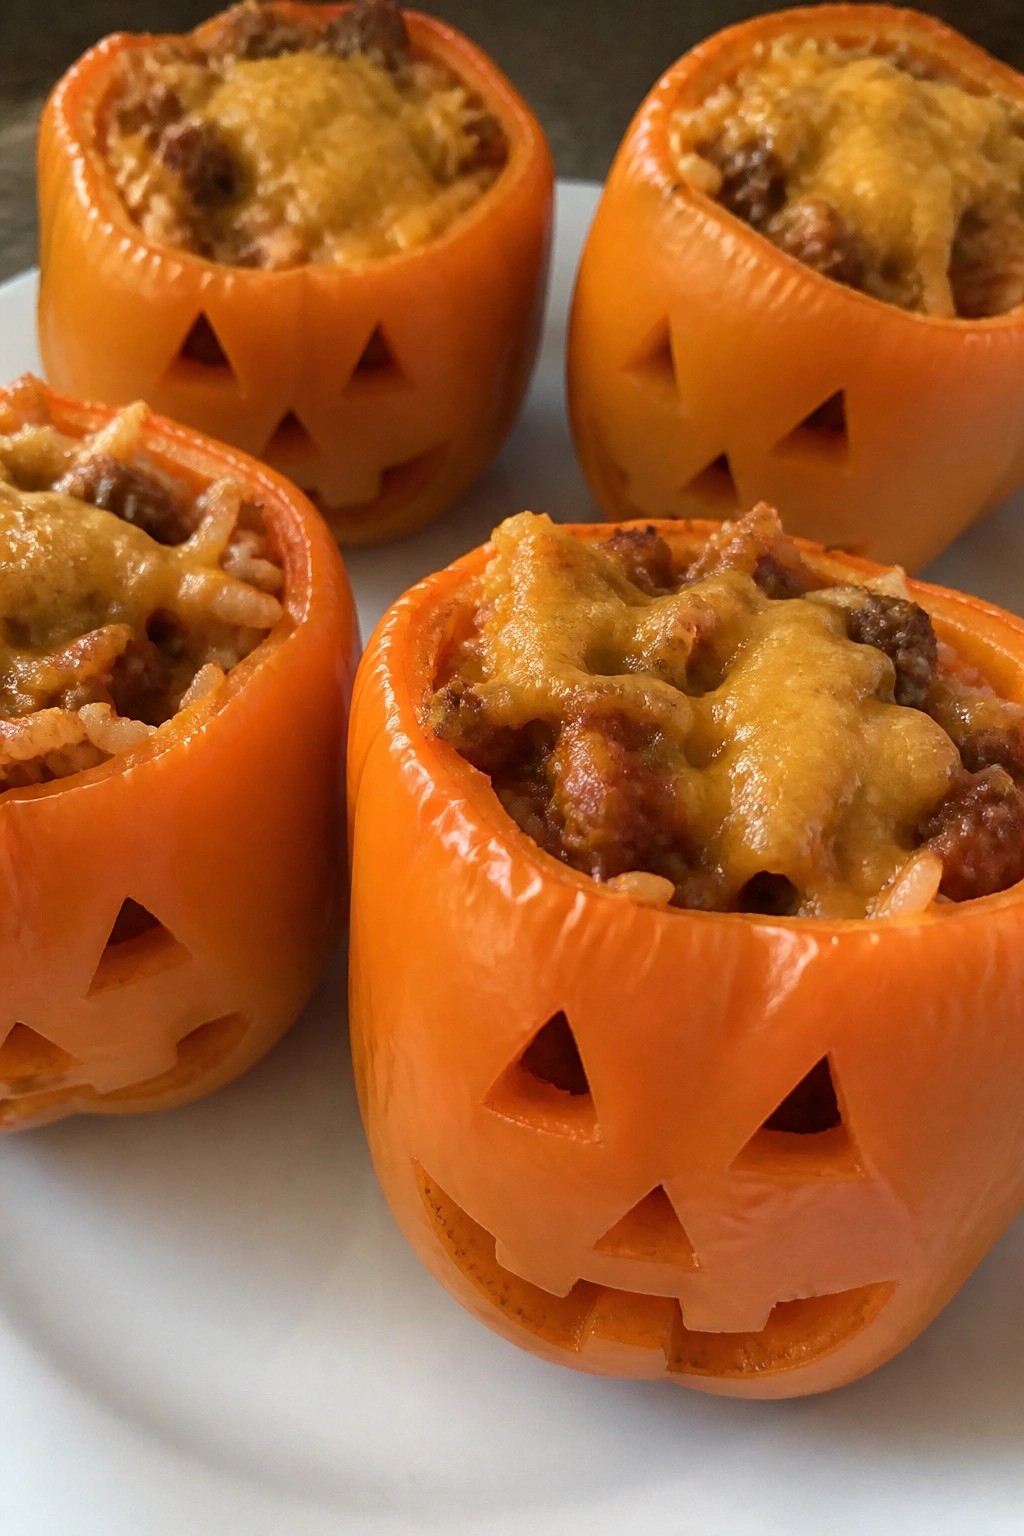
These stuffed peppers turn plain bell peppers into jack-o’-lanterns that kids can help decorate. The bright orange color fits right into a Halloween spread, and the mild beef and rice filling makes them easy for little ones to eat.
They work well as a party snack or light meal before trick-or-treating. The cheese melts into the tomato sauce for a soft, savory bite that still feels fun rather than fussy.
Serves 4 people.
Ingredients
- 4 large orange bell peppers
- 1 pound ground beef
- 1 small onion, finely chopped
- 1 cup cooked white rice
- 1 cup tomato sauce
- 1 cup shredded cheddar cheese
- 1 teaspoon Italian seasoning
- 1/2 teaspoon salt
- 1/4 teaspoon black pepper
- 1 tablespoon olive oil
Instructions
- Preheat the oven to 375 degrees. Cut the tops off each bell pepper and scoop out the seeds and membranes. Use a small knife to carve simple faces into the sides of the peppers.
- Heat the olive oil in a skillet over medium heat. Add the ground beef and chopped onion. Cook until the beef is browned and the onion is soft.
- Stir in the cooked rice, tomato sauce, Italian seasoning, salt, and black pepper. Cook for 2 minutes until everything is heated through. Remove from heat and mix in half of the cheddar cheese.
- Stand the carved peppers upright in a baking dish. Spoon the beef mixture evenly into each pepper. Sprinkle the remaining cheese over the tops.
- Bake for 25 minutes until the peppers are tender and the cheese is melted and lightly golden.
Extra Tips
Carve the faces after removing the tops so the peppers stay stable while baking. If the peppers tip over, slice a thin layer off the bottom to create a flat base. Leftovers reheat well in the microwave, though the carved faces soften after the first day. Course: Appetizer Cuisine: American Equipment: Baking dish, Skillet, Knife
Spiderweb Quesadilla Triangles
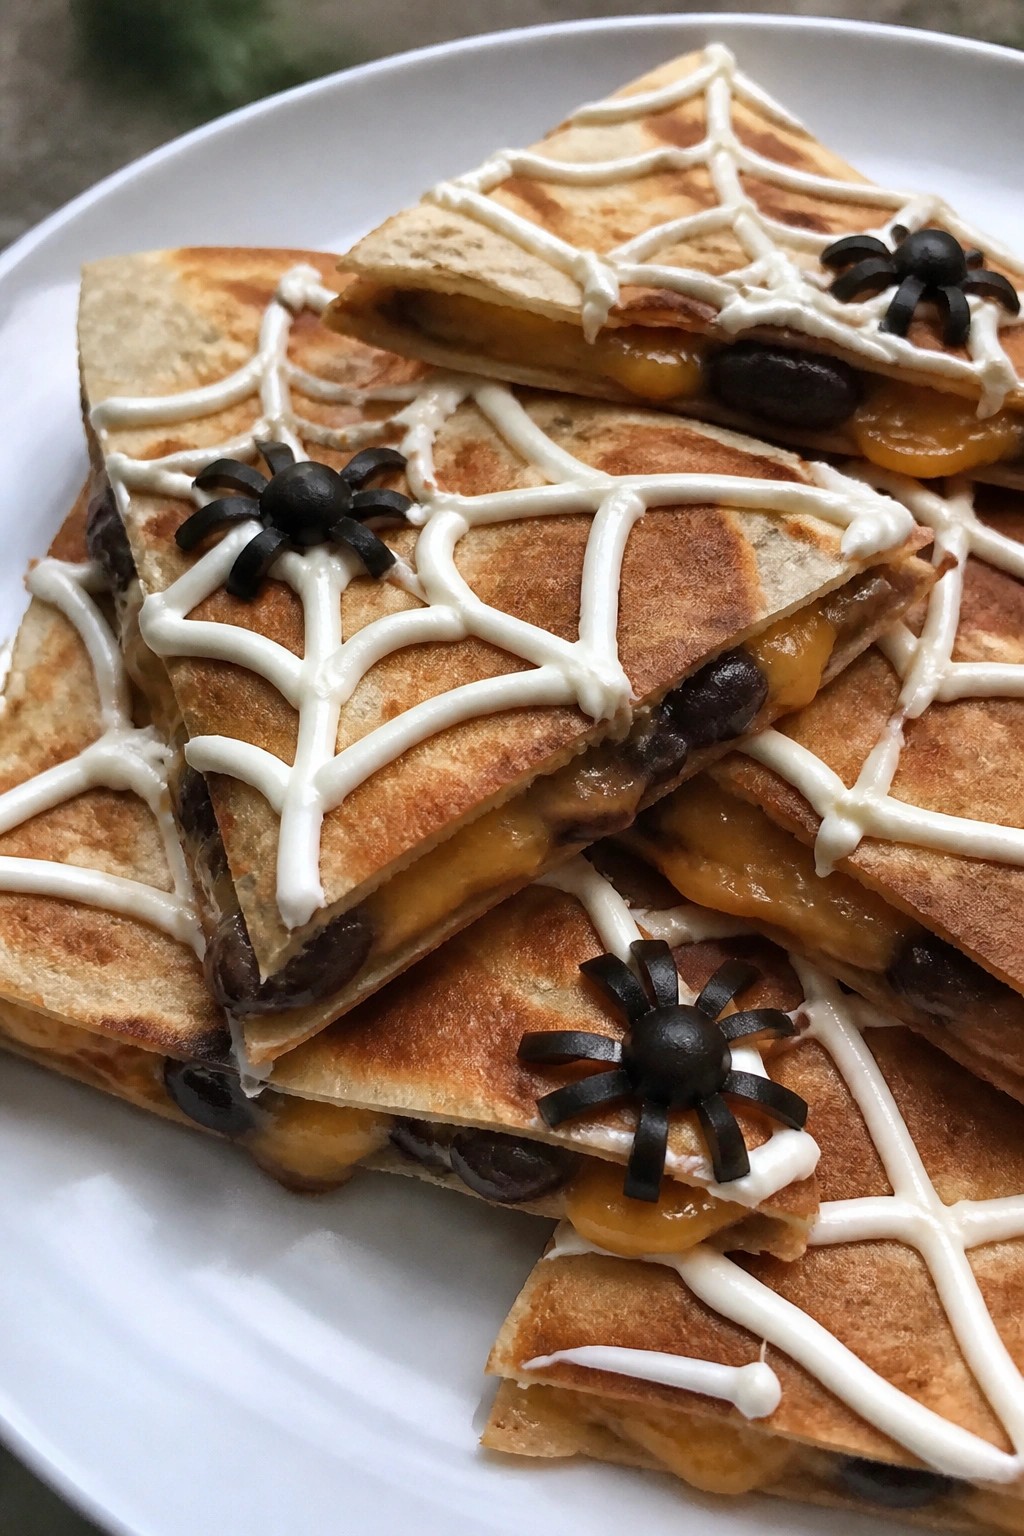
These quesadilla triangles bring a simple Halloween twist to a kid favorite. The spiderweb design comes from piping sour cream over the cooked quesadillas, while black beans add both color and a mild flavor that pairs well with the cheese.
The result is a warm, crispy snack with gooey cheese inside and a fun visual that stands out on a party table. Kids enjoy the familiar taste, and the triangles make them easy to grab and eat.
Serves 4 people.
Ingredients
- 4 large flour tortillas
- 2 cups shredded cheddar cheese
- 1/2 cup refried black beans
- 1/4 cup sour cream
- 8 black olives, sliced
Instructions
- Lay one tortilla flat and spread 2 tablespoons of refried black beans evenly across it. Sprinkle 1/2 cup of shredded cheddar cheese on top of the beans.
- Place a second tortilla over the filling to form a quesadilla. Repeat with the remaining tortillas, beans, and cheese to make two quesadillas total.
- Heat a large skillet over medium heat. Cook each quesadilla for 2 to 3 minutes per side until the tortillas turn golden and the cheese melts.
- Remove the quesadillas from the skillet and let them cool for 1 minute. Cut each one into 4 triangles.
- Spoon the sour cream into a small zip-top bag, snip a tiny corner, and pipe a spiderweb pattern on each triangle. Add two olive slices to each triangle to form a spider.
Extra Tips
Pipe the sour cream right before serving so the webs stay neat. If the refried beans seem thick, stir in a teaspoon of water to make spreading easier. Leftovers can be stored in an airtight container in the fridge and reheated in a skillet to keep the tortillas crisp. Course: Appetizer Cuisine: American Equipment: Large skillet, spatula, zip-top bag
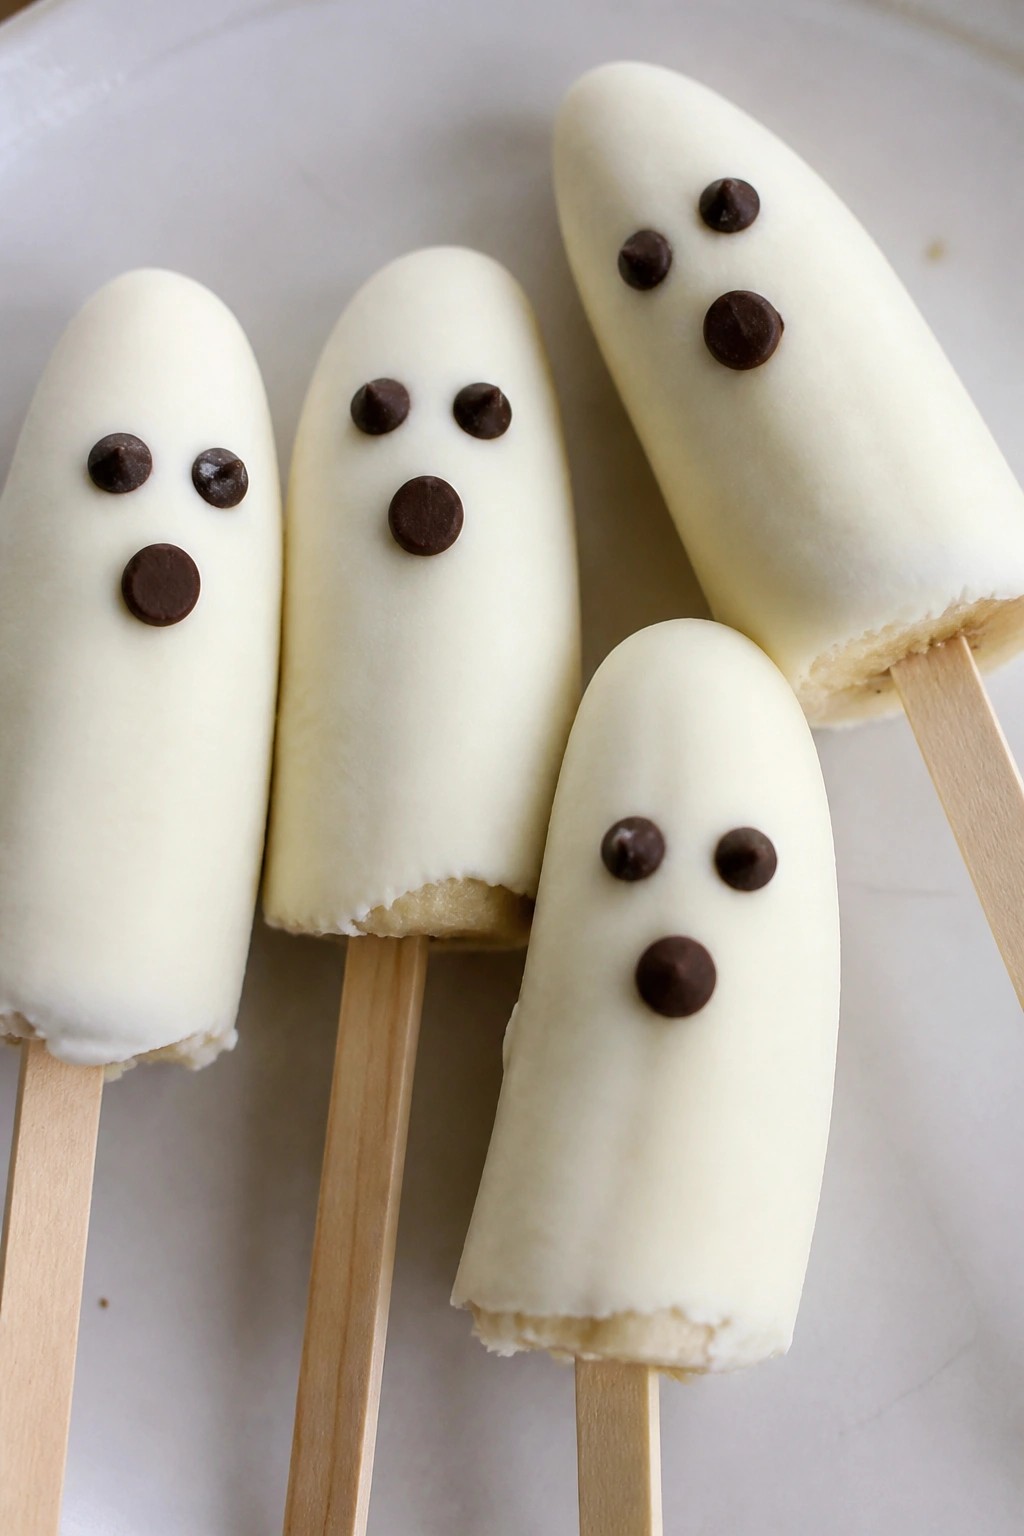
Ghostly Banana Pops Dipped in White Chocolate
These banana pops give kids a simple way to join the Halloween fun. Each one turns a fresh banana into a ghost shape with a smooth white chocolate coating. The result is a cool, creamy bite that balances sweet fruit with rich chocolate.
They work well at parties because they need little hands-on time and hold up on a platter. The texture stays soft inside with a firm shell outside.
Serves 4 people.
Ingredients
- 4 medium bananas
- 4 wooden popsicle sticks
- 200 grams white chocolate chips
- 1 tablespoon coconut oil
- 2 tablespoons mini chocolate chips
Instructions
- Peel the bananas and trim a small slice from the bottom of each so they stand upright. Insert one popsicle stick into the top of each banana.
- Place the white chocolate chips and coconut oil in a microwave-safe bowl. Heat in 20-second bursts, stirring between each, until fully melted and smooth.
- Dip each banana into the melted white chocolate, turning to coat all sides. Let excess drip back into the bowl.
- Immediately press two mini chocolate chips into the white chocolate near the top of each banana to form eyes. Place the coated bananas on a parchment-lined baking sheet.
- Chill in the freezer for 30 minutes or in the refrigerator for 1 hour until the coating sets.
Extra Tips
Press the mini chocolate chips on while the white chocolate is still soft so they stay in place. If the coating feels too thick, add a few extra drops of coconut oil to the melted chocolate before dipping. These pops soften quickly at room temperature, so keep them chilled until serving time. Course: Snack Cuisine: American Equipment: Baking sheet, Microwave-safe bowl, Parchment paper, Wooden popsicle sticks
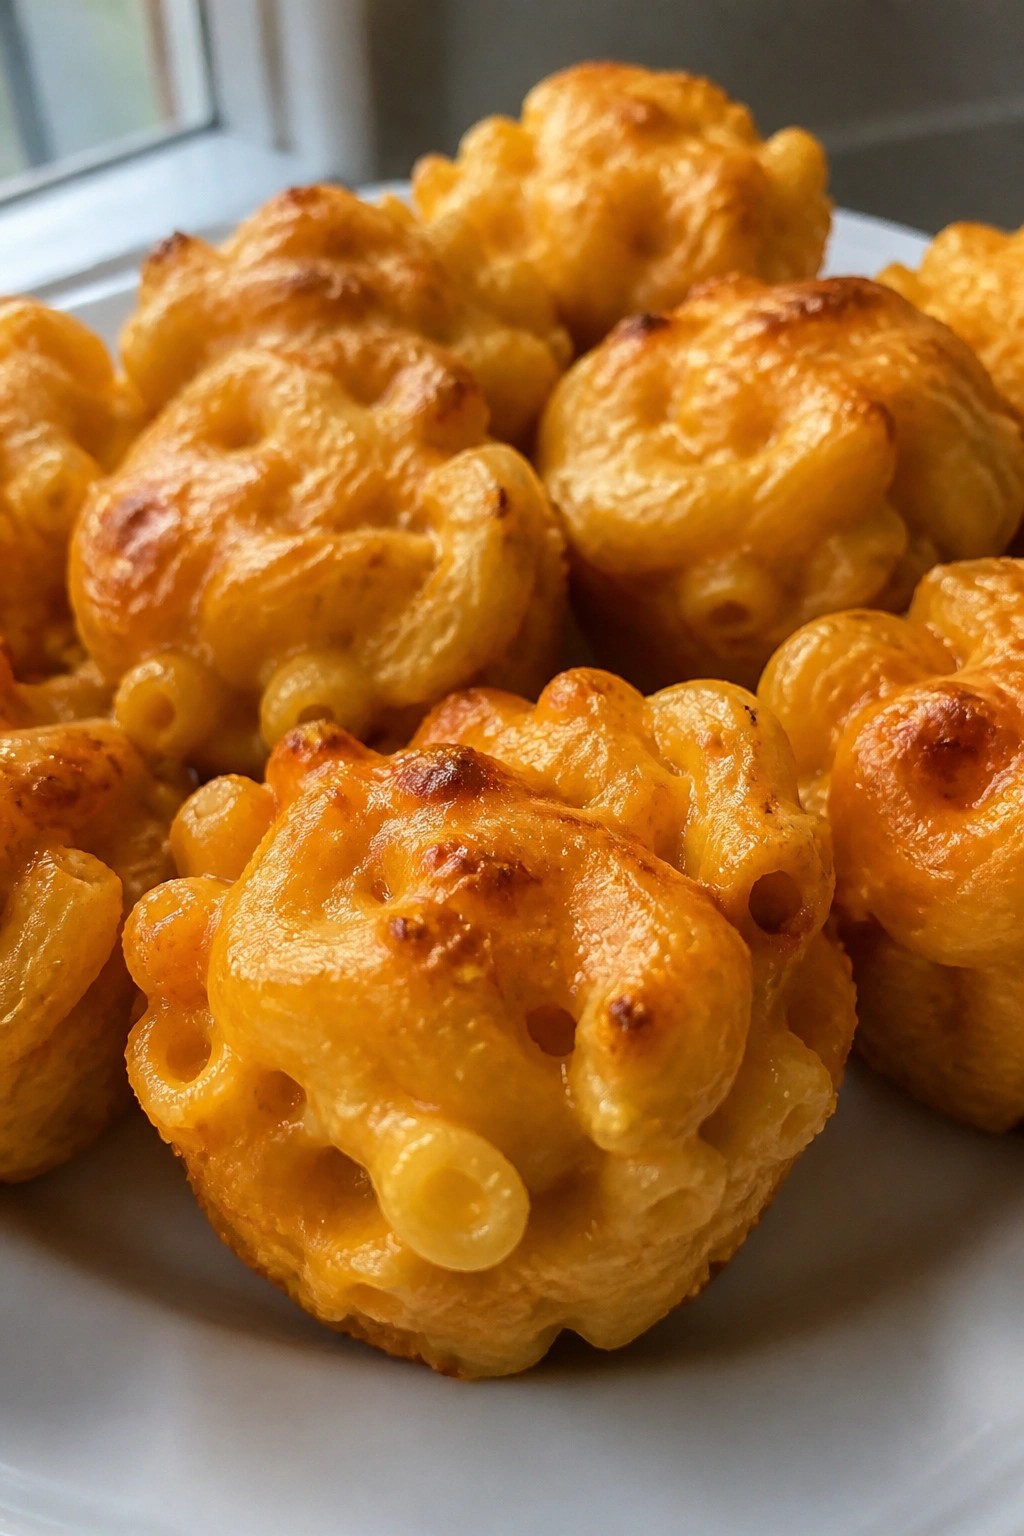
Cheesy Pumpkin Macaroni Cups
These individual macaroni cups bring a fun Halloween twist with bright orange pumpkin and plenty of melted cheese. They work well for kids parties because they are easy to grab and eat without much mess. The texture stays creamy inside with a lightly golden top from baking.
The flavor is mild and cheesy with a hint of warm nutmeg that pairs nicely with the pumpkin. Kids enjoy the familiar macaroni taste while the pumpkin adds color that fits the holiday theme.
Serves 4 people.
Ingredients
- 8 oz elbow macaroni
- 1 cup canned pumpkin puree
- 2 cups shredded cheddar cheese, divided
- 1 cup milk
- 2 tablespoons butter
- 2 tablespoons all-purpose flour
- 1/2 teaspoon ground nutmeg
- 1/2 teaspoon salt
- 1/4 teaspoon black pepper
- Cooking spray
Instructions
- Preheat the oven to 375 degrees and lightly coat a 12-cup muffin tin with cooking spray.
- Cook the elbow macaroni in a large pot of boiling water until al dente, then drain and set aside.
- In a medium saucepan, melt the butter over medium heat. Whisk in the flour and cook for one minute.
- Slowly whisk in the milk until the mixture thickens, then stir in the pumpkin puree, nutmeg, salt, and black pepper.
- Remove the saucepan from heat and stir in 1 1/2 cups of the shredded cheddar cheese until melted and smooth.
- Add the drained macaroni to the cheese sauce and stir until evenly coated.
- Spoon the mixture into the prepared muffin cups, filling each one to the top.
- Sprinkle the remaining 1/2 cup of cheddar cheese over the tops of the cups.
- Bake for 15 to 18 minutes until the cheese on top is melted and lightly golden.
- Let the cups cool in the tin for 5 minutes before removing them to serve.
Extra Tips
Use a cookie scoop to portion the macaroni mixture evenly so the cups hold their shape after baking. If the sauce thickens too much while mixing, add a splash of milk to loosen it. These reheat well in a 350-degree oven for a few minutes if made ahead for a party. Course: Appetizer Cuisine: American Equipment: Large pot, Medium saucepan, Muffin tin, Whisk
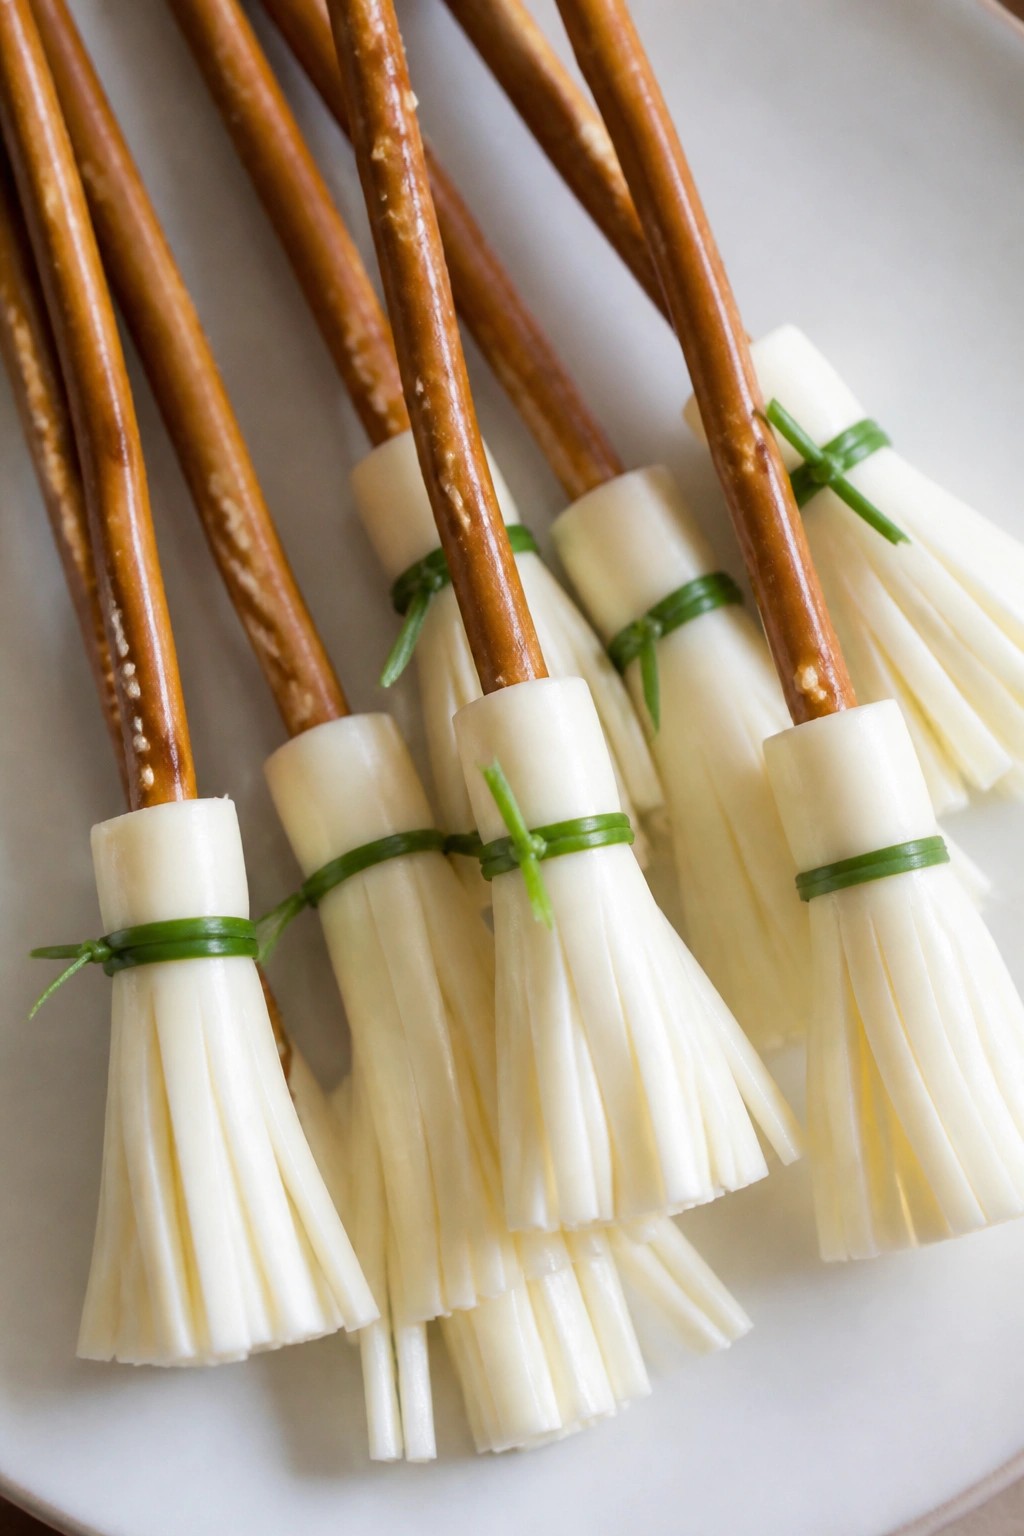
Witch Broom Pretzel Sticks with String Cheese
These witch broom snacks give kids a hands-on treat they can help assemble for a Halloween party. The simple shapes turn everyday items into something playful that fits right into a spread of finger foods.
The finished brooms offer a salty crunch from the pretzels paired with the mild, chewy texture of string cheese. They work well as a quick addition to any kids’ gathering without needing the oven.
Serves 4 people.
Ingredients
- 12 thin pretzel sticks
- 4 string cheese sticks
- 12 fresh chives
Instructions
- Place the string cheese sticks on a cutting board and slice each one lengthwise into thin strips, stopping about one inch from the top so the strips stay attached.
- Push one pretzel stick into the uncut end of each string cheese piece to create the broom handle.
- Gather the cheese strips around the pretzel and wrap one chive around the top of the strips.
- Tie the chive into a knot to hold the bristles in place and trim any extra length.
- Repeat with the remaining pieces until you have 12 brooms.
Extra Tips
Chill the string cheese for ten minutes before slicing so the strips stay neat instead of stretching. These brooms travel well on a platter and can be made an hour ahead, though the chives soften if left too long. Skip the chives and use thin strips of green onion if that is what you have on hand. Course: Snack Cuisine: American Equipment: Knife, Cutting Board
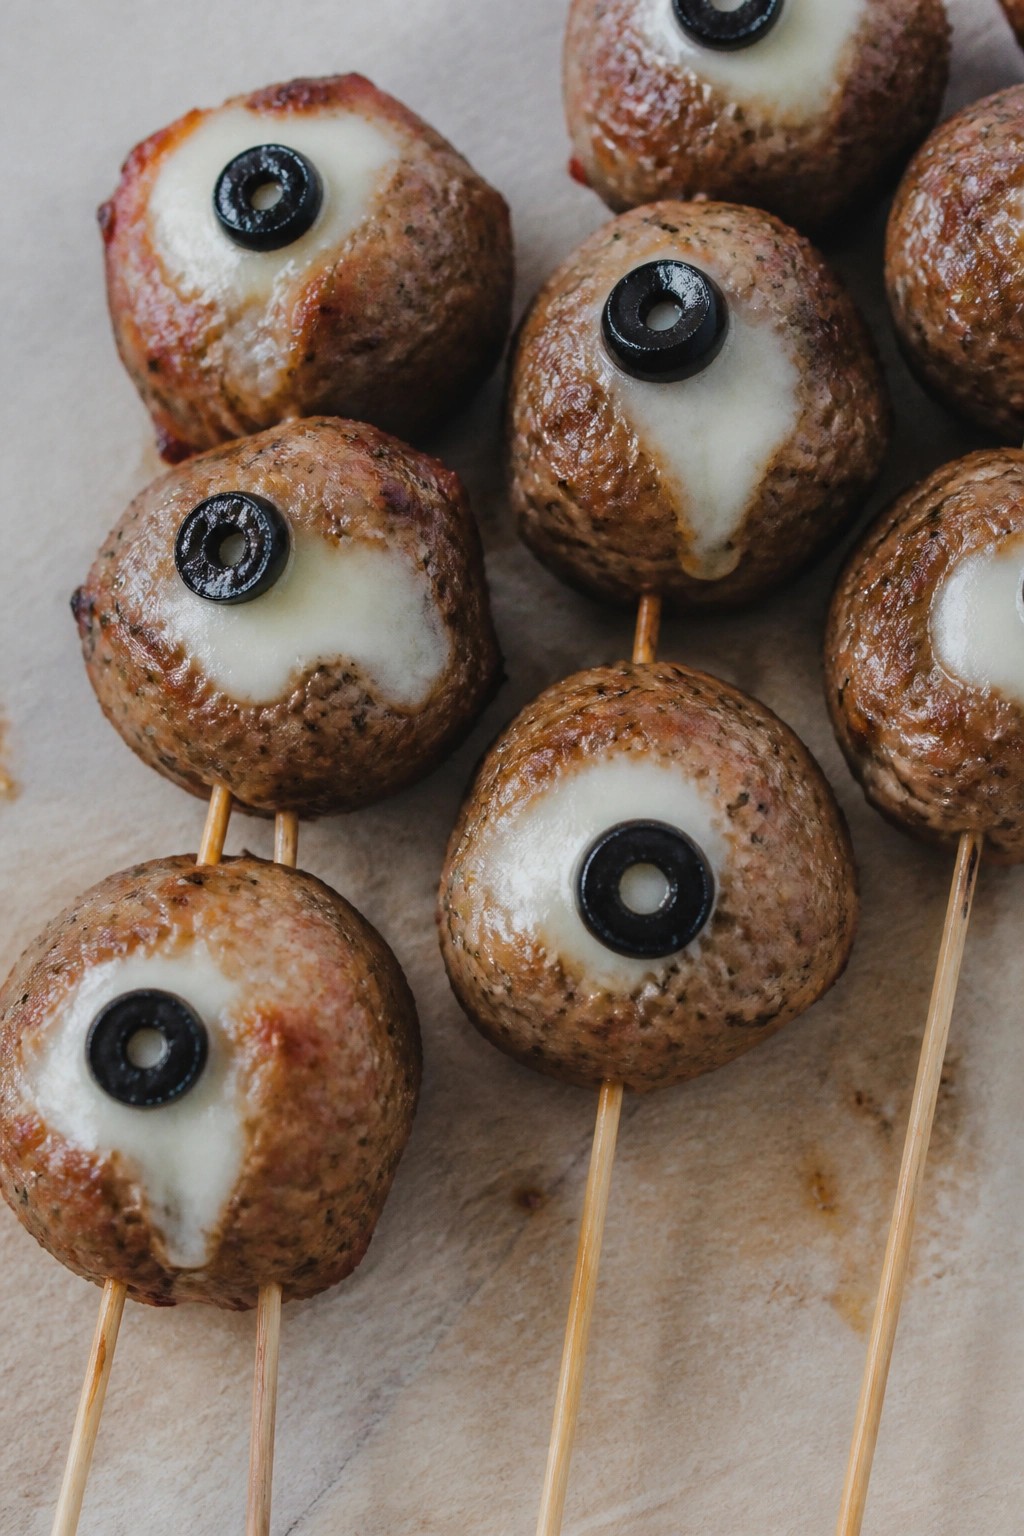
Monster Eyeball Turkey Meatballs on Skewers
These turkey meatballs turn into a playful party snack with mozzarella centers that melt into white "eyeballs" topped with olive slices. Kids enjoy the spooky look while parents like that the lean turkey keeps things light and the skewers make them easy to grab at a Halloween gathering. The meatballs stay moist inside with a lightly seasoned flavor that pairs well with simple dips.
Serves 4 people.
Ingredients
- 1 pound ground turkey
- ½ cup breadcrumbs
- 1 large egg
- 1 teaspoon garlic powder
- ½ teaspoon salt
- ¼ teaspoon black pepper
- 12 small mozzarella balls
- 12 black olives, sliced into rings
- 8 wooden skewers
Instructions
- Preheat the oven to 400°F and line a baking sheet with parchment paper.
- In a mixing bowl, combine the ground turkey, breadcrumbs, egg, garlic powder, salt, and black pepper. Mix until evenly blended.
- Scoop the mixture into 12 portions and roll each into a ball. Press one mozzarella ball into the center of each meatball and reshape to fully enclose the cheese.
- Place the meatballs on the prepared baking sheet and bake for 18 to 20 minutes until cooked through and lightly browned.
- Remove the meatballs from the oven. While still warm, press one olive ring onto the top of each meatball to create the eyeball effect.
- Thread three meatballs onto each skewer and serve warm.
Extra Tips
For the best eyeball appearance, press the olive rings on right after baking while the cheese is still soft. If making ahead, form and stuff the meatballs the day before, then bake and assemble the skewers just before serving so the cheese stays gooey. Course: Appetizer Cuisine: American Equipment: Mixing bowl, Baking sheet, Wooden skewers
Candy Corn Yogurt Parfaits with Granola
These layered parfaits copy the look of candy corn with yellow, orange, and white stripes, making them a festive choice for a kids Halloween party. The mix of creamy yogurt, sweet fruit, and crunchy granola gives a nice balance of textures that children enjoy without being overly rich.
They work well as a make-ahead snack or light dessert when you need something quick that still feels special. The flavors stay mild and fruity, so even picky eaters tend to try them.
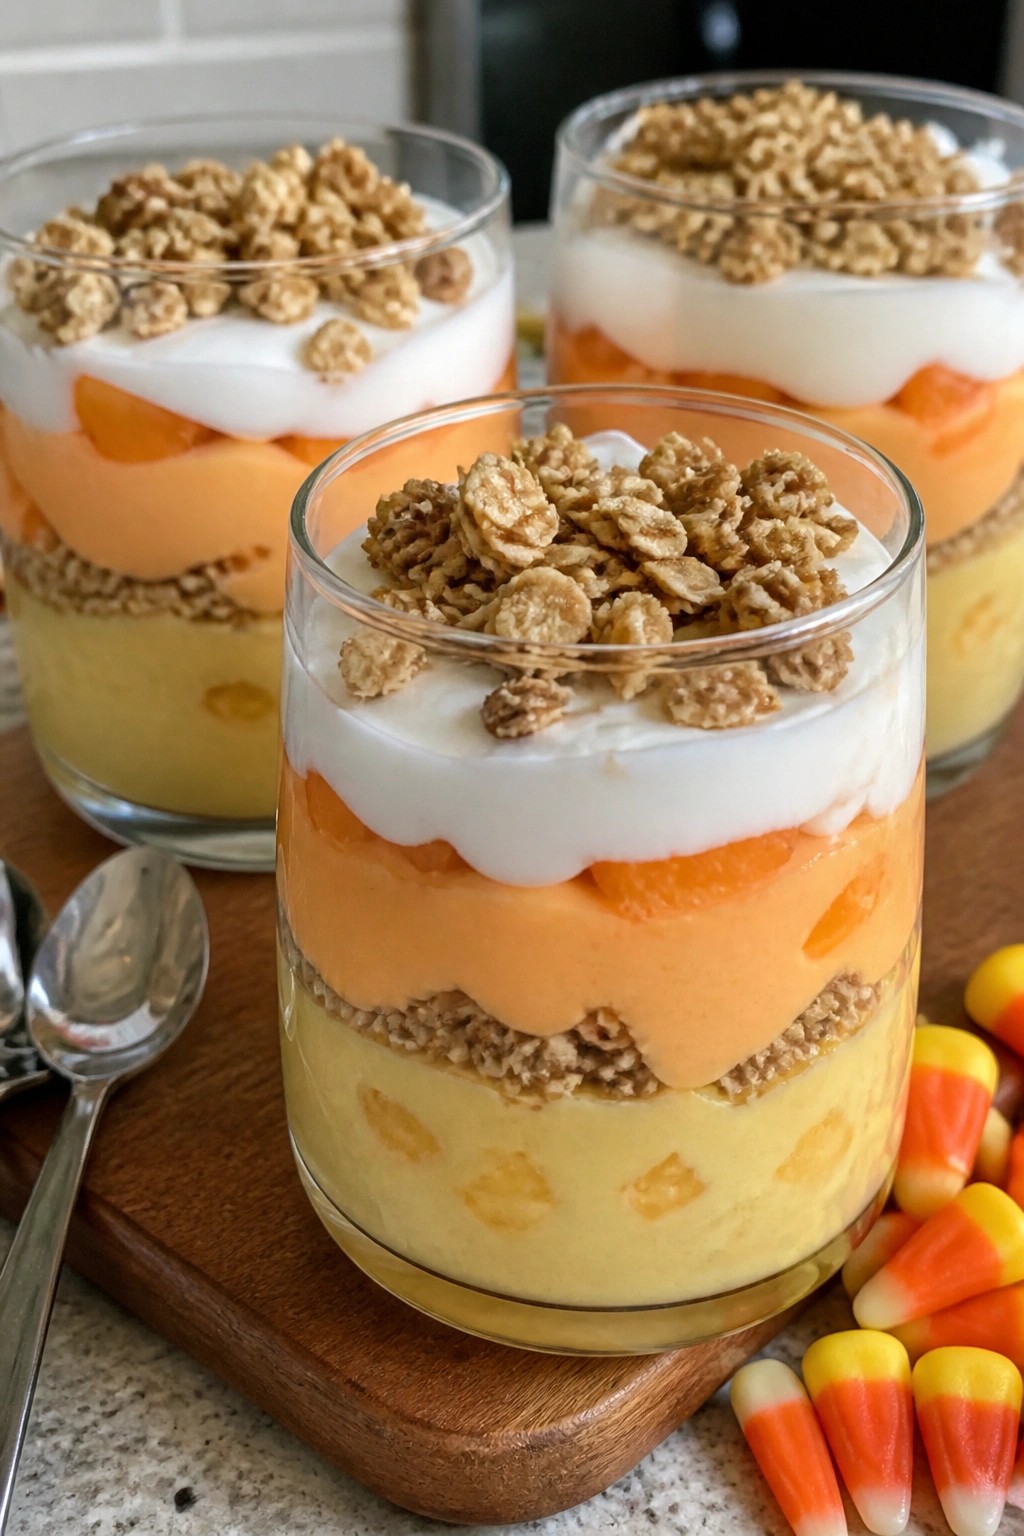
Serves 4 people.
Ingredients
- 2 cups vanilla Greek yogurt, divided
- 1/2 cup crushed pineapple, drained
- 1/2 cup mandarin orange segments, drained
- 1 cup granola
- Yellow and orange food coloring (optional)
Instructions
- Divide the vanilla Greek yogurt into three equal portions in separate bowls.
- Stir the crushed pineapple into one portion and add a few drops of yellow food coloring if desired to create the bottom yellow layer.
- Stir the mandarin orange segments into the second portion and add a few drops of orange food coloring if desired to create the middle orange layer.
- Leave the third portion plain to create the top white layer.
- Spoon the yellow yogurt mixture into the bottom of four clear glasses or jars.
- Add the orange yogurt mixture on top of the yellow layer.
- Finish with the plain yogurt layer.
- Sprinkle granola evenly over each parfait just before serving.
Extra Tips
Prepare the colored yogurt layers ahead and keep them covered in the fridge, then assemble with granola right before the party so the granola stays crisp. If you skip the food coloring, the fruit pieces still give the layers a soft tint that works for the candy corn theme. Swap the pineapple for banana puree if needed, but keep the portions small so the layers stay distinct. Course: Dessert Cuisine: American Equipment: Mixing bowls, spoons, clear glasses or jars
Skeleton Bone Breadsticks with Marinara
These skeleton bone breadsticks add a lighthearted touch to any Halloween spread. Kids enjoy the playful bone shapes that bake up golden and slightly crisp on the outside while staying soft inside. Garlic and Parmesan give them a savory flavor that pairs nicely with marinara for dipping.
The recipe works well for parties because it uses basic dough and comes together quickly. It delivers a fun visual without needing special tools or advanced skills.
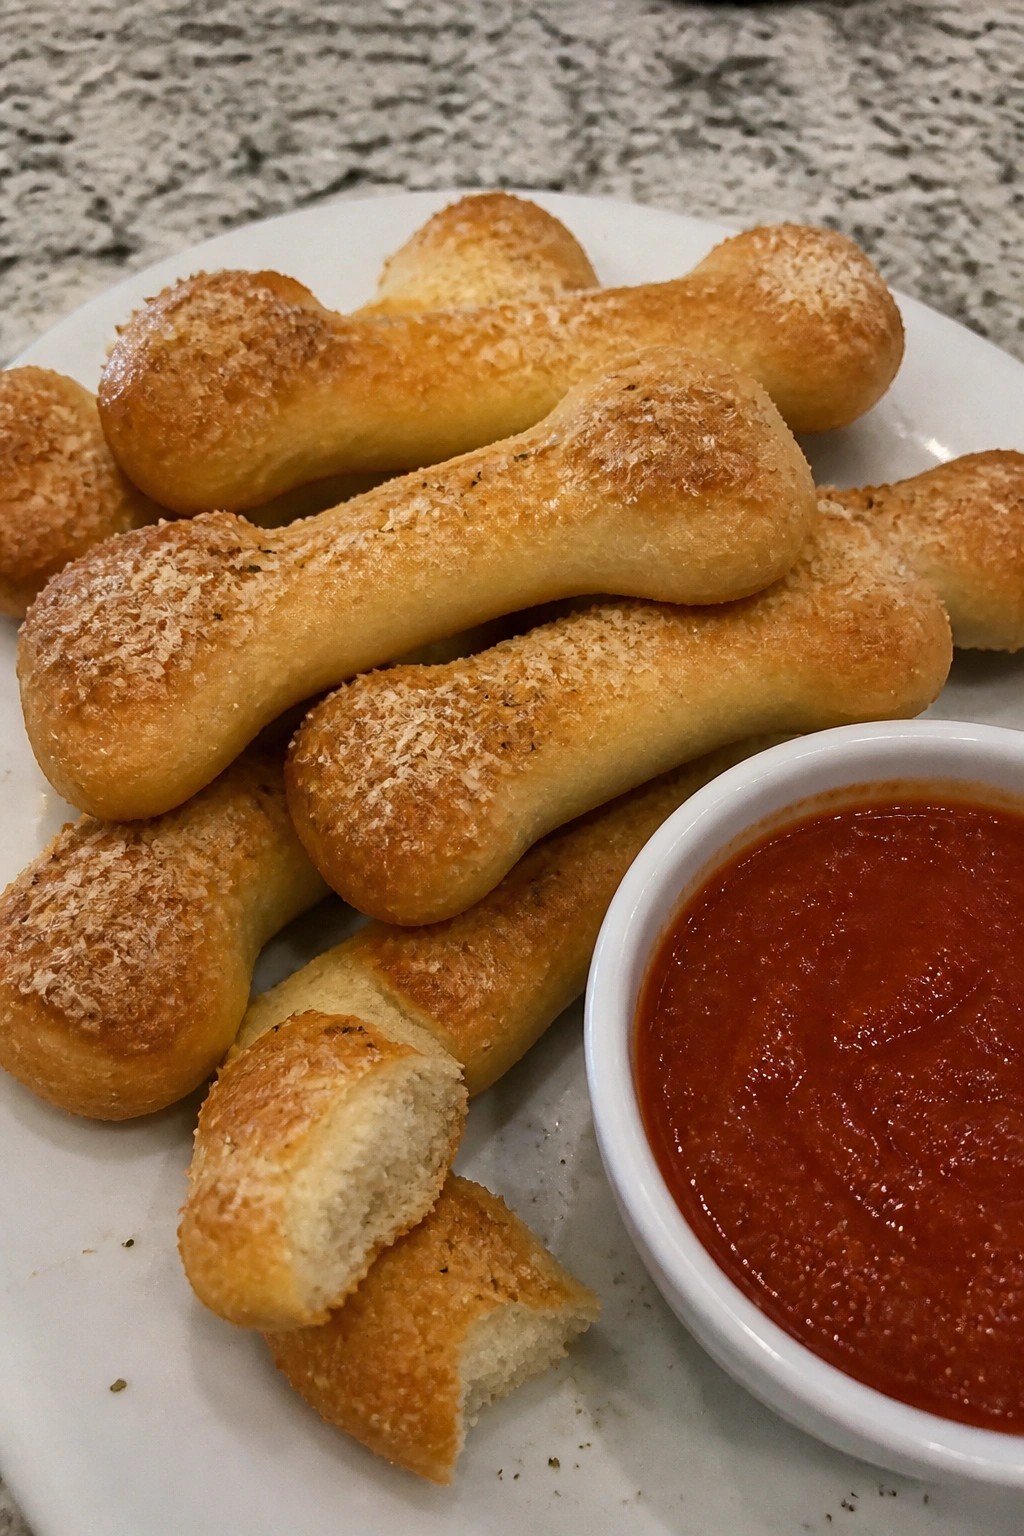
Serves 4 people.
Ingredients
- 1 pound pizza dough
- 2 tablespoons olive oil
- 1 teaspoon garlic powder
- 1/2 teaspoon salt
- 1/4 cup grated Parmesan cheese
- 1 cup marinara sauce
Instructions
- Preheat the oven to 400 degrees F and line a baking sheet with parchment paper.
- Divide the pizza dough into 8 equal pieces on a lightly floured surface.
- Roll each piece into a 6-inch rope, then tie a small knot at both ends to create a bone shape.
- Arrange the shaped pieces on the prepared baking sheet, spacing them apart.
- In a small bowl, stir together the olive oil, garlic powder, and salt.
- Brush the oil mixture evenly over each breadstick.
- Sprinkle the Parmesan cheese across the tops.
- Bake for 12 to 15 minutes until the breadsticks turn golden brown.
- Remove from the oven and let cool for a few minutes before serving with the marinara sauce on the side for dipping.
Extra Tips
Roll the dough ends slightly thicker than the middle so the bone shape holds after baking. Warm the marinara just before serving to keep the contrast with the warm breadsticks. Leftovers reheat well in a 350-degree oven for five minutes to restore crispness. Course: Appetizer Cuisine: Italian Equipment: Baking sheet, Parchment paper, Pastry brush, Small bowl
Frankenstein Avocado Toast Bites
These Frankenstein Avocado Toast Bites turn basic toast into a playful Halloween snack. Kids enjoy spreading the green avocado and adding olive faces to create their own monsters. The bites fit well on a party table because they are small, easy to pick up, and ready in minutes.
The finished bites have a creamy avocado layer over crisp toast with mild flavor that most children accept. The olives add a little salt without overpowering the dish, and the red pepper gives a subtle crunch.
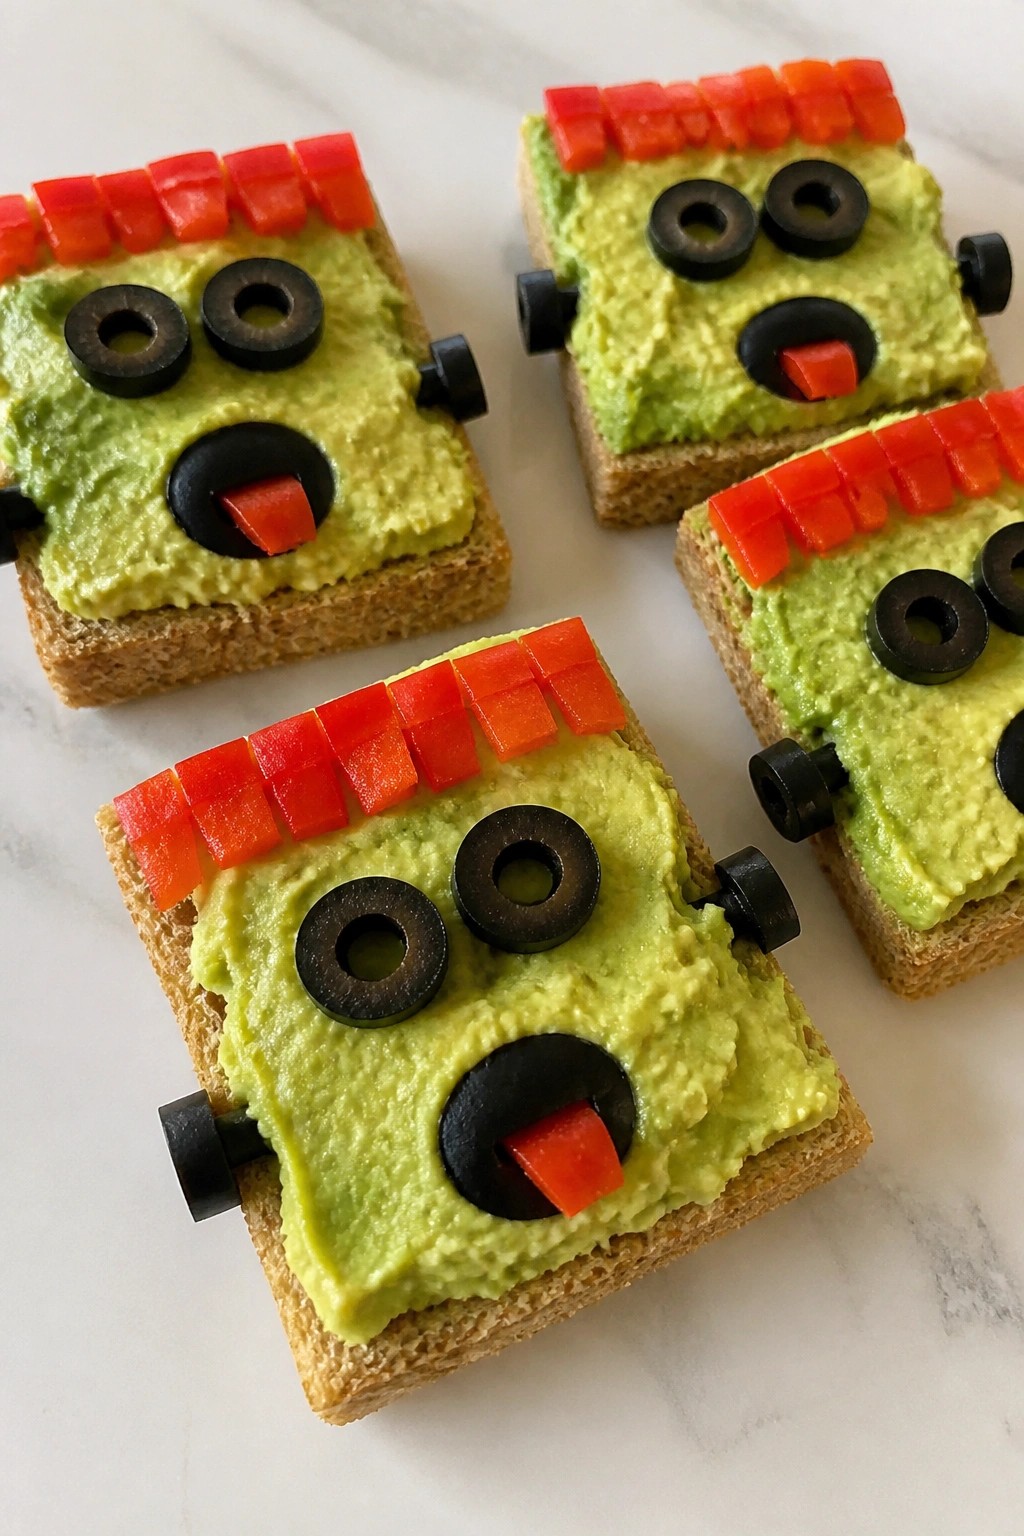
Serves 4 people.
Ingredients
- 4 slices whole wheat bread
- 2 ripe avocados
- 1 tablespoon fresh lime juice
- 1/4 teaspoon salt
- 8 pitted black olives
- 4 thin strips red bell pepper
Instructions
- Place the bread slices in a toaster and toast until lightly golden on both sides.
- Cut each toasted slice into two rectangles to create eight pieces total.
- Cut the avocados in half, remove the pits, and scoop the flesh into a mixing bowl.
- Add the lime juice and salt to the avocado, then mash with a fork until mostly smooth with a few small chunks remaining.
- Spread a generous layer of the mashed avocado over each toast rectangle.
- Slice four olives in half lengthwise to make eight eye pieces. Place two halves on each toast bite for eyes.
- Cut the remaining four olives into thin strips and arrange them across the top of each bite to look like hair.
- Lay one red bell pepper strip under the eyes on each bite to form a mouth.
Extra Tips
Use ripe avocados so the mash spreads smoothly without tearing the toast. If you prepare the avocado mixture ahead, press plastic wrap directly on the surface to keep it from browning. Serve the bites right after assembling so the toast stays crisp. Course: Snack Cuisine: American Equipment: Toaster, Mixing Bowl, Knife