


Planning for a Halloween potluck is easier when the recipes are simple to make and share. These ideas focus on dishes that hold up well at a gathering and use basic ingredients. You will find a mix of sweet and savory options that most people enjoy. Each recipe includes straightforward steps and tips for prep ahead of time.
Helpful Tips Before You Start
A little planning helps your dishes travel well and hold up at a crowded potluck table.
Pack in Sturdy Containers
Choose leakproof containers that stack easily in a car. Bring a tray or basket to carry multiple items at once without spills.
Prep Components Ahead
Make sauces, doughs, or fillings the day before. Assemble or reheat on site when possible to keep textures fresh.
Focus on Room Temperature Foods
Pick recipes that taste good without constant reheating or chilling. Dips, bars, and casseroles usually work better than delicate fried items.
Label Ingredients Clearly
List common allergens like nuts or dairy on a small card. Guests appreciate the info and it reduces questions during the event.
Spiderweb Seven-Layer Taco Dip with Tortilla Chips
This seven-layer taco dip gets a Halloween twist with a sour cream spiderweb piped right on top. It brings creamy, savory layers and a bit of crunch from the chips, making it an easy crowd-pleaser at any potluck spread.
The dip comes together quickly in one dish and travels well, so it works for parties where guests graze over several hours. The bold taco flavors stay balanced with cool sour cream and fresh toppings.

Serves 4 people.
Recommended Products

Ingredients
- 1 can (15 oz) refried beans
- 1 tablespoon taco seasoning
- 1 cup sour cream, divided
- 1 cup prepared guacamole
- 1 cup chunky salsa
- 1 cup shredded Mexican cheese blend
- 1/2 cup diced tomatoes
- 1/4 cup sliced black olives
- Tortilla chips, for serving
Instructions
- Stir the refried beans and taco seasoning together in a bowl until evenly mixed. Spread the mixture in an even layer across the bottom of an 8-inch square or round serving dish.
- Spread half the sour cream over the beans in a smooth layer. Reserve the remaining sour cream for the web.
- Spoon the guacamole over the sour cream layer and spread it gently to cover.
- Add the salsa as the next layer and spread it evenly.
- Sprinkle the shredded cheese over the salsa.
- Scatter the diced tomatoes across the cheese.
- Arrange the sliced black olives over the tomatoes.
- Spoon the reserved sour cream into a small zip-top bag, snip off one corner, and pipe concentric circles on top of the dip. Drag a toothpick from the center outward in several lines to form a spiderweb pattern. Place two olive slices together near the edge to form a simple spider shape.
Extra Tips
Pipe the sour cream web just before serving so it stays bright white against the other layers. If you need to make the dip ahead, prepare and refrigerate the base layers, then add the web and spider right before guests arrive. Use a sturdy, thicker salsa so the layers stay distinct when scooped. Course: Appetizer Cuisine: Mexican Equipment: Mixing bowl, 8-inch serving dish, zip-top bag, spoon
Slow Cooker Pumpkin Beef Chili with Cornbread
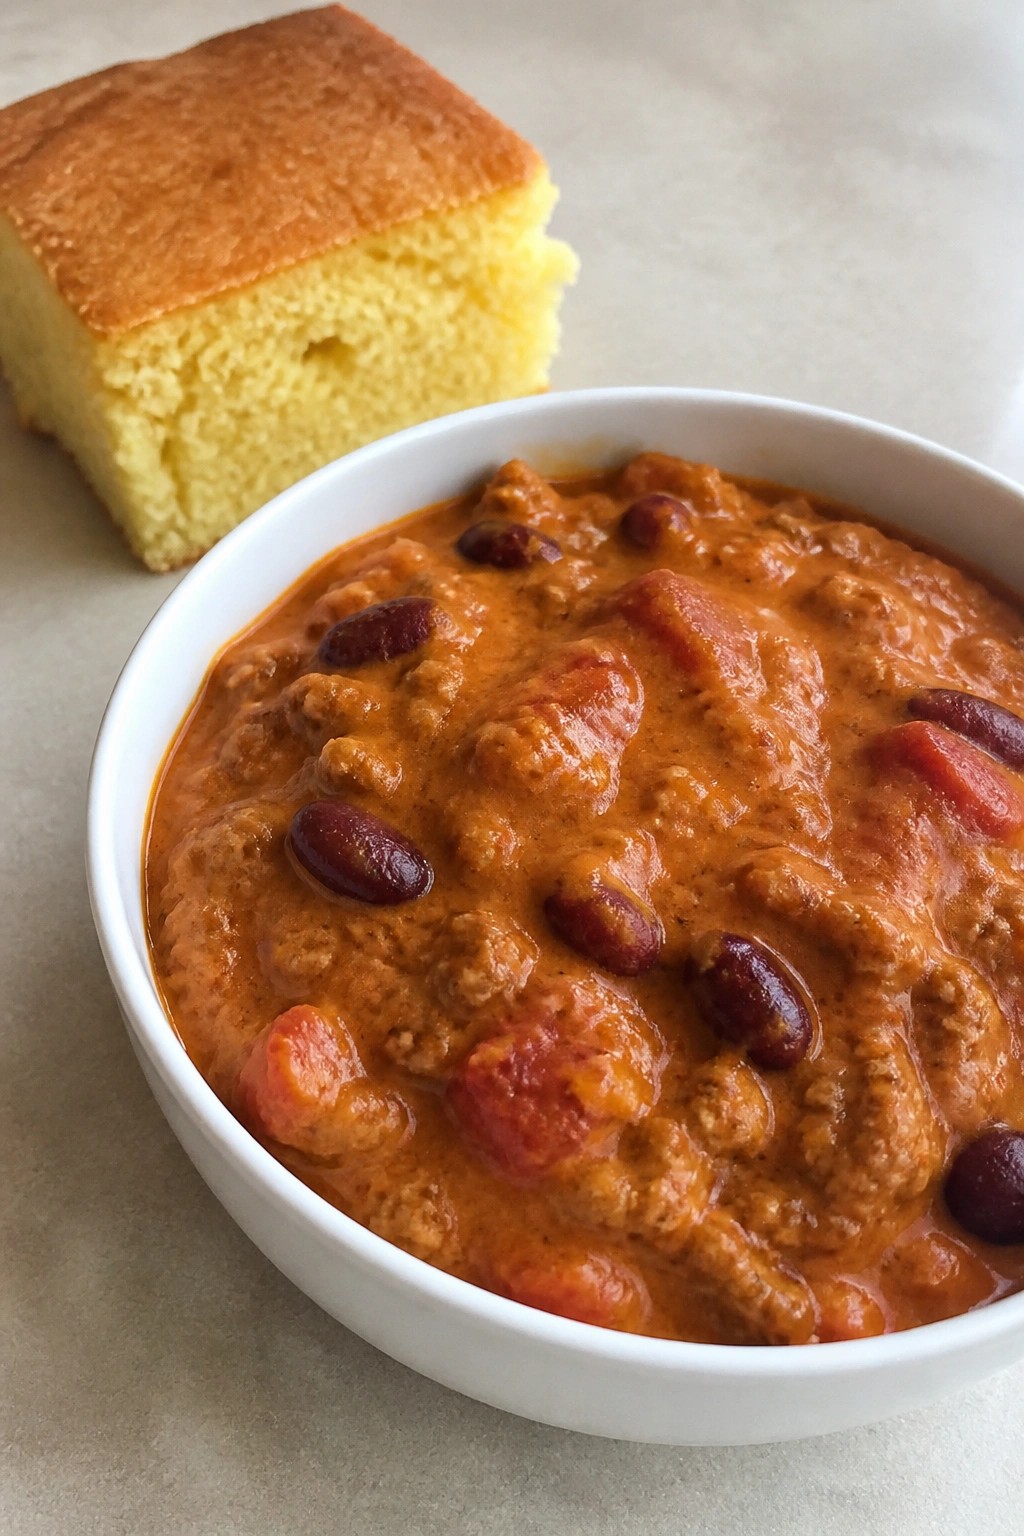
This slow cooker chili turns pumpkin into a creamy base that pairs with beef for a hearty dish. It travels well to potlucks and holds up during long events. The cornbread adds a sweet, crumbly contrast that rounds out each bowl.
The flavors stay mild enough for most crowds while the pumpkin keeps the texture thick and smooth. Serve it straight from the slow cooker with warm cornbread on the side.
Serves 4 people.
Recommended Products


Ingredients
- 1 lb ground beef
- 1 medium onion, diced
- 2 cloves garlic, minced
- 1 can (15 oz) pumpkin puree
- 1 can (14.5 oz) diced tomatoes
- 1 can (15 oz) kidney beans, drained and rinsed
- 2 tbsp chili powder
- 1 tsp ground cumin
- 1 tsp salt
- 1/2 tsp black pepper
- 1 cup cornmeal
- 1 cup all-purpose flour
- 1 tbsp baking powder
- 2 tbsp sugar
- 1 cup milk
- 1 egg
- 1/4 cup butter, melted
Instructions
- Brown the ground beef in a skillet over medium heat. Add the diced onion and minced garlic and cook until the onion softens.
- Transfer the beef mixture to the slow cooker. Stir in the pumpkin puree, diced tomatoes, kidney beans, chili powder, cumin, salt, and black pepper.
- Cover and cook on low for 6 hours or high for 3 hours.
- While the chili cooks, heat the oven to 400 degrees. In a mixing bowl, combine the cornmeal, flour, baking powder, and sugar.
- In a separate bowl, whisk the milk, egg, and melted butter. Pour the wet ingredients into the dry ingredients and stir until just combined.
- Pour the cornbread batter into a greased 8-inch square baking dish. Bake for 20 minutes until the top turns golden.
- Let the cornbread cool slightly, then cut into squares and serve alongside the chili.
Extra Tips
Stir the chili once halfway through cooking to keep the pumpkin evenly distributed. The cornbread tastes best warm, so bake it close to serving time or wrap slices in foil to reheat. Leftovers store in the fridge for three days and the chili thickens more as it sits, so add a splash of water when reheating. Course: Main Course Cuisine: American Equipment: Slow Cooker, Large Skillet, Mixing Bowl, Baking Dish
Cheesy Pull-Apart Mummy Garlic Bread
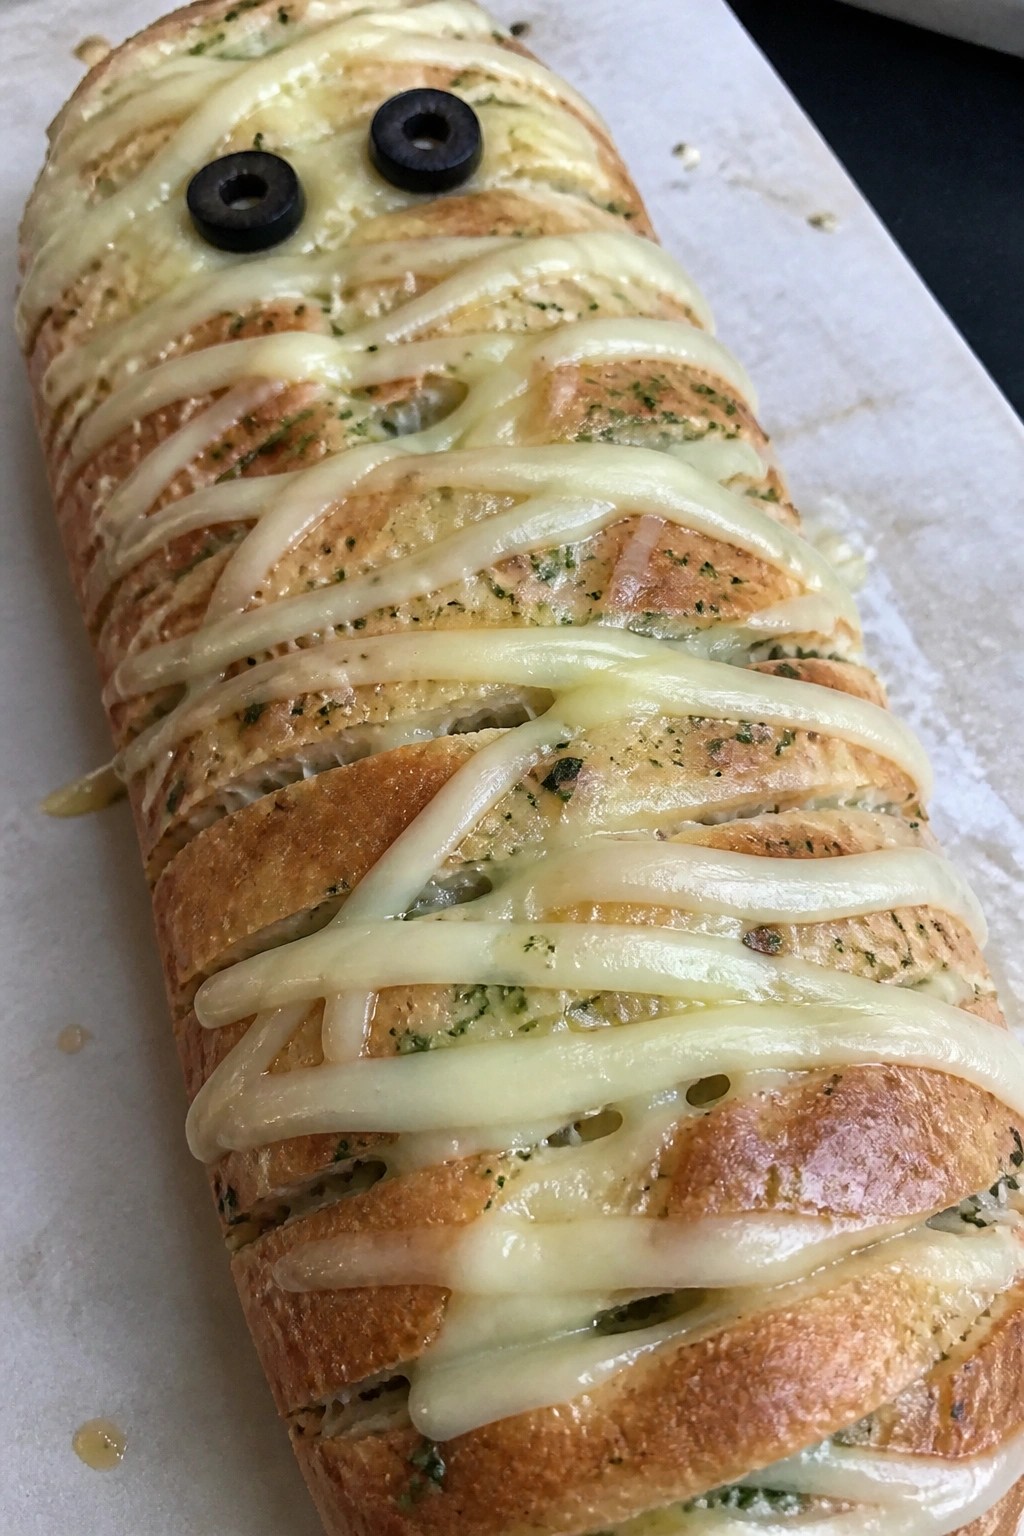
This cheesy pull-apart bread brings garlic flavor and gooey mozzarella to any Halloween potluck. The top gets arranged with cheese strips to look like mummy bandages, making it a fun centerpiece that still works as easy finger food.
It stays practical because the bread bakes in one pan and pulls apart cleanly for sharing. The garlic butter soaks into the loaf while the cheese melts into stretchy layers.
Serves 4 people.
Ingredients
- 1 large baguette
- 4 tablespoons butter, softened
- 3 cloves garlic, minced
- 1 tablespoon chopped fresh parsley
- 2 cups shredded mozzarella cheese
- 2 black olives
Instructions
- Preheat the oven to 375 degrees F and line a baking sheet with parchment paper.
- Use a serrated knife to cut the baguette into a grid pattern, slicing almost to the bottom but leaving the base intact so it holds together.
- Stir the softened butter, minced garlic, and parsley in a small bowl until combined.
- Spread the garlic butter into the cuts of the bread, making sure it reaches all the way down.
- Tuck about half the mozzarella into the cuts so the cheese melts inside the loaf.
- Lay the remaining mozzarella in thin strips across the top of the bread to create a mummy bandage pattern.
- Place the loaf on the baking sheet and bake for 15 minutes until the cheese is melted and lightly golden.
- Remove from the oven and press the two black olives into the top to form eyes.
Extra Tips
Slice the olives into thin rounds before placing them so they sit flat as eyes. If you want more garlic flavor, add an extra clove to the butter mix. Leftovers reheat best in a 350-degree oven for five minutes to restore the crisp edges. Course: Appetizer Cuisine: American Equipment: Baking sheet, Mixing bowl, Serrated knife
Graveyard Layered Taco Salad in a Baking Dish
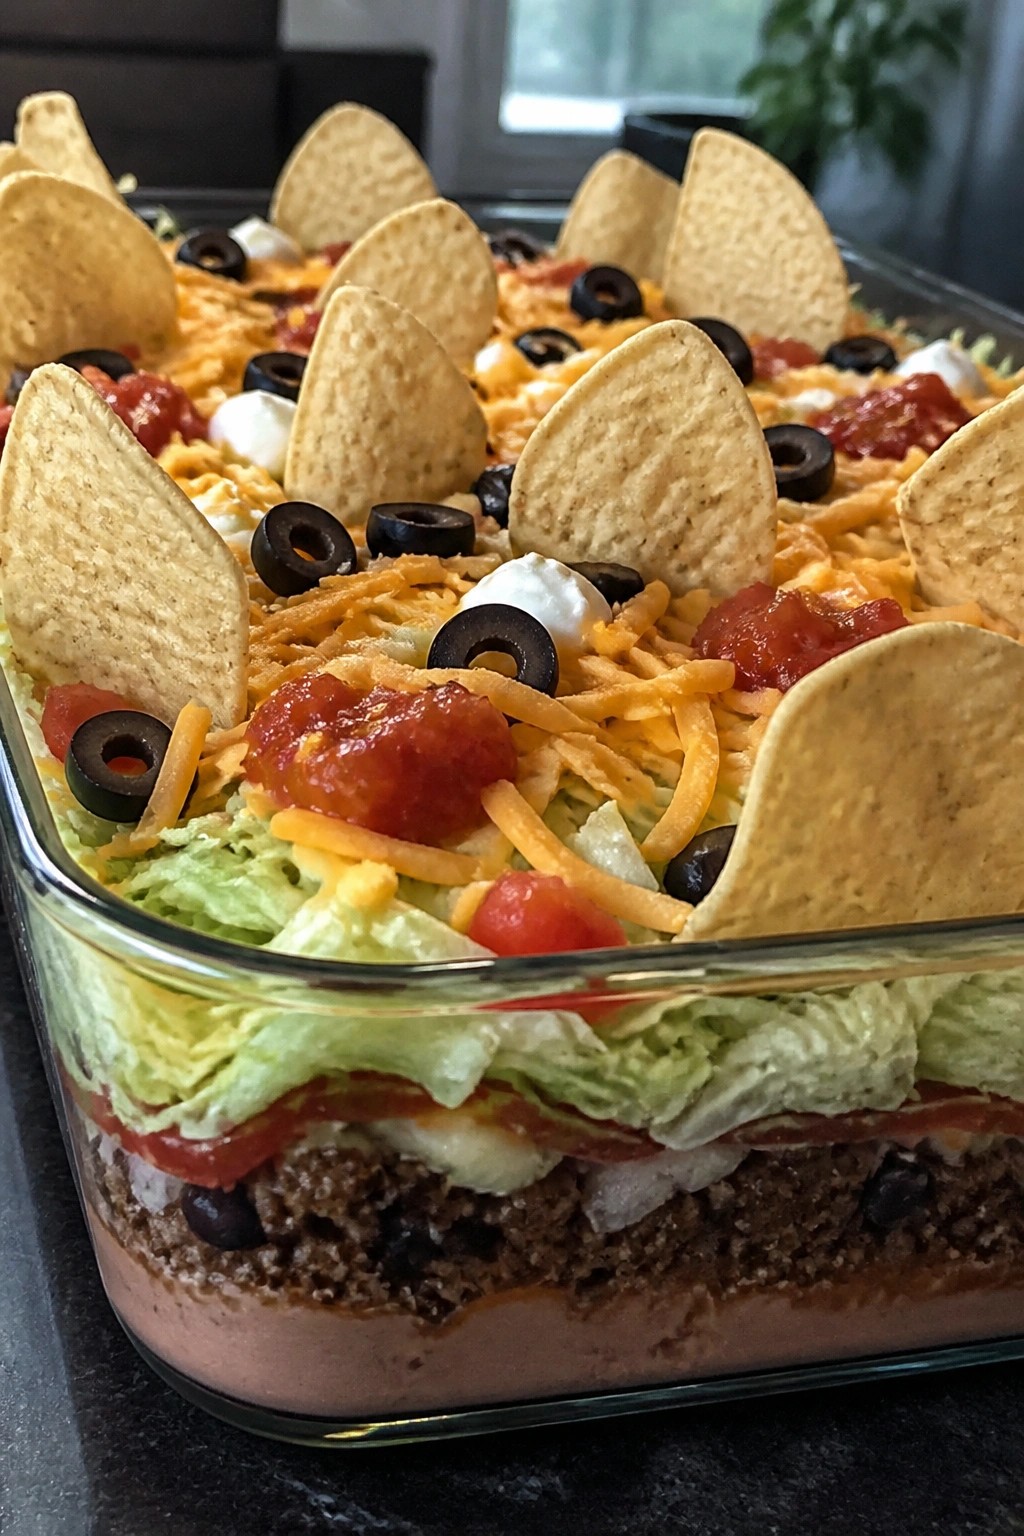
This layered taco salad brings a spooky touch to any Halloween potluck. Built in a baking dish, it shows off clear layers of seasoned meat, beans, and fresh toppings, with tortilla chips arranged like tombstones on top. The result gives guests a familiar taco flavor in a format that travels well and serves a small group.
The dish combines warm, savory elements with cool, crisp vegetables and creamy toppings. It works best when made shortly before serving so the chips stay crunchy.
Serves 4 people.
Ingredients
- 1 pound ground beef
- 1 packet taco seasoning
- 1 can (15 oz) black beans, drained and rinsed
- 4 cups shredded iceberg lettuce
- 2 medium tomatoes, diced
- 2 cups shredded cheddar cheese
- 1 cup sour cream
- 1 cup salsa
- 2 cups tortilla chips
- 1/2 cup sliced black olives
Instructions
- Cook the ground beef in a large skillet over medium heat until browned. Drain any excess fat, then stir in the taco seasoning and 1/4 cup water. Simmer for 3 minutes until thickened.
- Spread the seasoned beef evenly across the bottom of a 9×13-inch baking dish.
- Scatter the black beans over the beef layer.
- Add the shredded lettuce in an even layer on top of the beans.
- Sprinkle the diced tomatoes over the lettuce.
- Cover the tomatoes with the shredded cheddar cheese.
- Dollop the sour cream across the cheese layer and gently spread it thin.
- Spoon the salsa over the sour cream.
- Crush half the tortilla chips and sprinkle them over the salsa to resemble soil. Stand the remaining whole tortilla chips upright in the top layer to form tombstones. Scatter the black olives around the chips.
Extra Tips
Press the whole tortilla chips into the salad just before serving so they remain upright and crisp. If you need to prepare part of the dish ahead, assemble everything except the chips and add those right before guests arrive. Leftovers keep in the refrigerator for one day, though the chips will soften. Course: Salad Cuisine: Mexican Equipment: Large skillet, 9×13-inch baking dish
Baked Sausage Mummy Rolls with Marinara
These sausage rolls wrapped in strips of dough make a fun addition to any Halloween potluck spread. The flaky crust and juicy sausage pair well with warm marinara for dipping, and the simple mummy shape comes together quickly with store-bought dough.
They work best as a handheld appetizer that travels easily and holds up on a buffet table. The finished rolls have a crisp exterior and savory filling that appeals to both kids and adults.

Serves 4 people.
Ingredients
- 8 fully cooked link sausages
- 1 can (8 oz) refrigerated crescent roll dough
- 16 slices black olives
- 1 cup marinara sauce
Instructions
- Preheat the oven to 375°F and line a baking sheet with parchment paper.
- Unroll the crescent dough on a lightly floured surface and press the seams together to form a rectangle. Cut the dough into thin strips about 1/2 inch wide.
- Wrap the dough strips around each sausage, leaving small gaps near the top for the face. Place the wrapped sausages on the prepared baking sheet.
- Press two olive slices onto each sausage to create eyes. Bake for 12 to 15 minutes until the dough is golden brown.
- Warm the marinara sauce in a small saucepan or microwave. Serve the mummy rolls warm with the sauce on the side for dipping.
Extra Tips
If the dough starts to stick while wrapping, chill it for a few minutes. You can assemble the rolls a few hours ahead and keep them covered in the fridge before baking. Leftovers reheat well in a 350°F oven for 5 minutes to restore crispness. Use mild Italian sausages if you want extra flavor without changing the overall look. Course: Appetizer Cuisine: American Equipment: Baking sheet, Knife, Small saucepan
Caramel Apple Crumble Bars with Whipped Cream
These caramel apple crumble bars combine tender spiced apples with a buttery oat topping and a drizzle of caramel. They travel well to a Halloween potluck and give guests a familiar fall dessert in easy square portions.
The texture balances a crisp crumble with soft fruit, while the whipped cream adds a light finish that keeps each bite from feeling too heavy.

Serves 4 people.
Ingredients
- 4 medium apples, cored and thinly sliced
- 1/2 cup caramel sauce
- 1 cup all-purpose flour
- 1/2 cup rolled oats
- 1/2 cup packed brown sugar
- 6 tablespoons unsalted butter, melted
- 1 teaspoon ground cinnamon
- 1 cup heavy whipping cream
- 2 tablespoons powdered sugar
- 1/2 teaspoon vanilla extract
Instructions
- Preheat the oven to 350°F. Lightly grease an 8×8 baking pan.
- In a mixing bowl, stir together the flour, oats, brown sugar, cinnamon, and melted butter until the mixture forms moist crumbs.
- Press half of the crumble mixture evenly into the bottom of the prepared pan.
- Layer the apple slices over the base and drizzle the caramel sauce evenly across the apples.
- Sprinkle the remaining crumble mixture over the apples.
- Bake for 30 to 35 minutes, until the topping turns golden brown. Remove from the oven and let the bars cool completely in the pan before cutting.
- In a clean mixing bowl, combine the heavy whipping cream, powdered sugar, and vanilla extract. Beat until soft peaks form.
- Serve the bars with a dollop of the whipped cream on top.
Extra Tips
Cool the bars fully before slicing so the crumble holds its shape during transport. If you prepare the bars a day ahead, store them covered at room temperature and whip the cream right before serving so it stays light. A light extra drizzle of caramel on each plate works if you have a little left over from the measured amount. Course: Dessert Cuisine: American Equipment: Mixing Bowl, 8×8 Baking Pan, Hand Mixer
Monster Meatball Skewers with BBQ Glaze
These skewers turn classic meatballs into a fun finger food that travels well to any potluck. The BBQ glaze adds a sticky sweet and smoky finish while the meatballs stay juicy inside. They work great as a shared starter or main bite at a Halloween gathering.
The monster look comes from simple olive accents that give each meatball a playful face without extra work. Guests can grab a skewer and enjoy the mix of tender meat and thick glaze in one bite.

Serves 4 people.
Ingredients
- 1 pound ground beef
- 1/2 cup panko breadcrumbs
- 1 large egg
- 2 cloves garlic, minced
- 1 teaspoon onion powder
- 1/2 teaspoon salt
- 1/4 teaspoon black pepper
- 1 cup barbecue sauce
- 1/4 cup sliced black olives
- 8 wooden skewers
Instructions
- Preheat the oven to 400 degrees F and line a baking sheet with parchment paper.
- In a large mixing bowl, combine the ground beef, panko breadcrumbs, egg, minced garlic, onion powder, salt, and black pepper. Mix with your hands until just combined.
- Divide the mixture into 16 equal portions and roll each into a ball. Thread two meatballs onto each wooden skewer, leaving a small space between them.
- Place the skewers on the prepared baking sheet. Bake for 15 minutes.
- Remove the baking sheet from the oven and brush each meatball generously with barbecue sauce. Return to the oven for 8 more minutes.
- Take the skewers out and let them rest for 3 minutes. Press two sliced black olives onto each meatball to create eyes.
Extra Tips
Brush on a second light coat of barbecue sauce right before serving if you want extra stickiness. The olives stay in place best once the meatballs have cooled slightly after baking. Leftovers reheat well in a 350 degree oven for 8 minutes to keep the glaze from burning. Course: Appetizer Cuisine: American Equipment: Large mixing bowl, Baking sheet, Wooden skewers, Pastry brush
Creamy Spinach Artichoke Dip Bread Bowl
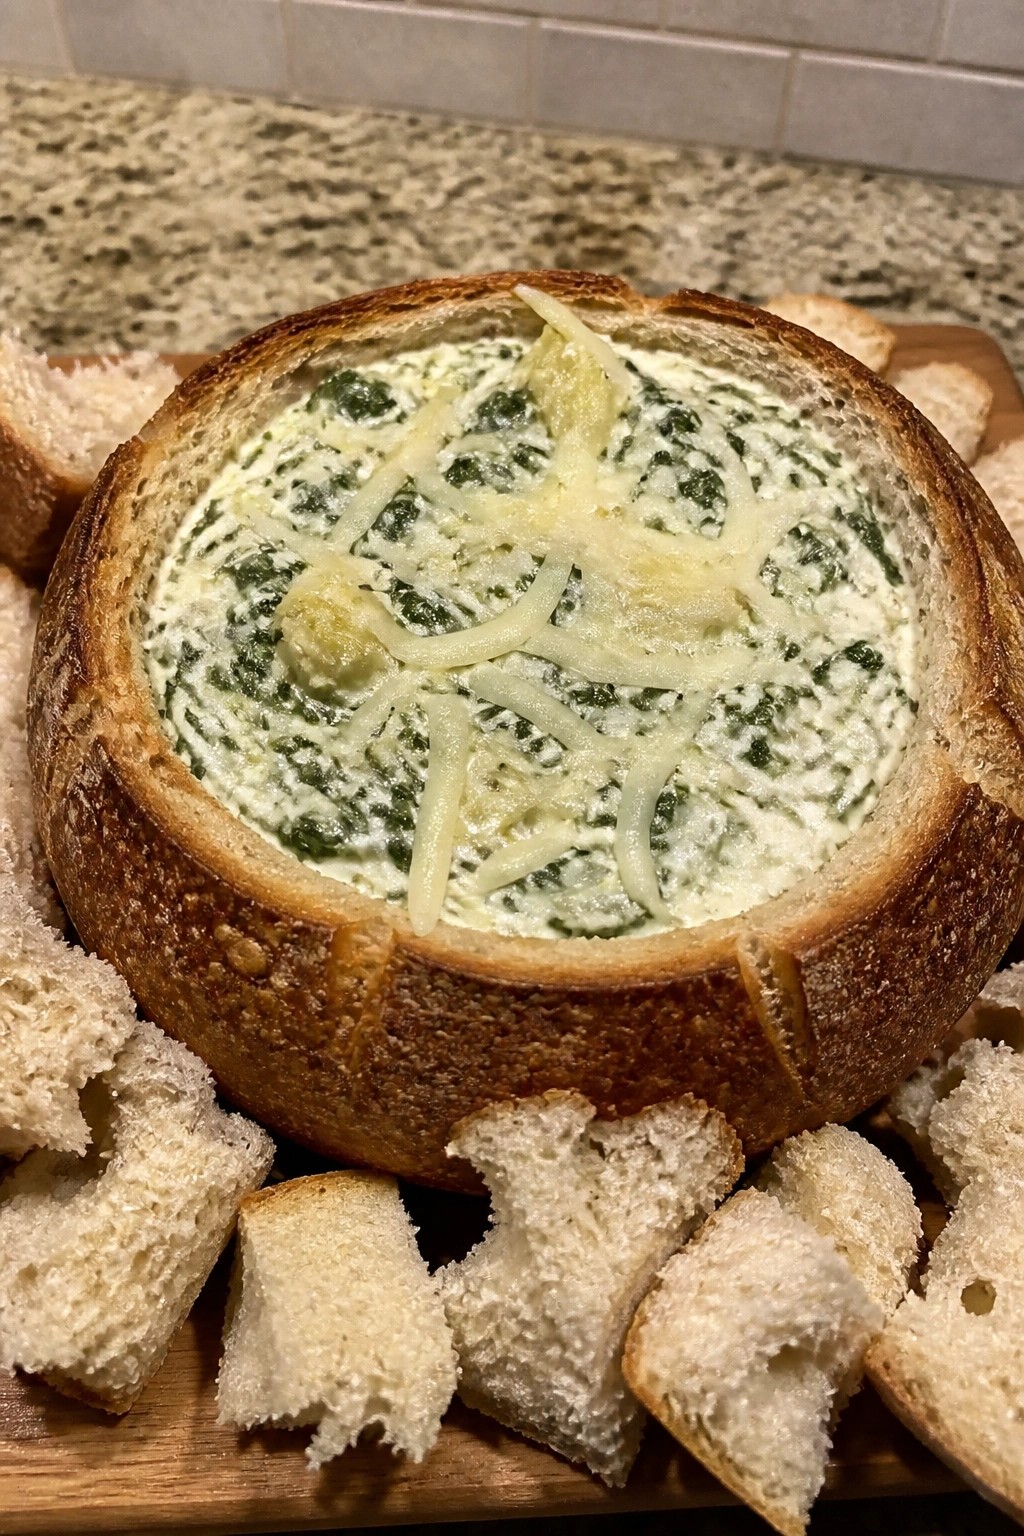
This bread bowl turns a classic spinach artichoke dip into a shareable potluck dish. The hollowed loaf holds a warm, creamy filling while the bread pieces around it become dippers. It travels well to gatherings and stays hot in the oven until guests arrive.
The texture stays thick and scoopable thanks to the cheeses and drained spinach. Artichokes add a mild tang that balances the richness. The result feels hearty without needing utensils.
Serves 4 people.
Ingredients
- 1 large round sourdough bread loaf
- 10 oz frozen chopped spinach, thawed and drained
- 14 oz can artichoke hearts, drained and chopped
- 8 oz cream cheese, softened
- 1/2 cup sour cream
- 1/2 cup grated Parmesan cheese
- 1 cup shredded mozzarella cheese
- 2 garlic cloves, minced
- 1/2 teaspoon salt
- 1/4 teaspoon black pepper
Instructions
- Preheat the oven to 375 degrees. Line a baking sheet with foil.
- Cut a circle around the top of the bread loaf and remove the lid. Hollow out the center, leaving a 1-inch shell. Cut the removed bread into bite-size pieces and set aside.
- In a mixing bowl, combine the cream cheese, sour cream, Parmesan, mozzarella, garlic, salt, and pepper. Stir until smooth.
- Add the drained spinach and chopped artichoke hearts to the bowl. Mix until evenly distributed.
- Spoon the filling into the hollowed bread loaf. Place the filled loaf on the baking sheet and surround it with the bread pieces.
- Bake for 20 to 25 minutes until the filling is hot and the cheese has melted. Serve the bread bowl with the toasted pieces for dipping.
Extra Tips
Use a firm sourdough loaf so the bowl holds its shape after baking. If the dip seems thick before baking, stir in one tablespoon of milk. Leftovers reheat best in a 350-degree oven for 10 minutes to restore creaminess without drying the bread. Course: Appetizer Cuisine: American Equipment: Mixing Bowl, Baking Sheet, Knife
Dirt Cup Dessert Parfaits with Gummy Worms
These parfaits bring a fun Halloween twist to any potluck table. The layers of chocolate pudding and crushed cookies create a look that resembles garden dirt, while the gummy worms add a playful touch that appeals to both kids and adults. They come together quickly and travel well in individual cups.
The texture combines creamy pudding with crunchy cookie bits and chewy candy. The flavor stays rich and chocolatey with just enough sweetness from the topping.
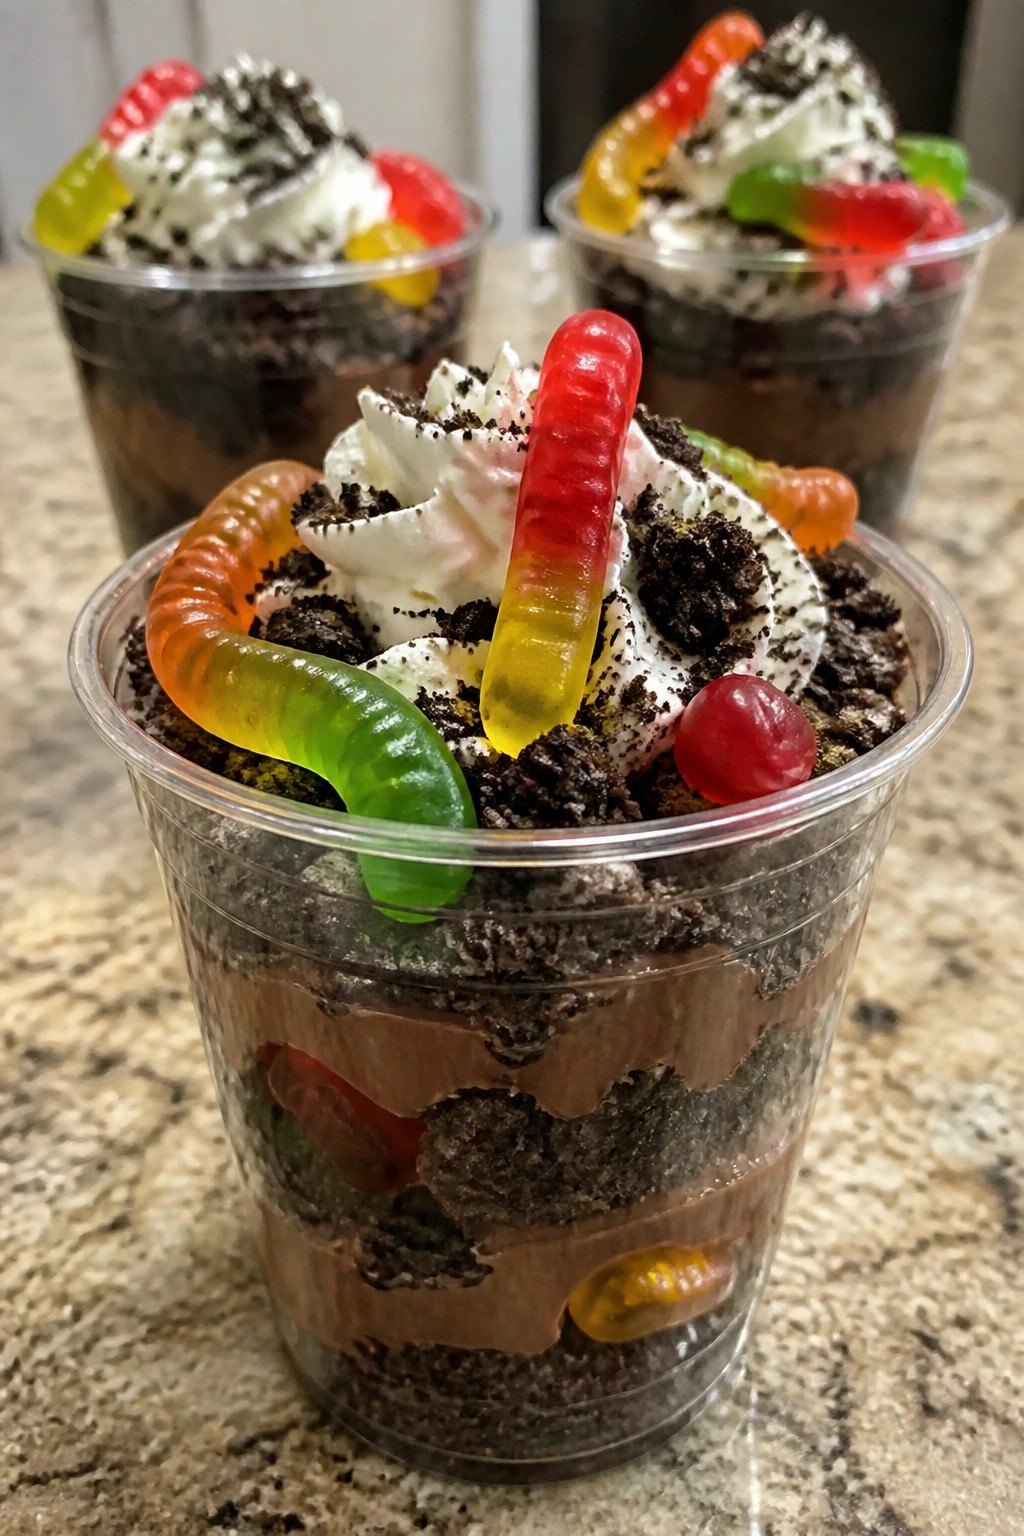
Serves 4 people.
Ingredients
- 1 (3.9-ounce) package instant chocolate pudding mix
- 2 cups cold milk
- 15 Oreo cookies
- 1 cup whipped topping
- 12 gummy worms
Instructions
- Pour the cold milk into a mixing bowl and add the instant chocolate pudding mix. Whisk for two minutes until the pudding thickens.
- Place the Oreo cookies in a zip-top bag and crush them with a rolling pin until they form coarse crumbs.
- Spoon a layer of pudding into the bottom of each of four small glasses or jars.
- Sprinkle a layer of crushed Oreo crumbs over the pudding in each glass.
- Repeat the layers once more with the remaining pudding and crumbs.
- Top each parfait with a dollop of whipped topping.
- Insert three gummy worms into the top of each parfait so they appear to crawl out of the crumbs.
Extra Tips
Make these parfaits the night before and keep them covered in the refrigerator so the cookie layers soften slightly without turning soggy. Use clear glasses to show off the dirt-like layers at the potluck. If you need a dairy-free version, swap the milk for almond milk and use a coconut whipped topping. Course: Dessert Cuisine: American Equipment: Mixing Bowl, Whisk, Rolling Pin, Glasses or Jars
Orange and Black Halloween Pasta Salad with Feta
This pasta salad stands out at a Halloween potluck with its bold orange and black colors from roasted squash and olives. It travels well and holds up at room temperature, making it a reliable choice for shared tables.
The dish combines tender pasta with sweet roasted squash, salty olives, and creamy feta. A simple herb dressing ties everything together without overpowering the main flavors.

Serves 4 people.
Ingredients
- 8 ounces farfalle pasta
- 2 cups peeled and cubed butternut squash
- 1 orange bell pepper, diced
- 1/2 cup sliced black olives
- 4 ounces feta cheese, crumbled
- 3 tablespoons olive oil
- 2 tablespoons balsamic vinegar
- 1/2 teaspoon dried oregano
- Salt and pepper to taste
Instructions
- Preheat the oven to 400°F. Toss the butternut squash cubes with 1 tablespoon of the olive oil and a pinch of salt and pepper. Spread them on a baking sheet and roast for 20 to 25 minutes until the edges turn golden and the squash is tender.
- While the squash roasts, bring a large pot of salted water to a boil. Cook the farfalle pasta according to the package directions until al dente. Drain the pasta and rinse it under cold water to cool.
- In a large mixing bowl, combine the cooled pasta, roasted squash, diced orange bell pepper, sliced black olives, and crumbled feta cheese.
- In a small bowl, whisk together the remaining 2 tablespoons olive oil, balsamic vinegar, dried oregano, and a pinch of salt and pepper. Pour the dressing over the pasta mixture and toss gently until everything is coated.
- Taste and adjust salt and pepper if needed. Serve the salad at room temperature or chilled.
Extra Tips
Roast the squash a day ahead and store it in the fridge so assembly takes only minutes on the day of the potluck. The balsamic dressing keeps the feta from drying out, but add it just before serving if you want the cheese to stay in larger crumbles. Course: Salad Cuisine: Mediterranean Equipment: Large pot, Baking sheet, Mixing bowl