

Planning a Halloween party often means needing snacks that are simple to prepare ahead of time.
Here are 14 snack ideas that work for different group sizes and tastes.
Each recipe uses basic ingredients and steps that fit into a busy schedule.
These options include both sweet and savory choices that tend to go over well with guests.
You can pick a few that match what you already have on hand.
Helpful Tips for Halloween Party Snacks
These tips will help you create snacks that are simple to prepare and easy for guests to enjoy.
Mix Sweet and Savory Options
Offer a balance so everyone finds something they like. This keeps the spread interesting without extra work.
Prep Ingredients Ahead
Chop veggies, measure dips, and assemble bases the day before. It cuts down on last-minute stress during the party.
Use Quick Decorations
Candy eyes, pretzel sticks, and colored cream cheese turn basic snacks into Halloween shapes fast. Keep a few supplies on hand for easy upgrades.
Choose Finger Foods
Skip anything that needs plates or forks. Small bites let guests mingle and grab more without slowing down the fun.
Label Each Item
Add simple name cards with spooky titles like Spider Bites. It helps guests spot options and adds to the theme.
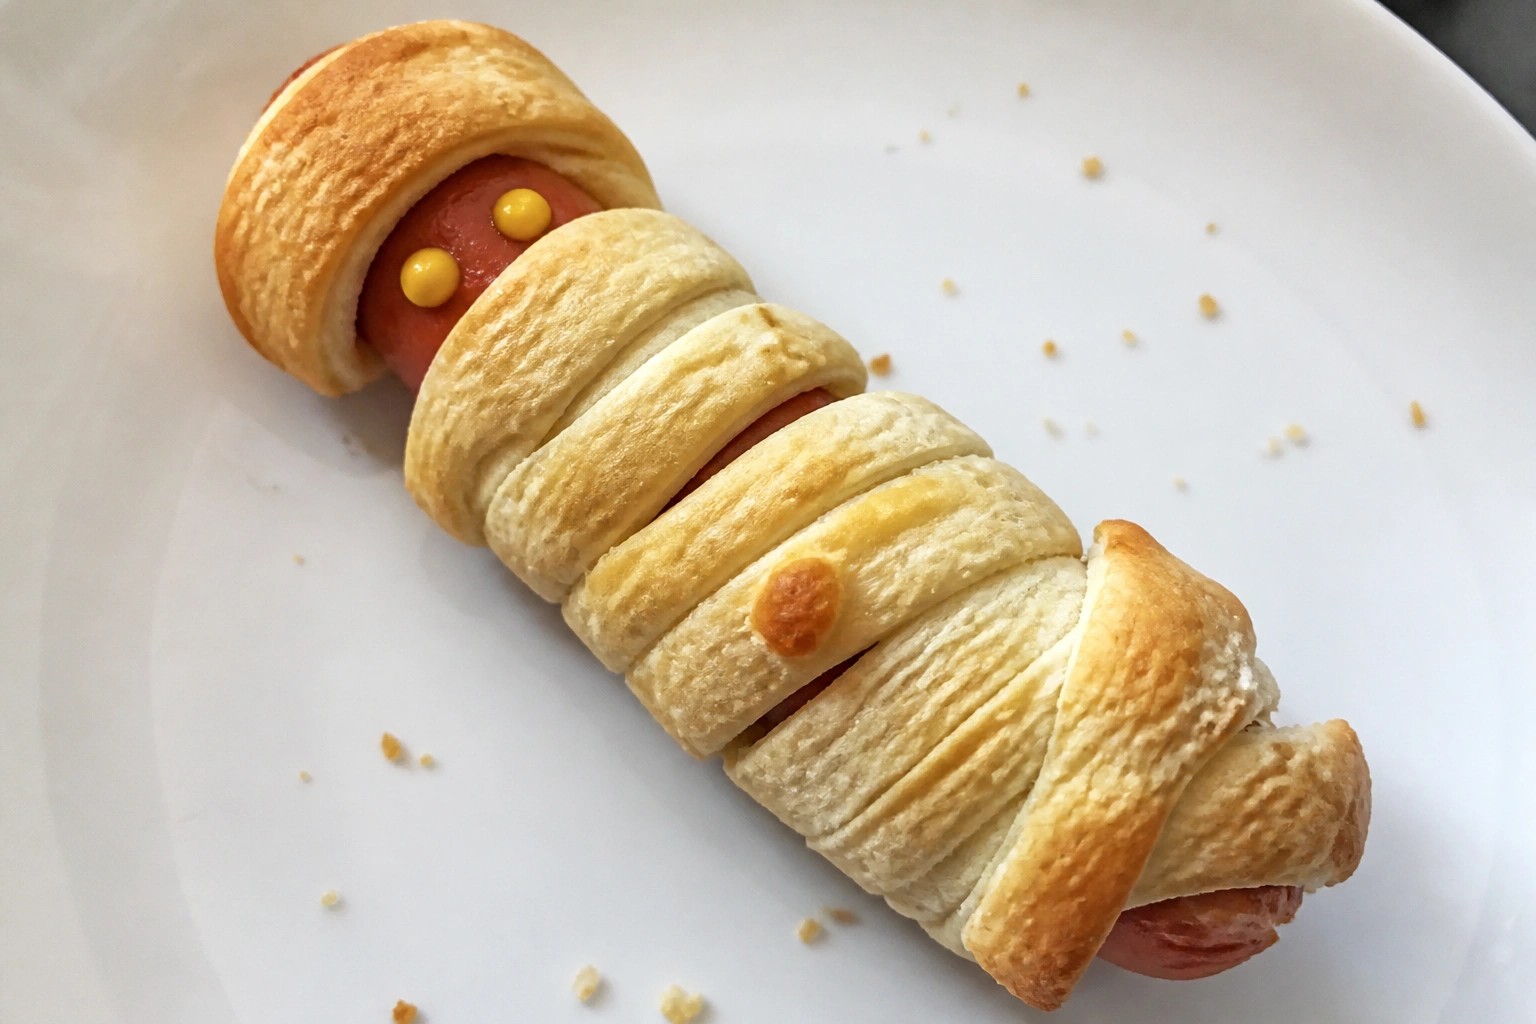
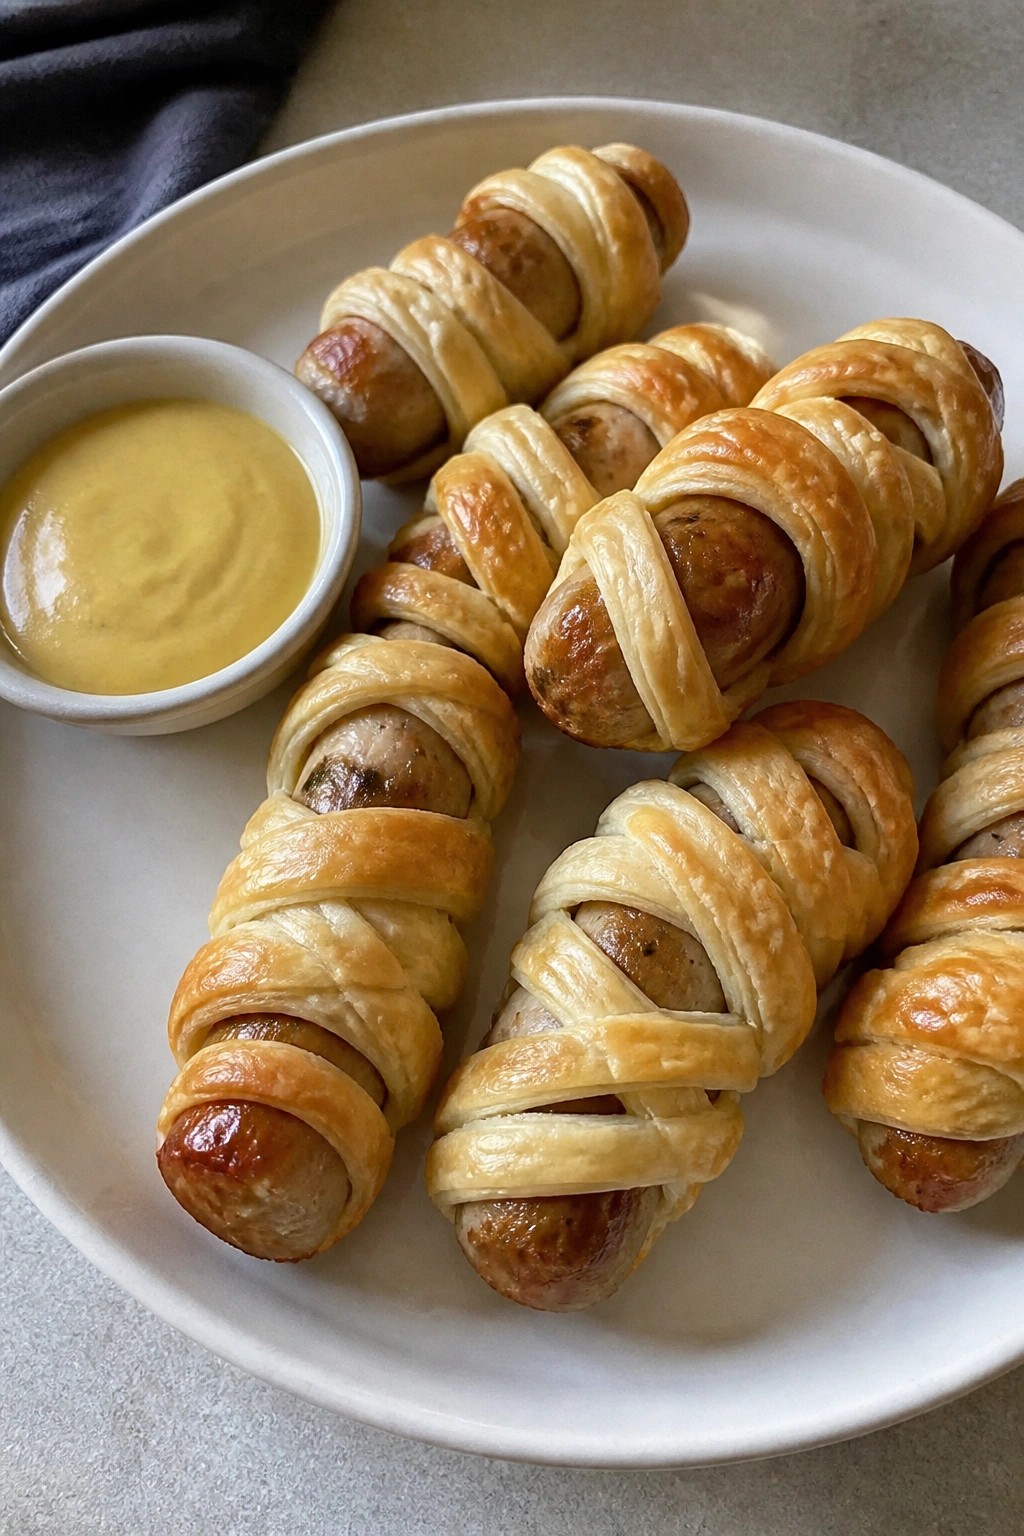
Mummy Sausage Rolls with Honey Mustard Dip
These mummy sausage rolls bring a playful touch to any Halloween spread. The pastry strips wrapped around the sausages create a bandage effect that fits right into a party table. Each bite gives flaky layers with savory sausage, and the honey mustard dip provides a sweet and tangy contrast that keeps guests reaching for more.
They work especially well as finger food at casual gatherings or kid-friendly events. The simple assembly makes them easy to prepare ahead while still feeling special for the occasion.
Serves 4 people.
Ingredients
- 8 pork sausages
- 1 sheet ready-rolled puff pastry (about 320g)
- 1 large egg, beaten
- 3 tablespoons honey
- 2 tablespoons Dijon mustard
- 1 tablespoon mayonnaise
Instructions
- Preheat the oven to 200°C (400°F) and line a baking sheet with parchment paper.
- Unroll the puff pastry sheet on a lightly floured surface. Cut it into thin strips about 1 cm wide.
- Place each sausage on the baking sheet. Wrap the pastry strips around each sausage in a crisscross pattern, leaving small gaps to resemble bandages.
- Brush the wrapped sausages lightly with the beaten egg.
- Bake for 20 to 25 minutes until the pastry is golden and the sausages are cooked through.
- While the rolls bake, mix the honey, Dijon mustard, and mayonnaise in a small bowl to make the dip.
- Remove the rolls from the oven and let them cool for a few minutes before serving with the dip on the side.
Extra Tips
Assemble the rolls the night before and keep them covered in the fridge so they are ready to bake when guests arrive. If the pastry feels too firm to cut into strips, let it sit at room temperature for five minutes. The dip can be made thicker by adding an extra spoonful of mayonnaise if you prefer a creamier texture for dipping. Course: Appetizer Cuisine: British Equipment: Baking sheet, Oven, Mixing bowl
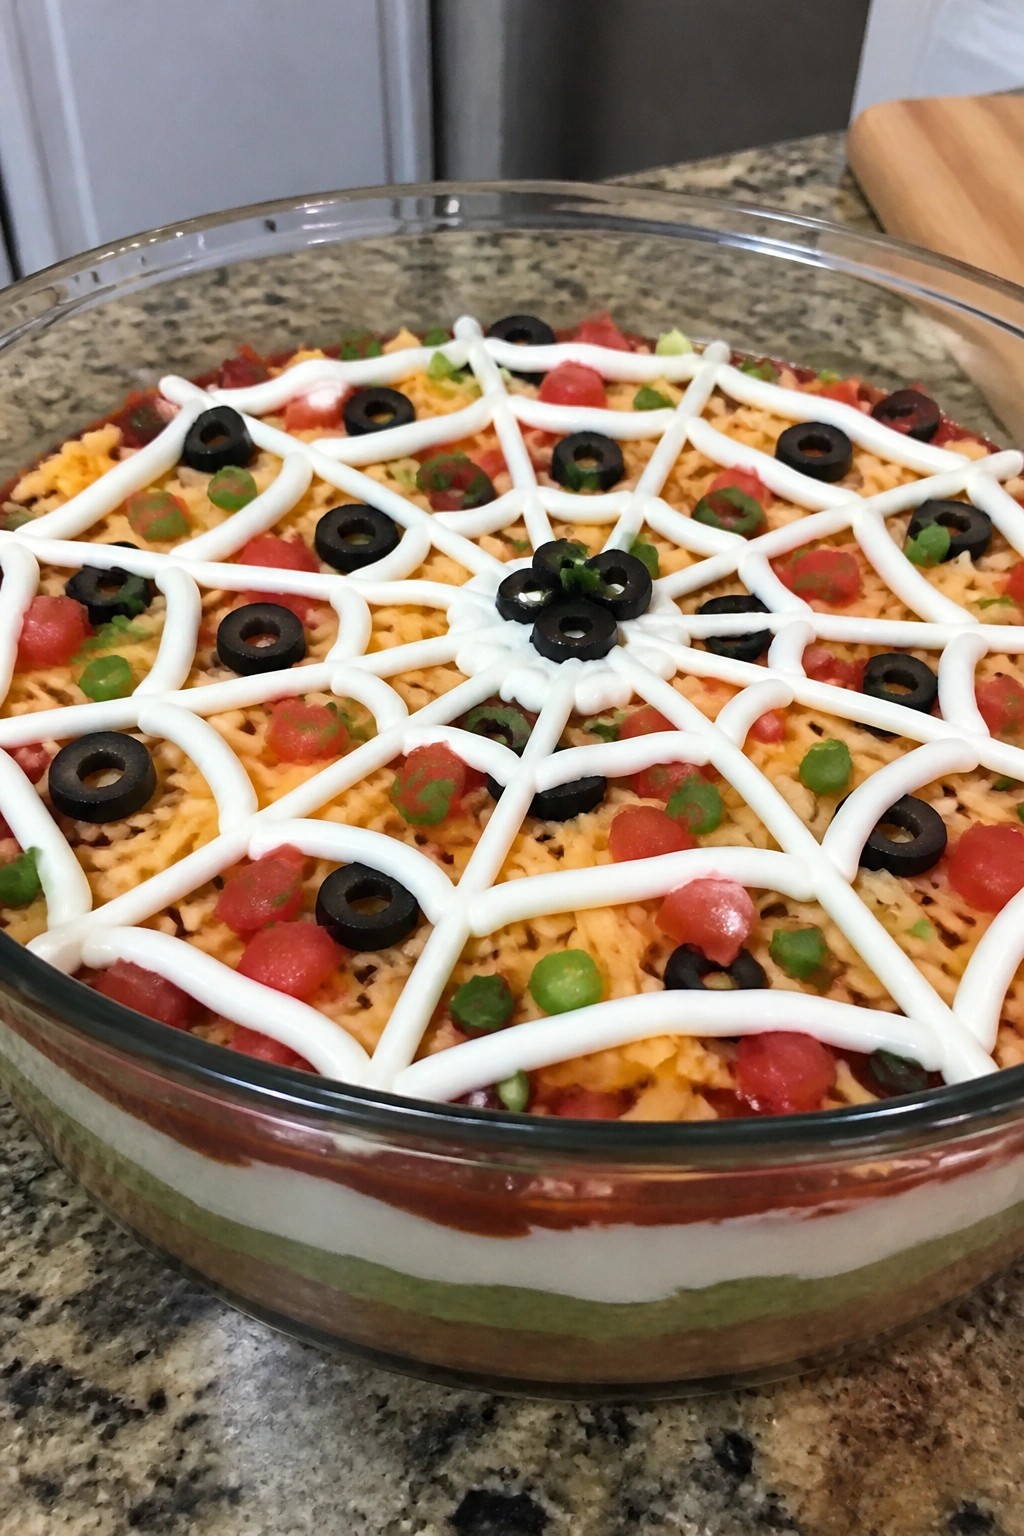
Spiderweb Seven-Layer Taco Dip
This seven-layer taco dip gets a Halloween twist with a sour cream spiderweb piped right on top. It brings creamy, savory layers that hold up well at parties and pair easily with tortilla chips. The mix of beans, guacamole, and seasoned sour cream gives it a familiar taco flavor with a fun visual that stands out on a snack table.
It works best for small gatherings where guests can scoop straight from the dish. The texture stays thick enough to hold the layers without turning runny, and the black olives add a nice contrast against the white web design.
Serves 4 people.
Ingredients
- 1 (15-ounce) can refried beans
- 1 cup guacamole
- 1 cup sour cream, divided
- 1 tablespoon taco seasoning
- 1/2 cup salsa
- 1 cup shredded Mexican cheese blend
- 1/2 cup diced tomatoes
- 1/4 cup sliced black olives
- 2 green onions, sliced
Instructions
- Spread the refried beans evenly across the bottom of a shallow serving dish to create the first layer.
- Mix 3/4 cup of the sour cream with the taco seasoning in a small bowl until smooth, then spread it over the beans as the second layer.
- Spoon the guacamole over the sour cream mixture and spread it gently into an even layer.
- Add the salsa as the next layer, spreading it carefully so it does not mix into the guacamole.
- Sprinkle the shredded cheese evenly over the salsa.
- Scatter the diced tomatoes across the cheese layer.
- Top with the remaining 1/4 cup sour cream. Place the rest in a small zip-top bag, snip off one corner, and pipe concentric circles. Drag a toothpick from the center outward to form the spiderweb design.
- Finish with the black olives and green onions scattered around the edges.
Extra Tips
Pipe the sour cream web just before serving so the lines stay sharp. If you make the dip ahead, keep the top sour cream layer covered tightly and add the web right before guests arrive. Black olives work best for the web accents since they stand out without adding extra moisture. Course: Appetizer Cuisine: Mexican Equipment: Shallow serving dish, Mixing bowl, Small zip-top bag
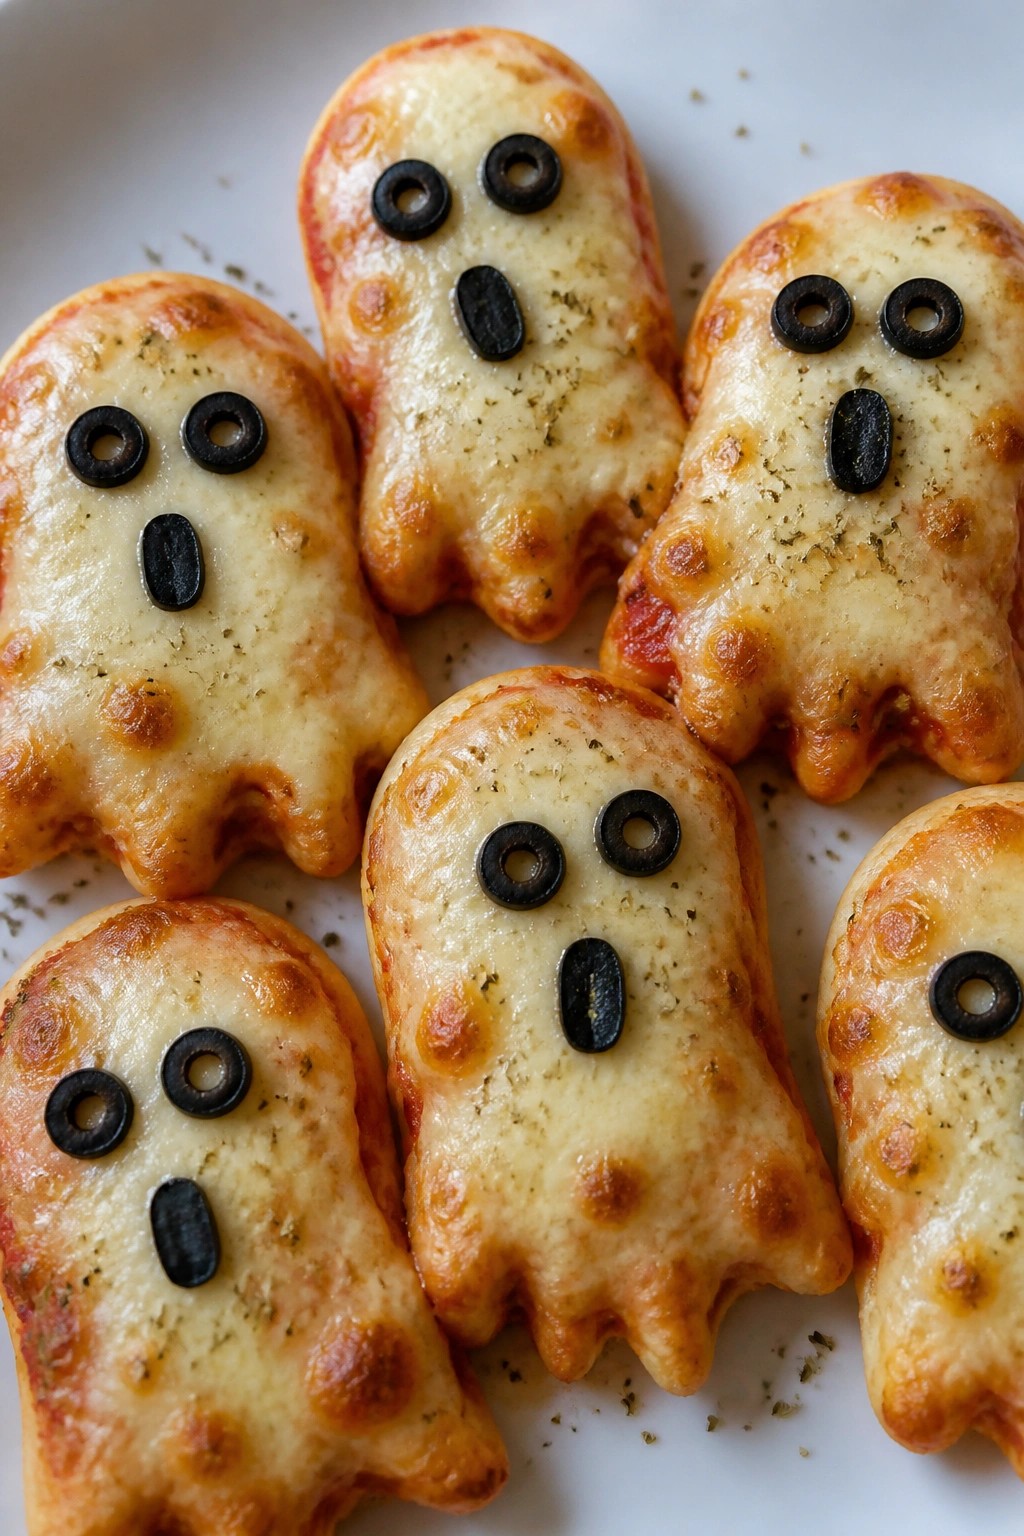
Ghost-Shaped Cheesy Pizza Bites
These Ghost-Shaped Cheesy Pizza Bites turn regular pizza dough into a simple Halloween snack. They fit well at parties because the shapes stand out on a platter without extra effort. The finished bites have a crisp edge and a layer of melted cheese that stays gooey for a few minutes after baking.
The marinara and mozzarella give each piece familiar pizza taste, while the olive details add just enough contrast. They pair easily with other finger foods and do not require plates or utensils.
Serves 4 people.
Ingredients
- 1 (13.8 oz) can refrigerated pizza dough
- 1 cup shredded mozzarella cheese
- 1/2 cup marinara sauce
- 2 tablespoons sliced black olives
- 1 tablespoon olive oil
- 1 teaspoon dried Italian seasoning
Instructions
- Preheat the oven to 400°F and line a baking sheet with parchment paper.
- Roll the pizza dough out on a lightly floured surface to about 1/4-inch thickness.
- Cut ghost shapes from the dough using a cookie cutter and place them on the baking sheet.
- Brush each shape lightly with olive oil and sprinkle with Italian seasoning.
- Spread a thin layer of marinara sauce over the center of each ghost.
- Top the sauce with shredded mozzarella cheese.
- Press small pieces of black olive onto the cheese to form eyes and a mouth.
- Bake for 10 to 12 minutes until the crust is golden and the cheese has melted.
Extra Tips
Press the olive pieces into the cheese right before baking so they stay in place. Use only a thin coat of marinara to keep the dough from becoming soggy while it bakes. Leftovers reheat best in a 350°F oven for five minutes rather than a microwave. Course: Appetizer Cuisine: American Equipment: Baking sheet, Rolling pin, Ghost-shaped cookie cutter
Witch Finger Pretzel Rods with Almond Nails
These witch finger pretzels bring a fun spooky touch to any Halloween spread. They are simple to put together and add a playful element that guests enjoy picking up. The salty crunch of the pretzel pairs with smooth chocolate coating and a crisp almond nail for a mix of textures that feels festive without being complicated.
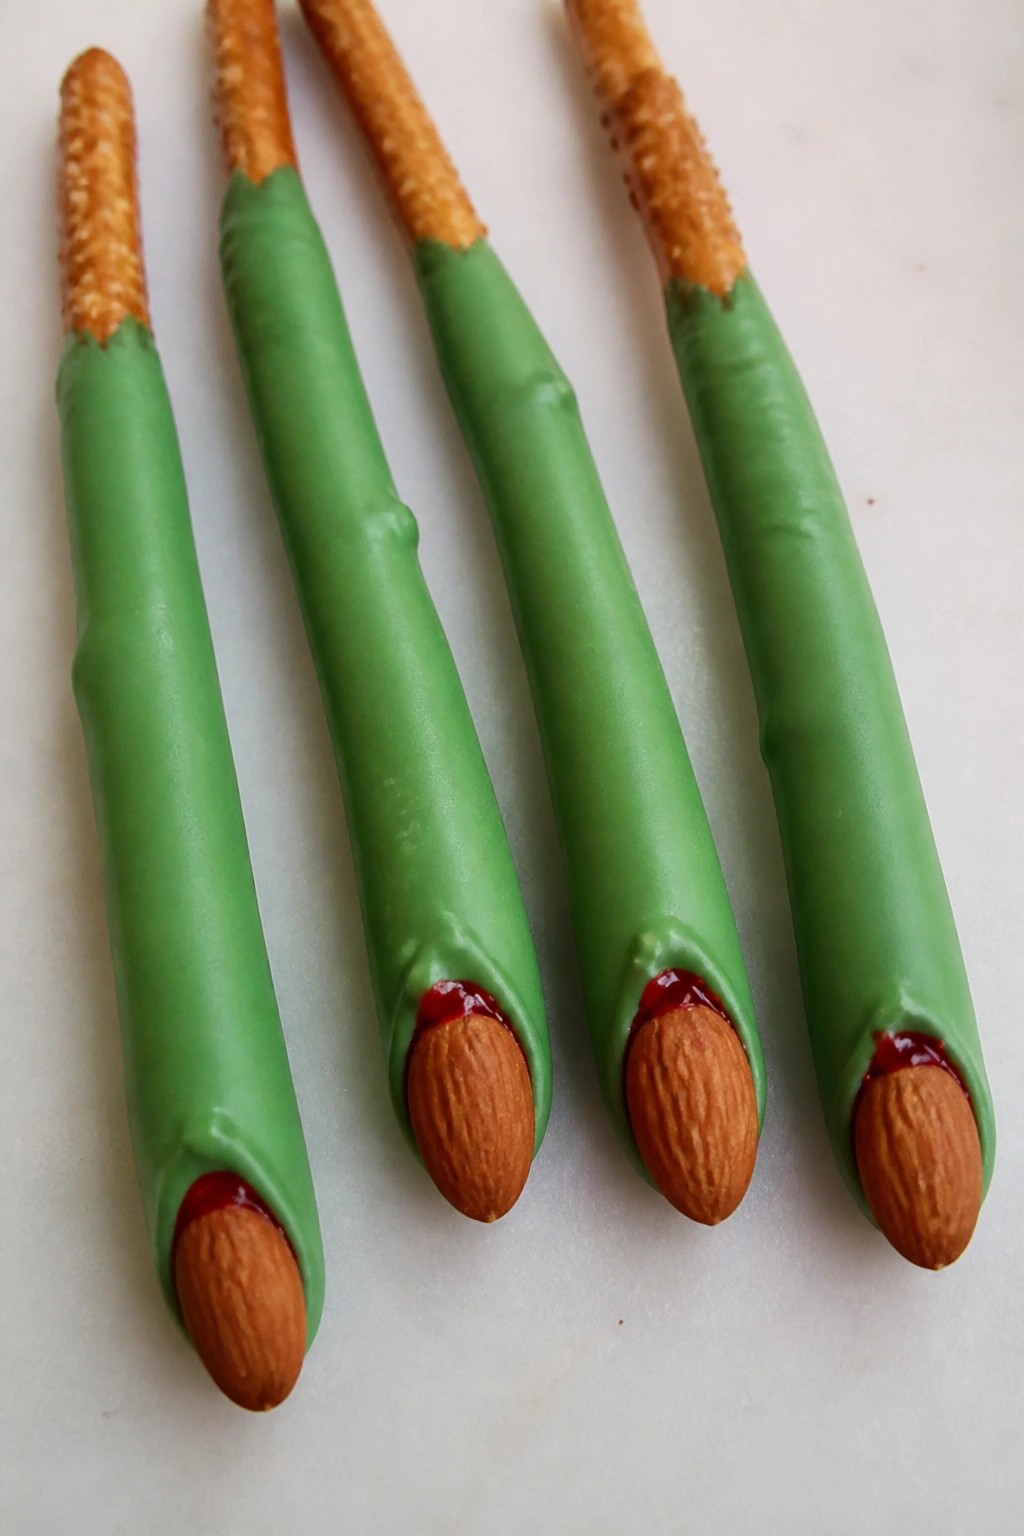
Serves 4 people.
Ingredients
- 12 pretzel rods
- 1 cup green candy melts
- 12 whole almonds
- Red gel icing
Instructions
- Line a baking sheet with parchment paper and set it aside.
- Place the green candy melts in a microwave-safe bowl and heat in 30-second intervals, stirring between each, until fully melted and smooth.
- Dip each pretzel rod into the melted candy melts, leaving about one inch uncoated at the bottom to resemble a finger base. Let excess coating drip off.
- Press one whole almond onto the coated tip of each pretzel to form the nail.
- Use the red gel icing to draw two or three lines across the middle of each coated pretzel to create knuckle details.
- Place the finished rods on the prepared baking sheet and let them set at room temperature until the coating hardens.
Extra Tips
Work with the candy melts while they are still warm for the smoothest dip, and press the almonds in place right away before the coating starts to firm. If the candy melts thicken during dipping, give them a quick 10-second reheat. These hold up well for a few hours at room temperature, making them easy to prepare ahead of the party. Course: Snack Cuisine: American Equipment: Microwave-safe bowl, Baking sheet, Parchment paper
Pumpkin-Shaped Cheese Ball with Crackers
This cheese ball brings a fun Halloween touch to any party spread. The pumpkin shape makes it stand out on the table while the creamy mix pairs well with crunchy crackers. It works best for small gatherings or as one of several snacks at a larger event.
The flavor comes from sharp cheddar balanced with mild seasonings. The texture stays smooth inside with a light coating on the outside. Guests can scoop it onto crackers for easy bites that hold up during conversation.
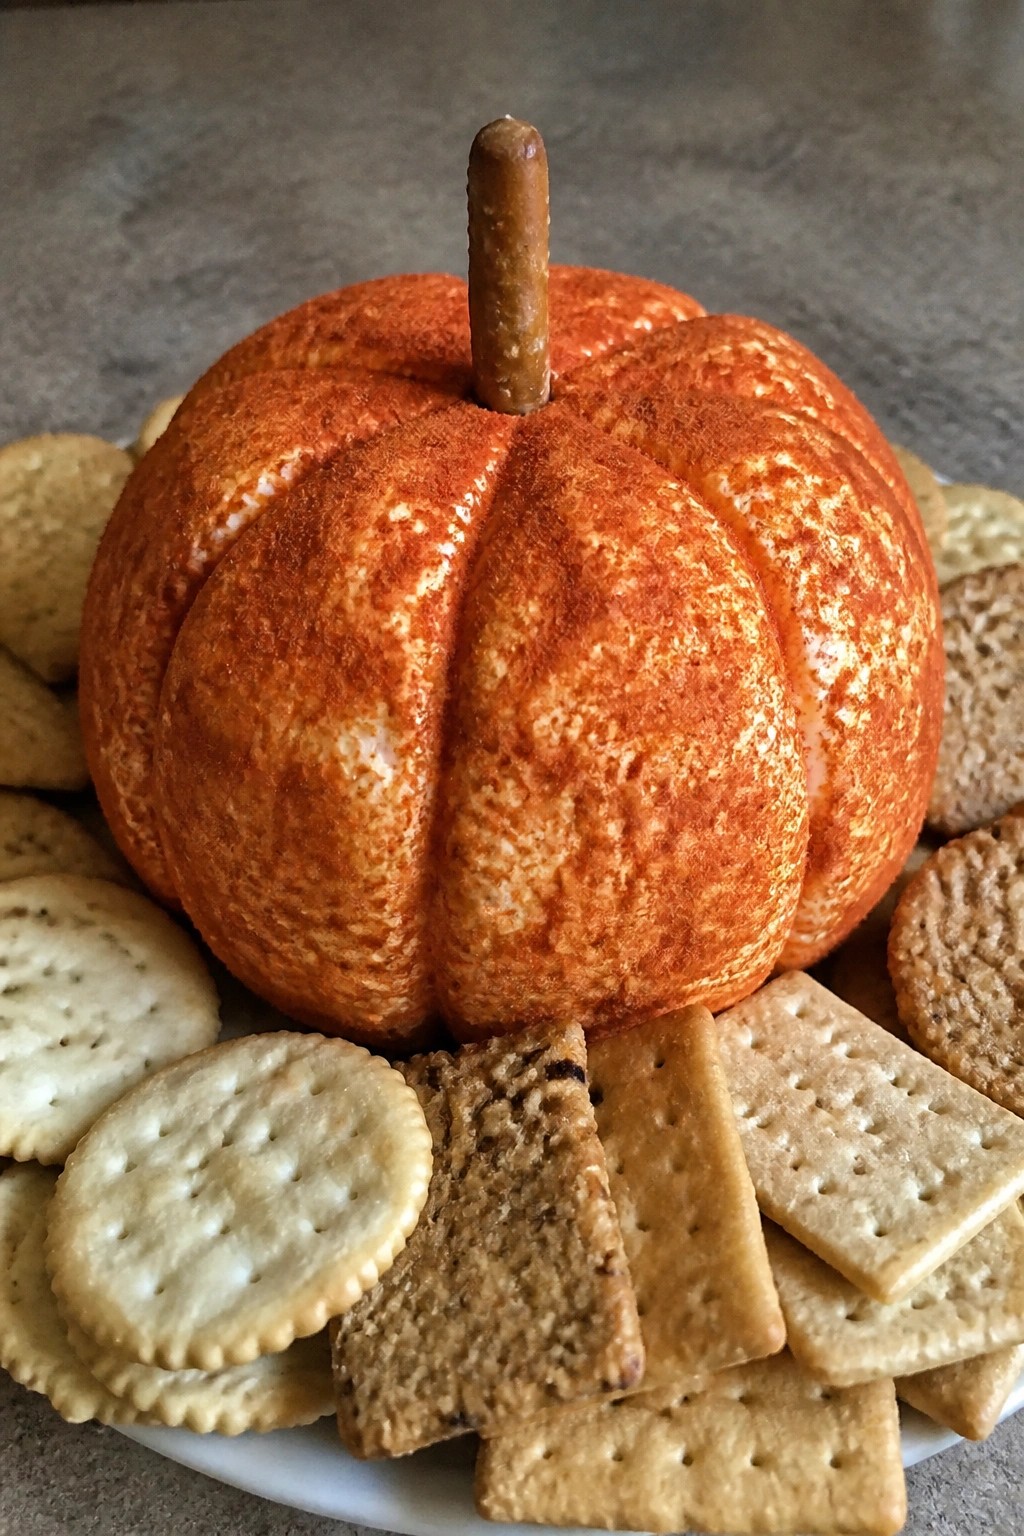
Serves 4 people.
Ingredients
- 8 ounces cream cheese, softened
- 1 1/2 cups shredded cheddar cheese
- 1/4 cup finely chopped chives
- 1/2 teaspoon garlic powder
- 1/4 teaspoon onion powder
- 2 tablespoons paprika
- 1 pretzel stick
- 20 assorted crackers
Instructions
- Place the cream cheese, cheddar cheese, chives, garlic powder, and onion powder in a mixing bowl. Stir until the mixture is evenly combined and smooth.
- Lay a sheet of plastic wrap on the counter. Scoop the cheese mixture onto the wrap and shape it into a round ball.
- Chill the ball in the refrigerator for 30 minutes to firm it up.
- Remove the ball from the refrigerator. Use your hands to gently press ridges around the sides to create a pumpkin shape.
- Sprinkle the paprika over the entire surface and roll the ball lightly to coat it evenly.
- Press the pretzel stick into the top center to form the stem.
- Arrange the crackers on a serving platter around the cheese ball.
Extra Tips
Chill the cheese ball longer if your kitchen is warm so it keeps its shape better when guests start scooping. The paprika adds color without much heat, but you can reduce it slightly if you prefer a milder taste. Keep extra crackers in a separate bowl so they stay crisp until served. Course: Appetizer Cuisine: American Equipment: Mixing Bowl, Plastic Wrap, Serving Platter
Bat Wing Crispy Chicken Tenders
These Bat Wing Crispy Chicken Tenders add a fun Halloween element to any party table. The chicken stays juicy inside while the outside turns golden and crunchy from a simple panko coating. They pair well with cool dips and work as easy finger food for guests of all ages.
The savory flavor comes from basic spices that keep the focus on the crisp texture. Arrange them on a platter so the tenders fan out like wings for a quick visual touch that fits the holiday without extra work.
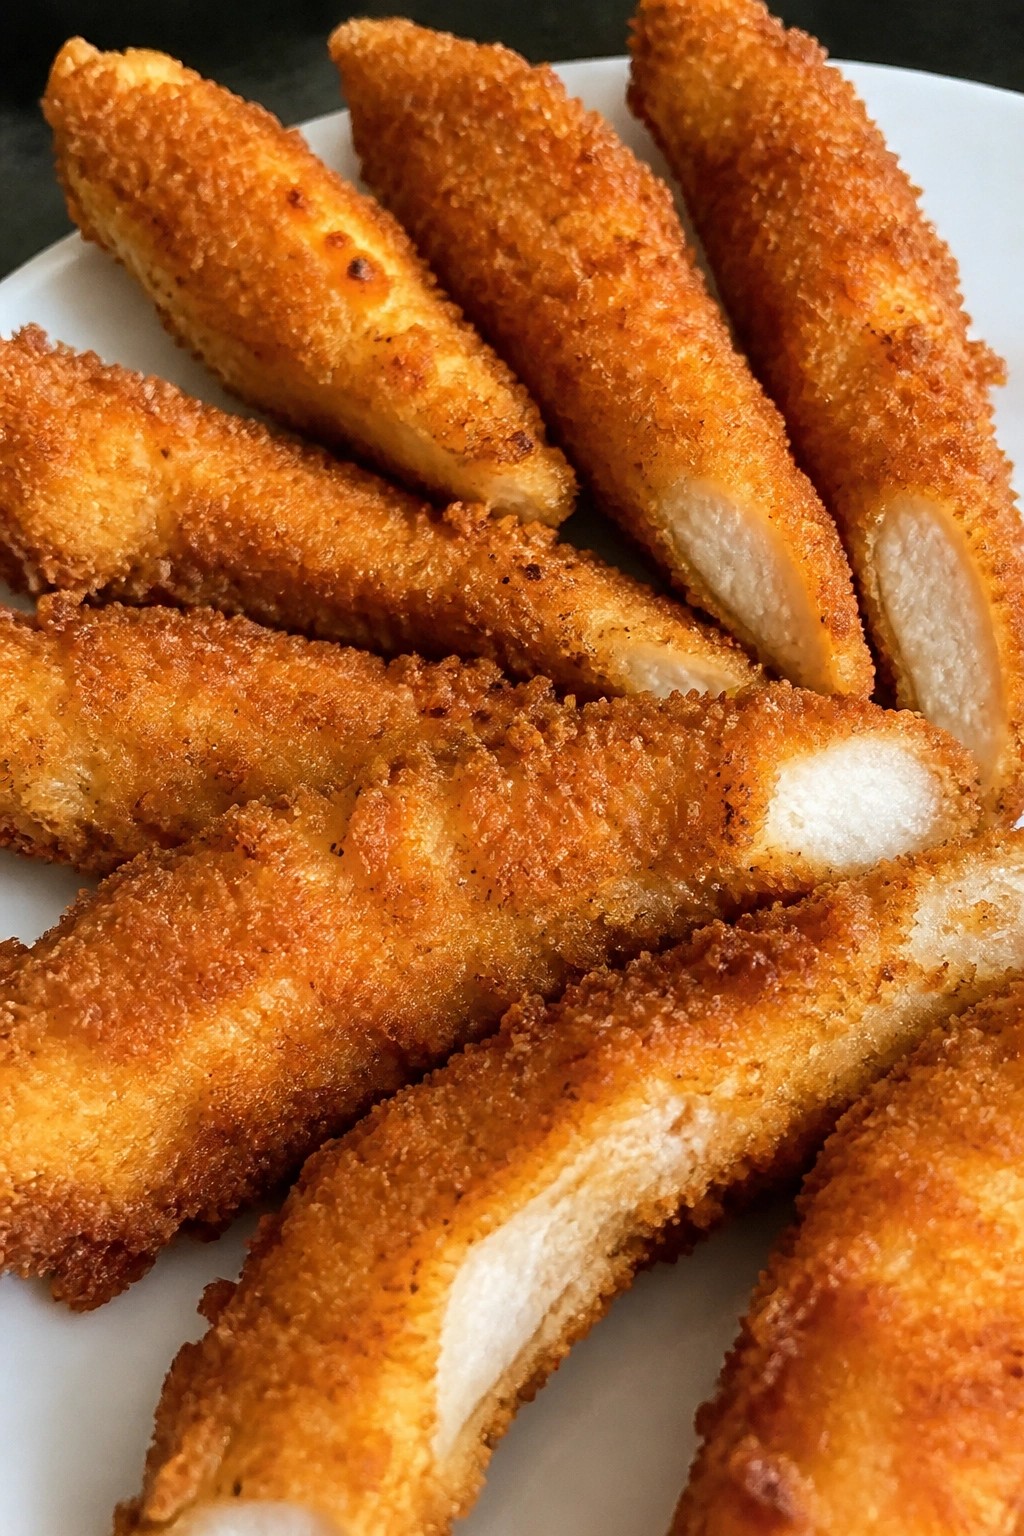
Serves 4 people.
Ingredients
- 1 pound chicken tenders
- 1 cup buttermilk
- 1 cup all-purpose flour
- 2 cups panko breadcrumbs
- 1 teaspoon garlic powder
- 1 teaspoon paprika
- 1/2 teaspoon salt
- 1/4 teaspoon black pepper
- Vegetable oil for frying
- 1/2 cup ranch dressing for serving
Instructions
- Place the chicken tenders in a bowl and pour the buttermilk over them. Let them soak for 15 minutes to help the coating stick later.
- In a shallow dish, stir together the flour, garlic powder, paprika, salt, and black pepper.
- Place the panko breadcrumbs in a second shallow dish.
- Remove each tender from the buttermilk and dredge it in the flour mixture, shaking off excess.
- Dip the floured tender back into the buttermilk, then press it into the panko until fully coated on all sides.
- Heat about 1 inch of vegetable oil in a large skillet over medium heat until it reaches 350 degrees.
- Fry the tenders in batches for 4 to 5 minutes per side until golden brown and cooked through.
- Drain the cooked tenders on a paper towel-lined plate.
- Serve warm with ranch dressing on the side.
Extra Tips
Press the panko firmly so it stays put during frying. If you want a darker look for the bat theme, add an extra pinch of paprika to the flour mix. Leftovers reheat best in a 375-degree oven for 8 minutes to bring back the crunch. Ranch works well here because its cool taste balances the smoky spices without overpowering them. Course: Appetizer Cuisine: American Equipment: Large bowl, Shallow dishes, Large skillet
Candy Corn Fruit and Yogurt Parfaits
These parfaits turn simple fruit and yogurt into a fun layered treat that echoes the colors of candy corn. They work well for Halloween parties because they come together quickly with no baking required. The result is creamy yogurt paired with juicy fruit and a bit of chewy sweetness on top.
This recipe serves 4 people. – 2 cups vanilla yogurt – 1 cup pineapple chunks, drained – 1 cup mandarin orange segments, drained – 1/2 cup candy corn
### Instructions 1. Set out four clear glasses or jars so the layers will show. 2. Spoon 1/4 cup vanilla yogurt into the bottom of each glass. 3. Add 2 tablespoons pineapple chunks on top of the yogurt in each glass. 4. Add another 1/4 cup vanilla yogurt over the pineapple. 5. Divide the mandarin orange segments evenly among the glasses, using about 2 tablespoons per glass. 6. Finish each parfait with a final 1/4 cup of vanilla yogurt. 7. Top each one with 2 tablespoons of candy corn right before serving.
### Extra Tips Drain the fruit well before layering so the yogurt stays thick. Build the layers in clear glasses to show the yellow, orange, and white stripes. If you make them ahead, add the candy corn just before guests arrive so it stays firm.
Course: Snack Cuisine: American Equipment: Parfait glasses, Spoon
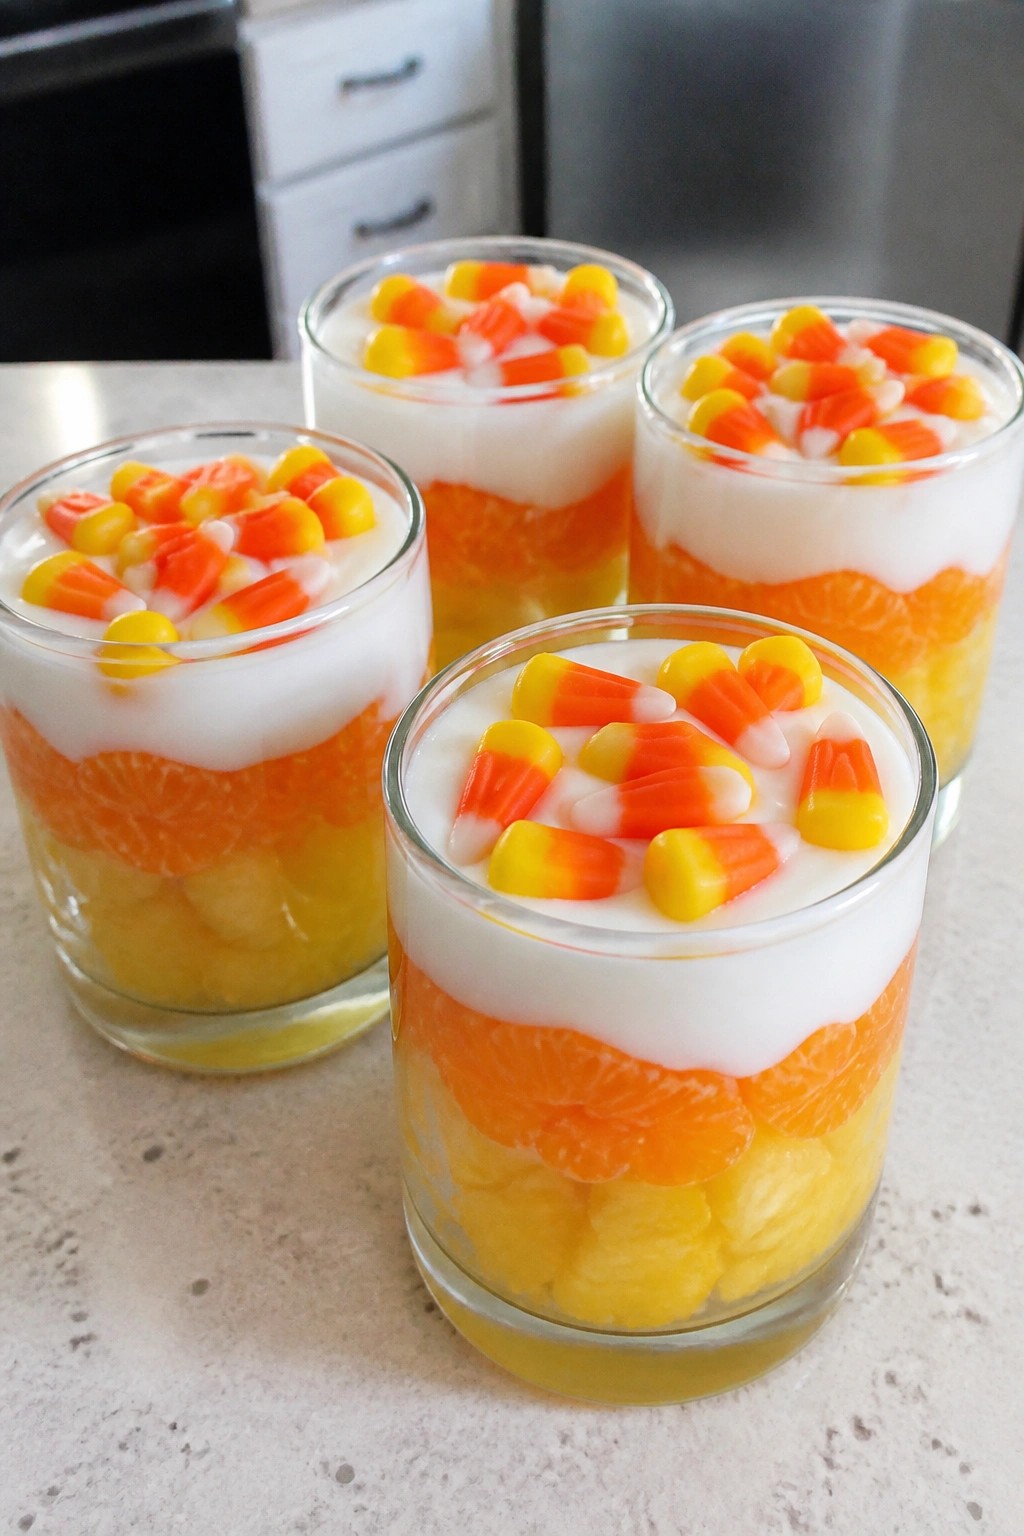
Serves 4 people.
Instructions
- Set out four clear glasses or jars so the layers will show.
- Spoon 1/4 cup vanilla yogurt into the bottom of each glass.
- Add 2 tablespoons pineapple chunks on top of the yogurt in each glass.
- Add another 1/4 cup vanilla yogurt over the pineapple.
- Divide the mandarin orange segments evenly among the glasses, using about 2 tablespoons per glass.
- Finish each parfait with a final 1/4 cup of vanilla yogurt.
- Top each one with 2 tablespoons of candy corn right before serving.
Extra Tips
Drain the fruit well before layering so the yogurt stays thick. Build the layers in clear glasses to show the yellow, orange, and white stripes. If you make them ahead, add the candy corn just before guests arrive so it stays firm. Course: Snack Cuisine: American Equipment: Parfait glasses, Spoon
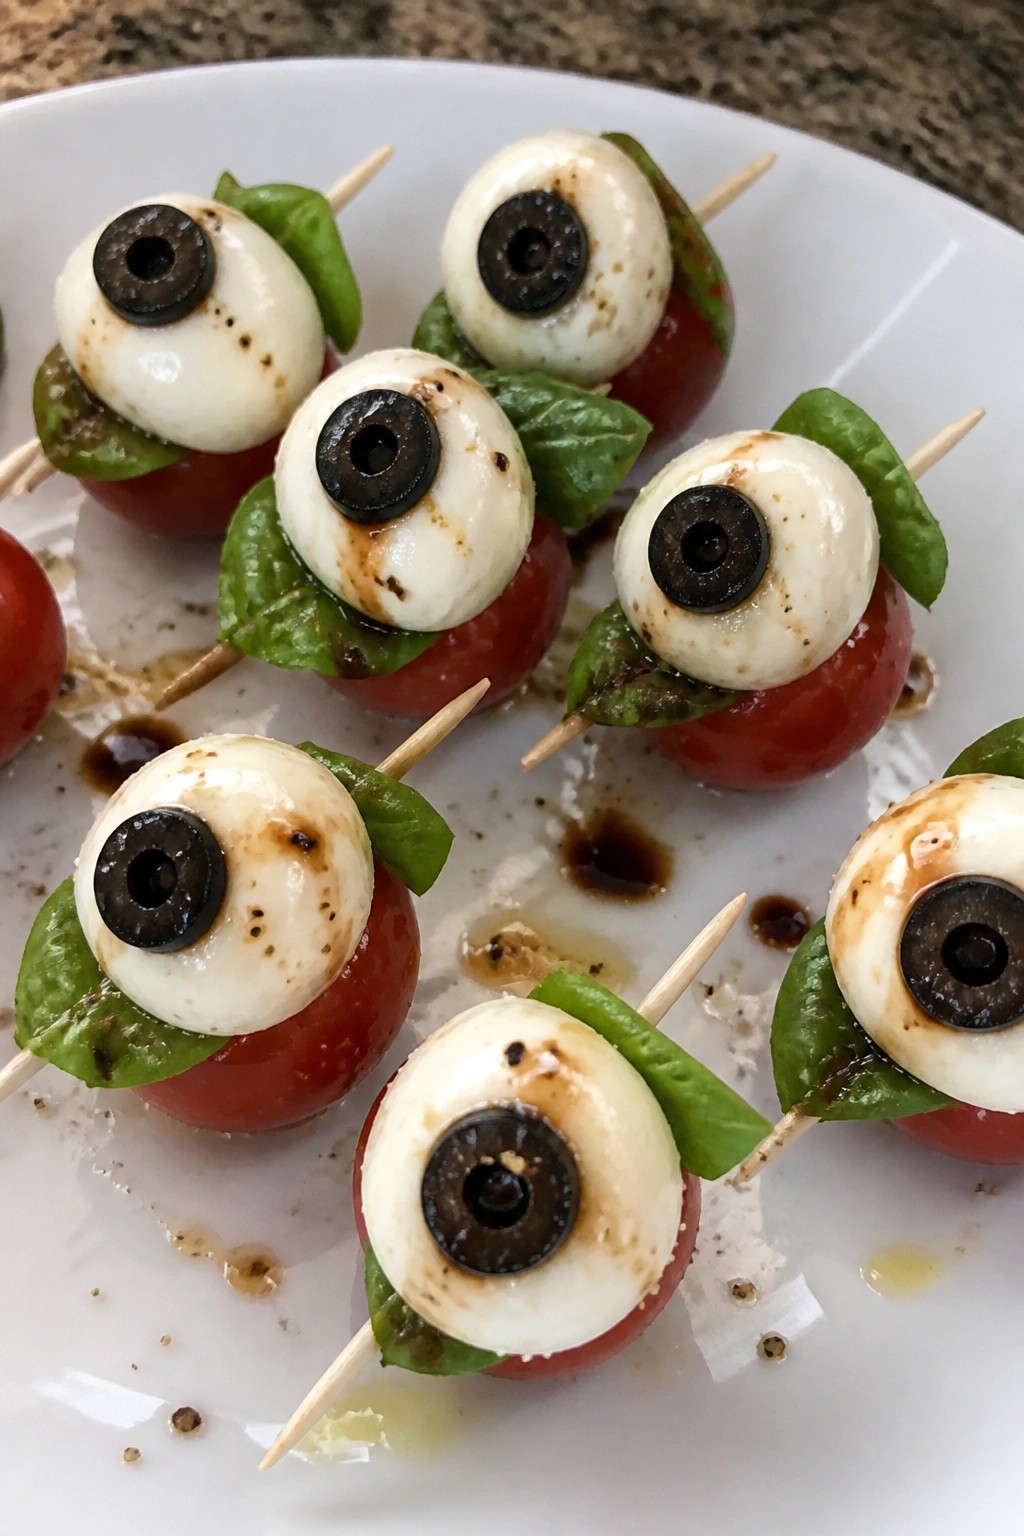
Monster Eyeball Caprese Skewers
These skewers turn a classic Caprese into a fun Halloween snack. Fresh tomatoes and mozzarella get a spooky touch with olive pupils that look like eyeballs. They come together quickly and work well for party platters where guests want something light but themed.
The flavor stays bright with juicy tomatoes, creamy cheese, and a touch of balsamic. Basil adds freshness while the olive gives a salty bite that fits the eyeball look without extra work.
Serves 4 people.
Ingredients
- 12 cherry tomatoes
- 12 small fresh mozzarella balls
- 12 fresh basil leaves
- 12 pitted black olives, halved
- 2 tablespoons olive oil
- 3 tablespoons balsamic glaze
- 1/2 teaspoon salt
- 1/4 teaspoon black pepper
- 12 wooden skewers
Instructions
- Thread one cherry tomato onto each skewer. Add one basil leaf next to the tomato. Follow with one mozzarella ball. Place one olive half on top of the mozzarella to form the pupil. Repeat with the remaining ingredients until all skewers are assembled. Arrange the skewers on a serving plate. Drizzle olive oil and balsamic glaze over the skewers. Sprinkle salt and black pepper evenly across the top.
Extra Tips
Make the skewers a few hours ahead and keep them covered in the fridge, but add the balsamic glaze just before serving so the mozzarella stays firm. If you want a stronger olive flavor, use extra-large black olives for the pupils. Skip the balsamic if you prefer a simpler taste and stick to just the oil and seasoning. Course: Appetizer Cuisine: Italian Equipment: Wooden skewers, Small bowl
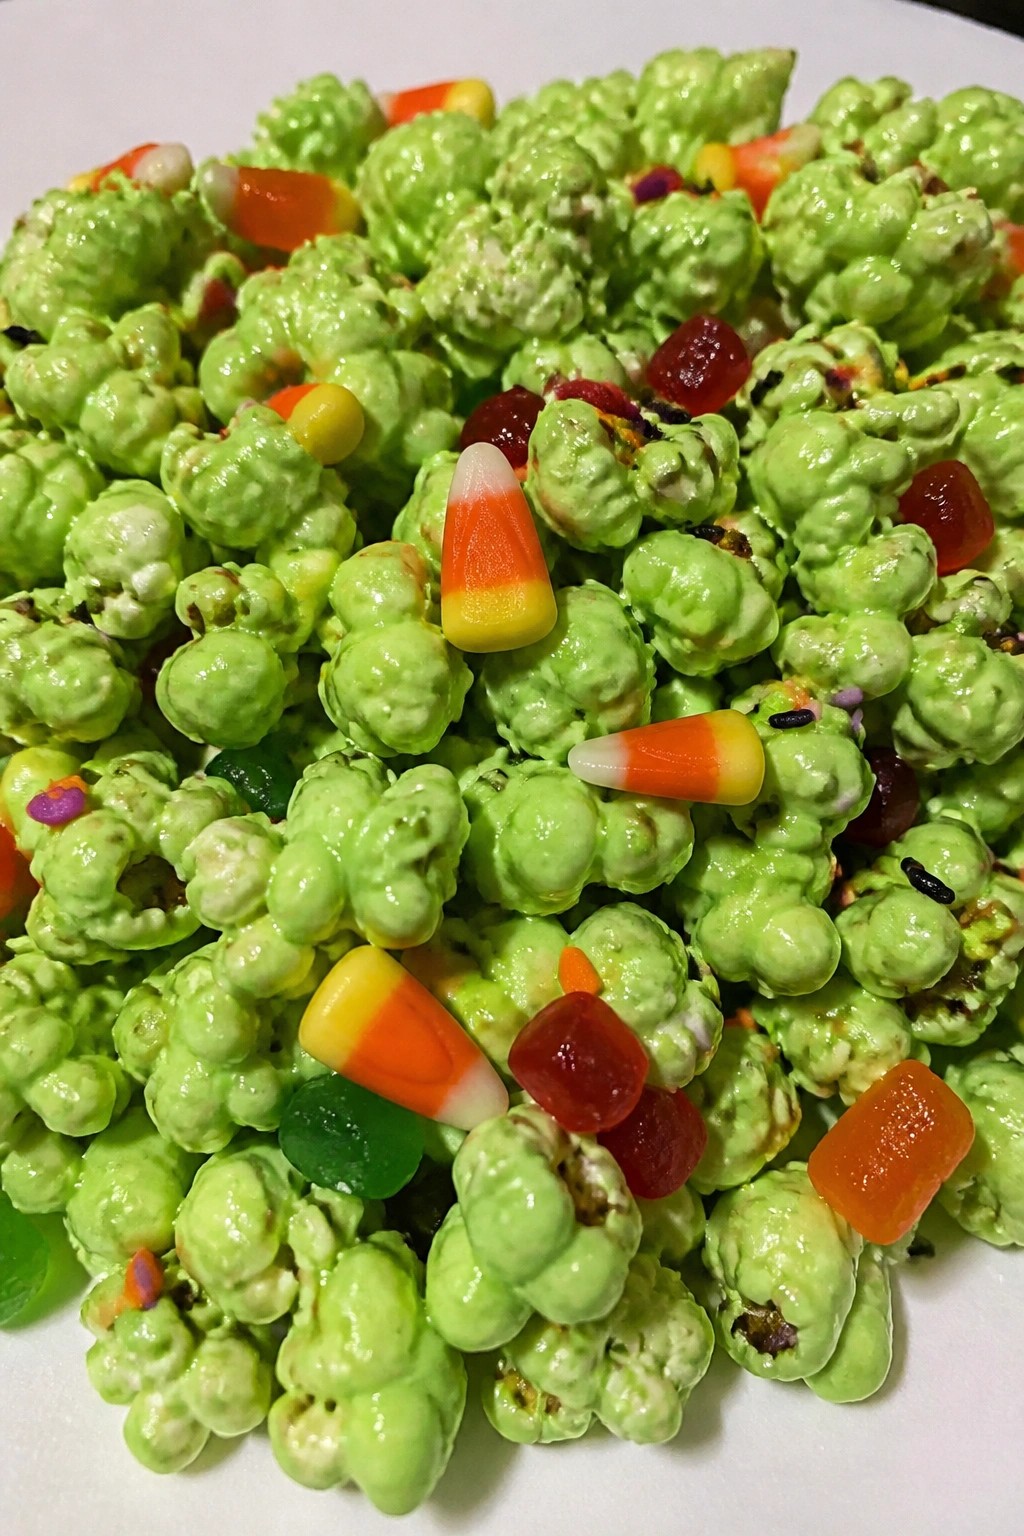
Green Slime Popcorn with Candy Mix-Ins
This popcorn turns a simple snack into a fun Halloween party bite. The green coating creates a slime effect that stands out on any snack table. It offers a sweet crunch from the popcorn paired with chewy and crunchy candy pieces.
It suits kids’ parties or movie nights when you want something quick and shareable. The mix stays light enough for munching while still feeling festive.
Serves 4 people.
Ingredients
- ½ cup popcorn kernels
- 2 tablespoons vegetable oil
- 1 cup green candy melts
- ½ cup candy corn
- ½ cup gummy worms, chopped
- ¼ cup Halloween sprinkles
Instructions
- Heat the vegetable oil in a large pot over medium heat. Add the popcorn kernels and cover the pot. Shake it gently until the popping slows, then remove from heat and let it sit for one minute.
- Transfer the popped popcorn to a large mixing bowl and discard any unpopped kernels.
- Place the green candy melts in a microwave-safe bowl. Heat in 30-second intervals, stirring between each, until fully melted and smooth.
- Pour the melted candy melts over the popcorn. Stir quickly with a spatula to coat the kernels evenly.
- Add the candy corn, chopped gummy worms, and Halloween sprinkles. Toss everything together until the mix-ins are distributed.
Extra Tips
Work fast once the candy melts are ready because they set quickly and can make stirring harder. Skip the gummy worms if you want a crunchier version and swap in extra candy corn instead. Store leftovers in a single layer on a baking sheet so the popcorn stays crisp longer. Course: Snack Cuisine: American Equipment: Large pot with lid, Microwave-safe bowl, Large mixing bowl
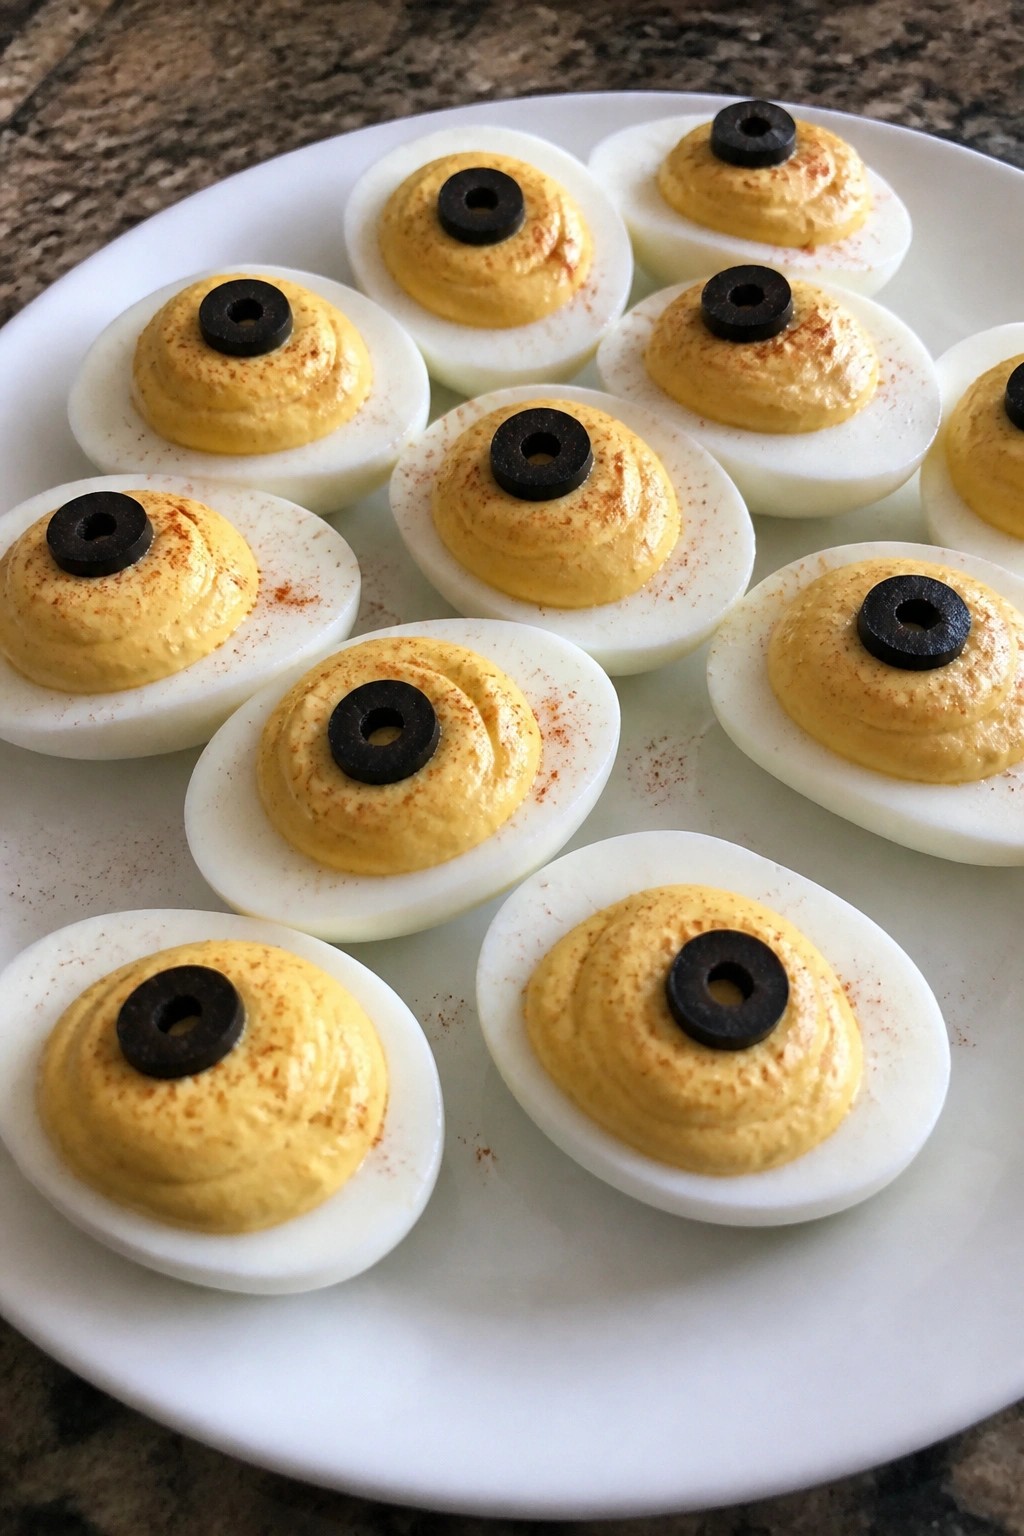
Deviled Egg Eyeballs with Black Olive Pupils
These deviled egg eyeballs bring a playful Halloween element to party spreads. Guests enjoy spotting the olive pupils on each half, and the familiar deviled egg base keeps everyone reaching for more.
They suit casual gatherings or themed snack tables where finger foods work best. The filling stays creamy and lightly tangy, while the olives add a briny contrast that fits the savory profile.
Serves 4 people.
Ingredients
- 6 large eggs
- 3 tablespoons mayonnaise
- 1 teaspoon yellow mustard
- 1 teaspoon white vinegar
- 1/4 teaspoon salt
- 1/8 teaspoon black pepper
- 1/4 teaspoon paprika
- 12 pitted black olives
Instructions
- Place the eggs in a large pot and cover with water. Bring to a boil, then reduce heat and simmer for 10 minutes.
- Drain the eggs and transfer them to a bowl of ice water. Let them cool for 5 minutes, then peel off the shells.
- Slice each egg in half lengthwise. Gently remove the yolks and place them in a mixing bowl.
- Mash the yolks with a fork. Add the mayonnaise, mustard, vinegar, salt, and black pepper. Stir until the mixture is smooth.
- Spoon or pipe the yolk mixture back into the egg white halves.
- Slice each black olive into thin rings. Press one ring into the center of the filling on each egg half to form a pupil.
- Dust the tops lightly with paprika before serving.
Extra Tips
Slice the olives just before assembly so the rings stay neat and dark against the filling. The eggs can be boiled and peeled a day ahead, then filled shortly before guests arrive to keep the whites firm. Course: Snack Cuisine: American Equipment: Large Pot, Mixing Bowl, Knife
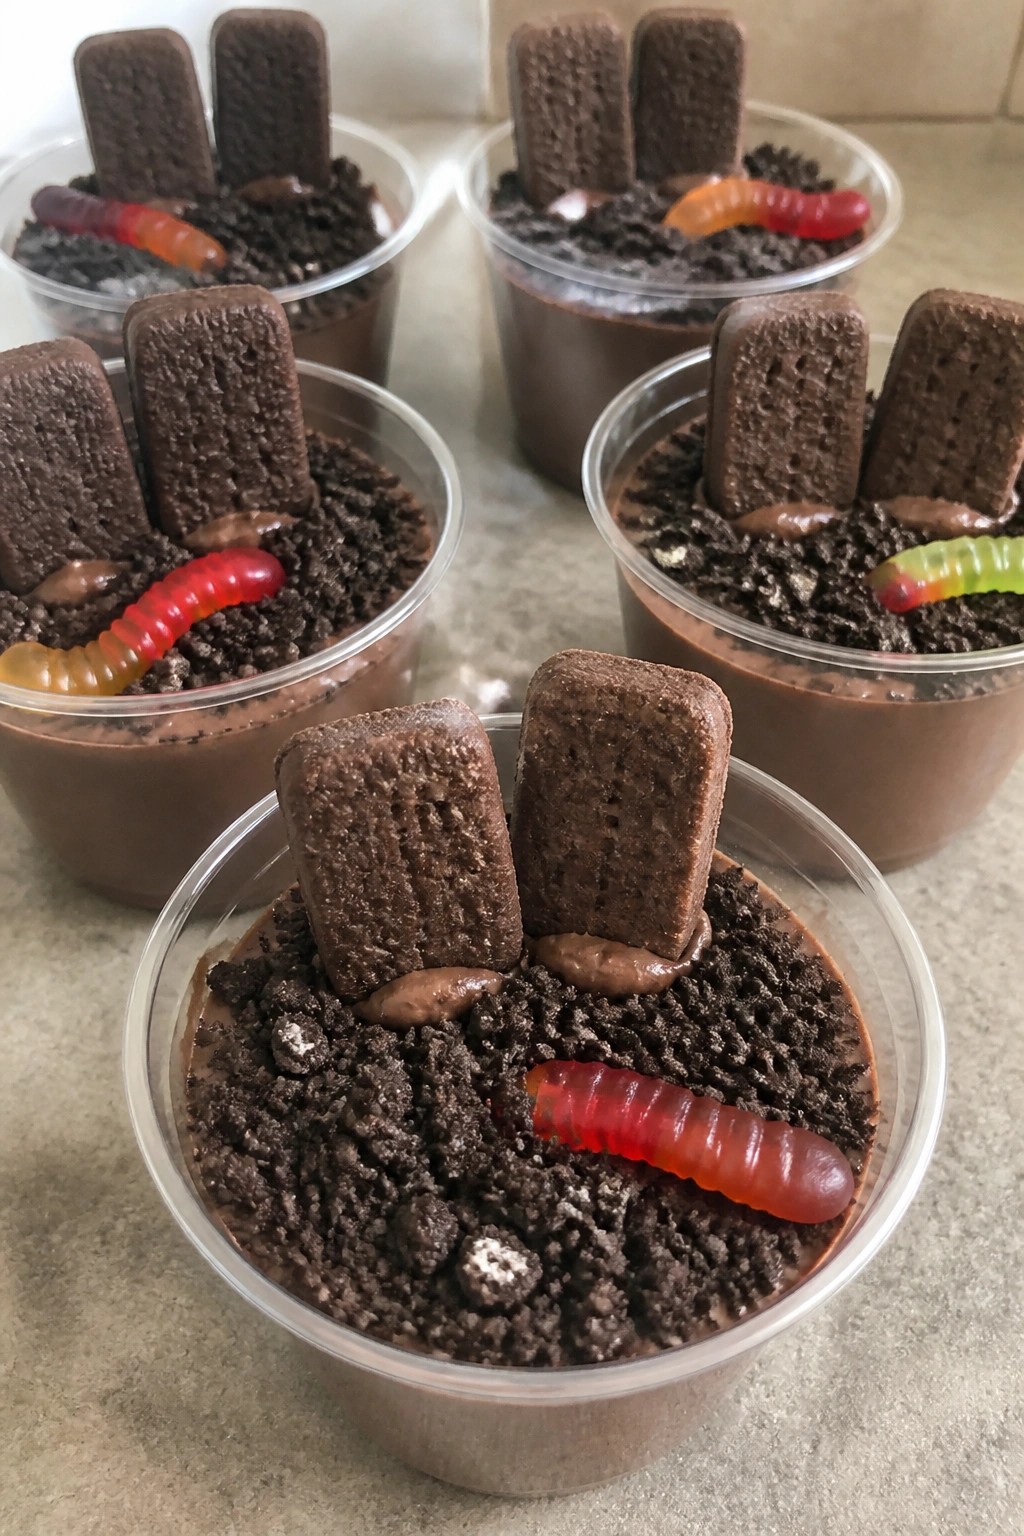
Graveyard Chocolate Pudding Cups
These pudding cups turn a simple chocolate dessert into a Halloween party snack. They look like tiny graveyards with cookie dirt and cookie tombstones, yet they stay easy to put together ahead of time. The texture combines smooth pudding with crunchy cookie pieces and chewy gummy worms for a mix kids and adults both enjoy at gatherings.
The flavor stays classic chocolate with a slight crunch from the cookies. Serve them at a buffet table or pass them out as individual treats during a movie night or costume party.
Serves 4 people.
Ingredients
- 1 (3.9-ounce) package instant chocolate pudding mix
- 2 cups cold milk
- 20 chocolate sandwich cookies
- 8 gummy worms
- 4 rectangular chocolate cookies
- 1 tablespoon chocolate frosting
Instructions
- Pour the instant chocolate pudding mix and cold milk into a mixing bowl. Whisk for two minutes until the mixture thickens, then set it aside for five minutes to finish setting.
- Place the chocolate sandwich cookies in a zip-top bag and crush them with a rolling pin until they resemble coarse dirt. Reserve about one quarter of the crumbs for topping.
- Spoon a layer of pudding into each of four clear cups. Add a layer of crushed cookies, then repeat with another pudding layer and cookie layer until the cups are nearly full.
- Spread a small dab of chocolate frosting on the back of each rectangular cookie and press it upright into the top of each cup to form a tombstone. Scatter the remaining cookie crumbs around the base.
- Tuck two gummy worms into the cookie crumbs on each cup so they appear to be coming out of the dirt.
Extra Tips
Crush the cookies right before assembly so they stay crisp. You can prepare the pudding and crush the cookies a few hours ahead, then assemble the cups just before guests arrive to keep the layers neat. If you need a nut-free version, check that the cookies and gummy worms you buy do not contain nuts. Course: Dessert Cuisine: American Equipment: Mixing bowl, Whisk, Rolling pin, Zip-top bag, 4 clear cups
Skeleton Bone Parmesan Breadsticks
These breadsticks turn simple dough into a fun Halloween snack that looks like real bones on the platter. They work well for parties because they bake quickly and hold up on a table without getting soggy. The outside turns crisp while the inside stays soft, and the Parmesan adds a savory, salty bite that pairs with any dip.
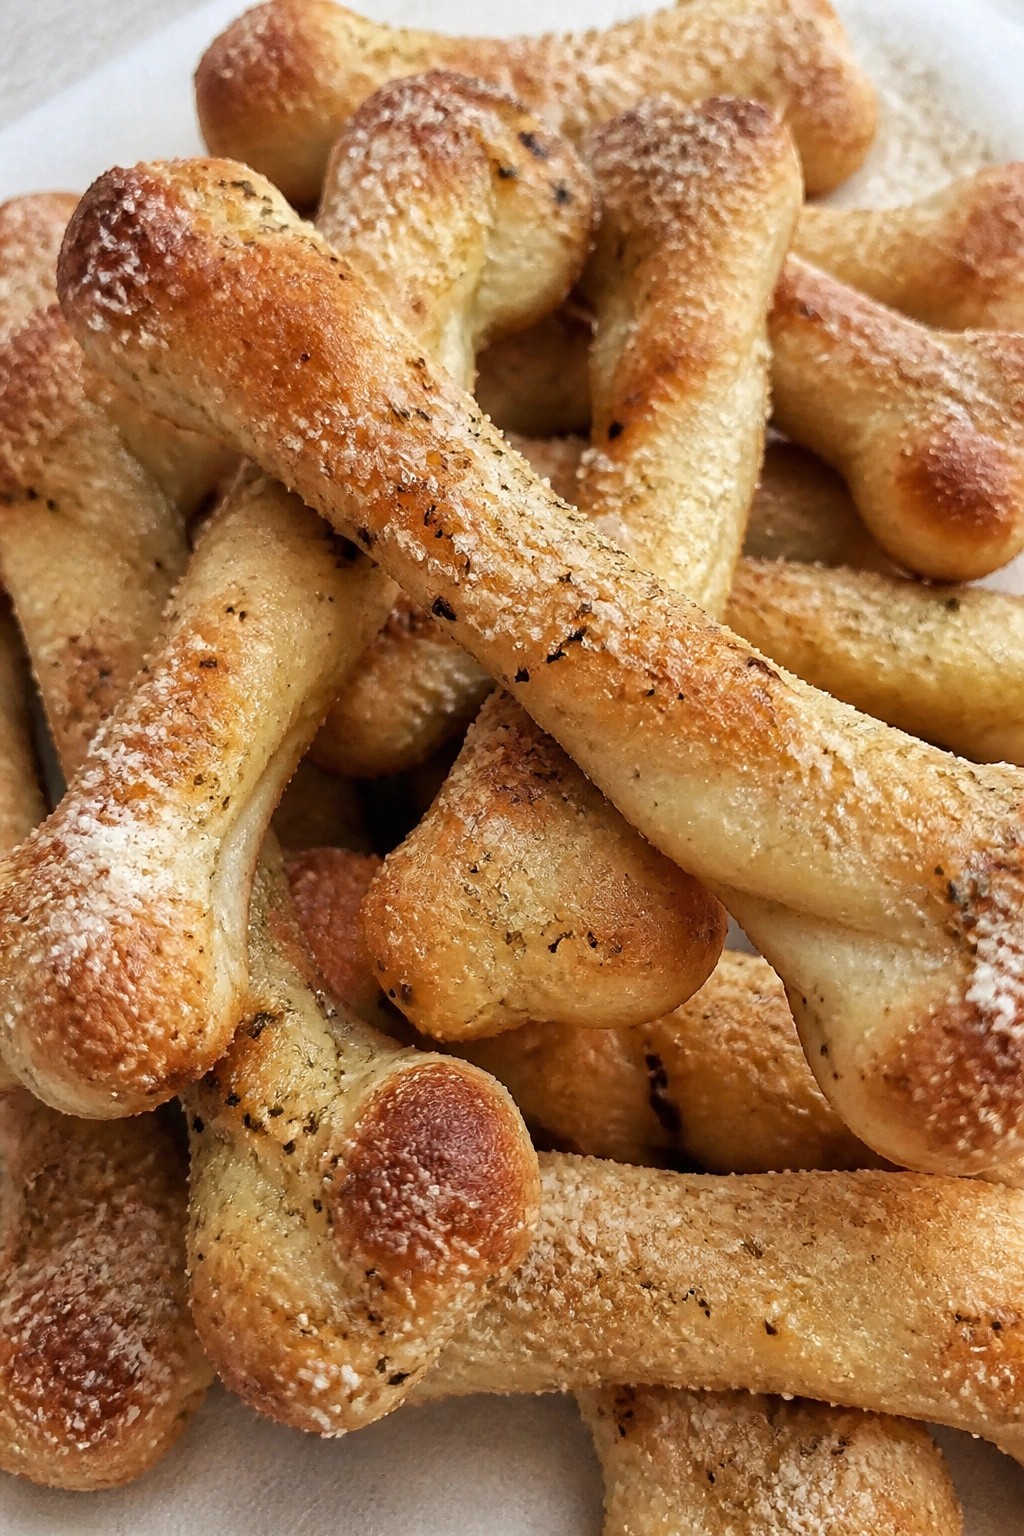
Serves 4 people.
Ingredients
- 1 pound pizza dough
- 3 tablespoons butter, melted
- 1/2 cup grated Parmesan cheese
- 1 teaspoon garlic powder
- 1/2 teaspoon Italian seasoning
- 1/4 teaspoon salt
Instructions
- Preheat the oven to 400°F and line a baking sheet with parchment paper.
- Divide the pizza dough into 8 equal pieces on a lightly floured surface.
- Roll each piece into a 6-inch rope, then press the ends slightly thicker to form bone shapes.
- Place the shaped dough on the prepared baking sheet, leaving space between each piece.
- Brush the tops and sides evenly with the melted butter.
- Sprinkle the Parmesan cheese, garlic powder, Italian seasoning, and salt over the buttered dough.
- Bake for 12 to 15 minutes until the breadsticks are golden and firm to the touch.
Extra Tips
Shape the ends carefully so they look more like bones once baked. If the dough springs back while shaping, let it rest a few minutes before trying again. Leftovers reheat well in a 350°F oven for five minutes to restore crispness. Course: Appetizer Cuisine: Italian Equipment: Baking sheet, Pastry brush, Oven
Caramel Apple Monster Mouths
These Caramel Apple Monster Mouths turn a simple fruit snack into a fun Halloween party bite. They suit casual gatherings where kids and adults want something quick to pick up and eat. Crisp apple wedges hold a layer of sweet caramel with rows of soft marshmallows that look like teeth.
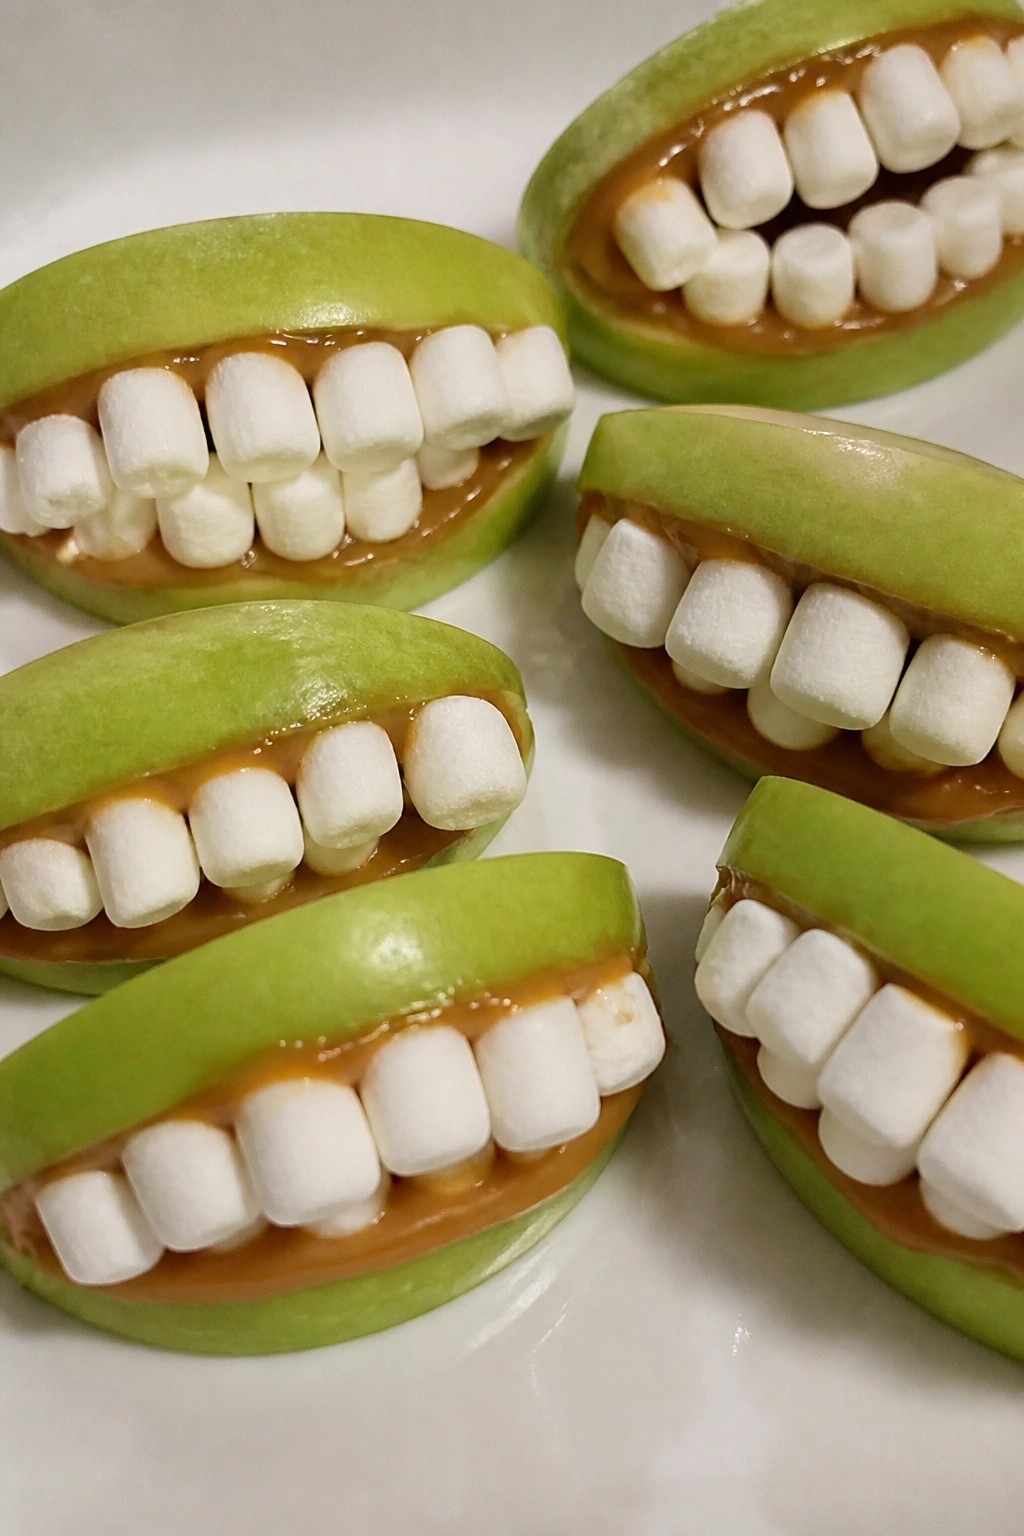
Serves 4 people.
Ingredients
- 2 large Granny Smith apples
- 1/2 cup caramel sauce
- 1/2 cup mini marshmallows
Instructions
- Wash the apples and cut each one into four wedges. Remove the core from every wedge with a small knife cut.
- Place the wedges on a plate with the cut side facing up. Spoon a thin layer of caramel sauce across the flat surface of each wedge.
- Press mini marshmallows into the caramel in a single row along one edge of each wedge to form the teeth. Serve the wedges right away so the caramel stays sticky.
Extra Tips
Choose firm apples so the wedges hold their shape after the caramel is added. If the caramel sauce is too thick to spread, warm it briefly in the microwave for ten seconds. Arrange the finished wedges on a platter with the marshmallow teeth facing outward for the best party display. Course: Snack Cuisine: American Equipment: Knife, Cutting Board, Spoon
No-Bake Ghost Oreo Truffles
These truffles turn classic Oreos into a fun Halloween treat that needs no oven. They work well for parties because you can make them ahead and they hold up on a snack table. The inside stays creamy and cookie-rich while the white chocolate shell gives a smooth finish.
The ghost shape comes from simple candy eyes added before the coating sets. Kids and adults both reach for them since the flavor stays familiar but the look fits the season.
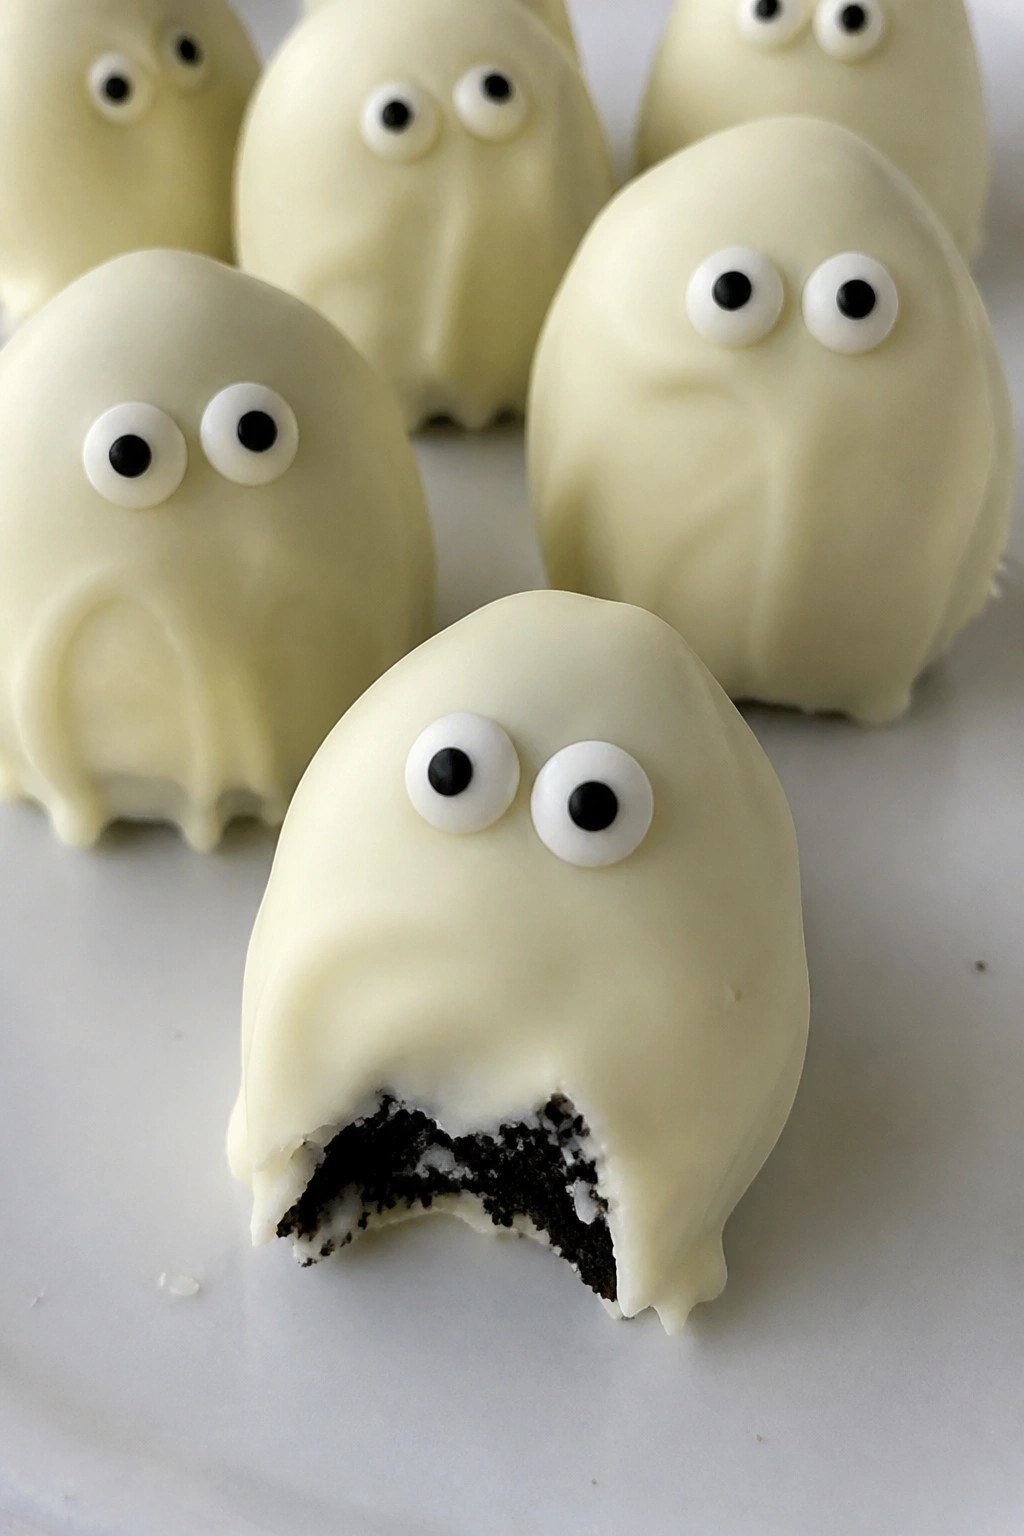
Serves 4 people.
Ingredients
- 12 Oreo cookies
- 4 ounces cream cheese, softened
- 8 ounces white chocolate chips
- 24 candy eyes
Instructions
- Place the Oreo cookies in a food processor and pulse until they form fine crumbs.
- Add the softened cream cheese to the crumbs and pulse until the mixture holds together.
- Scoop out tablespoon-sized portions and roll them into balls with your hands. Place the balls on a parchment-lined baking sheet.
- Melt the white chocolate chips in a microwave-safe bowl, stirring every 30 seconds until smooth.
- Dip each ball into the melted white chocolate using a fork to let excess drip off. Return the coated truffles to the baking sheet.
- Press two candy eyes onto each truffle while the coating is still wet. Let the truffles set at room temperature or in the refrigerator.
Extra Tips
Chill the formed balls for 15 minutes before dipping if the mixture feels soft. Store leftovers in an airtight container in the refrigerator for up to three days. If the white chocolate thickens during dipping, stir in a teaspoon of coconut oil to loosen it. Course: Snack Cuisine: American Equipment: Food Processor, Mixing Bowl, Baking Sheet, Microwave-Safe Bowl