

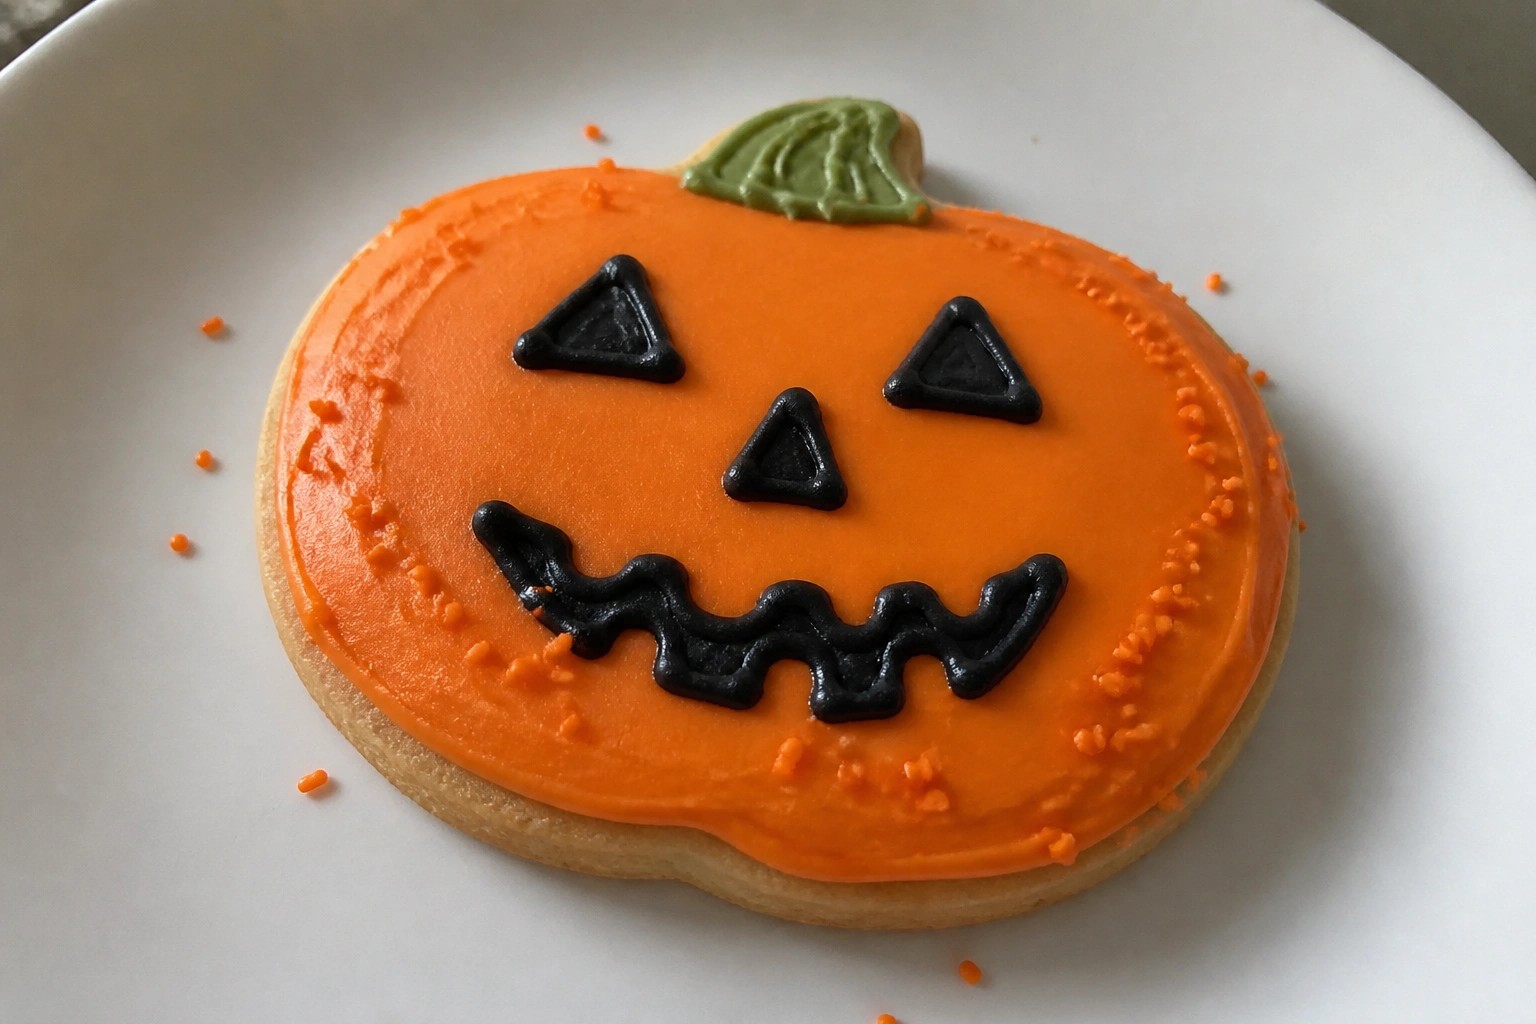
With Halloween coming up, I gathered some easy recipe ideas that fit the season. These options use basic ingredients and simple steps you can handle on a weekday. You will see a mix of snacks and treats that work for kids or parties. Each one includes practical tips to help you make them without stress.
Helpful Tips Before You Start
These tips will help your Halloween recipes come together smoothly.
Pick Gel Coloring
Gel food coloring gives bright orange, black, and green shades without watering down batters or frostings.
Make Components Early
Bake cookies or shape treats the day before so you only need to assemble on the day of your event.
Keep Shapes Simple
Use cookie cutters or a knife to cut basic ghost and pumpkin outlines instead of trying detailed designs.
Test One Batch First
Make a small test version of any new recipe to check how the colors and textures hold up.
Mummy Hot Dogs Wrapped in Crescent Dough with Mustard Dip
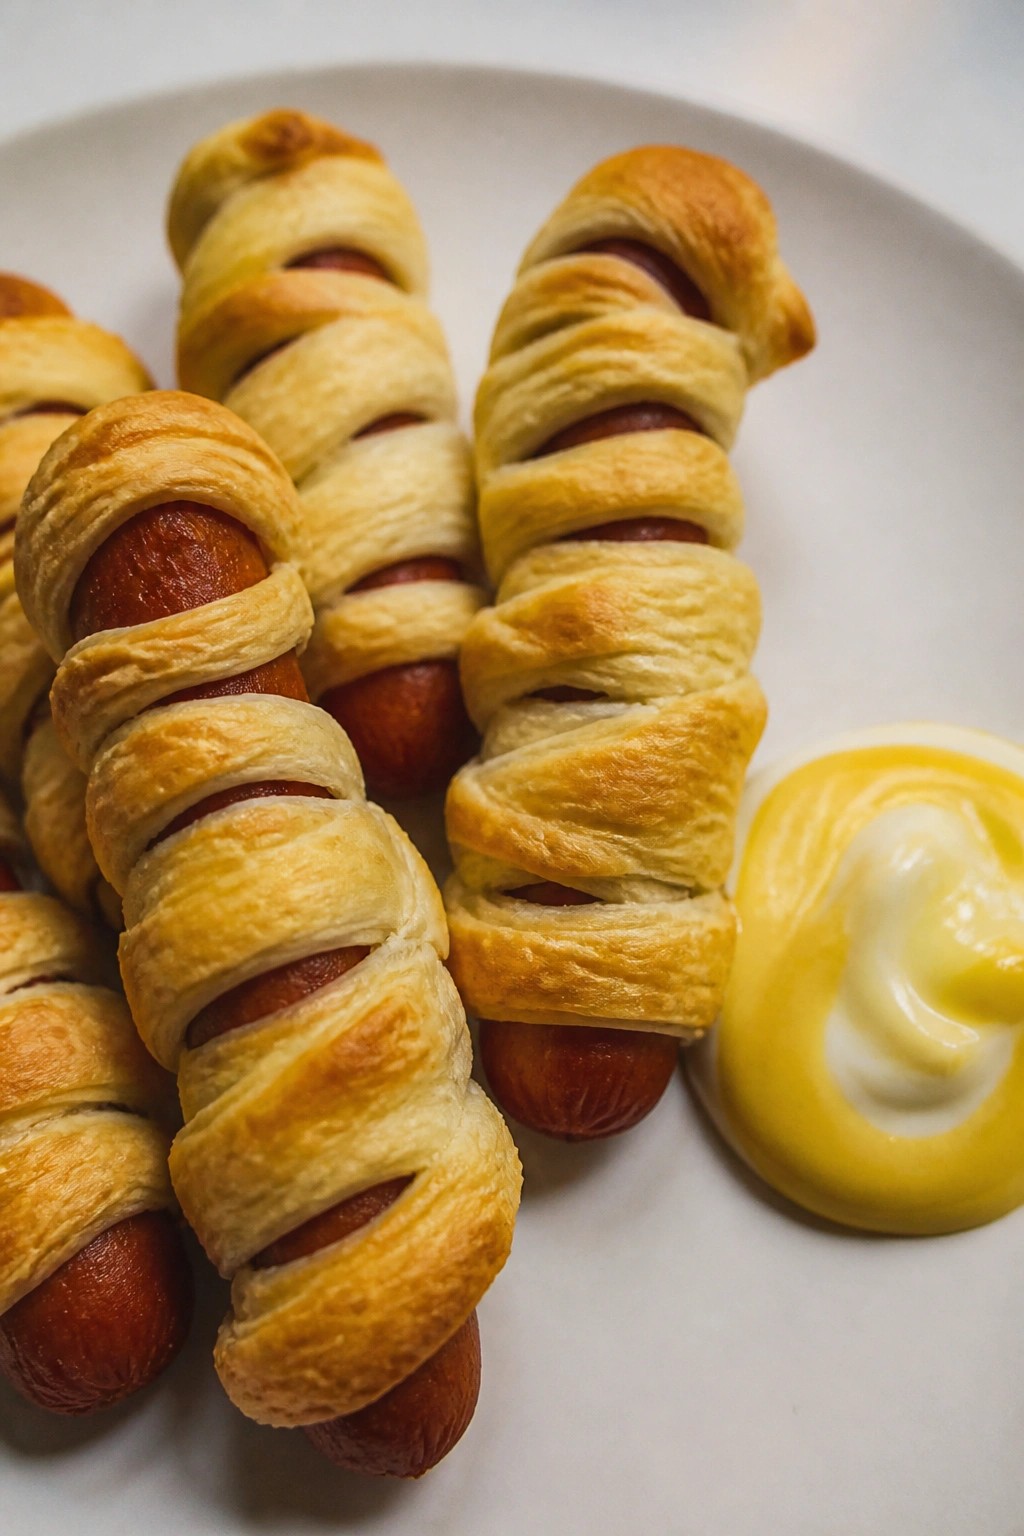
These mummy hot dogs are a quick way to add a playful touch to a Halloween spread. The crescent dough bakes into flaky layers around the hot dogs, while the mustard dip adds a sharp, tangy finish that balances the savory meat. They work well for a casual party snack or an easy weeknight meal before trick-or-treating.
The finished hot dogs have a crisp exterior with soft spots where the dough overlaps, and the mustard dip brings a smooth, slightly creamy texture that clings well to each bite.
Serves 4 people.
Ingredients
- 8 hot dogs
- 1 (8-ounce) can refrigerated crescent roll dough
- 1/4 cup yellow mustard
- 1 tablespoon mayonnaise
Instructions
- Preheat the oven to 375 degrees F and line a baking sheet with parchment paper.
- Unroll the crescent roll dough on a clean surface and press the seams together to form a single sheet. Cut the dough into thin strips about 1/2 inch wide.
- Wrap the dough strips around each hot dog, leaving small gaps near the top for the mummy face. Place the wrapped hot dogs on the prepared baking sheet.
- Bake for 12 to 15 minutes until the dough is golden brown and the hot dogs are heated through.
- While the hot dogs bake, stir together the yellow mustard and mayonnaise in a small bowl to make the dip.
- Remove the hot dogs from the oven and let them cool for 2 minutes. Use a small amount of the mustard mixture to dot eyes on each hot dog if desired. Serve the remaining mustard dip alongside.
Extra Tips
If the dough strips break while wrapping, simply press the pieces back together on the hot dog. The dip can be made a day ahead and kept covered in the refrigerator. Leftovers reheat best in a 350 degree F oven for 5 minutes to restore crispness to the dough. Course: Appetizer Cuisine: American Equipment: Baking sheet, Oven, Mixing bowl, Knife
Spiderweb Black Bean Quesadillas with Sour Cream
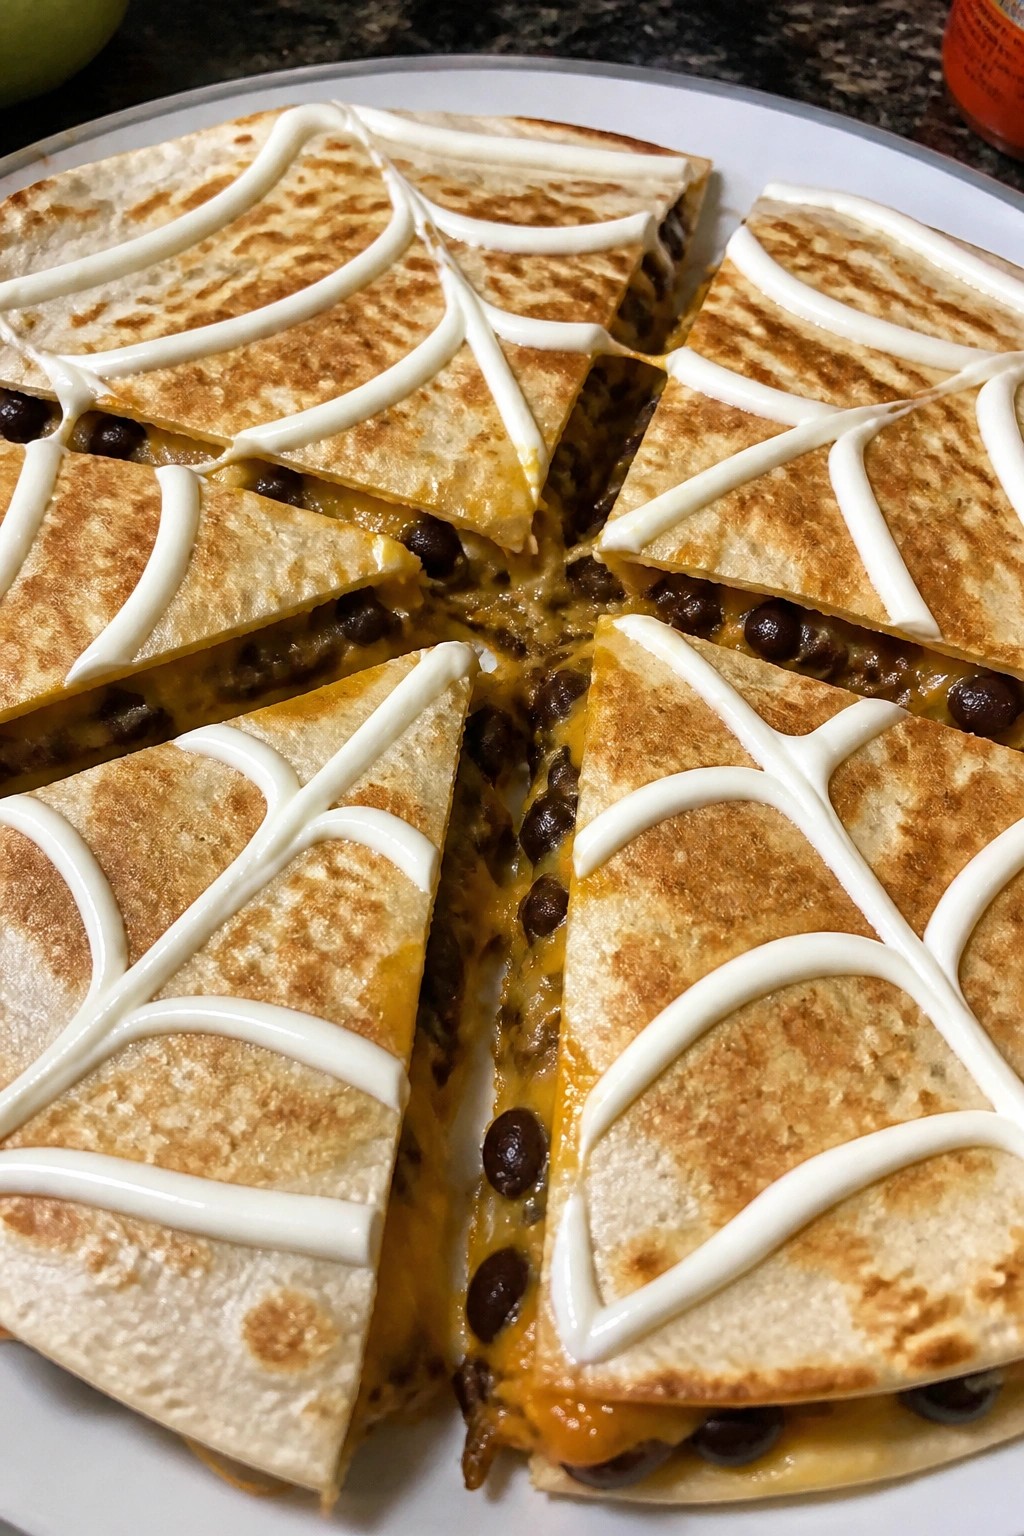
These quesadillas bring a simple Halloween touch to the table with a sour cream spiderweb piped right on top. They work well for a weeknight dinner before trick-or-treating or as part of a casual party spread. The filling stays hearty from spiced black beans while the tortillas turn crisp and the sour cream adds a cool finish.
Serves 4 people.
Recommended Products

Excellent Heat Retention – Made with durable foil-laminated paper (foil exterior / paper interior), these hot dog sleeves keep hot dogs and other foods warm for extended periods.

Enjoy a unique twist on Halloween with this hilarious hot dog mummy design. Perfect for anyone who loves a good laugh and appreciates quirky Halloween humor, it’s bound to turn heads.

Ingredients
- 4 large flour tortillas
- 1 (15 oz) can black beans, rinsed and drained
- 1 1/2 cups shredded cheddar cheese
- 1 teaspoon ground cumin
- 1/2 teaspoon chili powder
- 1/4 teaspoon garlic powder
- 2 tablespoons olive oil
- 1/2 cup sour cream
- Salt and black pepper to taste
Instructions
- Place the black beans in a bowl and mash them lightly with a fork. Stir in the cumin, chili powder, garlic powder, salt, and pepper until the mixture is evenly seasoned.
- Lay one tortilla flat and spread one quarter of the bean mixture over half of it. Sprinkle one quarter of the cheese on top of the beans. Fold the tortilla in half to form a half-moon shape. Repeat with the remaining tortillas, beans, and cheese.
- Heat 1 tablespoon of olive oil in a large skillet over medium heat. Place two folded quesadillas in the skillet and cook for 3 to 4 minutes per side until the tortillas are golden and the cheese has melted. Repeat with the remaining oil and quesadillas.
- Transfer the cooked quesadillas to a cutting board. Spoon the sour cream into a small zip-top bag, snip off one corner, and pipe concentric circles on each quesadilla. Drag a knife from the center outward in several places to create the spiderweb pattern. Slice and serve.
Extra Tips
Pipe the sour cream after the quesadillas have cooled for one minute so the lines stay defined instead of melting into the cheese. If you want a milder flavor, reduce the chili powder by half before mixing it into the beans. Course: Appetizer Cuisine: Mexican Equipment: Large skillet, Mixing bowl, Spatula
Ghostly Stuffed Bell Peppers with Rice and Cheese
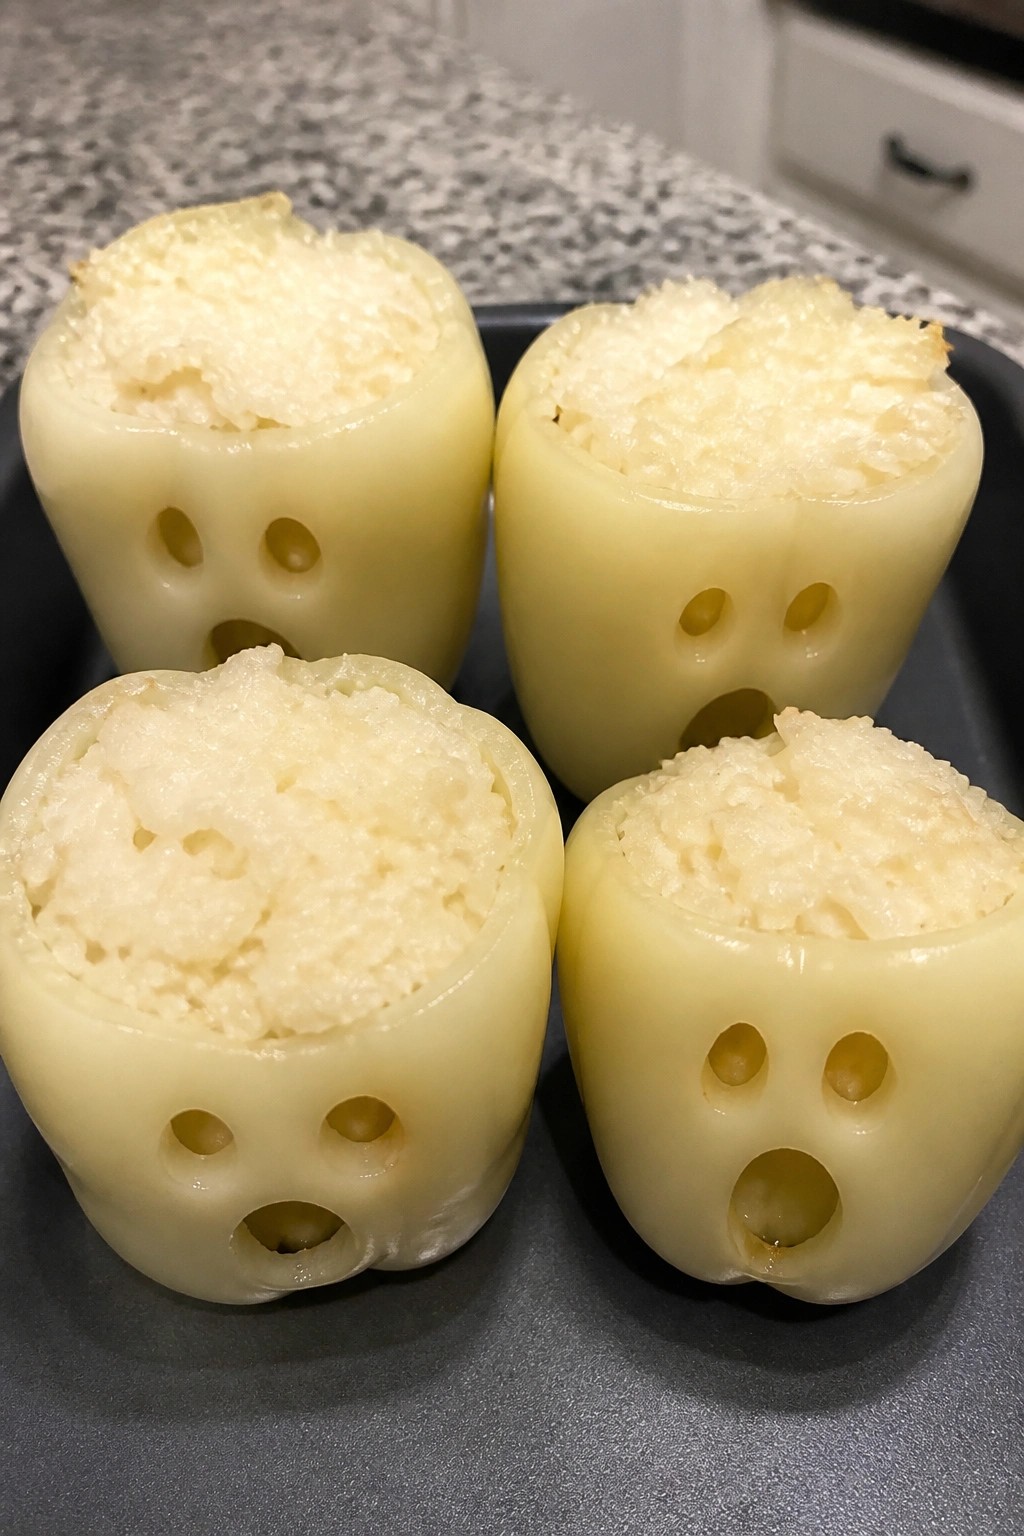
These stuffed peppers get their ghostly look from simple carved faces on the front of each pepper. They make a practical choice for a weeknight meal or a small Halloween gathering. The filling combines fluffy rice with two kinds of cheese for a mild, savory flavor and soft, melty texture.
The peppers stay tender after baking while the cheese holds the rice together inside. Families often enjoy them because the carving step is quick and the ingredients stay familiar.
Serves 4 people.
Ingredients
- 4 large white bell peppers
- 2 cups cooked white rice
- 1 1/2 cups shredded mozzarella cheese
- 1/2 cup grated Parmesan cheese
- 1 small onion, diced
- 2 cloves garlic, minced
- 1 tablespoon olive oil
- 1 teaspoon salt
- 1/2 teaspoon black pepper
Instructions
- Preheat the oven to 375 degrees. Cut a thin slice from the top of each white bell pepper and remove the seeds and membranes. Use a small knife to carve simple ghost faces into the front of each pepper.
- Warm the olive oil in a skillet over medium heat. Add the diced onion and cook until soft, about 4 minutes. Stir in the minced garlic and cook for 1 minute more.
- Remove the skillet from the heat. Add the cooked white rice, mozzarella cheese, Parmesan cheese, salt, and black pepper. Stir until the cheeses begin to melt and everything is evenly mixed.
- Spoon the rice mixture into the carved peppers, packing it gently so it fills each one. Place the peppers upright in a baking dish.
- Bake for 25 minutes until the peppers are tender and the cheese on top is lightly browned. Let them rest for 5 minutes before serving.
Extra Tips
Carve the ghost faces before stuffing so the peppers hold their shape during baking. If the rice mixture seems dry after mixing, add a splash of water to loosen it. Leftovers keep in the refrigerator for two days and reheat well in a covered dish at 350 degrees. Course: Main Course Cuisine: American Equipment: Large skillet, Mixing bowl, Baking dish, Sharp knife
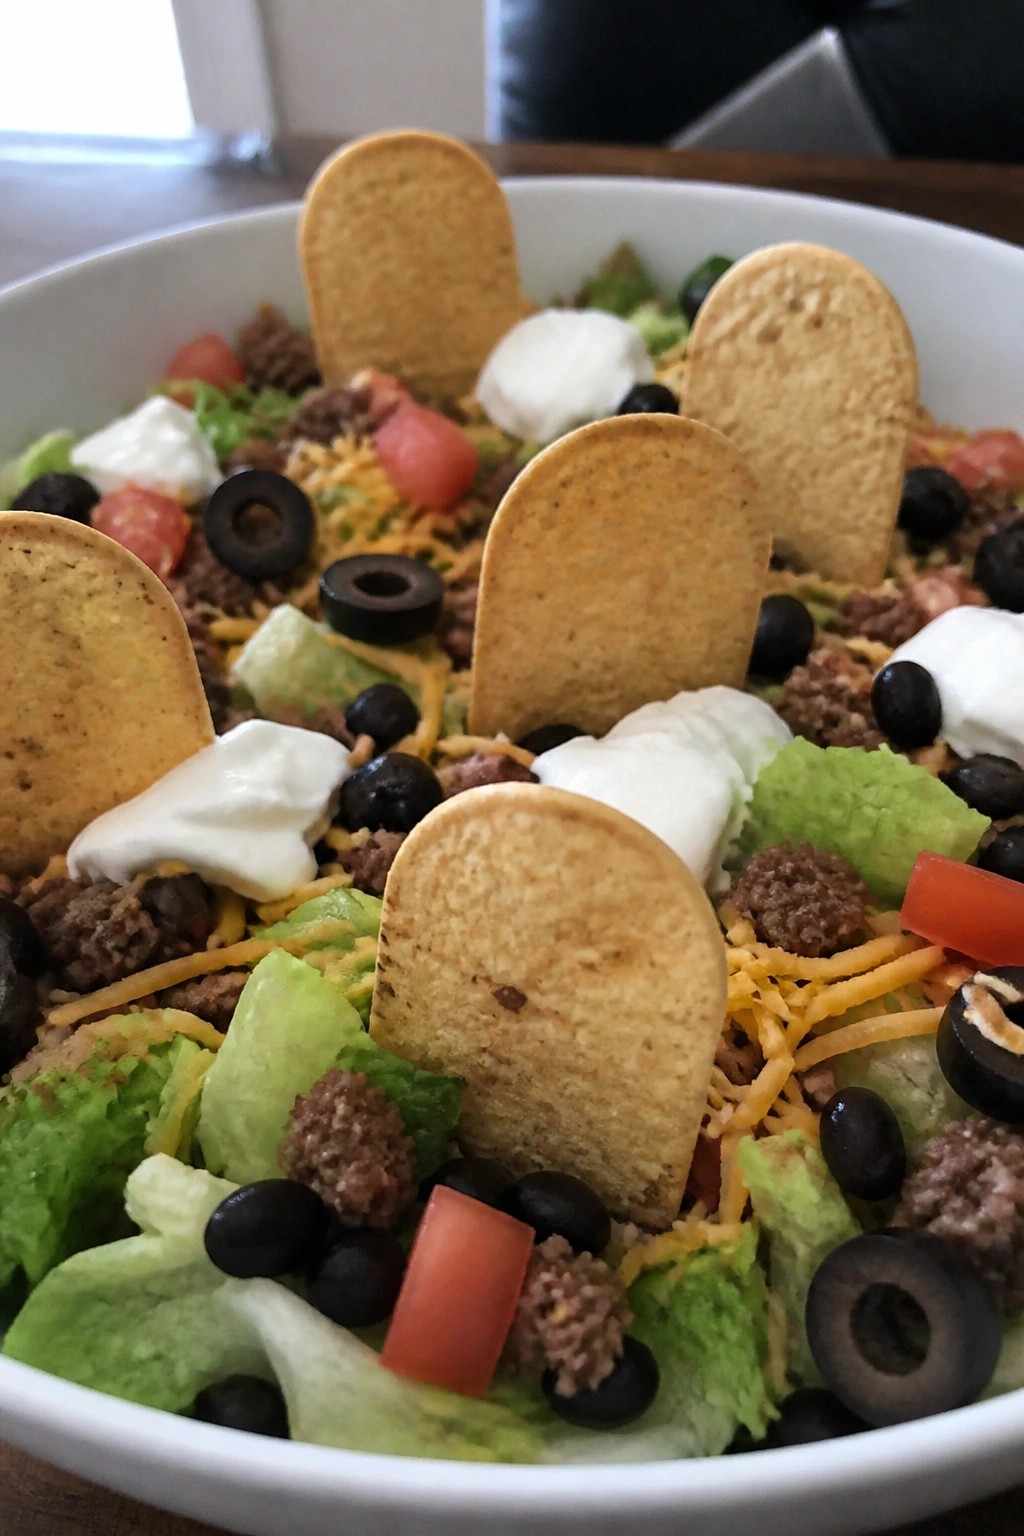
Graveyard Taco Salad with Tortilla Tombstones
This graveyard taco salad brings a fun Halloween twist to a family favorite. The tortilla tombstones stand upright in the salad and give it a playful look that fits right into October gatherings.
It works well for weeknight dinners or small parties when you want something hearty yet simple. Warm spiced beef sits alongside cool lettuce and beans, while the baked tortillas stay crisp on top.
Serves 4 people.
Recommended Products

SET OF 24 TOPPERS: Includes 24 red glitter vampire fangs cupcake toppers in 4 unique dripping lips designs to add spooky flair to your Halloween treats.

Gothic Party Styling: Designed for vampires don‘t age birthday party decorations and Halloween celebration setups, these red black vampire cupcake picks help create a dramatic dessert table filled with gothic atmosphere and playful spooky energy. The rose, coffin, castle, fang, bat and skull graphics bring strong visual contrast that stands out in party photos, helping guests instantly recognize the vampire inspired celebration theme

Ingredients
- 1 pound ground beef
- 2 tablespoons taco seasoning
- 6 cups chopped romaine lettuce
- 2 large tomatoes, diced
- 1 1/2 cups shredded cheddar cheese
- 1 can (15 oz) black beans, rinsed and drained
- 4 corn tortillas
- 1/2 cup sour cream
- 1/4 cup sliced black olives
Instructions
- Heat a large skillet over medium heat and add the ground beef. Cook until browned, breaking it up with a spoon. Drain excess fat, then stir in the taco seasoning and 1/4 cup water. Simmer for 3 minutes until the mixture thickens.
- While the beef cooks, preheat the oven to 375 degrees. Cut each corn tortilla into a tombstone shape with a sharp knife. Place the shapes on a baking sheet and bake for 8 to 10 minutes until crisp and lightly golden.
- In a large bowl, combine the romaine lettuce, diced tomatoes, black beans, and shredded cheddar cheese. Add the warm taco meat and toss gently to mix.
- Spoon the salad into a serving dish. Press the baked tortilla tombstones upright into the top of the salad. Pipe or spoon small amounts of sour cream onto the tombstones to write "RIP" and scatter the black olives around the base.
Extra Tips
Bake the tortillas ahead and store them in an airtight container so they stay crisp until serving. If the sour cream is too thick to pipe, stir in a teaspoon of milk to loosen it. Leftovers keep best when the tortilla pieces are stored separately from the salad to avoid sogginess. Course: Salad Cuisine: Mexican Equipment: Large Skillet, Baking Sheet, Large Bowl
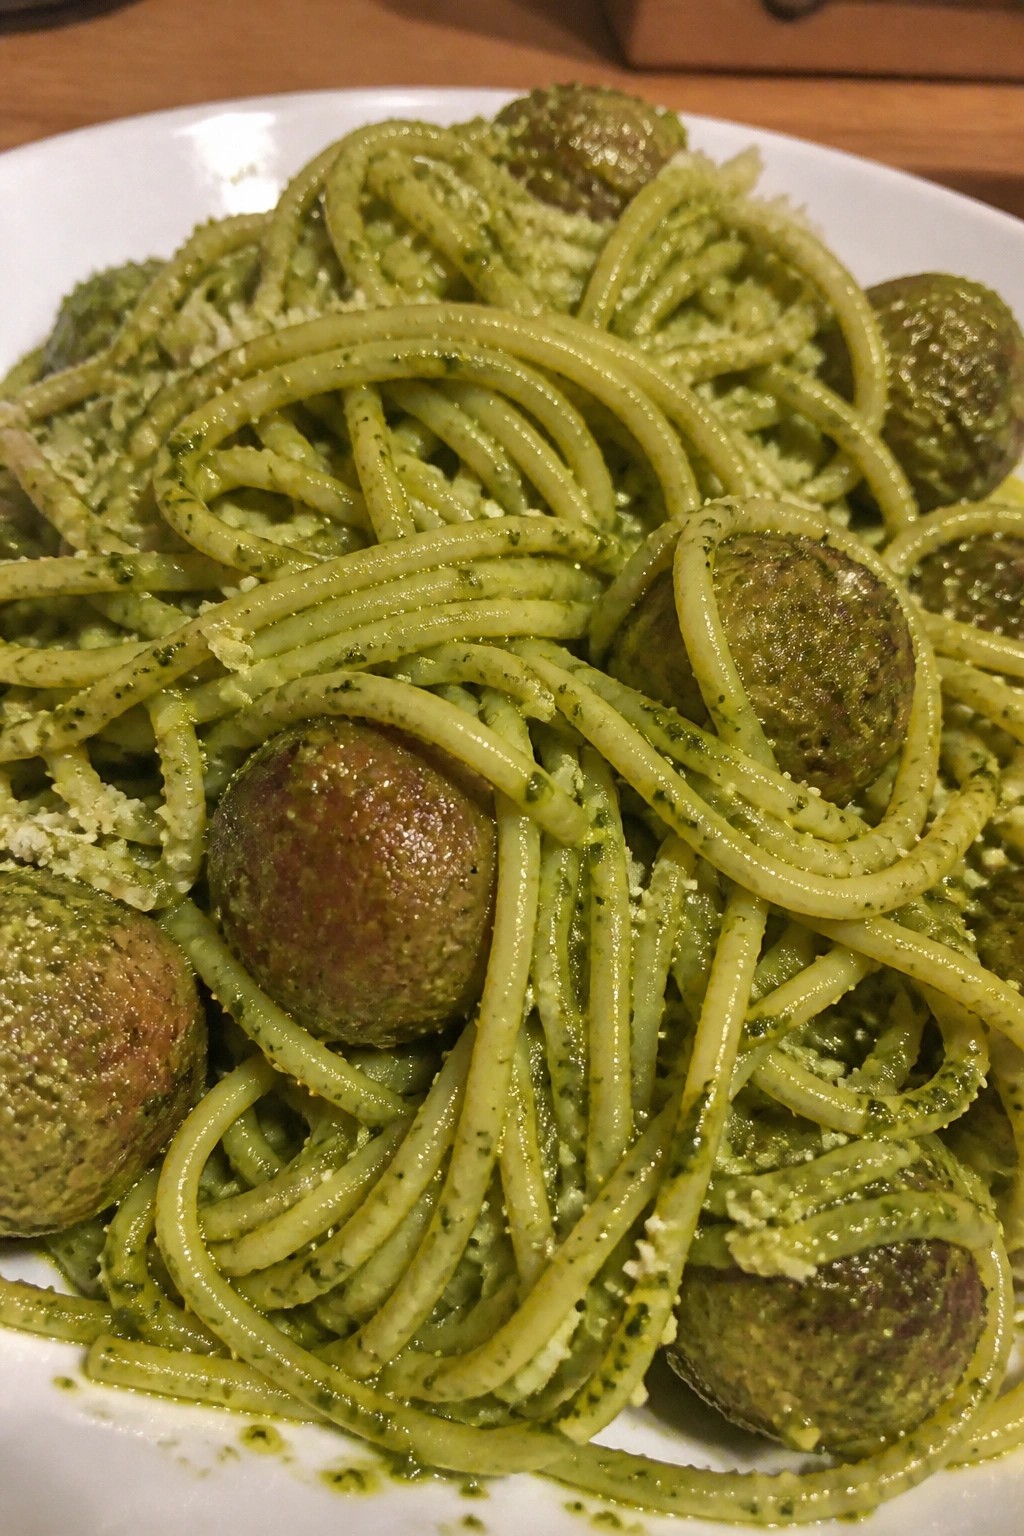
Monster Green Slime Pasta with Pesto and Meatballs
This pasta turns bright green from a generous coating of pesto, which gives it a playful slime look that fits right into Halloween meals. It works well for weeknight dinners or small gatherings when you want something simple yet themed.
The dish combines the fresh, herby taste of pesto with savory meatballs and tender pasta. Kids and adults both enjoy the mix of creamy sauce and hearty bites.
Serves 4 people.
Recommended Products
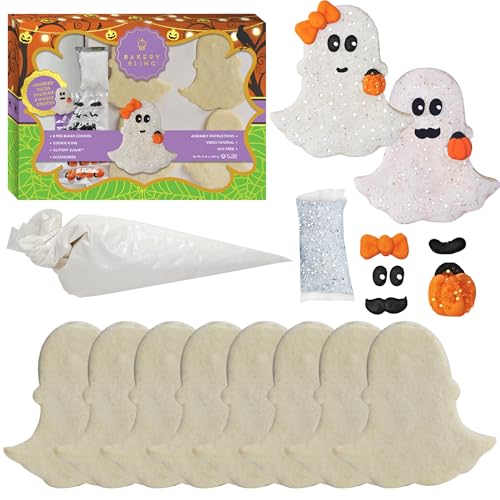
Complete Halloween Cookie Decorating Kit – Everything you need for a fun and festive activity in one box. Includes 8 pre-baked ghost-shaped vanilla sugar cookies, one 4.5 oz pre-filled royal icing decorating bag, 2 oz Diamond Glittery Sugar, and royal icing accessories. A must-have Halloween decorating kit for kids, families, and party hosts.

Ghost Eating Pizza design for men, women or kids to celebrate Halloween. Great costume idea for pizza lover or server.

COMPLETE KIT: Includes pre-printed 40x30cm framed numbered canvas, full set of acrylic paints, and quality paint brushes for a ready-to-start painting experience
Ingredients
- 12 ounces spaghetti
- 1 pound ground beef
- 1/2 cup breadcrumbs
- 1 large egg
- 2 cloves garlic, minced
- 1/4 cup grated Parmesan cheese, plus more for serving
- 1 cup basil pesto
- 2 tablespoons olive oil
- Salt and black pepper to taste
Instructions
- Combine the ground beef, breadcrumbs, egg, minced garlic, and 1/4 cup Parmesan in a bowl. Season with salt and pepper, then mix until evenly blended. Form the mixture into 16 small meatballs.
- Heat the olive oil in a large skillet over medium heat. Add the meatballs and cook, turning occasionally, until browned on all sides and cooked through, about 10 minutes. Remove from heat and set aside.
- Bring a large pot of salted water to a boil. Add the spaghetti and cook according to package directions until al dente. Drain the pasta, reserving 1/4 cup of the cooking water.
- Return the drained spaghetti to the pot. Stir in the basil pesto and a splash of the reserved pasta water to help the sauce coat evenly. Toss until the pasta turns fully green.
- Divide the pesto-coated pasta among four plates. Top each serving with the cooked meatballs and an extra sprinkle of Parmesan.
Extra Tips
Stir the pesto into the hot pasta right after draining so it clings well and creates the slime effect without clumping. If the meatballs finish cooking before the pasta, keep them warm in the skillet over low heat. Leftovers reheat best with a small splash of water to loosen the sauce again. Course: Main Course Cuisine: Italian Equipment: Large pot, Large skillet, Mixing bowl
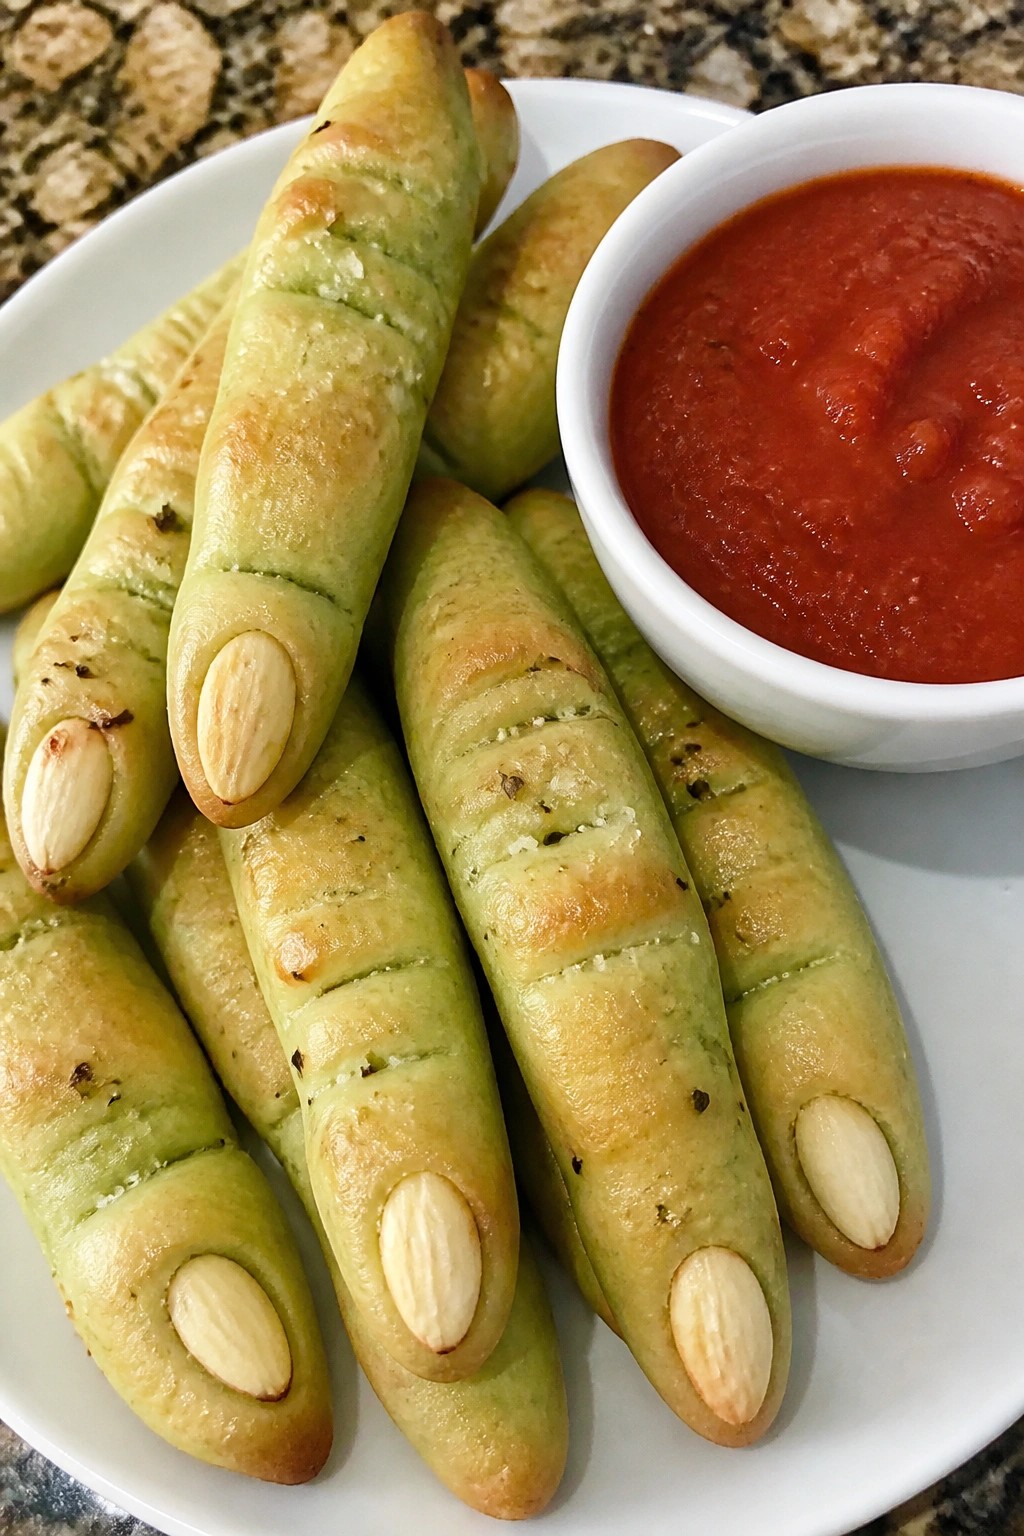
Witch Finger Breadsticks with Marinara Dip
These breadsticks bring a playful touch to any Halloween gathering. Shaped like crooked witch fingers, they work well as a starter at parties or a themed snack before trick-or-treating. Kids and adults both enjoy the hands-on look that fits right in with other spooky foods.
The breadsticks bake up golden with a light garlic flavor and soft interior. The marinara dip adds a bright, tangy contrast that balances the dough. Green coloring gives them their signature witchy appearance without extra steps.
Serves 4 people.
Ingredients
- 1 pound pizza dough
- 4 drops green food coloring
- 2 tablespoons olive oil
- 1 teaspoon garlic powder
- 1/2 teaspoon salt
- 12 blanched almonds
- 1 cup marinara sauce
Instructions
- Preheat the oven to 400 degrees F and line a baking sheet with parchment paper.
- Place the pizza dough in a mixing bowl and knead in the green food coloring until the color is even throughout.
- Divide the dough into 12 equal pieces and roll each into a thin finger shape about 5 inches long.
- Use a knife to score two or three lines near the middle of each finger to create knuckles.
- Press one almond into the tip of each finger to form a fingernail.
- Mix the olive oil, garlic powder, and salt in a small bowl, then brush the mixture over each breadstick.
- Arrange the breadsticks on the prepared baking sheet and bake for 12 to 15 minutes until lightly golden.
- Warm the marinara sauce in a small saucepan over low heat while the breadsticks bake, then transfer it to a serving bowl.
Extra Tips
Brush the olive oil mixture on right before baking so the garlic flavor stays bright and the surface turns golden without burning. If the almonds slide off during baking, press them back in while the breadsticks are still warm. Serve the dip slightly warm so it clings better to the crisp edges. Course: Appetizer Cuisine: American Equipment: Baking sheet, Mixing bowl, Oven
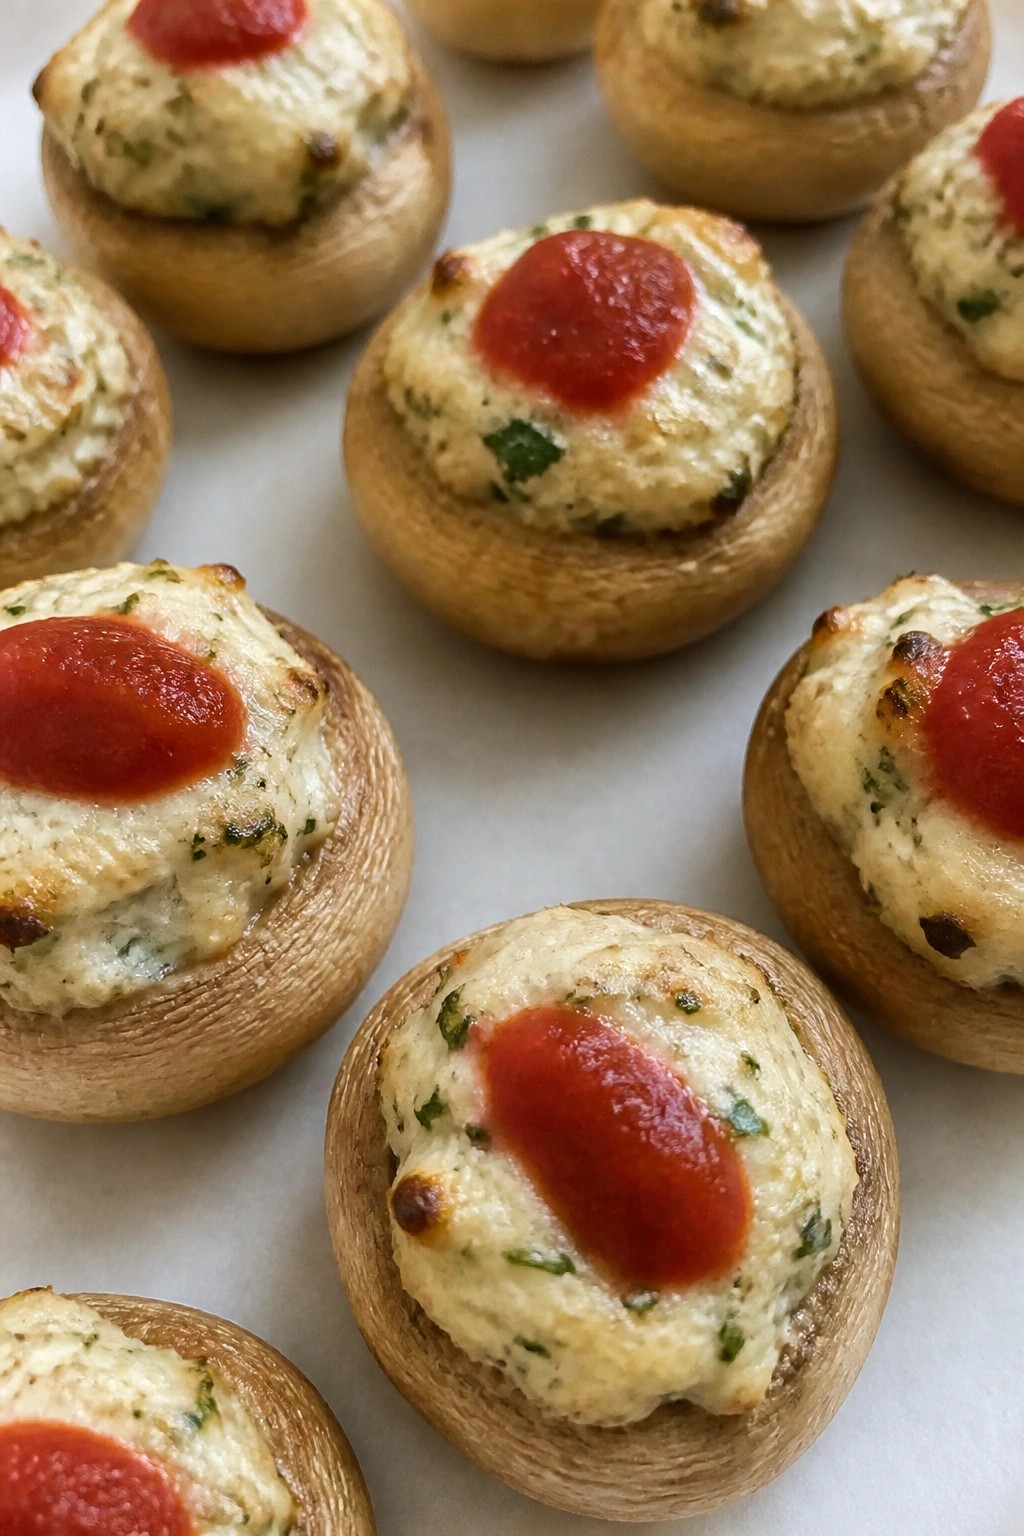
Vampire Bite Stuffed Mushrooms with Cream Cheese Filling
These stuffed mushrooms bring a simple, savory bite to any Halloween spread. The cream cheese filling turns rich and slightly tangy once baked, while the mushroom caps stay tender with a light golden edge. They work well as a starter for a party or a quick snack before trick-or-treating.
The red accents on top give the mushrooms their vampire-bite look without extra fuss. Serve them warm so the filling stays soft and easy to scoop.
Serves 4 people.
Ingredients
- 12 large white button mushrooms, stems removed
- 8 ounces cream cheese, softened
- 1/4 cup grated Parmesan cheese
- 2 cloves garlic, minced
- 2 tablespoons chopped fresh parsley
- 1/4 teaspoon salt
- 1/4 teaspoon black pepper
- 1 tablespoon olive oil
- 2 tablespoons marinara sauce
Instructions
- Heat the oven to 375 degrees and line a baking sheet with parchment paper.
- Wipe the mushroom caps clean with a damp cloth and arrange them open side up on the sheet.
- In a mixing bowl, combine the cream cheese, Parmesan, garlic, parsley, salt, and pepper until smooth.
- Spoon or pipe the filling into each mushroom cap, mounding it slightly.
- Brush the outside of the caps lightly with olive oil.
- Bake for 18 to 20 minutes until the mushrooms soften and the tops turn lightly golden.
- Remove from the oven and dot two small drops of marinara sauce on each filled mushroom to create the bite marks.
Extra Tips
Let the mushrooms rest for two minutes after baking so the filling sets a little and does not run when moved. If you want a milder garlic flavor, roast the cloves first before mixing them in. Leftovers keep in an airtight container in the fridge for up to two days and reheat best in a 350-degree oven for five minutes. Course: Appetizer Cuisine: American Equipment: Baking sheet, Mixing bowl, Knife
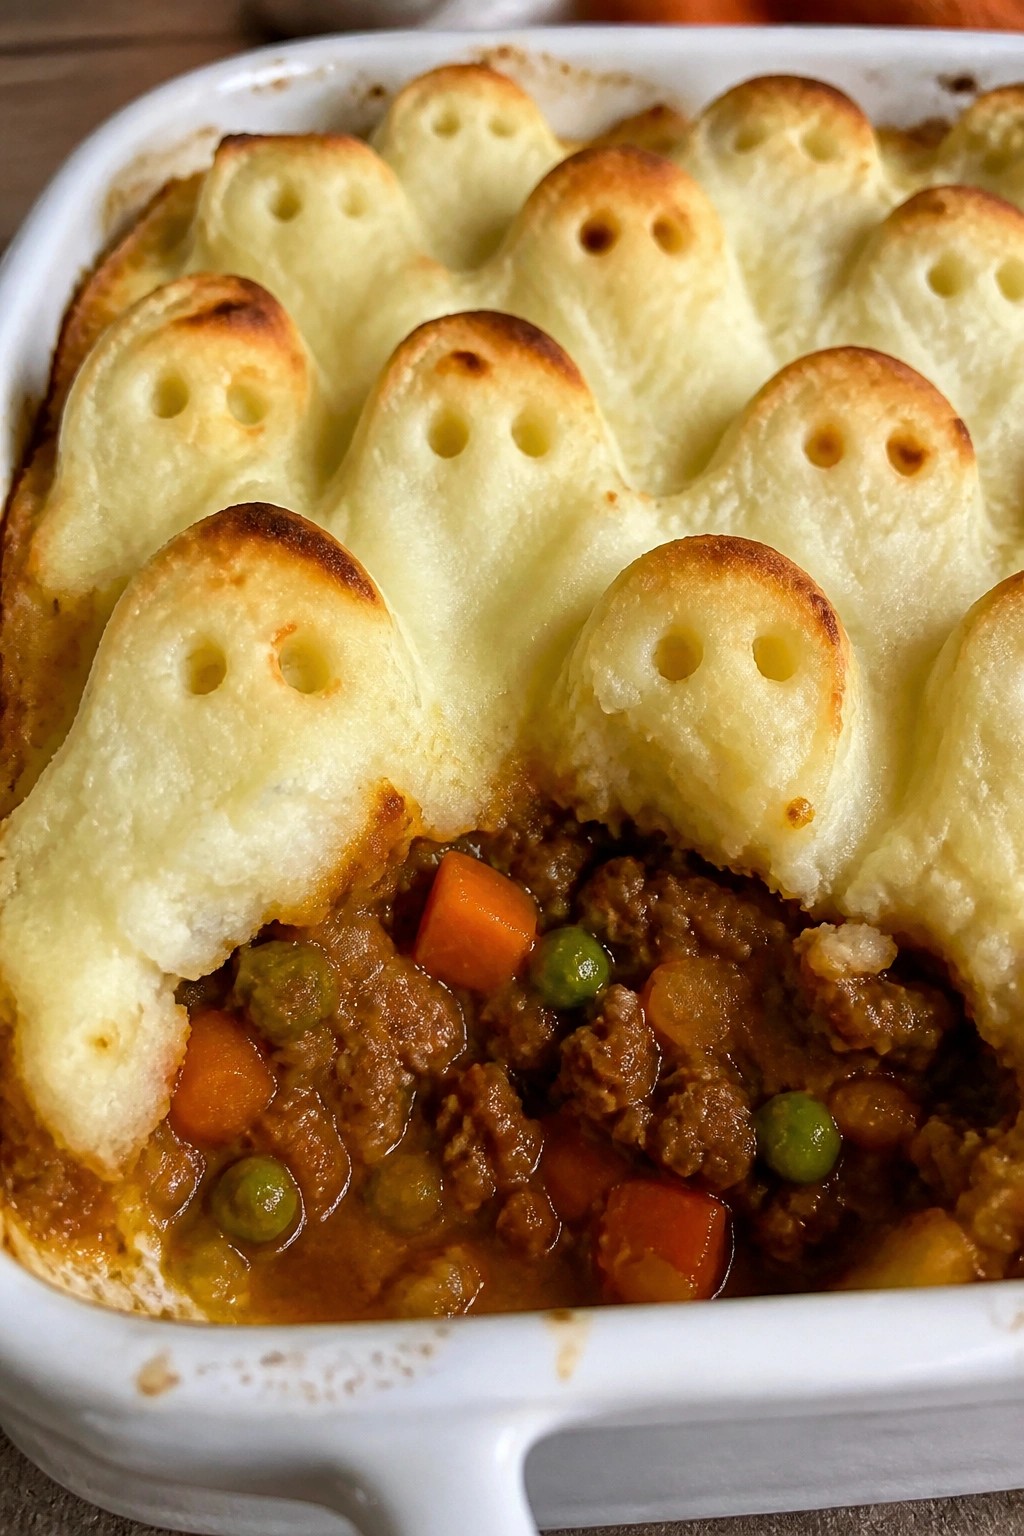
Pumpkin Patch Shepherd’s Pie with Mashed Potato Ghosts
This shepherd’s pie adds a playful Halloween touch with pumpkin stirred into the savory filling and mashed potatoes piped into ghost shapes on top. It suits a weeknight dinner or small gathering when you want a filling meal that still feels seasonal and lighthearted.
The dish combines classic shepherd’s pie comfort with mild pumpkin sweetness and creamy potato topping. The ghosts brown lightly in the oven while the filling stays moist underneath.
Serves 4 people.
Ingredients
- 1 lb ground beef
- 1 medium onion, diced
- 2 carrots, diced
- 1 cup pumpkin puree
- 1/2 cup beef broth
- 1 cup frozen peas
- 4 large russet potatoes, peeled and cubed
- 1/4 cup butter
- 1/2 cup milk
- 1 tsp dried thyme
- Salt and pepper to taste
- 2 tbsp olive oil
Instructions
- Heat olive oil in a large skillet over medium heat. Add the diced onion and carrots and cook until the onion turns soft.
- Add the ground beef to the skillet and cook until browned, breaking it up with a spoon. Stir in the pumpkin puree, beef broth, thyme, salt, and pepper. Simmer for 5 minutes, then mix in the frozen peas and remove from heat.
- Place the cubed potatoes in a large pot and cover with water. Boil until tender, about 15 minutes. Drain the potatoes.
- Mash the potatoes with butter and milk until smooth. Season with salt and pepper. Let the mash cool slightly so it holds shape when piped.
- Spoon the beef and pumpkin filling into a baking dish and spread it evenly. Transfer the mashed potatoes to a piping bag fitted with a large round tip.
- Pipe ghost shapes across the top of the filling. Bake at 400°F for 15 to 20 minutes until the ghosts turn lightly golden on the edges.
Extra Tips
Pipe the ghosts a little taller than wide so they keep their shape after baking. If the mash feels too stiff to pipe, add a splash more milk before filling the bag. Leftovers reheat well in the oven at 350°F with a piece of foil loosely covering the dish to prevent the ghosts from drying out. Course: Main Course Cuisine: American Equipment: Large skillet, Large pot, Potato masher, Baking dish, Piping bag
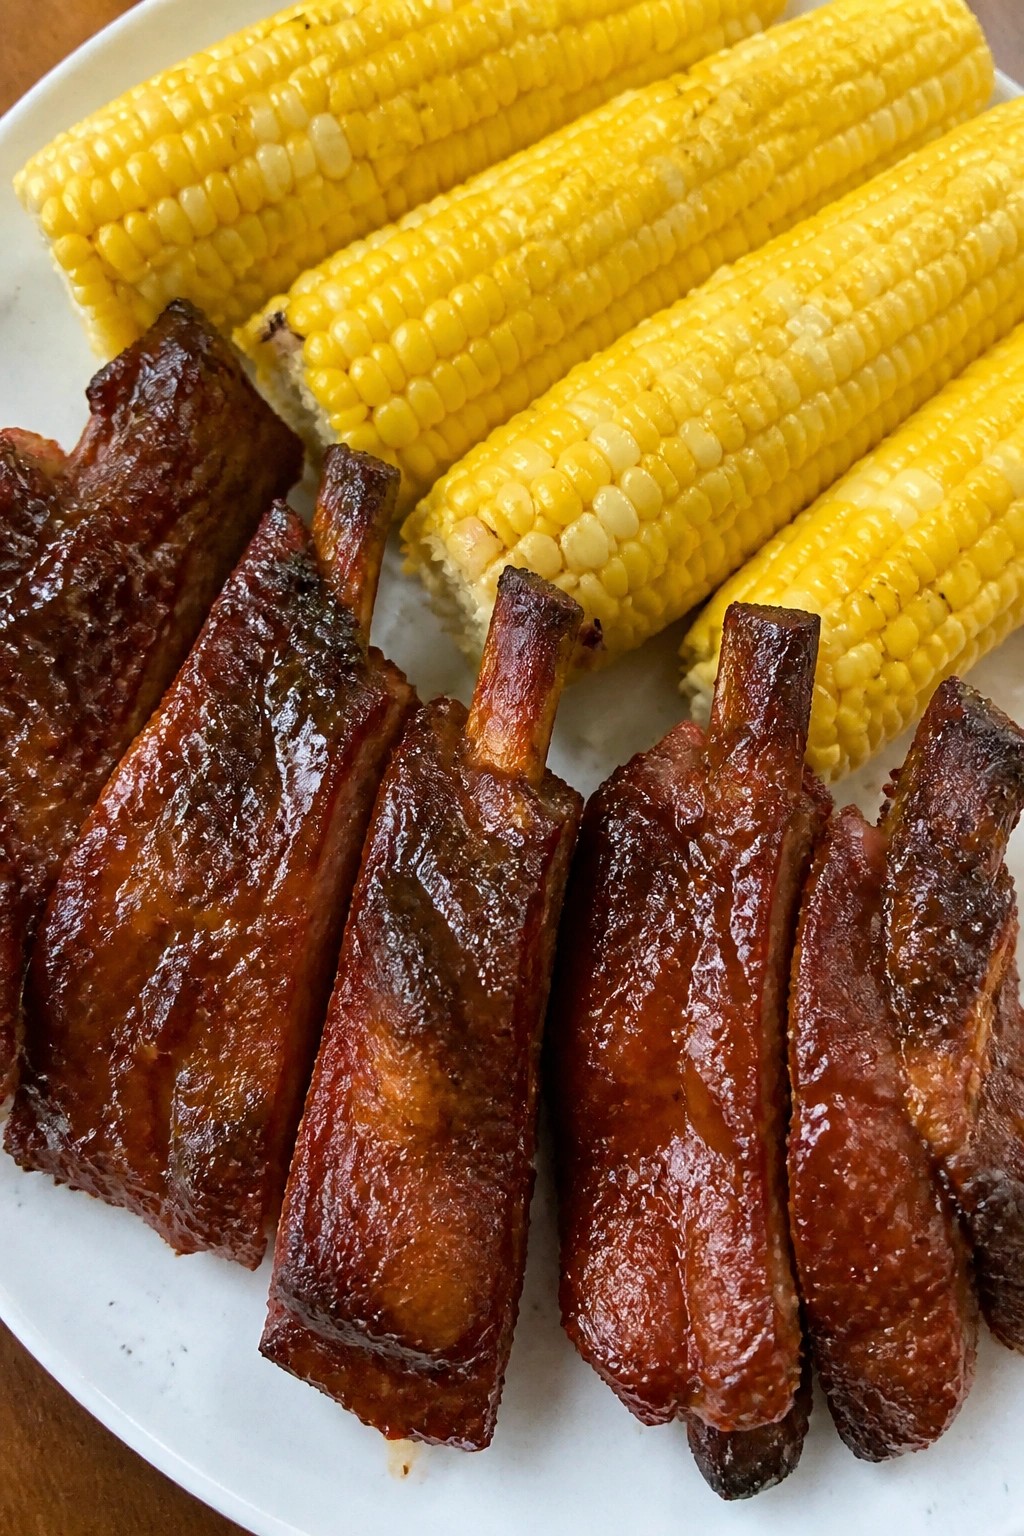
Skeleton Bone Barbecue Ribs with Corn on the Cob
These ribs get their name from the exposed bones that stand out once the meat is cooked and sauced. The presentation works well for a Halloween spread because the long bones give the dish a playful skeleton look while still tasting like standard barbecue.
The ribs turn out tender with a smoky-sweet coating, and the corn adds a simple sweet contrast that balances the meal. It fits a casual party table or a weeknight dinner when you want something themed without extra fuss.
Serves 4 people.
Ingredients
- 2 racks baby back ribs (about 3 pounds total)
- 2 teaspoons salt
- 1 teaspoon black pepper
- 1 teaspoon smoked paprika
- 1 cup barbecue sauce
- 4 ears corn on the cob
- 4 tablespoons butter
Instructions
- Preheat the oven to 300°F. Pat the ribs dry and rub them evenly with salt, black pepper, and smoked paprika on both sides.
- Place the ribs on a baking sheet, cover tightly with foil, and bake for 2 hours until the meat is tender and pulls away from the bone slightly.
- Remove the foil, brush both sides of the ribs with barbecue sauce, and return them to the oven uncovered for 15 minutes to set the sauce.
- While the ribs finish, bring a large pot of water to a boil. Add the corn and cook for 5 to 7 minutes until tender.
- Drain the corn and toss each ear with 1 tablespoon of butter. Cut the racks into individual ribs and serve with the buttered corn on the side.
Extra Tips
Arrange the ribs on the platter so the bones point outward to highlight the skeleton shape. If you prefer a deeper smoke flavor, finish the sauced ribs on a grill over medium heat for a few minutes instead of the oven. Leftovers keep in the fridge for up to three days and reheat well in a 350°F oven with a splash of water to keep the meat moist. Course: Main Course Cuisine: American Equipment: Oven, Baking Sheet, Large Pot, Basting Brush
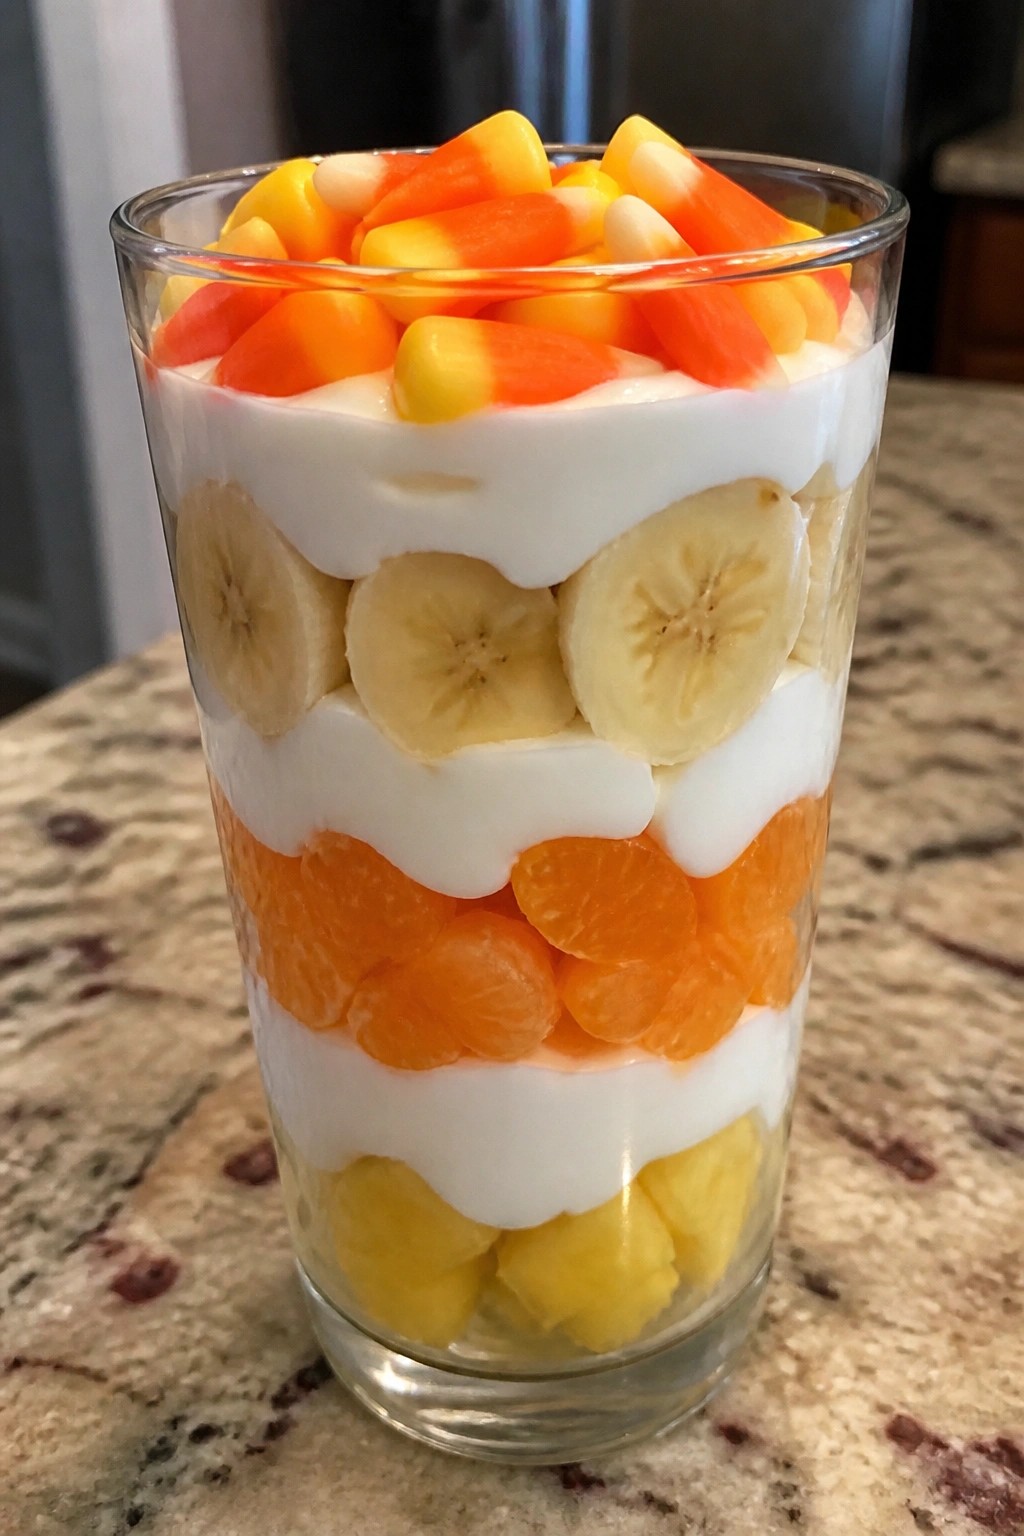
Candy Corn Layered Parfait with Yogurt and Fruit
This parfait brings a playful nod to classic candy corn through simple fruit layers and creamy yogurt. It works well for Halloween parties or after-school snacks when you want something light yet themed. The texture stays smooth from the yogurt while the fruit adds natural sweetness and a bit of bite.
Serves 4 people.
Ingredients
- 2 cups vanilla Greek yogurt
- 1 tablespoon honey
- 1 cup pineapple chunks
- 1 cup mandarin orange segments
- 1/2 cup banana slices
- 12 candy corn pieces
Instructions
- Stir the honey into the vanilla Greek yogurt until it is evenly blended. Set the mixture aside.
- Divide the pineapple chunks evenly among four clear glasses to form the bottom yellow layer.
- Spoon the mandarin orange segments over the pineapple to create the middle orange layer.
- Add the banana slices on top of the oranges.
- Spoon the sweetened yogurt over the fruit layers to form the white top layer.
- Place three candy corn pieces on the yogurt surface of each parfait just before serving.
Extra Tips
Chill the glasses ahead of time so the yogurt stays firm and the layers stay distinct. If the pineapple tastes very sweet, reduce the honey slightly. Leftovers keep covered in the refrigerator for one day, though the banana slices may soften. Course: Dessert Cuisine: American Equipment: Mixing bowl, spoon, parfait glasses
Bloody Eyeball Deviled Eggs with Paprika
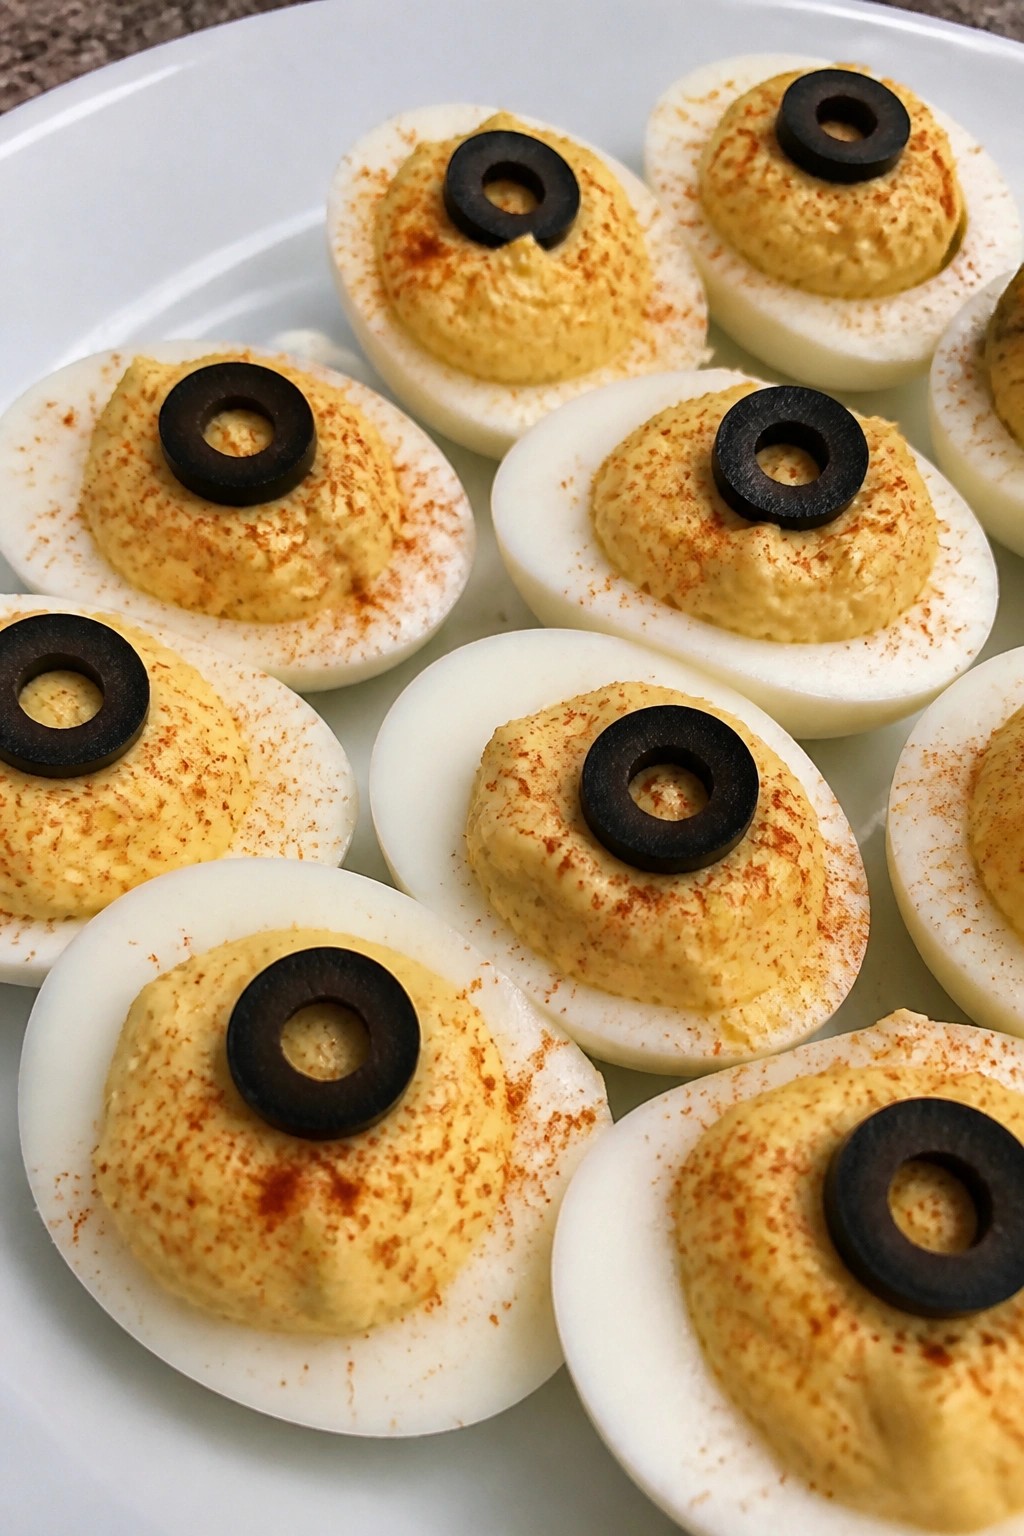
These deviled eggs turn a classic appetizer into a Halloween favorite with a simple paprika dusting that creates a bloodshot look. The creamy filling pairs well with the smoky spice, making them easy to serve at parties or potlucks. They hold up nicely on a platter and give guests a familiar flavor with a themed finish.
The texture stays smooth from the mashed yolks and mayonnaise while the paprika adds a mild warmth without overpowering the eggs. Black olive slices placed in the center complete the eyeball effect.
Serves 4 people.
Ingredients
- 6 large eggs
- 3 tablespoons mayonnaise
- 1 teaspoon Dijon mustard
- 1/2 teaspoon smoked paprika, plus extra for garnish
- 1/4 teaspoon salt
- 1/4 teaspoon black pepper
- 12 thin black olive slices
Instructions
- Place the eggs in a large pot and cover them with water. Bring the water to a boil over medium-high heat, then reduce to a simmer and cook for 10 minutes.
- Drain the hot water and transfer the eggs to a bowl of ice water. Let them cool for 5 minutes, then peel off the shells.
- Slice each egg in half lengthwise and scoop the yolks into a mixing bowl. Arrange the whites on a serving plate.
- Mash the yolks with a fork until smooth. Stir in the mayonnaise, Dijon mustard, 1/2 teaspoon smoked paprika, salt, and black pepper until the mixture is creamy.
- Spoon or pipe the yolk mixture back into the egg white halves.
- Press one black olive slice into the center of each filled egg to form the pupil.
- Lightly sprinkle extra smoked paprika around the olive slices and over parts of the filling to create the bloody effect.
Extra Tips
Make the eggs a day ahead and store them covered in the refrigerator, then add the olive slices and final paprika dusting right before serving so the color stays bright. If the filling seems too thick after mixing, add a small drop of water to loosen it. Smoked paprika gives a deeper red tone than regular paprika, so use that for the best visual result. Course: Appetizer Cuisine: American Equipment: Large pot, Mixing bowl, Knife, Fork, Spoon
Frankenstein Avocado Toast with Olive Features
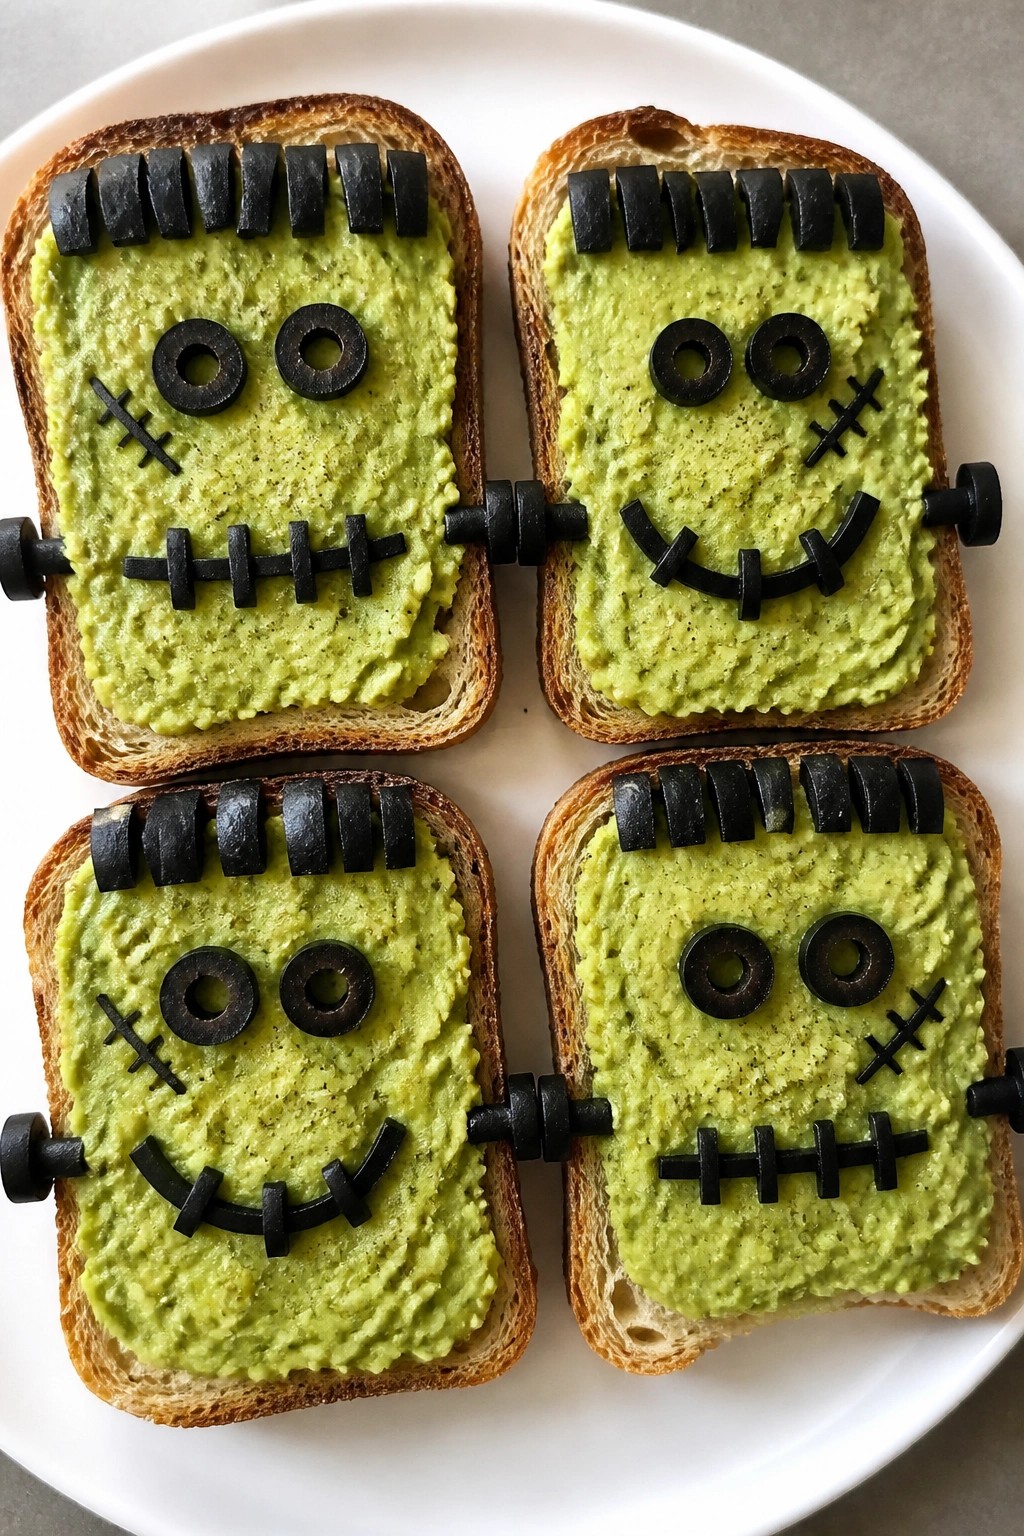
This avocado toast turns a simple breakfast into a playful Halloween snack. The green mash creates a base for olive details that form a friendly monster face. It works well for parties or family meals when you want something quick yet themed.
The texture stays creamy from the avocado while the olives add a salty bite. Kids and adults both enjoy assembling the faces, and the flavors stay familiar enough for everyday eating.
Serves 4 people.
Ingredients
- 4 slices sourdough bread
- 2 ripe avocados
- 1 tablespoon lemon juice
- 1/2 teaspoon salt
- 1/4 teaspoon black pepper
- 12 pitted black olives
Instructions
- Toast the sourdough slices until golden and crisp on both sides.
- Cut the avocados in half, remove the pits, and scoop the flesh into a mixing bowl.
- Add the lemon juice, salt, and black pepper to the bowl. Mash everything together with a fork until mostly smooth with a few small chunks remaining.
- Spread the avocado mixture evenly over each slice of toast.
- Slice four olives in half lengthwise for the eyes. Place two halves on each toast to form eyes.
- Cut four more olives into thin strips. Arrange the strips to create a mouth and a scar line across the forehead on each piece.
- Slice the remaining olives into small rounds. Position two rounds on the sides of each toast to look like neck bolts.
Extra Tips
Use firm but ripe avocados so the mash holds its shape on the toast. If the olives feel too salty, rinse them briefly under water before slicing. Prepare the avocado mixture right before serving to keep the color bright green. Course: Snack Cuisine: American Equipment: Toaster, Mixing Bowl, Knife