Ever wondered how to fix a sloping bathroom floor without the hassle of removing tiles? Picture this: You step out of the shower, only to find water pooling in one corner due to an uneven surface. Fret not, as we’ve got you covered with a solution that saves both time and effort.
In this article, you’ll discover practical tips on rectifying a sloped bathroom floor without having to deal with the tedious task of tile removal. Imagine enjoying a perfectly leveled bathroom floor without the disruption and cost of renovating from scratch. Stay tuned to learn how you can achieve a smooth and even surface in your bathroom effortlessly.
Key Takeaways
- Correcting slope in a bathroom floor is crucial to prevent water pooling, drainage issues, and safety risks.
- Visual inspection and using water levels are effective methods for identifying slope problems without removing tiles.
- Self-leveling compounds and shimming techniques offer practical solutions to correct minor slopes without disturbing existing tile surfaces.
- Preparing the surface, applying the solution, and performing routine maintenance are key steps in correcting slope effectively.
Understanding the Need to Correct Slope in Bathroom Floors
When your bathroom floor has an improper slope, it can lead to various issues that affect both the functionality and aesthetics of the space. Here’s why correcting the slope is essential:
Common Issues Caused by Improper Sloping
- Water Pooling: An incorrectly sloped floor can cause water to accumulate in certain areas, leading to puddles or even potential water damage over time.
- Difficulty Draining: Proper drainage is crucial in a bathroom, and an uneven slope can impede water flow towards drains, causing standing water after showers.
- Uneven Surfaces: Walking on a sloped floor not only feels awkward but also poses safety risks due to instability and discomfort.
- Visual Inspection: Start by visually assessing the floor for any noticeable slopes or dips that could indicate where the problem areas are located.
- Using Water Levels: A simple way to check slope severity is by placing a water level at different points on the floor to see how water accumulates or flows.
By understanding these common issues and methods for identifying slope problems, you’ll be better equipped to address and correct them effectively without having to remove tiles from your bathroom floor.
Options for Correcting Slope Without Tile Removal
If you’re looking to fix a sloping bathroom floor without the hassle of removing tiles, there are practical solutions available. Here are two effective methods to help you correct the slope without disrupting your existing tile surface.
Recommended Products

Use to fill and level surfaces prior to the installation of carpeting, vinyl floor tile, floor sheeting and more

EASY VERSATILE APPLICATION — Apply self-leveling concrete sealant to expansion joints without concern for uneven surfacing. Perfect for driveways, garages, sidewalks, or pavement
Using Self-Leveling Compounds
When dealing with a sloped bathroom floor, self-leveling compounds can be your go-to solution. These compounds are easy to apply and provide a quick fix for minor slope issues. Here’s how you can use them:
- Prepare the Surface: Clean the floor thoroughly to ensure proper adhesion of the self-leveling compound.
- Mix the Compound: Follow the manufacturer’s instructions to mix the self-leveling compound to the right consistency.
- Pour and Spread: Pour the compound onto the sloped area and spread it evenly using a trowel or squeegee.
- Allow Drying: Let the compound dry as per the recommended time on the product packaging.
- Check Levelness: Once dry, verify that the floor is now level by using a spirit level.
Self-leveling compounds offer a cost-effective and efficient way to correct minor slopes in your bathroom floor without disturbing your tiles.
Employing Shimming Techniques
Another method to correct slope in your bathroom floor without removing tiles is through shimming techniques. Shims are thin wedges that can be strategically placed under specific areas of your flooring to adjust its slope. Here’s how you can employ shimming techniques:
- Identify Sloped Areas: Use a level or water-filled tube to pinpoint where shimming is needed on your bathroom floor.
- Cut Shims: Cut wooden shims into appropriate sizes based on the identified sloped areas.
- Place Shims: Insert shims under the tiles at locations requiring adjustment until achieving desired levelness.
- Test Stability: Walk over shimmed areas gently to ensure stability and adjust if necessary.
By utilizing shimming techniques, you can effectively correct slope issues in targeted areas of your bathroom floor while keeping your existing tile intact.
Step-by-Step Guide to Correcting Slope
Fixing the slope in your bathroom floor without removing tiles is a practical solution to prevent water pooling and ensure proper drainage. Here’s how you can correct the slope effectively:
Recommended Products

This product adds a great value

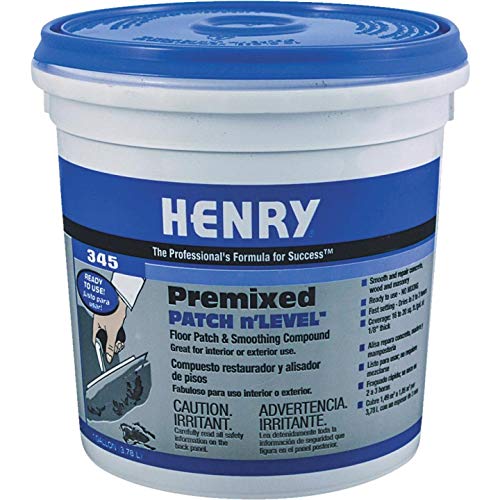
EASY APPLICATION: Premixed patch level paste is ready to use for quick and simple repairs. No mixing required. Ideal for both professionals and DIY projects on various surfaces.

Fiber-reinforced self-leveling floor underlayment for increased durability, tensile strength, and flexural performance
Preparing the Surface
To begin correcting the slope in your bathroom floor, you need to prepare the surface properly. Follow these steps:
- Clean the Floor: Start by ensuring that the existing tile surface is clean and free of any debris or dust. Use a broom or vacuum cleaner to remove dirt and particles.
- Inspect for Damage: Check for any damaged tiles or grout lines that may affect the correction process. Replace or repair any broken tiles before proceeding further.
- Leveling Compound: If there are significant irregularities in the floor, consider using a leveling compound to fill in low spots and create a more even surface.
Applying the Solution
After preparing the surface, it’s time to apply the solution for correcting the slope without removing tiles. Here’s what you need to do:
- Self-Leveling Compound: Prepare a self-leveling compound according to the manufacturer’s instructions. Pour it onto the sloped area of your bathroom floor and spread it evenly using a trowel.
- Example: If you notice a dip near your shower area, pour self-leveling compound over that spot until it reaches an even level with the rest of the floor.
- Verify Levelness: Once you’ve applied the self-leveling compound, use a level tool to ensure that the corrected area is flat and matches the surrounding floor height.
By following these steps, you can effectively correct slope issues in your bathroom floor without having to go through the hassle of tile removal.
Maintenance Tips After Correcting Slope
After successfully correcting the slope in your bathroom floor without removing tiles, there are essential maintenance tips to ensure the longevity of your fix and prevent future issues.
Recommended Products

100% Silicone Caulk Protection: This silicone caulk white provides ultimate waterproof protection, ensuring a reliable seal against water damage. Ideal for areas with consistent exposure, keeping your surfaces safeguarded and pristine under any weather condition.

✔Wide Application: Aqzfeuy caulking tape provides clean waterproof protection for bathroom and kitchen edges, preventing water from seeping into the joints, widely used for sealing the seams of toilets, bathtubs, showers, sinks, gas stoves, kitchen counters, vanities, tubs, floors, tiles, and walls, vinyl flooring, keeping kitchens and bathrooms clean and tidy for a long time.

【Size】Each roll Width: 38mm/1.5 inch, Length: 3.2m/126 inch.
Routine Checks and Balances
Regularly inspect your bathroom floor for any signs of re-sloping or water pooling. Use a level tool to check the evenness of the surface. If you notice any new slope irregularities, address them promptly using the same correction methods to maintain a flat and safe floor.
Long-Term Care Strategies
Consider applying a waterproof sealant over the corrected area to protect it from moisture damage. This additional layer can help prolong the life of your fixed slope and prevent water seepage into underlying structures. Additionally, avoid placing heavy objects directly on the corrected spot to maintain its integrity over time. Regular cleaning with mild detergents will also help preserve the corrected slope and keep your bathroom floor looking pristine.
Conclusion
You now have the knowledge to tackle sloping bathroom floors without the hassle of tile removal. By following the steps outlined in this guide, you can ensure a level surface and prevent water-related issues. Remember to conduct regular maintenance checks, apply waterproof sealant for protection, and implement long-term care practices for a stable bathroom floor. With these tips, you’ll maintain your corrected slope and keep your bathroom safe and functional for years to come.
Frequently Asked Questions
Can sloping bathroom floors be fixed without tile removal?
Yes, sloping bathroom floors can be fixed without tile removal using leveling compounds.
How can I fix a sloping bathroom floor with leveling compounds?
To fix a sloping bathroom floor, apply leveling compounds following the manufacturer’s instructions for a smooth and level surface.
What maintenance tips are recommended after fixing the slope issue?
After fixing the slope issue, regularly check for any new slope irregularities, apply waterproof sealant to protect the floor, and implement long-term care strategies for maintenance.