Ever wondered how to tackle that pesky issue of water lurking beneath your tiles without the hassle of removing them? Picture this: you step onto your tiled floor, only to feel a subtle squish underfoot that signals trapped moisture. Don’t fret – we’ve got you covered!
In this article, we’ll walk you through practical tips and tricks on how to effectively dry out water under tiles without the need for extensive renovations. Imagine regaining a dry, solid foundation under your feet without disrupting your entire space. Stay tuned as we unveil simple yet effective methods to address this common household concern.
Key Takeaways
- Water accumulation under tiles can be caused by leaky pipes, poor waterproofing, high humidity levels, and cracks in grout or seals.
- Neglecting water under tiles can lead to mold growth, structural damage, odor problems, and tile discoloration.
- Essential tools for drying out water under tiles include a moisture meter, flashlight, safety gear, dehumidifier, fans, absorbent materials, and a dry/wet vacuum cleaner.
- Steps to dry out water under tiles without removing them involve identifying the affected area, using dehumidifiers and fans for drying, and sealing the tiles post-drying.
- Preventive measures to avoid future water damage include regular maintenance checks, repairing grout lines promptly, applying sealants on grout and tile surfaces, improving ventilation in moisture-prone areas like bathrooms and kitchens.
Understanding the Problem of Water Under Tiles
Water accumulation under tiles can lead to various issues in your home. Here’s a breakdown of why this happens and the risks associated with neglecting this common concern.
Causes of Water Accumulation
When water seeps beneath your tiles, it’s often due to:
- Leaky Pipes: Damaged or leaking pipes can release water that finds its way under the tiles.
- Poor Waterproofing: Inadequate waterproofing during tile installation can allow water penetration.
- High Humidity Levels: Excessive moisture in the air can condense under tiles, leading to dampness.
- Cracks in Grout or Seals: Breaks in grout lines or seals provide pathways for water intrusion.
Risks of Ignoring the Issue
Neglecting water under your tiles can result in:
- Mold Growth: Damp conditions foster mold and mildew development, posing health risks.
- Structural Damage: Prolonged exposure to moisture weakens structures and compromises stability.
- Odor Problems: Stagnant water can produce unpleasant odors, affecting indoor air quality.
- Tile Discoloration: Water stains may appear on the surface of tiles, impacting aesthetics.
Understanding these causes and risks is crucial for addressing water accumulation effectively without resorting to extensive renovations.
Tools and Materials Needed
When tackling the task of drying out water under tiles without removing them, having the right tools and materials is crucial. Here’s what you’ll need:
Recommended Products

WATER LEAK DETECTOR detects relative moisture content from leaks and flooding
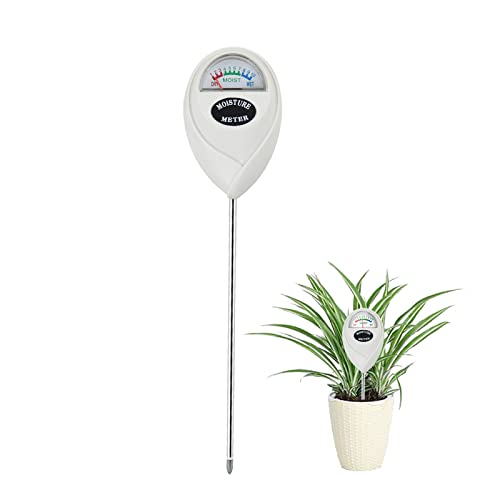
【SAVE YOUR PLANTS】: Over watering can cause problems with your plants or even kill them. This soil moisture meter helps you know the soil is dry, moist or wet.No more over watering!

Accurate Soil Moisture Detection: The XLUX Soil Moisture Meter can tell you if the soil deep inside your pot or garden is dry, moist or wet; whereas your eyes and fingers can only determine the moisture level of the soil surface. The probe is 5.5 inches (14 cm) longer than regular styles, allowing it to measure the soil moisture at the bottom of larger and deeper flower pots.
Basic Tools for Detection
- Moisture Meter: This handy device helps you detect the presence of moisture beneath your tiles accurately.
- Flashlight: A good quality flashlight will help you illuminate dark areas to spot any signs of water accumulation.
- Safety Gear: Ensure you have gloves, goggles, and a mask to protect yourself during the process.
- Utility Knife: Useful for carefully lifting a tile for inspection without causing damage.
- Screwdriver: Helps in removing grout or seals if needed for further investigation.
- Dehumidifier: An essential tool to reduce humidity levels and aid in drying out the area effectively.
- Fans: Position fans strategically to promote air circulation and speed up the drying process.
- Absorbent Materials (e.g., Towels): Use these to soak up excess water from the affected area before it causes further damage.
- Dry/Wet Vacuum Cleaner: Ideal for extracting standing water efficiently from under the tiles.
Having these tools at your disposal will make the process of drying out water under tiles more manageable and effective, helping you address potential issues promptly before they escalate into larger problems.
Step-by-Step Guide on How to Dry Out Water Under Tiles Without Removing Them
Drying out water under tiles without removing them is crucial to prevent mold growth and structural damage. Follow these steps carefully to effectively address the issue.
Recommended Products

HUMIDITY SENSOR: Our handy meter tool can quickly determine what level of remediation is needed to keep your family safe from black mold. High levels of dampness that go untreated are the leading cause of harmful fungus growth in the home.

More Accurate & Stable Moisture Detection Get fast and consistent moisture readings on walls, wood, drywall, concrete, and masonry. The upgraded sensor provides stable results when the device is placed flat on the surface and held still for 2–3 seconds

WOOD MOISTURE METER: Prevent water and moisture build-up with our humidity reader. It can quickly determine what level of remediation is needed to keep your family safe. High levels of dampness that go untreated can cause hazardous living conditions.
Identifying the Affected Area
Start by identifying the area where water has accumulated under the tiles. Look for signs such as discoloration, dampness, or a hollow sound when tapped. Use a moisture meter to accurately detect moisture levels and pinpoint the affected spots.
Using Dehumidifiers and Fans
Once you’ve located the water-logged areas, place dehumidifiers in the room to extract excess moisture from the air. Additionally, use fans to promote air circulation, helping dry out the water under the tiles more efficiently. Position them strategically to cover the entire affected area.
Sealing the Tiles Post-Drying
After drying out the water completely, consider sealing your tiles to prevent future water seepage. Apply a waterproof sealant over grout lines and tile surfaces to create a protective barrier against moisture intrusion. This step can help maintain your tiles’ integrity and prevent similar issues in the future.
By following these steps diligently, you can successfully dry out water under tiles without having to remove them, safeguarding your property from potential damage and ensuring a healthy indoor environment.
Preventive Measures to Avoid Future Water Damage
To maintain a water-free environment under your tiles, follow these preventive measures diligently.
Recommended Products

For use inside or out on a variety of surfaces including sanded grout, ceramic tile, porcelain tile, glazed tile, stucco, travertine, marble, slate, granite, terrazzo and more to protect against water, stains and slippage

Keep a clean, NATURAL APPEARANCE and improve the DURABILITY of your grout in your shower, kitchen, bathroom, and tile flooring

Convenient applicator bottle included; applicator tip
Regular Maintenance Tips
- Inspect Regularly: Check for any signs of water leakage or damage around your tiles frequently.
- Repair Grout Lines: Keep grout lines in good condition to prevent water seepage through cracks.
- Sealant Application: Apply a waterproof sealant on the grout and tile surfaces to enhance their resistance to water penetration.
- Ventilation Improvement: Ensure proper ventilation in areas prone to moisture buildup, like bathrooms and kitchens.
- Prompt Repairs: Address any leaks or plumbing issues promptly to prevent water from accumulating under the tiles.
- Waterproof Membranes: Consider installing waterproof membranes beneath the tiles during initial construction or renovation.
- Epoxy Grout Installation: Opt for epoxy grout that offers superior water resistance compared to traditional cement-based grouts.
- Hydrophobic Sealants: Use hydrophobic sealants that repel water effectively, reducing the chances of moisture infiltration.
- Professional Consultation: Seek advice from waterproofing experts for specialized solutions tailored to your specific needs.
By incorporating these preventive measures into your maintenance routine, you can significantly reduce the risk of future water damage under your tiles and enjoy a dry and healthy indoor environment.
Conclusion
Ensuring your tiles remain free of water accumulation is crucial for maintaining a healthy indoor environment. By following the tips and techniques outlined in this article, you can effectively dry out water under tiles without the need for removal. Remember to stay proactive in addressing any potential sources of water damage to prevent future issues. Implementing preventive measures and utilizing appropriate tools will help safeguard your property against mold growth and structural concerns. With these strategies in place, you can enjoy long-lasting protection and peace of mind knowing that your tiles are well-maintained and resistant to water damage.
Frequently Asked Questions
What are the risks of water accumulation under tiles?
Water accumulation under tiles can lead to mold growth, structural damage, and compromised indoor air quality. Prompt action is crucial to prevent these consequences.
How can I dry out water under tiles without removing them?
Utilize tools like a wet/dry vacuum, dehumidifier, fans, and towels. Create small holes in grout lines for ventilation and use moisture-absorbing materials like cat litter or silica gel.
What preventive measures can I take to avoid water damage under tiles?
Regularly inspect for leaks, repair grout lines promptly, improve ventilation in the area, apply sealants on grout joints, address plumbing issues swiftly.
How can I enhance water resistance under tiles?
Consider installing waterproof membranes beneath the tile layer, using epoxy grout for better sealing properties, applying hydrophobic sealants on surfaces. Seek professional advice for customized solutions.