Tired of staring at grimy grout lines on your wall tiles? Ever wondered how to tackle that stubborn grime without breaking a sweat? Picture this: You walk into your bathroom, and instead of being greeted by sparkling tiles, you’re met with dingy, discolored grout that’s seen better days. Fret not, as we’ve got you covered with a simple solution to refresh those walls effortlessly.
Key Takeaways
- Grout is essential in tile installation to secure tiles and prevent moisture penetration.
- Different types of grout, such as epoxy and cement-based, offer varying levels of durability and ease of use.
- Proper preparation, including using the right tools and safety gear, is crucial before removing grout from wall tiles.
- Safety measures like wearing protective gear and ventilating the area are vital during the grout removal process.
- Following a step-by-step guide can help you effectively remove old grout from wall tiles for regrouting.
- Tips like assessing the situation, choosing the right tools, and maintaining tile surfaces regularly can make grout removal more efficient.
Understanding Grout and Its Uses
Grout is a crucial element in tile installation, serving both functional and aesthetic purposes. It’s a material that fills the gaps between tiles to secure them in place and prevent moisture from seeping through. Without grout, tiles would be more susceptible to damage and shifting over time.
What Is Grout?
Grout is a mixture of cement, water, and sometimes sand that acts as a bonding agent for tiles. It comes in various forms, such as sanded or unsanded, depending on the tile spacing. Sanded grout is suitable for wider joints, while unsanded grout is ideal for narrower gaps.
Different Types of Grout
There are different types of grout available based on their composition and intended use. Epoxy grout is durable and resistant to stains but can be challenging to work with due to its quick setting time. Cement-based grout is more commonly used for general tiling projects and offers ease of application.
Understanding the role of grout in your tile installation can help you appreciate its significance in maintaining the integrity and appearance of your tiled surfaces. By choosing the right type of grout for your project, you ensure long-lasting results that enhance both the functionality and aesthetics of your tiled spaces.
Preparing to Remove Grout
Before you start the process of removing grout from your wall tiles, there are a few essential steps to take to ensure a successful outcome. Proper preparation is key in this task.
Tools and Materials Needed
To effectively remove grout from wall tiles, you’ll need the following tools and materials:
- Grout Saw: A handheld tool with a small, sharp blade designed to cut through grout.
- Safety Glasses: Protect your eyes from any debris that may come loose during the removal process.
- Dust Mask: Prevent inhaling dust particles while working on removing the grout.
- Grout Removal Tool: Electric or manual tool specifically made for grout removal.
- Utility Knife: Useful for cutting through old caulk and other sealants around the tiles.
- Grout Scraper: Helps in scraping out the loosened grout after initial cutting.
Having these tools at hand will make the grout removal process more manageable and efficient.
Safety Measures to Consider
When removing grout from wall tiles, it’s crucial to prioritize safety. Here are some safety measures you should consider:
- Wear Protective Gear: Put on safety glasses and a dust mask to shield yourself from debris and dust.
- Ventilate the Area: Ensure proper ventilation in the room where you’re working by opening windows or using fans.
- Work Carefully: Use tools with caution to avoid damaging the tiles while removing the grout.
- Take Breaks: If it’s a lengthy task, remember to take short breaks to prevent strain or fatigue.
By following these safety precautions, you can safely and effectively prepare for removing grout from your wall tiles.
Step-by-Step Guide on How to Remove Grout From Wall Tiles
Removing grout from wall tiles can be a meticulous process, but with the right approach, you can achieve clean and refreshed tile surfaces. Here’s a step-by-step guide to help you through the grout removal process.
Recommended Products

33-Piece All-in-One Grout Removal Tool Kit – This comprehensive set includes 2 Tile Grout Saws, 6 extra replacement blades, 2 Hand Grout Saws, 7 cleaning blades, and a Caulk Remover Tool, covering all your needs as a professional grout tool and caulking tool kit. No need to buy separate grout scraper, grout saw, or caulk remover tool – one kit solves tile grout cleaning, removal, and caulk stripping.

Industrial Grade Durability: Features tungsten carbide blades and hardened steel construction designed for heavy-duty grout removal. Resists corrosion and maintains sharpness 3X longer than standard grout tools for repeated use on ceramic tiles, marble, and stone surfaces. Ideal for grout haze remover applications and concrete grout maintenance.

Complete Set: This Tile Grout Tool Kit Includes 2 Grout Scraper Rakes, 3pcs Grout Scraper Rake Blades and 3pcs Grout Scraper Rake Serrated Blades, as Well as 1 Tile Joint Tool and 2 Hook Knife Replacement Blades
Assessing the Area
Start by assessing the area where you need to remove the grout. Check for any damaged or cracked tiles that may need replacement after the grout removal. Ensure you have proper ventilation in the room to avoid inhaling dust particles during the process.
The Removal Process
- Prepare Your Tools: Gather essential tools such as a grout saw, grout removal tool, safety goggles, and gloves before starting the removal process.
- Score the Grout: Use a grout saw to score along the grout lines carefully. Be gentle to avoid damaging the surrounding tiles.
- Remove Grout: With your grout removal tool, carefully chisel out the scored grout from between the tiles. Work systematically across all areas that need regrouting.
- Clean as You Go: Regularly clean away debris and dust while removing the grout to maintain visibility and prevent it from settling back into crevices.
Cleaning After Grout Removal
After successfully removing the old grout, it’s crucial to clean up properly before proceeding with regrouting:
- Vacuum Thoroughly: Use a vacuum cleaner with a brush attachment to remove leftover dust and debris from between tiles.
- Wipe Down Surfaces: Dampen a sponge or cloth with water and wipe down tile surfaces to ensure they are clean and ready for new grouting.
- Allow Drying Time: Let the cleaned area dry completely before applying new grout to ensure better adhesion and longevity of your tile installation.
Following these steps will help you effectively remove old grout from wall tiles in preparation for regrouting, leaving your tiled surfaces looking fresh and well-maintained.
Tips and Tricks for Efficient Grout Removal
When it comes to efficiently removing grout from your wall tiles, there are several tips and tricks you can follow to make the process smoother and more effective. Here’s a handy guide to help you tackle this task with confidence:
Recommended Products
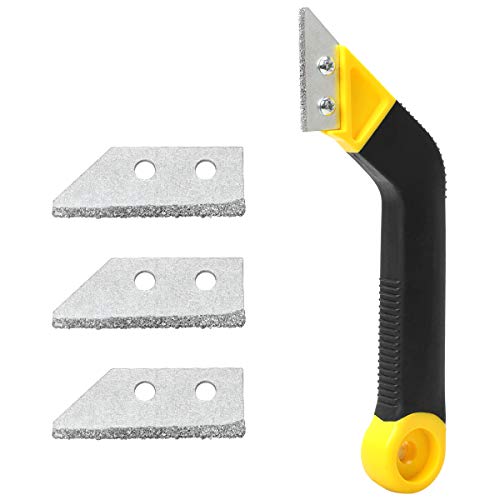
Premium Material: Grout saw is made of high-quality plastic and hard metal, “diamond style” blade helps you remove grout with minimal effort.

Strips, cleans and removes old grout and can be used on all grout types
Assess the Situation Before Starting
Before diving into grout removal, take a moment to assess the condition of the grout and tiles. Check for any damaged or loose tiles that may need attention before proceeding with the removal process. This initial inspection will give you a clear idea of what areas require focus and how much grout needs to be removed.
Choose the Right Tools for the Job
Having the proper tools at hand is crucial for successful grout removal. Invest in quality tools such as a grout saw or rotary tool with a grout removal attachment to make the job easier. Additionally, having safety gear like goggles and gloves will protect you during the process.
Score and Remove Grout Carefully
Start by scoring the grout lines using your chosen tool, making sure not to damage the surrounding tiles. Work methodically across each line, applying gentle pressure to avoid unnecessary tile damage. Once scored, carefully remove the loosened grout using a vacuum or brush to clear away debris.
Clean Up Thoroughly After Removal
After removing the bulk of the old grout, it’s essential to clean up any remaining residue effectively. Use a damp cloth or sponge to wipe down the tile surface, ensuring all traces of old grout are eliminated. Allow some time for drying before proceeding with regrouting to achieve optimal results.
Maintain Your Tile Surfaces Regularly
To prevent excessive buildup of grime and mold in your tile surfaces, consider regular maintenance routines such as periodic cleaning and inspections. Keeping an eye on your tiles’ condition will help you address any issues promptly and maintain their appearance over time.
Conclusion
You’ve now learned about the significance of grout in tile installations and explored different types based on spacing. Understanding how to remove grout from wall tiles step-by-step is essential for maintaining your tile surfaces. By assessing the area, preparing the right tools, and following the removal process carefully, you can keep your tiles looking fresh and clean. Remember to choose tools wisely, score the grout effectively, and ensure a thorough cleanup post-removal. Regular maintenance is key to preserving your tiles’ appearance and durability in the long run. Keep these tips in mind for efficient grout removal that will leave your walls looking as good as new!
Frequently Asked Questions
What is the role of grout in tile installations?
Grout secures tiles in place, fills gaps between them, and prevents moisture from seeping underneath.
What are the different types of grout available?
There are sanded and unsanded grouts, with options like epoxy and cement-based grouts based on tile spacing and project requirements.
How do I remove grout from wall tiles?
Assess the area, prepare tools like a grout saw or rotary tool, score the grout lines carefully, remove debris, clean up excess material.
What are some tips for efficient grout removal?
Assess the situation before starting, choose appropriate tools like a handheld scraper or oscillating tool, score and remove grout meticulously.