

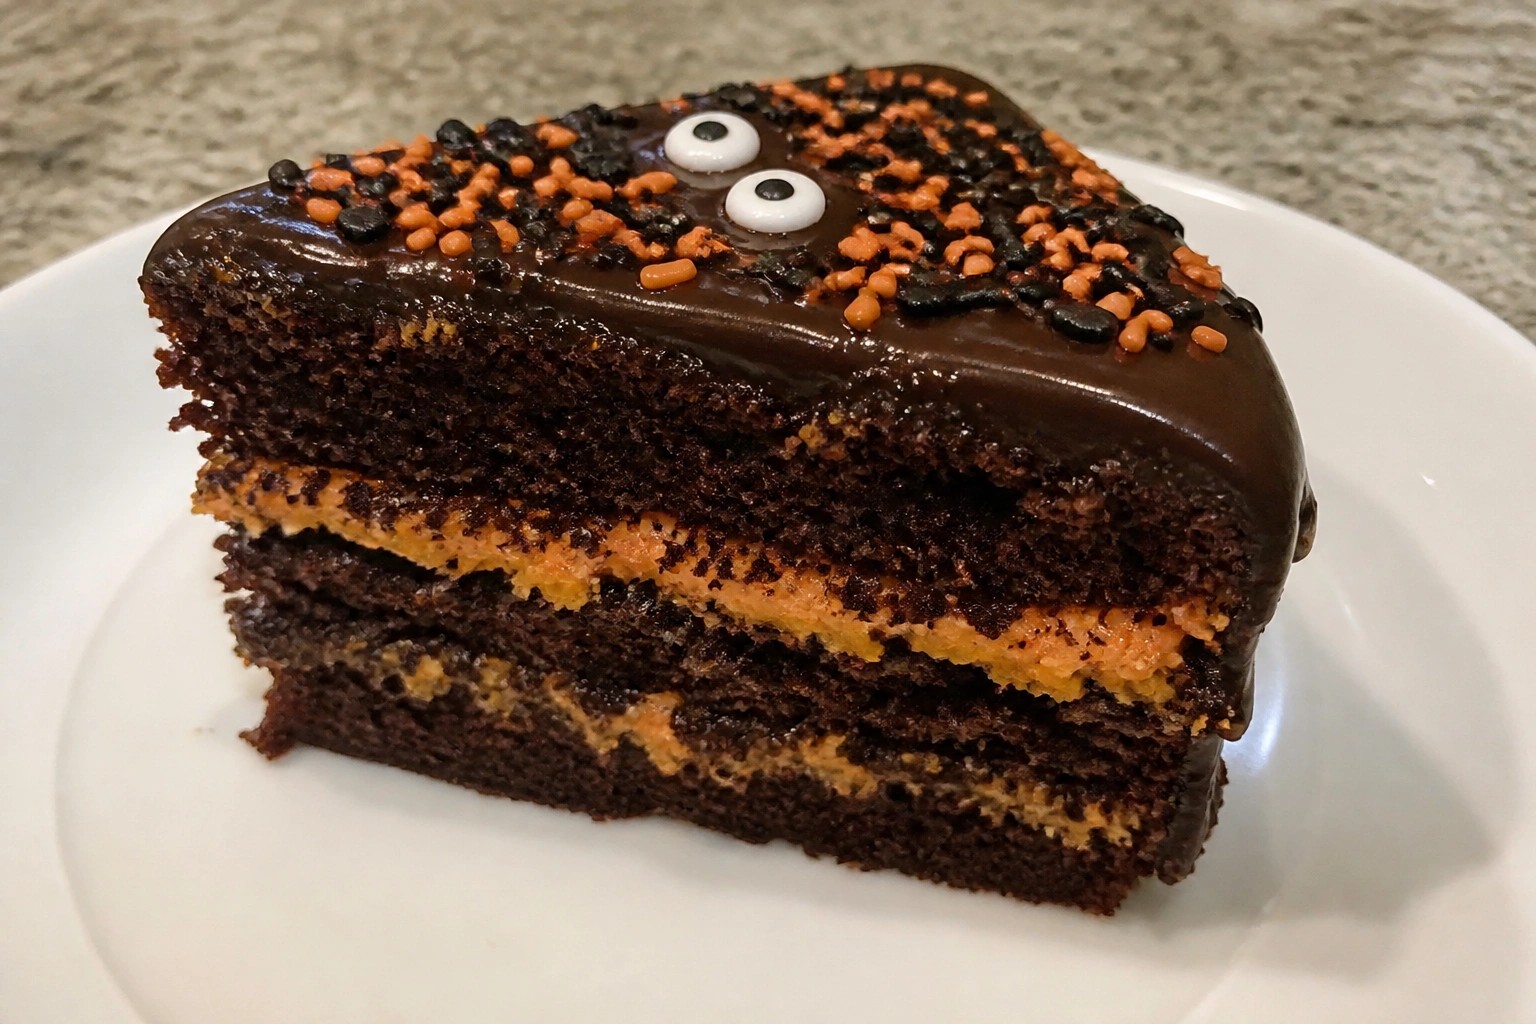
Planning a Halloween party menu takes some thought when you want desserts that look special. I collected these recipes because they deliver on taste and presentation without complicated steps. Each one uses ingredients that are easy to find and techniques that fit into a busy schedule. You can pick and choose based on what you already have or what your guests prefer.
Helpful Tips Before You Start
These tips will help you create desserts that look impressive and hold up well at a party.
Make Ahead Where Possible
Many Halloween desserts improve when assembled the day before. Bake bases like cookies or brownies early, then add toppings or decorations right before guests arrive.
Focus on Easy Serving Sizes
Cut or portion desserts into small pieces so people can try several without committing to a full slice. This works especially well when you have a long table of treats.
Stock Basic Decorations
Keep candy eyes, black and orange sprinkles, and melted chocolate ready. These items turn simple recipes into themed desserts with little extra work.
Plan for Temperature
Check which desserts need refrigeration and which hold at room temperature. Place chilled items near the back of the table and rotate them out as needed during the party.
Pumpkin Cheesecake Brownies with Swirled Topping
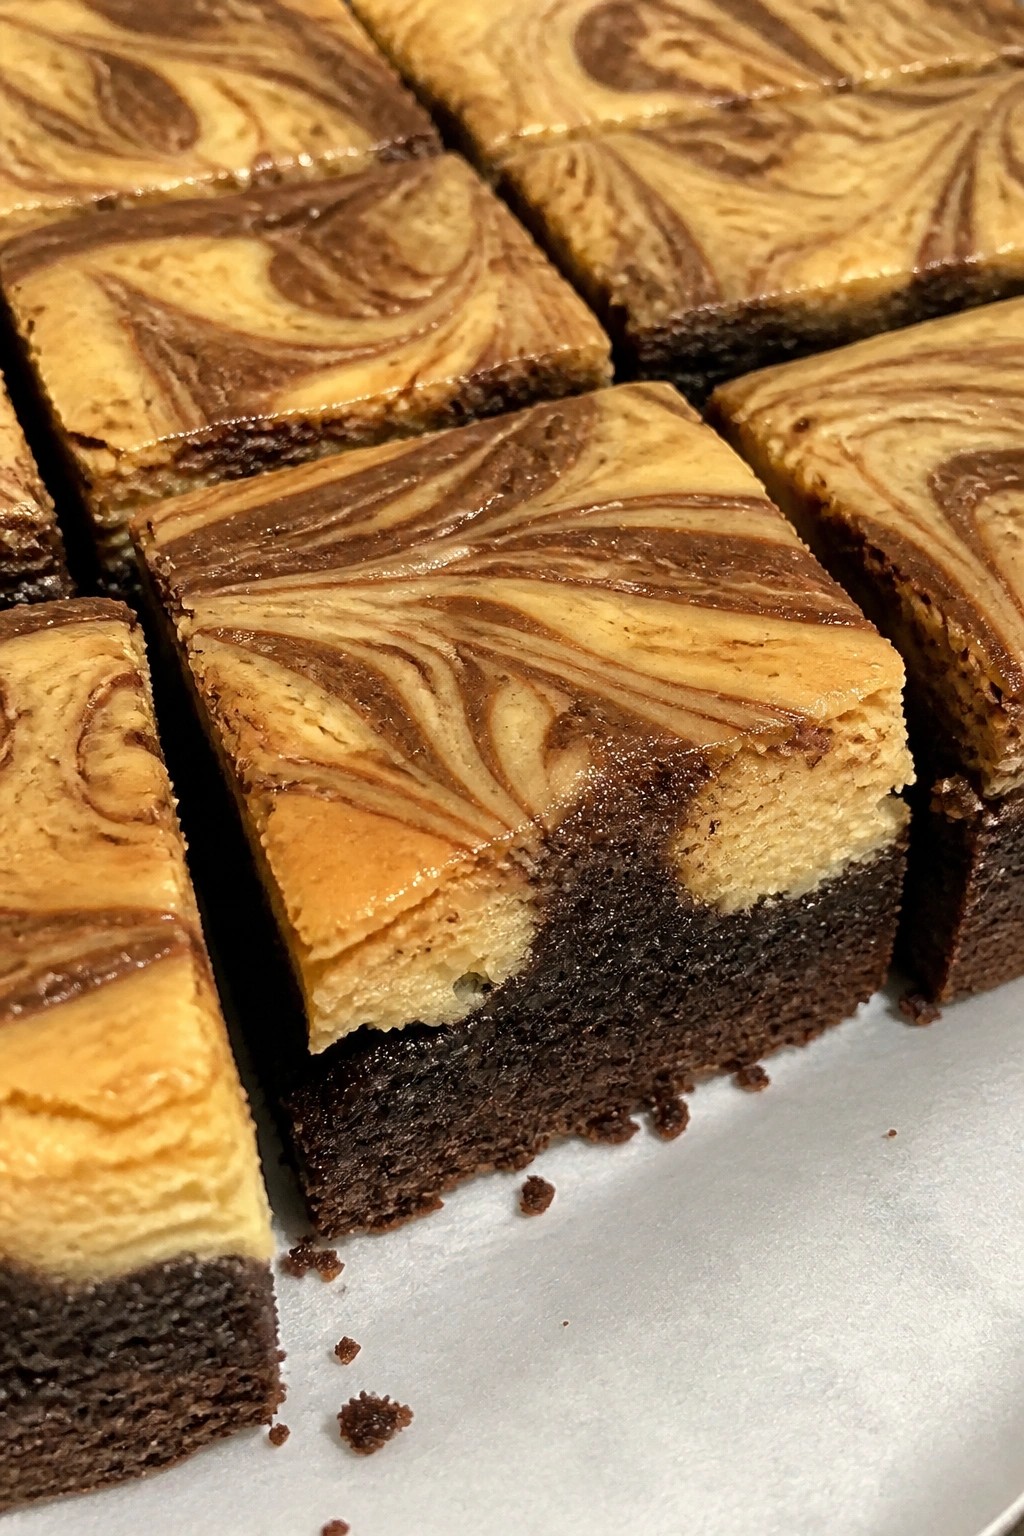
These brownies combine fudgy chocolate with a creamy pumpkin cheesecake layer that swirls into a marbled top. They bring a seasonal touch to Halloween parties without extra fuss. The texture balances dense brownie with smooth, spiced cheesecake in every bite.
They work well as a make-ahead dessert for gatherings. Guests can grab a square while mingling, and the pumpkin flavor feels festive without overpowering the chocolate base.
Serves 4 people.
Ingredients
- 4 tablespoons unsalted butter
- 1/2 cup granulated sugar
- 1/4 cup unsweetened cocoa powder
- 1 large egg
- 1/4 cup all-purpose flour
- 1/2 teaspoon vanilla extract
- 4 ounces cream cheese, softened
- 1/4 cup pumpkin puree
- 2 tablespoons granulated sugar
- 1 large egg yolk
- 1/2 teaspoon ground cinnamon
- 1/4 teaspoon ground nutmeg
Instructions
- Preheat the oven to 350 degrees and line a small 8×8 baking pan with parchment paper.
- Melt the butter in a microwave-safe bowl, then stir in the first 1/2 cup sugar and cocoa powder until smooth. Add the whole egg and vanilla extract, then mix in the flour until just combined. Spread the brownie batter evenly in the prepared pan.
- In a separate bowl, beat the cream cheese with the pumpkin puree, remaining 2 tablespoons sugar, egg yolk, cinnamon, and nutmeg until creamy and uniform. Drop spoonfuls of this mixture over the brownie batter.
- Use a knife to gently swirl the pumpkin cheesecake mixture into the brownie layer, creating a marbled pattern without fully mixing the two. Bake for 25 to 28 minutes until the edges look set and a toothpick comes out with a few moist crumbs. Cool completely in the pan before cutting.
Extra Tips
For cleaner slices, chill the brownies for an hour after cooling. The swirl stays distinct when the cheesecake layer is not overmixed during the knife step. Leftovers keep covered in the fridge for up to three days and taste best at room temperature. Course: Dessert Cuisine: American Equipment: Mixing bowls, 8×8 baking pan, whisk, parchment paper
No-Bake Chocolate Spiderweb Tart
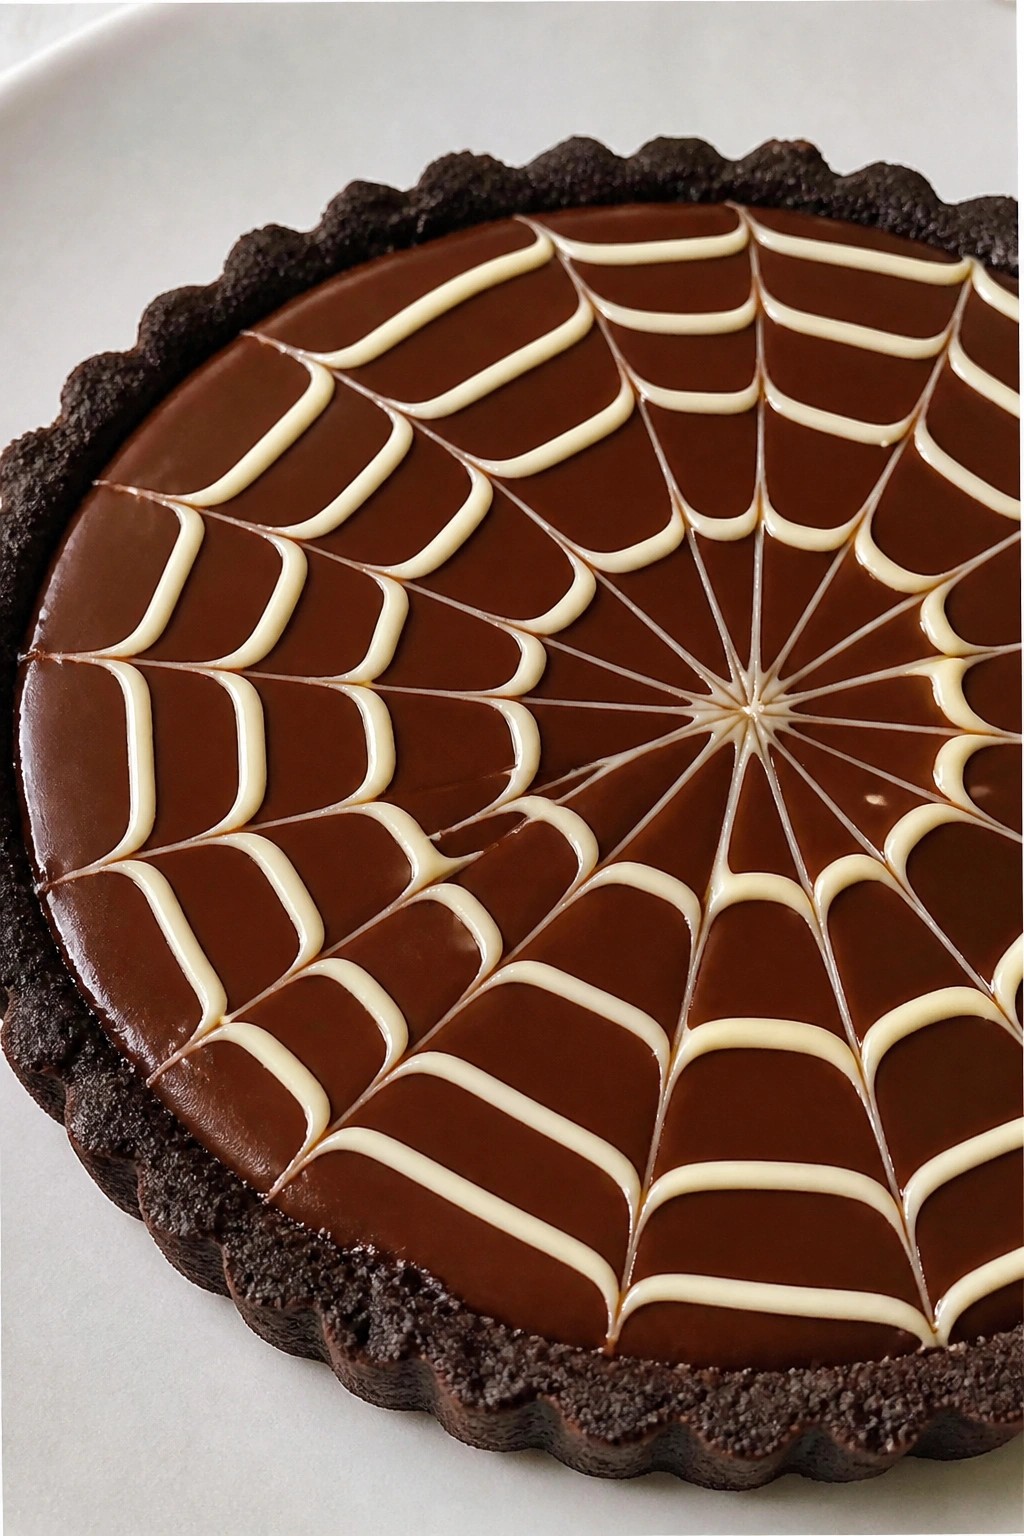
This no-bake tart brings a spooky touch to any Halloween spread. The chocolate cookie crust holds a smooth, rich filling that sets in the fridge, and a simple white chocolate web on top makes it look like it took more effort than it did. It works well for parties because it can be made ahead and needs no oven time.
It tastes like a creamy chocolate truffle with a crisp base. The spiderweb design adds a fun visual without extra decorations.
Serves 4 people.
Ingredients
- 1 1/2 cups chocolate cookie crumbs
- 4 tablespoons unsalted butter, melted
- 8 ounces semisweet chocolate, chopped
- 1 cup heavy cream
- 2 ounces white chocolate, chopped
Instructions
- Stir the chocolate cookie crumbs and melted butter together in a bowl until the crumbs are evenly coated. Press the mixture firmly into the bottom and up the sides of a 7-inch tart pan. Place the pan in the fridge while you prepare the filling.
- Put the chopped semisweet chocolate in a heatproof bowl. Heat the heavy cream in a small saucepan over medium heat until it just starts to simmer. Pour the hot cream over the chocolate and let it sit for two minutes. Stir until the mixture is smooth and glossy.
- Pour the chocolate filling into the chilled crust. Smooth the top with a spatula. Return the tart to the fridge and chill for at least two hours until the filling is firm.
- Melt the white chocolate in the microwave in short bursts, stirring between each one, until smooth. Spoon the melted white chocolate into a small zip-top bag and snip off a tiny corner. Pipe a spiderweb pattern over the set filling. Chill the tart for 15 more minutes before serving.
Extra Tips
Pipe the white chocolate web quickly once the filling has set, or the lines may sink instead of sitting on top. If the white chocolate thickens while piping, warm the bag briefly between your hands. Store leftovers covered in the fridge for up to three days. Course: Dessert Cuisine: American Equipment: Mixing bowl, 7-inch tart pan, Small saucepan, Heatproof bowl, Zip-top bag
Caramel-Stuffed Apple Cupcakes with Toasted Pecans
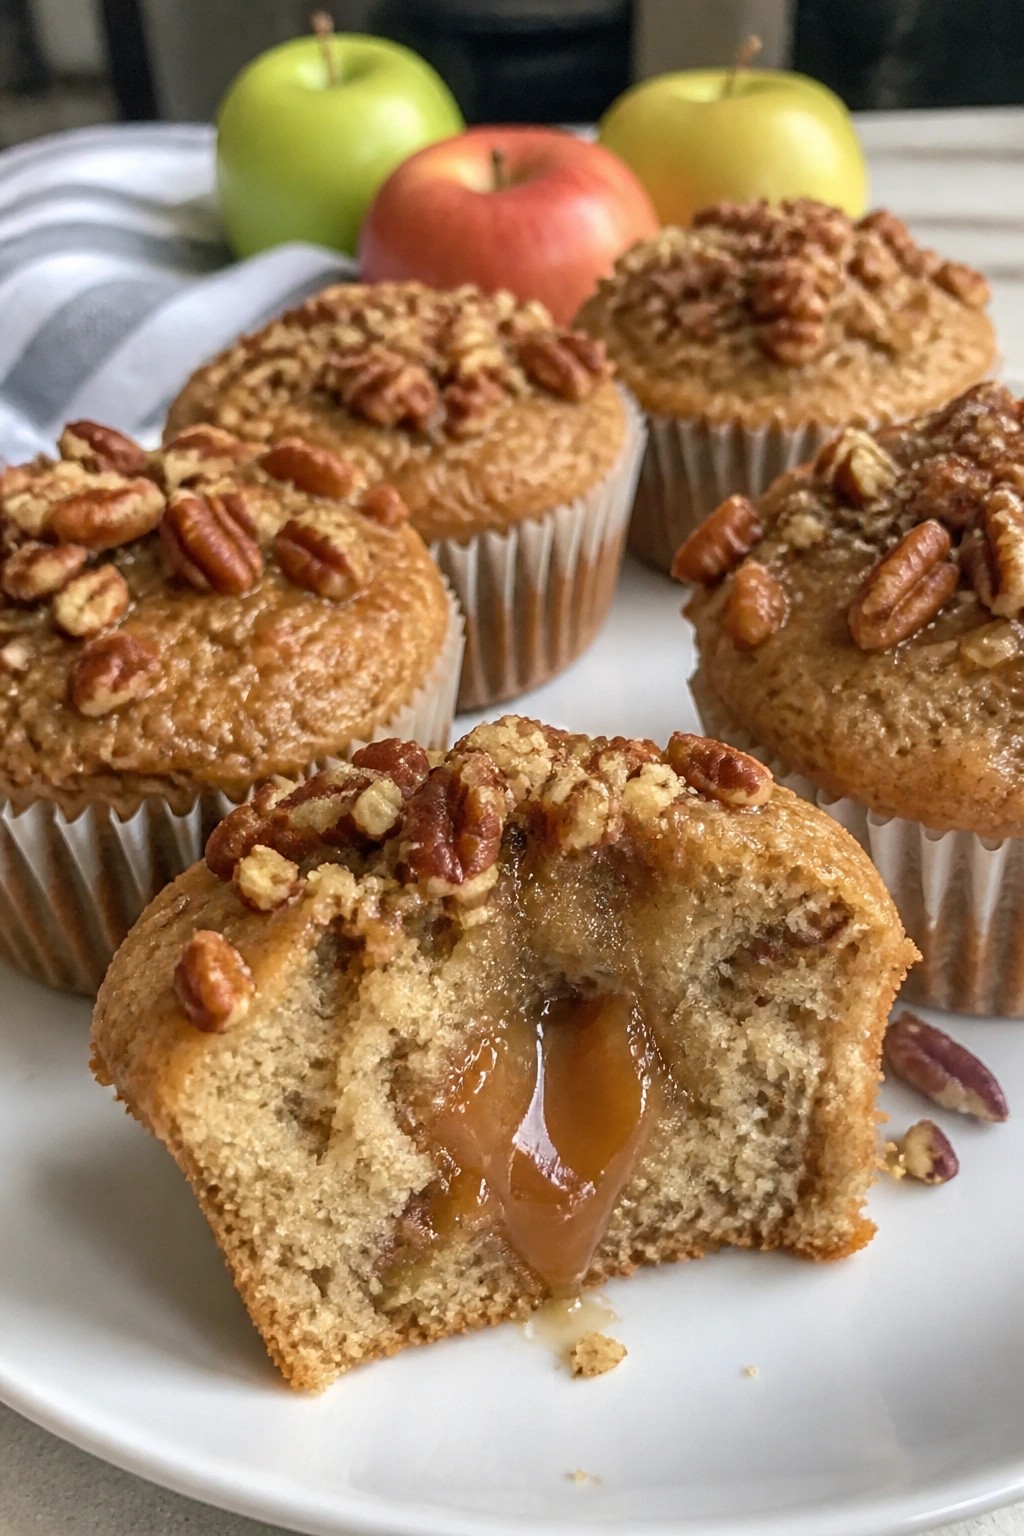
These cupcakes combine tender apple cake with a hidden caramel center. They suit Halloween parties because guests can grab one easily and the flavors feel festive without extra effort.
The cupcakes come out moist from the grated apple and offer a warm contrast between the soft cake and gooey caramel. Toasted pecans on top give a satisfying crunch that pairs well with the sweetness.
Serves 4 people.
Ingredients
- ¾ cup all-purpose flour
- ¼ cup granulated sugar
- ½ teaspoon baking powder
- ½ teaspoon ground cinnamon
- Pinch of salt
- 2 tablespoons unsalted butter, softened
- 1 large egg
- ⅓ cup milk
- ½ teaspoon vanilla extract
- 1 medium apple, peeled and grated
- 4 soft caramels
- ¼ cup chopped pecans, toasted
Instructions
- Heat the oven to 350°F and line a muffin tin with four paper liners.
- In a bowl, stir together the flour, sugar, baking powder, cinnamon, and salt.
- In a second bowl, beat the butter with the egg, then mix in the milk and vanilla.
- Pour the wet mixture into the dry ingredients and stir until just combined.
- Fold the grated apple into the batter.
- Divide the batter evenly among the four liners and bake for 18 to 20 minutes, until a toothpick comes out clean.
- Let the cupcakes cool for 10 minutes, then use a small knife to cut a shallow hole in the center of each one.
- Press one caramel into each hole and let it settle while the cupcakes finish cooling.
- Sprinkle the toasted pecans over the tops before serving.
Extra Tips
Serve the cupcakes slightly warm so the caramel stays soft and flows when bitten. Toast the pecans in a dry skillet for a few minutes to bring out their flavor without burning them. If you need to make them ahead, store the filled cupcakes in an airtight container and add the pecans just before serving to keep them crisp. Course: Dessert Cuisine: American Equipment: Mixing Bowls, Muffin Tin, Oven
Ghostly White Chocolate Mousse Cups
These white chocolate mousse cups bring a light and creamy treat to any Halloween spread. The pale mousse fills small cups while simple dark chocolate details on top create a ghost shape that fits the holiday without extra fuss. Guests enjoy the smooth texture and mild sweetness that balances richer party foods.
The recipe works well for make-ahead prep since the mousse sets in the fridge. It stays stable for hours at room temperature once served, so it travels easily to gatherings.
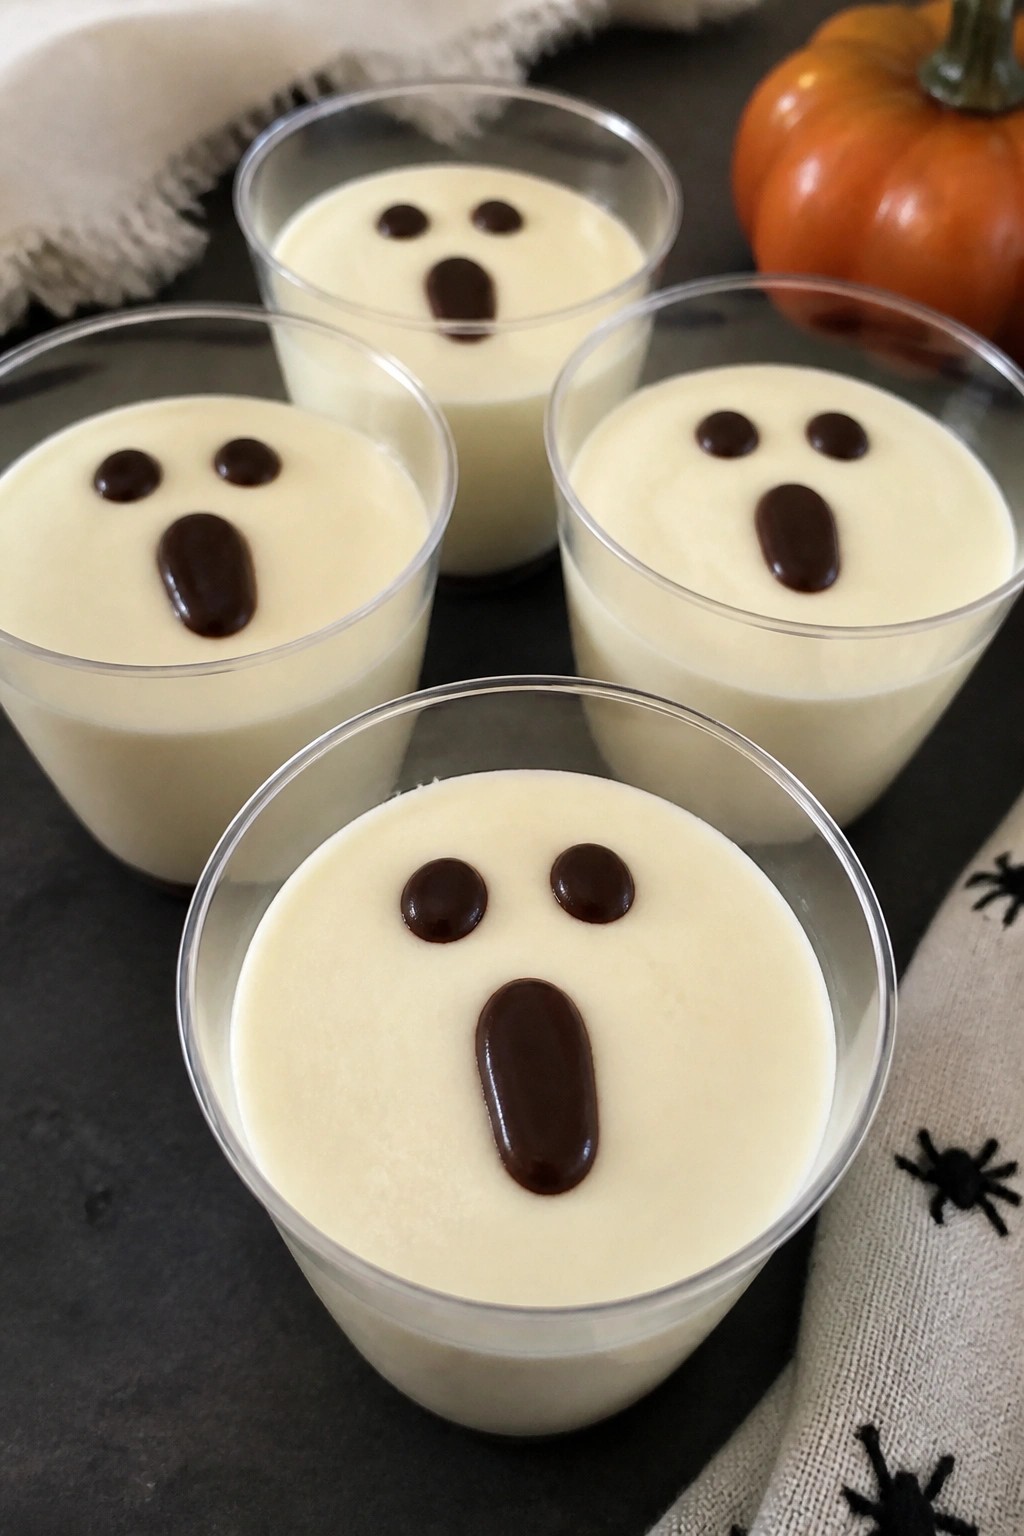
Serves 4 people.
Ingredients
- 8 ounces white chocolate, chopped
- 2 cups heavy whipping cream, divided
- 1 teaspoon vanilla extract
- 1/4 cup powdered sugar
- 2 tablespoons dark chocolate chips, melted
- 4 small clear serving cups
Instructions
- Place the chopped white chocolate and 1/2 cup of the heavy cream in a heatproof bowl set over simmering water. Stir until the chocolate melts and the mixture turns smooth. Remove from heat and let it cool to room temperature.
- In a separate bowl, whip the remaining 1 1/2 cups heavy cream with the vanilla extract and powdered sugar until soft peaks form.
- Gently fold the cooled white chocolate mixture into the whipped cream until no streaks remain.
- Spoon or pipe the mousse evenly into the four clear serving cups. Smooth the tops and chill for at least two hours until set.
- Once chilled, use a small spoon or piping tip to add a rounded dollop of extra mousse on top of each cup to form a ghost shape.
- Drizzle or pipe the melted dark chocolate to create eyes and a mouth on each ghost. Return the cups to the fridge until ready to serve.
Extra Tips
Chill the serving cups ahead of time so the mousse sets faster. If the dark chocolate thickens while piping, warm it briefly in the microwave for five seconds. For a stronger vanilla note, add an extra 1/2 teaspoon to the whipped cream. Store leftovers covered in the fridge for up to two days. Course: Dessert Cuisine: American Equipment: Heatproof bowl, Whisk, Mixing bowls, Piping bag or spoon, Serving cups
Spiced Pear and Cranberry Crisp with Oat Crumble
This crisp combines sweet pears with tart cranberries under a spiced oat topping. The warm spices bring out the fruit flavors while the crumble stays crisp after baking. It fits well at Halloween parties as a make-ahead dessert that holds up on a buffet table.
The finished dish offers soft baked fruit with a golden, crunchy layer on top. The red cranberries add a nice color contrast that feels seasonal without extra decoration.
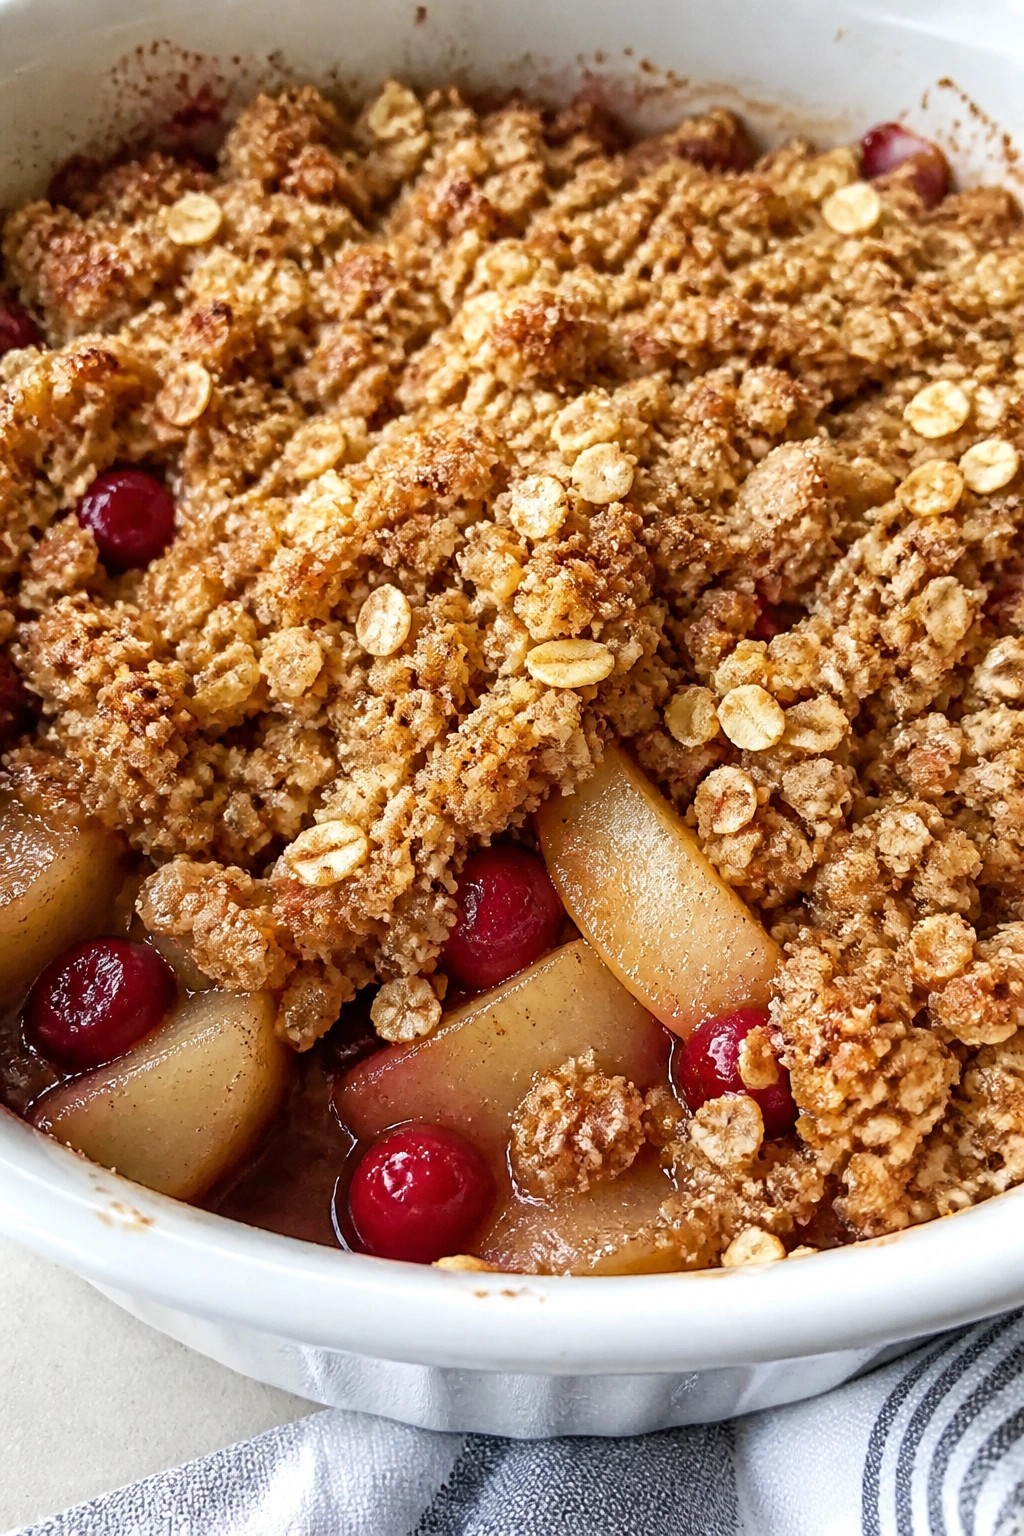
Serves 4 people.
Ingredients
- 4 medium pears, cored and sliced
- 1 cup fresh cranberries
- 1/4 cup granulated sugar
- 1 teaspoon ground cinnamon
- 1/2 teaspoon ground nutmeg
- 1 tablespoon lemon juice
- 3/4 cup rolled oats
- 1/2 cup all-purpose flour
- 1/4 cup brown sugar
- 1/4 cup unsalted butter, melted
- Pinch of salt
Instructions
- Preheat the oven to 375 degrees and lightly grease a small baking dish.
- In a mixing bowl, combine the sliced pears, cranberries, granulated sugar, cinnamon, nutmeg, and lemon juice. Stir until the fruit is evenly coated.
- Spread the fruit mixture into the prepared baking dish in an even layer.
- In a separate bowl, stir together the rolled oats, flour, brown sugar, and salt. Pour the melted butter over the dry mixture and stir until clumps form.
- Sprinkle the oat crumble evenly over the fruit filling.
- Bake for 35 to 40 minutes until the topping is golden and the fruit juices bubble at the edges.
- Remove from the oven and let it rest for 10 minutes before serving.
Extra Tips
Use firm but ripe pears so they hold their shape during baking. If the cranberries taste too sharp, add an extra tablespoon of brown sugar to the topping before baking. Leftovers reheat well in a 300-degree oven for 10 minutes to restore crispness. Course: Dessert Cuisine: American Equipment: Baking Dish, Mixing Bowls
Monster Eyeball Red Velvet Cake Pops
These cake pops bring a fun Halloween twist to classic red velvet. The moist, cocoa-tinged cake pairs with tangy cream cheese frosting inside a crisp white chocolate shell. They make an easy handheld treat for parties and look striking on a dessert table.
They work well for both kids and adults because the flavor stays familiar while the eyeball decorations add visual interest. The soft interior contrasts nicely with the firm outer coating.
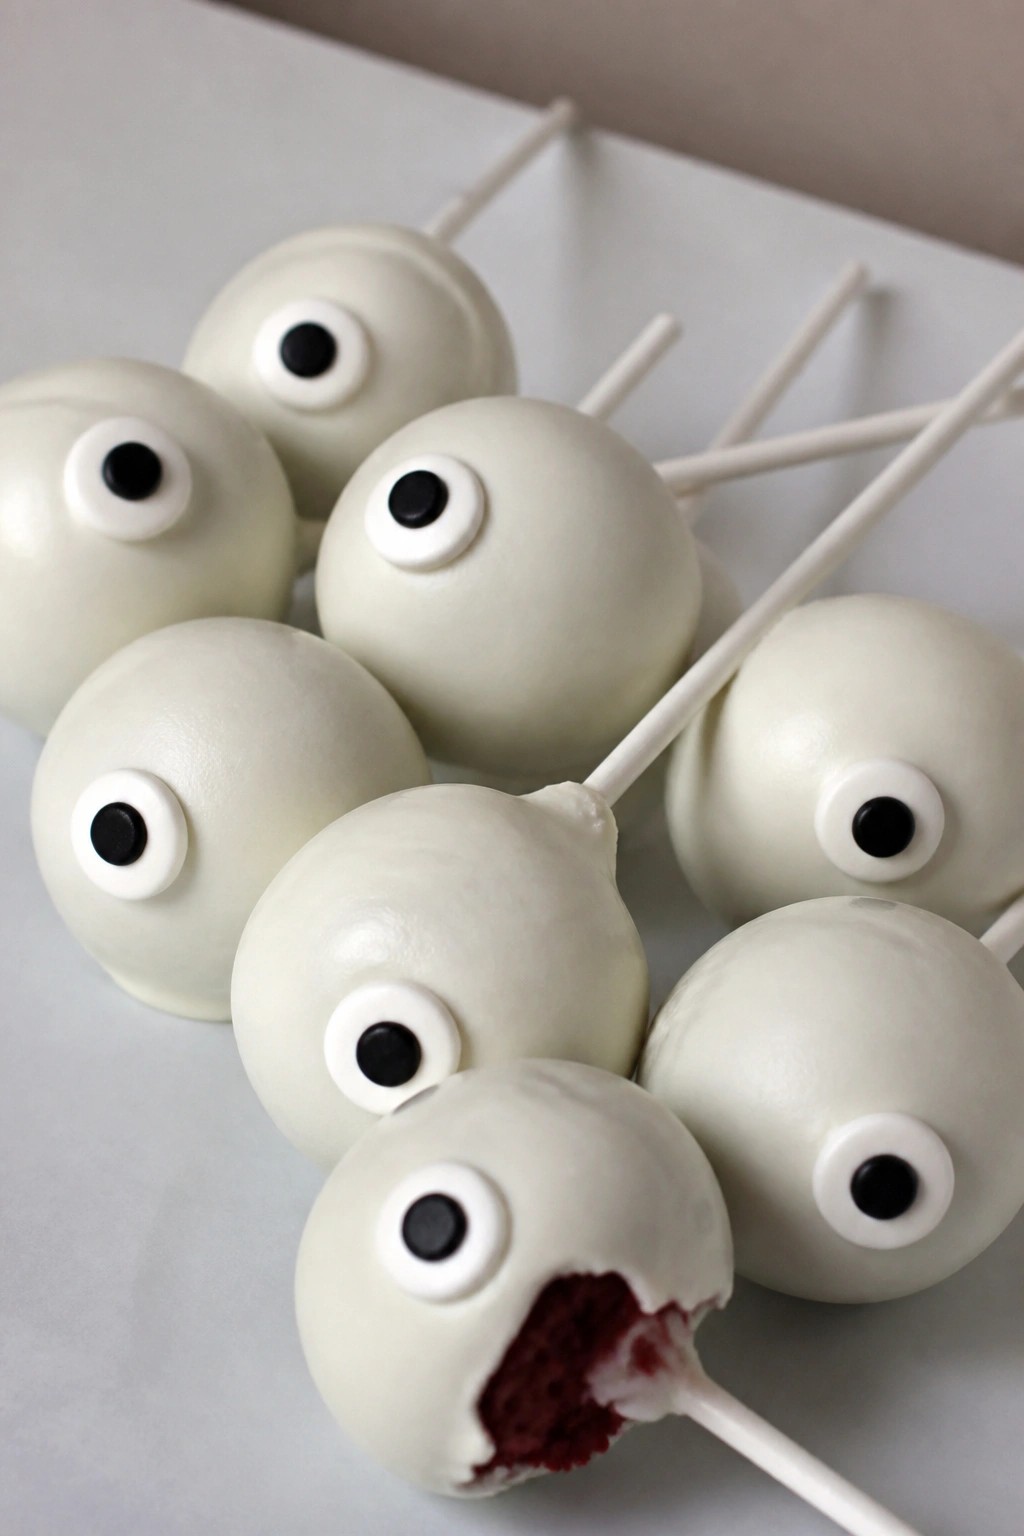
Serves 4 people.
Ingredients
- 2 cups red velvet cake crumbs
- 1/4 cup cream cheese frosting
- 1 cup white chocolate candy melts
- 12 candy eyeballs
- 8 lollipop sticks
Instructions
- Place the red velvet cake crumbs in a mixing bowl and add the cream cheese frosting. Stir until the mixture holds together when pressed.
- Scoop the mixture and roll it into 8 even balls about the size of a golf ball. Place the balls on a lined baking sheet.
- Insert one lollipop stick into the center of each ball, pushing it about halfway through.
- Melt the white chocolate candy melts in the microwave in 30-second bursts, stirring between each until smooth.
- Dip each cake pop into the melted chocolate, turning to coat completely. Let excess chocolate drip off, then return the pop to the baking sheet.
- Immediately press one candy eyeball onto the center of each coated pop while the chocolate is still wet. Let the pops set until the coating hardens.
Extra Tips
Roll the cake mixture firmly so the pops hold their shape on the stick. If the white chocolate thickens while dipping, warm it briefly again to keep it fluid. Store finished pops in an airtight container at room temperature for up to two days. Course: Dessert Cuisine: American Equipment: Mixing Bowl, Baking Sheet, Microwave
Blood Orange Panna Cotta with Pomegranate Gelée
This dessert brings a striking contrast of colors and textures to a Halloween table. The creamy panna cotta carries a gentle citrus note while the pomegranate layer adds a bright, slightly tart finish that looks festive without extra decoration.
It works well for parties because it can be made ahead and served in individual glasses. Guests enjoy the smooth base paired with the firm gelée and the pop of fresh seeds on top.
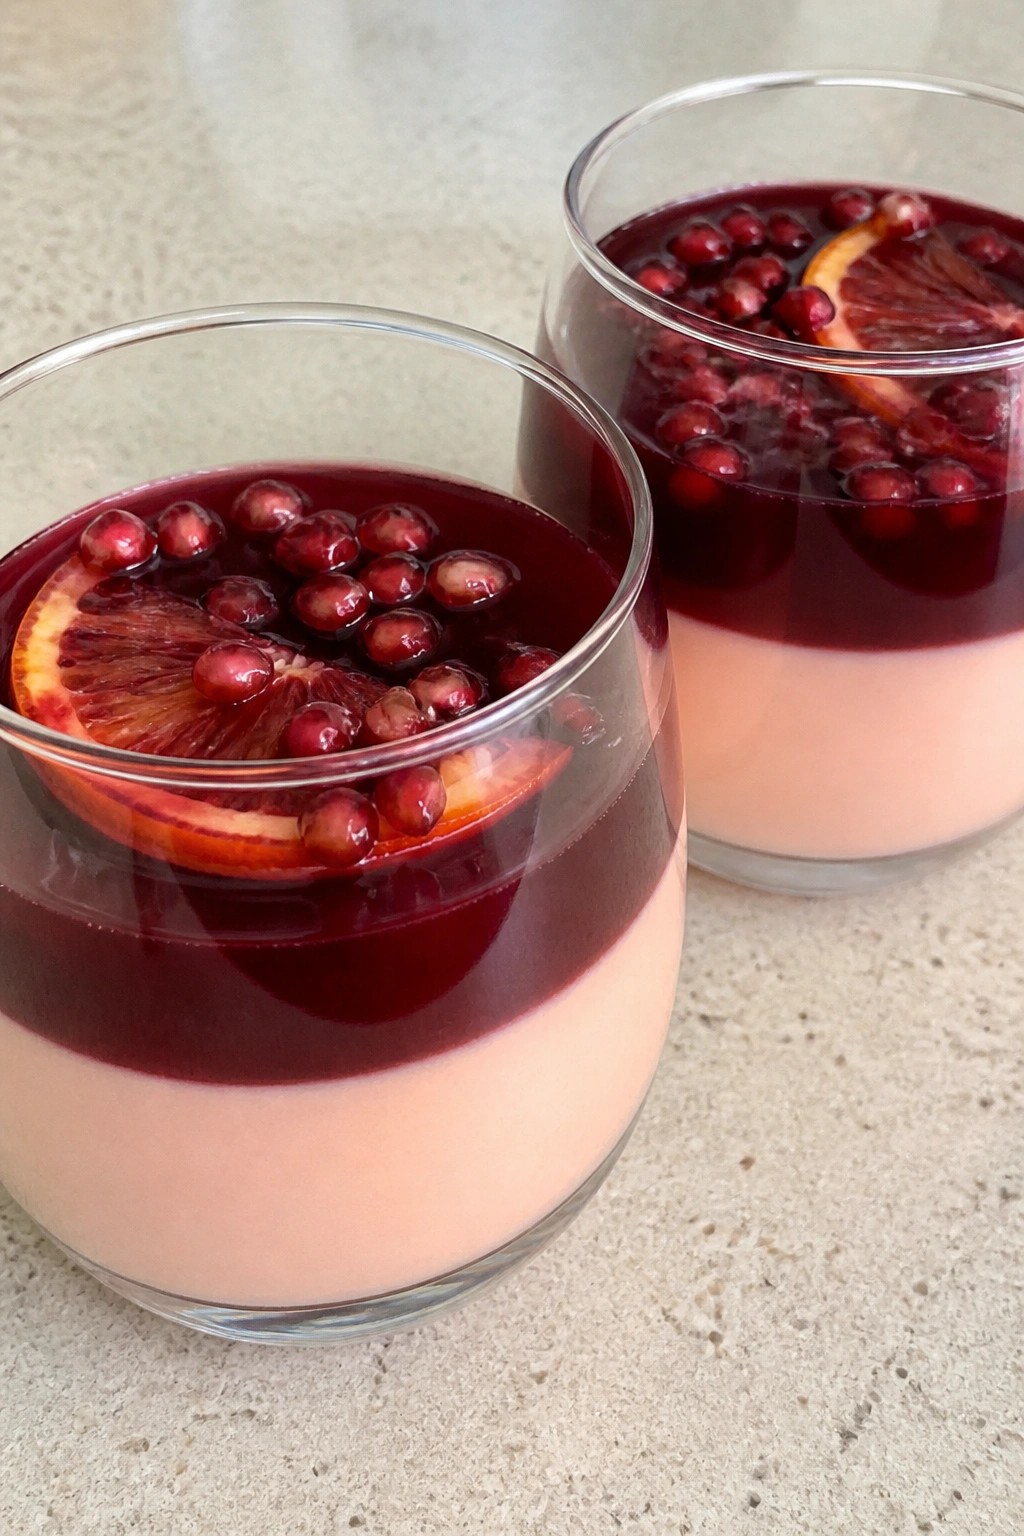
Serves 4 people.
Ingredients
- 2 cups heavy cream
- 1/2 cup blood orange juice
- 1/4 cup granulated sugar
- 2 1/2 teaspoons unflavored gelatin
- 1 teaspoon vanilla extract
- 1 cup pomegranate juice
- 2 tablespoons granulated sugar
- 1/4 cup pomegranate seeds
- 4 blood orange slices
Instructions
- Sprinkle 1 1/2 teaspoons gelatin over 2 tablespoons of cold water in a small bowl and let it bloom for 5 minutes.
- Warm the heavy cream, 1/4 cup sugar, and blood orange juice in a saucepan over medium heat until the sugar dissolves. Remove from heat and stir in the bloomed gelatin and vanilla extract until fully dissolved.
- Divide the mixture among four small glasses or ramekins. Chill for at least 2 hours until set.
- Sprinkle the remaining 1 teaspoon gelatin over 2 tablespoons of cold water and let it bloom. Warm the pomegranate juice and 2 tablespoons sugar in a saucepan until the sugar dissolves. Stir in the bloomed gelatin until smooth.
- Pour the pomegranate mixture over the chilled panna cotta layer in each glass. Return to the refrigerator for another 2 hours until the gelée sets.
- Top each serving with pomegranate seeds and a blood orange slice before serving.
Extra Tips
Chill the glasses on a tray so they stay level in the fridge. If the pomegranate juice tastes too tart, add an extra teaspoon of sugar while it warms. The panna cotta layer should be fully firm before adding the gelée or the layers may mix. Course: Dessert Cuisine: Italian Equipment: Saucepan, Whisk, Ramekins, Refrigerator
Pumpkin Spice Tiramisu with Mascarpone Layers
This pumpkin spice tiramisu swaps the usual coffee notes for a warm pumpkin layer that fits right into a Halloween party spread. The mascarpone stays rich and stable, so the dessert holds its shape when sliced and served to a crowd.
The finished dish gives a soft, creamy texture with gentle spice that does not overpower the coffee-soaked base. It works well chilled overnight, which keeps party prep simple.
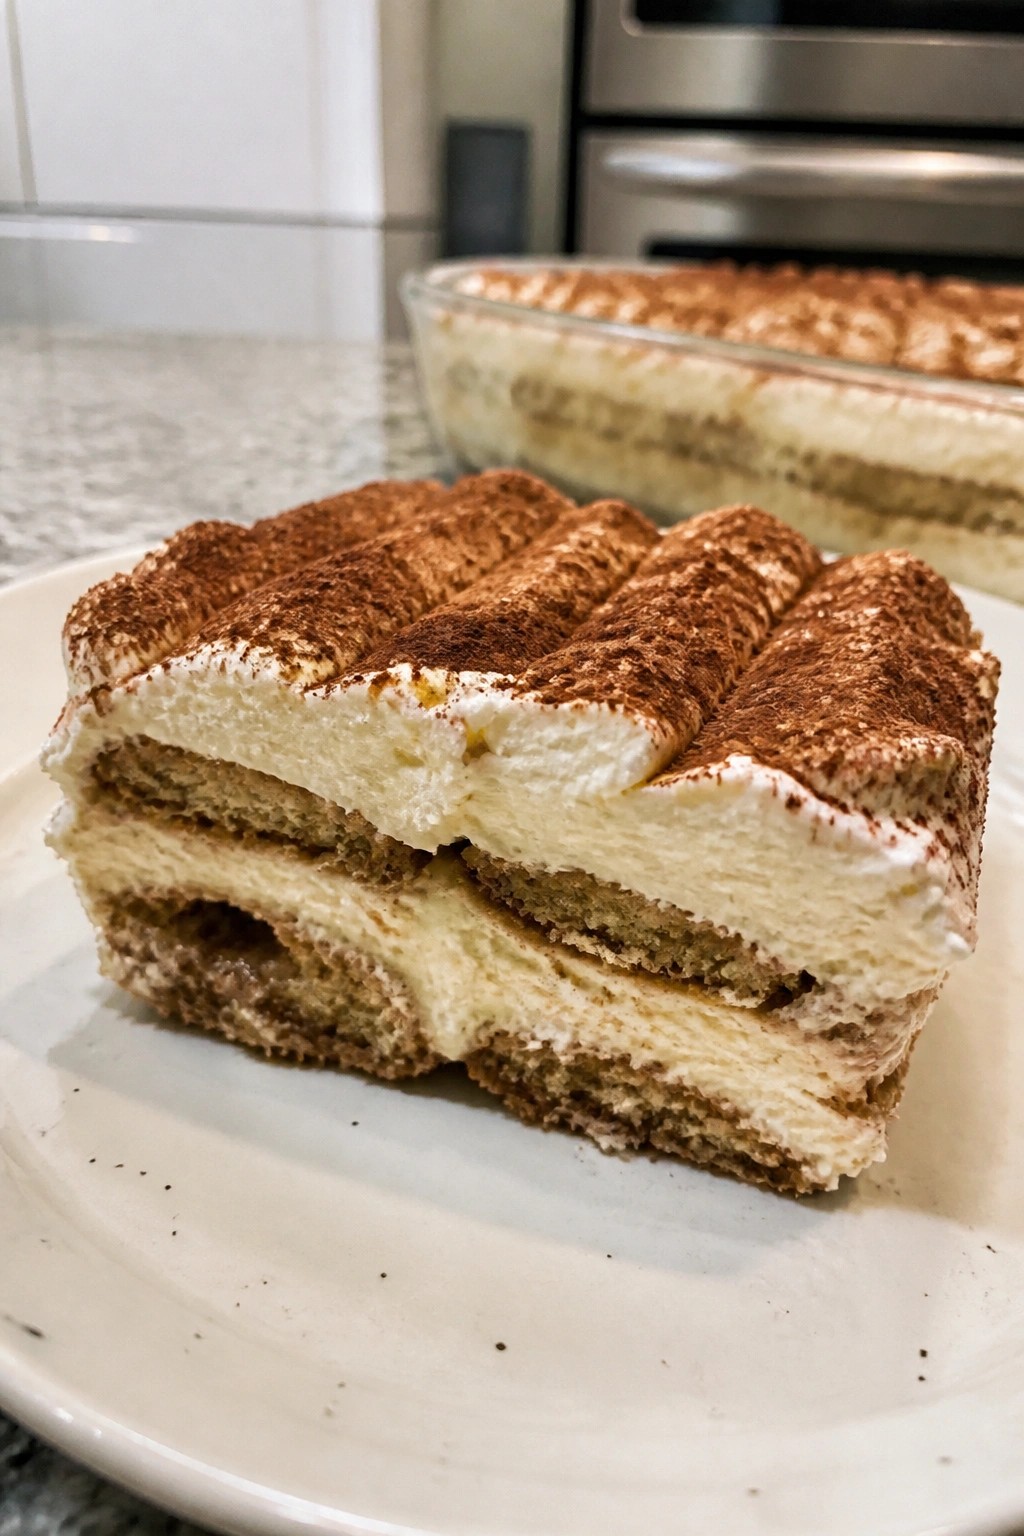
Serves 4 people.
Ingredients
- 8 ladyfinger cookies
- 1 cup strong brewed coffee, cooled
- 2 teaspoons pumpkin pie spice, divided
- 8 ounces mascarpone cheese
- 1/2 cup pumpkin puree
- 1/4 cup granulated sugar
- 1 cup heavy cream
- 1 teaspoon vanilla extract
- 2 tablespoons cocoa powder
Instructions
- Stir 1 teaspoon pumpkin pie spice into the cooled coffee. Quickly dip each ladyfinger into the coffee mixture for a few seconds and arrange them in a single layer in a 9×5 loaf pan.
- In a medium bowl, beat the mascarpone, pumpkin puree, sugar, and remaining teaspoon of pumpkin pie spice until smooth.
- In a separate bowl, whip the heavy cream and vanilla extract until stiff peaks form. Fold the whipped cream into the pumpkin-mascarpone mixture until no streaks remain.
- Spread half the pumpkin cream over the soaked ladyfingers. Add a second layer of dipped ladyfingers, then finish with the remaining pumpkin cream.
- Dust the top evenly with cocoa powder. Cover and refrigerate for at least 4 hours before serving.
Extra Tips
Chill the tiramisu overnight so the layers set firmly and the spice flavor mellows. If the pumpkin cream feels too thick after mixing, add one tablespoon of the coffee liquid to loosen it before spreading. Dust the cocoa just before serving to keep the top looking fresh. Course: Dessert Cuisine: Italian Equipment: Mixing Bowls, Electric Mixer, Loaf Pan
Candy Corn Parfait with Whipped Cream and Crumbs
This no-bake dessert turns classic candy corn into a layered treat that stands out at any fall gathering. It works well for Halloween parties because it requires no oven time and can be put together in clear glasses for an easy, colorful presentation.
The result offers sweet candy corn pieces, light whipped cream, and a bit of crunch from the crumbs in each bite.
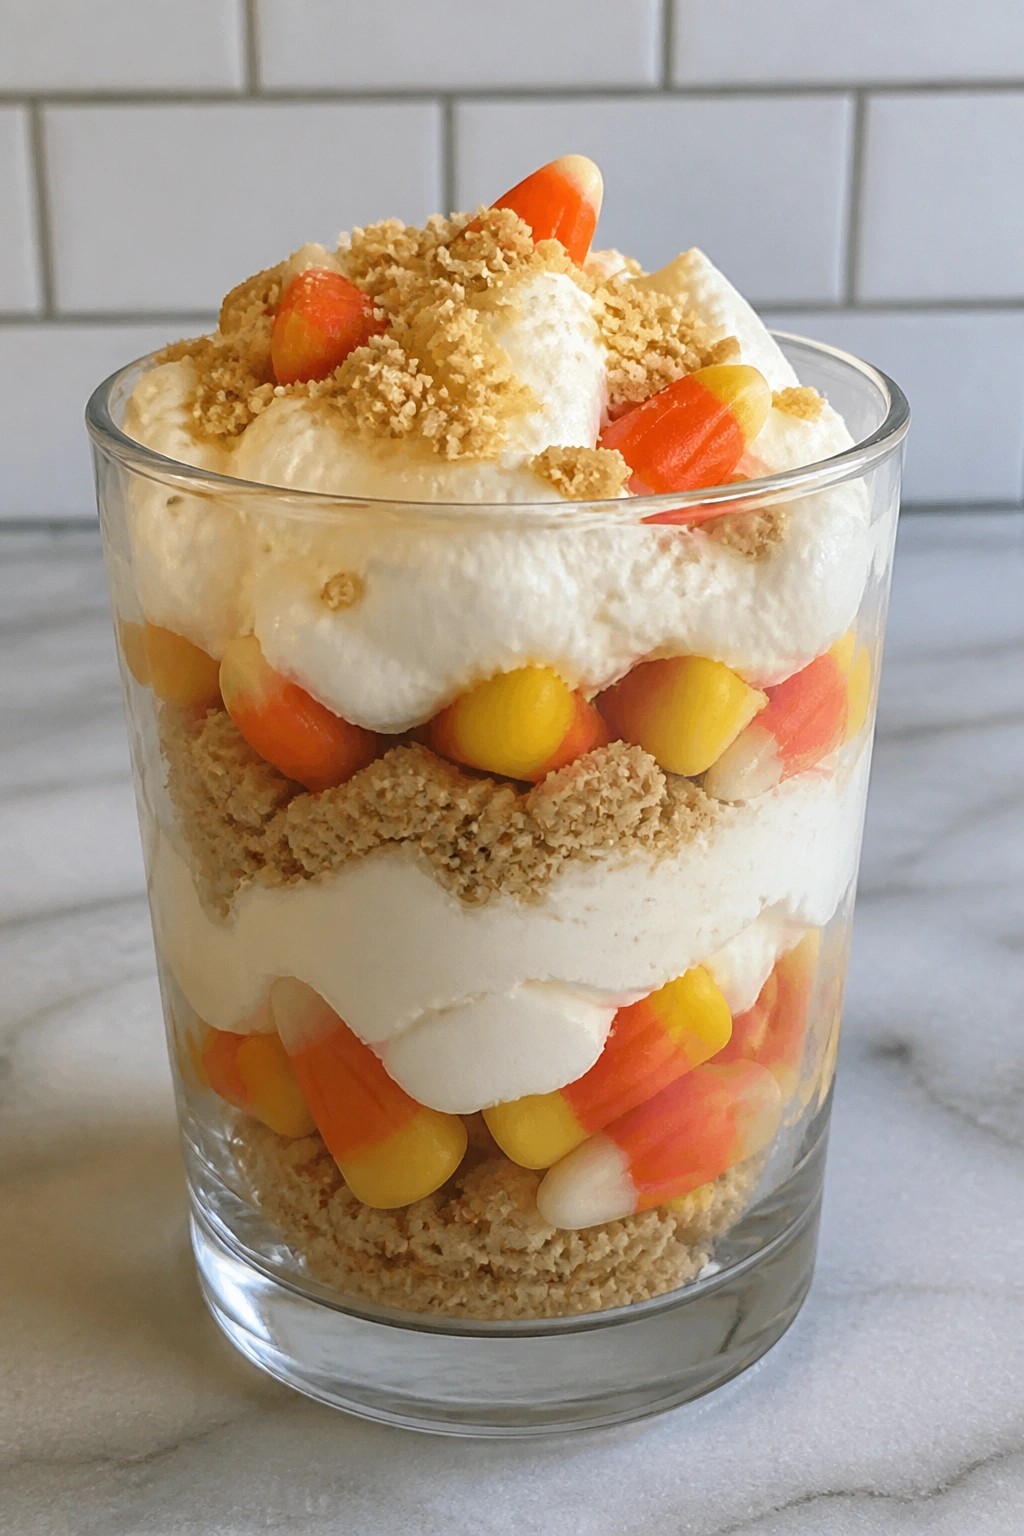
Serves 4 people.
Ingredients
- 2 cups heavy whipping cream
- 1/4 cup powdered sugar
- 1 teaspoon vanilla extract
- 2 cups candy corn, divided
- 1 1/2 cups graham cracker crumbs
Instructions
- Place the heavy whipping cream, powdered sugar, and vanilla extract in a large mixing bowl. Beat with an electric mixer on medium-high speed until stiff peaks form.
- Set out four clear glasses or small jars. Spoon a layer of graham cracker crumbs into the bottom of each glass.
- Add a layer of candy corn on top of the crumbs, using about half of the total candy corn across all glasses.
- Spoon or pipe a layer of whipped cream over the candy corn. Repeat the layers of crumbs, remaining candy corn, and whipped cream until the glasses are filled, finishing with whipped cream on top.
- Sprinkle a few extra graham cracker crumbs over the final whipped cream layer.
Extra Tips
Chill the mixing bowl and beaters ahead of time so the cream whips up faster and holds its shape better. Assemble the parfaits no more than an hour before serving so the crumbs stay crisp. If you need to make them earlier, add the final crumb layer just before guests arrive. Course: Dessert Cuisine: American Equipment: Mixing bowl, Electric mixer, Clear glasses
Chocolate-Dipped Strawberry Ghosts on Sticks
These chocolate-dipped strawberry ghosts add a light and playful touch to any Halloween spread. They come together quickly and look cute lined up on a platter for guests to grab.
The white chocolate shell sets firm around the juicy berry, while the dark chocolate details create simple ghost faces. The sticks make them easy to serve and eat without mess.
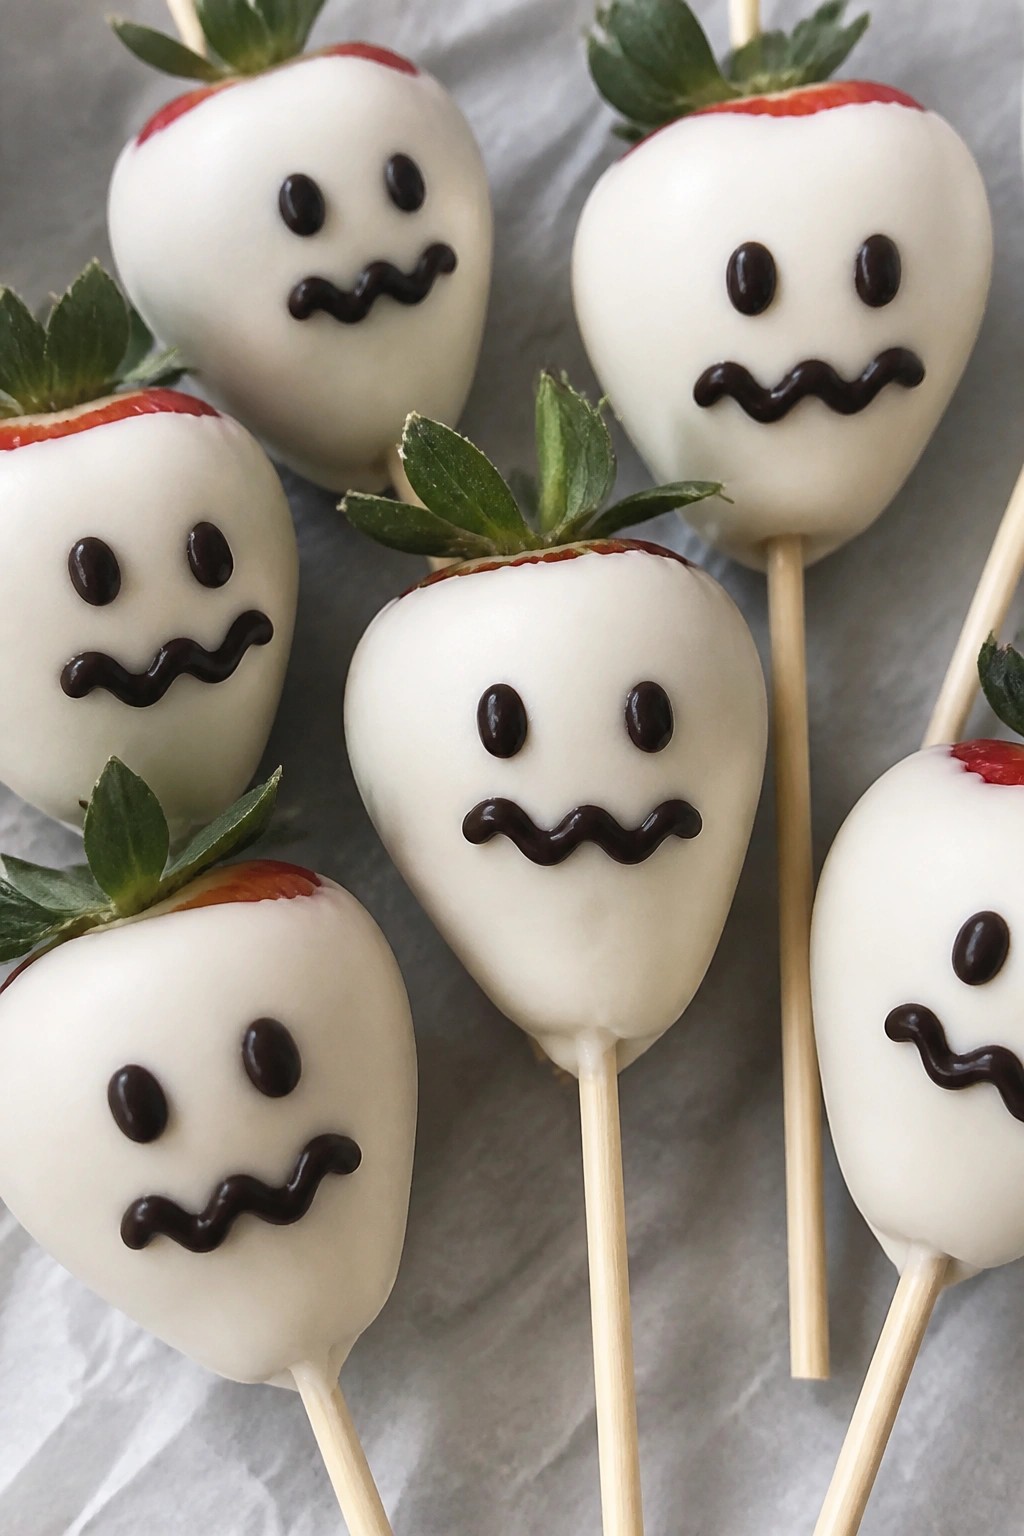
Serves 4 people.
Ingredients
- 12 large strawberries
- 8 ounces white chocolate chips
- 2 ounces dark chocolate chips
- 12 wooden sticks
Instructions
- Rinse the strawberries and pat them dry completely. Insert one wooden stick into the top of each strawberry.
- Place the white chocolate chips in a microwave-safe bowl. Heat in 20-second intervals, stirring between each, until the chocolate is smooth and fully melted.
- Dip each strawberry into the melted white chocolate, turning to coat all sides while leaving a small section of the berry near the stick uncovered. Let excess chocolate drip off.
- Set the coated strawberries on a parchment-lined baking sheet. Chill in the refrigerator for 15 minutes until the coating hardens.
- Melt the dark chocolate chips in a separate bowl using the same microwave method. Spoon the melted chocolate into a small piping bag or zip-top bag with one corner snipped off. Pipe simple eyes and a mouth on each strawberry to form ghost faces. Return to the refrigerator for another 10 minutes to set.
Extra Tips
Work with dry strawberries so the white chocolate sticks well. If the dark chocolate feels too thick for piping, add a drop of neutral oil to loosen it. Store finished ghosts in the refrigerator in a single layer for up to one day. For a variation, swap the dark chocolate for candy eyes if you prefer a quicker finish. Course: Dessert Cuisine: American Equipment: Baking sheet, Parchment paper, Microwave-safe bowls, Piping bag
Halloween Sprinkle Sugar Cookie Sandwiches with Buttercream
These cookie sandwiches bring bright color and a soft texture to any Halloween spread. The sprinkle-filled sugar cookies pair with a simple vanilla buttercream for a treat that feels festive without much fuss. They work well for parties because guests can grab one and go.
The cookies bake up tender with a light crunch from the sprinkles on the edges. The buttercream adds a creamy middle that holds the two halves together. Kids and adults both reach for them when the dessert table needs something fun and easy to eat.
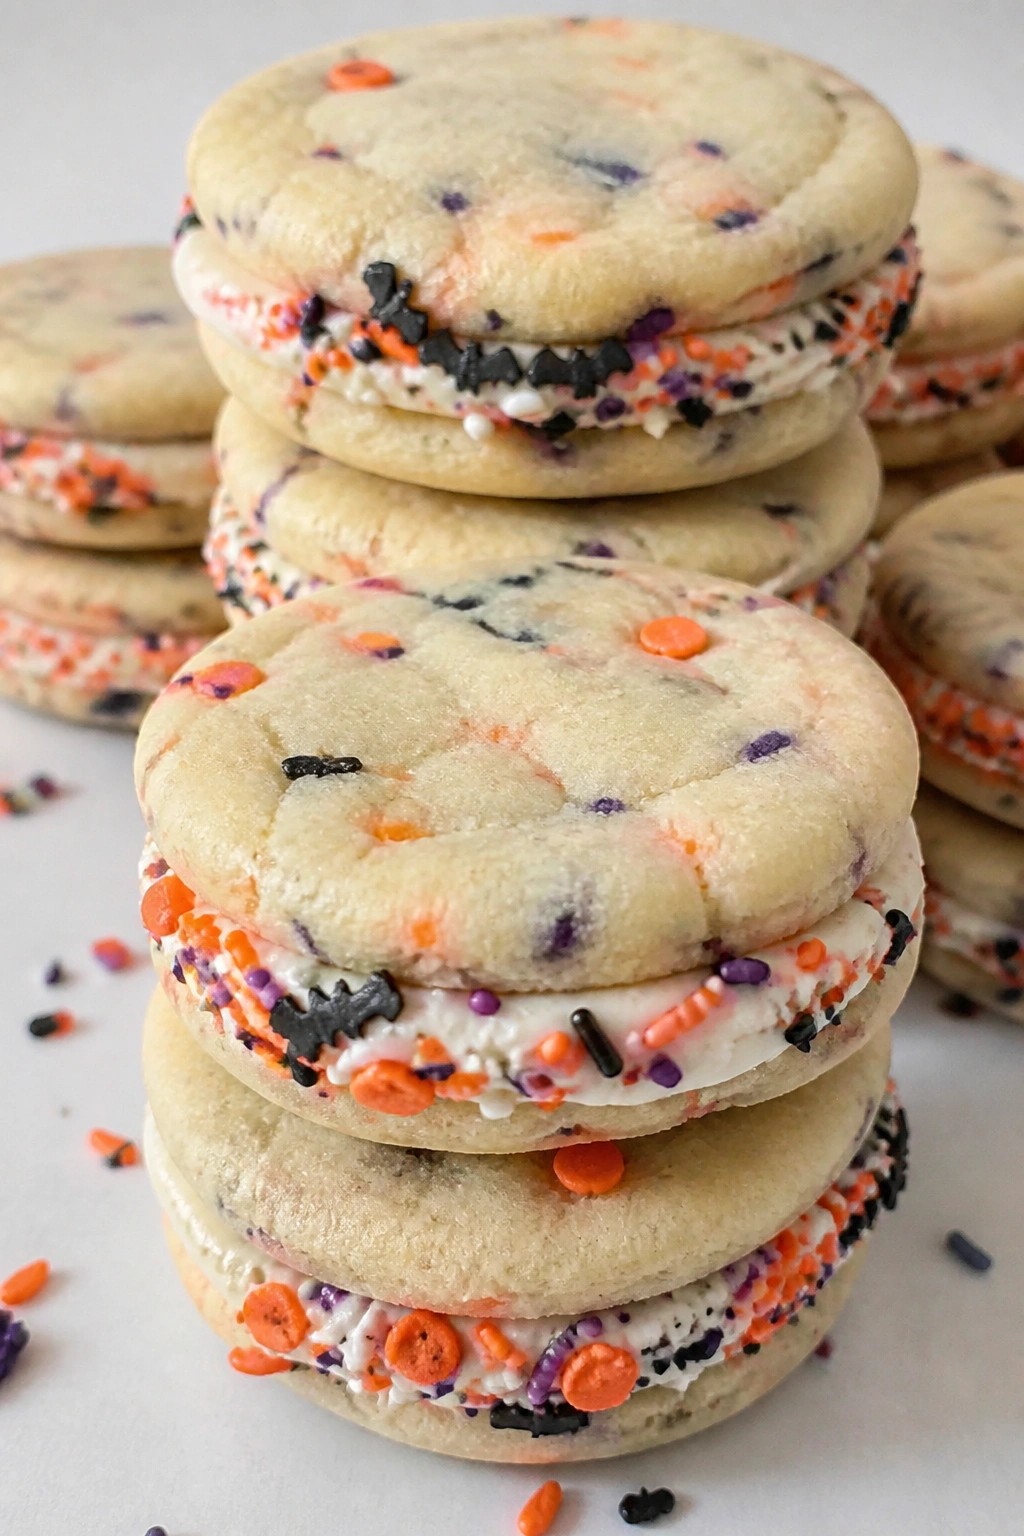
Serves 4 people.
Ingredients
- 1 1/2 cups all-purpose flour
- 1/2 teaspoon baking powder
- 1/4 teaspoon salt
- 1/2 cup unsalted butter, softened
- 1/2 cup granulated sugar
- 1 large egg
- 1 teaspoon vanilla extract
- 1/4 cup Halloween sprinkles
- 1/2 cup unsalted butter, softened
- 1 1/2 cups powdered sugar
- 1 teaspoon vanilla extract
- 1 to 2 tablespoons milk
- Extra Halloween sprinkles for rolling
Instructions
- Preheat the oven to 350 degrees and line a baking sheet with parchment paper.
- Whisk together the flour, baking powder, and salt in a medium bowl.
- In a separate bowl, beat 1/2 cup softened butter with the granulated sugar until light and creamy.
- Add the egg and 1 teaspoon vanilla extract to the butter mixture and mix until combined.
- Stir the dry ingredients into the wet ingredients until a dough forms.
- Fold the 1/4 cup Halloween sprinkles into the dough.
- Scoop the dough into 8 equal balls and roll each one in the extra sprinkles.
- Place the balls on the baking sheet and flatten slightly with the palm of your hand.
- Bake for 10 to 12 minutes until the edges turn lightly golden.
- Let the cookies cool completely on a wire rack.
- Beat the remaining 1/2 cup softened butter with the powdered sugar, 1 teaspoon vanilla extract, and 1 tablespoon milk until smooth. Add the second tablespoon of milk only if needed for spreadable consistency.
- Spread or pipe the buttercream onto the flat side of four cookies and top each with a second cookie.
Extra Tips
Roll the dough balls in sprinkles right before baking so they stick well and create a colorful edge. If the buttercream feels too thick, add milk one teaspoon at a time. Store the assembled sandwiches in an airtight container at room temperature for up to two days. The cookies stay soft when kept away from direct air. Course: Dessert Cuisine: American Equipment: Mixing Bowls, Baking Sheet, Whisk, Electric Mixer