


Potluck season around Halloween calls for dishes that are easy to transport and fun to eat. This list has twelve ideas that fit the theme without needing fancy equipment or rare ingredients. You can make most of them ahead of time so you are not rushed on the day. Each recipe includes clear steps and common items you probably already have. They are designed to feed a crowd and hold up well at a shared table.
Helpful Tips Before You Start
Keep these ideas in mind to create foods that travel well and stay easy to share at a potluck.
Pack for Travel
Choose sturdy, lidded containers that keep shapes intact. Avoid loose toppings until you arrive.
Make Components Ahead
Prep doughs, fillings, or bases the day before. This cuts down on last minute work and keeps everything fresh.
Go for Grab and Go Portions
Cut or shape items into single servings. Guests can serve themselves without extra plates or utensils.
Add Theme Details Quickly
Use cookie cutters or a few candy eyes to give foods a Halloween look. Skip complicated steps that slow you down.
Label Clearly
Note any common allergens on cards next to each dish. This helps everyone choose safely at a shared table.
Jack-O’-Lantern Stuffed Bell Peppers
These jack-o’-lantern stuffed bell peppers add a simple Halloween touch to a classic potluck dish. They hold up well during transport and look festive on a shared table without extra decoration.
The carved orange peppers contain a savory filling of beef, rice, and tomatoes, finished with melted cheese. Each bite offers soft pepper with a seasoned, hearty center.

Serves 4 people.
Ingredients
- 4 large orange bell peppers
- 1 pound ground beef
- 1 small onion, diced
- 1 cup cooked white rice
- 1 can (14 oz) diced tomatoes, drained
- 1 cup shredded cheddar cheese
- 1 teaspoon garlic powder
- Salt and pepper to taste
Instructions
- Preheat the oven to 375 degrees. Cut the tops off each bell pepper and remove the seeds and membranes. Use a small knife to carve simple jack-o’-lantern faces into the sides of the peppers.
- Place the carved peppers in a baking dish. Set aside.
- In a large skillet over medium heat, cook the ground beef and diced onion until the beef is browned and the onion is soft. Drain any excess fat.
- Stir in the cooked rice, drained diced tomatoes, garlic powder, salt, and pepper. Cook for 2 minutes until heated through.
- Spoon the beef mixture evenly into the four carved peppers. Top each with shredded cheddar cheese.
- Bake for 25 minutes until the peppers are tender and the cheese is melted.
Extra Tips
Carve the faces after removing the seeds to keep the peppers stable. For potlucks, assemble the peppers the night before, cover, and bake just before leaving so they arrive warm. If the filling seems dry after mixing, add a tablespoon of the drained tomato liquid before stuffing. Course: Appetizer Cuisine: American Equipment: Oven, Large Skillet, Baking Dish, Sharp Knife
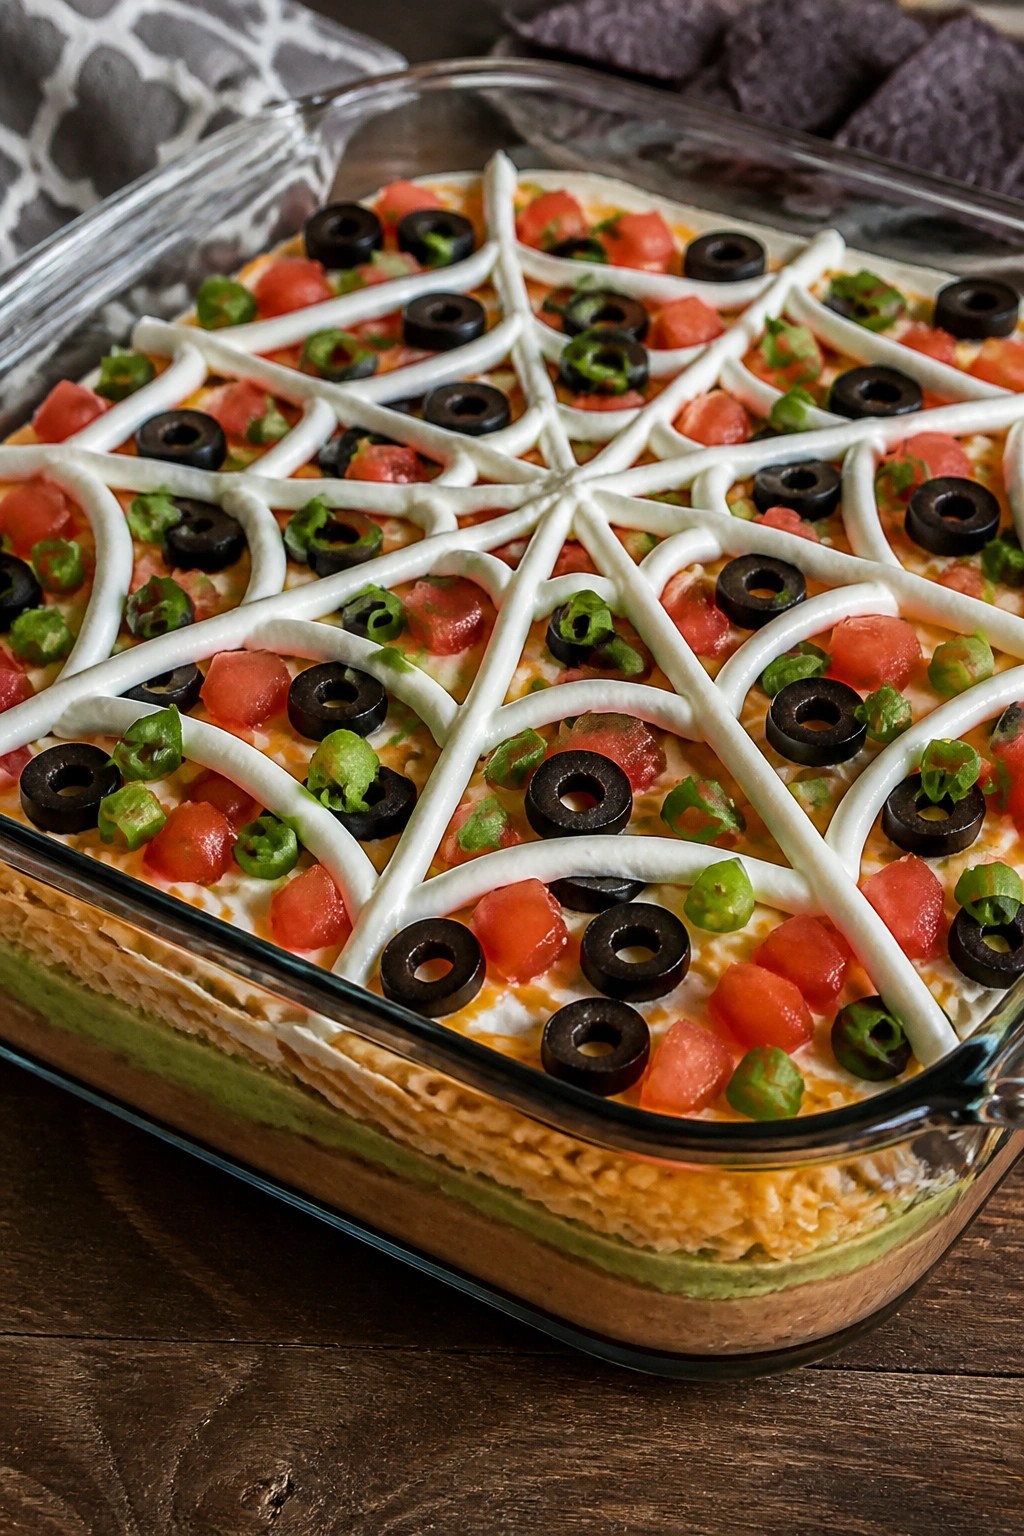
Spooky Seven-Layer Spiderweb Dip
This seven-layer dip puts a Halloween spin on a classic party favorite. The layers stay creamy and hearty while the sour cream web on top adds a simple spooky detail that travels well to any potluck.
It works best as a make-ahead appetizer that guests can scoop with chips. The mix of beans, guacamole, and cheese gives a familiar savory flavor with a cool, fresh finish from the tomatoes and onions.
Serves 4 people.
Ingredients
- 1 (16-ounce) can refried beans
- 1 cup prepared guacamole
- 1 cup sour cream, divided
- 1 cup shredded cheddar cheese
- 1/2 cup diced tomatoes
- 1/4 cup sliced black olives
- 2 green onions, chopped
- Tortilla chips, for serving
Instructions
- Spread the refried beans evenly across the bottom of an 8×8-inch baking dish.
- Spoon the guacamole over the beans and smooth it into an even layer.
- Mix 3/4 cup of the sour cream until it is loose enough to spread, then add it as the next layer.
- Sprinkle the shredded cheddar cheese over the sour cream layer.
- Scatter the diced tomatoes on top of the cheese.
- Add the sliced black olives in an even layer.
- Finish with the chopped green onions.
- Place the remaining 1/4 cup sour cream in a small zip-top bag, snip off one corner, and pipe a spiderweb pattern across the top.
- Arrange a few olive slices into small spider shapes on the web if desired.
- Serve with tortilla chips on the side.
Extra Tips
Pipe the sour cream web right before serving so the lines stay sharp. If you make the dip ahead, keep the sour cream bag separate in the fridge and add the design at the last minute. Use store-bought guacamole to save time, or mash ripe avocados with a little lime if you prefer homemade. Course: Appetizer Cuisine: American Equipment: 8×8 Baking Dish, Mixing Bowl, Plastic Bag
Mummy Jalapeño Popper Skewers
These Mummy Jalapeño Popper Skewers turn a classic appetizer into a shareable Halloween bite. The skewers make them easy to grab at a potluck without needing plates or utensils.
Creamy cheese fills each pepper while strips of dough create a wrapped mummy effect. A touch of bacon adds savory flavor that balances the pepper heat.

Serves 4 people.
Ingredients
- 8 large jalapeño peppers
- 8 ounces cream cheese, softened
- 1 cup shredded cheddar cheese
- 1/2 cup cooked bacon, crumbled
- 1 can crescent roll dough
- 16 wooden skewers
- 16 sliced black olives
Instructions
- Preheat the oven to 375 degrees and line a baking sheet with parchment paper.
- Cut each jalapeño in half lengthwise and remove the seeds and membranes.
- Stir the cream cheese, cheddar cheese, and crumbled bacon together in a bowl until evenly mixed.
- Spoon the cheese mixture into each jalapeño half and press it down gently.
- Unroll the crescent dough and cut it into thin strips about 1/4 inch wide.
- Wrap the dough strips around each stuffed jalapeño in a crisscross pattern, leaving small gaps to show the filling.
- Thread two wrapped jalapeños onto each wooden skewer.
- Place the skewers on the baking sheet and bake for 15 to 18 minutes until the dough turns golden.
- Remove from the oven and press two olive slices onto each jalapeño to form eyes.
Extra Tips
Bake the skewers right before serving so the dough stays crisp. If you prepare the stuffed peppers ahead, keep the dough strips separate until the last minute to avoid sogginess. The bacon adds enough salt, so taste the filling before adding any extra seasoning. Course: Appetizer Cuisine: American Equipment: Baking sheet, Mixing bowl, Knife
Vampire Garlic Knots with Marinara
These Vampire Garlic Knots make a smart choice for Halloween potlucks because they travel well and stay tasty at room temperature. Guests can pull apart the soft knots and dip them into marinara for a simple shared bite.
The knots bake up golden on the outside with a tender center, while the garlic butter adds bold savory flavor that pairs cleanly with the tangy sauce.

Serves 4 people.
Ingredients
- 1 pound refrigerated pizza dough
- 4 tablespoons unsalted butter, melted
- 5 garlic cloves, minced
- 2 tablespoons fresh parsley, chopped
- 1/2 teaspoon salt
- 1 cup marinara sauce
- 1/4 cup grated Parmesan cheese
Instructions
- Preheat the oven to 400 degrees and line a baking sheet with parchment paper.
- Divide the pizza dough into 8 equal pieces and roll each into a rope about 6 inches long. Tie each rope into a simple knot and place them on the prepared sheet.
- Bake the knots for 12 to 15 minutes until they turn light golden.
- While the knots bake, stir together the melted butter, minced garlic, chopped parsley, and salt in a small bowl.
- Remove the knots from the oven and immediately brush them all over with the garlic butter mixture.
- Transfer the knots to a serving plate and place the marinara sauce in a bowl alongside them. Sprinkle the Parmesan cheese over the knots just before serving.
Extra Tips
Shape the dough ahead of time and keep the knots covered in the fridge until you are ready to bake. Warm any leftovers in a 350-degree oven for five minutes to restore the crust before adding fresh garlic butter. If the marinara is too thick for dipping, stir in a spoonful of water while it heats. Course: Appetizer Cuisine: Italian Equipment: Baking sheet, Small bowl, Pastry brush
Monster Eyeball Deviled Eggs
These Monster Eyeball Deviled Eggs turn a classic appetizer into a Halloween crowd-pleaser with bright green filling and olive centers. They suit potlucks because they hold up well at room temperature and need no reheating. The result is a creamy, tangy bite with a savory olive accent on top.
The green color comes from a few drops of food coloring mixed into the yolk base. This keeps the flavor familiar while giving each half a clear eyeball look that fits the theme.

Serves 4 people.
Ingredients
- 6 large eggs
- 1/4 cup mayonnaise
- 1 teaspoon yellow mustard
- 1/2 teaspoon apple cider vinegar
- 1/4 teaspoon salt
- 1/8 teaspoon black pepper
- 3 drops green food coloring
- 6 black olives, sliced into rounds
Instructions
- Place the eggs in a large pot and cover them with cold water by one inch. Bring the water to a boil over medium-high heat, then remove the pot from the heat, cover it, and let the eggs sit for 12 minutes.
- Drain the hot water and transfer the eggs to a bowl of ice water. Let them cool for 5 minutes, then peel off the shells.
- Slice each egg in half lengthwise and gently pop out the yolks into a mixing bowl. Arrange the empty whites on a serving plate.
- Mash the yolks with a fork until smooth. Add the mayonnaise, mustard, vinegar, salt, pepper, and green food coloring. Stir until the mixture is evenly colored and creamy.
- Spoon or pipe the green filling back into the egg white halves. Top each filled half with one black olive slice to create the pupil.
Extra Tips
Mix the filling right before filling the eggs so the green stays bright. If you make the eggs ahead, store the whites and filling separately in the fridge and assemble just before serving to keep the olives from bleeding color into the filling. Course: Appetizer Cuisine: American Equipment: Large pot, Mixing bowl, Knife
Graveyard Taco Salad with Tortilla Tombstones
This taco salad turns a classic potluck dish into something festive for Halloween. The tortilla pieces stand upright like tombstones, giving the bowl a playful graveyard look while the seasoned beef and fresh toppings stay hearty and familiar.
It travels well to gatherings and holds up on a buffet table. Crunchy lettuce and baked tortillas contrast with creamy avocado and melted cheese, while the taco flavors keep it savory and crowd-friendly.

Serves 4 people.
Ingredients
- 1 lb ground beef
- 1 packet taco seasoning
- 1 head romaine lettuce, chopped
- 2 large tomatoes, diced
- 1 can black beans, drained and rinsed
- 1 cup shredded cheddar cheese
- 1 avocado, sliced
- 1/2 cup salsa
- 1/4 cup sour cream
- 4 corn tortillas
- 1/4 cup sliced black olives
Instructions
- Preheat the oven to 350 degrees. Cut each corn tortilla into a tombstone shape and place the pieces on a baking sheet. Bake for 8 to 10 minutes until crisp.
- Cook the ground beef in a large skillet over medium heat until browned. Drain any excess fat.
- Stir the taco seasoning into the beef along with 1/4 cup water. Simmer for 3 minutes until the mixture thickens.
- In a large serving bowl, layer the chopped romaine lettuce as the base. Spoon the seasoned beef over the lettuce.
- Scatter the black beans, diced tomatoes, and shredded cheddar cheese across the top.
- Arrange the avocado slices and black olives over the salad. Dollop the salsa and sour cream in small spots around the surface.
- Insert the baked tortilla tombstones upright into the salad just before serving.
Extra Tips
Bake the tortilla tombstones a few hours ahead and store them in an airtight container so they stay crisp until you assemble the salad at the event. If the beef mixture thickens too much during transport, stir in a spoonful of salsa to loosen it before adding it to the lettuce. Course: Salad Cuisine: Mexican Equipment: Large skillet, Baking sheet, Large bowl
Witch Finger Breadsticks with Pesto
These witch finger breadsticks add a playful Halloween element to a potluck spread. Shaped like crooked fingers and served with bright green pesto, they stand out on a shared table while still being simple to prepare ahead.
The breadsticks bake up golden and crisp on the outside with a soft center. The pesto provides fresh basil flavor for dipping and helps secure the almond fingernails in place.

Serves 4 people.
Ingredients
- 1 pound store-bought pizza dough
- 1/4 cup basil pesto, divided
- 12 blanched almonds
- 1 tablespoon olive oil
- 1/2 teaspoon coarse salt
- 1/4 teaspoon garlic powder
Instructions
- Preheat the oven to 400°F and line a baking sheet with parchment paper.
- Divide the pizza dough into 12 equal pieces. Roll each piece into a thin, finger-shaped log about 4 inches long.
- Dab a small amount of pesto on one end of each log and press an almond into the pesto to create a fingernail.
- Arrange the shaped dough on the prepared baking sheet. Lightly brush each piece with olive oil.
- Sprinkle the salt and garlic powder evenly over the breadsticks.
- Bake for 12 to 15 minutes until the breadsticks are golden brown. Serve warm with the remaining pesto for dipping.
Extra Tips
Press a few light indentations along each finger before baking to suggest knuckles. If the almonds loosen during baking, press them back in place while the breadsticks are still warm. Store leftovers in an airtight container and reheat briefly in a 350°F oven to restore crispness. Use a thicker pesto so it holds the almonds securely without running. Course: Appetizer Cuisine: American Equipment: Baking sheet, Parchment paper, Pastry brush
Pumpkin Patch Cheese Ball with Crackers
This cheese ball brings a fun fall twist to any gathering. Shaped like a pumpkin and served with crackers, it fits right in at Halloween potlucks where guests want something savory to share.
The mix of cheddar and cream cheese creates a smooth, spreadable texture with a mild savory flavor. It travels well and holds its shape once chilled, making it easy to prepare ahead.

Serves 4 people.
Ingredients
- 8 ounces cream cheese, softened
- 2 cups shredded cheddar cheese
- 1 teaspoon paprika
- 1/4 cup chopped chives
- 1 pretzel stick
- 20 assorted crackers
Instructions
- Place the softened cream cheese, shredded cheddar cheese, and paprika in a mixing bowl. Stir until the mixture is evenly combined and holds together.
- Add the chopped chives and mix again until they are distributed throughout the cheese.
- Lay a piece of plastic wrap on the counter. Scoop the cheese mixture onto the wrap and form it into a round ball.
- Use the edge of a spatula or knife to press shallow vertical lines around the ball to resemble a pumpkin.
- Insert the pretzel stick into the top center to act as a stem. Wrap the cheese ball and chill it for at least one hour.
- Unwrap the cheese ball and place it on a serving platter. Arrange the crackers around the base.
Extra Tips
Chill the cheese ball longer if you need to transport it to a potluck. The paprika adds color without overpowering the cheddar flavor. If the mixture feels too soft when shaping, chill it for 15 minutes before forming the lines and adding the stem. Course: Appetizer Cuisine: American Equipment: Mixing Bowl, Plastic Wrap, Serving Platter
Bat Wing BBQ Chicken Wings
These bat wing BBQ chicken wings give classic party food a fun Halloween touch that fits right into any potluck spread. They hold up well when served warm or at room temperature, making them practical for sharing. The wings come out crispy with a thick, smoky BBQ coating that balances sweet and savory notes.

Serves 4 people.
Ingredients
- 2 pounds chicken wings
- 2 tablespoons olive oil
- 1 teaspoon garlic powder
- 1 teaspoon paprika
- 1/2 teaspoon salt
- 1/2 teaspoon black pepper
- 1 cup BBQ sauce
- 2 tablespoons chopped fresh parsley
Instructions
- Preheat the oven to 400 degrees F and line a baking sheet with parchment paper.
- Place the chicken wings in a large bowl and drizzle with the olive oil.
- Sprinkle the garlic powder, paprika, salt, and black pepper over the wings, then toss until evenly coated.
- Arrange the wings in a single layer on the prepared baking sheet.
- Bake for 20 minutes, then remove the sheet from the oven.
- Brush the wings generously with the BBQ sauce on all sides.
- Return the sheet to the oven and bake for another 15 minutes until the sauce is sticky and the wings are cooked through.
- Sprinkle the chopped fresh parsley over the wings before serving.
Extra Tips
For extra crisp skin, place the wings on a wire rack set inside the baking sheet during baking. If you want more sauce at the table, warm an extra half cup of BBQ sauce separately and serve it on the side. Leftovers store well in an airtight container in the fridge for up to three days and reheat best in a 350-degree oven for 10 minutes. Course: Appetizer Cuisine: American Equipment: Baking Sheet, Large Bowl, Pastry Brush
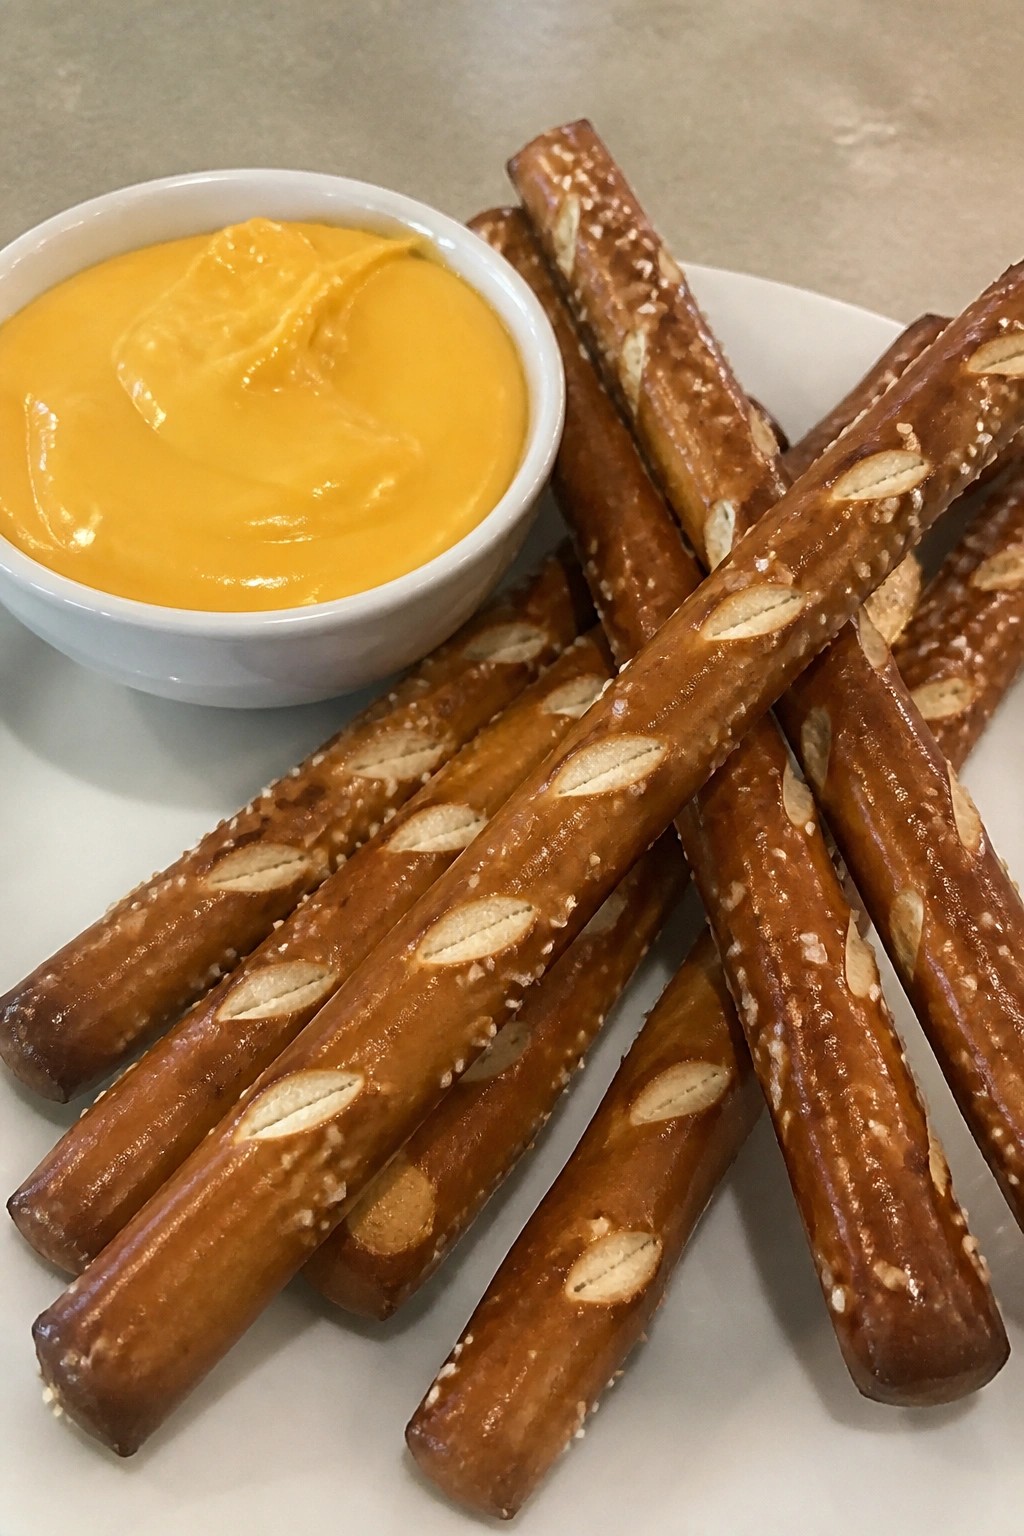
Skeleton Bone Pretzel Rods with Cheese Dip
These pretzel rods work as stand-in bones for a Halloween spread. They come with a simple cheese dip that stays smooth and scoopable for group sharing at any potluck table. The salty crunch pairs with the mild, creamy dip for an easy savory bite.
This option travels well and holds up without special equipment. It fits casual gatherings where guests want something fun but not fussy to eat.
Serves 4 people.
Ingredients
- 12 large pretzel rods
- 2 tablespoons butter
- 2 tablespoons all-purpose flour
- 1 cup milk
- 2 cups shredded cheddar cheese
- 1/2 teaspoon garlic powder
- 1/4 teaspoon salt
- 1/4 teaspoon black pepper
Instructions
- Melt the butter in a saucepan over medium heat.
- Whisk in the flour and cook for one minute to form a smooth paste.
- Slowly pour in the milk while whisking to avoid lumps.
- Add the garlic powder, salt, and black pepper.
- Stir in the shredded cheddar cheese a handful at a time until fully melted and the dip thickens.
- Remove the pan from heat and pour the dip into a serving bowl.
- Arrange the pretzel rods around the bowl for dipping.
Extra Tips
Keep the dip warm by placing the bowl over a small dish of hot water if the potluck runs long. Stir the cheese sauce once more right before serving to restore its smooth texture. Use a block of cheddar and shred it yourself for the best melt. Leftovers store in the fridge for two days and reheat gently with a splash of milk. Course: Appetizer Cuisine: American Equipment: Saucepan, Whisk, Serving Bowl
Orange and Black Halloween Pasta Salad
This pasta salad brings bold color to any potluck table with its mix of bright orange bell pepper and dark black olives and beans. It travels well, holds up at room temperature, and gives guests something savory to scoop alongside heavier dishes.
The flavors stay simple and fresh with a light vinaigrette that lets the vegetables stand out. Tender pasta catches the dressing while the beans add a little heartiness without weighing the salad down.

Serves 4 people.
Ingredients
- 8 oz rotini pasta
- 2 tablespoons olive oil
- 1 orange bell pepper, diced
- 1 cup canned black beans, drained and rinsed
- 1/2 cup sliced black olives
- 2 tablespoons red wine vinegar
- 1 teaspoon garlic powder
- 1/4 cup chopped fresh parsley
- Salt and pepper to taste
Instructions
- Bring a large pot of salted water to a boil and cook the rotini until al dente. Drain the pasta in a colander and rinse briefly under cool water to stop the cooking.
- Transfer the cooled pasta to a large mixing bowl. Add the olive oil and red wine vinegar, then sprinkle in the garlic powder, salt, and pepper. Stir until the pasta is evenly coated.
- Add the diced orange bell pepper, black beans, and sliced black olives to the bowl. Toss gently so the colors stay distinct and the beans do not break apart.
- Fold in the chopped parsley last. Taste and adjust salt or pepper if needed before serving.
Extra Tips
Make this salad a few hours ahead so the flavors can settle, then give it a quick stir before the potluck. If the pasta absorbs too much dressing during storage, add an extra teaspoon of olive oil and a splash of vinegar right before serving to refresh it. Skip the parsley only if you want a milder look, but it adds nice color contrast against the black beans. Course: Salad Cuisine: American Equipment: Large pot, Colander, Large mixing bowl
Cauldron Queso with Chorizo and Chips
This queso dip works well for Halloween potlucks because it travels easily and looks striking when served in a dark bowl. The name comes from the way the thick cheese mixture sits like a bubbling brew, ready for guests to scoop with chips.
The finished dip tastes rich and savory with a bit of spice from the chorizo. It stays creamy as long as it is kept warm, which makes it practical for sharing at a table full of other dishes.

Serves 4 people.
Ingredients
- 8 ounces Mexican chorizo, casings removed
- 1 tablespoon olive oil
- 1/2 cup diced onion
- 2 cloves garlic, minced
- 1 pound Velveeta cheese, cubed
- 1 (10-ounce) can diced tomatoes with green chilies, undrained
- 1/4 cup milk
- Black tortilla chips, for serving
Instructions
- Heat the olive oil in a large skillet over medium heat. Add the chorizo and cook, breaking it up with a spoon, until it is browned and cooked through.
- Add the diced onion and minced garlic to the skillet. Cook for 3 minutes until the onion softens.
- Stir in the cubed Velveeta, the can of diced tomatoes with green chilies, and the milk. Reduce the heat to low.
- Stir the mixture often until the cheese melts completely and the dip becomes smooth and thick.
- Transfer the queso to a serving bowl that resembles a small cauldron. Set out the black tortilla chips alongside for dipping.
Extra Tips
Keep the queso warm in a slow cooker on the low setting if the potluck runs long. If the dip thickens too much while sitting, stir in a splash of milk to loosen it. The black tortilla chips give the cauldron look without adding extra ingredients to the dip itself. Course: Appetizer Cuisine: Mexican Equipment: Large Skillet, Wooden Spoon, Serving Bowl