


Halloween parties usually need a balance of snacks for different tastes. Many guests skip the sweet treats and look for salty options instead. These recipes use everyday ingredients and simple steps to make. Each one works for a small group or a larger crowd. You will find ten practical ideas below.
Helpful Tips Before You Start
These tips will keep your salty snacks crisp and party ready.
Season at the Right Time
Add salt right after cooking so it sticks to hot surfaces. This gives better flavor than seasoning cold food.
Prep Bases in Advance
Cut vegetables, mix doughs, or portion cheeses the day before. Store them covered in the fridge to save time on party day.
Skip Any Sweet Add Ins
Check labels on sauces and seasonings to avoid hidden sugars. Stick to herbs, garlic, and smoked paprika for depth.
Keep Batches Warm
Hold finished snacks in a 200 degree oven on a wire rack. This prevents sogginess while you finish the rest.
Mummy-Wrapped Sausage Rolls
Mummy-Wrapped Sausage Rolls turn basic sausages into a savory Halloween snack. Thin strips of pastry wrap around each sausage to create a bandage look that fits the theme without any sweetness.
These rolls suit party platters or casual gatherings where guests prefer salty bites. The finished result gives a crisp pastry shell around a juicy, seasoned sausage.

Serves 4 people.
Ingredients
- 8 cocktail sausages
- 1 sheet puff pastry, thawed
- 1 large egg
- 1 teaspoon water
- 2 tablespoons yellow mustard
Instructions
- Preheat the oven to 400 degrees F and line a baking sheet with parchment paper.
- Unroll the puff pastry sheet on a lightly floured surface and cut it into thin strips about half an inch wide.
- Wrap the pastry strips around each cocktail sausage in a crisscross pattern, leaving small gaps to show the sausage underneath.
- Place the wrapped sausages on the prepared baking sheet.
- Whisk the egg with the water and brush the mixture over the pastry on all sides.
- Bake for 15 to 18 minutes until the pastry turns golden brown.
- Remove from the oven and let cool slightly. Use a small amount of yellow mustard to dot two eyes on each mummy.
Extra Tips
Assemble the rolls ahead of time and keep them covered in the fridge until you are ready to bake. The mustard both creates the eyes and adds a sharp flavor that pairs well with the rich pastry and sausage. Reheat leftovers in a 350 degree F oven for a few minutes to restore crispness. Course: Appetizer Cuisine: American Equipment: Baking sheet, Oven, Pastry brush, Sharp knife
Spiderweb Black Bean Nachos
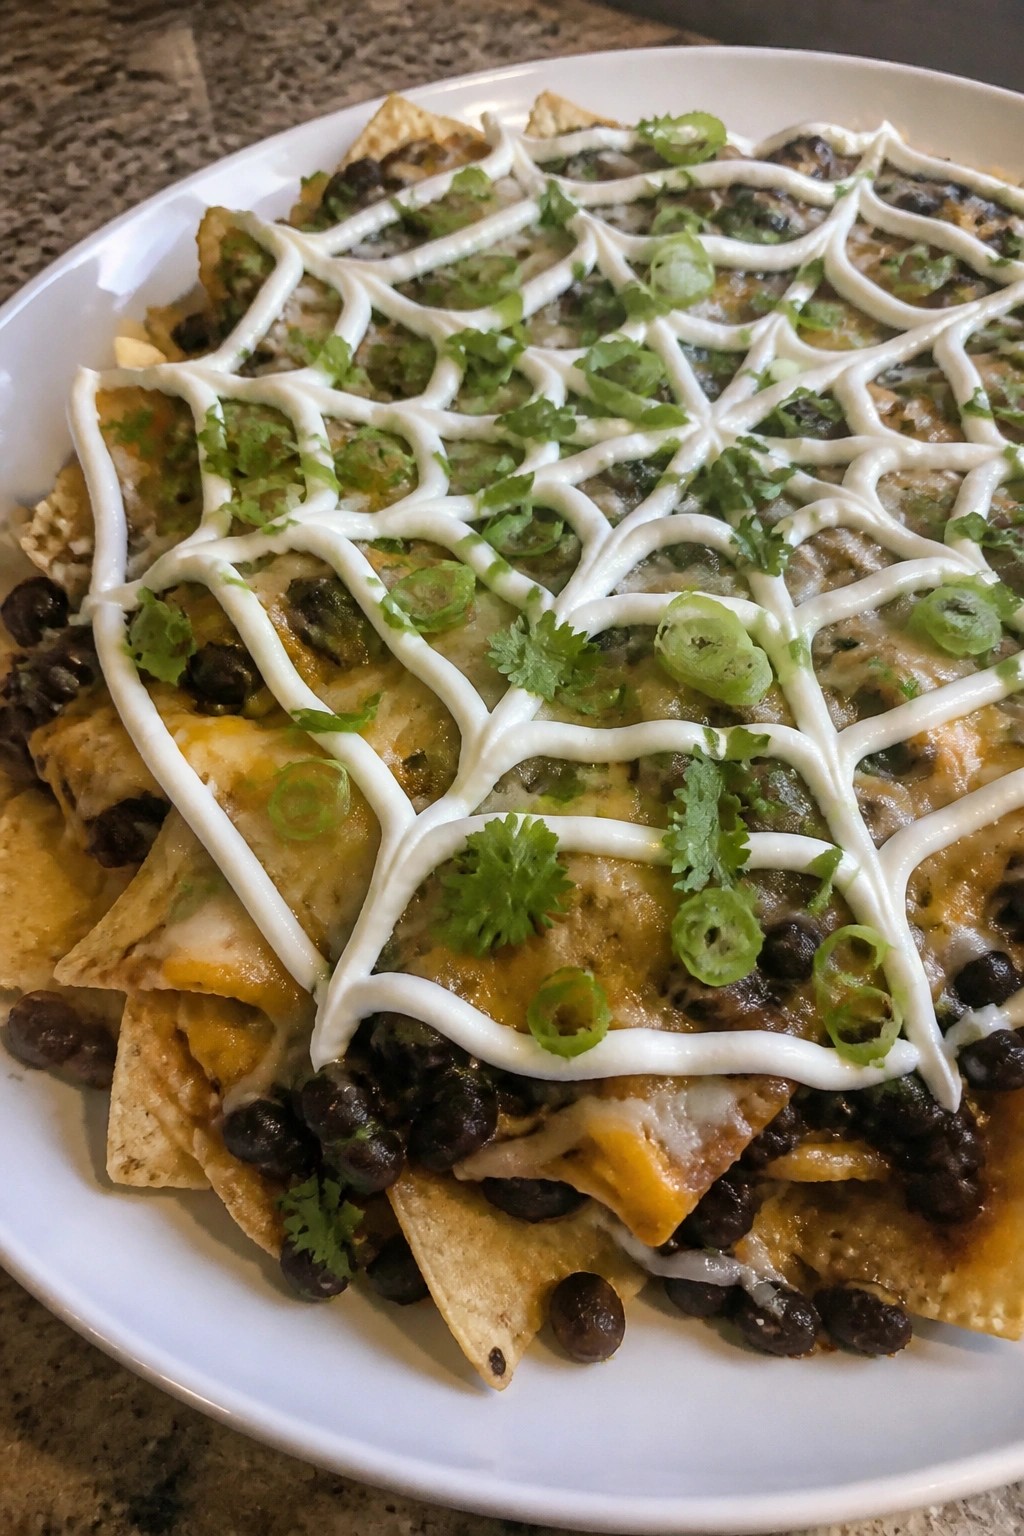
These nachos bring a simple Halloween touch to a classic salty snack. Black beans and melted cheese form the base while sour cream creates an easy spiderweb pattern on top. The result is savory, crunchy, and easy to share at a party.
The dish works well as a casual starter or main snack when guests want something hearty but not sweet. It stays grounded in familiar nacho flavors with just enough visual detail to fit the season.
Serves 4 people.
Ingredients
- 12 ounces tortilla chips
- 2 cans (15 ounces each) black beans, drained and rinsed
- 2 cups shredded Mexican cheese blend
- 1 cup sour cream
- 1 teaspoon chili powder
- 1/2 teaspoon cumin
- 1/4 teaspoon salt
- 2 green onions, sliced
- 2 tablespoons chopped cilantro
Instructions
- Preheat the oven to 375 degrees. Line a large baking sheet with parchment paper.
- Place the black beans in a skillet over medium heat. Stir in the chili powder, cumin, and salt. Cook for 5 minutes until the beans are warmed through and the spices are evenly distributed.
- Spread half the tortilla chips in an even layer on the baking sheet. Spoon half the seasoned beans over the chips and sprinkle with 1 cup of cheese. Add the remaining chips, beans, and cheese.
- Bake for 10 to 12 minutes until the cheese is fully melted and the edges of the chips are lightly browned.
- While the nachos bake, spoon the sour cream into a small resealable plastic bag and snip off one corner. Remove the nachos from the oven and pipe the sour cream in a spiral pattern across the surface. Drag a toothpick from the center outward at several points to form a web. Finish with sliced green onions and chopped cilantro.
Extra Tips
Pipe the sour cream while the cheese is still hot so it settles into the surface without sliding. If you need to hold the nachos for a few minutes before serving, keep the sour cream web separate and add it just before guests arrive. Leftovers reheat best in a 350-degree oven for 5 minutes to restore crispness. Course: Appetizer Cuisine: Mexican Equipment: Baking sheet, Large skillet, Resealable plastic bag
Garlic Herb Stuffed Mushroom Caps
These garlic herb stuffed mushroom caps make a solid savory option for a Halloween gathering. They come together quickly and hold up well on a snack table when guests want something warm and filling instead of candy.
The mushrooms stay juicy after baking while the breadcrumb and cheese topping turns crisp. Garlic and fresh herbs give the filling a bold, earthy taste that feels satisfying with a cold drink.

Serves 4 people.
Ingredients
- 16 large cremini mushrooms
- 3 tablespoons olive oil, divided
- 4 garlic cloves, minced
- 1/4 cup chopped fresh parsley
- 2 teaspoons chopped fresh thyme
- 1/2 cup panko breadcrumbs
- 1/3 cup grated Parmesan cheese
- 1/2 teaspoon salt
- 1/4 teaspoon black pepper
Instructions
- Preheat the oven to 375°F and line a baking sheet with parchment paper.
- Wipe the mushrooms clean, remove the stems, and finely chop the stems.
- Heat 1 tablespoon olive oil in a skillet over medium heat. Add the minced garlic and chopped mushroom stems. Cook for 3 to 4 minutes until the stems soften.
- Transfer the cooked mixture to a bowl. Stir in the parsley, thyme, panko breadcrumbs, Parmesan cheese, salt, and black pepper.
- Place the mushroom caps on the baking sheet. Spoon the filling evenly into each cap and press it down lightly.
- Drizzle the remaining 2 tablespoons olive oil over the tops. Bake for 18 to 20 minutes until the mushrooms are tender and the tops are golden.
Extra Tips
Use cremini mushrooms for better flavor and structure than white button ones. The filling can be mixed a few hours ahead and kept covered in the fridge until you are ready to stuff and bake. Leftovers reheat well in a 350°F oven for 8 minutes to restore crispness on top. Course: Appetizer Cuisine: American Equipment: Baking sheet, Skillet, Mixing bowl
Smoky Paprika Roasted Chickpea Cups
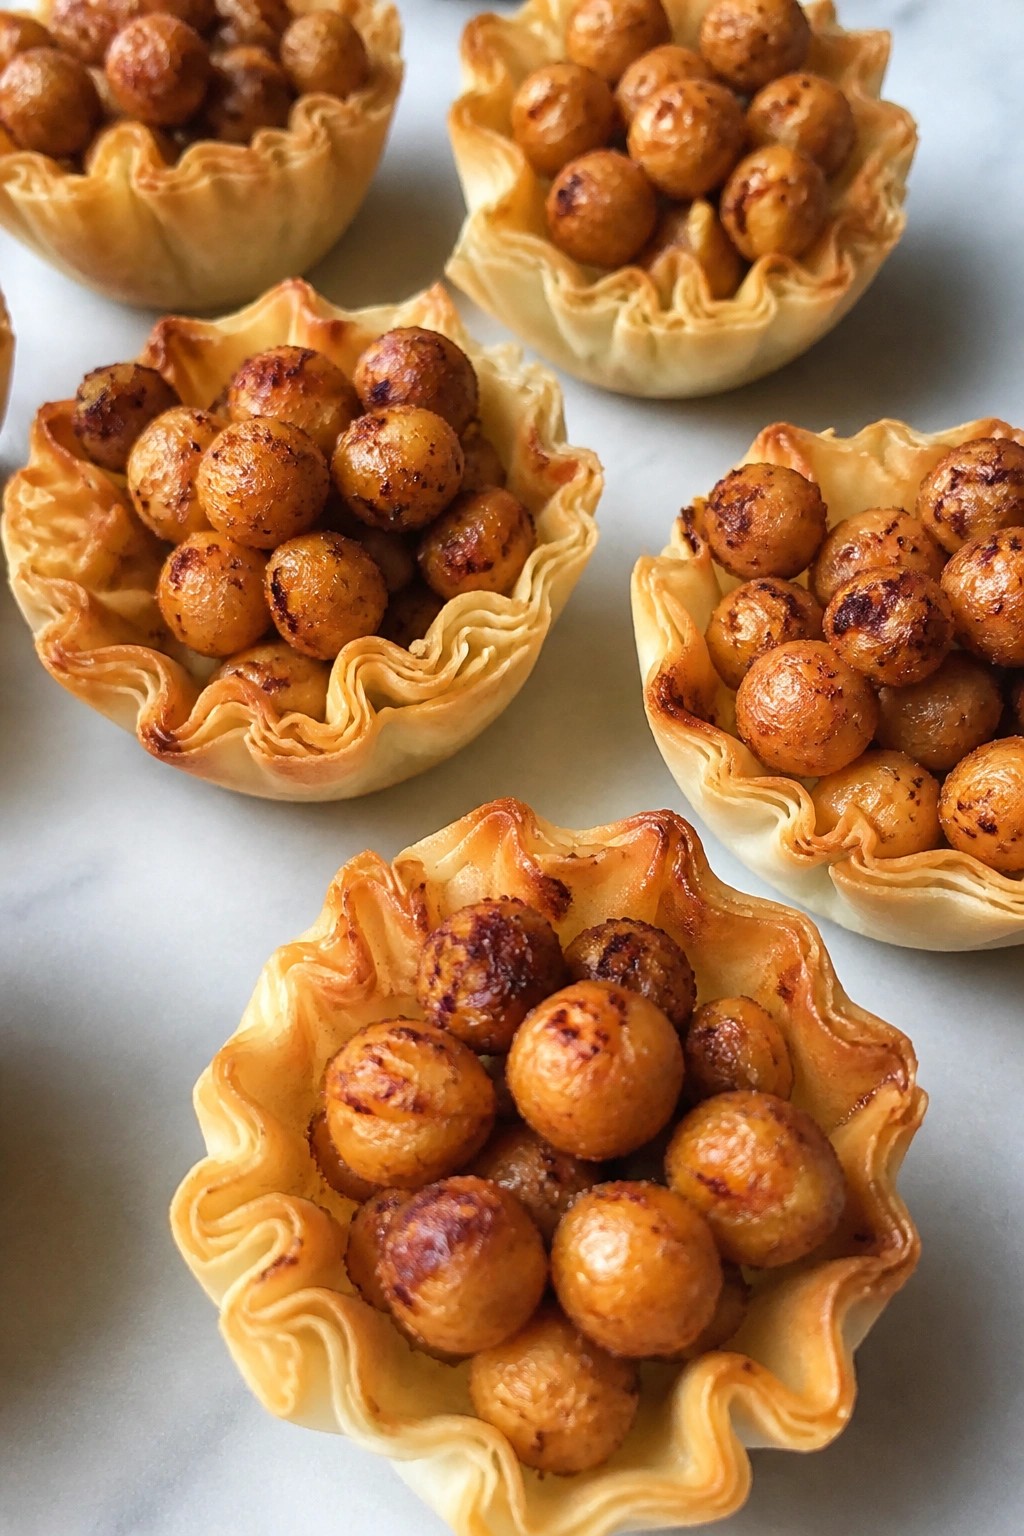
These roasted chickpeas bring a smoky, savory crunch that works well for a Halloween spread. Guests who want something salty can grab a cup and keep snacking without reaching for sweets. The flavor is bold from the paprika and garlic, with a satisfying crisp texture from the oven.
The cups make them easy to serve at a party. Each one holds a small portion so people can pick them up and move around.
Serves 4 people.
Ingredients
- 2 (15 oz) cans chickpeas, drained and rinsed
- 2 tablespoons olive oil
- 1 tablespoon smoked paprika
- 1 teaspoon garlic powder
- 1/2 teaspoon salt
- 1/4 teaspoon black pepper
- 12 mini phyllo cups
Instructions
- Preheat the oven to 400 degrees F. Line a baking sheet with parchment paper.
- In a mixing bowl, combine the drained chickpeas with the olive oil, smoked paprika, garlic powder, salt, and black pepper. Toss until the chickpeas are evenly coated.
- Spread the chickpeas in a single layer on the prepared baking sheet. Roast for 25 to 30 minutes, stirring once halfway through, until the chickpeas are dry and crisp.
- Remove the baking sheet from the oven and let the chickpeas cool for 5 minutes. Spoon the roasted chickpeas into the mini phyllo cups, dividing them evenly.
Extra Tips
Serve the cups right after filling so the phyllo stays crisp. If you make the chickpeas ahead, store them in an airtight container and reheat briefly in a 350 degree F oven before assembling. A light sprinkle of extra salt right after roasting brings out the smoky flavor even more. Course: Snack Cuisine: American Equipment: Baking sheet, Mixing bowl, Oven
Buffalo Cauliflower Bites with Celery Slaw
These buffalo cauliflower bites bring a spicy, savory punch that works well at any gathering where guests want something salty instead of sweet. The celery slaw adds a cool, crunchy contrast that balances the heat and keeps the whole dish feeling fresh.
The bites roast until tender inside with crisp edges, then get tossed in a simple buffalo sauce. The slaw comes together quickly with basic ingredients and pairs right on the plate for easy serving.

Serves 4 people.
Ingredients
- 1 large head cauliflower, cut into bite-sized florets
- 2 tablespoons olive oil
- 1/2 teaspoon garlic powder
- 1/2 teaspoon salt
- 1/4 teaspoon black pepper
- 1/3 cup hot sauce
- 2 tablespoons unsalted butter, melted
- 4 celery stalks, thinly sliced
- 1 small carrot, grated
- 3 tablespoons mayonnaise
- 1 tablespoon apple cider vinegar
Instructions
- Preheat the oven to 425 degrees and line a baking sheet with parchment paper.
- Toss the cauliflower florets with olive oil, garlic powder, salt, and black pepper in a large bowl until evenly coated.
- Spread the florets in a single layer on the prepared baking sheet and roast for 20 minutes, flipping halfway through.
- While the cauliflower roasts, stir the hot sauce and melted butter together in a small bowl.
- Remove the cauliflower from the oven and drizzle the buffalo sauce over the florets, tossing gently to coat.
- Return the pan to the oven for 5 more minutes to set the sauce.
- In a separate bowl, combine the sliced celery, grated carrot, mayonnaise, and apple cider vinegar. Stir until the vegetables are coated.
- Serve the warm buffalo cauliflower bites alongside the celery slaw.
Extra Tips
Make the slaw first so the flavors can sit while the cauliflower roasts. If you want a bit more crunch, add an extra celery stalk. Leftovers reheat best in a 350-degree oven for a few minutes to restore crisp edges rather than in the microwave. Course: Appetizer Cuisine: American Equipment: Baking sheet, Mixing bowls, Parchment paper
Crispy Bacon-Wrapped Asparagus Bundles
These bundles bring a savory crunch that stands out at any Halloween gathering. The bacon turns golden and crisp in the oven while the asparagus stays tender inside. They work well as a finger food that feels substantial without any sweetness.
The salt from the bacon pairs with the earthy vegetable for a balanced bite. Guests who avoid candy will appreciate something warm and simple to grab between other snacks.

Serves 4 people.
Ingredients
- 16 asparagus spears, trimmed
- 8 slices bacon
- 1 tablespoon olive oil
- 1/2 teaspoon garlic powder
- 1/4 teaspoon black pepper
- 8 toothpicks
Instructions
- Preheat the oven to 400 degrees F and line a baking sheet with parchment paper.
- Toss the asparagus spears with the olive oil, garlic powder, and black pepper in a large bowl until evenly coated.
- Divide the asparagus into 8 groups of 2 spears each.
- Wrap one slice of bacon around each group, starting at the base and spiraling upward. Secure the end with a toothpick.
- Place the bundles seam side down on the prepared baking sheet.
- Bake for 20 to 25 minutes until the bacon is browned and crisp. Remove the toothpicks before serving if desired.
Extra Tips
Serve the bundles right after baking so the bacon stays crisp. If you need to make them ahead, assemble and refrigerate up to four hours before baking. For a smokier flavor, use thick-cut bacon, but check the bundles a few minutes early to avoid over-browning. Course: Appetizer Cuisine: American Equipment: Baking sheet, Large bowl, Oven
Loaded Mini Baked Potato Skins
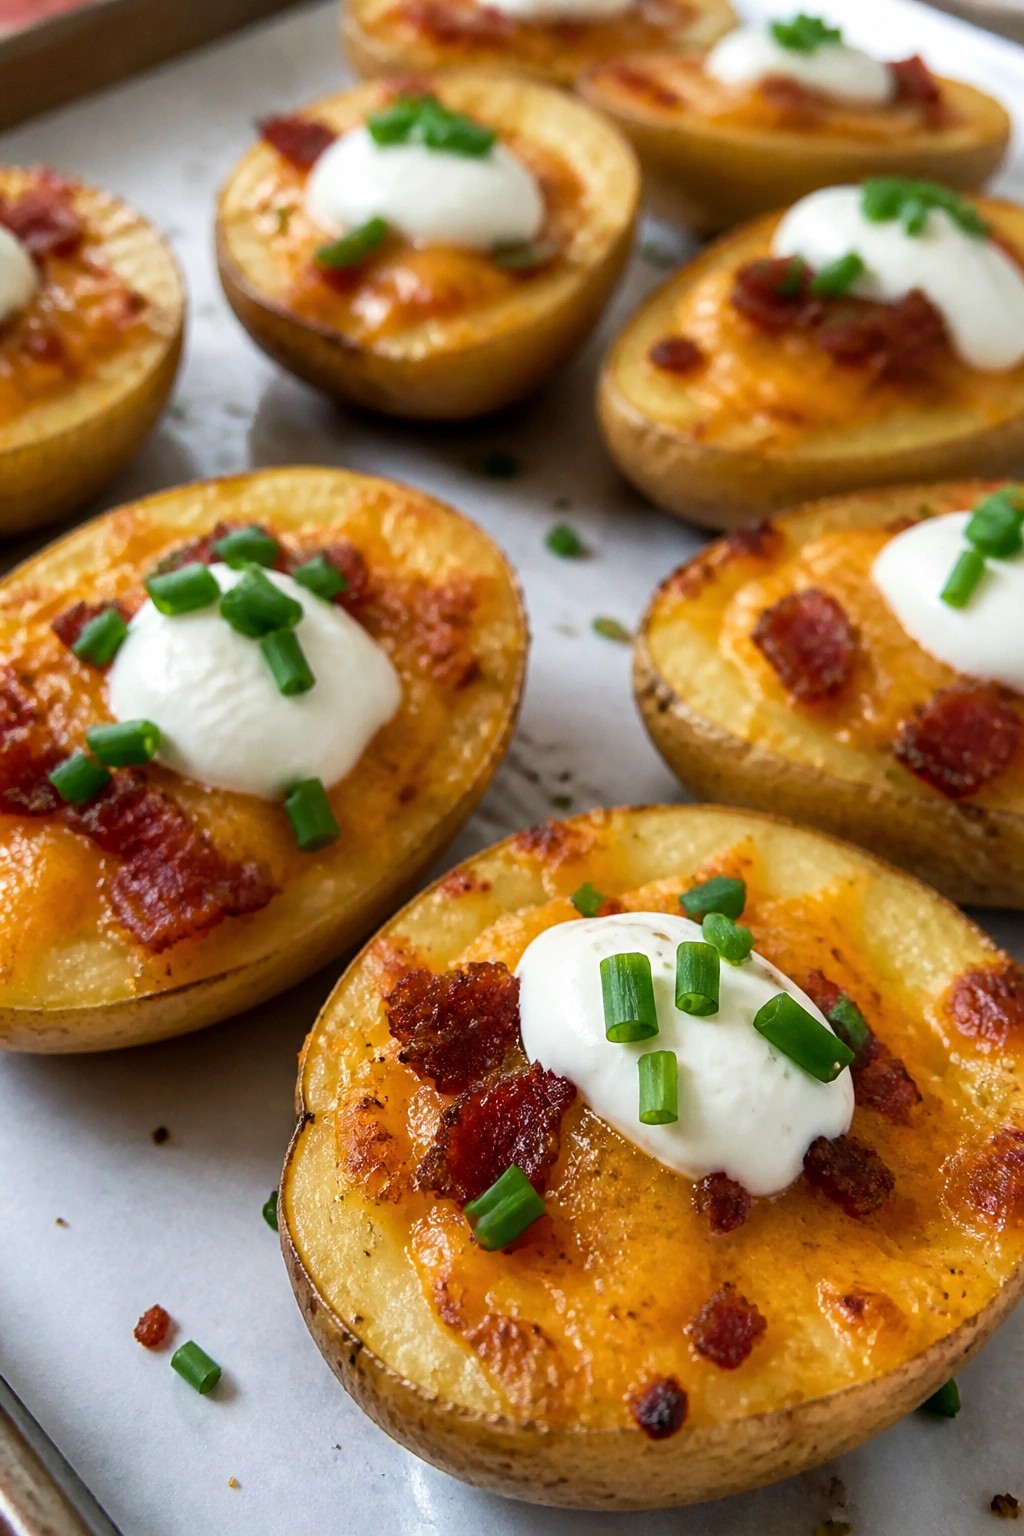
These mini potato skins give guests a savory option that stands out at any gathering. They deliver crispy potato edges topped with melted cheese and bacon for a salty snack that pairs well with drinks or other finger foods during Halloween parties.
The texture balances a crunchy skin with soft centers, while the toppings add richness without any sweetness. This recipe keeps things simple and satisfying for home cooks who want reliable results.
Serves 4 people.
Ingredients
- 12 small Yukon gold potatoes
- 2 tablespoons olive oil
- ½ teaspoon salt
- 1 cup shredded cheddar cheese
- 4 slices bacon, cooked and crumbled
- ½ cup sour cream
- 2 tablespoons chopped chives
Instructions
- Preheat the oven to 400°F. Prick each potato several times with a fork and place them on a baking sheet. Bake for 25 minutes until the potatoes feel tender when pierced with a knife.
- Remove the potatoes from the oven and let them cool slightly. Slice each one in half lengthwise and use a small spoon to scoop out a little of the center flesh, leaving a thin layer inside the skin.
- Brush the insides and outsides of the potato halves with olive oil and sprinkle them evenly with salt. Return them to the baking sheet cut side down and bake for 10 minutes.
- Flip the potato halves cut side up and sprinkle the cheddar cheese and crumbled bacon over each one. Bake for another 5 minutes until the cheese melts and the edges turn crisp.
- Remove from the oven and let them cool for a minute. Dollop sour cream on top of each skin and finish with a sprinkle of chopped chives before serving.
Extra Tips
Bake the potatoes a day ahead and store them in the fridge, then finish the scooping and second bake right before guests arrive for the crispiest results. Use room temperature sour cream so it spreads easily without tearing the warm skins. If you prefer less salt, reduce the amount sprinkled on the skins and let the bacon provide most of the seasoning. Course: Appetizer Cuisine: American Equipment: Baking sheet, Oven, Knife
Spiced Pumpkin Seed and Pretzel Mix
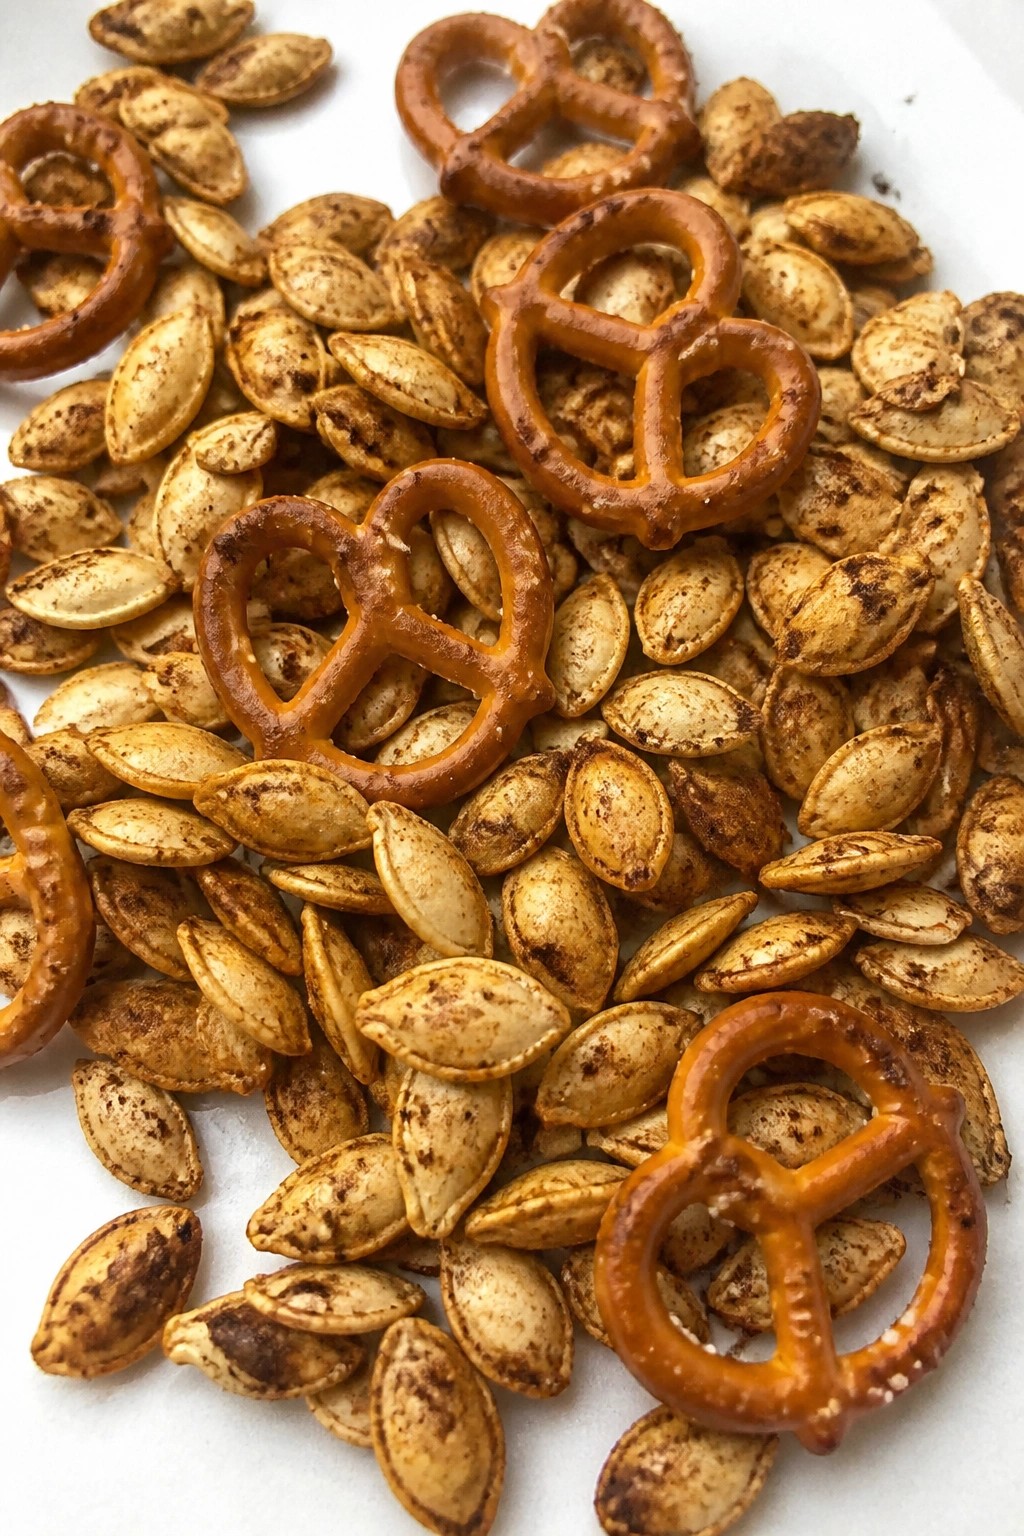
This mix combines roasted pumpkin seeds with crunchy pretzels and a blend of warm spices for a savory snack. It suits Halloween parties or casual gatherings where guests prefer salty bites over sweets. The finished mix delivers bold flavor and a mix of textures from the crisp seeds and sturdy pretzels.
It works well as a make-ahead option that guests can grab by the handful. The spices create a gentle heat that keeps people reaching for more without overpowering the palate.
Serves 4 people.
Ingredients
- 1 1/2 cups raw pumpkin seeds
- 2 cups mini pretzels
- 2 tablespoons olive oil
- 1 teaspoon chili powder
- 1/2 teaspoon smoked paprika
- 1/2 teaspoon garlic powder
- 1/4 teaspoon cayenne pepper
- 1/2 teaspoon salt
Instructions
- Preheat the oven to 350 degrees F and line a baking sheet with parchment paper.
- In a large bowl, combine the pumpkin seeds with the olive oil, chili powder, smoked paprika, garlic powder, cayenne pepper, and salt. Stir until the seeds are evenly coated.
- Spread the seasoned seeds in a single layer on the prepared baking sheet. Bake for 15 minutes, stirring once halfway through, until the seeds turn lightly golden.
- Remove the baking sheet from the oven and let the seeds cool completely on the sheet. Once cool, transfer them to a bowl and gently fold in the mini pretzels.
Extra Tips
For the best crunch, store the cooled mix in an airtight container at room temperature and serve within three days. Reduce the cayenne if you want milder heat, or add an extra pinch for more kick. This blend pairs well with beer or sparkling water at a party spread. Course: Snack Cuisine: American Equipment: Mixing Bowl, Baking Sheet
Cheesy Pull-Apart Olive Bread
This pull-apart bread brings together melted cheese and briny olives in every bite. It works well as a shared starter at Halloween gatherings where guests want something salty instead of sweet. The crust turns golden while the inside stays soft with pockets of cheese and olive.
The flavor leans savory with garlic and herbs to balance the olives. Guests can tear off pieces easily without any extra utensils.

Serves 4 people.
Ingredients
- 1 round loaf of sourdough bread
- 1 1/2 cups shredded mozzarella cheese
- 1/2 cup sliced black olives
- 1/4 cup unsalted butter, melted
- 2 garlic cloves, minced
- 1 teaspoon dried oregano
- 1 tablespoon chopped fresh parsley
Instructions
- Preheat the oven to 350 degrees F. Place the sourdough loaf on a cutting board.
- Use a sharp knife to cut a grid pattern into the top of the loaf. Stop before slicing all the way through the bottom.
- Gently pull apart the cuts and stuff shredded mozzarella and sliced black olives into the spaces.
- Stir the melted butter with minced garlic and dried oregano in a small bowl.
- Drizzle the butter mixture evenly over the loaf so it seeps into the cuts.
- Wrap the loaf loosely in foil and bake for 15 minutes. Unwrap and bake for another 10 minutes until the cheese melts and the crust turns golden.
- Remove from the oven and sprinkle chopped fresh parsley over the top before serving.
Extra Tips
Serve the bread straight from the oven so the cheese stays stretchy. If you need to make it ahead, assemble the loaf and keep it wrapped in foil in the fridge for up to four hours before baking. Leftovers reheat well in a 300 degrees F oven for 10 minutes to restore the crisp edges. Course: Snack Cuisine: American Equipment: Sharp Knife, Mixing Bowl, Baking Sheet
Crispy Fried Pickle Chips with Dill Dip
These crispy fried pickle chips deliver a salty crunch that stands out at any gathering. The cool dill dip adds a fresh contrast that keeps people reaching for more.
They work well for Halloween parties or game nights when guests want savory bites instead of candy. The coating stays light while the pickles stay tangy inside.

Serves 4 people.
Ingredients
- 1 jar (16 oz) dill pickle chips, drained and patted dry
- 1 cup all-purpose flour
- 2 large eggs, beaten
- 1 cup panko breadcrumbs
- 1 tsp garlic powder
- 1 tsp paprika
- 1/2 tsp salt
- Vegetable oil for frying
- 1/2 cup sour cream
- 1/4 cup mayonnaise
- 2 tbsp chopped fresh dill
- 1 clove garlic, minced
- 1 tsp lemon juice
- 1/4 tsp salt
Instructions
- Mix the sour cream, mayonnaise, fresh dill, minced garlic, lemon juice, and 1/4 tsp salt in a small bowl to make the dip. Cover and set it aside in the fridge.
- Set up three shallow bowls for breading. Place the flour mixed with garlic powder, paprika, and 1/2 tsp salt in the first bowl. Add the beaten eggs to the second bowl and the panko breadcrumbs to the third.
- Heat 2 inches of vegetable oil in a large skillet over medium-high heat until it reaches 350°F.
- Working in batches, dredge the dried pickle chips in the seasoned flour, dip them in the eggs, then coat them in the panko. Fry for 2 to 3 minutes per side until golden and crisp.
- Remove the chips with a slotted spoon and drain them on a wire rack. Serve hot with the dill dip on the side.
Extra Tips
Pat the pickle chips very dry before breading to help the coating stick and stay crunchy. Fry in small batches so the oil temperature stays steady. The dip can be made a few hours ahead and kept chilled until serving. Course: Appetizer Cuisine: American Equipment: Large skillet, Mixing bowls, Wire rack