

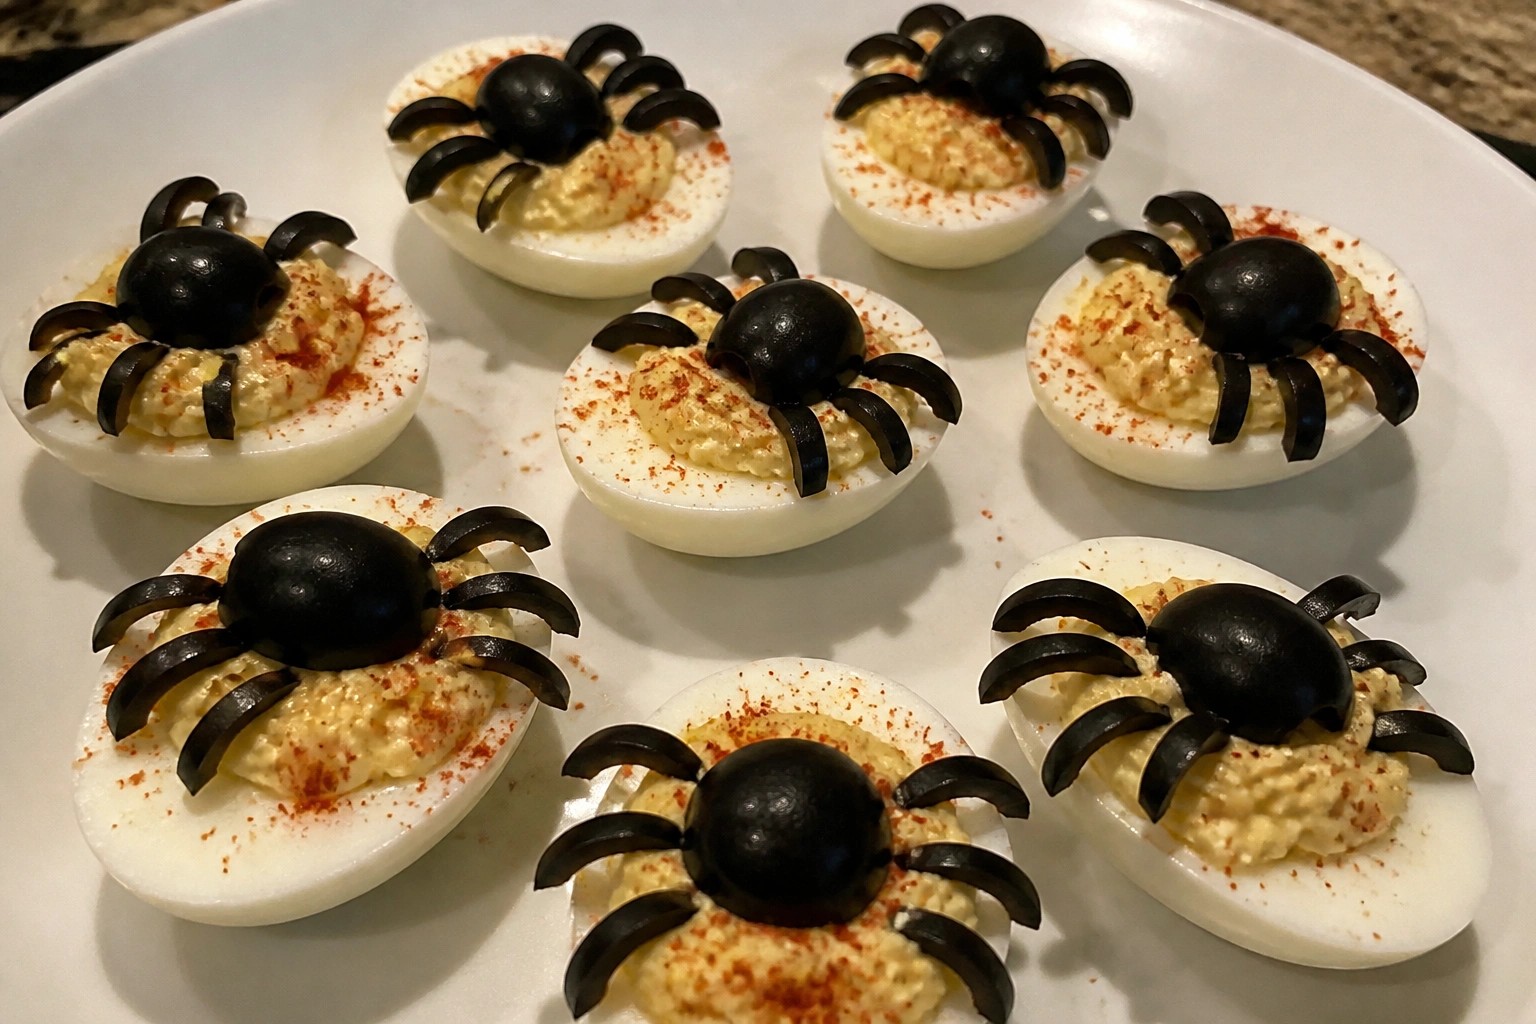
Planning a Halloween party means needing food that can feed a group without extra stress. These savory recipes focus on simple options that still suit the holiday theme. Each idea works well for making ahead or scaling up as needed. You will find a range of appetizers and dishes that hold up at room temperature. They are meant to be practical choices for busy hosts.
Helpful Tips Before You Start
These steps keep your savory Halloween dishes organized and easy to serve for a large group.
Recommended Products
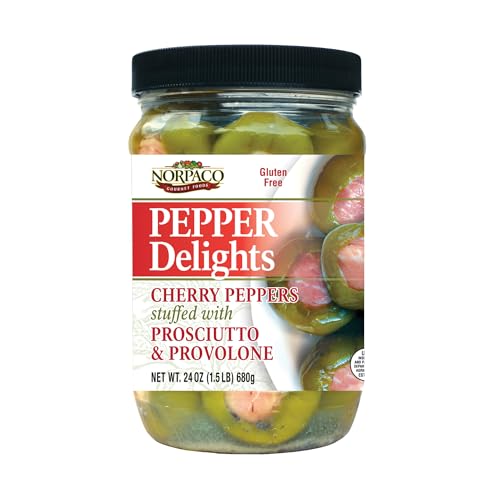
GOURMET CHERRY PEPPERS – Tender, mildly sweet cherry peppers generously stuffed with savory prosciutto and rich aged provolone cheese for a perfectly balanced combination of bold, authentic Italian-inspired flavors.

Cute bell peppers orange yellow red or green are funny bell peppers. Great bell peppers cute or loves bell pepper.

Autumn Harvest Faceless Gnome Ornament: Standing 11 inches tall, this whimsical fall decor piece features a faceless gnome design, accented with corn, bell pepper, and pumpkin details. The soft fabric construction and tall orange hat capture the warm tones of the harvest season.
Make a timeline
List each recipe and note what can be done the day before. Prep doughs, sauces, and fillings ahead so you only assemble and bake on party day.
Scale portions early
Most of these recipes serve 8 to 10 people. Double or triple the ones you choose based on your guest count rather than guessing at the last minute.
Choose sheet pan and slow cooker methods
Recipes that bake on sheet pans or hold in a slow cooker free up stove space. They also make it simple to keep food warm for hours.
Set up a simple serving station
Place plates, napkins, and small labels near the food. This helps guests move through the line quickly when you have multiple savory options out at once.
Spiderweb Seven-Layer Taco Dip with Tortilla Chips
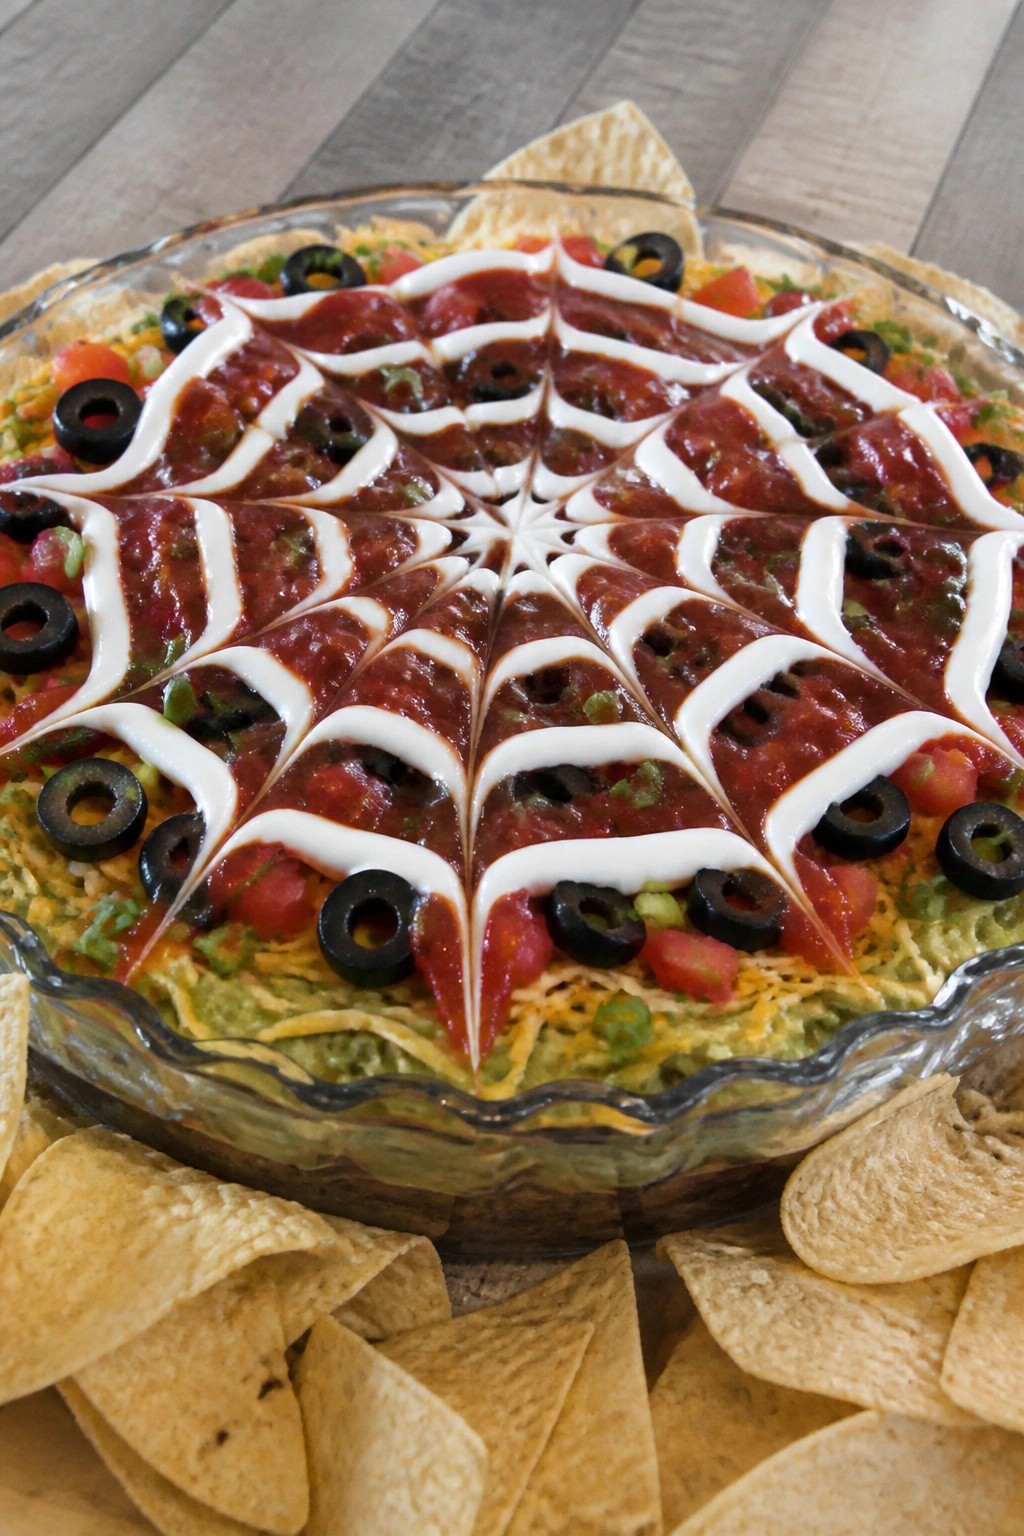
This dip brings a fun Halloween touch to any party spread. The spiderweb design on top makes it stand out while the layers underneath deliver familiar taco flavors that guests enjoy. It works well for casual gatherings where people can scoop and mingle.
The texture stays creamy from the beans and guacamole, with a bit of crunch from the chips and fresh toppings. Each bite gives a mix of savory beans, mild spice, and cool sour cream.
Serves 4 people.
Ingredients
- 1 (16 oz) can refried beans
- 1 cup guacamole
- 1 cup shredded cheddar cheese
- 1 cup diced tomatoes
- 1/2 cup sliced green onions
- 1/2 cup sliced black olives
- 1 cup sour cream
- 1/4 cup salsa
- Tortilla chips, for serving
Instructions
- Spread the refried beans evenly across the bottom of a serving dish to form the first layer.
- Spoon the guacamole over the beans and smooth it into an even layer.
- Sprinkle the shredded cheddar cheese across the guacamole.
- Add the diced tomatoes in an even layer next.
- Scatter the sliced green onions over the tomatoes.
- Place the sliced black olives on top of the green onions.
- Spread the sour cream over the olives to cover the surface completely. Use the salsa in a squeeze bottle to draw three or four concentric circles on the sour cream. Drag a knife from the center outward in several lines to create the spiderweb pattern.
- Serve with tortilla chips on the side.
Extra Tips
Make this dip a few hours ahead and keep it chilled so the layers set and the web stays sharp. Use a clear glass dish if you want guests to see the layers. Leftovers store in the refrigerator for one day but the web may soften. Course: Appetizer Cuisine: Mexican Equipment: Serving dish, Spatula, Squeeze bottle, Knife
Mummy-Wrapped Italian Sausage Rolls with Marinara
These sausage rolls turn ordinary Italian links into a playful Halloween snack. Strips of dough wrap around each sausage to create a mummy effect, while the flaky crust contrasts with the savory, juicy filling. They work well for parties because they stay easy to hold and dip.
The marinara adds a simple tomato note that cuts through the richness. Guests can grab one without needing plates or utensils.

Serves 4 people.
Ingredients
- 4 mild Italian sausage links
- 1 (8-ounce) can refrigerated crescent rolls
- 1 cup marinara sauce
- 8 black olive slices
Instructions
- Cook the sausages in a skillet over medium heat until browned and cooked through. Let them cool slightly so they are easy to handle.
- Heat the oven to 375°F and line a baking sheet with parchment paper.
- Unroll the crescent dough on a lightly floured surface and press the seams together to form one sheet. Cut the dough into thin strips.
- Wrap the dough strips around each cooled sausage, leaving small gaps between strips to show the sausage underneath.
- Place the wrapped sausages on the baking sheet. Press two olive slices onto each sausage near one end to form eyes.
- Bake for 12 to 15 minutes until the dough turns golden brown.
- Warm the marinara sauce and serve it alongside the baked rolls for dipping.
Extra Tips
Press the dough strips gently so they stay in place but do not fully cover the sausage. If the dough browns too quickly, tent the tray loosely with foil for the last few minutes. Leftovers reheat best in a 350°F oven for five minutes to restore crispness. You can assemble the rolls ahead and bake them right before guests arrive. Course: Appetizer Cuisine: Italian Equipment: Skillet, Baking sheet, Knife
Smoky Cauldron Chili with Cornbread Dippers
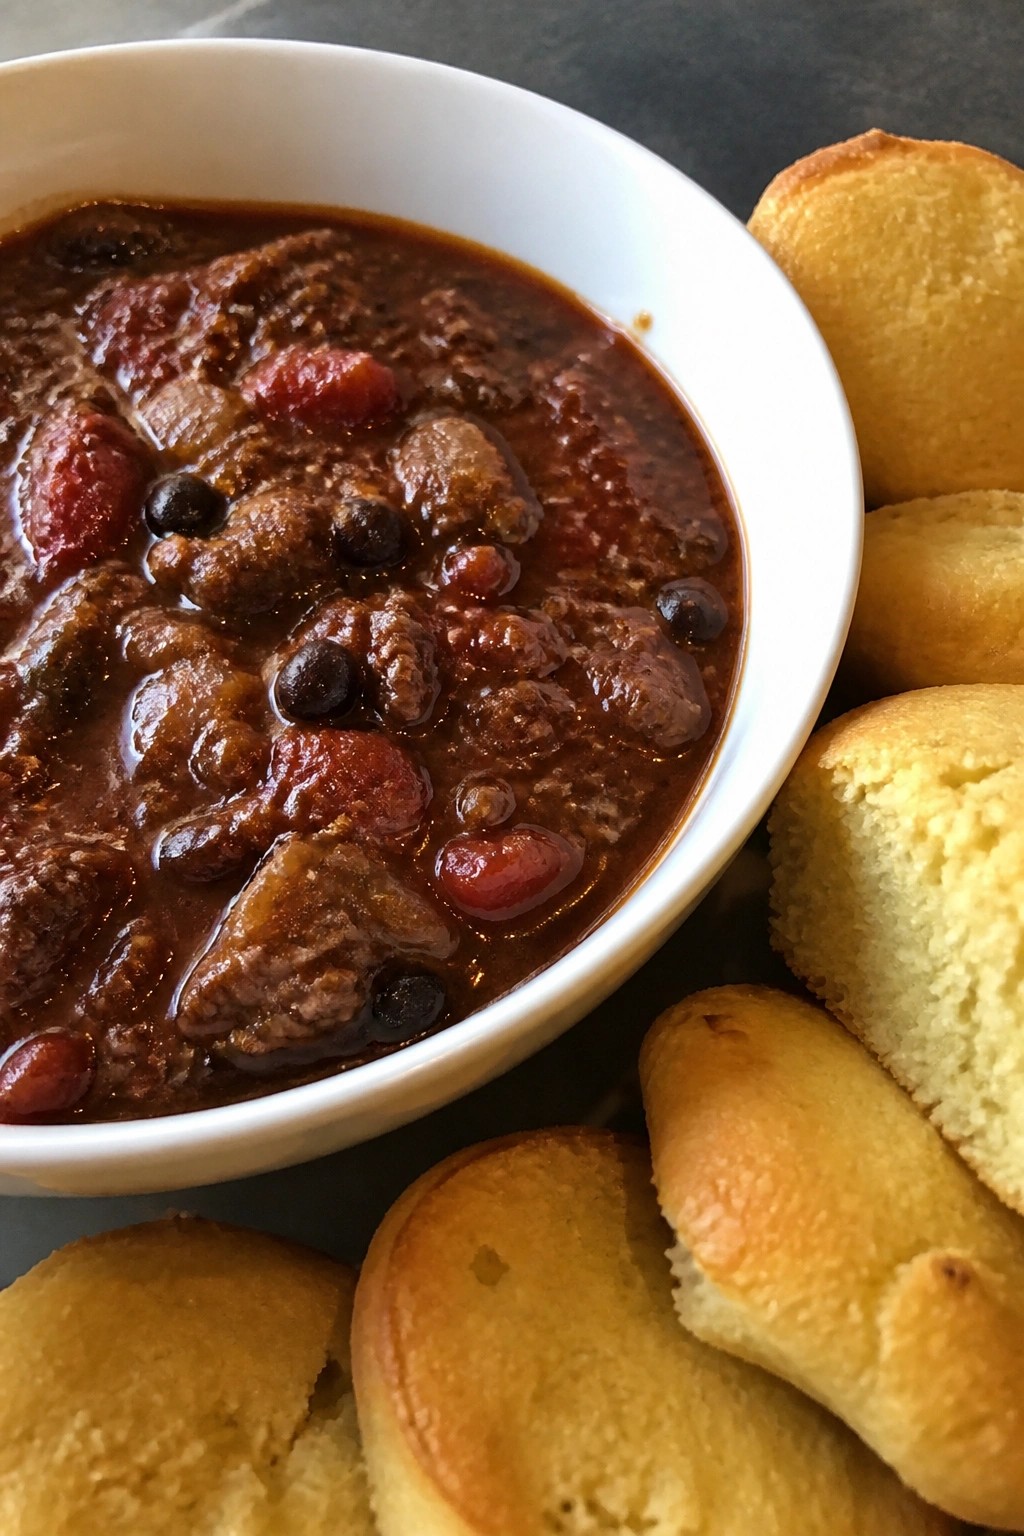
This chili brings a rich smoky flavor to the table that feels right at home at a Halloween gathering. The thick texture holds up well when guests use pieces of warm cornbread to scoop it up. It is simple to make ahead and easy to serve in one pot for a crowd.
The cornbread dippers add a slightly sweet contrast that balances the spices without extra work. Together they create a hearty option that keeps people coming back for more.
Serves 4 people.
Ingredients
- 1 pound ground beef
- 1 medium onion, diced
- 2 cloves garlic, minced
- 1 can (15 oz) black beans, drained and rinsed
- 1 can (14.5 oz) fire-roasted tomatoes
- 2 tablespoons chili powder
- 1 tablespoon smoked paprika
- 1 teaspoon ground cumin
- Salt and black pepper to taste
- 1 cup cornmeal
- 1 cup all-purpose flour
- 1 tablespoon sugar
- 1 teaspoon baking powder
- 1 cup milk
- 1 egg
- 2 tablespoons melted butter
Instructions
- Heat a large pot over medium heat. Add the ground beef, diced onion, and minced garlic. Cook until the beef is browned and the onion is soft. Drain any excess fat.
- Stir in the chili powder, smoked paprika, cumin, salt, and pepper. Cook for one minute until the spices smell fragrant.
- Add the black beans and fire-roasted tomatoes. Bring the mixture to a simmer. Reduce heat to low and cook uncovered for 20 minutes, stirring occasionally.
- While the chili simmers, preheat the oven to 400°F. In a mixing bowl, combine the cornmeal, flour, sugar, and baking powder. In a separate bowl, whisk together the milk, egg, and melted butter. Pour the wet ingredients into the dry ingredients and stir until just combined.
- Spread the cornbread batter into a greased 8-inch square pan. Bake for 15 to 18 minutes until the top is golden and a toothpick comes out clean. Let it cool for 5 minutes, then cut into strips for dipping.
- Serve the chili hot with the cornbread dippers on the side.
Extra Tips
Make the chili a day ahead and reheat it gently on the stove, adding a splash of water if it thickens too much. Cut the cornbread into narrow strips so they hold up better when dipped. For extra smoke, add an extra half teaspoon of smoked paprika at the end of cooking. Course: Main Course Cuisine: American Equipment: Large pot, Mixing bowl, 8-inch square baking pan
Garlic Butter Vampire Bat Wings
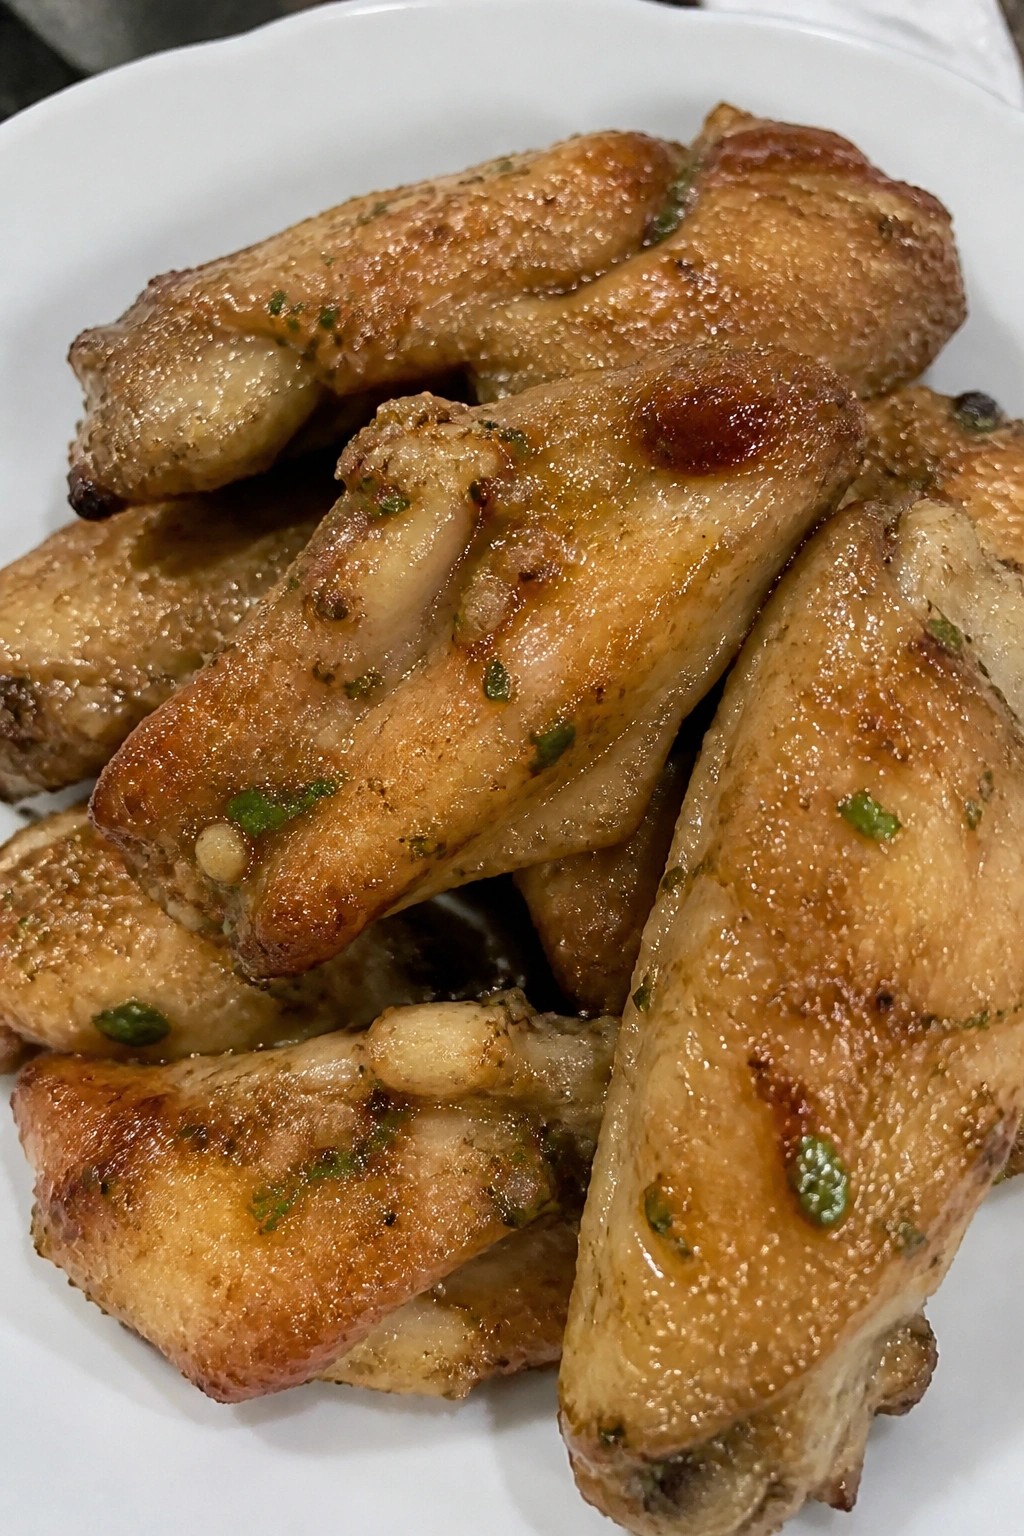
These wings bring a rich garlic butter coating to classic party fare. They work well for Halloween gatherings where guests want something savory and easy to eat by hand. The skin turns crisp in the oven while the butter sauce adds a savory, garlicky finish.
The texture stays tender inside with a light crunch on the outside. Garlic butter keeps the flavor bold without extra heat, so they suit a mixed crowd.
Serves 4 people.
Ingredients
- 2 pounds chicken wings
- 1/2 cup unsalted butter
- 5 garlic cloves, minced
- 2 tablespoons fresh parsley, chopped
- 1 teaspoon salt
- 1/2 teaspoon black pepper
Instructions
- Preheat the oven to 400 degrees F. Line a baking sheet with foil and place a wire rack on top.
- Pat the chicken wings dry with paper towels. Toss them with salt and black pepper in a large bowl until evenly coated.
- Arrange the wings in a single layer on the wire rack. Bake for 40 minutes, flipping once halfway through, until the skin is golden and crisp.
- While the wings bake, melt the butter in a small saucepan over medium heat. Add the minced garlic and cook for 2 minutes until fragrant but not browned.
- Remove the wings from the oven and transfer them to a clean large bowl. Pour the garlic butter over the wings and toss to coat.
- Sprinkle the chopped parsley over the wings and toss once more before serving.
Extra Tips
For the crispiest skin, keep the wings on the wire rack during baking so air can circulate underneath. If you make the wings ahead, bake them plain and reheat in a 350 degree F oven for 10 minutes before tossing with the garlic butter. The sauce thickens slightly as it cools, so serve right after coating for the best shine and flavor. Course: Appetizer Cuisine: American Equipment: Baking sheet, Wire rack, Large bowl, Small saucepan
Cheesy Pumpkin-Stuffed Bell Pepper Cups
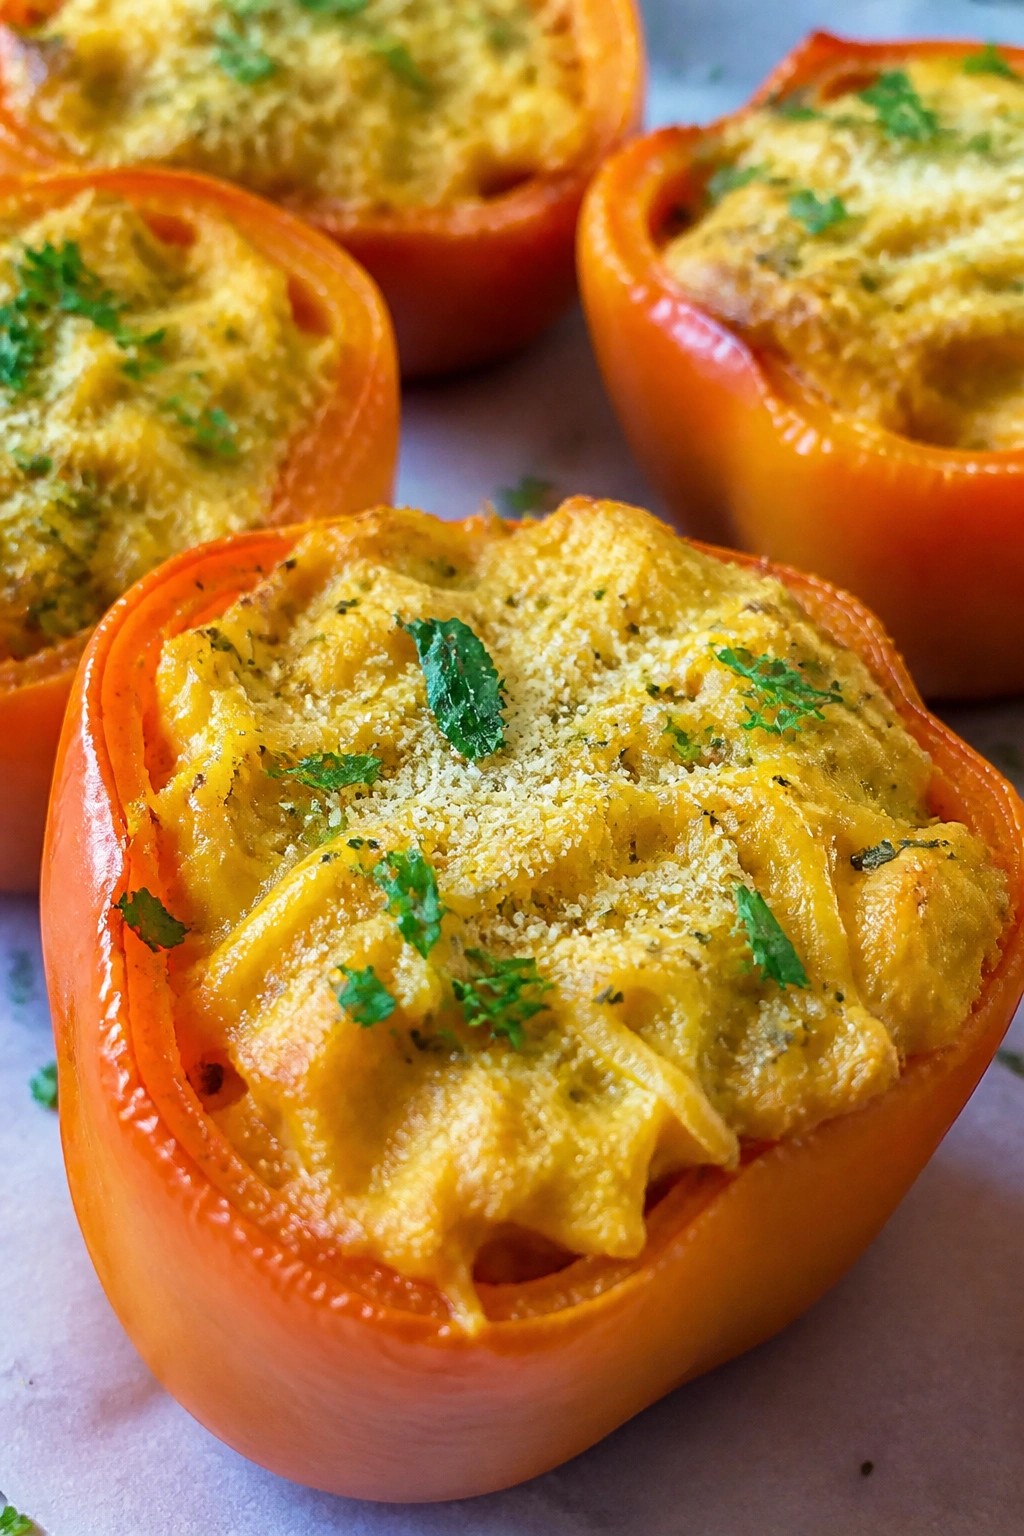
These bell pepper cups bring a festive touch to any Halloween spread. The orange peppers hold a savory pumpkin and cheese filling that feels hearty without being heavy. They work well for parties because they can be made ahead and served warm or at room temperature.
The texture is soft and creamy inside with a slight bite from the roasted pepper. The flavor stays mild and cheesy with a touch of herb.
Serves 4 people.
Ingredients
- 4 medium orange bell peppers
- 1 tablespoon olive oil
- 1 small onion, finely chopped
- 2 garlic cloves, minced
- 2 cups pumpkin puree
- 1 1/2 cups shredded cheddar cheese
- 1 teaspoon dried oregano
- Salt and black pepper to taste
- 1/4 cup grated Parmesan cheese
- Chopped fresh parsley for garnish
Instructions
- Preheat the oven to 375°F. Cut the tops off the bell peppers and remove the seeds and membranes. Place the peppers in a baking dish so they stand upright.
- Heat the olive oil in a skillet over medium heat. Add the onion and cook until soft, about 4 minutes. Stir in the garlic and cook for 1 minute more.
- Remove the skillet from the heat. Stir in the pumpkin puree, cheddar cheese, oregano, salt, and pepper until the cheese begins to melt.
- Spoon the filling evenly into the prepared peppers. Sprinkle the Parmesan cheese over the top of each pepper.
- Bake for 25 to 30 minutes until the peppers are tender and the tops are lightly browned. Remove from the oven and let them rest for 5 minutes.
- Sprinkle with fresh parsley before serving.
Extra Tips
Choose peppers with flat bottoms so they stand steady in the dish. If the filling seems thick after mixing, add a tablespoon of water to loosen it. Leftovers reheat well in a 350°F oven for 10 minutes to keep the cheese creamy. Course: Appetizer Cuisine: American Equipment: Baking dish, Skillet, Mixing bowl
Crispy Fried Pickle Eyeballs with Ranch
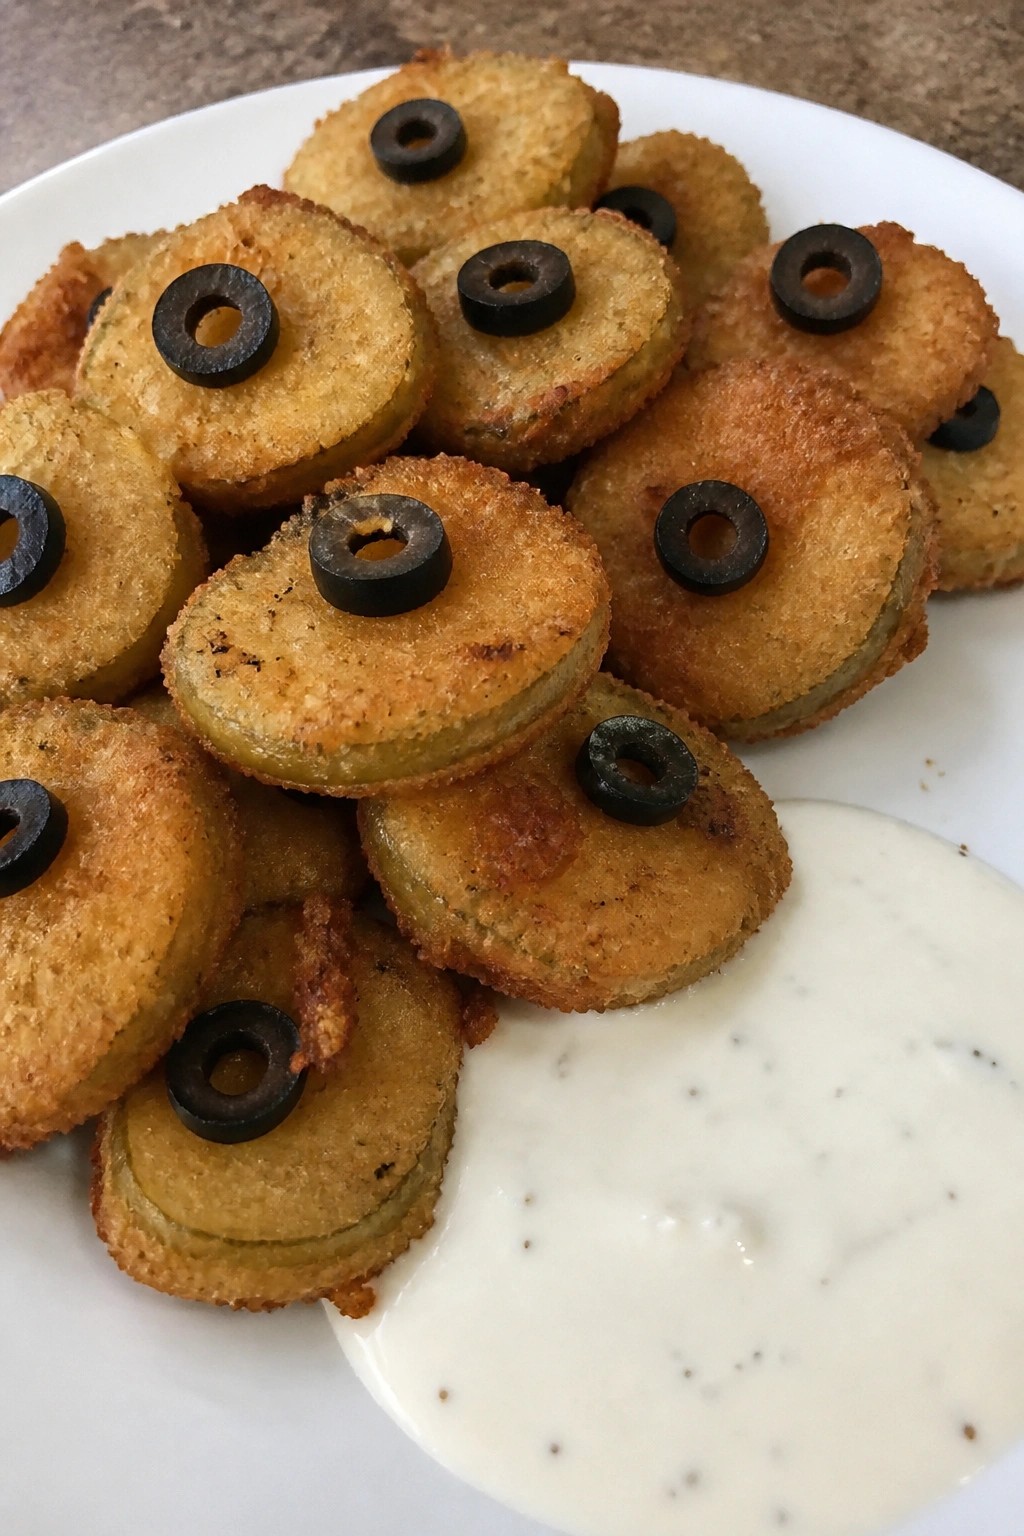
These crispy fried pickle eyeballs bring a fun Halloween twist to classic fried pickles. The tangy dill slices get coated in a light batter, fried until golden, and finished with an olive slice on top to create a simple eyeball look. They pair well with cool ranch for dipping and work as a quick savory bite at any party spread.
The texture stays crunchy on the outside with a juicy center, while the ranch adds a creamy contrast. Serve them hot on a platter so guests can grab a few at a time.
Serves 4 people.
Ingredients
- 12 large dill pickle slices
- 1 cup all-purpose flour
- 1/2 cup cornstarch
- 1 teaspoon baking powder
- 1 cup cold water
- 1 teaspoon paprika
- 4 cups vegetable oil
- 1/2 cup ranch dressing
- 12 black olive slices
Instructions
- Pat the dill pickle slices dry with paper towels to remove excess moisture.
- In a medium bowl, whisk together the flour, cornstarch, baking powder, and paprika.
- Slowly pour in the cold water and stir until the batter is smooth.
- Heat the vegetable oil in a deep skillet or pot over medium-high heat until it reaches 350 degrees.
- Dip each pickle slice into the batter, let excess drip off, and carefully place it in the hot oil.
- Fry the pickles in batches for 2 to 3 minutes per side until golden and crisp.
- Remove with a slotted spoon and drain on a paper towel-lined plate.
- While the pickles are still warm, press one black olive slice onto the center of each to form the eyeball.
- Arrange on a serving plate and offer the ranch dressing on the side for dipping.
Extra Tips
Pat the pickles very dry before battering so the coating sticks better and stays crisp longer. Fry in small batches to avoid crowding the oil, which helps maintain even browning. If you want a stronger eyeball effect, use slightly larger olive slices or add a tiny dot of ranch in the center of each olive. Course: Appetizer Cuisine: American Equipment: Mixing bowl, Deep skillet or pot, Slotted spoon, Paper towels
Graveyard Beef Sliders on Hawaiian Rolls
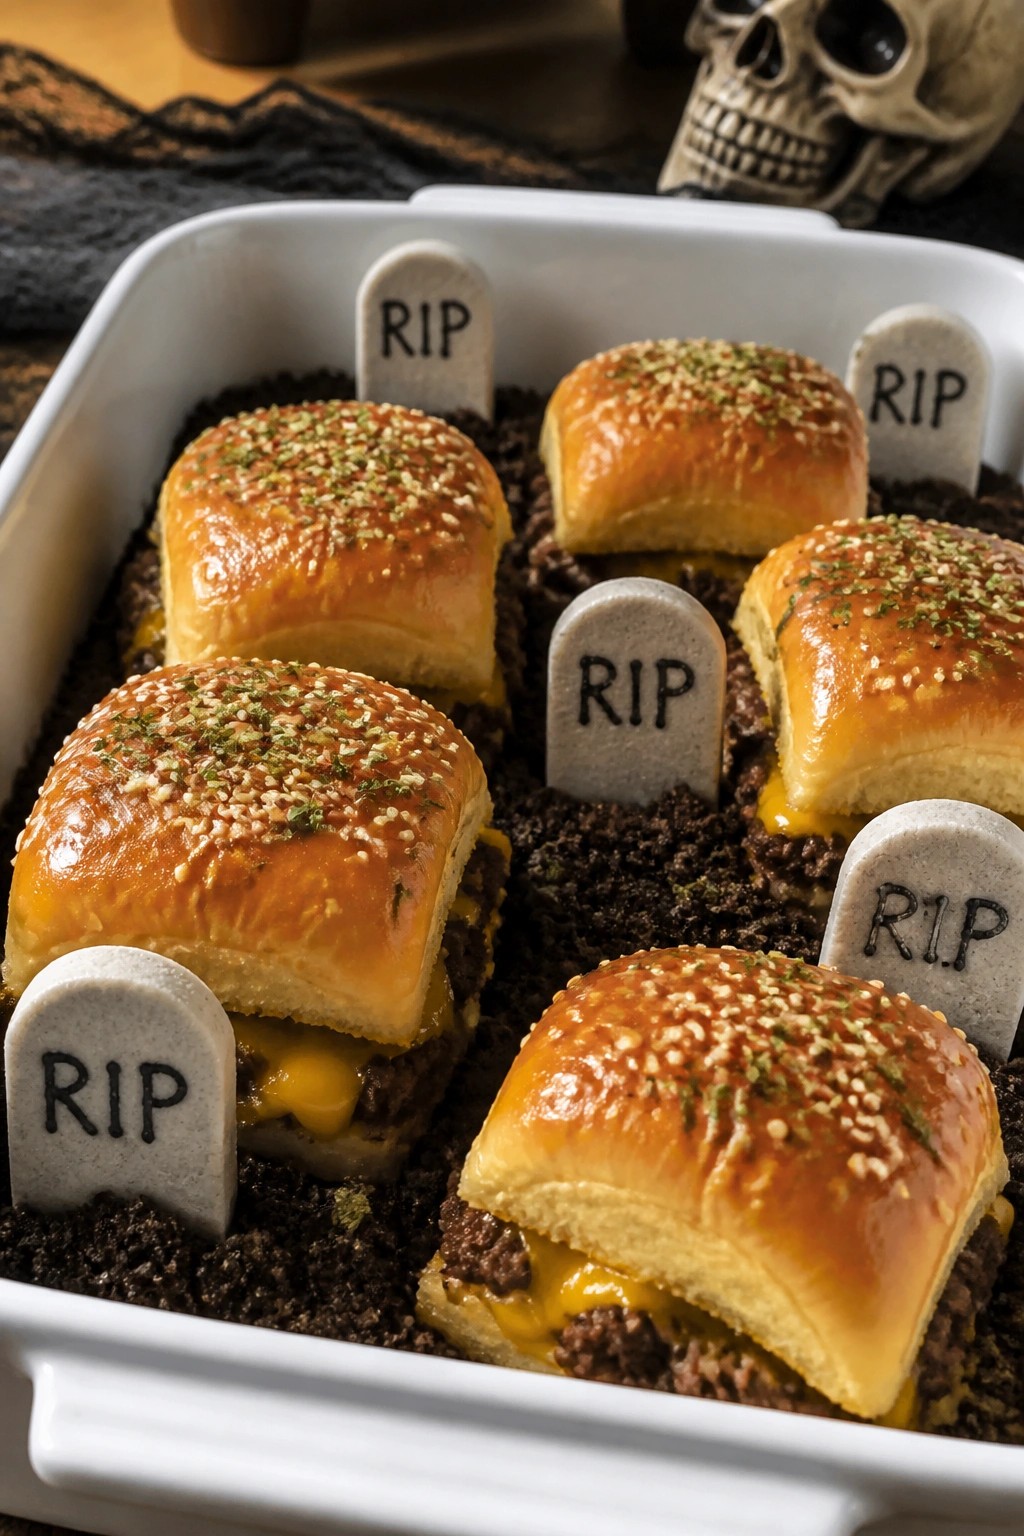
These beef sliders bring a fun Halloween twist to a classic party bite. The sweet Hawaiian rolls pair with savory beef and melted cheese for a balance that works well at any gathering. Arrange them in a dish to create a simple graveyard scene that guests notice right away.
The filling stays juicy from the onions and Worcestershire while the cheese adds a creamy layer. Serve them warm so the rolls stay soft and the tops hold their shape for the themed presentation.
Serves 4 people.
Ingredients
- 1 pound ground beef
- 1 small onion, finely chopped
- 2 cloves garlic, minced
- 1 tablespoon Worcestershire sauce
- 1/2 teaspoon salt
- 1/4 teaspoon black pepper
- 8 Hawaiian sweet rolls
- 4 slices cheddar cheese
- 2 tablespoons butter, melted
- 1 teaspoon sesame seeds
- 2 tablespoons chopped fresh parsley
Instructions
- Heat a skillet over medium heat and add the ground beef. Cook until browned, breaking it up with a spoon.
- Add the chopped onion and minced garlic to the skillet. Stir and cook for 3 minutes until the onion softens.
- Stir in the Worcestershire sauce, salt, and black pepper. Cook for 1 more minute, then remove from heat.
- Slice the Hawaiian rolls in half horizontally without separating them. Place the bottom half in a baking dish.
- Spread the beef mixture evenly over the bottom rolls. Cut 4 of the cheese slices into 8 small rectangles and lay them over the beef.
- Replace the top half of the rolls. Brush the tops with melted butter and sprinkle with sesame seeds.
- Cut the remaining cheese slices into tombstone shapes and set them upright on top of the rolls. Bake at 350 degrees for 10 minutes until the cheese melts.
- Remove from the oven and sprinkle the chopped parsley around the base of the rolls to finish the graveyard look.
Extra Tips
Press the cheese tombstones into the rolls right after baking so they stand up without sliding. If you need to make these ahead, assemble everything except the parsley, cover, and bake just before serving. The parsley adds a fresh note that contrasts the rich beef, so add it at the last minute to keep it bright. Course: Appetizer Cuisine: American Equipment: Skillet, Baking dish, Pastry brush
Spiced Sausage and Pepper Skillet with Flatbread
This one-pan skillet combines savory sausage with sweet peppers and warm spices for a hearty dish that holds up well at parties. The mix of smoky and slightly spicy flavors pairs nicely with soft flatbread for easy sharing among guests.
It works especially well for Halloween gatherings because the colorful peppers stand out on the table and the whole thing stays hot in the skillet without much extra effort. The texture stays balanced with tender vegetables and crisp-edged sausage.

Serves 4 people.
Ingredients
- 1 pound spicy sausage links, sliced into rounds
- 3 bell peppers in mixed colors, thinly sliced
- 1 large yellow onion, thinly sliced
- 3 garlic cloves, minced
- 1 tablespoon smoked paprika
- 1 teaspoon ground cumin
- 1/2 teaspoon red pepper flakes
- 2 tablespoons olive oil
- Salt and black pepper to taste
- 4 pieces flatbread, for serving
- Fresh parsley, chopped, for garnish
Instructions
- Heat the olive oil in a large skillet over medium heat. Add the sausage rounds and cook until browned on both sides.
- Add the sliced onion and bell peppers to the skillet. Stir and cook until the vegetables soften and the edges begin to brown.
- Stir in the minced garlic, smoked paprika, cumin, and red pepper flakes. Cook for one minute until the spices smell fragrant.
- Season the mixture with salt and black pepper. Stir well and remove the skillet from the heat.
- Warm the flatbread pieces in a separate pan or oven just until soft and pliable.
- Spoon the sausage and pepper mixture onto plates or into a serving dish. Top with chopped parsley and serve with the warm flatbread.
Extra Tips
Warm the flatbread right before serving so it stays soft enough to scoop up the spiced filling. If the sausage releases extra fat, drain a little before adding the vegetables to keep the texture from turning greasy. Leftovers reheat well in a skillet over low heat with a splash of water to loosen the spices. Course: Main Course Cuisine: American Equipment: Large Skillet, Knife, Cutting Board
Blackened Chicken Skull Skewers with Avocado Crema
These skewers add a fun Halloween touch to any party table. The chicken gets a bold, smoky crust from the blackening spices while the avocado crema cools everything down with its smooth texture.
They work well for a crowd because you can assemble the skewers in advance and cook them right before guests arrive. The contrast between the spicy chicken and creamy dip makes them easy to eat in one or two bites.

Serves 4 people.
Ingredients
- 1 pound boneless skinless chicken breasts
- 2 tablespoons olive oil
- 2 tablespoons paprika
- 1 teaspoon cayenne pepper
- 1 teaspoon garlic powder
- 1 teaspoon onion powder
- 1 teaspoon dried thyme
- 1/2 teaspoon salt
- 1/4 teaspoon black pepper
- 2 ripe avocados
- 1/2 cup sour cream
- Juice of 1 lime
- 1/4 cup fresh cilantro leaves
- 8 wooden skewers
Instructions
- Soak the wooden skewers in water for 15 minutes while you prepare the chicken.
- Cut the chicken breasts into long strips about 1 inch wide. Thread the strips onto the skewers.
- In a small bowl stir together the paprika, cayenne pepper, garlic powder, onion powder, dried thyme, salt, and black pepper.
- Brush the chicken skewers with olive oil on all sides. Sprinkle the spice mix evenly over the chicken and press it in so it sticks.
- Heat a large skillet or grill pan over medium-high heat. Cook the skewers for 4 to 5 minutes per side until the chicken is blackened and cooked through.
- While the chicken cooks, add the avocados, sour cream, lime juice, and cilantro to a blender. Blend until smooth.
- Serve the hot skewers with the avocado crema on the side for dipping.
Extra Tips
Soak the skewers well to prevent burning and keep the chicken strips fairly even in thickness so they cook at the same rate. If the blackened crust starts to darken too fast, lower the heat slightly to finish cooking without burning the spices. The crema can be made up to a day ahead and stored covered in the fridge. Course: Appetizer Cuisine: American Equipment: Large Skillet, Wooden Skewers, Blender, Mixing Bowl
Loaded Baked Potato Skins with Bacon and Chives
These potato skins make a hearty option for a Halloween party spread. They hold up well on a buffet table and give guests something warm and savory to grab between other bites. The skins turn crispy in the oven while the toppings add a mix of smoky, cheesy, and fresh flavors.
The texture stays sturdy enough for easy handling yet soft enough inside to feel comforting. Bacon brings the salt and crunch that pairs with the mild potato base.

Serves 4 people.
Recommended Products

【Spooky BOO Design】 Bring the ultimate spooky season elements to your gothic home decor! This 3-piece halloween serving board set spells out "BOO" with intricate engravings of a cute ghost, bat, and spider web. It serves as an eye-catching table centerpiece for any witch party supplies or scary movie night.

Halloween Decoration: this Halloween charcuterie platter set includes 2 different spooky styles, coffin and skull, ideal for Halloween parties and Gothic parties

Halloween Decorations: this Halloween charcuterie board set includes 4 different spooky styles, bat, coffin, pumpkin, and skull; The package also comes with 12 charcuterie labels and 30 Halloween food picks; The classic designs add a festive touch to your Halloween celebration, making it a lively decoration for your party
Ingredients
- 4 medium russet potatoes
- 2 tablespoons olive oil
- 1/2 teaspoon salt
- 1/2 teaspoon black pepper
- 6 slices bacon, cooked and crumbled
- 1 1/2 cups shredded cheddar cheese
- 1/4 cup chopped fresh chives
- 1/2 cup sour cream
Instructions
- Preheat the oven to 400°F. Scrub the potatoes clean, pierce each one several times with a fork, and place them directly on the oven rack. Bake for 50 to 60 minutes until the centers feel soft when pressed.
- Remove the potatoes from the oven and let them cool for 10 minutes. Slice each potato in half lengthwise. Use a spoon to scoop out most of the flesh, leaving a 1/4-inch thick shell.
- Brush the inside and outside of each skin with olive oil. Sprinkle evenly with salt and black pepper. Return the skins to a baking sheet, cut side up, and bake for 12 to 15 minutes until the edges start to brown and crisp.
- Remove the baking sheet from the oven. Fill each skin with shredded cheddar cheese and crumbled bacon. Return to the oven for 5 minutes, just until the cheese melts.
- Take the skins out and let them rest for 2 minutes. Sprinkle with chopped chives and serve with sour cream on the side.
Extra Tips
Bake the potato shells a little longer on the second round if you want extra crunch. Use thick-cut bacon for better texture once it is crumbled. Sour cream works best served cold on the side so it contrasts with the hot skins. Leftovers reheat well in a 350°F oven for 8 minutes to restore crispness. Course: Appetizer Cuisine: American Equipment: Baking sheet, Oven, Spoon
Herb-Crusted Meatball Spiders on Polenta Bites
These meatball spiders bring a fun Halloween touch to any party spread. The herb crust adds a savory crunch while the creamy polenta base keeps each bite balanced. They work well for casual gatherings where guests want something hearty yet easy to pick up.
The flavor comes from fresh herbs mixed into the coating and a simple seasoning inside the meatballs. Polenta slices provide a soft contrast to the crisp exterior. Kids and adults both enjoy the playful spider shape without any complicated steps.

Serves 4 people.
Ingredients
- 12 oz ground beef
- 1 large egg
- 1/2 tsp salt
- 1/4 tsp black pepper
- 1/2 cup panko breadcrumbs
- 2 tbsp fresh parsley, finely chopped
- 1 tbsp fresh oregano, finely chopped
- 1 (18 oz) tube prepared polenta
- 2 tbsp olive oil
- 16 thin pretzel sticks
- 8 black olive slices
Instructions
- Mix the ground beef with the egg, salt, and black pepper in a bowl until evenly combined. Shape the mixture into 8 small meatballs.
- Combine the panko breadcrumbs with the parsley and oregano on a plate. Roll each meatball in the mixture to coat the outside completely.
- Cut the polenta tube into 8 rounds, each about 1/2 inch thick. Brush both sides of the rounds with 1 tablespoon of olive oil.
- Heat the remaining tablespoon of olive oil in a skillet over medium heat. Cook the herb-coated meatballs for 8 to 10 minutes, turning often, until browned and cooked through.
- While the meatballs cook, warm the polenta rounds in the same skillet for 2 minutes per side until lightly golden. Place one round on each serving plate.
- Insert 2 pretzel sticks into each side of a warm meatball to form 8 legs. Set the meatball on a polenta round and add 1 olive slice on top as an eye. Repeat with the remaining meatballs and rounds.
Extra Tips
Make the meatballs a few hours ahead and keep them covered in the fridge, then reheat briefly in the skillet before adding the pretzel legs so they stay crisp. Skip the pretzels if anyone has gluten issues and use thin strips of roasted red pepper instead. The herb coating browns quickly, so watch the meatballs closely during the last few minutes of cooking to avoid burning the crumbs. Course: Appetizer Cuisine: American Equipment: Mixing Bowl, Skillet, Baking Sheet
Roasted Vegetable Skeleton Platter with Whipped Feta
This platter turns simple roasted vegetables into a fun skeleton shape that fits right into a Halloween spread. The mix of charred edges and tender centers pairs with a tangy whipped feta that guests can scoop onto each bite. It works well as a shared starter when you need something savory that still feels light.
It comes together with basic pantry staples and holds up if made a bit ahead. The contrast of sweet roasted peppers and carrots against the creamy, garlicky dip gives it staying power on a crowded table.

Serves 4 people.
Ingredients
- 1 large head cauliflower, cut into large florets
- 3 medium carrots, peeled and cut into 3-inch sticks
- 2 medium zucchini, cut into 3-inch sticks
- 1 red bell pepper, cut into strips
- 1 yellow bell pepper, cut into strips
- 3 tablespoons olive oil
- 1 teaspoon dried rosemary
- 1/2 teaspoon salt
- 1/4 teaspoon black pepper
- 8 ounces feta cheese
- 1/4 cup plain Greek yogurt
- 1 garlic clove
- 1 tablespoon lemon juice
Instructions
- Preheat the oven to 425 degrees. Toss the cauliflower florets, carrot sticks, zucchini sticks, and bell pepper strips with 2 tablespoons olive oil, rosemary, salt, and black pepper on a large baking sheet.
- Spread the vegetables in a single layer and roast for 25 minutes, turning once halfway through, until the edges are browned and the carrots are tender.
- While the vegetables roast, combine the feta cheese, Greek yogurt, garlic clove, lemon juice, and remaining 1 tablespoon olive oil in a food processor. Blend until smooth and creamy.
- Transfer the whipped feta to a small bowl and place it at the top of a large platter to act as the skeleton head area. Arrange the roasted cauliflower florets below it to form the skull shape. Line the carrot sticks outward as ribs and arm bones. Place the zucchini and bell pepper strips as leg bones and spine.
Extra Tips
Roast the vegetables until the carrots just give when pierced so they still look like bones when arranged. If making ahead, roast the vegetables up to two hours before and keep them at room temperature, then whip the feta right before guests arrive to keep the dip light. Swap rosemary for thyme if that is what you have on hand, but keep the lemon in the feta to balance the saltiness. Course: Appetizer Cuisine: Mediterranean Equipment: Baking sheet, Food processor, Mixing bowl