

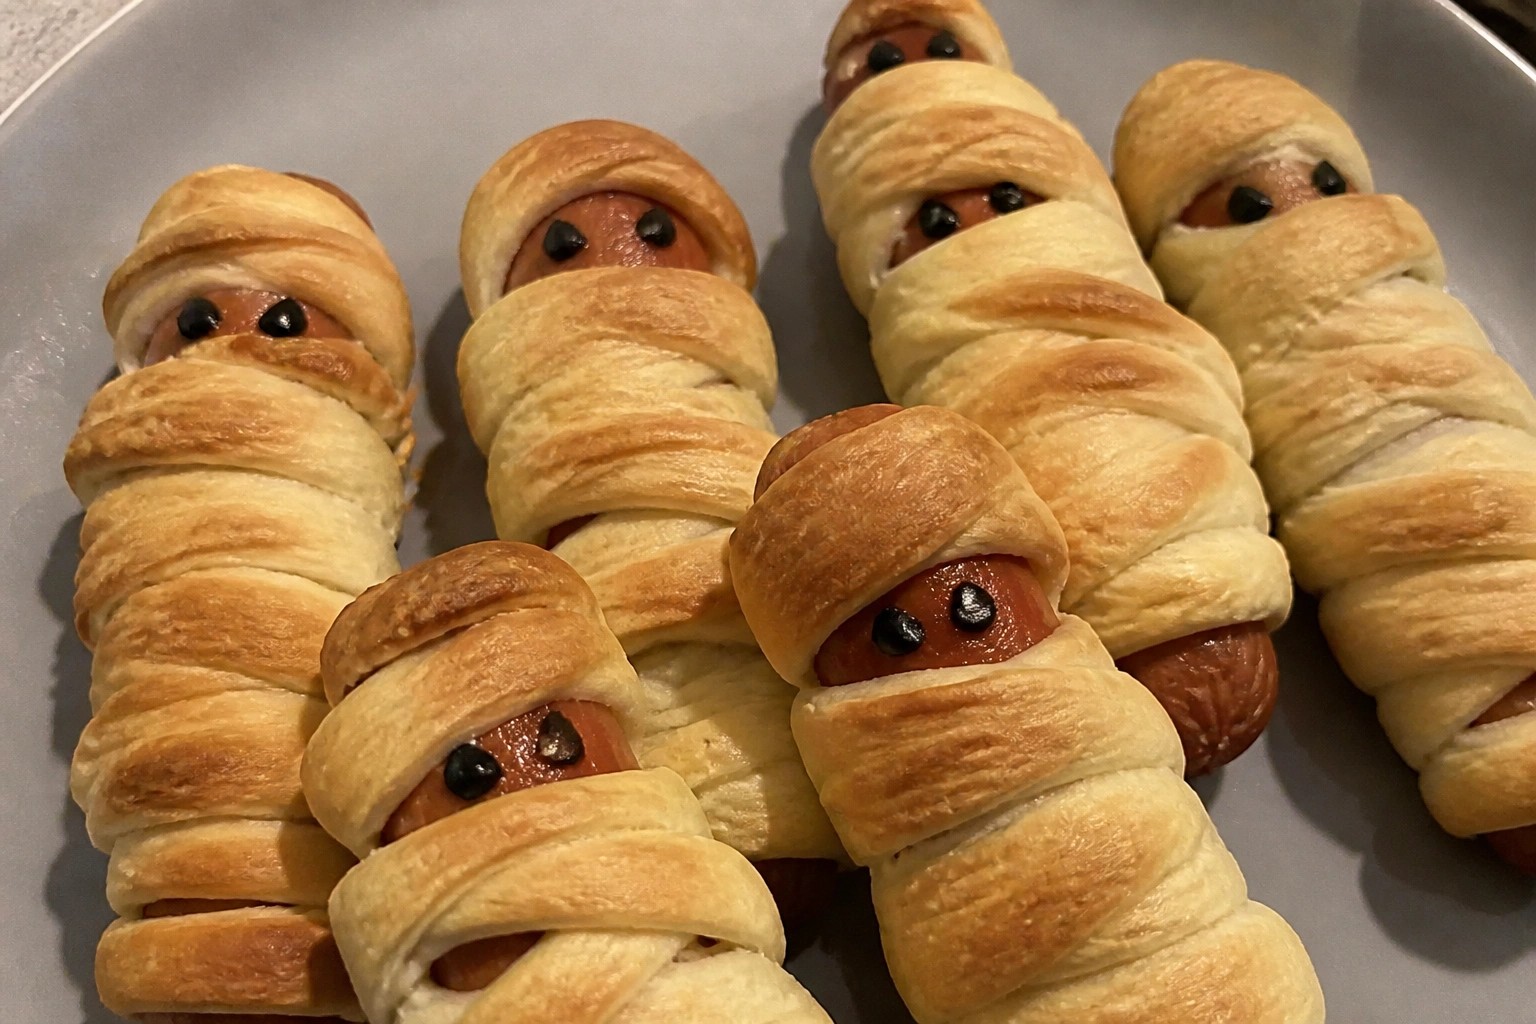
Halloween is a good time to have some savory snacks on hand. These recipes focus on flavors that feel filling and work for parties or weeknight treats. I chose ideas that use ingredients you can find at most stores. Each one is simple to put together and serves a small group. You will find 15 options in the list below.
Helpful Tips Before You Start
These quick steps will help your savory Halloween snacks come together smoothly and taste their best.
Choose Make-Ahead Recipes
Pick at least half the snacks that can be fully assembled or baked the day before. Items like stuffed peppers or savory cheese straws hold up well in the fridge.
Balance Flavors with Acid and Salt
Add a squeeze of lemon or a sprinkle of flaky salt right before serving. This keeps rich snacks from tasting heavy after they sit out.
Set Up a Warm and Room-Temp Station
Keep one tray in a low oven for hot bites and arrange the rest on platters that stay good at room temperature. This prevents last-minute reheating stress.
Offer Simple Dips on the Side
Place two or three easy dips nearby so guests can customize each bite. Think herbed yogurt, spicy marinara, or garlic aioli.
Cut Everything into Small Pieces
Aim for two-bite portions so people can sample many different snacks without committing to one large item.
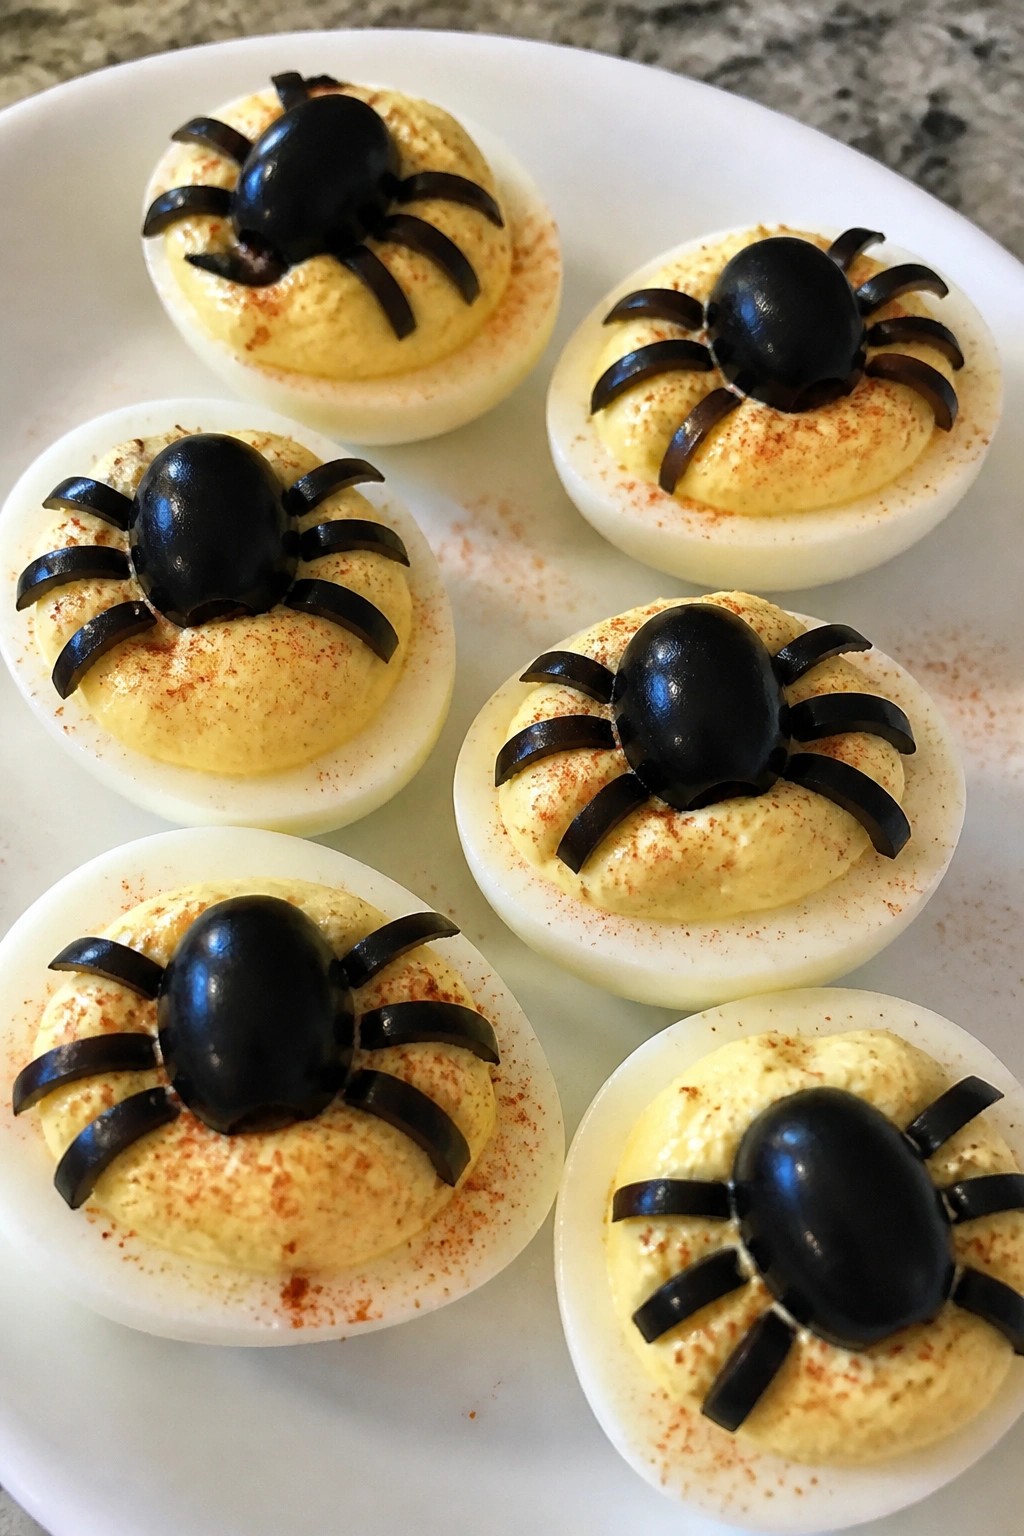
Spooky Spider Deviled Eggs
These deviled eggs get a simple Halloween twist with black olive spiders on top. They work well for parties or casual get-togethers where you need something savory and easy to pick up. The filling stays creamy with a light tang, while the olives add a salty bite that pairs nicely with the egg.
Serves 4 people.
Ingredients
- 6 large eggs
- 1/4 cup mayonnaise
- 1 teaspoon Dijon mustard
- 1 teaspoon white vinegar
- 1/4 teaspoon salt
- 1/8 teaspoon black pepper
- 1/4 teaspoon paprika
- 6 whole black olives
Instructions
- Place the eggs in a pot and cover with cold water. Bring to a boil, then remove from heat, cover, and let sit for 12 minutes. Drain and cool the eggs in ice water before peeling.
- Slice each egg in half lengthwise and scoop the yolks into a mixing bowl. Arrange the empty whites on a serving plate.
- Mash the yolks with a fork. Add the mayonnaise, Dijon mustard, white vinegar, salt, and black pepper. Stir until the mixture is smooth.
- Spoon or pipe the yolk mixture back into the egg white halves.
- Slice each black olive in half lengthwise. Place one half on top of each filled egg to form the spider body. Cut the remaining olive halves into thin strips and arrange eight strips around each body to form the legs.
- Lightly dust the eggs with paprika before serving.
Extra Tips
Make the eggs a day ahead and store the filled halves in the fridge without the olive spiders. Add the olives just before serving so they stay fresh and do not bleed color into the filling. If you want less tang, swap the Dijon for yellow mustard. Leftovers keep covered in the refrigerator for up to two days. Course: Appetizer Cuisine: American Equipment: Large Pot, Mixing Bowl, Knife
Mummy-Wrapped Sausage Bites with Mustard
These sausage bites make a fun finger food for Halloween gatherings. The flaky dough wrapping gives them a playful mummy look while the savory sausages stay juicy inside. They pair well with mustard for a tangy dip that balances the richness.
This snack works best at parties or casual get-togethers where guests want something easy to grab. The texture combines crisp pastry with tender meat, and the mustard adds a sharp contrast that keeps each bite satisfying.

Serves 4 people.
Ingredients
- 12 cocktail sausages
- 1 can (8 oz) refrigerated crescent roll dough
- 1/4 cup prepared mustard
Instructions
- Preheat the oven to 375°F and line a baking sheet with parchment paper.
- Unroll the crescent roll dough on a clean surface and press the seams together to form a single sheet. Cut the dough into thin strips about 1/4 inch wide.
- Wrap each cocktail sausage with several dough strips, leaving small gaps so the sausage shows through like mummy bandages. Place the wrapped sausages on the prepared baking sheet.
- Bake for 12 to 15 minutes until the dough turns golden brown and the sausages are heated through.
- Arrange the baked bites on a serving plate and place the mustard in a small bowl for dipping.
Extra Tips
Serve these bites warm so the pastry stays crisp. If you need to make them ahead, wrap and bake the sausages earlier in the day, then reheat briefly in a 350°F oven just before serving to restore texture. Use any leftover mustard as a quick spread on the side if you want extra flavor without extra ingredients. Course: Appetizer Cuisine: American Equipment: Baking sheet, Oven, Knife
Roasted Pumpkin and Feta Tartlets
These tartlets combine sweet roasted pumpkin with salty feta in a flaky pastry shell. They make a solid choice for a Halloween snack spread because they hold up well on a platter and do not require utensils. The contrast of creamy cheese and tender pumpkin gives each bite a balanced savory profile with a crisp base.
They work well for casual gatherings or as a starter before a larger meal. The recipe keeps the focus on simple roasting and assembly so the flavors stay straightforward.

Serves 4 people.
Ingredients
- 1 sheet puff pastry, thawed
- 2 cups pumpkin, peeled and cut into 1/2-inch cubes
- 4 ounces feta cheese, crumbled
- 2 tablespoons olive oil
- 1 teaspoon dried thyme
- 1/2 teaspoon salt
- 1/4 teaspoon black pepper
- 1 egg, beaten
Instructions
- Preheat the oven to 400 degrees F. Line a baking sheet with parchment paper.
- Toss the pumpkin cubes with olive oil, thyme, salt, and pepper on the baking sheet. Spread them in a single layer and roast for 20 minutes until the edges turn golden and the pieces soften.
- While the pumpkin roasts, roll out the puff pastry on a lightly floured surface to about 1/8 inch thick. Cut the sheet into 8 equal squares or rounds.
- Press each pastry piece into the cups of a muffin tin to form tartlet shells. Prick the bottoms lightly with a fork.
- Remove the roasted pumpkin from the oven and divide it evenly among the pastry shells. Sprinkle the crumbled feta over the top of each one.
- Brush the exposed pastry edges with the beaten egg. Bake the tartlets for 15 to 18 minutes until the pastry turns golden brown and puffs slightly.
- Let the tartlets cool in the tin for 5 minutes before removing them to a wire rack.
Extra Tips
Roast the pumpkin until the edges brown to avoid excess moisture in the finished tartlets. If the feta is very salty, reduce the added salt by half. These taste best served warm the same day, but leftovers can be reheated in a 350 degree F oven for 5 minutes to restore crispness. Course: Appetizer Cuisine: Mediterranean Equipment: Baking sheet, muffin tin, mixing bowl, pastry brush
Bat-Shaped Buffalo Chicken Sliders
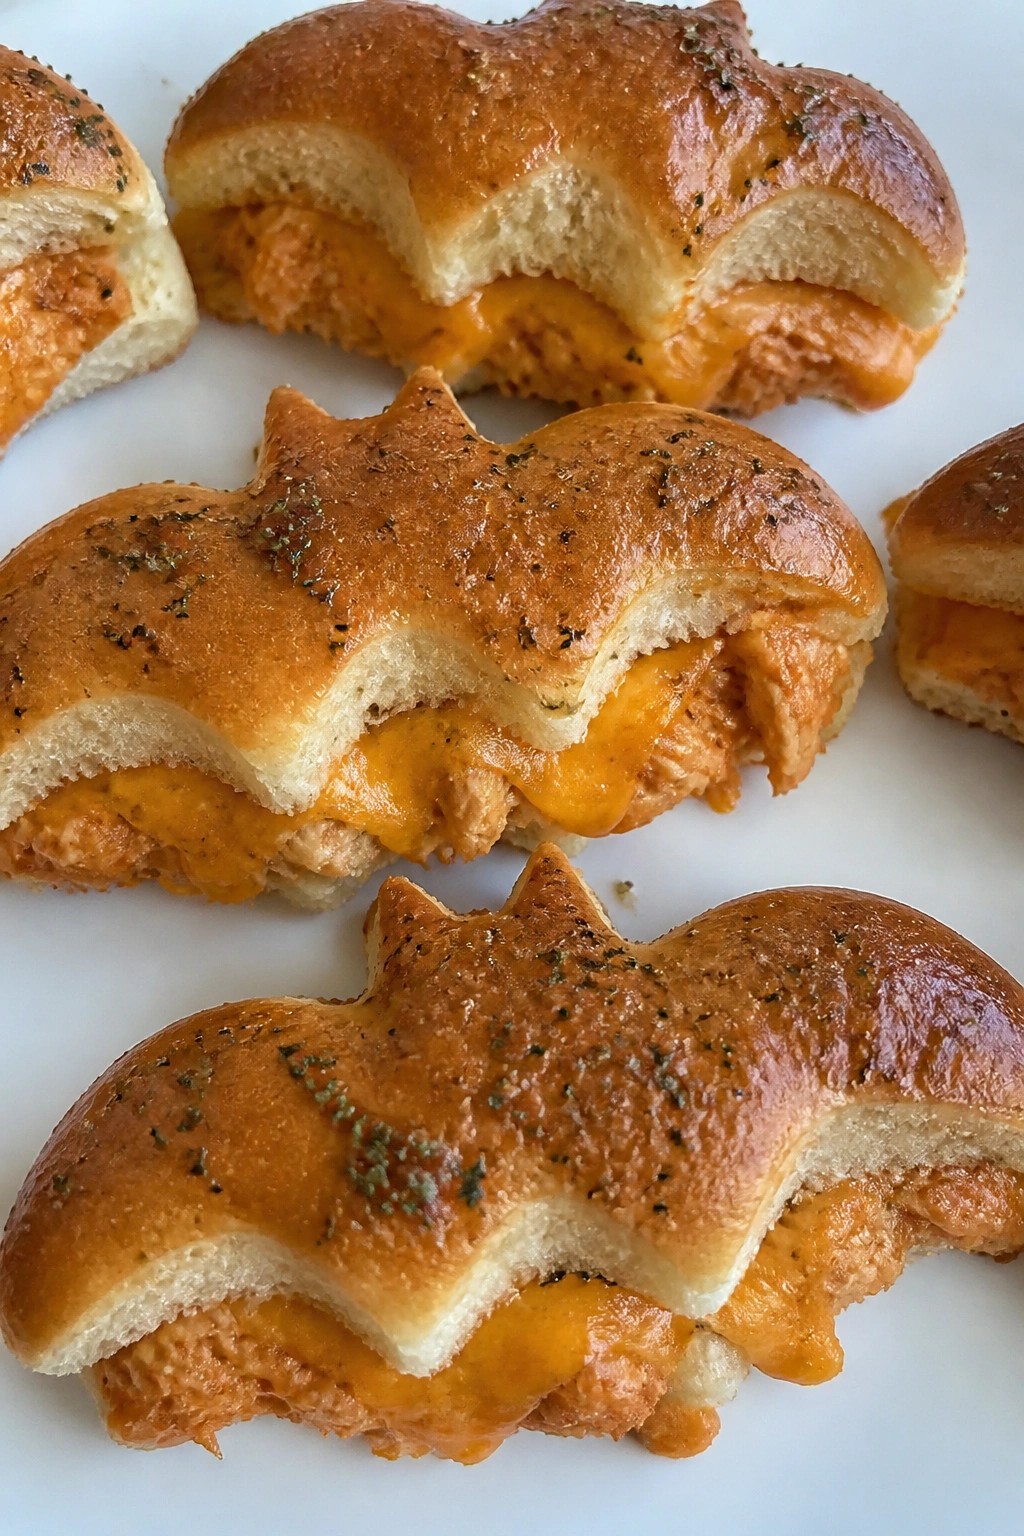
These bat-shaped buffalo chicken sliders add a playful touch to any Halloween spread. They come together quickly and deliver bold flavor in a handheld format that works for parties or casual weeknight meals. Tender chicken in spicy buffalo sauce sits between soft buns with melted cheese on top for a mix of heat and creaminess.
This recipe serves 4 people. – 2 cups shredded cooked chicken – ½ cup buffalo sauce – 8 slider buns – 4 slices cheddar cheese – 2 tablespoons butter, melted – 1 teaspoon garlic powder – Blue cheese dressing for serving
### Instructions 1. Preheat the oven to 350°F and line a baking sheet with parchment paper. 2. In a mixing bowl, stir together the shredded chicken and buffalo sauce until evenly coated. 3. Place the bottom halves of the slider buns on the baking sheet. Spoon the chicken mixture evenly over each bottom bun. 4. Use a small bat-shaped cookie cutter to cut shapes from the cheddar cheese slices. Lay one bat-shaped piece of cheese on top of the chicken on each slider. 5. Add the top halves of the buns. Stir the garlic powder into the melted butter and brush the mixture over the tops of the buns. 6. Bake for 10 minutes until the cheese has melted and the buns are lightly toasted. Serve warm with blue cheese dressing on the side.
### Extra Tips Cut the cheese bats right before assembly so they hold their shape on the hot chicken. If the buffalo sauce tastes too spicy, stir in a spoonful of the blue cheese dressing to mellow the heat before adding it to the chicken. Leftovers reheat best in a 300°F oven for a few minutes to keep the buns from getting soggy.
Course: Appetizer Cuisine: American Equipment: Baking sheet, Mixing bowl, Cookie cutter
Serves 4 people.
Instructions
- Preheat the oven to 350°F and line a baking sheet with parchment paper.
- In a mixing bowl, stir together the shredded chicken and buffalo sauce until evenly coated.
- Place the bottom halves of the slider buns on the baking sheet. Spoon the chicken mixture evenly over each bottom bun.
- Use a small bat-shaped cookie cutter to cut shapes from the cheddar cheese slices. Lay one bat-shaped piece of cheese on top of the chicken on each slider.
- Add the top halves of the buns. Stir the garlic powder into the melted butter and brush the mixture over the tops of the buns.
- Bake for 10 minutes until the cheese has melted and the buns are lightly toasted. Serve warm with blue cheese dressing on the side.
Extra Tips
Cut the cheese bats right before assembly so they hold their shape on the hot chicken. If the buffalo sauce tastes too spicy, stir in a spoonful of the blue cheese dressing to mellow the heat before adding it to the chicken. Leftovers reheat best in a 300°F oven for a few minutes to keep the buns from getting soggy. Course: Appetizer Cuisine: American Equipment: Baking sheet, Mixing bowl, Cookie cutter
Ghostly Caprese Skewers with Balsamic
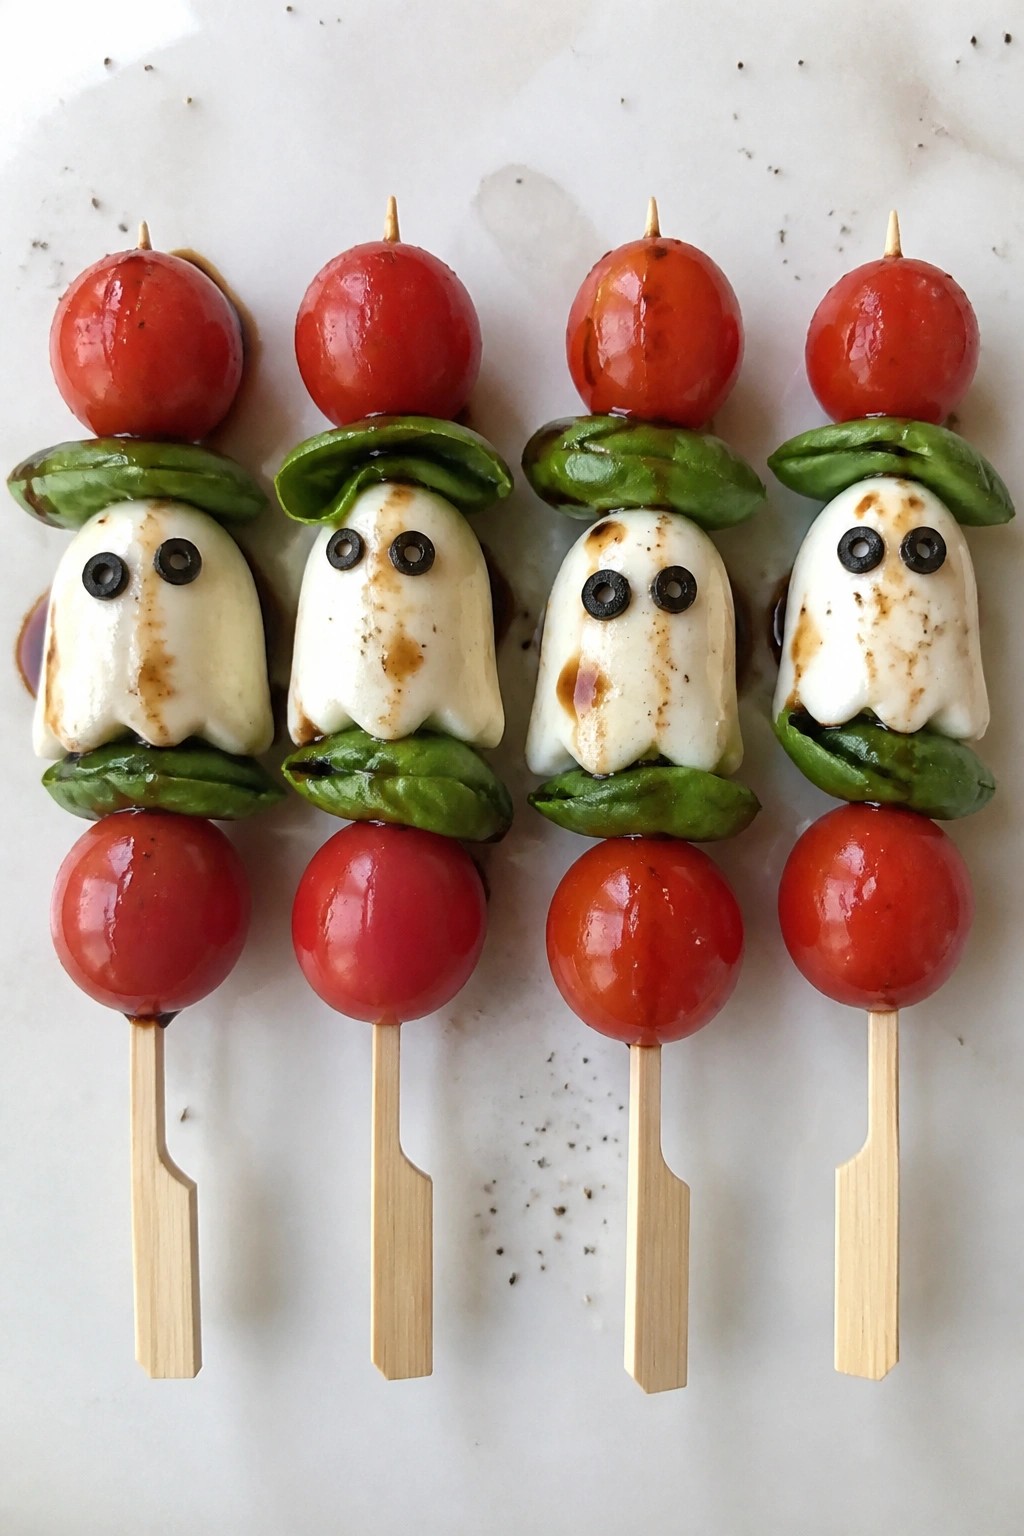
These skewers give the classic Caprese combination a playful Halloween spin. Small mozzarella balls become little ghosts once you add olive eyes, and the balsamic glaze adds a sweet tangy finish that pairs well with the fresh ingredients. They work well as a quick snack for parties or a light bite before a bigger meal.
The flavors stay bright and simple, with juicy tomatoes, creamy cheese, and fragrant basil in every bite. The balsamic brings just enough acidity to balance everything without overpowering the other ingredients.
Serves 4 people.
Ingredients
- 12 cherry tomatoes
- 12 bocconcini mozzarella balls
- 12 fresh basil leaves
- 4 wooden skewers
- 2 tablespoons olive oil
- 1/4 cup balsamic glaze
- 4 black olives, sliced into thin rounds
- Salt and black pepper to taste
Instructions
- Thread one cherry tomato onto each skewer, followed by a basil leaf and a mozzarella ball. Repeat the pattern once more on each skewer so it ends with a mozzarella ball.
- Use the sliced black olives to make two small eyes on the front of each top mozzarella ball. This creates the ghost shape.
- Drizzle the olive oil evenly over the assembled skewers. Add a light sprinkle of salt and black pepper.
- Finish by drizzling the balsamic glaze over the skewers right before serving.
Extra Tips
Make the skewers a few hours ahead and keep them covered in the fridge, then add the balsamic glaze just before guests arrive so it stays glossy. If you want less olive flavor, use a toothpick to dab tiny dots of balsamic instead of olive slices for the eyes. These taste best at room temperature. Course: Appetizer Cuisine: Italian Equipment: Wooden skewers, Small bowl, Serving platter
Witch Finger Pretzel Rods with Cheese Dip
These pretzel rods get a playful Halloween twist by turning into witch fingers with almond nails attached using the cheese dip. They pair well with the warm, savory dip for parties or casual get-togethers.
The rods stay crisp while the dip brings a smooth, cheesy texture with garlic notes. It works as a fun snack that feels festive without extra fuss.

Serves 4 people.
Ingredients
- 12 pretzel rods
- 2 cups shredded cheddar cheese
- 4 ounces cream cheese, softened
- 1/2 cup milk
- 1 teaspoon garlic powder
- 12 whole almonds
Instructions
- Place the cheddar cheese, cream cheese, milk, and garlic powder in a small saucepan. Heat over medium-low, stirring often until the mixture melts into a smooth dip.
- Remove the dip from heat and let it sit for one minute to thicken slightly. This helps it hold the almonds in place.
- Take one pretzel rod and dip the tip lightly into the cheese dip. Press one almond onto the dipped end to form a fingernail.
- Repeat with the remaining pretzel rods and almonds. Arrange the finished rods on a plate.
- Pour the rest of the cheese dip into a small bowl and serve alongside the rods for dipping.
Extra Tips
If the dip thickens too much while you work, stir in a splash of milk to loosen it. Serve right away so the pretzels stay crisp. Skip the almonds if anyone has nut allergies and use a small piece of green olive instead. Course: Snack Cuisine: American Equipment: Small saucepan, Spoon
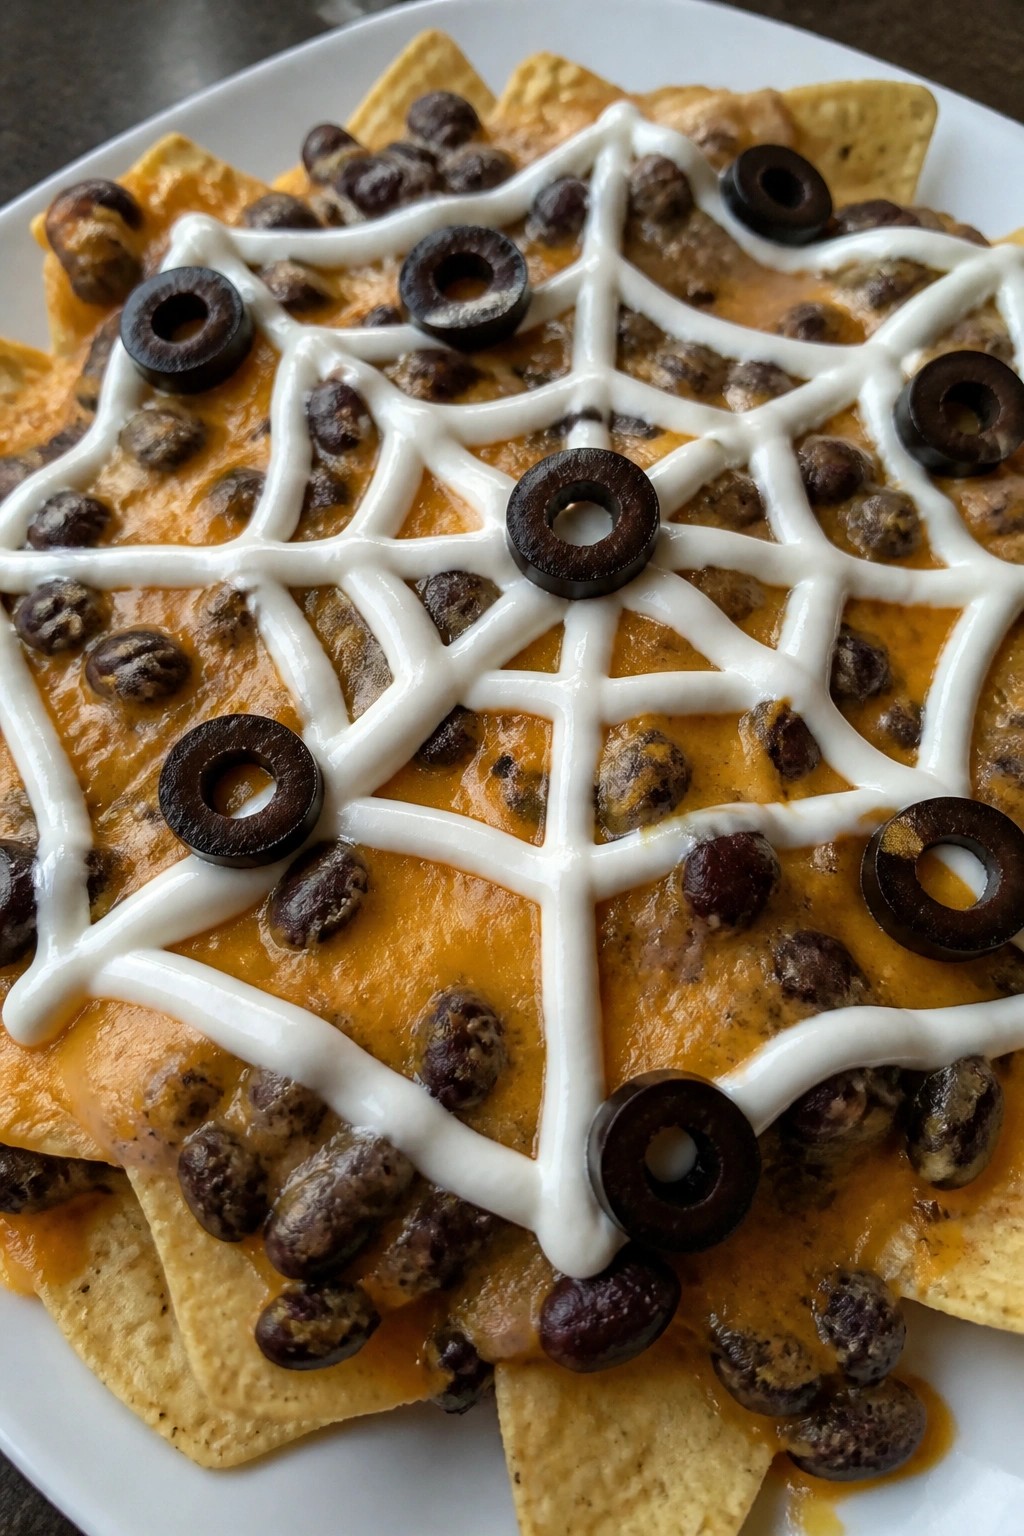
Black Bean Spiderweb Nachos
These nachos turn a simple snack into something festive for Halloween parties or casual get-togethers. The black beans give the dish a hearty base while the sour cream design adds a playful touch that fits the season without extra effort.
The result is a warm, crunchy plate with melted cheese and well-seasoned beans. The cool sour cream cuts through the spices and keeps every bite balanced.
Serves 4 people.
Ingredients
- 12 ounces tortilla chips
- 1 (15-ounce) can black beans, drained and rinsed
- 1 teaspoon ground cumin
- ½ teaspoon chili powder
- ¼ teaspoon salt
- 2 cups shredded cheddar cheese
- ¾ cup sour cream
- 8 sliced black olives
Instructions
- Heat the oven to 375°F and line a large baking sheet with parchment paper.
- Spread the tortilla chips in an even layer on the prepared sheet.
- Place the black beans in a bowl and stir in the cumin, chili powder, and salt until the beans are evenly coated.
- Scatter the seasoned beans over the chips, then sprinkle the shredded cheddar cheese on top.
- Bake for 10 to 12 minutes, until the cheese is fully melted and the edges of the chips start to brown.
- Remove the sheet from the oven and let the nachos rest for 2 minutes.
- Spoon the sour cream into a zip-top bag, snip off one corner, and pipe concentric circles followed by straight lines from the center outward to create a spiderweb pattern.
- Place the sliced black olives around the web to act as spiders and serve right away.
Extra Tips
Pipe the sour cream while the nachos are still warm so the lines stay defined. If the sour cream is too thick to pipe, stir in a teaspoon of milk to loosen it. Leftovers reheat best in a 350°F oven for five minutes to restore crispness, though the web design will soften. Course: Snack Cuisine: Mexican Equipment: Baking sheet, Mixing bowl, Plastic bag
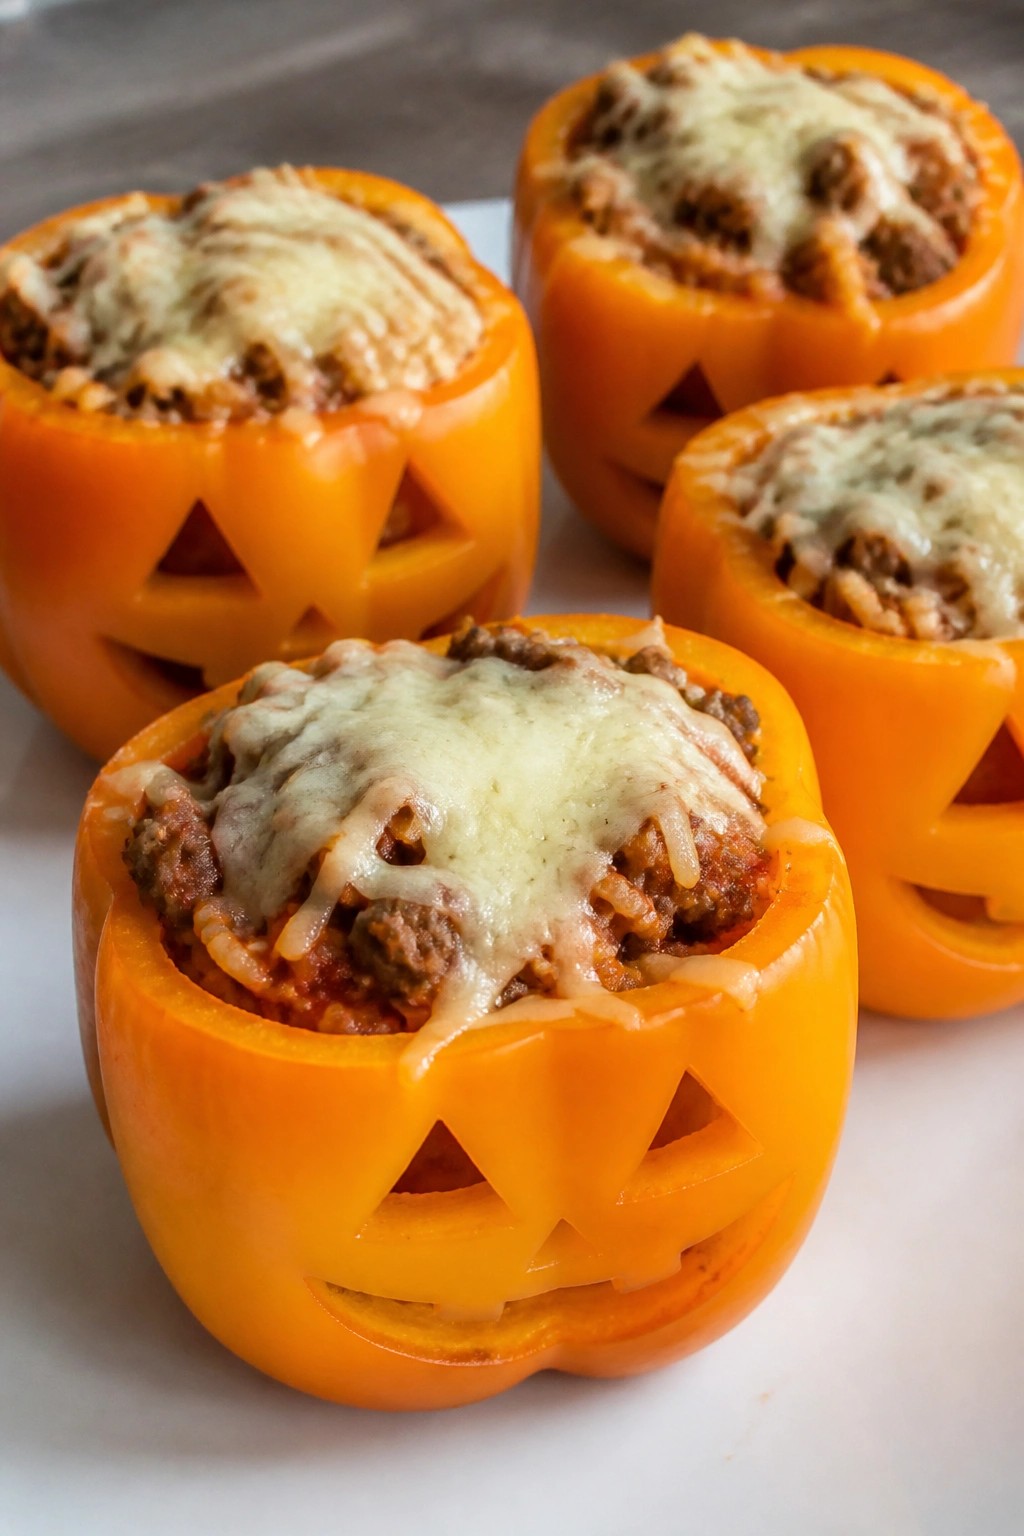
Stuffed Jack-o’-Lantern Bell Peppers
These stuffed peppers work well as a Halloween snack because the orange bell peppers can be carved with simple faces before baking. The filling combines seasoned meat and rice with melted cheese for a hearty bite that feels substantial without being heavy. They hold up well on a party table and give guests something warm to grab between other bites.
Serves 4 people.
Ingredients
- 4 large orange bell peppers
- 1 pound ground beef
- 1 cup cooked white rice
- 1 small onion, finely chopped
- 2 cloves garlic, minced
- 1 cup marinara sauce
- 1 teaspoon Italian seasoning
- 1 cup shredded mozzarella cheese
- Salt and pepper to taste
Instructions
- Preheat the oven to 375 degrees. Cut the tops off each bell pepper and scoop out the seeds. Use a small knife to carve simple jack-o’-lantern faces into the sides of the peppers.
- Place the carved peppers in a baking dish and set aside.
- Heat a large skillet over medium heat. Add the ground beef, onion, and garlic. Cook until the beef is browned and the onion is soft, breaking up the meat as it cooks.
- Stir in the cooked rice, marinara sauce, Italian seasoning, salt, and pepper. Mix until everything is evenly combined and heated through.
- Spoon the beef mixture into each carved pepper until they are full. Top each pepper with shredded mozzarella cheese.
- Bake for 25 to 30 minutes until the peppers are tender and the cheese is melted and lightly browned.
Extra Tips
Carve the faces after scooping out the seeds so the peppers stay stable while you work. If the filling seems dry after mixing, add a spoonful of extra marinara sauce before stuffing. Leftovers reheat well in the microwave, though the carved faces soften slightly. Course: Snack Cuisine: American Equipment: Large skillet, Baking dish, Cutting board
Mini Meatball Monsters in Marinara
These mini meatballs turn into monsters with simple olive and cheese details on top. They work well for Halloween parties or casual get-togethers where you want a savory bite that feels fun without extra fuss.
The meatballs stay tender inside with a light crust from pan cooking, then simmer in marinara for a balanced, hearty flavor. Kids can help add the eyes before serving.

Serves 4 people.
Ingredients
- 1 pound ground beef
- 1/2 cup breadcrumbs
- 1 large egg
- 2 cloves garlic, minced
- 1 teaspoon dried oregano
- 1/2 teaspoon salt
- 1/4 teaspoon black pepper
- 2 cups marinara sauce
- 1/2 cup small mozzarella balls
- 16 black olives, halved
Instructions
- Mix the ground beef, breadcrumbs, egg, garlic, oregano, salt, and pepper in a bowl until evenly combined. Roll the mixture into 16 small meatballs, each about 1 inch wide.
- Heat a skillet over medium heat and add the meatballs in a single layer. Cook them for 8 to 10 minutes, turning often until browned on all sides. Pour the marinara sauce into the skillet and reduce the heat to low. Simmer for 10 minutes so the meatballs finish cooking through.
- Place two mozzarella balls on each meatball to form eyes. Add one olive half to the center of each mozzarella ball as a pupil. Cover the skillet for 1 minute to let the cheese soften slightly.
Extra Tips
Use a spoon to nestle the meatballs close together in the sauce so the cheese stays in place while it softens. If you make the meatballs ahead, store them in the sauce and add the cheese and olives right before reheating on the stove. Course: Appetizer Cuisine: Italian Equipment: Mixing bowl, Skillet
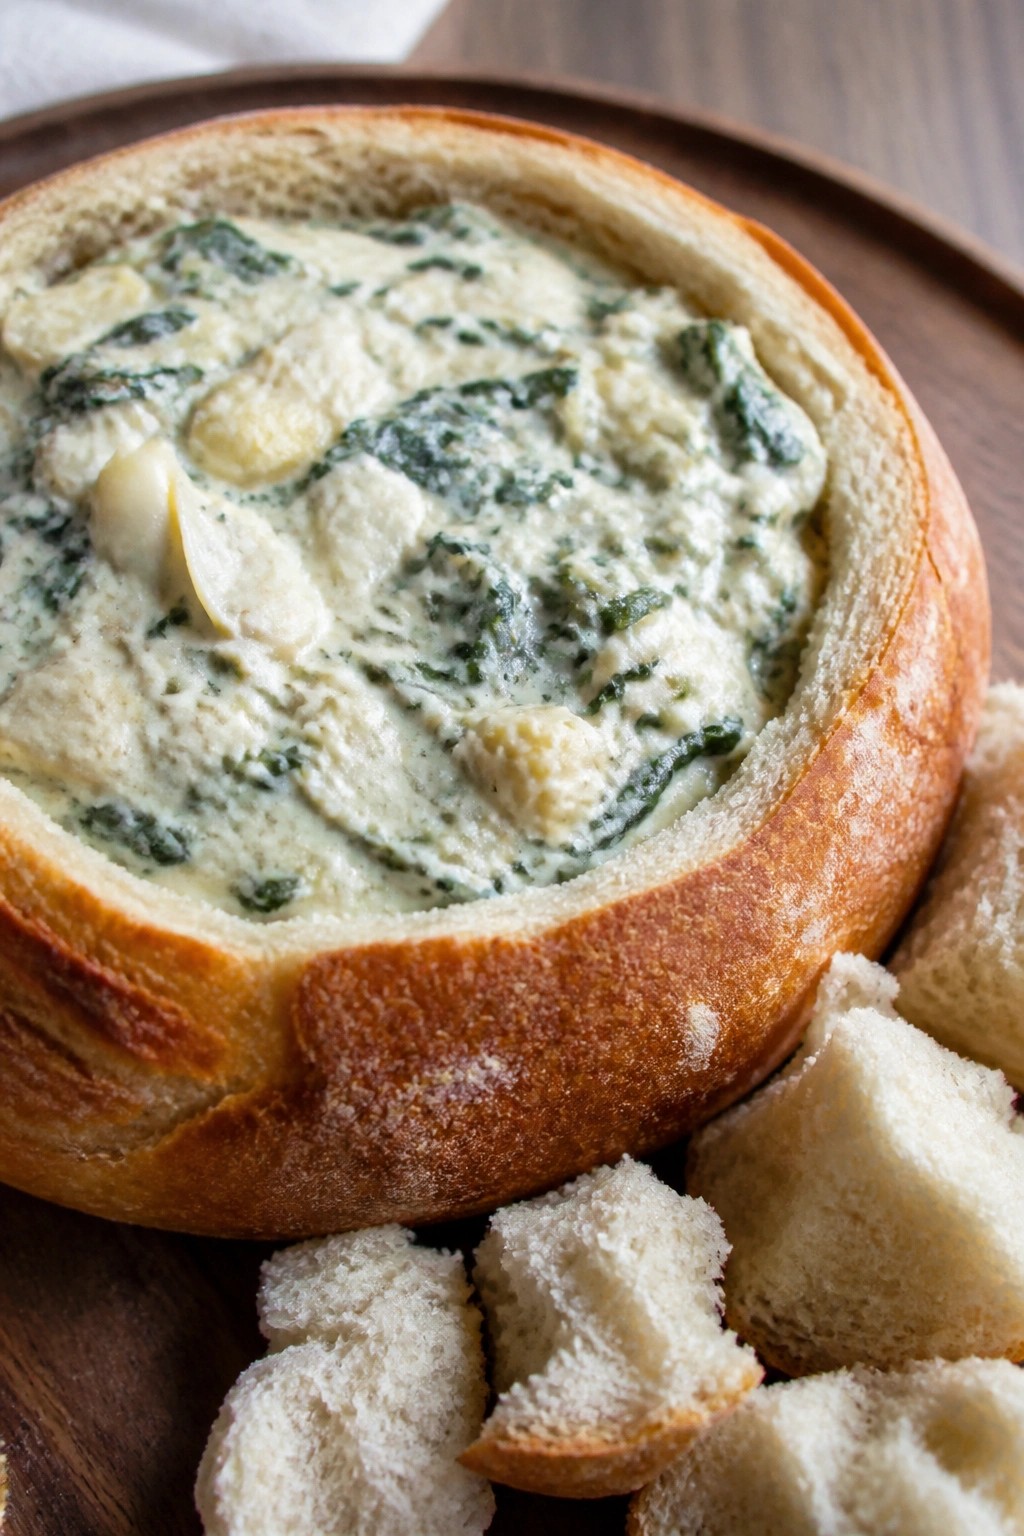
Cauldron Spinach Artichoke Dip with Bread
This dip brings a warm, creamy spinach and artichoke filling that pairs well with soft bread for dipping. It works nicely at Halloween gatherings when you want a savory option that feels hearty without much fuss. The texture stays smooth and rich while the bread adds a chewy contrast.
It shines as a shareable snack for small groups and holds up during casual parties or movie nights. The flavors lean garlicky and cheesy with a touch of tang from the artichokes.
Serves 4 people.
Ingredients
- 10 ounces frozen spinach, thawed and drained
- 1 (14-ounce) can artichoke hearts, drained and chopped
- 8 ounces cream cheese, softened
- ½ cup sour cream
- ½ cup mayonnaise
- 1 cup shredded mozzarella cheese
- ½ cup grated Parmesan cheese
- 2 garlic cloves, minced
- 1 round sourdough loaf
- Salt and pepper to taste
Instructions
- Preheat the oven to 375 degrees Fahrenheit.
- In a mixing bowl, combine the spinach, artichoke hearts, cream cheese, sour cream, mayonnaise, mozzarella, Parmesan, and garlic. Stir until evenly mixed, then add salt and pepper to taste.
- Slice off the top of the sourdough loaf and hollow out the center to create a bread bowl. Cut the removed bread into bite-sized pieces for dipping.
- Spoon the dip mixture into the hollowed bread bowl and place it on a baking sheet.
- Bake for 20 to 25 minutes until the dip is hot and the top turns lightly golden.
- Remove from the oven and serve immediately with the bread pieces.
Extra Tips
Assemble the dip in the bread bowl a few hours ahead and keep it covered in the fridge until baking time. If the bread edges start to brown too quickly, loosely tent the loaf with foil for the last part of baking. Leftovers reheat best in a 350-degree oven to restore the creamy texture without drying out the bread. Course: Appetizer Cuisine: American Equipment: Mixing Bowl, Baking Sheet, Oven
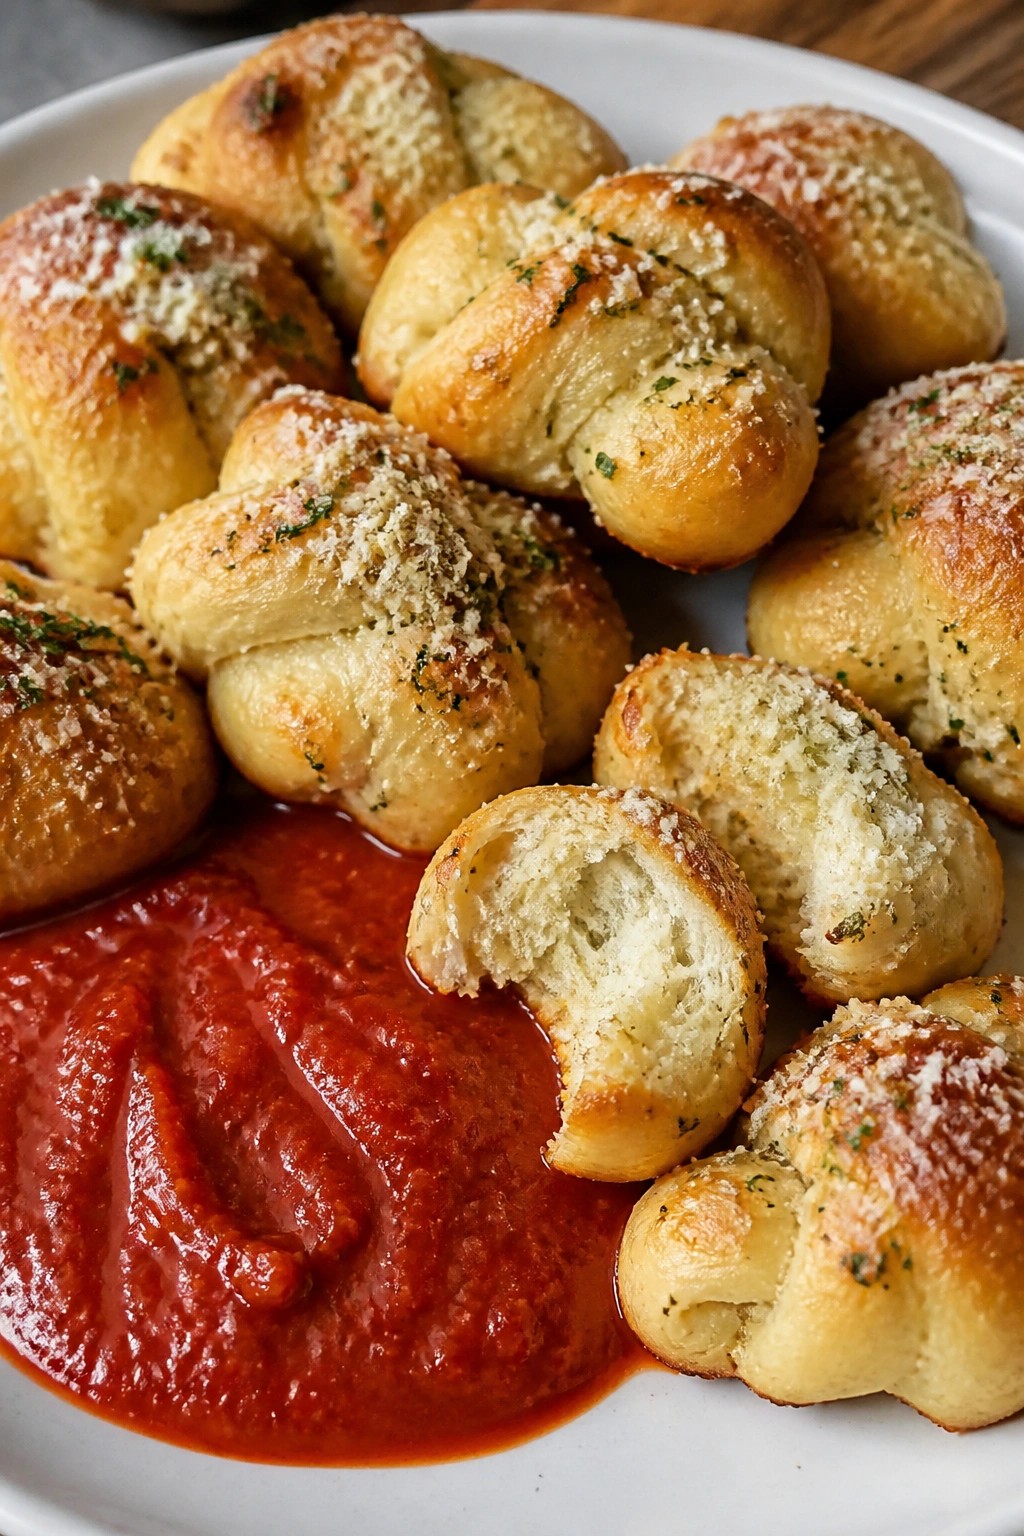
Vampire Garlic Knot Bites
These Vampire Garlic Knot Bites turn classic garlic knots into a savory Halloween snack with plenty of garlic and a marinara dip that resembles blood. They suit parties or casual get-togethers when you want something easy to eat by hand. The bites come out soft inside with a golden crust and a strong garlic taste.
Serves 4 people.
Ingredients
- 1 pound pizza dough
- 6 garlic cloves, minced
- 1/4 cup butter, melted
- 2 tablespoons olive oil
- 1/4 cup grated Parmesan cheese
- 2 tablespoons chopped parsley
- 1 cup marinara sauce
Instructions
- Preheat the oven to 400 degrees and line a baking sheet with parchment paper.
- Divide the pizza dough into 16 small pieces and roll each into a short rope, then tie into a simple knot.
- Place the knots on the baking sheet and bake for 12 minutes until lightly golden.
- While the knots bake, mix the minced garlic, melted butter, and olive oil in a bowl.
- Remove the knots from the oven and brush them generously with the garlic butter mixture.
- Sprinkle the Parmesan cheese and chopped parsley over the warm knots.
- Serve right away with the marinara sauce on the side for dipping.
Extra Tips
Use fresh garlic rather than jarred for the strongest flavor, and reheat any leftovers in a 350-degree oven for five minutes to restore crisp edges instead of using a microwave. Course: Appetizer Cuisine: Italian Equipment: Baking sheet, Mixing bowl, Pastry brush
Skeleton Bone Breadsticks with Herb Oil
These breadsticks bring a playful touch to any Halloween spread. Shaped like bones and served with a simple herb oil for dipping, they offer a savory bite that feels festive without extra fuss. The dough bakes up crisp on the outside and soft inside, while the oil adds fresh herbal notes.
This recipe serves 4 people.
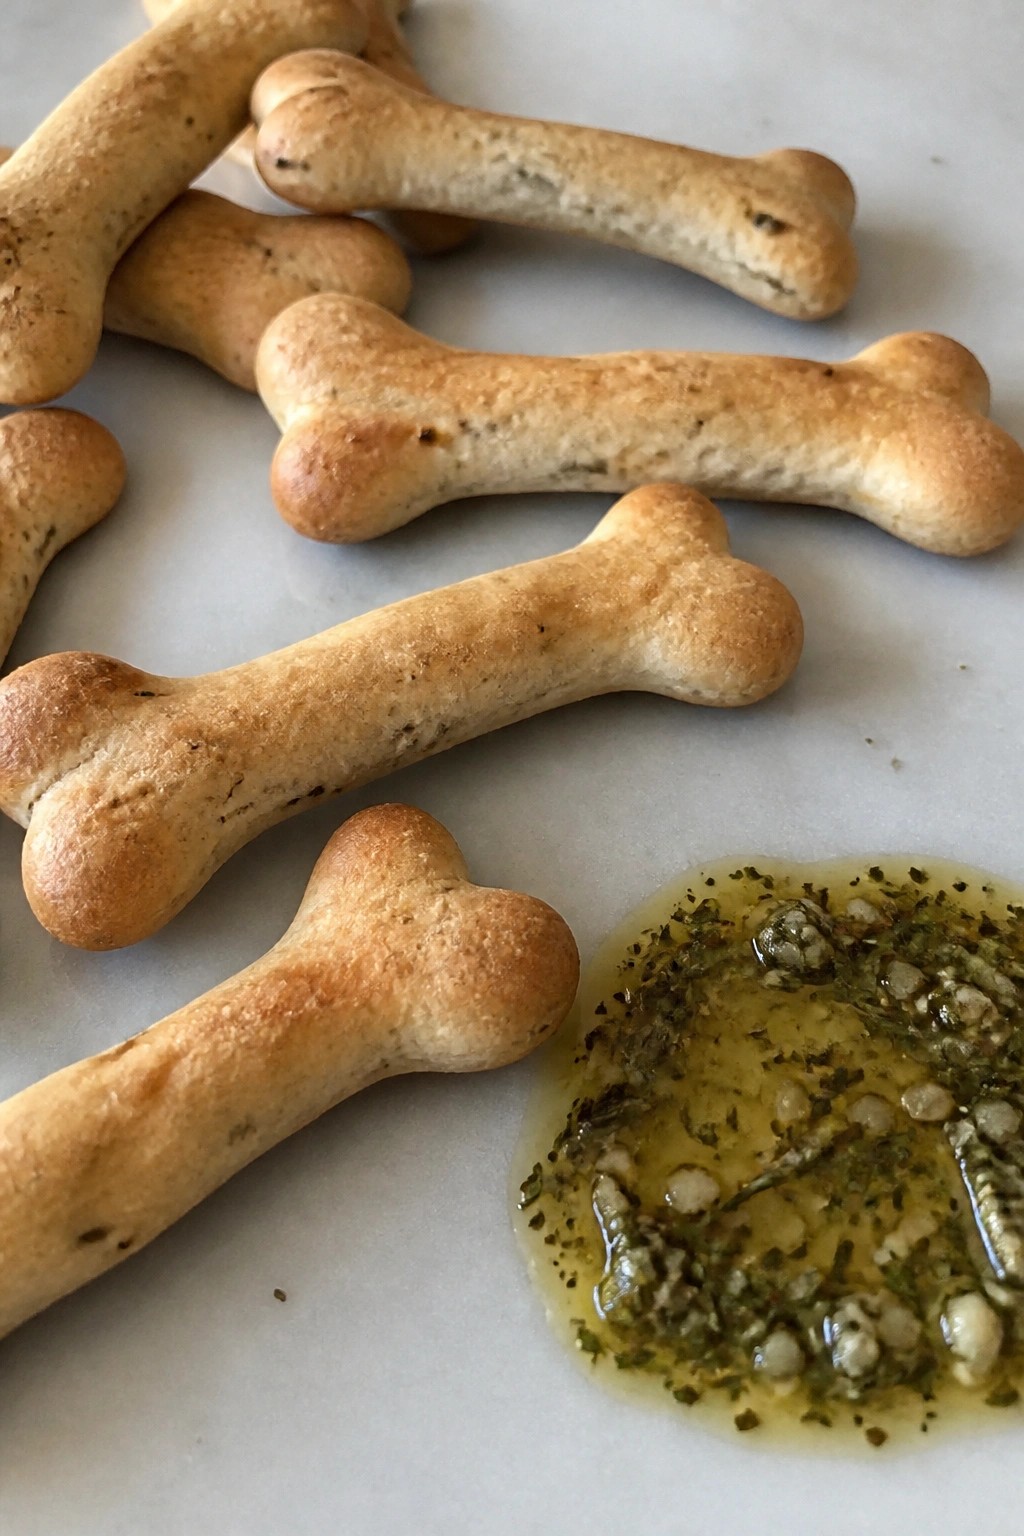
Serves 4 people.
Ingredients
- 2 cups all-purpose flour
- 1 packet (2 1/4 tsp) active dry yeast
- 3/4 cup warm water
- 1 tsp salt
- 2 tbsp olive oil, divided
- 1/4 cup olive oil
- 2 garlic cloves, minced
- 1 tbsp chopped fresh rosemary
- 1 tsp dried oregano
- 1/2 tsp salt
- 1/4 tsp black pepper
Instructions
- Stir the yeast into the warm water and let it sit for 5 minutes until foamy. Mix in 1 tablespoon olive oil, the flour, and 1 teaspoon salt to form a dough.
- Knead the dough on a lightly floured surface for 5 minutes until smooth. Place it in a bowl, cover, and let it rise for 30 minutes.
- Punch down the dough and divide it into 8 equal pieces. Roll each piece into a thin rope, then shape it into a bone by forming small knobs at both ends.
- Place the shaped breadsticks on a baking sheet and brush them with the remaining 1 tablespoon olive oil. Bake at 400°F for 12 to 15 minutes until golden.
- While the breadsticks bake, combine the 1/4 cup olive oil, minced garlic, rosemary, oregano, 1/2 teaspoon salt, and black pepper in a small bowl. Stir well and let it sit to blend flavors.
- Serve the warm breadsticks with the herb oil for dipping.
Extra Tips
Shape the dough ropes slightly thicker in the center and thinner near the ends for a clearer bone look after baking. The herb oil tastes best at room temperature, so mix it right before the breadsticks come out of the oven. Leftovers reheat well in a 350°F oven for a few minutes to restore crispness. Course: Snack Cuisine: American Equipment: Mixing Bowl, Baking Sheet, Small Bowl
Eyeball Turkey and Cheese Roll-Ups
These turkey and cheese roll-ups add a simple Halloween twist to a classic snack. The olive tops turn each piece into a quick eyeball shape that fits right into a party spread without much extra work.
They come together fast and travel well for school events or casual get-togethers. The soft cream cheese holds the layers together while the olives add a salty bite against the mild turkey and cheese.
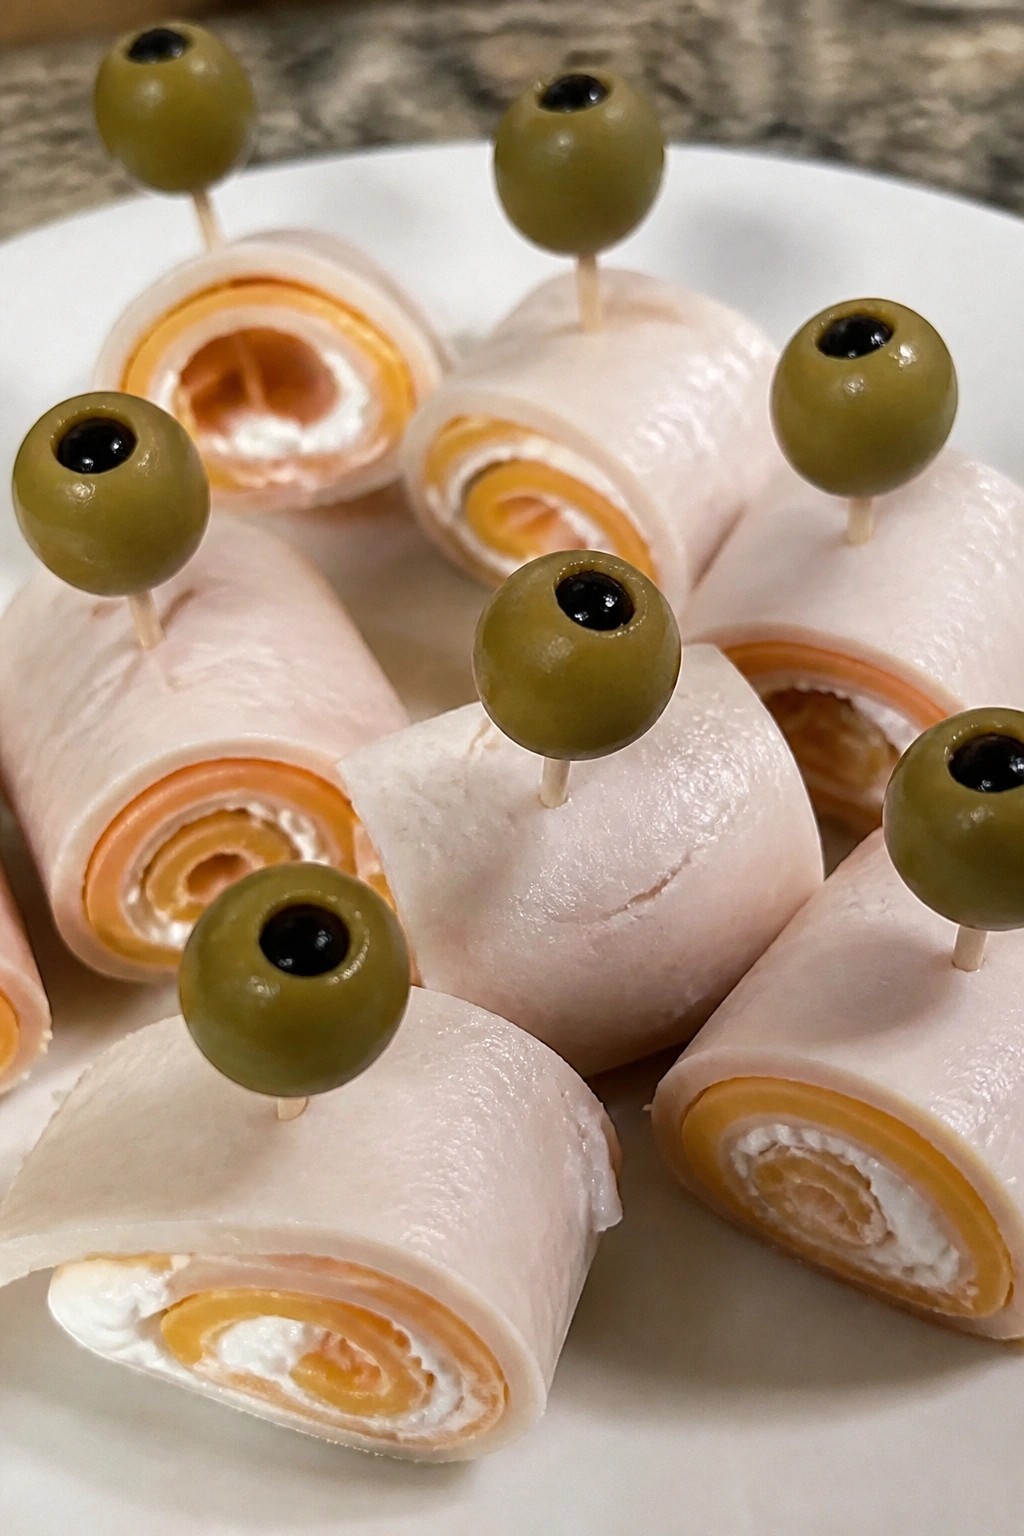
Serves 4 people.
Ingredients
- 8 slices deli turkey
- 8 slices cheddar cheese
- 1/4 cup cream cheese, softened
- 8 green olives
- 8 wooden toothpicks
Instructions
- Place one slice of turkey on a clean surface and lay one slice of cheddar cheese on top of it.
- Spread about 1 teaspoon of cream cheese over the cheddar cheese.
- Roll the turkey and cheese tightly from one end to the other to form a cylinder.
- Push one toothpick straight through the center of the roll-up to hold it together.
- Press one green olive onto the top of the toothpick so it sits like an eyeball.
- Repeat with the remaining ingredients until you have eight roll-ups.
Extra Tips
Keep the cream cheese at room temperature so it spreads evenly without tearing the turkey. If you need to make these ahead, wrap the finished roll-ups in plastic and store them in the fridge for up to one day. Swap green olives for black if that is what you have on hand. Course: Snack Cuisine: American Equipment: Cutting board, Toothpicks
Savory Pumpkin Sage Arancini Balls
These arancini bring a savory pumpkin and sage risotto inside a crisp breadcrumb shell. They make a hearty finger food for Halloween gatherings or casual fall parties when you want something warm and substantial.
The pumpkin adds a subtle earthy note while sage keeps the flavor profile firmly savory. Each ball has a creamy center that contrasts with the golden fried exterior.

Serves 4 people.
Ingredients
- 1 cup Arborio rice
- 3 cups vegetable broth
- 1 cup pumpkin puree
- 2 tablespoons chopped fresh sage
- 1/2 cup grated Parmesan cheese
- 4 ounces fresh mozzarella, cut into small cubes
- 1/2 cup all-purpose flour
- 2 large eggs, beaten
- 1 cup plain breadcrumbs
- Salt and black pepper
- Vegetable oil for frying
Instructions
- Cook the Arborio rice in a large saucepan with the vegetable broth over medium heat until the liquid is absorbed and the rice is tender. Stir in the pumpkin puree, chopped sage, Parmesan, salt, and pepper. Spread the mixture on a baking sheet and let it cool completely.
- Once cooled, scoop about two tablespoons of the rice mixture into your hand, press a mozzarella cube into the center, and shape into a ball. Repeat with the remaining mixture.
- Set up three shallow bowls with flour, beaten eggs, and breadcrumbs. Roll each ball first in flour, then egg, then breadcrumbs until fully coated.
- Heat vegetable oil in a deep pot or skillet to 350°F. Fry the balls in batches for 3 to 4 minutes until golden brown on all sides. Drain on paper towels and serve warm.
Extra Tips
Form the balls a few hours ahead and keep them chilled on a tray so they hold their shape during frying. Use day-old risotto if you have it for easier handling. For a lighter version, bake the breaded balls at 400°F for 20 minutes, turning once. Course: Appetizer Cuisine: Italian Equipment: Large saucepan, Baking sheet, Deep pot or skillet, Three shallow bowls
Creepy Olive and Salami Skewers
These skewers bring a salty, savory option to a Halloween table without much work. They pair chewy salami with briny olives for a simple bite that stands up to other snacks. The dark olives and folded salami slices create a naturally spooky look that fits the occasion.
They suit a casual party or movie night where people want something easy to pick up. The flavors stay straightforward and satisfying, with no cooking required beyond assembly.

Serves 4 people.
Ingredients
- 24 thin slices salami
- 1 (6-ounce) can pitted black olives, drained
- 12 wooden skewers
Instructions
- Fold each salami slice in half twice to create a compact, ruffled shape.
- Slide one folded salami piece onto a wooden skewer, followed by three black olives.
- Repeat the pattern of one salami piece and three olives until the skewer holds four salami pieces and twelve olives.
- Set the finished skewer on a serving plate and continue with the remaining ingredients until all twelve skewers are complete.
Extra Tips
Group two olives side by side at the top of each skewer to suggest eyes for a stronger Halloween effect. If the salami slices are very large, trim them slightly before folding so they stay balanced on the skewer. These can be assembled a few hours ahead and kept covered in the refrigerator until guests arrive. Course: Appetizer Cuisine: Italian Equipment: Wooden skewers, Serving platter