


Halloween is coming up and baking a cake can be a simple way to mark the occasion. I collected some cake ideas that work with basic tools and ingredients most people keep on hand. Each recipe gives full steps so you can follow along without extra guesswork. The options cover different skill levels so you can choose what fits your schedule. Here are 11 ideas to consider for your own kitchen.
Helpful Tips Before You Start
These tips will help your Halloween cakes come together smoothly and look their best.
Recommended Products

Package Included: You will receive 1 x witch cake topper, 1 x skull, 1 x ghost, 1 x RIP cake topper, 1 x Boo cake topper, 1 x castle, 1 x castle gate, 2 x pumpkins, 5 x balls, 5 x spider webs, 6 x clouds, 7 x bats.

EDIBLE HALLOWEEN GHOST TOPPERS – Includes 15 edible ghost-shaped icing decorations for adding a fun spooky touch to cupcakes, cakes, cookies, brownies, and other Halloween desserts.

Halloween Toys Pack: This mega bundle features 52 pcs of white halloween mini ghosts in 16 unique spooky styles. Ideal for creating ghost micro landscapes, or adding a festive touch to tabletop decor.
Pick a sturdy base recipe
Chocolate or dense vanilla cakes hold up better under thick frosting and heavy decorations than lighter sponges.
Chill the layers first
Let baked cakes cool completely, then refrigerate them for 30 minutes before slicing or frosting to reduce crumbs.
Make decorations in advance
Prepare candy eyes, fondant shapes, or colored icing details one or two days ahead so assembly stays simple.
Level and stack with care
Trim domed tops with a serrated knife and add a thin crumb coat before the final layer of frosting for clean edges.
Graveyard Pumpkin Chocolate Layer Cake
This cake combines moist pumpkin layers with rich chocolate flavor for a dessert that feels festive without being overly sweet. It works well for Halloween gatherings or small parties where you want something themed but still easy to slice and serve. The chocolate frosting holds the layers together while crushed cookies create a simple graveyard scene on top.

Serves 4 people.
Recommended Products

Halloween Cake Decoration Set: includes 1 Halloween Signboard, 1 Witch Hat, 1 Ghost Cake Toppers, 2 Pumpkin Cake Toppers, 2 Pumpkin Bucket (Black & Pumpkin Color), 3 Spider Web, 10 Bat, 20 Cake Topper Balls (Black & Pumpkin Color), a total of 40 pieces.

Halloween Decorations Outdoor: The creep cloth is suitable for halloween decoration,cobwebs halloween decorations,witchy room decor,witch halloween decorations,spider webs halloween decorations,halloween curtains,black halloween cloth.Made of black gauze,can be draped,cut and torn easily,making Halloween night more mystery and scary
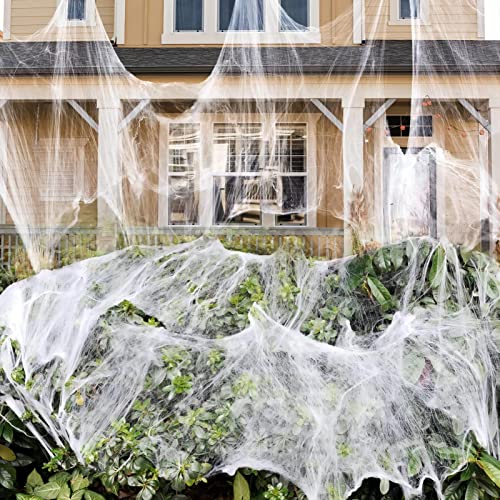
Perfect Halloween Party Decorations: Spider webs must be one of the simplest ways to add Halloween atmosphere to your haunted house or Halloween party. White spider web looks like real cobwebs, making your house looks like an abandoned cabin or your living room likes a creepy cellar.
Ingredients
- 1 1/2 cups all-purpose flour
- 1/2 cup unsweetened cocoa powder
- 1 cup granulated sugar
- 1 cup pumpkin puree
- 2 large eggs
- 1/2 cup vegetable oil
- 1 tsp baking soda
- 1/2 tsp salt
- 1 cup chocolate frosting
- 6 chocolate sandwich cookies, crushed
- 4 chocolate sandwich cookies, whole
Instructions
- Preheat the oven to 350°F and grease two 6-inch round cake pans.
- In a large bowl, whisk together the flour, cocoa powder, sugar, baking soda, and salt.
- Add the pumpkin puree, eggs, and vegetable oil to the dry ingredients. Stir until the batter is smooth and evenly combined.
- Divide the batter between the prepared pans and bake for 25 to 28 minutes, or until a toothpick inserted in the center comes out clean.
- Let the cakes cool in the pans for 10 minutes, then turn them out onto a wire rack to cool completely.
- Place one cooled cake layer on a plate and spread half the chocolate frosting over the top. Add the second layer and frost the top and sides with the remaining frosting.
- Sprinkle the crushed chocolate sandwich cookies over the frosting to resemble dirt. Press the whole cookies upright into the top to stand as tombstones.
Extra Tips
Crush the cookies just before decorating so they stay crisp on top. If the frosting feels too thick, stir in a teaspoon of milk to loosen it for smoother spreading. Store leftovers in an airtight container at room temperature for up to two days. Course: Dessert Cuisine: American Equipment: Mixing Bowl, Cake Pans, Wire Rack, Oven
Witch’s Cauldron Black Velvet Cake
This black velvet cake brings a dark, rich look to any Halloween spread. The deep cocoa flavor pairs with a moist crumb that holds up well for parties or small gatherings. It works especially well when you want a striking centerpiece without complicated decorating.
It has a tender texture from the oil and buttermilk, with just enough tang to balance the cocoa. The black color comes through clearly once baked, making it easy to style as a cauldron on the table.

Serves 4 people.
Recommended Products

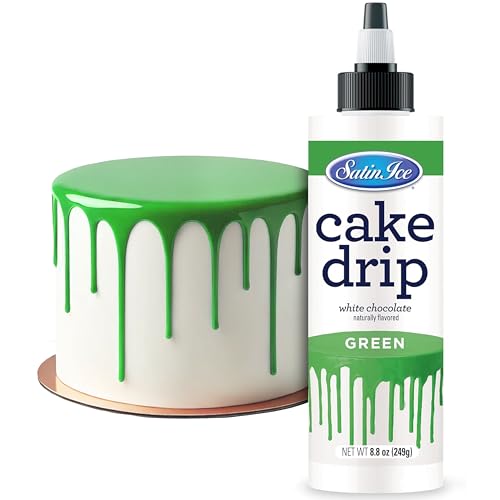
Satin Ice Cake Drip is fun and easy to use! Simply melt in the microwave, shake thoroughly, and you're ready to create stunning drip cakes or drizzle over desserts
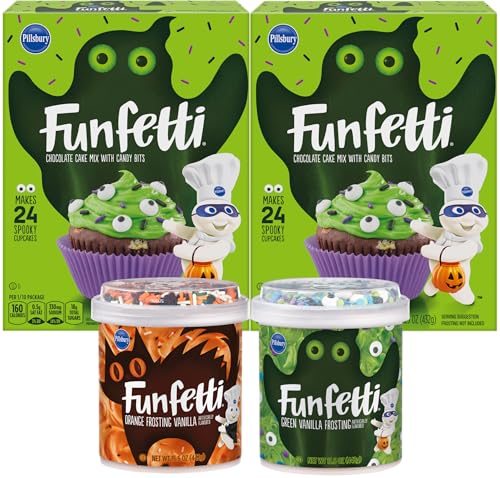
2 - boxes of Funfetti Chocolate Cake Mix and 1 of each Funfetti Vanilla flavor Frosting in Green and Orange
Ingredients
- 1 1/4 cups all-purpose flour
- 1 cup granulated sugar
- 1/4 cup black cocoa powder
- 1/2 teaspoon baking soda
- 1/4 teaspoon salt
- 1/2 cup buttermilk
- 1/4 cup vegetable oil
- 1 large egg
- 2 teaspoons vanilla extract
- 1 tablespoon black food coloring
- 1 teaspoon white vinegar
- 1 cup black buttercream frosting
- Green sanding sugar
Instructions
- Preheat the oven to 350°F and grease a 6-inch round cake pan. Line the bottom with parchment.
- In a medium bowl, whisk together the flour, sugar, black cocoa powder, baking soda, and salt.
- In a separate bowl, whisk the buttermilk, vegetable oil, egg, vanilla extract, black food coloring, and white vinegar until smooth.
- Pour the wet mixture into the dry ingredients and stir until just combined and no dry streaks remain.
- Transfer the batter to the prepared pan and smooth the top. Bake for 28 to 32 minutes, until a toothpick inserted in the center comes out clean.
- Cool the cake in the pan for 10 minutes, then turn it out onto a wire rack to cool completely.
- Once cool, spread the black buttercream frosting evenly over the top and sides. Sprinkle green sanding sugar over the surface while the frosting is still soft.
Extra Tips
Use room-temperature buttermilk and egg so the batter mixes evenly and bakes flat. If the black cocoa tastes slightly bitter, add an extra 1/2 teaspoon of sugar to the frosting. Store leftovers in an airtight container at room temperature for up to two days. Course: Dessert Cuisine: American Equipment: Mixing bowls, 6-inch cake pan, whisk, wire rack
Spiderweb Caramel Apple Bundt Cake
This bundt cake brings together tender apple pieces and warm cinnamon in a moist crumb, finished with a glossy caramel glaze and a simple chocolate spiderweb on top. It suits Halloween gatherings or fall baking days when you want something festive but still straightforward to make at home. The texture stays soft inside with a slight chew from the apples, while the caramel adds richness and the web gives a playful spooky touch.

Serves 4 people.
Ingredients
- 1 1/2 cups all-purpose flour
- 3/4 cup granulated sugar
- 1/2 cup unsalted butter, softened
- 2 large eggs
- 2 medium apples, peeled and diced
- 1 teaspoon ground cinnamon
- 1 teaspoon baking powder
- 1/4 teaspoon salt
- 1/2 cup caramel sauce
- 1/4 cup semisweet chocolate chips
Instructions
- Preheat the oven to 350°F and grease a small bundt pan.
- In a mixing bowl, cream the softened butter and sugar until light. Add the eggs one at a time and mix until combined.
- Stir in the diced apples, cinnamon, and salt.
- In a separate bowl, whisk the flour with the baking powder. Gradually add the dry mix to the wet ingredients and stir until a thick batter forms.
- Spoon the batter into the prepared pan and smooth the top. Bake for 35 to 40 minutes until a toothpick inserted in the center comes out clean.
- Let the cake cool in the pan for 10 minutes, then turn it out onto a wire rack to cool completely.
- Once cool, drizzle the caramel sauce evenly over the top and sides of the cake.
- Melt the chocolate chips in a small bowl in the microwave in 20-second bursts, stirring between each. Spoon the melted chocolate into a piping bag or zip-top bag with a tiny corner snipped off. Pipe a spiderweb pattern over the caramel layer and let it set.
Extra Tips
Use firm apples like Granny Smith so they hold their shape and add a slight tart note against the sweet caramel. If the chocolate sets too quickly while piping, warm the bag briefly between your hands. Store any leftovers covered at room temperature for up to two days; the caramel stays glossy and the web holds its shape. Course: Dessert Cuisine: American Equipment: Bundt Pan, Mixing Bowl, Wire Rack
Bloody Orange Creamsicle Sheet Cake
This sheet cake brings the classic orange and vanilla creamsicle flavor into a Halloween setting with blood oranges that add a natural red tint and a hint of tartness. The moist crumb pairs with a glossy glaze that creates a dripping effect for a spooky finish. It suits casual gatherings or a themed dessert table without much fuss.
The cake stays simple to make in one pan and delivers bright citrus notes against a creamy vanilla base. Blood orange slices on top reinforce the visual while keeping the flavor consistent from bite to bite.

Serves 4 people.
Ingredients
- 1 cup all-purpose flour
- 1/2 cup granulated sugar
- 1 teaspoon baking powder
- 1/4 teaspoon salt
- 1/2 cup blood orange juice
- 1/4 cup vegetable oil
- 2 large eggs
- 1 teaspoon vanilla extract
- 1 cup powdered sugar
- 2 tablespoons blood orange juice
- Blood orange slices
Instructions
- Preheat the oven to 350 degrees and line an 8×8 inch pan with parchment paper.
- In a mixing bowl, whisk together the flour, granulated sugar, baking powder, and salt.
- Add the blood orange juice, vegetable oil, eggs, and vanilla extract to the dry ingredients and stir until the batter is smooth.
- Pour the batter into the prepared pan and bake for 25 minutes or until a toothpick comes out clean.
- Cool the cake in the pan for 10 minutes, then transfer it to a wire rack to finish cooling.
- In a small bowl, stir the powdered sugar with 2 tablespoons blood orange juice until a thick but pourable glaze forms.
- Drizzle the glaze over the cooled cake so it runs down the sides.
- Arrange blood orange slices across the top before slicing and serving.
Extra Tips
Use freshly squeezed blood orange juice for the brightest color in both the batter and glaze. If the glaze thickens too much while sitting, add a few drops of juice to loosen it before drizzling. Store leftovers covered at room temperature for up to two days. Course: Dessert Cuisine: American Equipment: Mixing Bowl, 8×8 Inch Pan, Wire Rack
Ghost Meringue Lemon Chiffon Cake
This cake pairs a light, citrusy chiffon base with piped meringue ghosts that brown slightly in the oven. It suits Halloween gatherings or any fall dessert table where you want something festive but not overly heavy. The chiffon stays tender and lemon-forward while the meringue delivers a crisp, sweet contrast.

Serves 4 people.
Ingredients
- ¾ cup all-purpose flour
- ½ cup granulated sugar
- 1 tsp baking powder
- ¼ tsp salt
- 2 large egg yolks
- ¼ cup vegetable oil
- ¼ cup fresh lemon juice
- Zest of 1 lemon
- 4 large egg whites
- ½ tsp cream of tartar
- ½ cup granulated sugar
- ½ tsp vanilla extract
Instructions
- Preheat the oven to 325°F and line a small 8-inch round cake pan with parchment.
- In a medium bowl, whisk together the flour, ½ cup granulated sugar, baking powder, and salt.
- In another bowl, mix the egg yolks, vegetable oil, lemon juice, and lemon zest until smooth. Stir the wet mixture into the dry ingredients until just combined.
- In a clean bowl, beat 2 of the egg whites with ¼ tsp cream of tartar until soft peaks form. Gently fold these whites into the batter. Pour the batter into the prepared pan and bake for 25 minutes, or until a toothpick comes out clean. Let the cake cool in the pan.
- Raise the oven temperature to 200°F. In a clean bowl, beat the remaining 2 egg whites with the remaining ¼ tsp cream of tartar until foamy. Gradually add the remaining ½ cup granulated sugar and the vanilla extract. Continue beating until stiff, glossy peaks form.
- Transfer the meringue to a piping bag fitted with a round tip. Pipe ghost shapes directly onto the cooled cake. Bake the decorated cake for 45 minutes to set the meringue. Cool before serving.
Extra Tips
Whip the meringue just until stiff peaks form so the ghosts hold their shape without spreading. If you prefer softer peaks for a fluffier look, reduce the final bake time by 10 minutes. Leftovers keep in an airtight container at room temperature for one day. Course: Dessert Cuisine: American Equipment: Mixing bowls, Electric mixer, 8-inch cake pan, Piping bag, Oven
Poisoned Apple Red Velvet Dome Cake
This red velvet dome cake turns the classic poisoned apple idea into a simple dessert for a small group. The moist cake holds a warm apple filling that gives it a juicy center. A shiny red glaze on the outside makes each dome look like a glossy apple ready for Halloween.
The texture stays soft with a light cocoa note from the red velvet. Cinnamon in the filling adds a cozy contrast to the sweet glaze. It suits a Halloween dinner or a themed gathering where you want something eye-catching but not too complicated.

Serves 4 people.
Ingredients
- 1 cup all-purpose flour
- 3/4 cup granulated sugar
- 1 tablespoon unsweetened cocoa powder
- 1/2 teaspoon baking soda
- 1/4 teaspoon salt
- 1/2 cup buttermilk
- 1/4 cup vegetable oil
- 1 tablespoon red food coloring
- 1 teaspoon vanilla extract
- 1 teaspoon white vinegar
- 1 large egg
- 2 medium apples, peeled and diced
- 2 tablespoons brown sugar
- 1/2 teaspoon ground cinnamon
- 1 cup powdered sugar
- 2 tablespoons milk
- Extra red gel food coloring
Instructions
- Combine the diced apples, brown sugar, and cinnamon in a small saucepan. Cook over medium heat for 5 minutes until the apples soften, then set the filling aside to cool.
- In a mixing bowl, whisk together the flour, granulated sugar, cocoa powder, baking soda, and salt. In a second bowl, mix the buttermilk, vegetable oil, red food coloring, vanilla extract, white vinegar, and egg until smooth.
- Pour the wet mixture into the dry ingredients and stir until just combined. Grease four small dome molds or ramekins and fill each one halfway with batter.
- Spoon a tablespoon of the cooled apple filling into the center of each mold, then cover with the remaining batter. Bake at 350°F for 22 minutes or until a toothpick comes out clean.
- Let the domes cool in the molds for 10 minutes, then turn them out onto a wire rack. Mix the powdered sugar, milk, and enough extra red gel food coloring to reach a bright red shade. Spoon the glaze over each cooled dome and let it set.
Extra Tips
Use a light coat of oil in the molds so the domes release cleanly without tearing the red velvet surface. If the glaze looks too thick, add a teaspoon of milk at a time until it flows smoothly over the curves. These cakes keep well in an airtight container at room temperature for one day. Course: Dessert Cuisine: American Equipment: Mixing bowls, small saucepan, dome molds or ramekins, wire rack
Haunted Forest Matcha Layer Cake
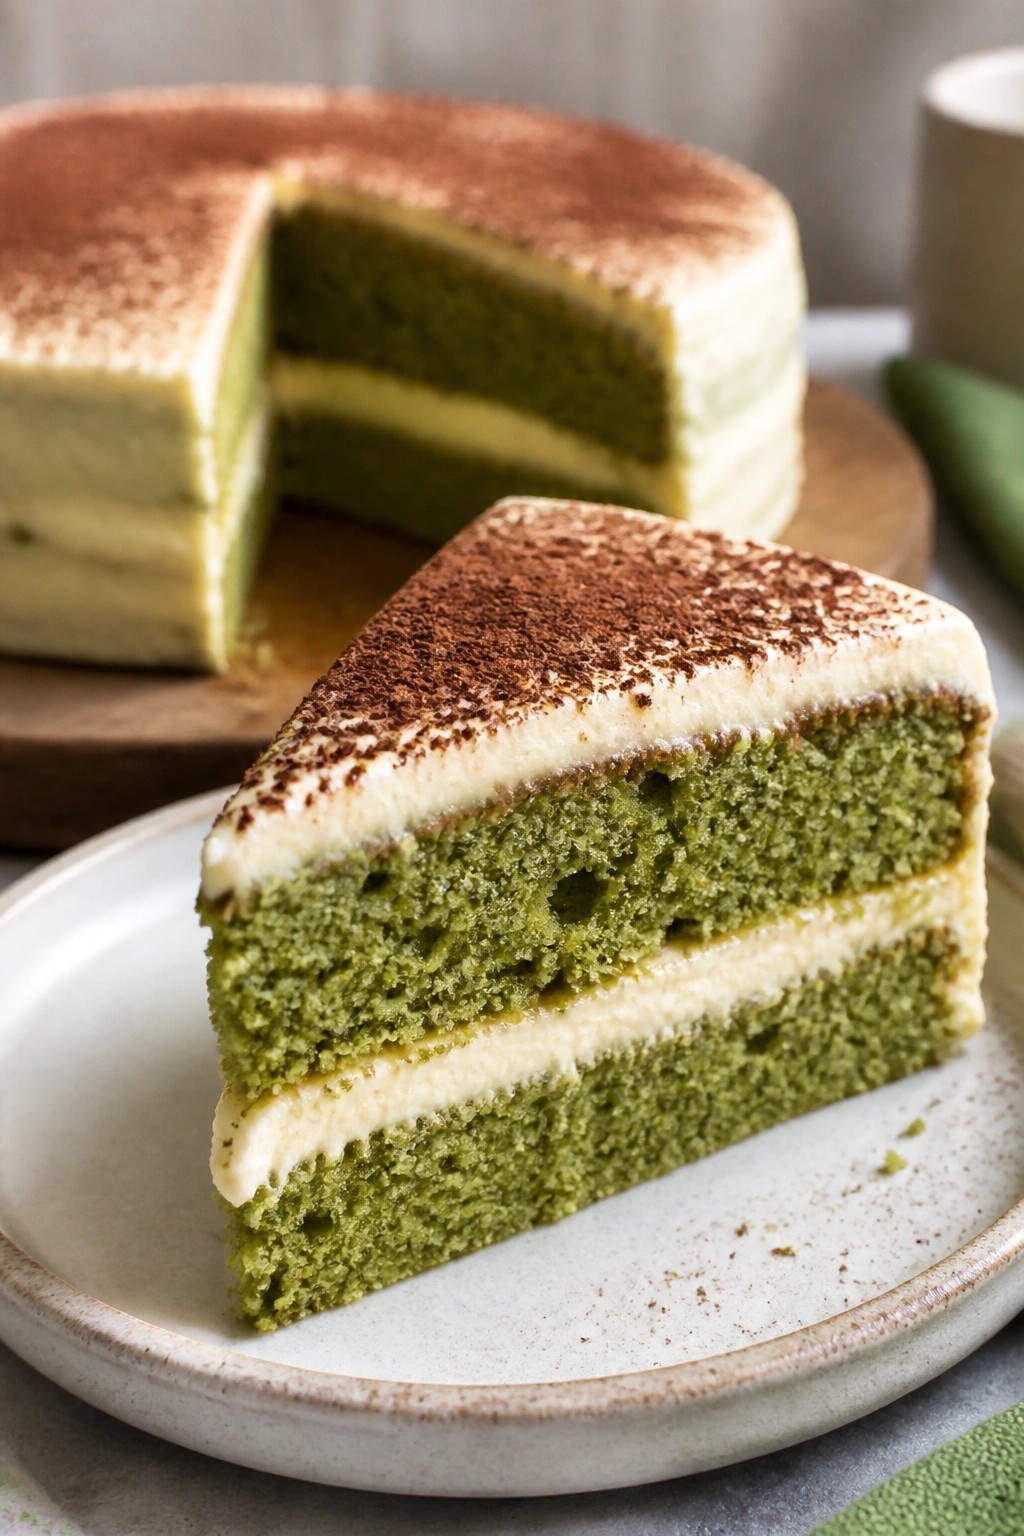
This matcha layer cake brings a subtle earthy flavor and soft green color that fits right into a Halloween spread. The two layers stay light and moist, while the cream cheese frosting adds a gentle tang that balances the matcha. It works well for small gatherings or as a centerpiece dessert when you want something a little different from chocolate or pumpkin.
The finished cake has a tender crumb and a smooth finish. A light dusting of cocoa gives it a forest-floor look without extra work.
Serves 4 people.
Ingredients
- 1 cup all-purpose flour
- 2 tablespoons matcha powder
- 3/4 cup granulated sugar
- 1 teaspoon baking powder
- 1/2 teaspoon salt
- 1/2 cup unsalted butter, softened
- 2 large eggs
- 1/2 cup whole milk
- 1 teaspoon vanilla extract
- 1/2 cup unsalted butter, softened
- 4 ounces cream cheese, softened
- 1 cup powdered sugar
- 1 tablespoon matcha powder
- 2 tablespoons cocoa powder
Instructions
- Preheat the oven to 350°F and grease two 6-inch round cake pans. Line the bottoms with parchment paper.
- In a mixing bowl, whisk together the flour, 2 tablespoons matcha powder, granulated sugar, baking powder, and salt.
- Add the first 1/2 cup softened butter, eggs, milk, and vanilla extract to the dry ingredients. Beat on medium speed until the batter is smooth and evenly green.
- Divide the batter between the prepared pans. Bake for 22 to 25 minutes, until a toothpick inserted in the center comes out clean. Cool the layers in the pans for 10 minutes, then turn them out onto a wire rack to cool completely.
- For the frosting, beat the remaining 1/2 cup softened butter and cream cheese until creamy. Gradually add the powdered sugar and 1 tablespoon matcha powder. Continue beating until the frosting is light and spreadable.
- Place one cooled cake layer on a plate. Spread a thin layer of frosting over the top. Set the second layer in place and cover the top and sides with the remaining frosting.
- Use a fine mesh sieve to dust the cocoa powder lightly over the top of the cake for contrast.
Extra Tips
Chill the cake for 20 minutes after frosting so the layers hold together when sliced. If the matcha tastes too grassy, a pinch more powdered sugar in the frosting will soften it. Leftovers keep covered in the refrigerator for two days. Bring slices to room temperature before serving so the frosting softens again. Course: Dessert Cuisine: Japanese-Inspired Equipment: Mixing Bowl, Electric Mixer, Cake Pan, Oven
Zombie Brain Marble Loaf Cake
This marble loaf cake hides a spooky surprise with its red and chocolate swirls that resemble brain folds when sliced. It works well for Halloween gatherings or as a simple weekend bake that feels festive without much extra effort. The cake stays moist with a light vanilla base and subtle chocolate notes.

Serves 4 people.
Ingredients
- 1 cup all-purpose flour
- 1/2 cup granulated sugar
- 1/4 cup unsalted butter, softened
- 1 large egg
- 1/4 cup milk
- 2 tablespoons unsweetened cocoa powder
- 1 teaspoon baking powder
- 1/4 teaspoon salt
- 1 teaspoon vanilla extract
- Red food coloring
Instructions
- Preheat the oven to 350 degrees and grease a small loaf pan.
- Cream the butter and sugar together in a mixing bowl until light and fluffy.
- Beat in the egg and vanilla extract until fully combined.
- In a separate bowl, whisk together the flour, baking powder, and salt.
- Add the dry mixture to the wet ingredients in two parts, alternating with the milk, and stir until smooth.
- Divide the batter evenly into two bowls. Stir the cocoa powder into one bowl and add red food coloring to the other until it reaches a deep shade.
- Drop spoonfuls of each colored batter into the loaf pan, alternating colors, then run a knife through the batter a few times to create swirls.
- Bake for 35 to 40 minutes until a toothpick inserted in the center comes out clean. Cool in the pan for 10 minutes before removing.
Extra Tips
Let the cake cool fully before slicing so the red and chocolate swirls stay sharp. For a stronger brain effect, add a few extra drops of red coloring to the second batter. Store leftovers wrapped tightly at room temperature for up to two days. Course: Dessert Cuisine: American Equipment: Mixing Bowls, Loaf Pan, Whisk
Candy Corn Ombré Vanilla Cake
This cake brings candy corn colors to the table with three vanilla layers in yellow, orange, and white. The light crumb and simple buttercream make it a good choice for Halloween gatherings or small family desserts. It looks festive without needing advanced decorating skills.

Serves 4 people.
Ingredients
- 1 1/2 cups all-purpose flour
- 1 cup granulated sugar
- 1/2 cup unsalted butter, softened
- 2 large eggs
- 2 teaspoons vanilla extract
- 1/2 cup milk
- 1 1/2 teaspoons baking powder
- 1/4 teaspoon salt
- Yellow food coloring
- Orange food coloring
- 1/2 cup unsalted butter, softened (for frosting)
- 2 cups powdered sugar
- 2 tablespoons milk (for frosting)
- Candy corn pieces
Instructions
- Preheat the oven to 350°F and grease three 6-inch round cake pans.
- In a large bowl, cream the 1/2 cup softened butter with the granulated sugar until light. Add the eggs one at a time, then mix in 2 teaspoons vanilla extract.
- In a separate bowl, whisk together the flour, baking powder, and salt. Add the dry mixture to the wet mixture in two parts, alternating with the 1/2 cup milk, and stir until just combined.
- Divide the batter evenly into three bowls. Leave one bowl plain, stir yellow food coloring into the second bowl, and stir orange food coloring into the third bowl.
- Pour each colored batter into its own prepared pan and bake for 18 to 22 minutes, or until a toothpick comes out clean. Cool the layers completely on a wire rack.
- For the frosting, beat the remaining 1/2 cup softened butter until smooth, then gradually add the powdered sugar and 2 tablespoons milk until creamy.
- Place the yellow layer on a plate, spread a thin layer of frosting on top, add the orange layer, frost again, and finish with the white layer. Cover the outside with the remaining frosting and press candy corn pieces around the base.
Extra Tips
Stack the layers in color order from bottom to top so the gradient shows clearly when sliced. If the frosting feels too thick, add milk one teaspoon at a time until it spreads easily. Store leftovers in an airtight container at room temperature for up to two days. Course: Dessert Cuisine: American Equipment: Mixing bowls, Electric mixer, Cake pans, Oven, Wire rack
Bat Wing Black Sesame Chocolate Cake
This black sesame chocolate cake brings a nutty depth to classic chocolate flavor while keeping a dark, moody look that suits Halloween. The ground sesame adds a subtle toasted note that pairs well with cocoa, and the cake stays moist enough to serve at a small gathering without feeling heavy.
It works best as a centerpiece for an evening dessert table or a casual get-together with friends. The finished cake has a tender crumb and a rich chocolate taste balanced by the earthy sesame.

Serves 4 people.
Ingredients
- ¾ cup all-purpose flour
- ½ cup ground black sesame seeds
- ½ cup cocoa powder
- ¾ cup sugar
- 1 teaspoon baking powder
- ½ teaspoon baking soda
- ½ teaspoon salt
- 2 large eggs
- ½ cup milk
- ⅓ cup vegetable oil
- 1 teaspoon vanilla extract
- 6 ounces dark chocolate
- ½ cup heavy cream
- Extra black sesame seeds for garnish
Instructions
- Heat the oven to 350°F and line a small loaf pan or 8-inch round pan with parchment.
- In a large bowl, whisk together the flour, ground black sesame seeds, cocoa powder, sugar, baking powder, baking soda, and salt.
- In a separate bowl, beat the eggs with the milk, oil, and vanilla until smooth.
- Pour the wet mixture into the dry ingredients and stir just until no streaks remain.
- Transfer the batter to the prepared pan and bake for 30 to 35 minutes, or until a toothpick inserted in the center comes out with a few moist crumbs.
- Let the cake cool in the pan for 10 minutes, then remove it to a rack to cool completely.
- While the cake cools, chop the dark chocolate and place it in a heatproof bowl. Heat the cream until it just begins to simmer, then pour it over the chocolate and let it sit for one minute before stirring until glossy.
- Spread the ganache over the cooled cake and sprinkle extra black sesame seeds on top. Shape small spoonfuls of remaining ganache into wing forms and press them into the sides before the ganache sets.
Extra Tips
Grind the black sesame seeds finely before measuring so they blend evenly into the batter without adding grit. If the ganache thickens too much while you shape the wings, warm it gently over a bowl of hot water to loosen it again. Store any leftovers in an airtight container at room temperature for up to two days. Course: Dessert Cuisine: American Equipment: Mixing Bowl, Whisk, Loaf Pan, Oven, Heatproof Bowl
Monster Eyeball Funfetti Celebration Cake
This cake adds a playful touch to Halloween with its bright sprinkles and scattered candy eyes on top. It suits a small gathering or family night when you want something festive without too much fuss. The vanilla layers stay light and tender, with pops of color from the sprinkles and a simple buttercream that sets off the monster decorations.

Serves 4 people.
Ingredients
- 1 1/2 cups all-purpose flour
- 3/4 cup granulated sugar
- 1 1/2 teaspoons baking powder
- 1/4 teaspoon salt
- 1/2 cup unsalted butter, softened
- 2 large eggs
- 1/2 cup milk
- 1 teaspoon vanilla extract
- 1/3 cup rainbow sprinkles
- 1 1/2 cups powdered sugar
- 1/4 cup unsalted butter, softened
- 1 tablespoon milk
- 1/2 teaspoon vanilla extract
- 1/2 cup assorted candy eyeballs
Instructions
- Preheat the oven to 350 degrees F and grease two 6-inch round cake pans.
- In a large bowl, whisk together the flour, granulated sugar, baking powder, and salt.
- Add the softened butter, eggs, milk, and vanilla extract. Beat with a hand mixer until the batter is smooth.
- Gently fold in the rainbow sprinkles until they are evenly spread through the batter.
- Divide the batter between the two pans and bake for 22 to 25 minutes, until a toothpick comes out clean. Let the cakes cool in the pans for 10 minutes, then turn them out onto a wire rack to cool completely.
- In a medium bowl, beat the powdered sugar with the softened butter, milk, and vanilla extract until the frosting is creamy and spreadable.
- Place one cake layer on a plate and spread a thin layer of frosting over the top. Set the second layer on top and cover the whole cake with the remaining frosting.
- Press the candy eyeballs into the frosting while it is still soft, scattering them across the top and sides.
Extra Tips
Press the eyeballs in right after frosting so they stick without sinking. If the sprinkles start to bleed color while mixing, stop stirring and finish folding by hand. Store leftovers in an airtight container at room temperature for up to two days. Course: Dessert Cuisine: American Equipment: Mixing Bowls, Hand Mixer, 6-inch Cake Pans, Oven