

Halloween is coming up and Rice Krispie treats are an easy base for making something fun at home. These recipes use simple add ins like food coloring and candy to create spooky shapes and themes. You will find 12 different ideas that work for parties or after school snacks. Most of them need basic pantry items and take under 30 minutes to put together. Pick the ones that match what you already have on hand.
Helpful Tips Before You Start
These tips will help your Rice Krispie treats hold their spooky shapes and colors.
Recommended Products

✿Food-Grade Silicone: The popsicle molds are made of high quality silicone. The silicone is soft and the surface of the mold is smooth, and are healthy for baby kids and adults, and is environmentally friendly.

Specially designed for Halloween theme, creating an immersive party atmosphere: The 3D ghost-shaped silicone mold is tailored for Halloween, the ghost-shaped food can be directly used as table or scene decorations, adding festive elements to party food and enhancing overall decoration effects, combining practicality with aesthetics, and adding interesting interactive elements to Halloween.

Halloween Ghost Design: this Halloween spooky ghost cake pop mold set comes with 3 different ghost designs, bringing eerie seasonal fun to home baking; It supports crafting treats, chocolate lollipops, fondant pops and more, letting you craft festive desserts full of haunted Halloween holiday vibes
Melt Over Low Heat
Combine butter and marshmallows in a large pot. Stir constantly over low heat until fully melted to prevent hard spots.
Add Gel Coloring Early
Stir in gel food coloring right after the marshmallows melt. This gives even spooky shades without streaking the cereal.
Grease Hands and Tools
Lightly coat your hands and any cookie cutters with butter or oil. The mixture will not stick when you press or cut shapes.
Cool Before Cutting
Let the treats set at room temperature for at least 30 minutes. They slice cleanly into ghosts, bats, or pumpkins.
Store in One Layer
Place finished treats in a single layer inside an airtight container. This keeps decorations from smearing for up to three days.
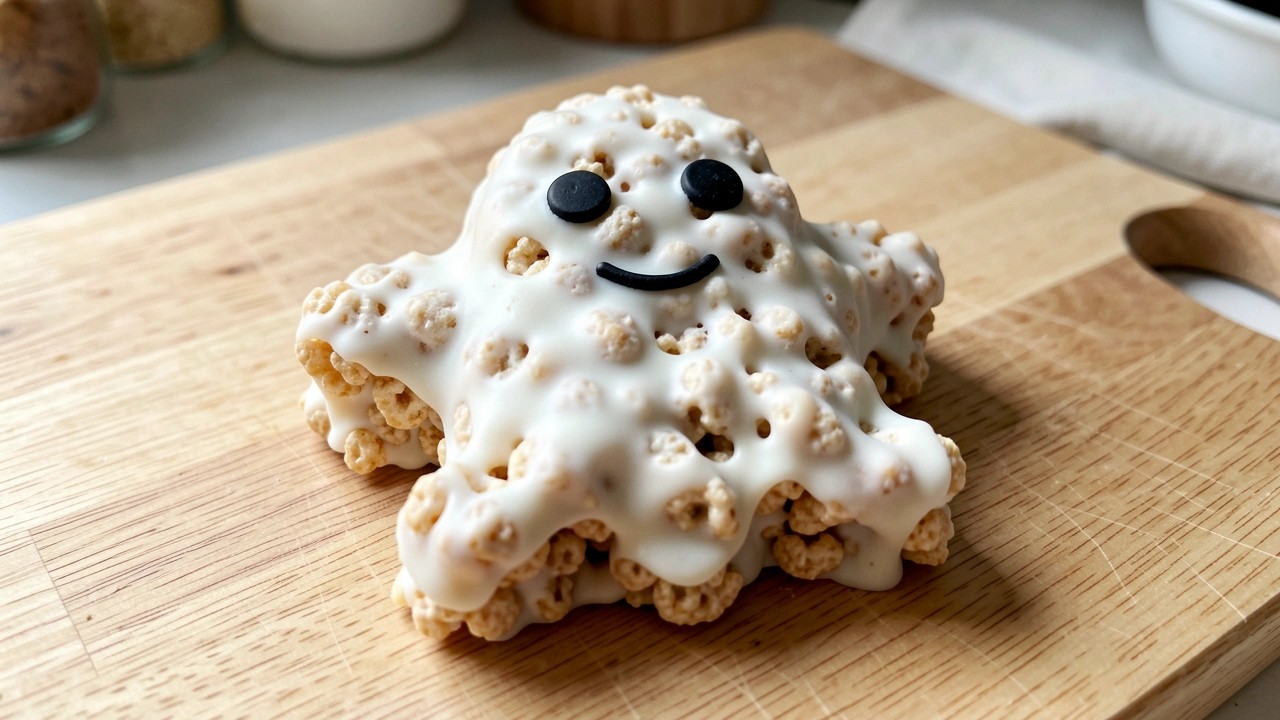
Ghostly White Chocolate Rice Krispie Treats with Marshmallow Eyes
These treats give the classic Rice Krispie square a simple white chocolate update that makes them look like little ghosts. They work well for a quick Halloween activity with kids or as a last-minute party snack. The base stays chewy while the white chocolate adds a mild sweetness and pale color that stands out on a dessert table.

Serves 4 people.
Recommended Products

BOLD & TANGY: Trolli Mini Sour Brite Crawlers (18 oz, 30 ct) include cherry-lemon, strawberry-grape & orange-lime flavors. They’re bold & tangy with a twist that leaves your taste buds wanting more

👁️ Fun Eyeball-Shaped Gummies-4D eyeball-shaped gummy candies with a playful Halloween design, featuring assorted colors and detailed textures.
Dive into the spooky spirit of Halloween with our 3D Eyeball Gummies, featuring incredibly realistic eye-shaped candies crafted with a three-layer design for maximum realism and fun.
Ingredients
- 3 tablespoons unsalted butter
- 4 cups mini marshmallows, divided
- 3 cups Rice Krispies cereal
- 1 cup white chocolate chips
- 8 mini marshmallows
Instructions
- Line a small baking dish with parchment paper and set it aside.
- Melt the butter in a large saucepan over low heat. Add 3 cups of the mini marshmallows and stir until completely smooth.
- Remove the pan from the heat and stir in the Rice Krispies cereal until evenly coated.
- Let the mixture cool for 2 minutes, then fold in the white chocolate chips so they melt slightly into the warm cereal.
- Press the mixture firmly into the prepared dish in an even layer. Allow it to set at room temperature for 20 minutes.
- Cut the cooled slab into 4 rectangles. Place 2 mini marshmallows on top of each rectangle to form eyes.
Extra Tips
Press the cereal mixture firmly so the bars hold their shape when cut. If the white chocolate chips do not melt fully into the warm base, place the dish in a 200°F oven for 2 minutes then smooth the surface with a spatula. Store leftovers in an airtight container at room temperature for up to 2 days. Course: Dessert Cuisine: American Equipment: Large saucepan, Mixing bowl, Baking dish, Parchment paper
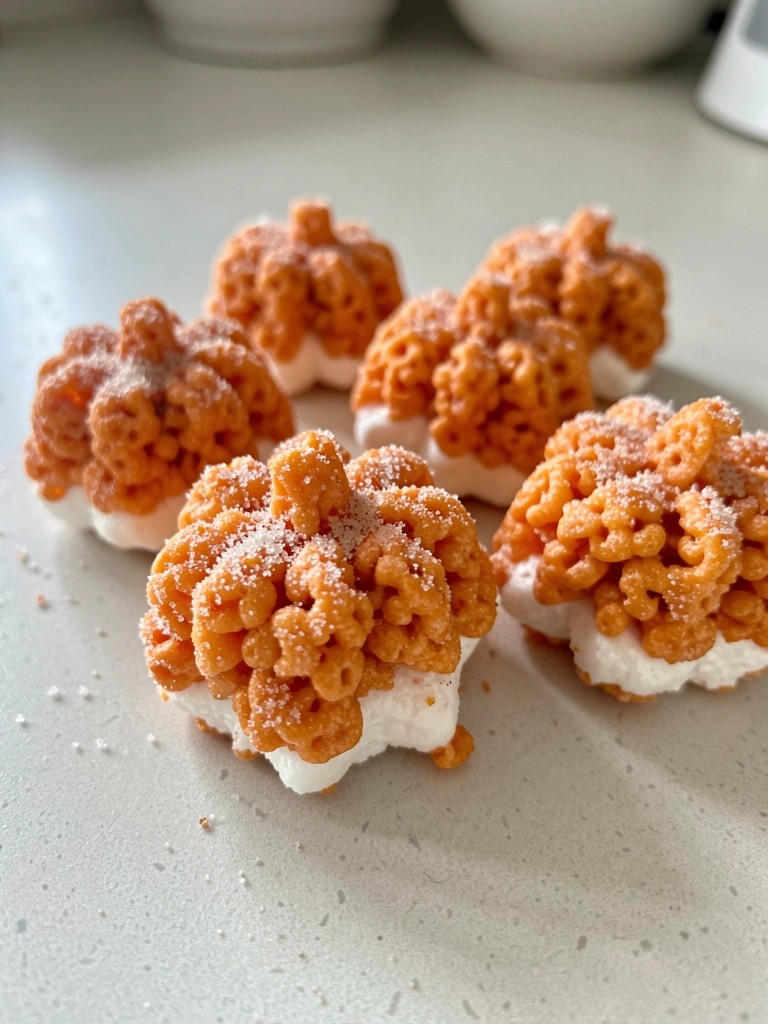
Pumpkin-Shaped Orange Rice Krispie Treats Rolled in Cinnamon Sugar
These treats bring a simple fall twist to classic Rice Krispie squares by adding bright orange color and a cinnamon sugar coating. They work well for Halloween parties or casual family nights when you want something quick that still feels festive. The result is a chewy base with a light crunch from the cereal and a sweet, spiced finish on the outside.
Serves 4 people.
Ingredients
- 3 cups Rice Krispies cereal
- 3 tablespoons butter
- 20 large marshmallows
- 6 drops orange food coloring
- 1 teaspoon vanilla extract
- 1/4 cup granulated sugar
- 2 teaspoons ground cinnamon
Instructions
- Line a baking sheet with parchment paper and set it aside.
- Melt the butter in a large saucepan over low heat. Add the marshmallows and stir until fully melted and smooth.
- Remove the pan from heat. Stir in the orange food coloring and vanilla extract until the mixture is evenly orange.
- Add the Rice Krispies cereal to the marshmallow mixture and stir quickly until every piece is coated.
- Let the mixture cool for one minute until it is safe to handle. Lightly butter your hands, then divide the mixture into four equal portions and shape each into a small pumpkin form.
- Stir the granulated sugar and ground cinnamon together in a shallow bowl. Roll each pumpkin in the cinnamon sugar until fully coated on all sides.
- Place the coated treats on the prepared baking sheet and let them set for 15 minutes before serving.
Extra Tips
Work quickly when shaping the pumpkins so the mixture does not harden too soon. If the treats feel too sticky while rolling, lightly coat your hands with butter again. Store any leftovers in an airtight container at room temperature for up to two days to keep the coating crisp. Course: Dessert Cuisine: American Equipment: Large Saucepan, Mixing Bowl, Baking Sheet
Bat-Winged Dark Chocolate Rice Krispie Treats with Candy Eyes
These treats bring a dark chocolate flavor to classic Rice Krispie bars while adding simple bat details that fit right into a Halloween spread. They work well for an afternoon baking session with kids or as a last-minute party addition. The bars stay chewy with a crisp snap from the cereal and a smooth chocolate coating that holds the candy eyes in place.

Serves 4 people.
Ingredients
- 3 tablespoons unsalted butter
- 4 cups mini marshmallows
- 6 cups Rice Krispies cereal
- 1 cup dark chocolate chips
- 1/2 cup dark chocolate chips
- 8 candy eyes
Instructions
- Melt the butter in a large saucepan over medium heat. Add the mini marshmallows and stir until fully melted and smooth. Stir in the 1 cup dark chocolate chips until they melt into the marshmallow mixture. Remove the pan from heat and quickly fold in the Rice Krispies cereal until evenly coated. Press the mixture into a greased 8×8 pan and let it cool for 20 minutes. Melt the remaining 1/2 cup dark chocolate chips in a microwave-safe bowl in 20-second bursts, stirring between each. Spoon the melted chocolate into a small zip-top bag, snip a tiny corner, and pipe bat wing shapes onto parchment paper. Let the wings set for 10 minutes. Cut the cooled bars into four rectangles. Attach two chocolate wings to each bar with a dab of melted chocolate and press two candy eyes onto the front of each treat.
Extra Tips
Pipe the bat wings a little thicker so they hold their shape when lifted. If the chocolate starts to firm up while piping, warm the bag briefly in your hands. Store the finished treats in a single layer in an airtight container at room temperature for up to two days. Course: Dessert Cuisine: American Equipment: Large saucepan, Mixing spoon, 8×8 pan, Microwave-safe bowl, Piping bag
Green Witch’s Brew Rice Krispie Treats Mixed with Gummy Worms
These treats bring a fun green color to the table along with chewy gummy worms tucked throughout. The bright hue and creepy mix-ins make them a good choice for Halloween gatherings or kids parties where you want something simple yet themed.
The base stays classic with crispy cereal and gooey marshmallow, while the green tint and worms add the spooky twist. The result has a soft chew from the marshmallows balanced by the slight crunch of the cereal and the stretchy texture of the worms.

Serves 4 people.
Recommended Products

Halloween Themed Treats: Original marshmallow Rice Krispies Treats featuring festive Halloween packaging, perfect for seasonal celebrations, trick-or-treaters, and holiday gatherings throughout the spooky season

Rice Krispies Treats cereal bars are delicious snacks for everyday family moments; Perfectly sized, ready-to-enjoy treat
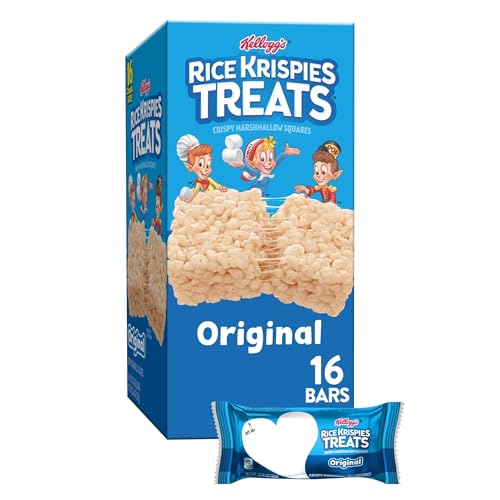
Rice Krispies Treats marshmallow cereal bars for everyday family moments; Individually wrapped snacks made with soft, marshmallowy flavor
Ingredients
- 3 tablespoons butter
- 3 cups mini marshmallows
- 4 drops green food coloring
- 3 cups Rice Krispies cereal
- 1/2 cup gummy worms
Instructions
- Melt the butter in a large saucepan over low heat. Add the mini marshmallows and stir until fully melted and smooth.
- Remove the pan from heat and stir in the green food coloring until the mixture turns an even green shade.
- Add the Rice Krispies cereal to the saucepan and stir quickly until every piece is coated.
- Let the mixture cool for two minutes, then fold in the gummy worms so they stay intact.
- Press the mixture evenly into a greased 8×8 pan using a spatula or lightly oiled hands. Allow it to set at room temperature for 30 minutes before cutting into bars.
Extra Tips
Press the gummy worms in gently near the end of mixing so they do not break apart or melt from residual heat. If the treats feel too sticky when cutting, run a knife under warm water first. Store leftovers in an airtight container at room temperature for up to two days to keep the cereal crisp. Course: Dessert Cuisine: American Equipment: Large saucepan, Spatula, 8×8 pan
Skeleton Bone Rice Krispie Treats Dipped in Vanilla Almond Bark
These treats turn classic Rice Krispie squares into bone shapes that fit right into a Halloween spread. The crisp cereal base holds up well after dipping, while the vanilla almond bark adds a smooth white coating that looks like bone. They work well for parties or as a simple project with kids.
The finished treats have a chewy center, a crisp outer layer, and a sweet vanilla finish from the bark. Dark chocolate lines give them a skeleton look without much extra work.

Serves 4 people.
Ingredients
- 3 tablespoons butter
- 4 cups mini marshmallows
- 6 cups Rice Krispies cereal
- 1 pound vanilla almond bark
- 1/4 cup dark chocolate chips
Instructions
- Line a baking sheet with parchment paper and set it aside.
- Melt the butter in a large saucepan over medium heat. Add the mini marshmallows and stir until fully melted and smooth.
- Remove the pan from heat and quickly stir in the Rice Krispies cereal until evenly coated.
- Let the mixture cool for two minutes, then shape it into 8 bone shapes by hand. Place the bones on the prepared baking sheet and let them set for 20 minutes.
- Break the vanilla almond bark into pieces and melt it in a microwave-safe bowl in 30-second bursts, stirring between each burst until smooth.
- Dip each bone into the melted almond bark, letting excess drip off, then return it to the baking sheet.
- Melt the dark chocolate chips in a small bowl using the microwave. Spoon the melted chocolate into a zip-top bag, snip a small corner, and pipe lines across the bones to create a skeleton look. Let the chocolate set before serving.
Extra Tips
Shape the bones while the mixture is still warm but cool enough to handle so they hold their form. If the almond bark thickens during dipping, warm it for a few seconds in the microwave. Store leftovers in an airtight container at room temperature for up to three days to keep the coating from getting sticky. Course: Dessert Cuisine: American Equipment: Large saucepan, Baking sheet, Parchment paper, Microwave-safe bowl
Spiderweb Black Cocoa Rice Krispie Treats with White Icing Designs
These treats use black cocoa to give the cereal base a true black color that sets off the white icing designs. They work well for Halloween parties or school events where you want something quick to assemble and easy to portion.
The finished squares stay chewy in the center with a light snap from the cereal. The cocoa adds a mild chocolate note without overpowering the marshmallow flavor.

Serves 4 people.
Ingredients
- 3 cups Rice Krispies cereal
- 3 cups mini marshmallows
- 2 tablespoons unsalted butter
- 2 tablespoons black cocoa powder
- 1/2 cup powdered sugar
- 2 tablespoons milk
- 1/2 teaspoon vanilla extract
Instructions
- Grease an 8×8 baking pan and set it aside.
- In a large saucepan, melt the butter over medium heat. Add the mini marshmallows and stir until fully melted and smooth.
- Remove the pan from heat and stir in the black cocoa powder until the mixture is evenly dark.
- Add the Rice Krispies cereal and stir quickly until every piece is coated.
- Press the mixture firmly into the prepared pan using a greased spatula or wax paper. Let it cool completely.
- In a small bowl, whisk together the powdered sugar, milk, and vanilla extract until smooth and pourable.
- Cut the cooled slab into four squares. Pipe or drizzle the white icing in concentric circles on each square, then drag a toothpick through the lines to form spiderweb patterns.
Extra Tips
Black cocoa gives the deepest color, so skip regular cocoa if you want the treats to look truly black. Pipe the icing with a small zip-top bag with one corner snipped for better control. Store any leftovers in an airtight container at room temperature for up to two days. Course: Dessert Cuisine: American Equipment: Large saucepan, 8×8 baking pan, Mixing bowl, Spatula, Toothpick
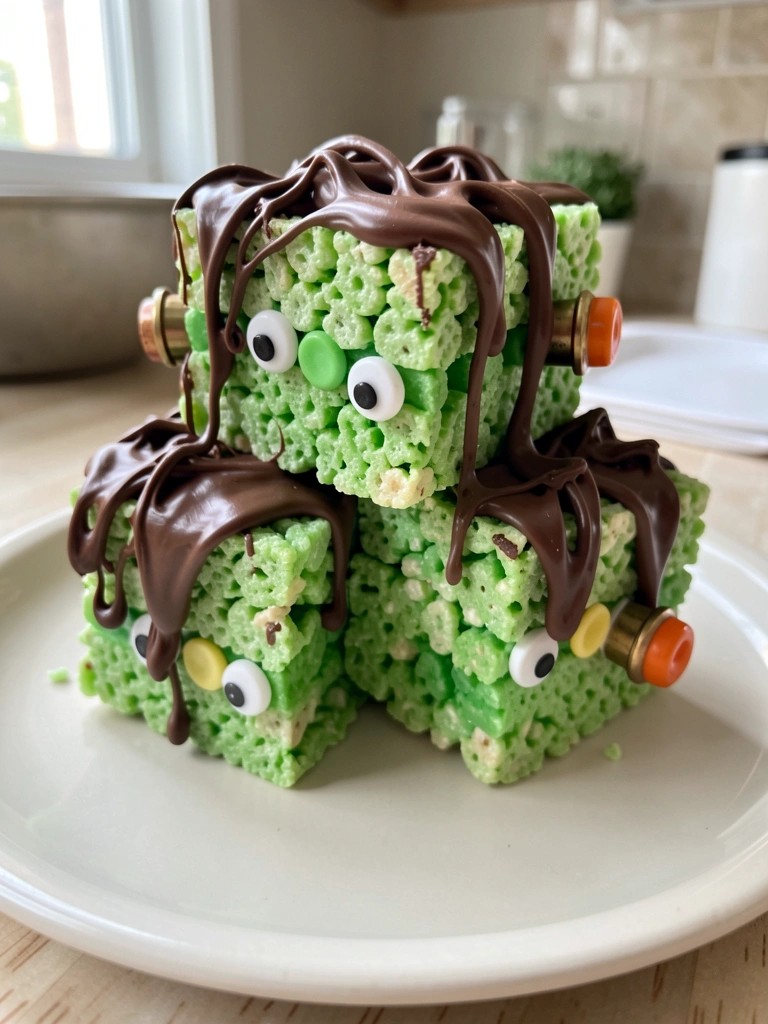
Frankenstein Green Rice Krispie Treats with Chocolate Hair and Candy Bolts
These treats stand out at Halloween gatherings because of their bright green color and playful Frankenstein details. They suit after-school snacks or party platters when you want something quick that still feels themed. The base stays chewy while the chocolate on top adds a slight crunch and richer flavor.
The finished squares hold their shape well enough to stack on a plate without sticking together.
Serves 4 people.
Ingredients
- 3 tablespoons unsalted butter
- 4 cups mini marshmallows
- 6 cups Rice Krispies cereal
- 10 drops green food coloring
- ½ cup semisweet chocolate chips
- 8 candy eyes
- 4 small candy bolts
Instructions
- Melt the butter in a large saucepan over medium heat. Add the mini marshmallows and stir until fully melted and smooth.
- Remove the pan from heat and stir in the green food coloring until the mixture turns an even shade.
- Add the Rice Krispies cereal and mix until every piece is coated.
- Press the mixture into a greased 8×8 pan in an even layer and let it cool for 15 minutes.
- Cut the cooled slab into four rectangles. Melt the chocolate chips in the microwave in 20-second bursts, stirring between each.
- Spread or drizzle the melted chocolate across the top of each rectangle to form the hair. Press two candy eyes and one candy bolt onto each treat while the chocolate is still soft.
Extra Tips
Press the treats firmly into the pan so they hold clean edges when cut. Use a zip-top bag with one corner snipped for neater chocolate lines if you want the hair to look stringy. Store any leftovers in an airtight container at room temperature for up to two days. Course: Dessert Cuisine: American Equipment: Large saucepan, Wooden spoon, 8×8 baking pan, Microwave-safe bowl
Layered Candy Corn Rice Krispie Treats in Orange, Yellow, and White
These treats stack three colored layers to mimic candy corn without any extra fuss. They work well for Halloween parties or a quick weekend project with kids. The bars stay chewy with a light crisp from the cereal.
The colors stay bright once set and the flavor stays simple and sweet. They slice cleanly when cooled and travel well in a lunchbox or on a dessert tray.

Serves 4 people.
Ingredients
- 3 tablespoons butter
- 4 cups mini marshmallows
- 3 cups Rice Krispies cereal
- Orange food coloring
- Yellow food coloring
Instructions
- Melt the butter in a large saucepan over low heat. Add the mini marshmallows and stir until fully melted and smooth.
- Remove the pan from heat. Divide the marshmallow mixture evenly into three bowls.
- Stir orange food coloring into the first bowl until the color looks even. Stir yellow food coloring into the second bowl until the color looks even. Leave the third bowl plain.
- Add 1 cup of Rice Krispies cereal to each bowl. Stir quickly until the cereal is coated.
- Press the plain white layer into the bottom of a small loaf pan lined with parchment. Add the yellow layer on top and press firmly. Finish with the orange layer and press again.
- Let the treats cool at room temperature for 30 minutes. Lift out of the pan and cut into four bars.
Extra Tips
Press each layer firmly before adding the next so the colors stay separate when sliced. Gel food coloring gives stronger shades than liquid drops. Store leftovers in an airtight container at room temperature for up to three days. Course: Dessert Cuisine: American Equipment: Saucepan, Mixing bowls, Loaf pan
Bloody Red Velvet Rice Krispie Treats Drizzled with Raspberry Sauce
These Bloody Red Velvet Rice Krispie Treats add a spooky touch to a familiar favorite. The cocoa and red coloring give the bars a red velvet taste and look, while the raspberry sauce creates a striking drizzle that fits right into a Halloween spread.
They suit a last-minute party tray or a simple weekend project with family. The finished bars stay chewy with a light snap, and the sauce adds a bright tart note that balances the sweetness.

Serves 4 people.
Ingredients
- 3 tablespoons unsalted butter
- 4 cups mini marshmallows
- 1 tablespoon unsweetened cocoa powder
- 1 teaspoon red food coloring
- 6 cups Rice Krispies cereal
- 1 cup fresh raspberries
- 2 tablespoons granulated sugar
- 1 tablespoon lemon juice
Instructions
- Grease an 8×8 inch pan and set it aside.
- Melt the butter in a large saucepan over medium heat.
- Add the marshmallows and stir until fully melted and smooth.
- Stir in the cocoa powder and red food coloring until the mixture turns an even red.
- Remove the pan from heat and fold in the Rice Krispies cereal until evenly coated.
- Press the mixture firmly into the prepared pan and let it cool completely.
- Combine the raspberries, sugar, and lemon juice in a small saucepan.
- Cook over medium heat, stirring often, until the berries break down and the sauce thickens slightly.
- Let the sauce cool for a few minutes, then drizzle it over the cooled treats before cutting into four pieces.
Extra Tips
Press the cereal mixture firmly so the bars hold their shape when you cut them. If the raspberry sauce thickens too much while cooling, stir in a teaspoon of water to loosen it for easier drizzling. Store any leftovers in an airtight container at room temperature for up to two days. Course: Dessert Cuisine: American Equipment: Large saucepan, Small saucepan, 8×8 inch pan, Mixing spoon
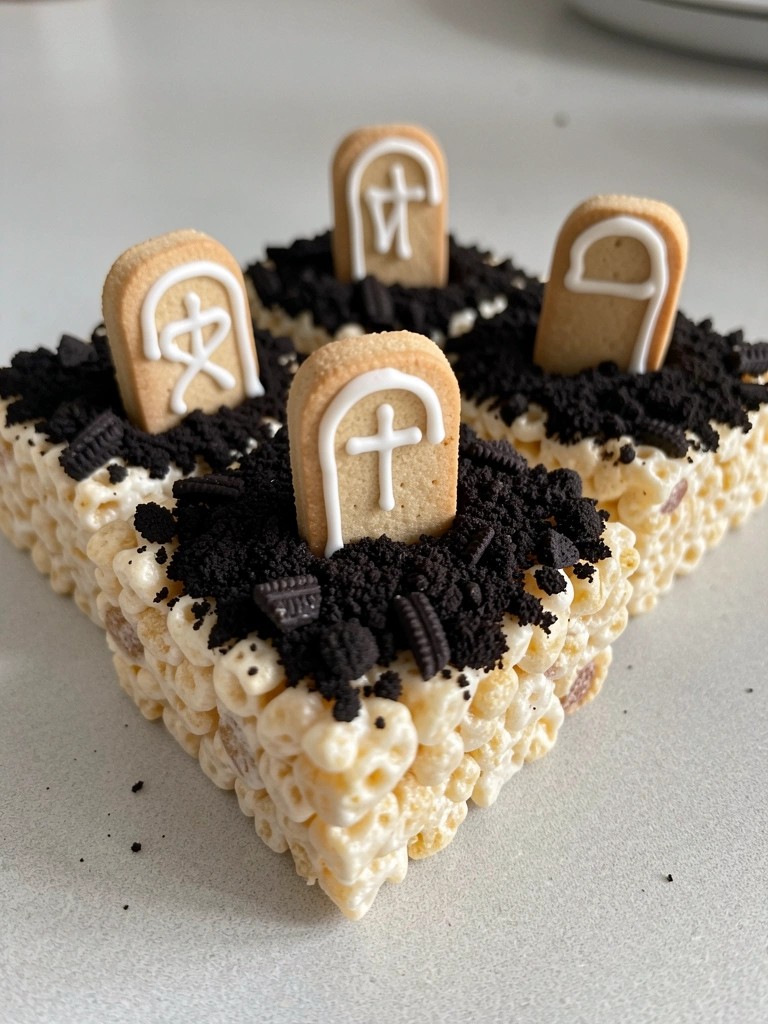
Graveyard Dirt Rice Krispie Treats Topped with Crushed Oreos and Tombstone Cookies
These treats turn classic Rice Krispie squares into a simple Halloween dessert. Crushed Oreos give the look of fresh dirt while the marshmallow base stays chewy and light. They work well for school parties or a quick weekend project with kids.
The finished bars have a crisp cereal texture, rich chocolate notes from the cookies, and a bit of sweetness from the frosting on the tombstones. The recipe scales easily if you need more than four servings.
Serves 4 people.
Ingredients
- 3 tablespoons unsalted butter
- 4 cups mini marshmallows
- 5 cups Rice Krispies cereal
- 12 Oreo cookies, divided
- 2 tablespoons white frosting
Instructions
- Line an 8-inch square pan with parchment paper and set it aside.
- In a large saucepan over medium heat, melt the butter. Add the mini marshmallows and stir until fully melted and smooth.
- Remove the pan from the heat. Stir in the Rice Krispies cereal until evenly coated.
- Crush 8 of the Oreo cookies into coarse crumbs. Fold most of the crumbs into the cereal mixture, reserving a small handful for topping.
- Press the mixture firmly into the prepared pan using a spatula or lightly greased hands. Sprinkle the reserved Oreo crumbs evenly over the top and press them in lightly.
- Cut the remaining 4 Oreo cookies in half to create 8 tombstone shapes. Pipe short messages onto each half with the white frosting. Let the frosting set for a few minutes.
- Slice the bars into 4 squares. Press two decorated tombstone cookies gently into the top of each square before serving.
Extra Tips
Press the Oreo crumbs into the surface right after spreading the mixture so they stick without falling off later. If the frosting is too thick to pipe, warm it for five seconds in the microwave. Store leftovers in an airtight container at room temperature for up to two days; the Oreo crumbs stay crisp and the tombstones do not soften. Course: Dessert Cuisine: American Equipment: Large saucepan, 8-inch square pan, Spatula
Jack-o’-Lantern Rice Krispie Treats Carved with Melted Candy Faces
These treats turn the standard Rice Krispie square into a simple Halloween shape. The orange color gives them a pumpkin look, while the melted candy creates clear faces on top. The base stays chewy and sweet with a light crunch from the cereal.
They suit an afternoon of making snacks with kids or adding something homemade to a party table. The process stays straightforward once the base is mixed, and the candy faces add detail without extra tools.

Serves 4 people.
Ingredients
- 3 tablespoons butter
- 4 cups mini marshmallows
- 6 cups Rice Krispies cereal
- 1 teaspoon orange gel food coloring
- 1/2 cup black candy melts
- 1 teaspoon vegetable oil
Instructions
- Melt the butter in a large saucepan over low heat.
- Add the mini marshmallows and stir until fully melted and smooth.
- Remove the pan from heat and stir in the orange gel food coloring until the color is even.
- Add the Rice Krispies cereal and mix until every piece is coated.
- Lightly grease your hands and shape the warm mixture into four rounded pumpkin forms. Place them on a baking sheet to cool and firm.
- Combine the black candy melts and vegetable oil in a microwave-safe bowl. Heat in 20-second bursts, stirring between each, until smooth.
- Spoon the melted candy into a piping bag or zip-top bag with one corner snipped, then pipe simple faces onto each cooled treat.
Extra Tips
Work quickly when shaping the warm cereal mixture so the treats hold their rounded form. If the candy melts thicken while piping, warm the bag briefly in your hands or return it to the microwave for a few seconds. Store any leftovers in an airtight container at room temperature for up to two days to keep the candy faces from softening. Course: Dessert Cuisine: American Equipment: Large saucepan, Baking sheet, Microwave-safe bowl, Piping bag
Vampire Bite Rice Krispie Treats Filled with Cherry Marshmallow Centers
These treats hide a soft cherry marshmallow center inside a crisp Rice Krispie shell. The contrast between the chewy middle and the crunchy outside makes them a hit at Halloween gatherings or movie nights. The red accents give them a playful bite mark look without extra fuss.
They work well when you want a simple handheld dessert that feels a bit different from plain squares. The cherry flavor stays mild and pairs nicely with the toasted cereal taste.

Serves 4 people.
Ingredients
- 3 tablespoons unsalted butter
- 5 cups mini marshmallows, divided
- 1 teaspoon cherry extract
- 3 cups Rice Krispies cereal
- 4 drops red food coloring
- 2 tablespoons cherry preserves
Instructions
- Line a baking sheet with parchment paper and set it aside. Place 1 cup of the mini marshmallows in a small bowl with the cherry preserves and cherry extract. Microwave in 15-second bursts, stirring between each, until melted and smooth. Let the mixture cool for 2 minutes, then roll it into 4 small balls and set them on the prepared sheet.
- In a large saucepan, melt the butter over medium heat. Add the remaining 4 cups of mini marshmallows and stir until fully melted and combined.
- Remove the pan from the heat. Stir in the Rice Krispies cereal and red food coloring until the cereal is evenly coated and the color is uniform.
- While the mixture is still warm, scoop about 1/2 cup of the cereal mixture around each cherry marshmallow ball. Gently press and shape it into a compact square or round treat so the center is fully enclosed.
- Place the finished treats on the baking sheet and let them set at room temperature for 20 minutes before serving.
Extra Tips
Form the centers first so they have time to firm up slightly before wrapping them in the cereal mixture. If the outer layer starts to stick to your hands, lightly dampen your fingertips with water. Store any leftovers in an airtight container at room temperature for up to two days to keep the centers from drying out. Course: Dessert Cuisine: American Equipment: Large saucepan, Mixing bowl, Baking sheet