

Halloween snacks do not need to be complicated to feel special. I gathered some straightforward recipes that use common ingredients and simple steps. These ideas work for school parties, family gatherings, or just a weekend at home. Each one includes easy instructions and turns out looking festive on the table. You can pick a few that match what you already have in your kitchen.
Helpful Tips Before You Start
These quick steps keep your Halloween snacks looking festive without extra stress.
Choose a Color Palette
Stick to orange, black, and green accents across the snacks. This creates a unified look on the table.
Keep Cutters and Molds Ready
Have ghost, pumpkin, and bat cookie cutters on hand. They work on dough, cheese, or fruit for quick shapes.
Prep Base Elements Ahead
Mix dips, doughs, and coatings the day before. Assemble snacks the same day they will be served.
Label Allergens Clearly
Note any nut or dairy items with small tags. Guests can spot safe options at a glance.
Test One Batch First
Make a single version of new recipes before scaling up. This confirms timing and portion sizes.
Spiced Pumpkin Hummus with Pita Triangles
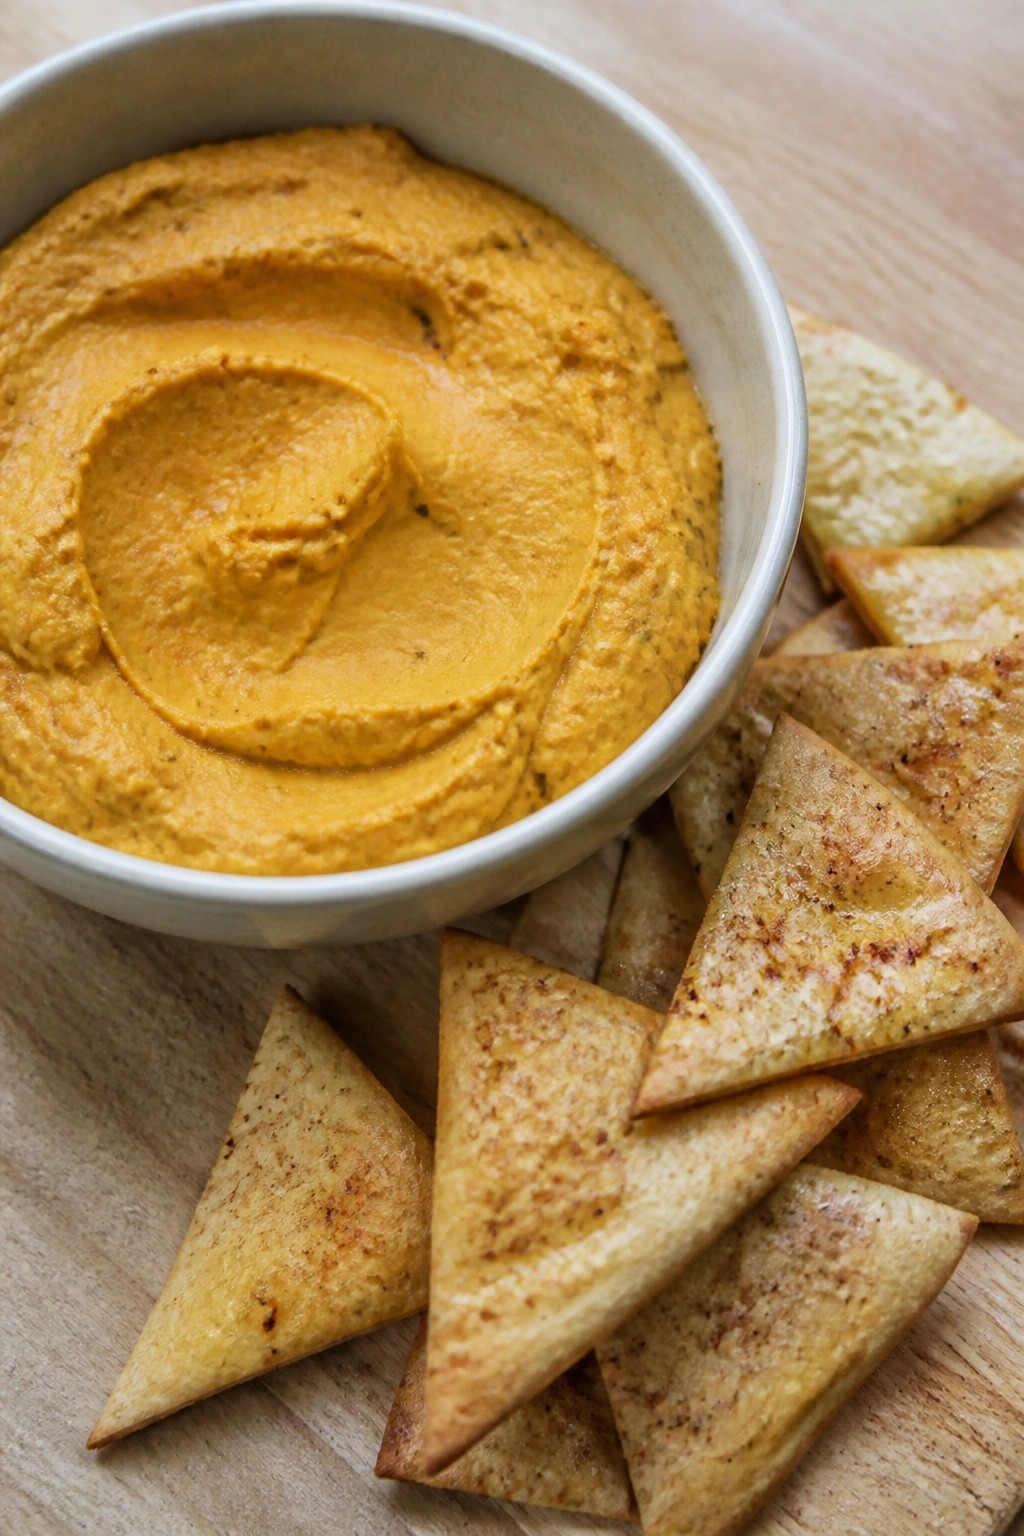
This spiced pumpkin hummus adds a seasonal touch to snack time with its bright orange color and warm spices. It works well for Halloween gatherings because the flavors feel festive without being overly sweet. The dip stays creamy while the spices give it a savory depth that pairs nicely with crunchy pita.
The pita triangles bake until crisp and carry a light coating of oil and spice that matches the hummus. Together they make an easy finger food that holds up on a party table.
Serves 4 people.
Ingredients
- 1 (15-ounce) can chickpeas, drained and rinsed
- 1 cup pumpkin puree
- 3 tablespoons tahini
- 2 tablespoons olive oil, plus 1 tablespoon for pita
- 1 garlic clove, minced
- 1 tablespoon lemon juice
- 1 teaspoon ground cumin
- 1/2 teaspoon smoked paprika
- 1/4 teaspoon ground cinnamon
- 1/2 teaspoon salt
- 4 pita breads, cut into triangles
Instructions
- Add the chickpeas, pumpkin puree, tahini, 2 tablespoons olive oil, garlic, lemon juice, cumin, smoked paprika, cinnamon, and salt to a food processor.
- Blend until the mixture is smooth and creamy, stopping to scrape down the sides as needed.
- Place the pita triangles on a baking sheet and drizzle with the remaining 1 tablespoon olive oil.
- Sprinkle a light dusting of cumin, smoked paprika, and cinnamon over the pita if desired, then toss to coat.
- Bake at 375°F for 10 to 12 minutes until the triangles turn golden and crisp.
- Transfer the hummus to a serving bowl and arrange the baked pita triangles alongside.
Extra Tips
For a smoother dip, blend the hummus a little longer or add a splash of water if it seems thick. The pita stays crisp longest when baked just before serving, but you can cut the triangles ahead and store them unbaked on the sheet. Skip the cinnamon if you prefer a strictly savory version. Course: Appetizer Cuisine: Mediterranean Equipment: Food processor, Baking sheet, Oven
Mummy-Wrapped Sausage Bites with Mustard Dip
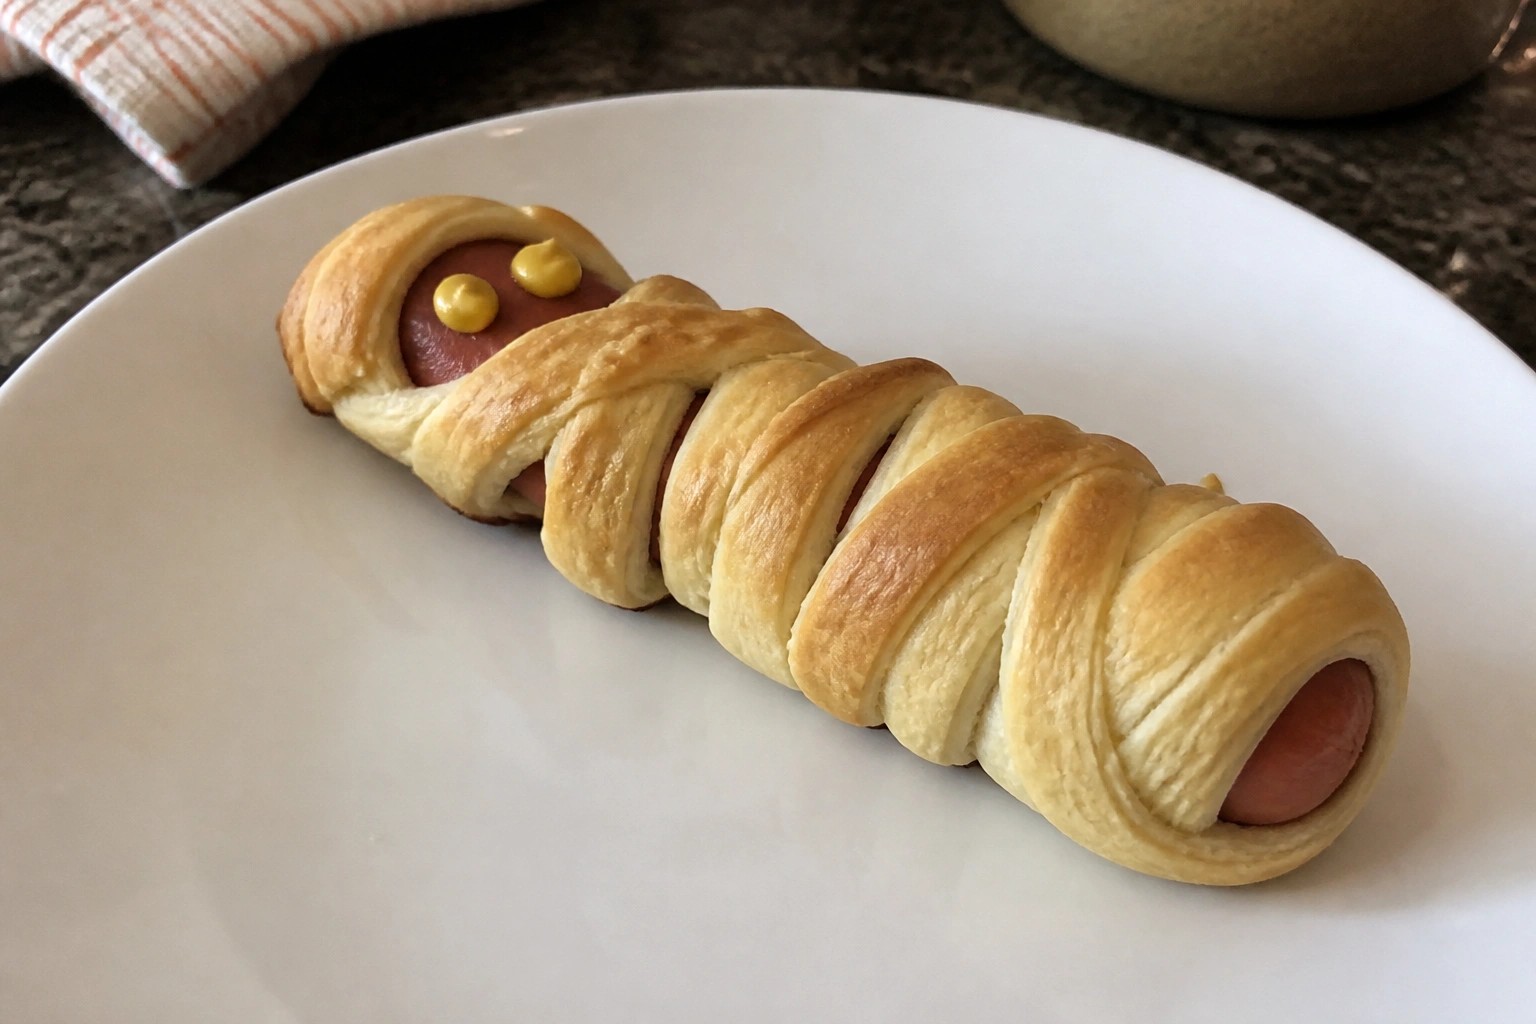
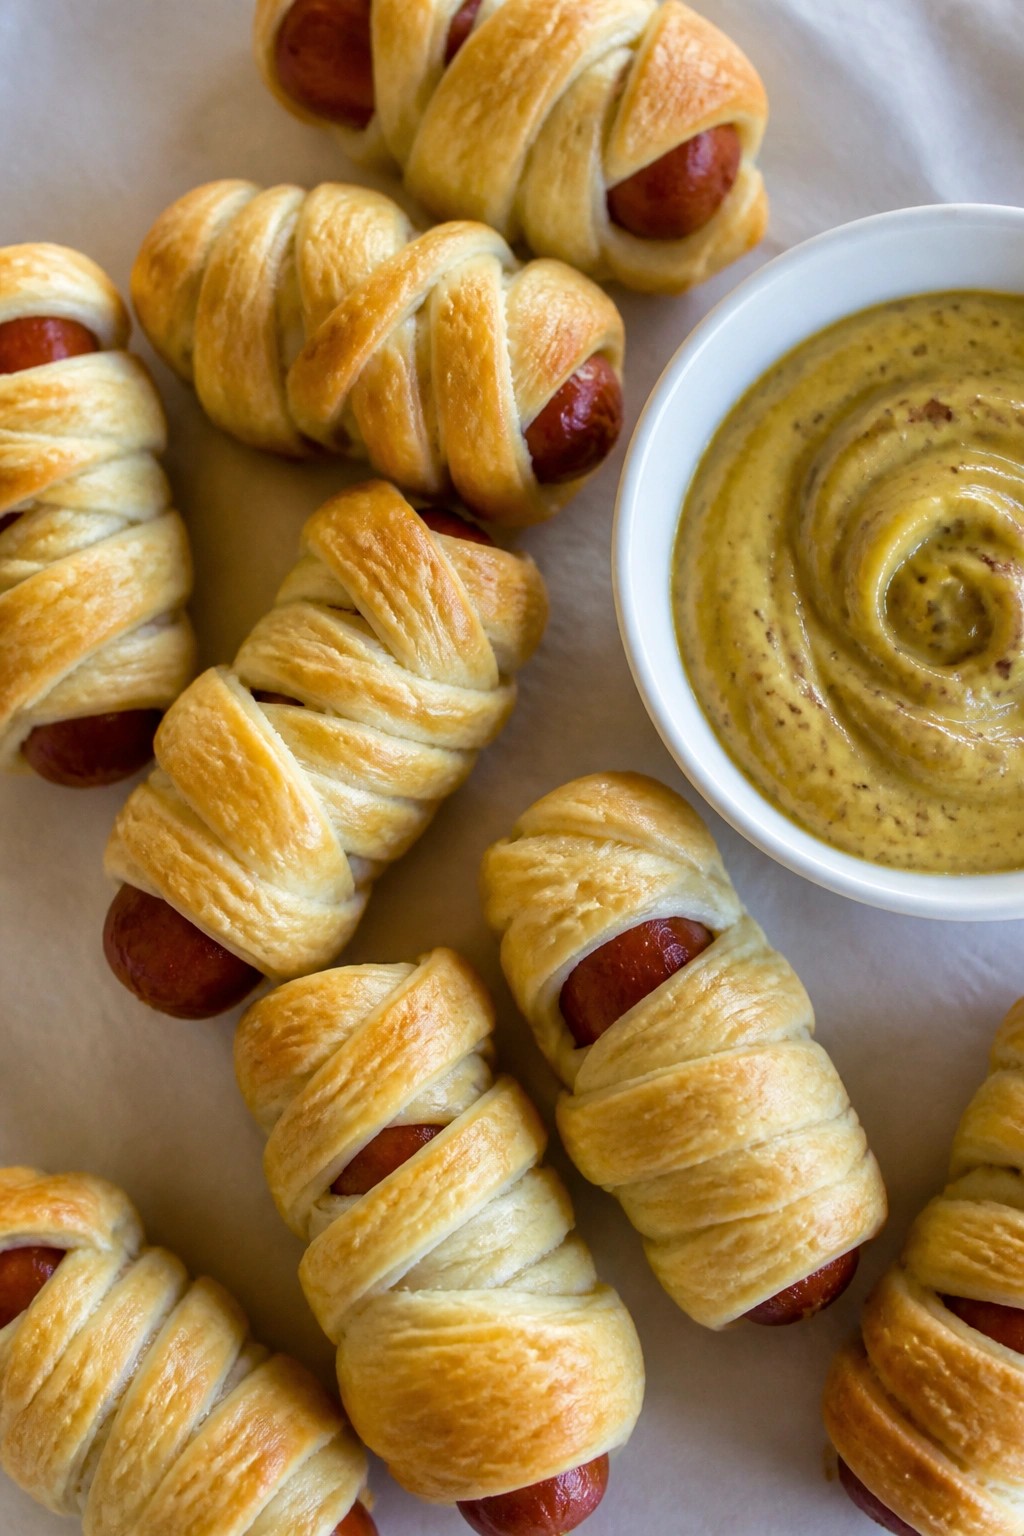
These mummy-wrapped sausage bites bring a playful Halloween touch to any snack table. The flaky dough wraps around the sausages to create a simple wrapped effect that feels festive without much effort. The mustard dip on the side adds a sharp, tangy contrast to the warm, savory bites.
They fit well at casual gatherings or as an easy finger food for kids and adults alike. The texture combines crisp pastry with juicy sausage in every bite.
Serves 4 people.
Ingredients
- 12 cocktail sausages
- 1 can (8 oz) refrigerated crescent roll dough
- 3 tablespoons Dijon mustard
- 2 tablespoons yellow mustard
Instructions
- Preheat the oven to 375 degrees F and line a baking sheet with parchment paper.
- Unroll the crescent roll dough on a clean surface and cut it into thin strips about 1/2 inch wide.
- Wrap each strip of dough around a cocktail sausage, leaving small gaps between the strips to create the mummy look. Place the wrapped sausages on the prepared baking sheet.
- Bake for 12 to 15 minutes until the dough turns golden brown and the sausages are heated through.
- While the bites bake, stir together the Dijon mustard and yellow mustard in a small bowl to make the dip.
- Serve the sausage bites warm with the mustard dip on the side.
Extra Tips
Cut the dough strips evenly so the wrapping stays secure during baking. If you want a milder dip, use all yellow mustard instead of mixing in Dijon. These bites reheat well in a 350 degree F oven for a few minutes to restore crispness. Make the wrapped sausages ahead and keep them covered in the fridge until ready to bake. Course: Appetizer Cuisine: American Equipment: Baking sheet, Oven, Mixing bowl, Knife
Ghostly White Chocolate Pretzel Rods
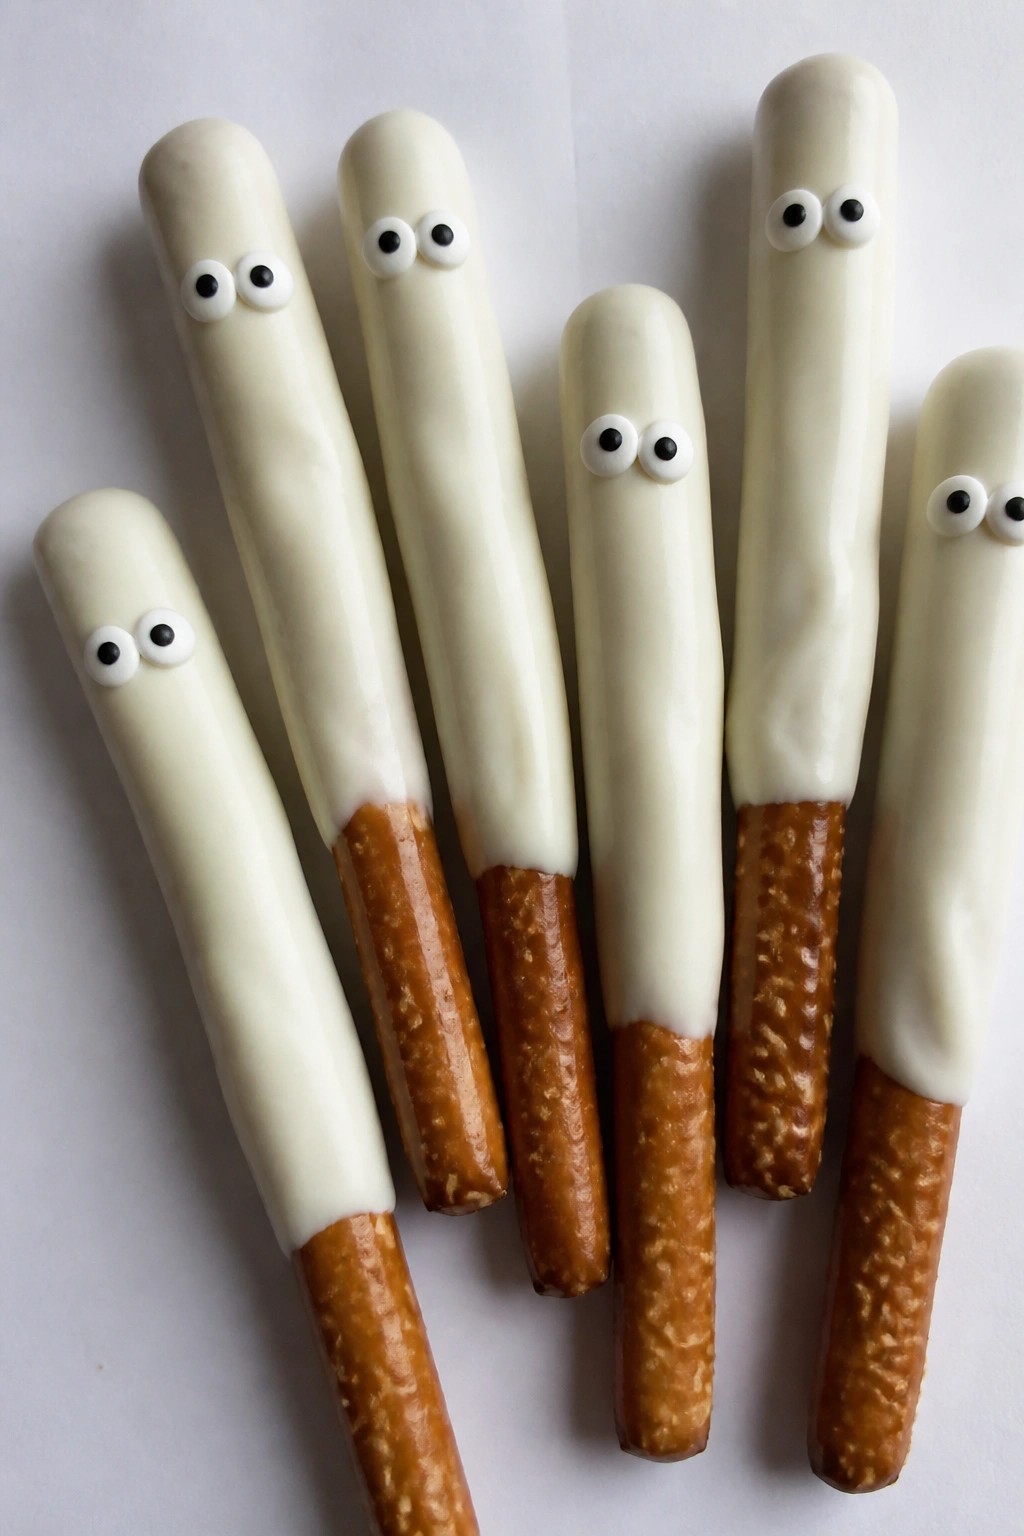
These white chocolate pretzel rods bring a simple Halloween touch to any snack table. The coating turns ordinary pretzels into pale ghost shapes that kids and adults both reach for. The finished rods give a pleasant contrast of crunchy salt and smooth sweetness.
They fit well at a casual party or as an afternoon project before trick-or-treating. The flavor stays light, so they pair easily with fruit or other treats without feeling heavy.
Serves 4 people.
Ingredients
- 12 pretzel rods
- 8 ounces white chocolate melting wafers
- 1 tablespoon coconut oil
- 24 candy eyes
Instructions
- Line a baking sheet with parchment paper and set it aside.
- Place the white chocolate melting wafers and coconut oil in a microwave-safe bowl. Heat in 30-second bursts, stirring after each round, until the mixture is smooth.
- Hold one pretzel rod by the end and dip it into the melted chocolate, leaving about two inches uncoated at the bottom. Let excess chocolate drip back into the bowl.
- Lay the coated rod on the prepared baking sheet. While the chocolate is still wet, press two candy eyes near the top to form the ghost face. Repeat with the remaining rods.
- Let the rods sit at room temperature until the chocolate hardens completely before moving them.
Extra Tips
Work in small batches when dipping so the chocolate stays fluid. If it starts to thicken, give it another short microwave burst. Store finished rods in an airtight container at room temperature for up to three days. They travel well in a single layer for school parties or potlucks. Course: Snack Cuisine: American Equipment: Microwave-safe bowl, Baking sheet, Parchment paper
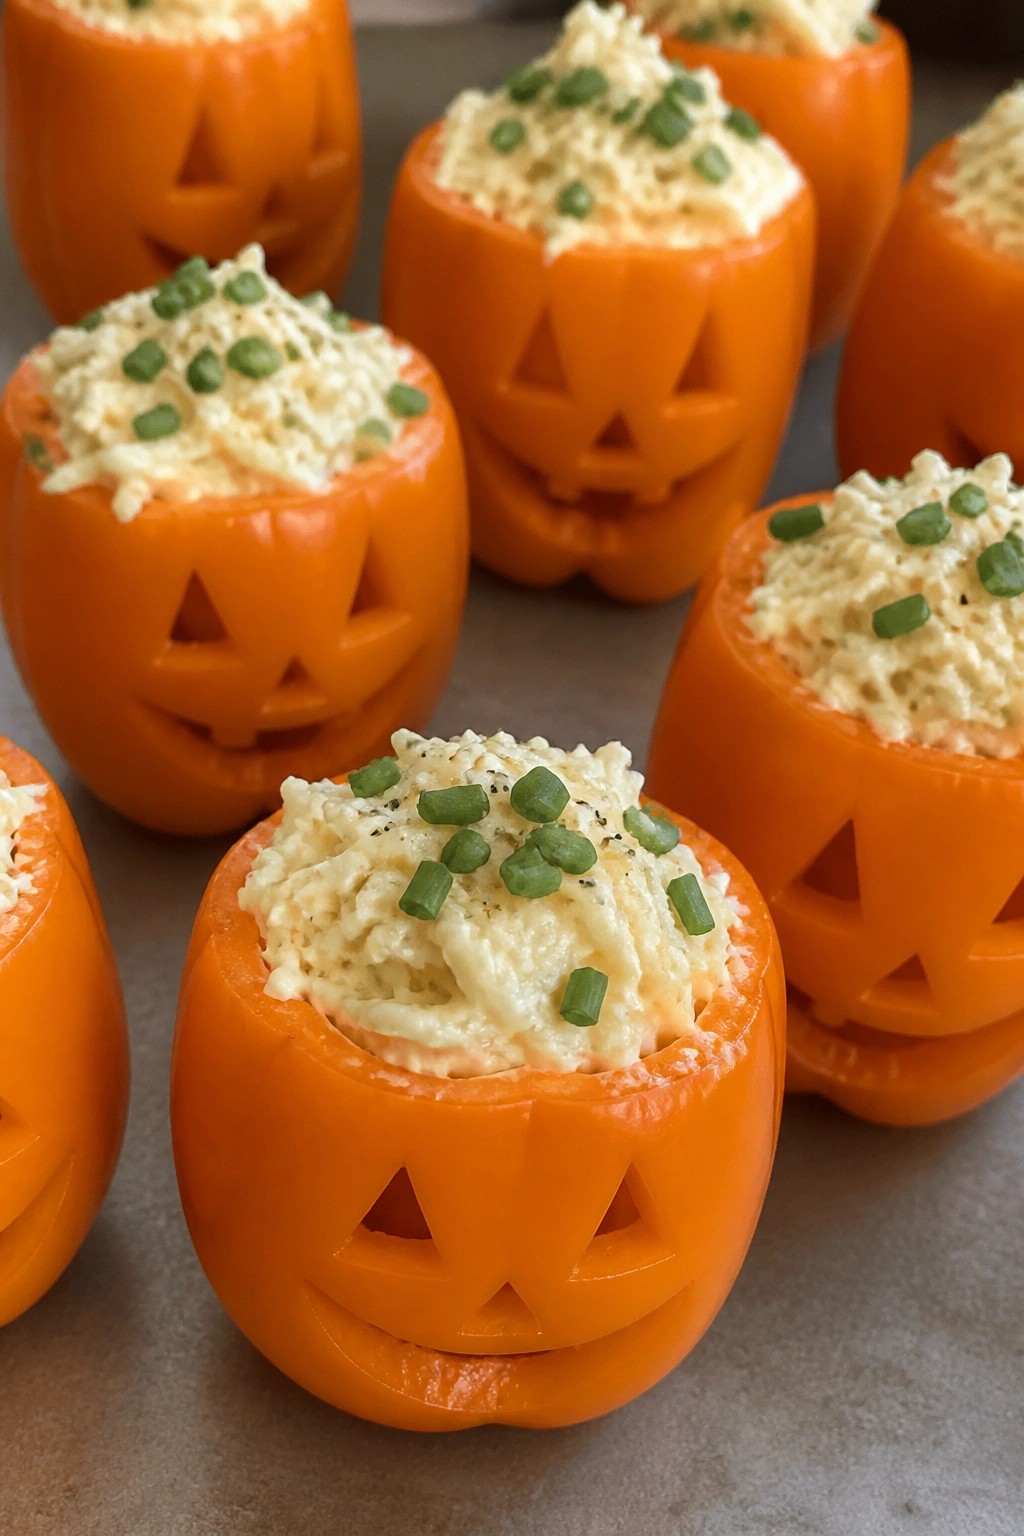
Jack-O’-Lantern Stuffed Mini Peppers
These mini peppers stand out at any Halloween gathering thanks to their carved faces that mimic classic jack-o’-lanterns. They suit parties or after-school snacks because the steps stay straightforward and the finished tray looks festive without extra effort.
The peppers stay crisp while the filling turns creamy and lightly spiced. Each one delivers a fresh bite followed by rich cheese flavor that pairs well with other finger foods on the table.
Serves 4 people.
Ingredients
- 12 mini orange bell peppers
- 8 ounces cream cheese, softened
- 1 cup shredded cheddar cheese
- 1/2 teaspoon garlic powder
- 1/4 teaspoon salt
- 1/4 teaspoon black pepper
- 2 tablespoons chopped fresh chives
Instructions
- Slice the tops off each mini pepper and set the tops aside. Use a small paring knife to cut out eyes, a nose, and a mouth on one side of every pepper to create the jack-o’-lantern faces. Remove any seeds and ribs from inside.
- Place the cream cheese in a mixing bowl. Add the shredded cheddar cheese, garlic powder, salt, and black pepper. Stir until the mixture becomes smooth and evenly combined.
- Spoon the cheese mixture into each carved pepper until it reaches just below the top edge. Press gently so the filling settles without tearing the pepper walls.
- Sprinkle the chopped chives over the filled openings. Replace the pepper tops if desired for presentation, then arrange the peppers on a serving plate.
Extra Tips
Chill the stuffed peppers for 20 minutes before serving so the filling firms up and holds its shape when guests pick them up. If the mini peppers feel wobbly on the plate, slice a thin strip from the bottom of each one to create a flat base. Leftovers keep in an airtight container in the refrigerator for one day, though the carved faces soften slightly over time. Course: Snack Cuisine: American Equipment: Mixing bowl, Sharp knife, Spoon
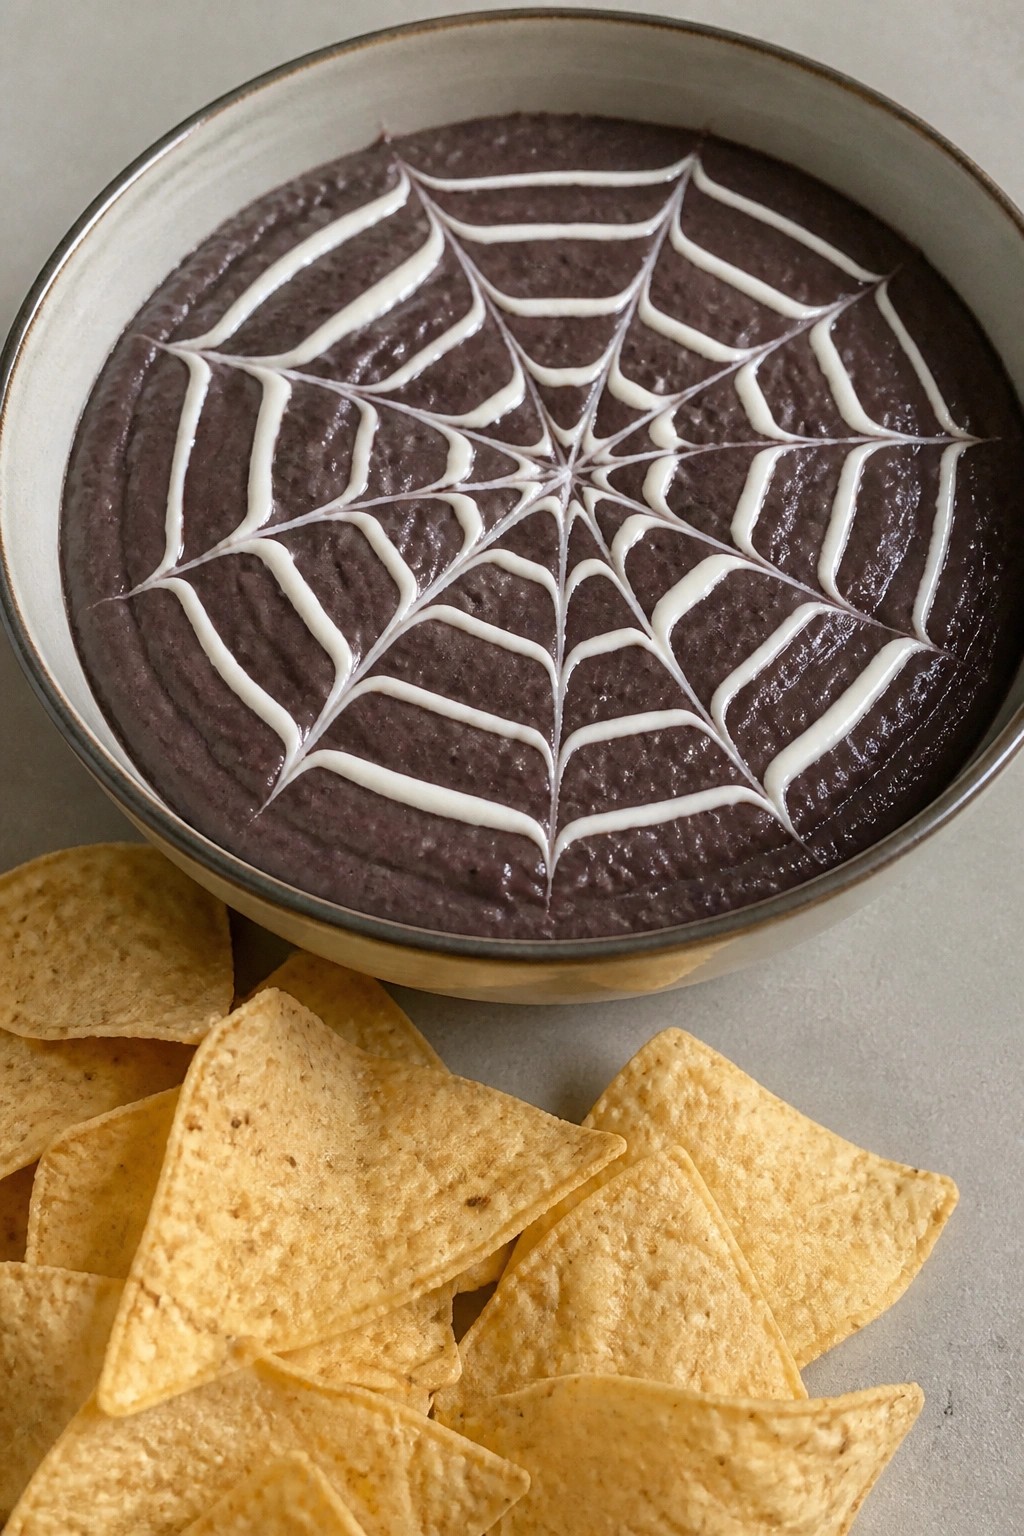
Spiderweb Black Bean Dip with Tortilla Chips
This black bean dip brings a fun Halloween twist with a simple sour cream spiderweb on top. It works well for parties or casual get-togethers where you want something savory and easy to share. The dip is creamy with a mild spice and pairs nicely with crunchy tortilla chips.
Serves 4 people.
Ingredients
- 2 (15-ounce) cans black beans, drained and rinsed
- 1 tablespoon olive oil
- 1 small onion, diced
- 2 cloves garlic, minced
- 1 teaspoon ground cumin
- 1 teaspoon chili powder
- Juice of 1 lime
- 1/2 teaspoon salt
- 1/2 cup sour cream
- Tortilla chips, for serving
Instructions
- Heat the olive oil in a skillet over medium heat. Add the diced onion and minced garlic, then cook for 3 to 4 minutes until the onion softens.
- Stir in the black beans, cumin, chili powder, lime juice, and salt. Cook for another 2 minutes until everything is warmed through.
- Transfer the mixture to a food processor and blend until smooth. Spoon the dip into a serving bowl and smooth the top with the back of a spoon.
- Place the sour cream in a small resealable plastic bag and snip off one corner. Pipe a spiral of sour cream over the dip, then drag a knife from the center outward to create the web pattern.
- Serve right away with tortilla chips on the side.
Extra Tips
Make the black bean base a day ahead and store it covered in the fridge, then add the sour cream web just before serving to keep the design sharp. If the dip thickens after chilling, stir in a splash of lime juice to loosen it. Use a thin piping tip for finer web lines if you have one on hand. Course: Appetizer Cuisine: Mexican Equipment: Skillet, Food processor, Resealable plastic bag
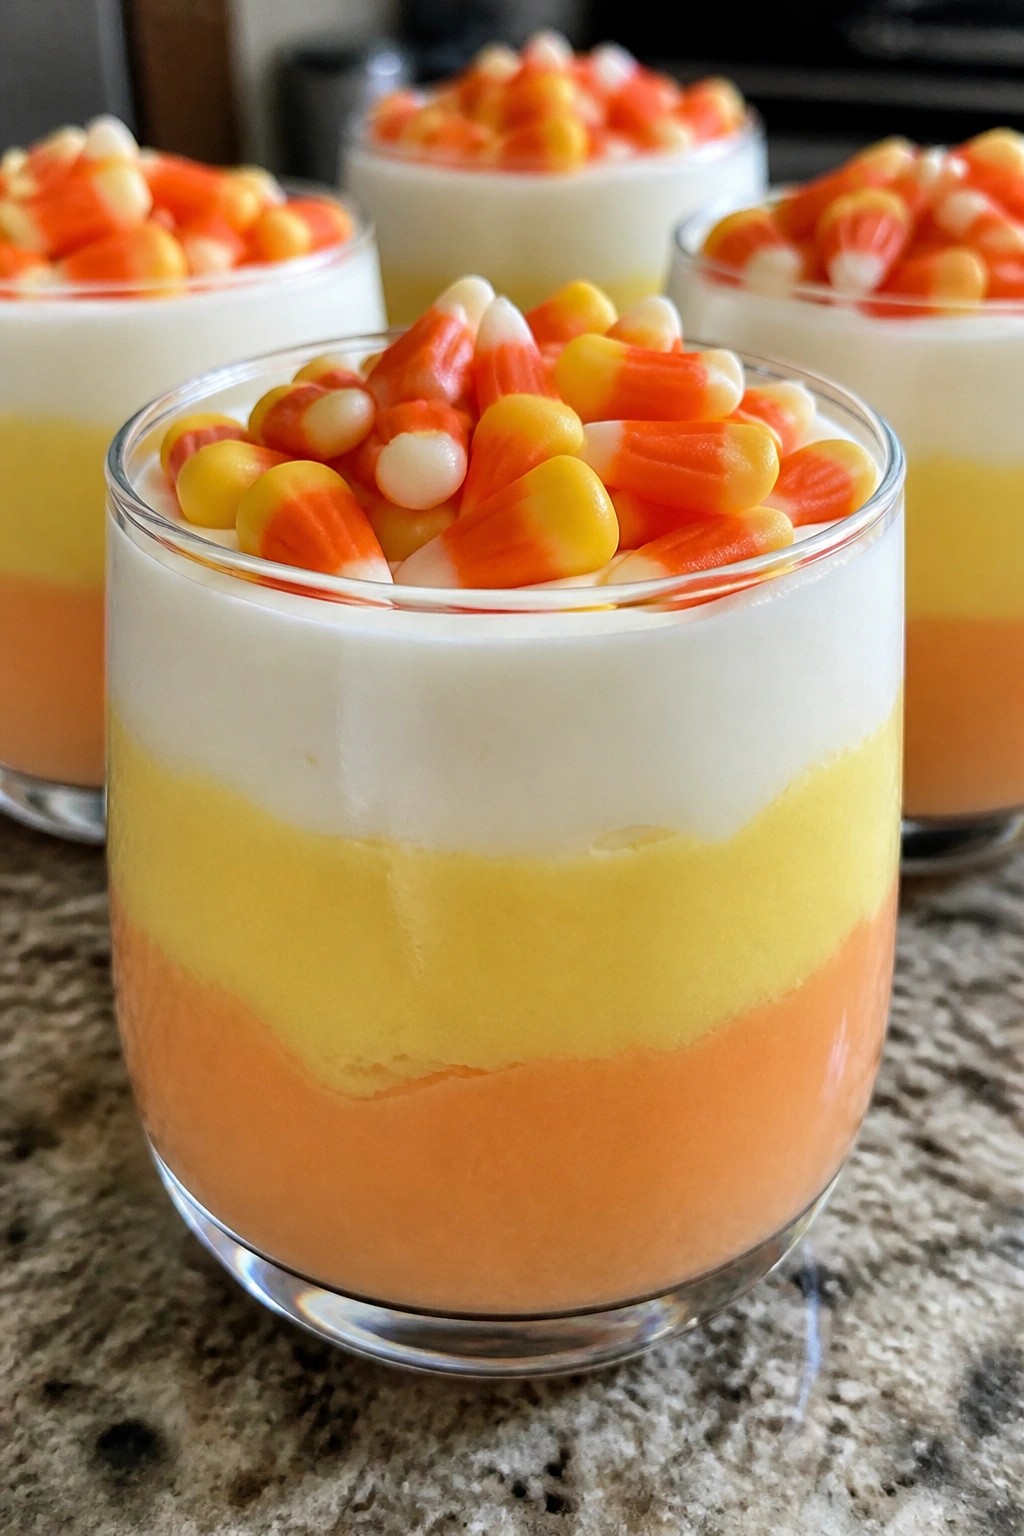
Candy Corn Yogurt Parfait Cups
These Candy Corn Yogurt Parfait Cups bring a simple Halloween touch to snack time. The layered colors copy the look of classic candy corn while keeping the base creamy and light. They come together quickly and work well for after-school treats or small party gatherings.
The texture stays smooth from the yogurt with a bit of chew from the candy corn on top. Kids enjoy building the layers, and the finished cups look neat in clear glasses.
Serves 4 people.
Ingredients
- 2 cups vanilla yogurt
- Yellow food coloring
- Orange food coloring
- 1/2 cup candy corn
Instructions
- Divide the vanilla yogurt evenly into three small bowls. Leave one bowl plain for the white layer.
- Add a few drops of yellow food coloring to the second bowl and stir until the color looks even.
- Add a few drops of orange food coloring to the third bowl and stir until the color looks even.
- Spoon the yellow yogurt into the bottom of four clear cups. Add the orange yogurt on top of the yellow layer. Finish with the plain white yogurt on top.
- Place a few pieces of candy corn on the white layer of each cup before serving.
Extra Tips
Use gel food coloring for brighter layers that need fewer drops. Assemble the cups right before serving so the candy corn stays firm instead of softening in the yogurt. Course: Snack Cuisine: American Equipment: Mixing bowls, Spoons, Clear cups
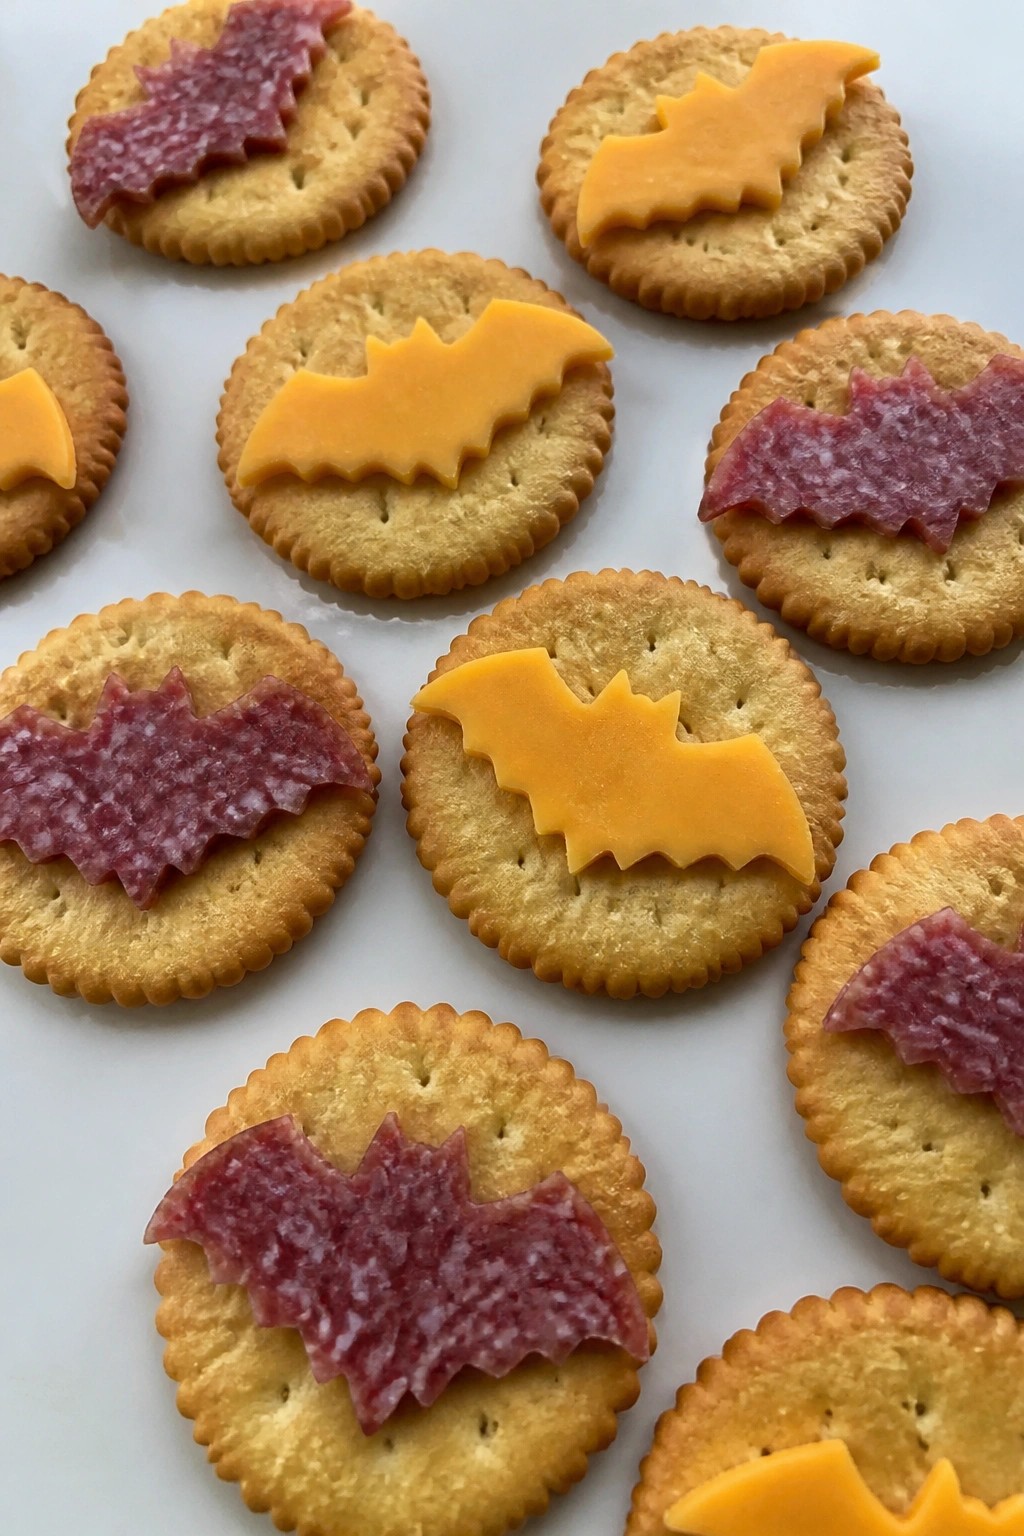
Bat-Shaped Salami and Cheese Crackers
These crackers make a quick savory snack that fits right into a Halloween party table. The bat shapes add a playful touch without much effort, and the combination of salty salami with mild cheese on a crisp base gives a balanced bite that works well with other finger foods.
They suit casual gatherings or after-school snacks in October. The texture stays crunchy from the crackers while the toppings provide a chewy, slightly rich contrast.
Serves 4 people.
Ingredients
- 12 round butter crackers
- 6 slices salami
- 6 slices cheddar cheese
Instructions
- Arrange the 12 round butter crackers in a single layer on a serving plate.
- Press a small bat-shaped cookie cutter into each salami slice to create 12 bat shapes total, then set the shapes aside.
- Press the same cookie cutter into each cheddar cheese slice to create 12 bat shapes.
- Place one salami bat and one cheese bat on top of each cracker, pressing lightly so they stay in place.
Extra Tips
Stack the salami and cheese bats slightly offset on each cracker so both shapes show clearly. If the cheese feels too soft to cut cleanly, chill the slices for 10 minutes first. These are best assembled right before serving to keep the crackers crisp. Course: Snack Cuisine: American Equipment: Bat-shaped cookie cutter, Serving plate
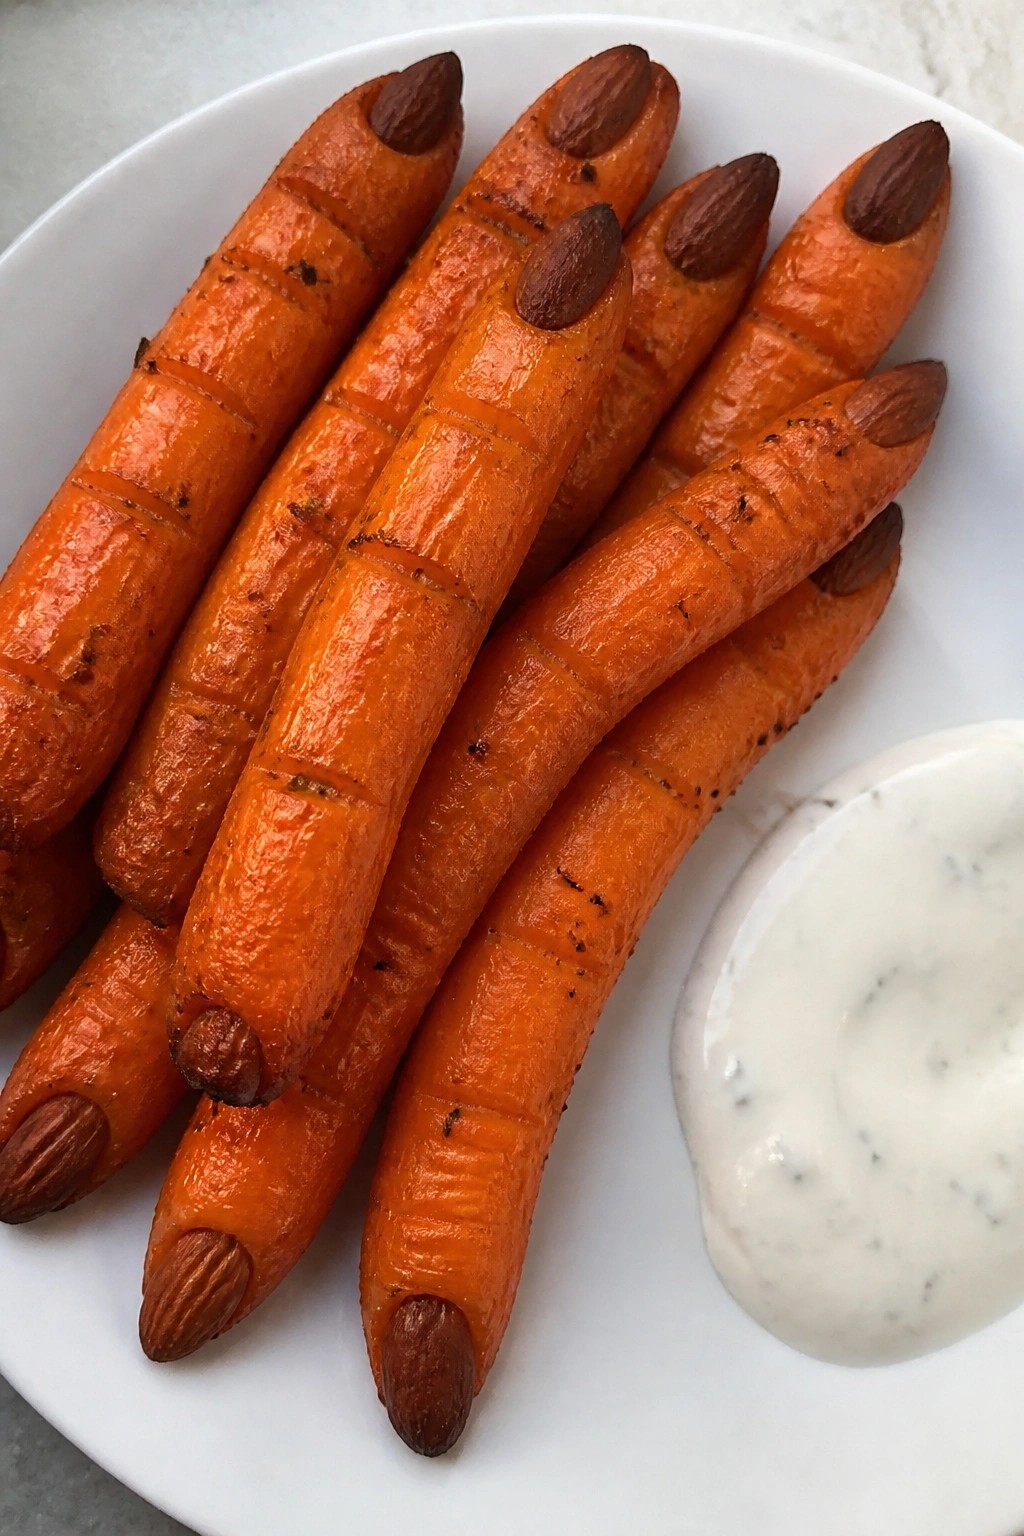
Roasted Carrot Witch Fingers with Ranch
These roasted carrot fingers bring a simple, savory bite to any Halloween spread. They work well as a make-ahead snack for parties or a quick after-school treat when you want something themed without much fuss. The carrots turn tender with slightly crisp edges, and the ranch adds a cool, creamy contrast.
Serves 4 people.
Ingredients
- 1 pound medium carrots, peeled
- 2 tablespoons olive oil
- 1 teaspoon salt
- 1/2 teaspoon garlic powder
- 1/4 teaspoon paprika
- 8 whole almonds
- 1/2 cup ranch dressing, for serving
Instructions
- Preheat the oven to 400 degrees and line a baking sheet with parchment paper.
- Trim the carrots so each one is about finger length, then cut a shallow notch near one end of each carrot to hold an almond.
- Place the carrots in a bowl and toss with the olive oil, salt, garlic powder, and paprika until evenly coated.
- Arrange the carrots on the prepared baking sheet and press one almond into the notch on each carrot to form a nail.
- Roast for 20 to 25 minutes until the carrots are tender and lightly browned at the edges.
- Let the carrots cool for a few minutes, then serve them with the ranch dressing on the side for dipping.
Extra Tips
Press the almonds firmly into the notches right before roasting so they stay in place. If the carrots vary in thickness, check smaller ones early to avoid overcooking. Leftovers can be stored in an airtight container in the fridge for up to two days and reheated briefly in a 350-degree oven to restore texture. Course: Appetizer Cuisine: American Equipment: Baking sheet, Mixing bowl, Peeler
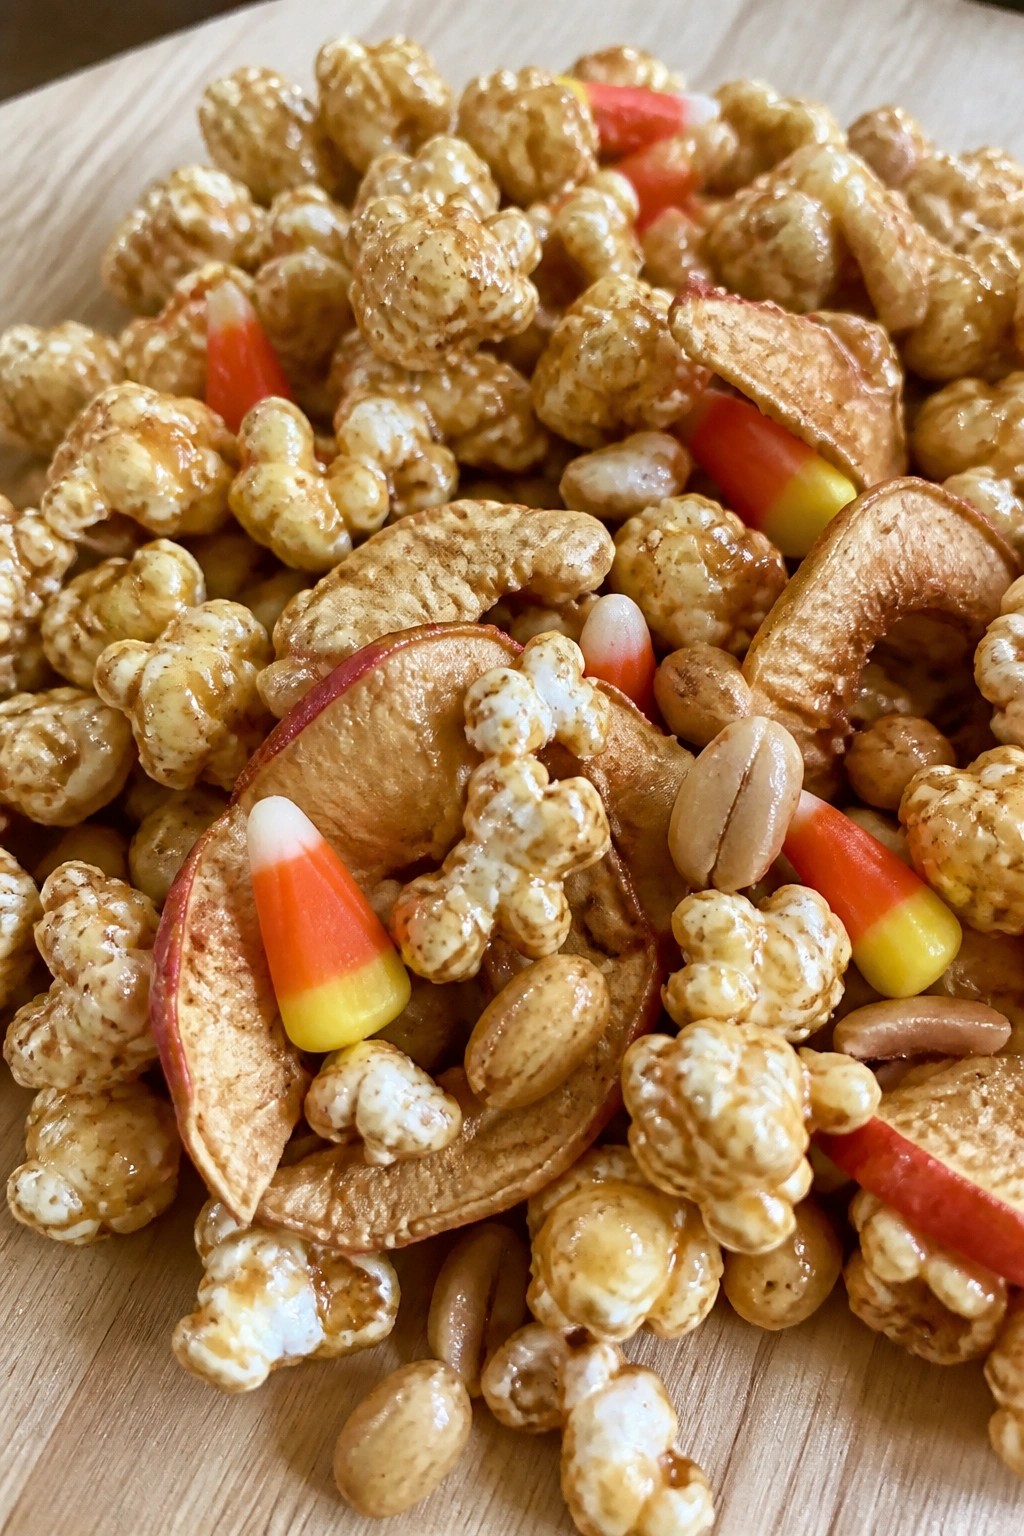
Caramel Apple Popcorn Snack Mix
This caramel apple popcorn snack mix combines buttery popcorn with tart dried apple pieces and a light caramel coating. It makes a good choice for Halloween parties or casual fall get-togethers when you need something sweet and crunchy to serve in bowls. The finished mix has a balance of chewy caramel, crisp apple bits, and salty popcorn that holds up well at room temperature.
Serves 4 people.
Ingredients
- 8 cups popped popcorn
- 1 1/2 cups chopped dried apple rings
- 20 soft caramel candies
- 2 tablespoons milk
- 1/2 cup roasted peanuts
- 1/3 cup candy corn
- 1/4 teaspoon cinnamon
- 1/4 teaspoon salt
Instructions
- Place the popped popcorn and chopped dried apple rings in a large bowl and set aside.
- Add the caramel candies and milk to a microwave-safe bowl. Heat in 20-second bursts, stirring between each, until the caramels melt into a smooth sauce.
- Pour the warm caramel sauce over the popcorn and apple pieces. Stir gently with a spatula until most pieces are lightly coated.
- Sprinkle the cinnamon and salt over the mixture and stir again to distribute evenly.
- Let the mix cool for 5 minutes, then add the roasted peanuts and candy corn. Toss once more to combine all ingredients.
Extra Tips
Spread the mix on a parchment-lined baking sheet after coating if you want the caramel to set into clusters rather than staying loose. Store leftovers in an airtight container at room temperature for up to two days. If the caramel firms up too much during mixing, warm it briefly before adding the peanuts and candy corn. Course: Snack Cuisine: American Equipment: Large bowl, Microwave-safe bowl, Spatula
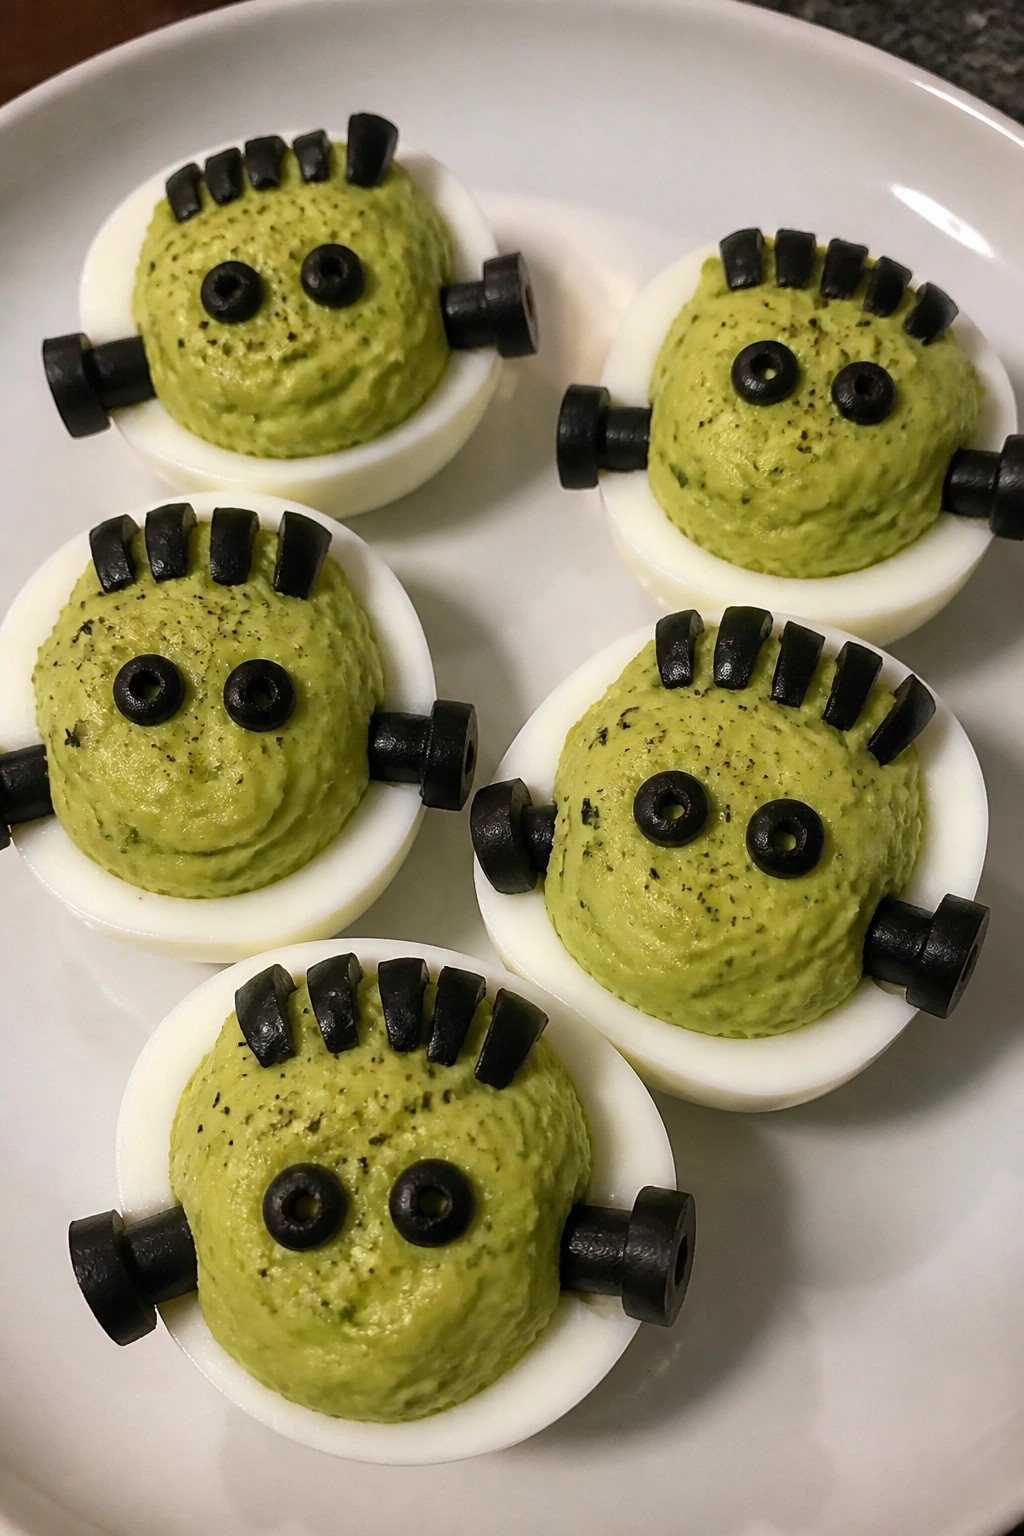
Frankenstein Avocado Deviled Eggs
These Frankenstein Avocado Deviled Eggs turn a classic appetizer into a simple Halloween snack. The avocado adds natural green color and creaminess that works well for party trays or kid-friendly gatherings.
The filling stays smooth and slightly tangy, while olive pieces create the monster details without extra steps.
Serves 4 people.
Ingredients
- 4 large eggs
- 1 ripe avocado
- 1 tablespoon mayonnaise
- 1 teaspoon Dijon mustard
- 1 teaspoon lime juice
- Salt and black pepper, to taste
- 8 black olives
Instructions
- Place the eggs in a large pot and cover with cold water. Bring the water to a boil over medium-high heat, then cook the eggs for 10 minutes.
- Drain the eggs and run them under cold water until cool enough to handle. Peel off the shells and slice each egg in half lengthwise.
- Scoop the yolks into a mixing bowl. Add the avocado, mayonnaise, mustard, lime juice, salt, and black pepper. Mash everything together until the mixture is smooth.
- Spoon or pipe the avocado filling back into the hollowed egg whites.
- Slice the black olives. Use two small pieces as eyes on each egg half and one slice on each side as neck bolts to create the Frankenstein look.
Extra Tips
Choose a soft avocado so the filling mashes easily without lumps. Assemble the eggs close to serving time since the green color can darken if left out too long. Leftover filled eggs store in an airtight container in the fridge for one day. Course: Snack Cuisine: American Equipment: Large Pot, Mixing Bowl, Knife
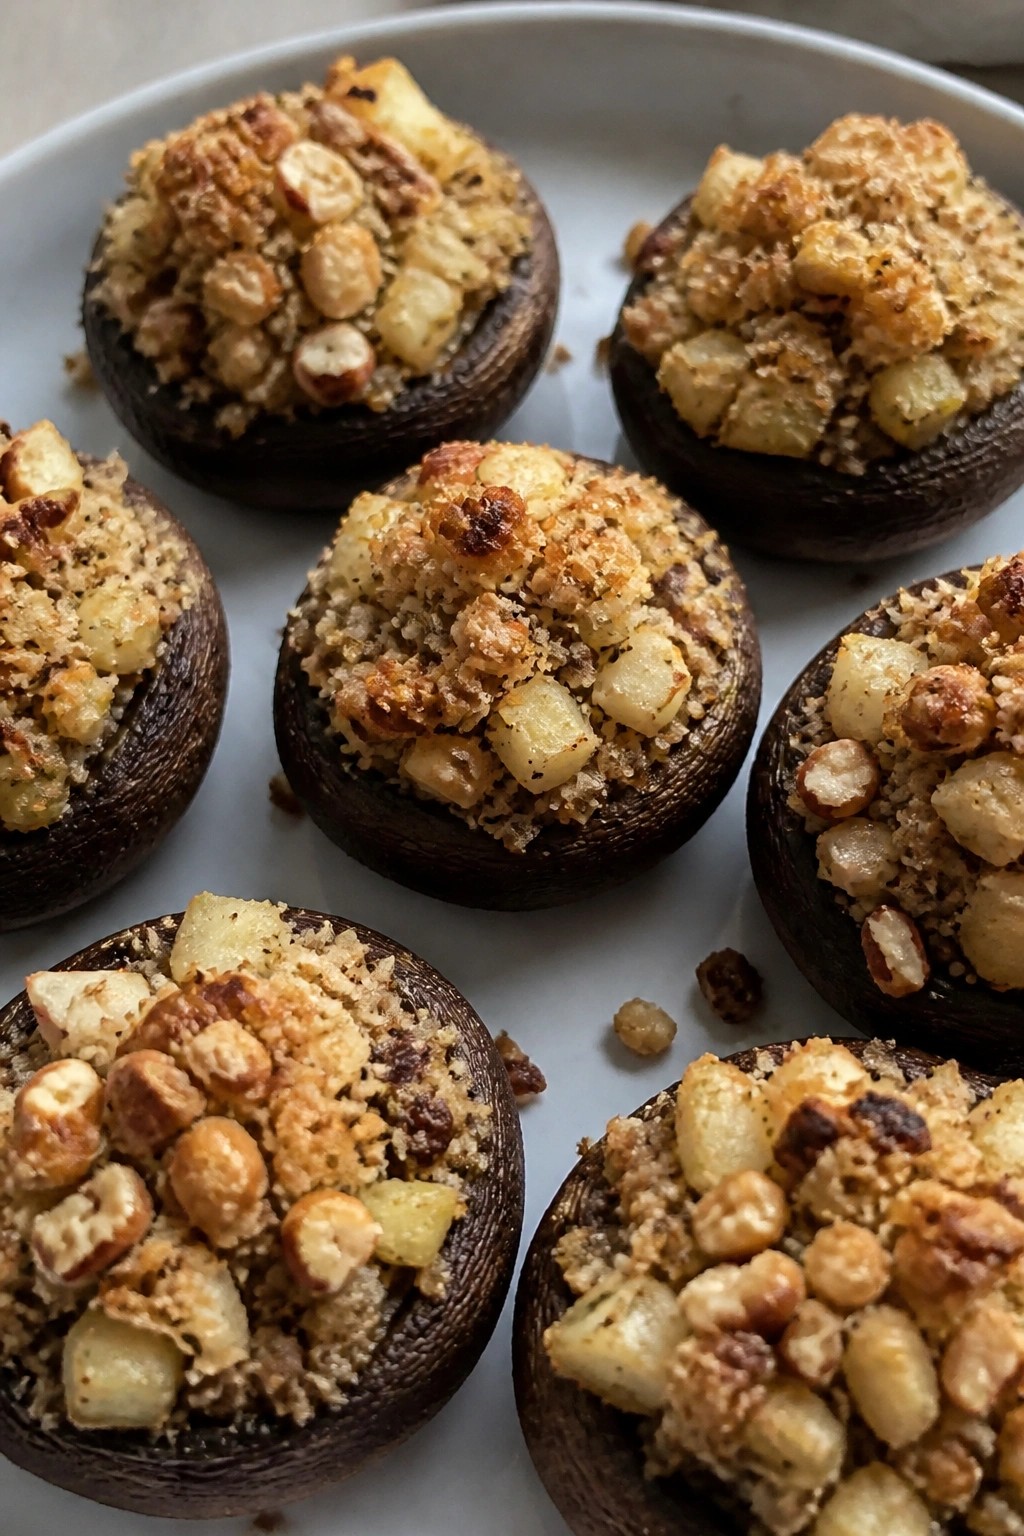
Harvest Stuffed Mushroom Caps
These Harvest Stuffed Mushroom Caps pack earthy mushrooms with a savory mix of apple, nuts, and herbs. They work well as a finger food at Halloween gatherings and offer a warm, seasonal bite without much fuss.
The filling turns soft inside the tender caps while the nuts add a light crunch. A touch of sage keeps the flavor balanced and autumn-focused.
Serves 4 people.
Ingredients
- 12 large button mushrooms
- 2 tablespoons olive oil, divided
- 1 small onion, finely diced
- 1 apple, peeled and diced
- 1/3 cup chopped walnuts
- 1 teaspoon dried sage
- 1/2 cup breadcrumbs
- 1/4 cup grated Parmesan cheese
- Salt and black pepper to taste
Instructions
- Preheat the oven to 375 degrees F and line a baking sheet with parchment paper.
- Wipe the mushrooms clean with a damp cloth. Twist off the stems and chop them finely. Set the caps aside.
- Heat 1 tablespoon of olive oil in a skillet over medium heat. Add the onion and chopped mushroom stems. Cook for 3 to 4 minutes until the onion softens.
- Stir in the diced apple, walnuts, and sage. Cook for 2 more minutes, then remove the skillet from the heat.
- In a mixing bowl, combine the cooked mixture with breadcrumbs, Parmesan cheese, remaining olive oil, salt, and pepper. Mix until the filling holds together.
- Spoon the filling into each mushroom cap and press lightly to pack it in. Arrange the stuffed caps on the baking sheet.
- Bake for 18 to 20 minutes until the tops turn golden and the mushrooms are tender.
Extra Tips
Choose mushrooms that are similar in size so they finish cooking at the same time. The filling can be made a few hours ahead and kept covered in the fridge, then stuffed and baked right before serving. If you want a bit more richness, add an extra tablespoon of Parmesan on top before baking. Course: Appetizer Cuisine: American Equipment: Baking sheet, Skillet, Mixing bowl
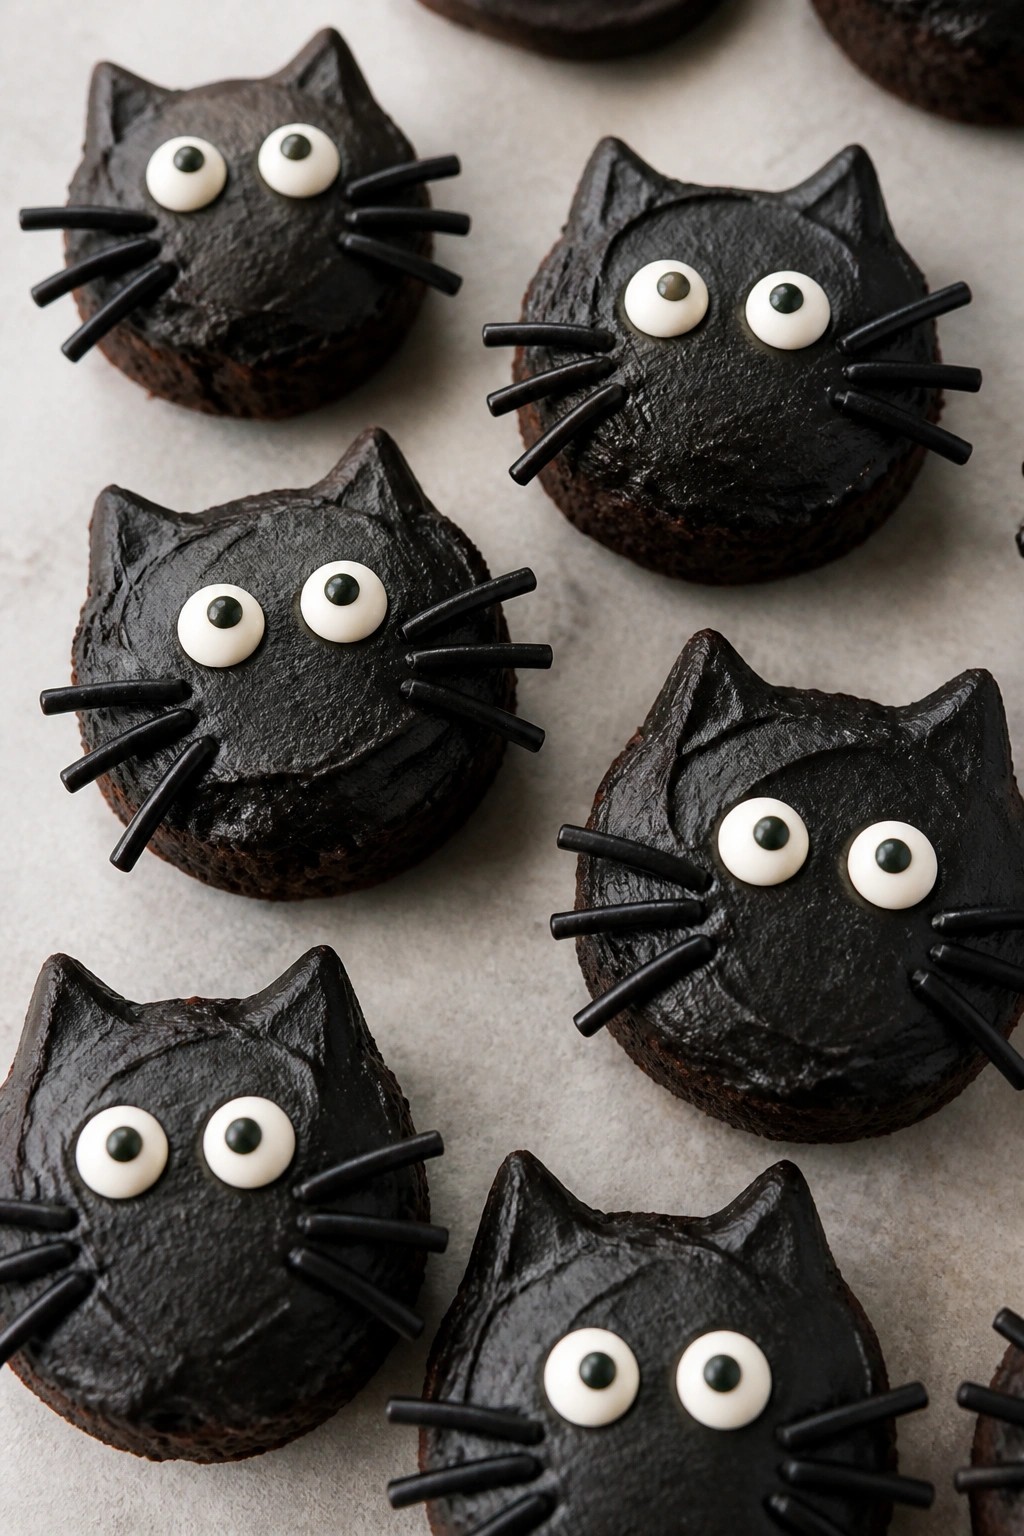
Black Cat Brownie Bites
These brownie bites bring a fun Halloween touch with their cat shape and dark finish. They work well for a small gathering or as a simple treat to set out at a party. The brownies stay fudgy inside with a slightly crisp edge, and the black frosting adds a smooth contrast.
Serves 4 people.
Ingredients
- 4 tablespoons unsalted butter
- 1/2 cup granulated sugar
- 1 large egg
- 1/4 cup unsweetened cocoa powder
- 1/3 cup all-purpose flour
- 1/4 teaspoon salt
- 1/2 cup black chocolate frosting
- 8 candy eyes
- 4 pieces black licorice, cut into 8 short strips
Instructions
- Preheat the oven to 350 degrees and grease a mini muffin pan with 4 cups.
- Melt the butter in a small bowl, then stir in the sugar until smooth.
- Add the egg and mix well, followed by the cocoa powder, flour, and salt until a thick batter forms.
- Divide the batter evenly among the 4 muffin cups and bake for 12 to 14 minutes until the tops look set.
- Let the brownie bites cool in the pan for 5 minutes, then remove them to a wire rack to cool completely.
- Spread or pipe the black chocolate frosting over each cooled brownie bite.
- Press two candy eyes into the frosting on each bite and add two licorice strips below the eyes to form whiskers.
Extra Tips
Use a small round cutter if you prefer to bake a small square pan and cut out circles instead of using a mini muffin pan. The black frosting sets quickly, so add the eyes and licorice right after spreading it. Store leftovers in an airtight container at room temperature for up to two days to keep the texture soft. Course: Snack Cuisine: American Equipment: Mixing Bowl, Mini Muffin Pan, Oven, Wire Rack
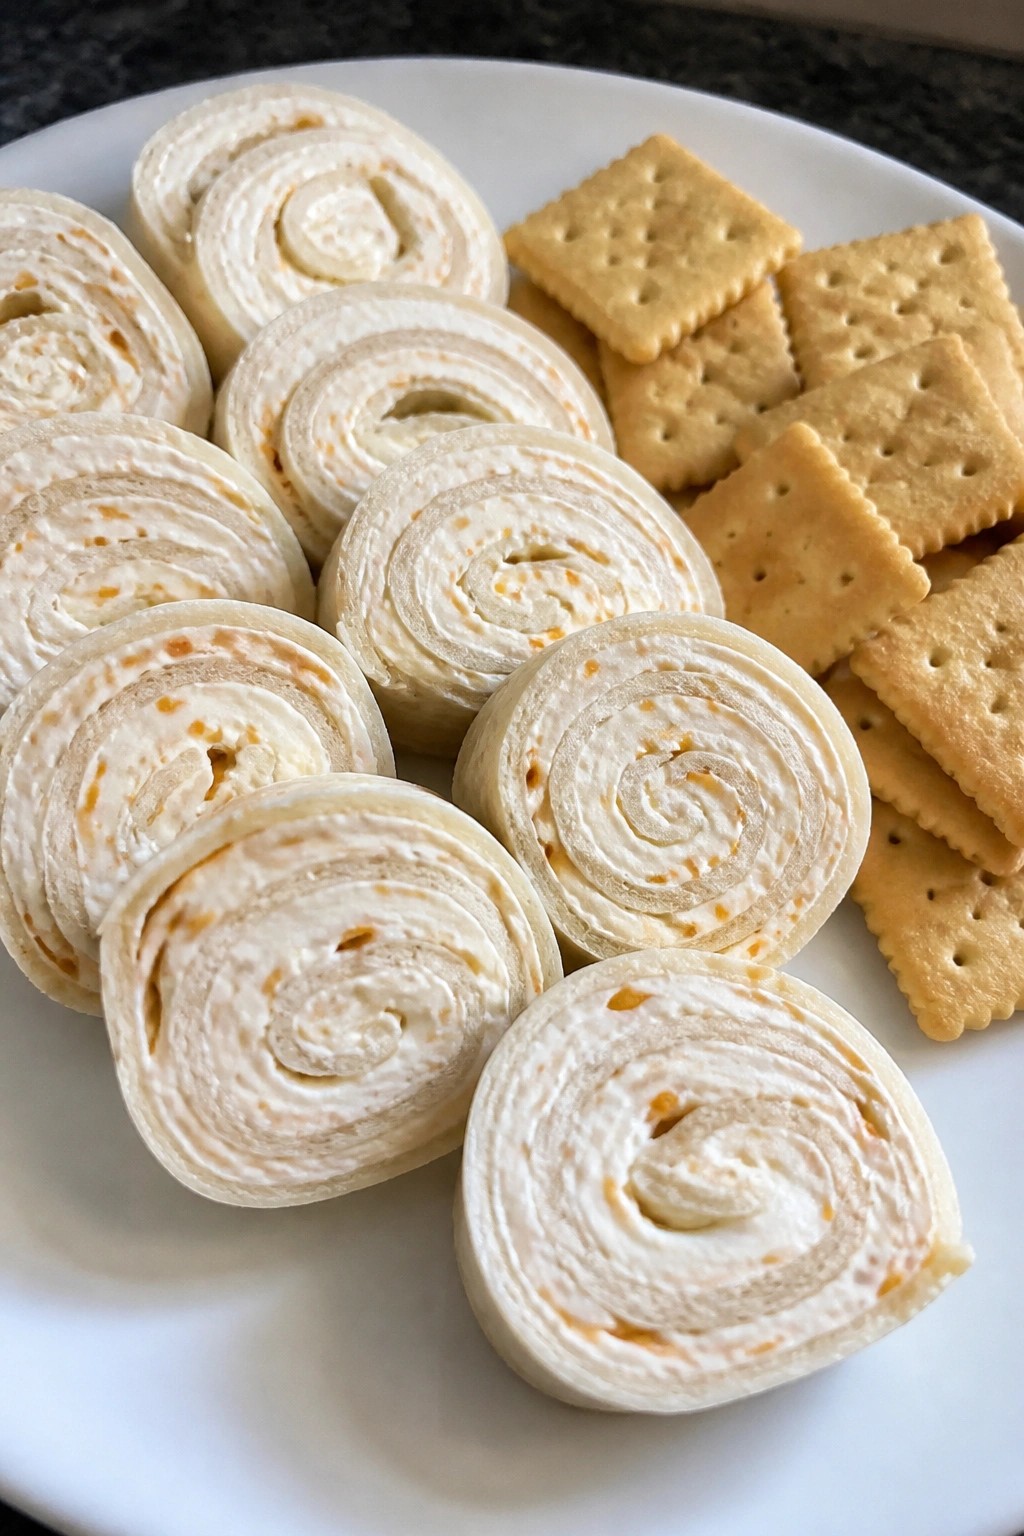
Orange Cream Cheese Pinwheels with Crackers
These pinwheels bring a bright citrus note to any snack table. The orange cream cheese filling pairs nicely with crisp crackers, making them easy to grab and eat at a Halloween gathering. They work well for kids and adults alike because the flavor is mild and the shape is fun.
The texture stays creamy inside with a slight crunch from the crackers on the side. You can prepare them ahead so the rolls firm up before slicing. This keeps the pinwheels neat and ready for serving.
Serves 4 people.
Ingredients
- 4 medium flour tortillas
- 8 ounces cream cheese, softened
- Zest of 1 large orange
- 2 tablespoons fresh orange juice
- 2 tablespoons powdered sugar
- 1 teaspoon vanilla extract
- 16 butter crackers
Instructions
- Place the softened cream cheese in a mixing bowl. Add the orange zest, orange juice, powdered sugar, and vanilla extract.
- Stir the mixture until it becomes smooth and evenly combined.
- Lay one tortilla flat on a clean surface. Spread about one-quarter of the cream cheese mixture across the entire tortilla in a thin, even layer.
- Roll the tortilla tightly from one edge to the other to form a log. Repeat with the remaining tortillas and filling.
- Wrap each rolled tortilla in plastic wrap and place them in the refrigerator for 30 minutes to firm up.
- Remove the rolls from the refrigerator. Unwrap and slice each log into 1-inch pieces to create the pinwheels.
- Arrange the pinwheels on a plate and serve with the butter crackers on the side.
Extra Tips
Chill the rolls a little longer if your kitchen is warm so the slices hold their shape better. You can swap the butter crackers for plain saltines if that is what you have on hand. Leftovers keep in an airtight container in the refrigerator for one day. Course: Snack Cuisine: American Equipment: Mixing bowl, Knife, Plastic wrap