

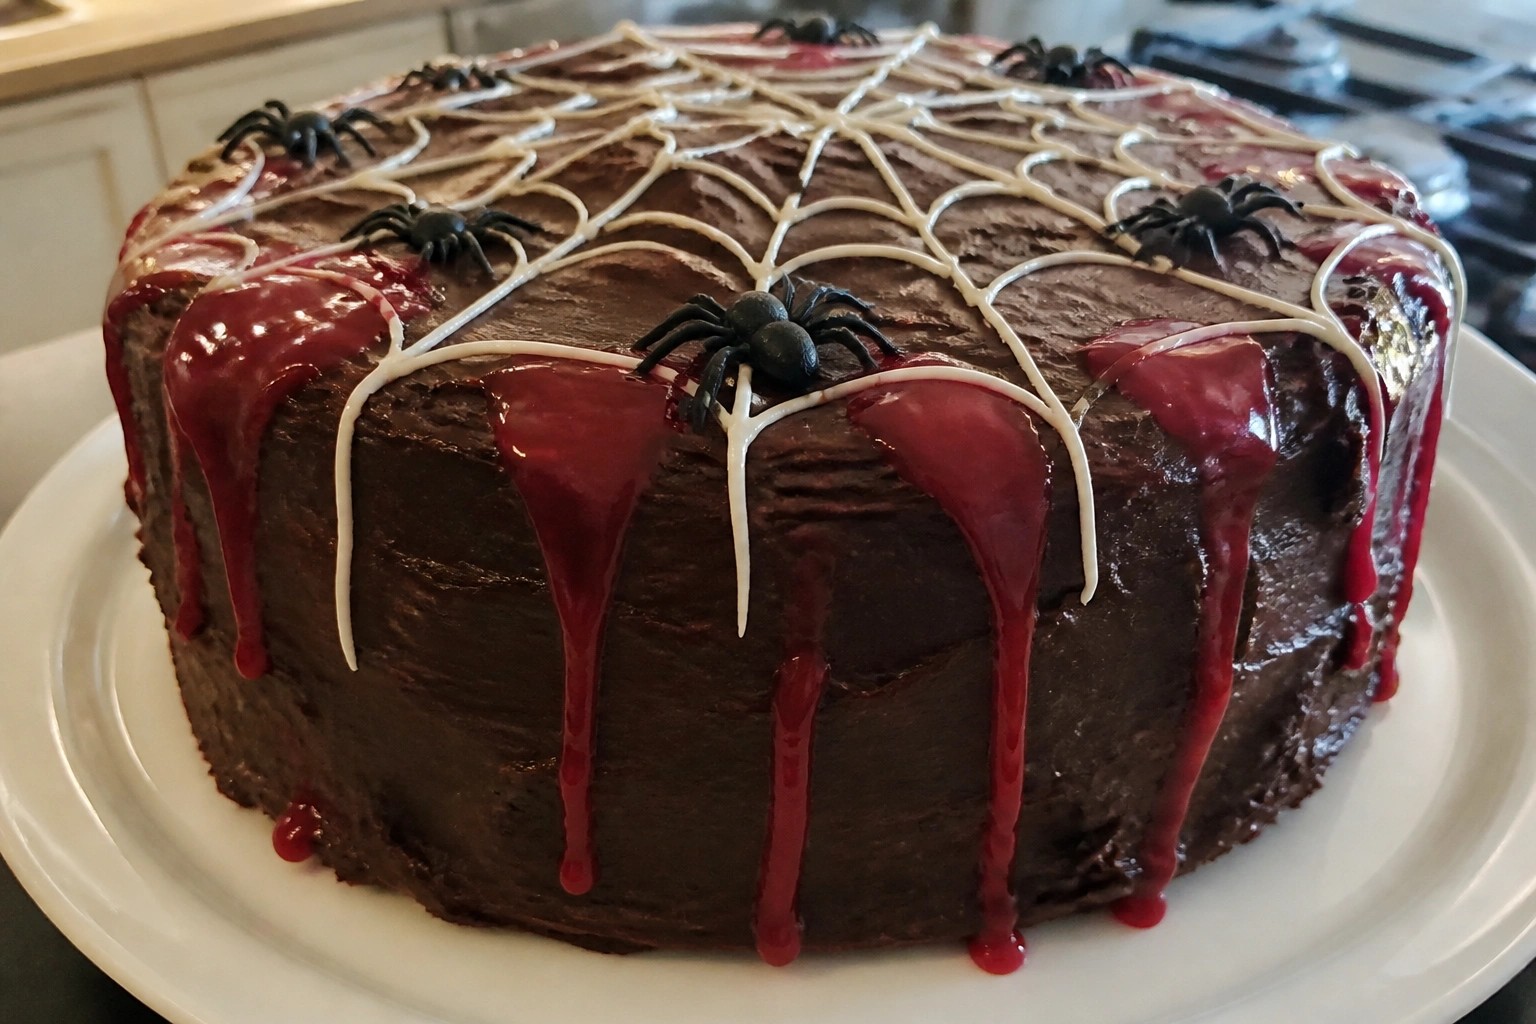
If you need cake ideas for Halloween this year, these options should help. They focus on looks that fit a haunted table without needing special tools. Most use basic cake mixes or from-scratch recipes that are easy to follow. You will find ways to decorate them with everyday items too.
Helpful Tips Before You Start
A few steps ahead of time will help your cakes look and taste the way you want.
Recommended Products

🕷️Premium Material: These Halloween Spider cupcake picks are made of wafer rice paper, it is completely edible ,eco-friendly but not delicious, They are virtually tasteless, not sweet at all and are sugar free, very safe to put them on cakes, cupcakes, ice cream, fruits, pie, dessert, cheese or any dish and food appetizer you want to decorate with this creepy spider cupcake decoration.

🕷️Premium Material: These Halloween Spider cupcake picks are made of wafer rice paper, it is completely edible ,eco-friendly but not delicious, They are virtually tasteless, not sweet at all and are sugar free, very safe to put them on cakes, cupcakes, ice cream, fruits, pie, dessert, cheese or any dish and food appetizer you want to decorate with this creepy spider cupcake decoration.

Bold Red & Blue Hero Vibe for Eye-Catching Desserts:Paired with fun spider-shaped sprinkles,instantly creates a heroic,action-packed look for your desserts.Ideal for hero birthday parties,Halloween events,and bold themed celebrations
Pick Dark Cake Bases
Chocolate or black cocoa recipes give a natural dark color that makes spooky details stand out without extra dye.
Make Decorations Ahead
Shape fondant tombstones, candy bones, or web pieces the day before so assembly goes faster on the day you bake.
Use Gel Colors Sparingly
Add gel food coloring a little at a time to reach deep shades without thinning the batter or changing the taste.
Chill Layers Before Frosting
Refrigerate cooled cake layers for 30 minutes so crumbs stay in place and your final coat stays smooth.
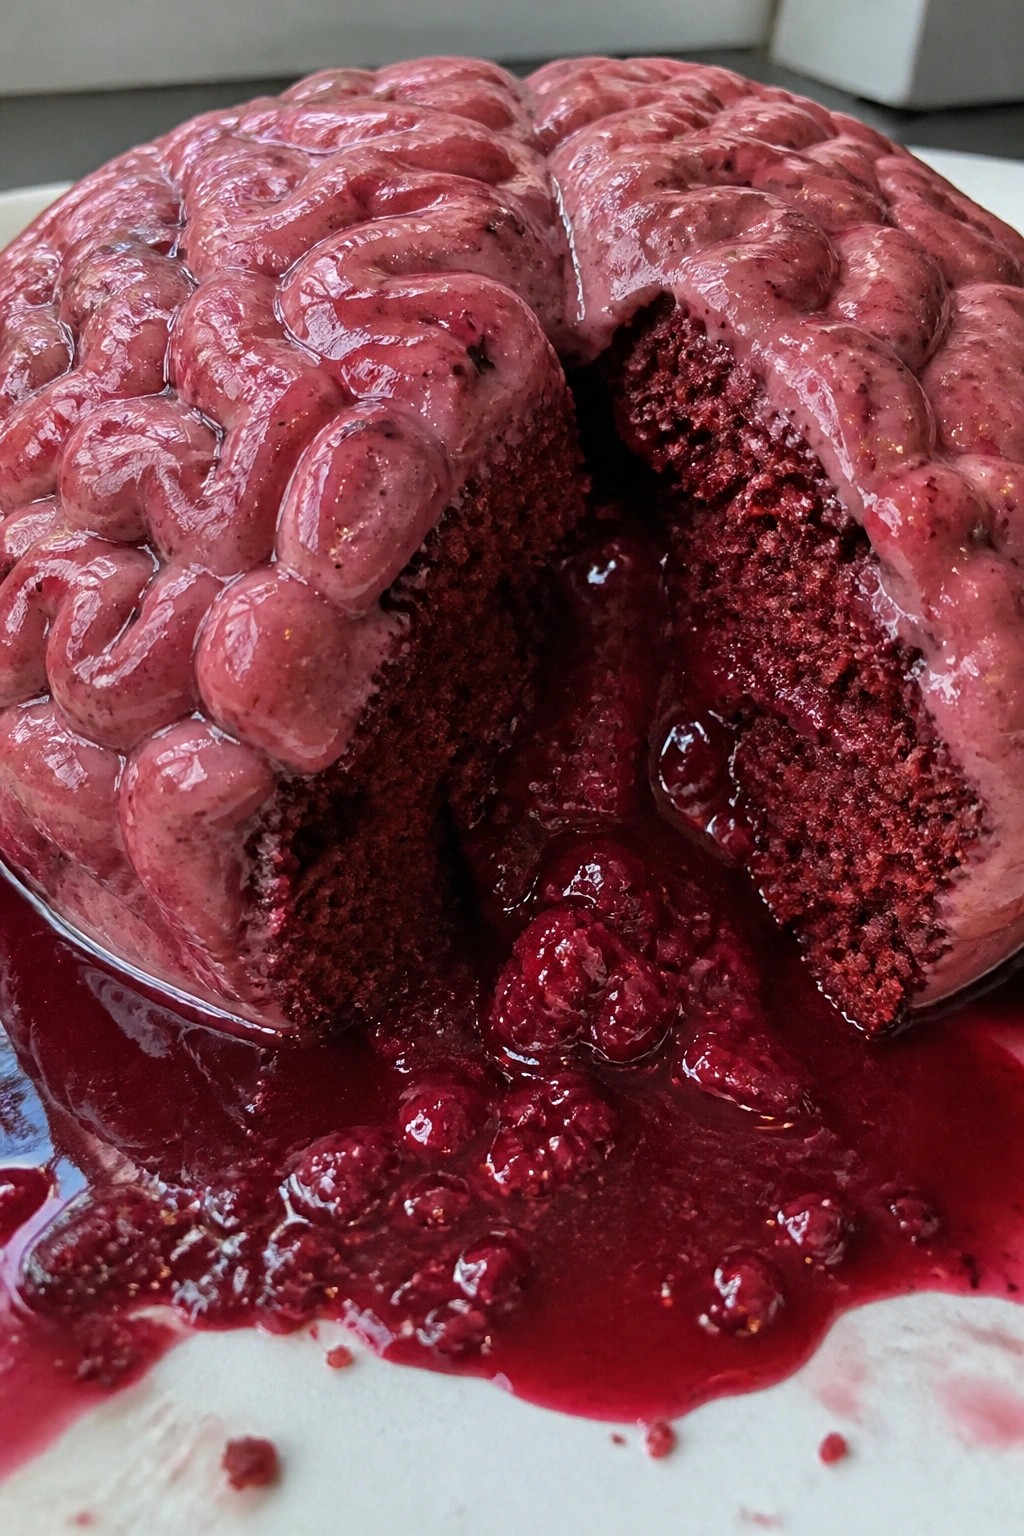
Decaying Zombie Brain Cake with Raspberry Ooze
This cake brings a creepy but simple touch to any Halloween spread. The red velvet base stays moist with a light cocoa note, while the raspberry ooze adds bright tartness that cuts through the sweetness. It works well for small gatherings or as a standout dessert on a haunted table.
It looks striking when sliced, with the sauce seeping out like fresh decay. The texture stays tender inside and slightly crisp on the edges from the bake.
Serves 4 people.
Recommended Products

Package Included--15PCS in pack, have 13PCS different Cake toppers style design, black Haunted House, yellow Pumpkin, white Ghost, black Bat, red BOO, Happy Halloween and black Spider etc. Made of high quality, Food Standard Paper. Easy to use.

Package Included:22 Pcs Cake toppers. 2pcs ghost cake topper,2pcs castle cake toppers, 2pcs witch cake topper,2pcs spider web cake toppers,2pcs black tree cake toppers. 2pcs red boo cake topper,2pcs happy halloween red letter cake toppers,2 pcs pumpkin cake toppers, 6pcs spider cake toppers.

Quantity: You will receive 3pcs Halloween theme cake toppers, 3pcs spider, 2pcs pumpkin, 5pcs spiderweb cake toppers, 3pcs bat, 3pcs ghost, 1pcs tombstone, 3pcs purple ball, 3pcs gold ball. Variety, can better show you need a theme cake scene.
Ingredients
- 1 1/2 cups all-purpose flour
- 1 cup granulated sugar
- 1/4 cup unsweetened cocoa powder
- 1 teaspoon baking soda
- 1/2 teaspoon salt
- 1 cup buttermilk
- 1/2 cup vegetable oil
- 1 large egg
- 1 tablespoon red food coloring
- 1 teaspoon vanilla extract
- 1 cup fresh raspberries
- 2 tablespoons granulated sugar
- 1 teaspoon lemon juice
Instructions
- Heat the oven to 350 degrees and grease a small brain-shaped silicone mold or 8-inch round cake pan.
- In a large bowl, whisk together the flour, 1 cup sugar, cocoa powder, baking soda, and salt until evenly mixed.
- In a second bowl, stir the buttermilk, oil, egg, red food coloring, and vanilla until smooth.
- Pour the wet mixture into the dry ingredients and stir just until no streaks remain.
- Transfer the batter to the prepared mold or pan and bake for 25 to 30 minutes, or until a toothpick comes out clean.
- Let the cake cool in the pan for 10 minutes, then turn it out onto a plate.
- While the cake cools, place the raspberries, 2 tablespoons sugar, and lemon juice in a small saucepan.
- Cook the raspberry mixture over medium heat for 5 minutes, stirring often, until the berries break down and the sauce thickens slightly.
- Spoon the warm raspberry ooze over the top of the cake so it drips down the sides.
Extra Tips
Bake the cake a day ahead and store it wrapped at room temperature, then warm the raspberry sauce just before serving so it stays glossy and loose. If you cannot find a brain mold, bake in a round pan and use a spoon to carve shallow grooves across the top before adding the ooze. The sauce can be thinned with a splash of water if it sets too firm after cooling. Course: Dessert Cuisine: American Equipment: Mixing Bowls, Cake Pan, Saucepan, Oven
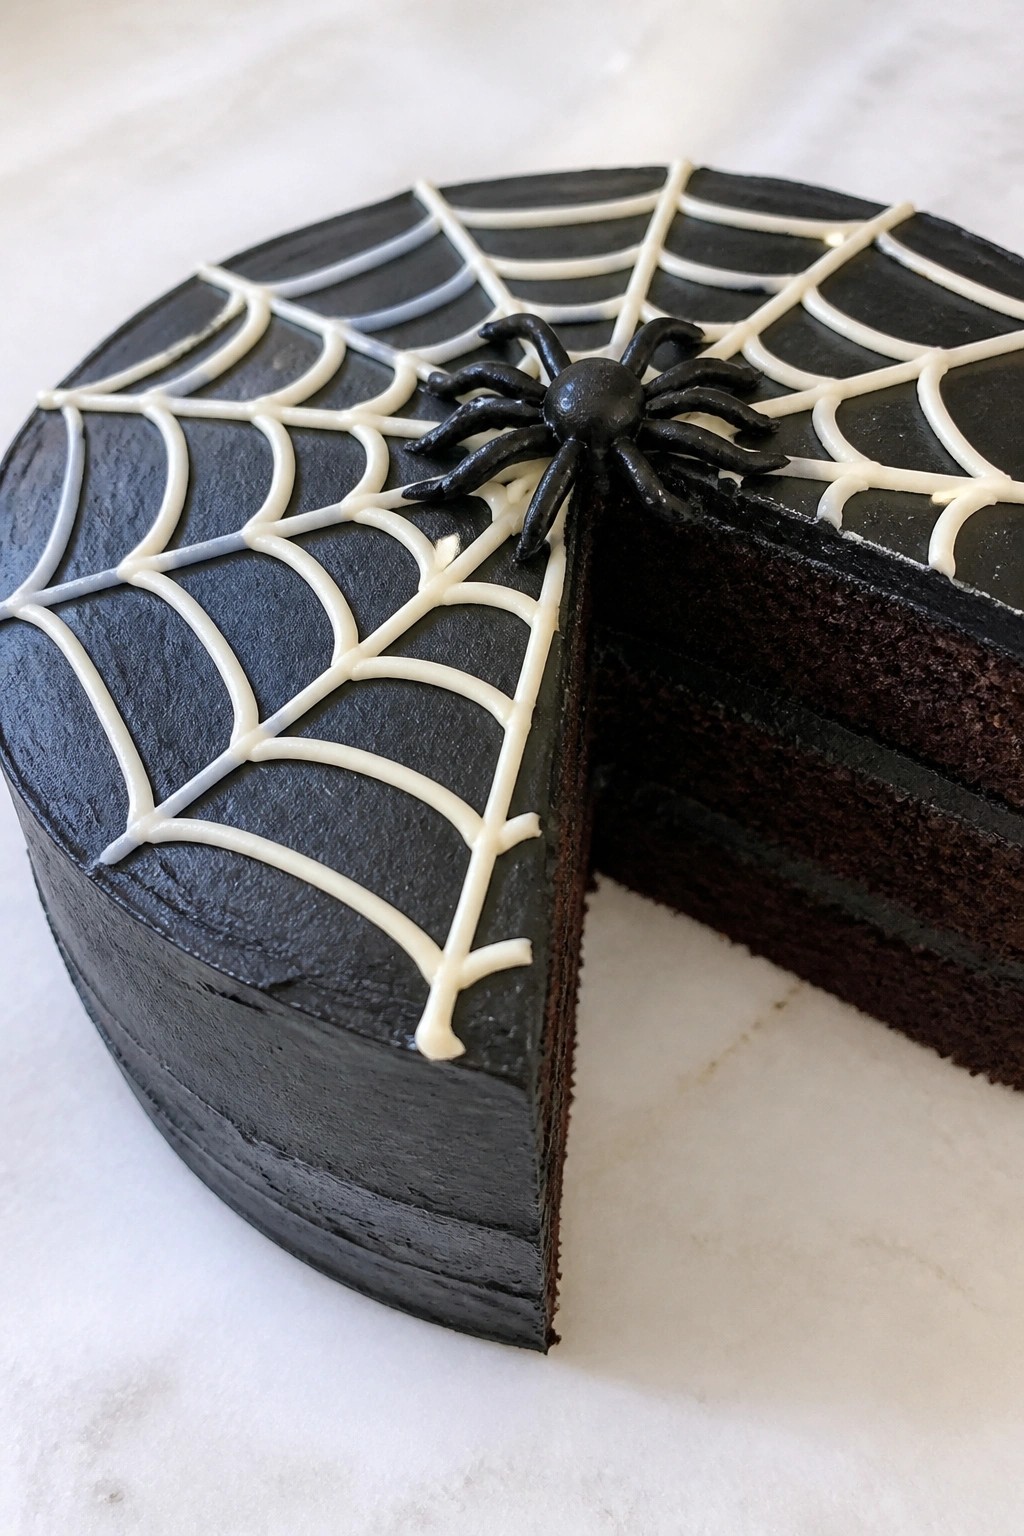
Black Widow Spiderweb Chocolate Layer Cake
This chocolate layer cake brings a spooky touch to any Halloween table with its dark layers and striking spiderweb design. The rich cocoa flavor pairs with smooth frosting for a dessert that feels festive without extra fuss. It works well for small gatherings where you want something visual but still simple to slice and serve.
The cake stays moist inside while the frosting adds a creamy finish. A piped web on top with a small spider detail gives it that haunted look guests notice right away.
Serves 4 people.
Ingredients
- 1 1/2 cups all-purpose flour
- 1 cup granulated sugar
- 1/2 cup unsweetened cocoa powder
- 1 teaspoon baking soda
- 1/2 teaspoon salt
- 1 cup buttermilk
- 1/2 cup vegetable oil
- 1 large egg
- 1 teaspoon vanilla extract
- 1/2 cup hot water
- 1 cup unsalted butter, softened
- 3 cups powdered sugar
- 2 tablespoons milk
- 1 teaspoon black food coloring
- 1/4 cup white chocolate chips, melted
Instructions
- Preheat the oven to 350 degrees and grease two 6-inch round cake pans. In a large bowl, whisk together the flour, granulated sugar, cocoa powder, baking soda, and salt. Add the buttermilk, vegetable oil, egg, and vanilla extract. Stir until smooth, then slowly mix in the hot water until the batter is thin but even.
- Divide the batter between the prepared pans. Bake for 25 to 28 minutes until a toothpick comes out clean. Let the layers cool in the pans for 10 minutes, then remove them to a wire rack to cool completely.
- While the cakes cool, beat the softened butter in a mixing bowl until light. Gradually add the powdered sugar and milk, mixing until fluffy. Stir in the black food coloring until the frosting reaches a deep black shade.
- Place one cooled cake layer on a plate and spread a thin layer of black frosting on top. Add the second layer and cover the entire cake with the remaining black frosting. Use the melted white chocolate in a piping bag or zip-top bag with a small corner cut to pipe concentric circles on the top. Drag a toothpick from the center outward in several lines to form the spiderweb. Let the white chocolate set before serving.
Extra Tips
Melt the white chocolate just until smooth so it pipes cleanly without running into the black frosting. If the cake layers seem too tall for your gathering, trim them slightly before stacking. Store leftovers in an airtight container at room temperature for up to two days to keep the frosting from drying out. Course: Dessert Cuisine: American Equipment: Mixing Bowls, Cake Pans, Whisk, Oven, Piping Bag
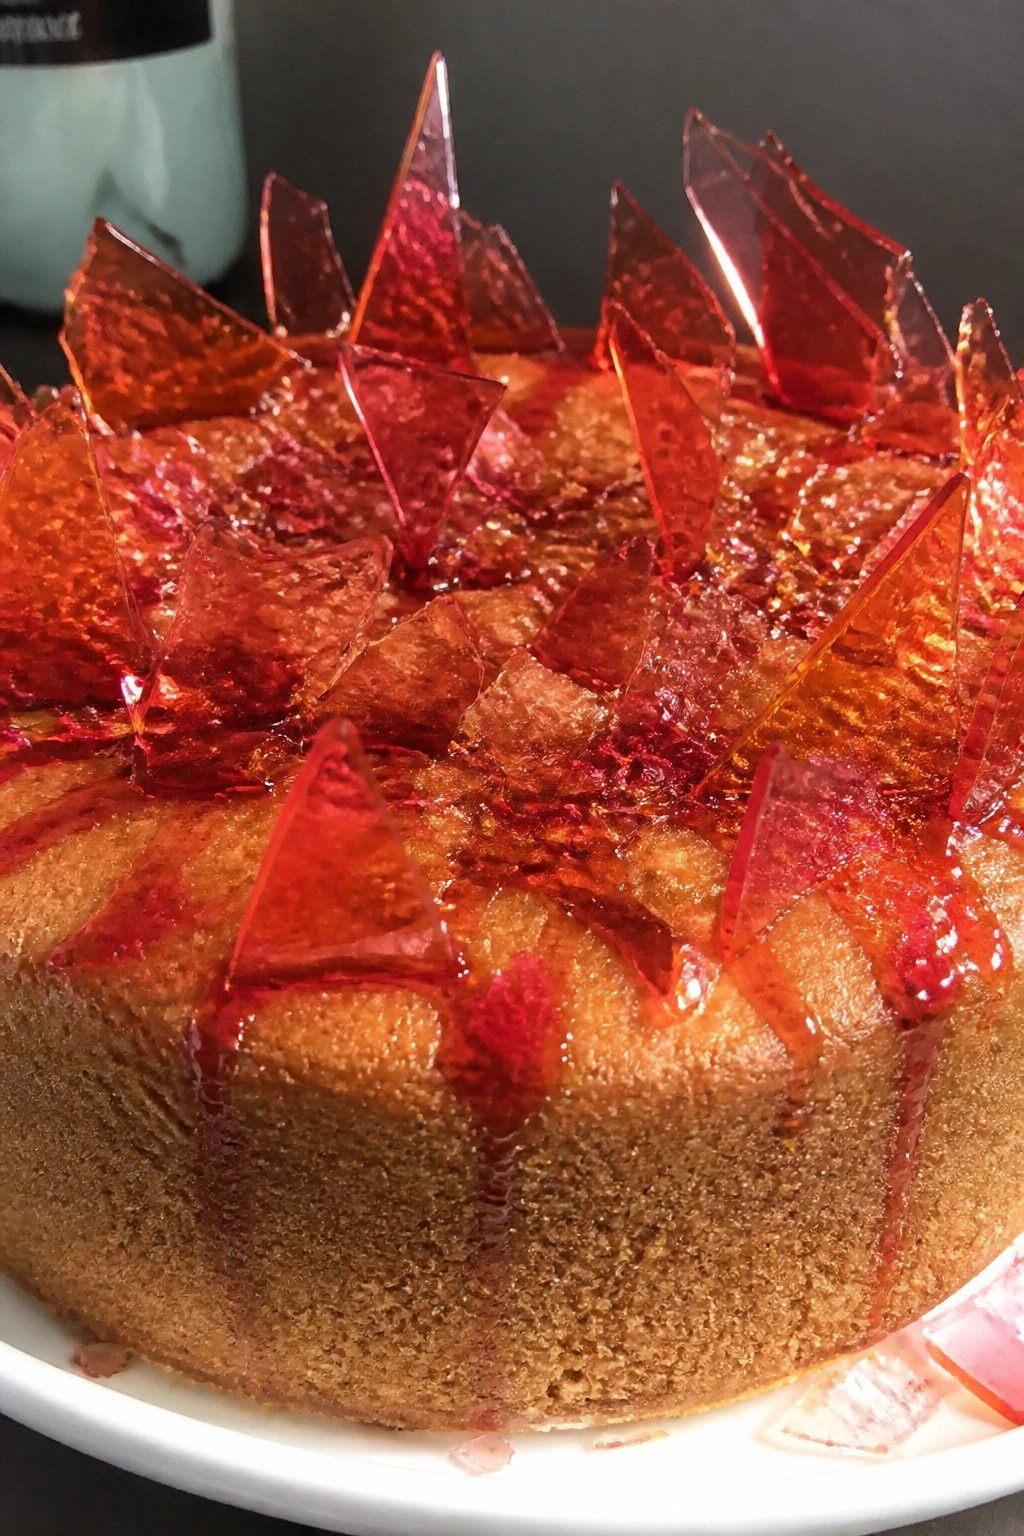
Bleeding Broken Glass Caramel Cake
This cake pairs a soft caramel sponge with sharp sugar shards that shatter on top. The red coloring on the glass gives a bleeding look that fits a Halloween table without extra fuss. It tastes sweet and buttery with a clear crunch from the candy pieces.
Serves 4 people.
Ingredients
- 1 cup all-purpose flour
- 1/2 cup unsalted butter, softened
- 3/4 cup granulated sugar
- 2 large eggs
- 1/2 cup milk
- 1 teaspoon baking powder
- 1 teaspoon vanilla extract
- 1/2 cup caramel sauce
- 1 cup granulated sugar
- 1/4 cup water
- 1/4 cup light corn syrup
- Red gel food coloring
Instructions
- Heat the oven to 350 degrees and grease a small loaf pan. Beat the butter with 3/4 cup granulated sugar until light. Add the eggs one at a time, then mix in the vanilla.
- Stir together the flour and baking powder. Add half the dry mix to the butter bowl, then pour in the milk. Add the rest of the dry mix and stir until smooth.
- Spread the batter in the pan and bake for 25 to 30 minutes until a toothpick comes out clean. Cool the cake completely on a rack.
- While the cake cools, combine 1 cup granulated sugar, water, and corn syrup in a saucepan. Cook over medium heat without stirring until the mixture reaches 300 degrees on a candy thermometer.
- Remove the pan from heat and stir in several drops of red gel food coloring until the color is even. Pour the mixture onto a silicone mat or parchment-lined baking sheet and let it harden.
- Break the cooled sugar sheet into rough shards with your hands or a knife. Drizzle the caramel sauce over the cake and press the red sugar pieces into the top so some edges look cracked and wet.
Extra Tips
Make the sugar glass a day ahead and store the pieces in an airtight container so they stay dry and sharp until serving. If the caramel sauce is too thick, warm it briefly in the microwave so it spreads easily without soaking the cake. Use gel coloring instead of liquid to keep the sugar from turning sticky. Course: Dessert Cuisine: American Equipment: Mixing Bowl, Loaf Pan, Saucepan, Candy Thermometer, Baking Sheet
Haunted Graveyard Dirt Cake with Cookie Tombstones
This dirt cake brings a simple chocolate dessert to the Halloween table. It layers creamy pudding with crushed cookies that look like soil, then adds cookie tombstones to create a small graveyard scene. The result is rich chocolate flavor with a smooth, creamy base and a bit of crunch from the cookies on top.
It works well for small Halloween gatherings or family nights when you want something quick to assemble ahead of time. Kids enjoy spotting the tombstones and worms, while adults appreciate the familiar chocolate taste without extra fuss.

Serves 4 people.
Recommended Products

HAPPY HALLOWEEN: Perfect for Halloween-themed events. Craft a spooky graveyard centerpiece for your ghoul and goblin guests to enjoy.

DecoPac Halloween Cauldron Cupcake Toppers- From bubbling brews to full on potion power this layon is sure to conjure up some Halloween magic. Use half of the cauldron or combine the two halves for a full cauldron. Contains 24 full cauldron decorations or 48 half cauldron's perfect to lay flat on cupcakes.

【Package Content】 The package includes 2 pcs 8 grids witch themed chocolate molds, including witches cauldron, poison, broomstick, bat and cats shapes., The combination of gray and pink is very cute. perfect for your next halloween or witch theme cake decorations.
Ingredients
- 12 chocolate sandwich cookies
- 1 cup cold milk
- 1 (3.9 oz) package instant chocolate pudding mix
- 4 oz cream cheese, softened
- 2 tablespoons powdered sugar
- 1 cup whipped topping
- 4 rectangular shortbread cookies
- Black decorating gel
- 4 gummy worms
Instructions
- Place the chocolate sandwich cookies in a zip-top bag and crush them with a rolling pin until they resemble fine soil. Set aside 2 tablespoons of the crumbs for the final topping.
- In a mixing bowl, whisk the cold milk and instant chocolate pudding mix for 2 minutes until it begins to thicken. Let it stand for 5 minutes.
- In a separate bowl, beat the softened cream cheese and powdered sugar until smooth. Fold in the whipped topping until evenly combined.
- Gently fold the pudding into the cream cheese mixture until no streaks remain.
- Spoon half the pudding mixture into a small serving dish. Sprinkle half the cookie crumbs over it. Repeat with the remaining pudding mixture and crumbs to create the dirt layer.
- Press the rectangular shortbread cookies upright into the top layer to form tombstones. Use the black decorating gel to write "RIP" on each cookie.
- Tuck the gummy worms partially into the cookie crumb layer so they appear to be emerging from the dirt. Finish with the reserved cookie crumbs around the base of the tombstones.
Extra Tips
Chill the assembled cake for at least 30 minutes before serving so the layers firm up and the tombstones stay upright. If the cream cheese mixture feels too stiff after folding, add one tablespoon of milk to loosen it. Store leftovers covered in the refrigerator for up to two days. The shortbread cookies hold their shape better than softer varieties when standing in the pudding. Course: Dessert Cuisine: American Equipment: Mixing Bowl, Whisk, Spatula, Serving Dish
Poison Apple Caramel Bundt Cake
This bundt cake brings a spooky twist to classic apple caramel flavors with a subtle green tint that fits right into a haunted table spread. It works well for Halloween gatherings or autumn parties where you want something festive but still simple to slice and serve. The cake stays moist from the apples while the caramel adds a rich, sticky sweetness that balances the slight tartness.

Serves 4 people.
Ingredients
- 1 1/2 cups all-purpose flour
- 1 teaspoon baking powder
- 1/2 teaspoon ground cinnamon
- 1/4 teaspoon salt
- 1/2 cup unsalted butter, softened
- 3/4 cup granulated sugar
- 2 large eggs
- 1 teaspoon vanilla extract
- 1/2 teaspoon green food coloring
- 2 medium Granny Smith apples, peeled and diced
- 1/2 cup caramel sauce, divided
Instructions
- Preheat the oven to 350 degrees and grease a small bundt pan.
- Whisk the flour, baking powder, cinnamon, and salt in a bowl.
- Beat the butter and sugar until light, then add the eggs one at a time.
- Mix in the vanilla extract and green food coloring until the batter turns an even shade.
- Stir the dry ingredients into the wet mixture until just combined.
- Fold in the diced apples and 1/4 cup of the caramel sauce.
- Pour the batter into the prepared pan and smooth the top.
- Bake for 35 to 40 minutes until a toothpick comes out clean.
- Cool the cake in the pan for 10 minutes, then turn it out onto a plate.
- Warm the remaining caramel sauce and drizzle it over the cooled cake.
Extra Tips
Use firm Granny Smith apples so they hold their shape during baking and keep the cake from turning too sweet. Drizzle the final caramel while it is still slightly warm for a nice drip effect down the sides. Store leftovers in an airtight container at room temperature for up to two days. Course: Dessert Cuisine: American Equipment: Bundt pan, Mixing bowls, Electric mixer, Oven
Creepy Crawler Insect Swarm Cake
This chocolate cake makes a fun addition to any Halloween table. The dark base gives it a moody look while the candy insects create the swarm effect on top. It has a moist crumb and rich chocolate taste that pairs well with the chewy candy pieces.
It works best for small gatherings or as one dessert among several spooky treats. The combination of soft cake and varied candy textures keeps it interesting without extra effort.
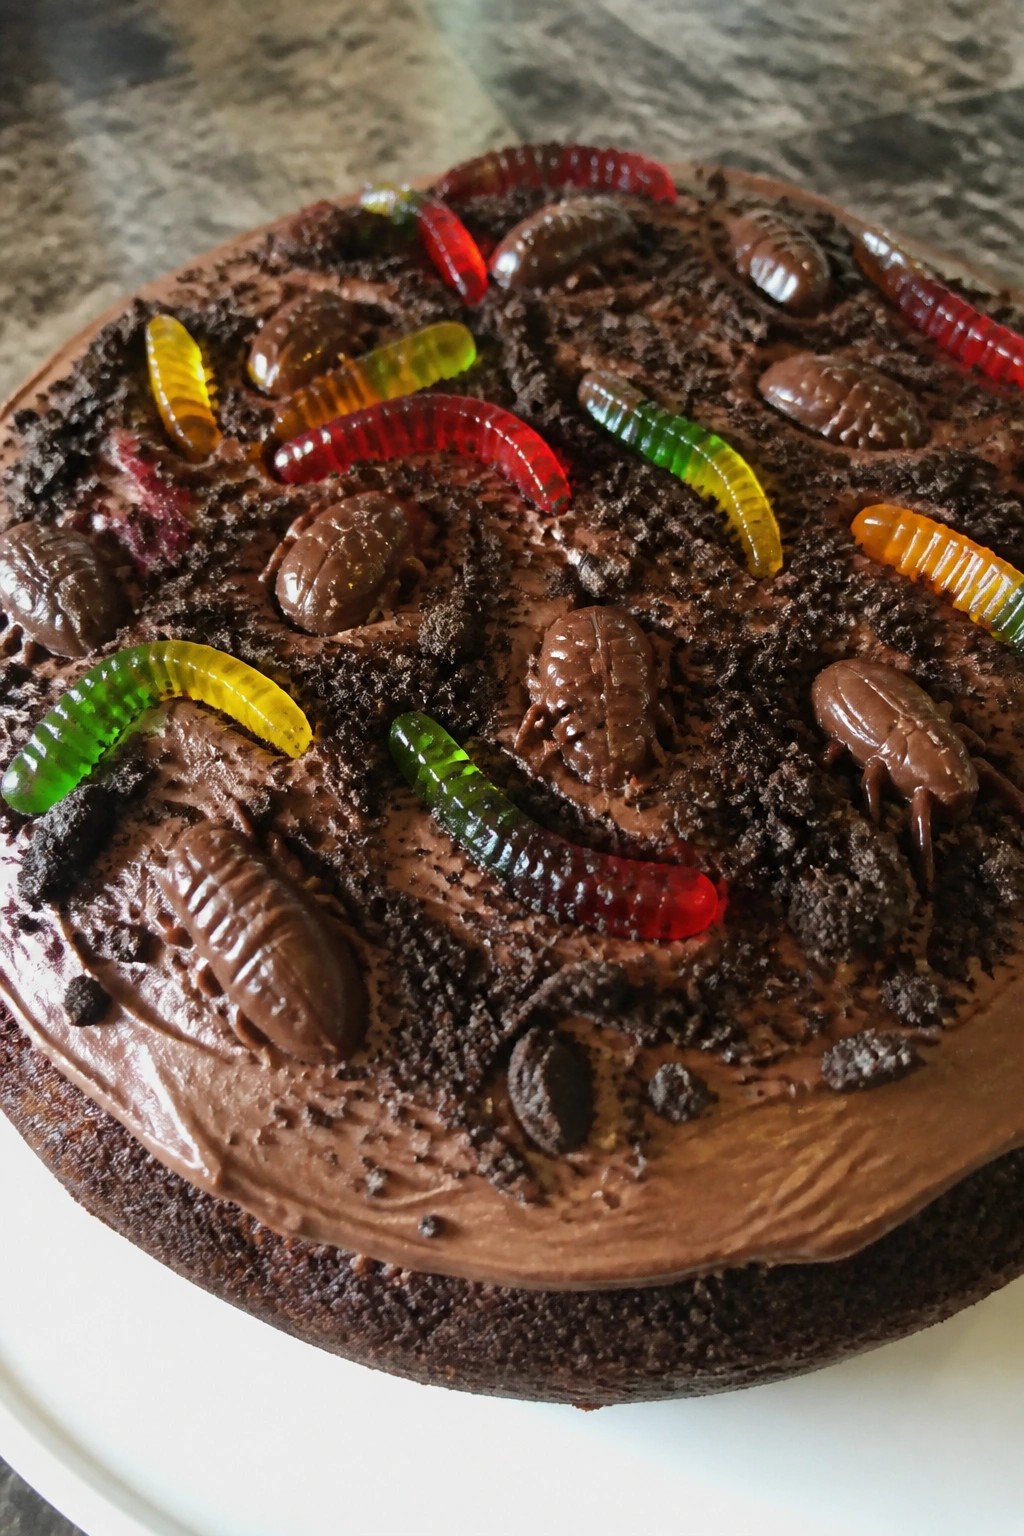
Serves 4 people.
Ingredients
- 1 box devil’s food cake mix
- 3 large eggs
- 1/2 cup vegetable oil
- 1 cup water
- 1 can chocolate frosting
- 1 cup gummy worms
- 1/2 cup chocolate-covered candy bugs
- 1/2 cup crushed chocolate sandwich cookies
Instructions
- Preheat the oven to 350 degrees and grease a round cake pan.
- In a mixing bowl, combine the devil’s food cake mix, eggs, vegetable oil, and water. Stir until smooth.
- Pour the batter into the prepared pan and bake for 30 minutes or until a toothpick comes out clean.
- Let the cake cool completely in the pan before removing it.
- Spread the chocolate frosting evenly over the top and sides of the cooled cake.
- Sprinkle the crushed chocolate sandwich cookies over the frosting to create a dirt-like layer.
- Arrange the gummy worms and chocolate-covered candy bugs across the top so they look scattered and swarming.
Extra Tips
Press the candy bugs gently into the frosting so they stay in place when the cake is moved. You can swap the chocolate-covered candy bugs for other gummy insects if needed. Store leftovers in an airtight container at room temperature for up to two days to keep the cake from drying out. Course: Dessert Cuisine: American Equipment: Mixing Bowl, Cake Pan, Oven
Vampire Fang Pomegranate Red Velvet Cake
This red velvet cake uses pomegranate juice for color and a slight tart edge. The cream cheese frosting keeps it creamy while sliced almonds stand in as fangs along the top. Pomegranate seeds add a juicy pop that fits the vampire theme without extra work.
It suits a small Halloween gathering or as one option on a dessert spread. The cake stays moist from the oil and juice, with a mild cocoa flavor that balances the sweetness.

Serves 4 people.
Ingredients
- 1 cup all-purpose flour
- 3/4 cup granulated sugar
- 2 tablespoons unsweetened cocoa powder
- 1/2 teaspoon baking soda
- 1/4 teaspoon salt
- 1/2 cup pomegranate juice
- 1/4 cup vegetable oil
- 1 large egg
- 1 teaspoon vanilla extract
- 1 teaspoon white vinegar
- 1/2 teaspoon red food coloring
- 4 ounces cream cheese, softened
- 1/4 cup powdered sugar
- 2 tablespoons pomegranate seeds
- 8 sliced almonds
Instructions
- Heat the oven to 350 degrees and line a small square pan with parchment.
- In a bowl, whisk the flour, sugar, cocoa powder, baking soda, and salt until combined.
- In a second bowl, mix the pomegranate juice, oil, egg, vanilla, vinegar, and red food coloring.
- Pour the wet mixture into the dry ingredients and stir until smooth.
- Transfer the batter to the pan and bake for 25 minutes, or until a toothpick comes out clean.
- Cool the cake fully on a rack.
- Beat the cream cheese with powdered sugar until smooth, then spread over the cooled cake.
- Scatter pomegranate seeds across the top and press the sliced almonds into the frosting to form two sets of fangs.
Extra Tips
Bake the cake a day ahead and frost just before serving so the almonds stay crisp. If the frosting feels too thick, add a teaspoon of pomegranate juice to loosen it without changing the flavor. Course: Dessert Cuisine: American Equipment: Mixing Bowl, Cake Pan, Whisk, Oven
Ghostly Apparition Meringue-Topped Vanilla Cake
This cake brings a light touch to a Halloween spread. The vanilla base stays soft and simple while the meringue forms tall, airy ghosts that stand out on the surface. It works well for small gatherings or as one element on a larger dessert table.
The flavor stays mild and sweet with clear vanilla notes in both the cake and topping. The meringue adds a crisp exterior and soft center that contrasts the moist crumb below.

Serves 4 people.
Ingredients
- 1 cup all-purpose flour
- 3/4 cup granulated sugar, divided
- 1/4 cup unsalted butter, softened
- 1 large egg
- 2 tsp vanilla extract, divided
- 1 1/2 tsp baking powder
- 1/2 cup milk
- 2 large egg whites
- 1/4 tsp cream of tartar
- Pinch of salt
Instructions
- Preheat the oven to 350°F and grease a 6-inch round cake pan. In a bowl, whisk together the flour, 1/2 cup sugar, and baking powder.
- In a separate bowl, beat the butter with 1 tsp vanilla until creamy. Add the egg and mix until combined.
- Alternate adding the dry ingredients and milk to the butter mixture, stirring just until smooth. Pour the batter into the prepared pan.
- Bake for 25-28 minutes until a toothpick comes out clean. Cool the cake completely in the pan before removing it.
- Lower the oven to 200°F. In a clean bowl, beat the egg whites with cream of tartar and salt until soft peaks form. Gradually add the remaining 1/4 cup sugar and 1 tsp vanilla while beating until stiff, glossy peaks hold.
- Transfer the meringue to a piping bag fitted with a round tip. Pipe ghost shapes directly onto the cooled cake, spacing them evenly.
- Return the cake to the oven and bake for 25 minutes to set the meringue. Let it cool before serving.
Extra Tips
Whip the meringue just until stiff peaks form so the ghosts hold their shape during the low oven bake. If the cake browns too quickly on the edges, tent it loosely with foil for the final minutes. Leftovers keep covered at room temperature for one day before the meringue softens. Course: Dessert Cuisine: American Equipment: Mixing bowls, Electric mixer, 6-inch cake pan, Piping bag with round tip, Whisk
Mummy Bandage Coconut Cream Cake
This coconut cream cake brings a fun Halloween twist to the dessert table with its mummy-inspired look. The moist cake layers hold a rich coconut flavor while the whipped coconut cream topping adds a light finish. White chocolate strips create the bandage effect across the top, making it a simple yet striking centerpiece for a haunted gathering.
The recipe works well for small parties or as one of several desserts on a themed spread. It delivers a creamy texture with subtle sweetness from the coconut and a slight crunch from the shredded coconut baked inside.
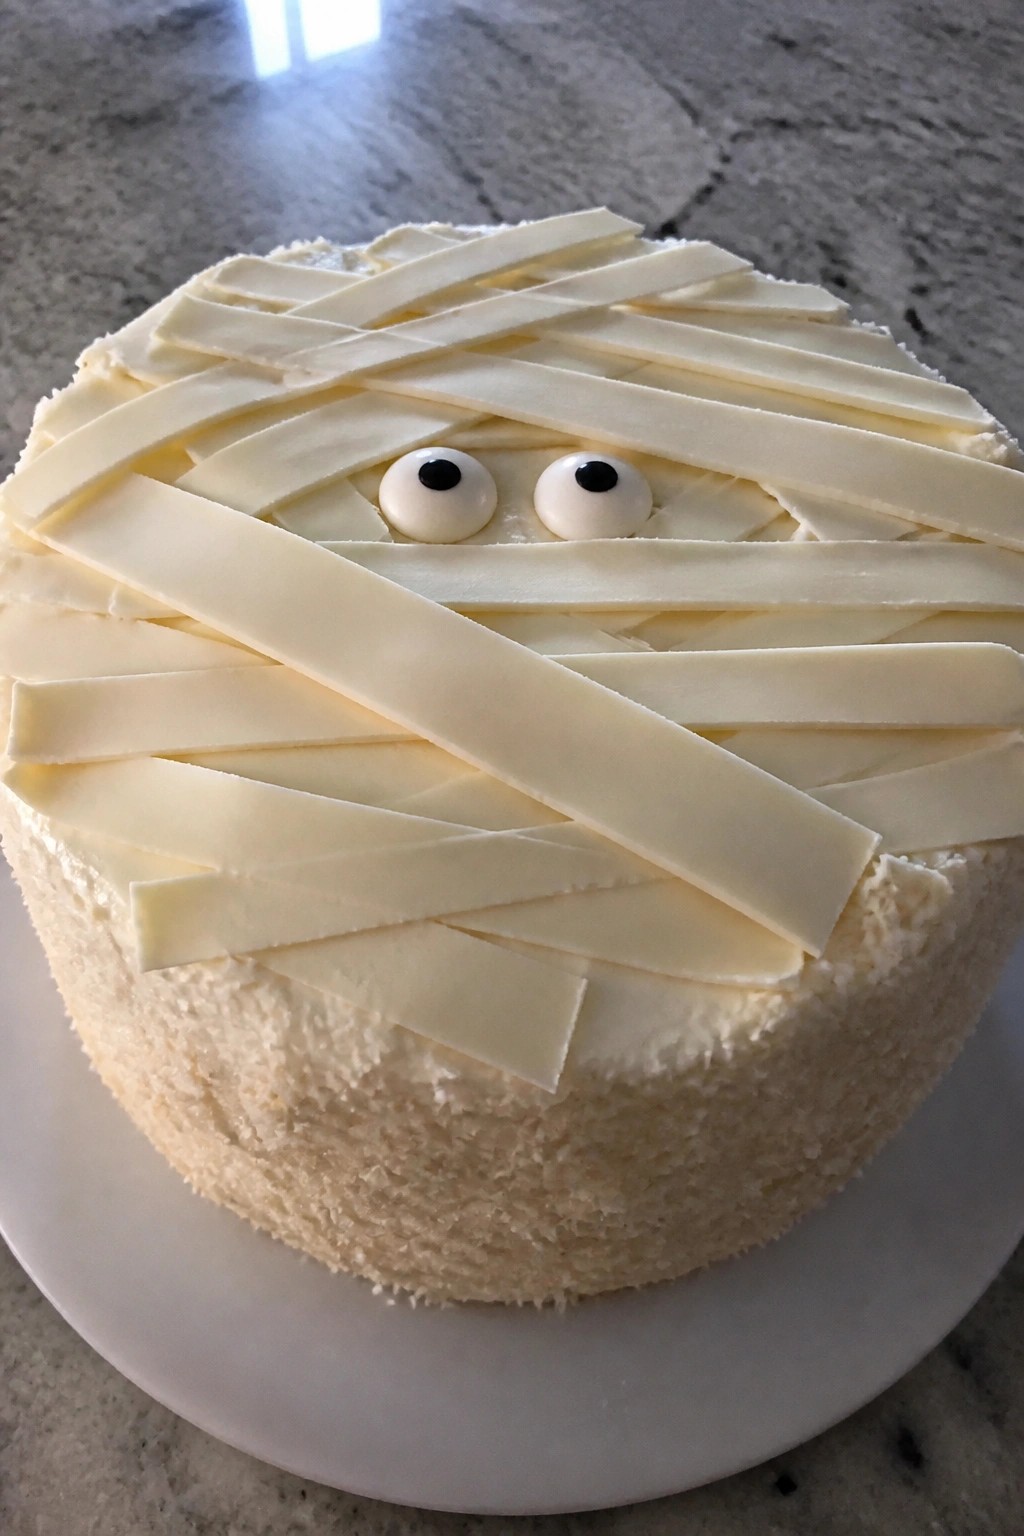
Serves 4 people.
Ingredients
- 1 cup all-purpose flour
- 1/2 cup granulated sugar
- 1 teaspoon baking powder
- 1/2 cup coconut milk
- 2 large eggs
- 1/2 cup shredded coconut
- 1 cup coconut cream
- 1/4 cup powdered sugar
- 1 teaspoon vanilla extract
- 1/4 cup white chocolate chips
- 2 candy eyes
Instructions
- Preheat the oven to 350 degrees and grease a small loaf pan. In a mixing bowl, whisk together the flour, granulated sugar, and baking powder.
- Add the coconut milk, eggs, and shredded coconut to the dry ingredients. Stir until the batter is smooth and evenly combined.
- Pour the batter into the prepared pan and bake for 25 to 30 minutes until a toothpick inserted in the center comes out clean. Let the cake cool completely in the pan.
- While the cake cools, beat the coconut cream with the powdered sugar and vanilla extract until it forms soft peaks. Spread the whipped mixture evenly over the cooled cake.
- Melt the white chocolate chips in a microwave-safe bowl in short bursts, stirring until smooth. Transfer to a piping bag or zip-top bag with a small corner cut off.
- Pipe thin, overlapping strips of melted white chocolate across the frosted cake to resemble bandages. Press the candy eyes into place near one end of the cake.
Extra Tips
Chill the coconut cream can overnight before whipping so it thickens properly without added stabilizers. If the white chocolate sets too quickly while piping, rewarm it briefly to keep the strips smooth and easy to apply. Leftovers keep covered in the refrigerator for two days. Course: Dessert Cuisine: American Equipment: Mixing Bowl, Loaf Pan, Whisk, Piping Bag
Witch’s Cauldron Matcha Bundt Cake
This matcha bundt cake turns a simple green tea flavor into a striking centerpiece for Halloween. The bundt shape gives it a cauldron-like look, and the natural green color from matcha fits right in with a haunted table display. It works well when you need a dessert that feels festive without extra decorations.
The cake has a tender crumb and a mild earthy sweetness that balances the matcha. It slices cleanly and holds up on a dessert table through the evening.
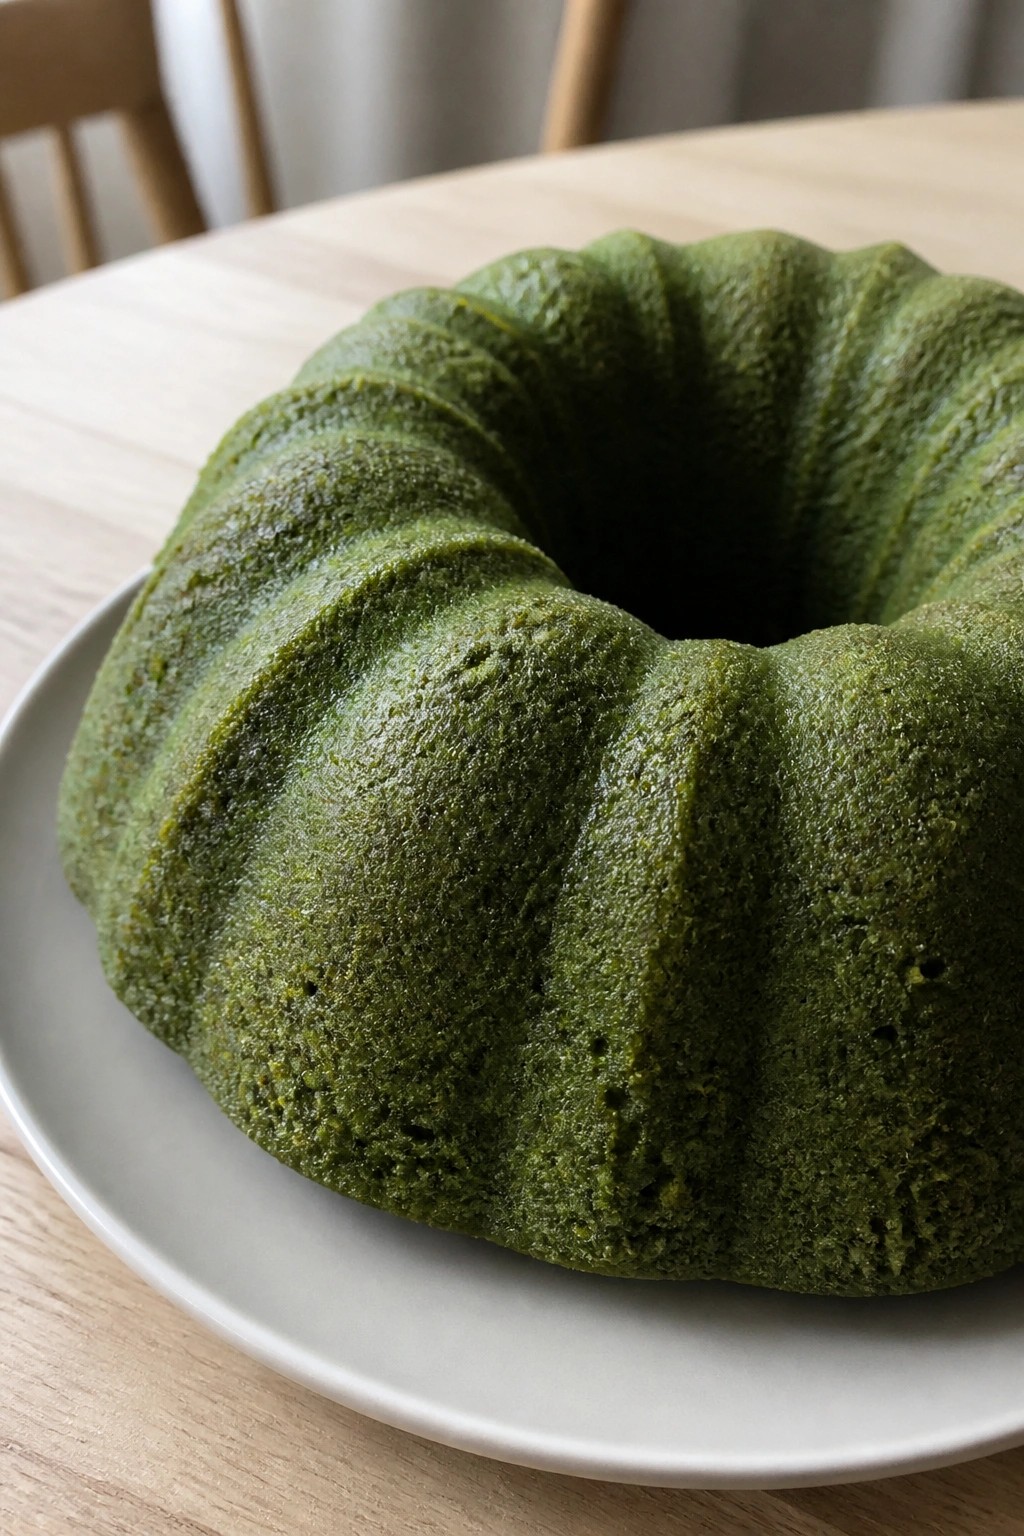
Serves 4 people.
Ingredients
- 1 cup all-purpose flour
- 1/2 cup granulated sugar
- 2 tablespoons matcha powder
- 1 teaspoon baking powder
- 1/4 teaspoon salt
- 1/4 cup unsalted butter, melted
- 1 large egg
- 1/2 cup milk
- 1 teaspoon vanilla extract
Instructions
- Preheat the oven to 350°F and grease a small bundt pan.
- In a mixing bowl, whisk together the flour, sugar, matcha powder, baking powder, and salt until evenly combined.
- In a second bowl, stir the melted butter, egg, milk, and vanilla extract until smooth.
- Pour the wet mixture into the dry ingredients and stir just until no dry streaks remain.
- Spoon the batter into the prepared bundt pan and smooth the top.
- Bake for 25 to 30 minutes, or until a toothpick inserted in the center comes out clean.
- Cool the cake in the pan for 10 minutes, then turn it out onto a wire rack to cool completely.
Extra Tips
Dust the cooled cake lightly with extra matcha powder right before serving to deepen the green color and add a subtle bitter note that contrasts the sweetness. If the matcha tastes too strong, reduce it by one teaspoon next time. Store leftovers in an airtight container at room temperature for up to two days. Course: Dessert Cuisine: American Equipment: Bundt Pan, Mixing Bowls, Whisk, Oven
Skeleton Bone White Chocolate Drip Cake
This cake brings a spooky touch to any Halloween table with its pale white chocolate drip and scattered bone shapes on top. It works well for small gatherings or as a centerpiece on a dessert spread. The flavor is sweet and creamy from the white chocolate, with a light vanilla cake base that stays moist.
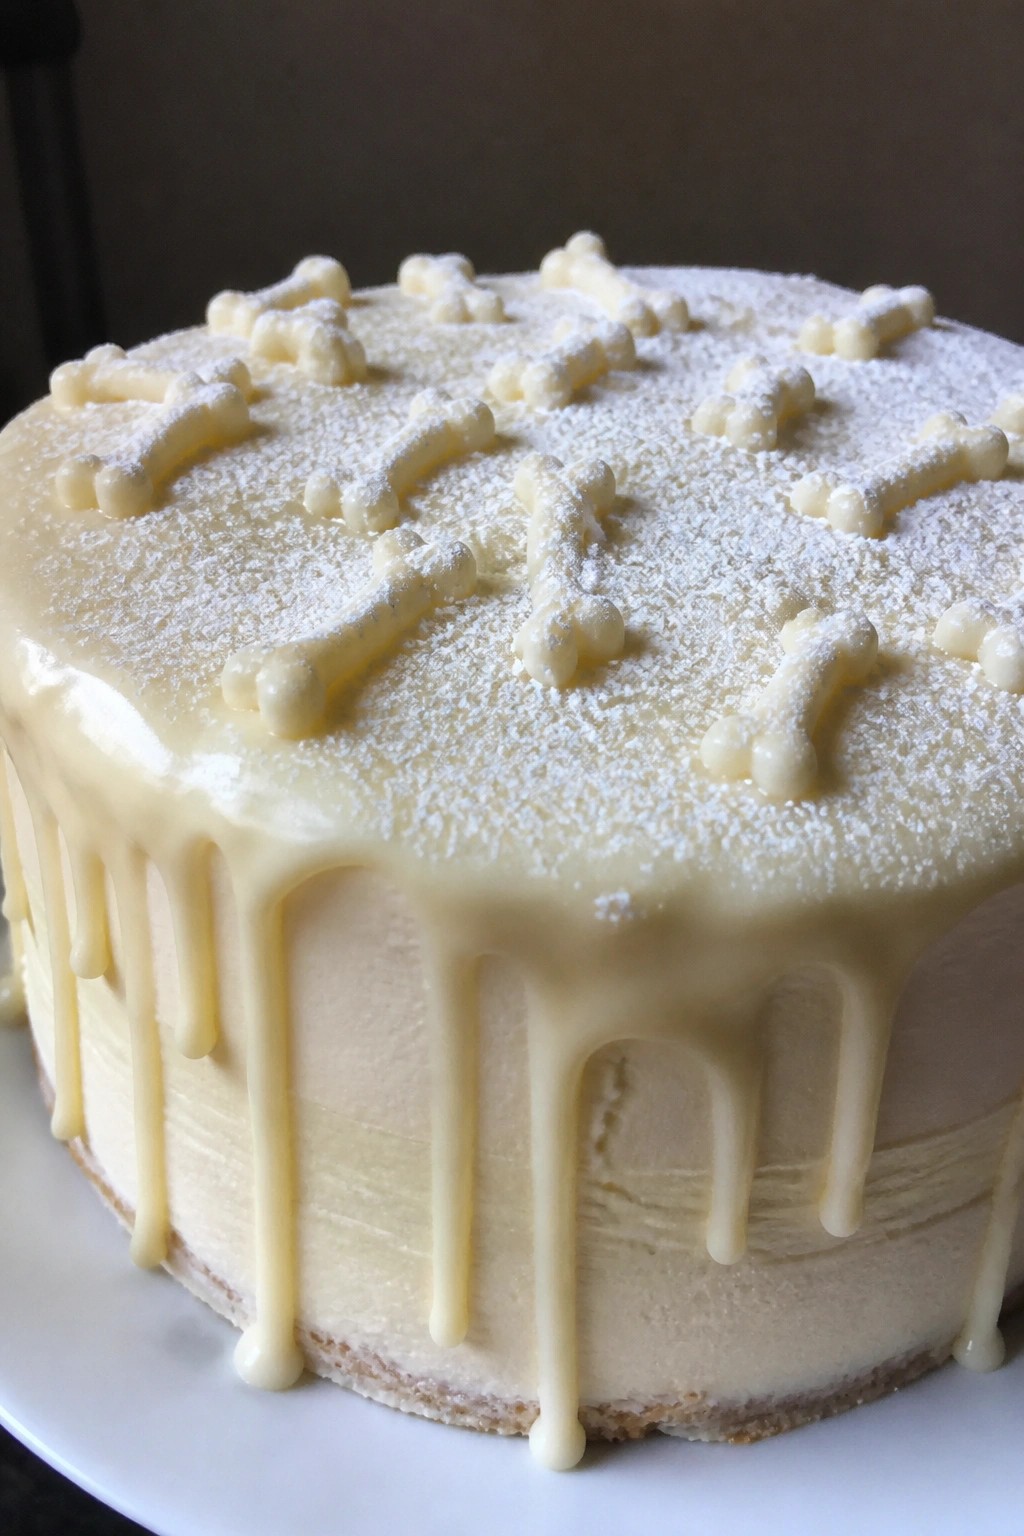
Serves 4 people.
Ingredients
- 1 cup all-purpose flour
- ¾ cup granulated sugar
- ½ cup unsalted butter, softened
- 2 large eggs
- ½ cup milk
- 1 teaspoon baking powder
- 1 teaspoon vanilla extract
- 6 ounces white chocolate, divided
- ⅓ cup heavy cream
- ¼ cup powdered sugar
Instructions
- Preheat the oven to 350°F and grease a 6-inch round cake pan. In a mixing bowl, whisk together the flour, granulated sugar, and baking powder. In a second bowl, beat the butter until smooth, then add the eggs one at a time followed by the vanilla extract and milk. Combine the wet and dry mixtures until just blended, then pour the batter into the prepared pan. Bake for 25 to 30 minutes until a toothpick comes out clean. Let the cake cool completely in the pan.
- Melt 4 ounces of the white chocolate with the heavy cream in a small saucepan over low heat, stirring until smooth to create the drip. Pour the mixture over the cooled cake so it runs down the sides. Melt the remaining 2 ounces of white chocolate and use a piping bag or spoon to shape small bone forms on parchment paper. Let the bones set, then arrange them on the cake. Dust lightly with the powdered sugar before serving.
Extra Tips
Make the bone shapes a day ahead and store them in the fridge so they hold their form when placed on the cake. If the white chocolate drip thickens too much, warm it gently with a splash of extra cream to loosen it. The cake keeps covered at room temperature for one day or in the fridge for three days. Course: Dessert Cuisine: American Equipment: Mixing bowls, 6-inch cake pan, saucepan, parchment paper
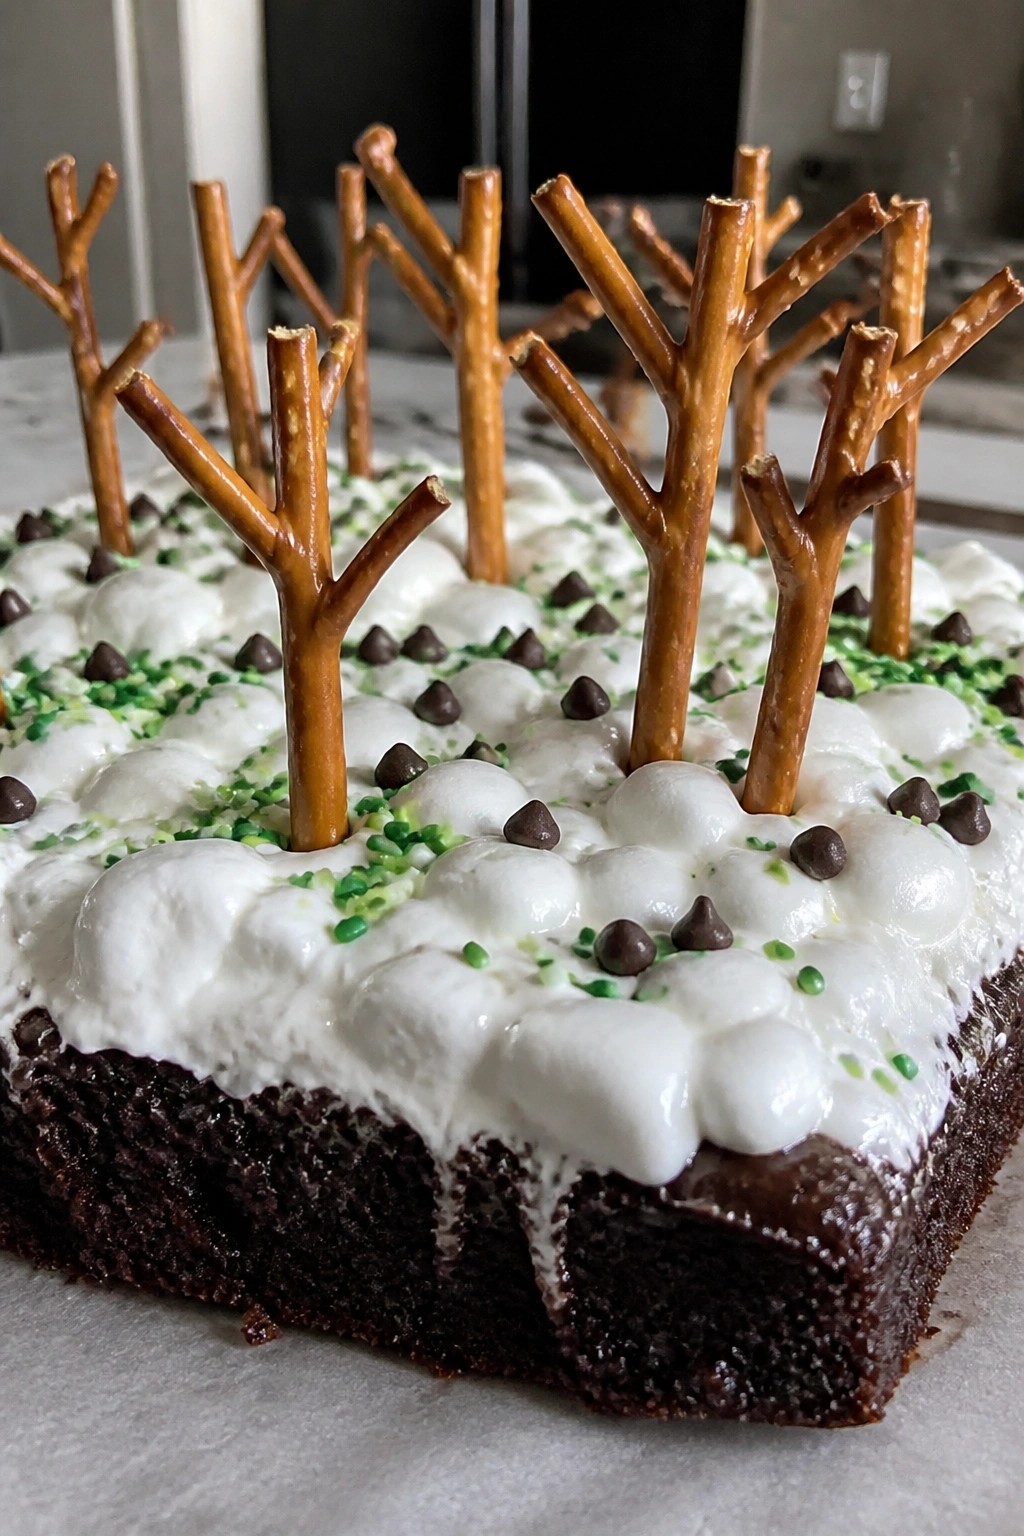
Foggy Marshmallow Horror Forest Cake
This cake brings a dark chocolate base to the table with a soft layer of melted marshmallows on top. The pretzel trees add height and a stark look that fits a Halloween spread. It works well for small gatherings where you want something simple yet themed.
The flavor stays rich from the chocolate while the marshmallows give a light, sticky contrast. The overall texture balances a moist crumb with chewy elements on top.
Serves 4 people.
Ingredients
- 1 box chocolate cake mix
- 1 cup water
- 1/2 cup vegetable oil
- 3 large eggs
- 3 cups mini marshmallows
- 1/2 cup dark chocolate chips
- 12 pretzel sticks
- 1/4 cup green sprinkles
Instructions
- Preheat the oven to 350 degrees and grease a 9-inch round cake pan.
- In a large bowl, combine the chocolate cake mix, water, vegetable oil, and eggs. Mix until smooth.
- Pour the batter into the prepared pan and bake for 30 minutes, or until a toothpick comes out clean. Let the cake cool in the pan for 10 minutes before turning it out onto a plate.
- Place the mini marshmallows in a microwave-safe bowl and heat in 20-second bursts, stirring between each, until fully melted.
- Spread the melted marshmallows evenly over the cooled cake to create a foggy layer.
- Melt the dark chocolate chips in the microwave in 15-second bursts, stirring until smooth. Dip the ends of the pretzel sticks into the melted chocolate and press them upright into the marshmallow layer to form trees.
- Scatter the green sprinkles around the base of the trees for added color.
Extra Tips
Melt the marshmallows just before assembly so they stay stretchy and do not set too firm. If the chocolate thickens while dipping the pretzels, warm it for a few more seconds. Store leftovers in an airtight container at room temperature for up to two days. Course: Dessert Cuisine: American Equipment: Mixing bowl, 9-inch cake pan, Microwave-safe bowl, Oven
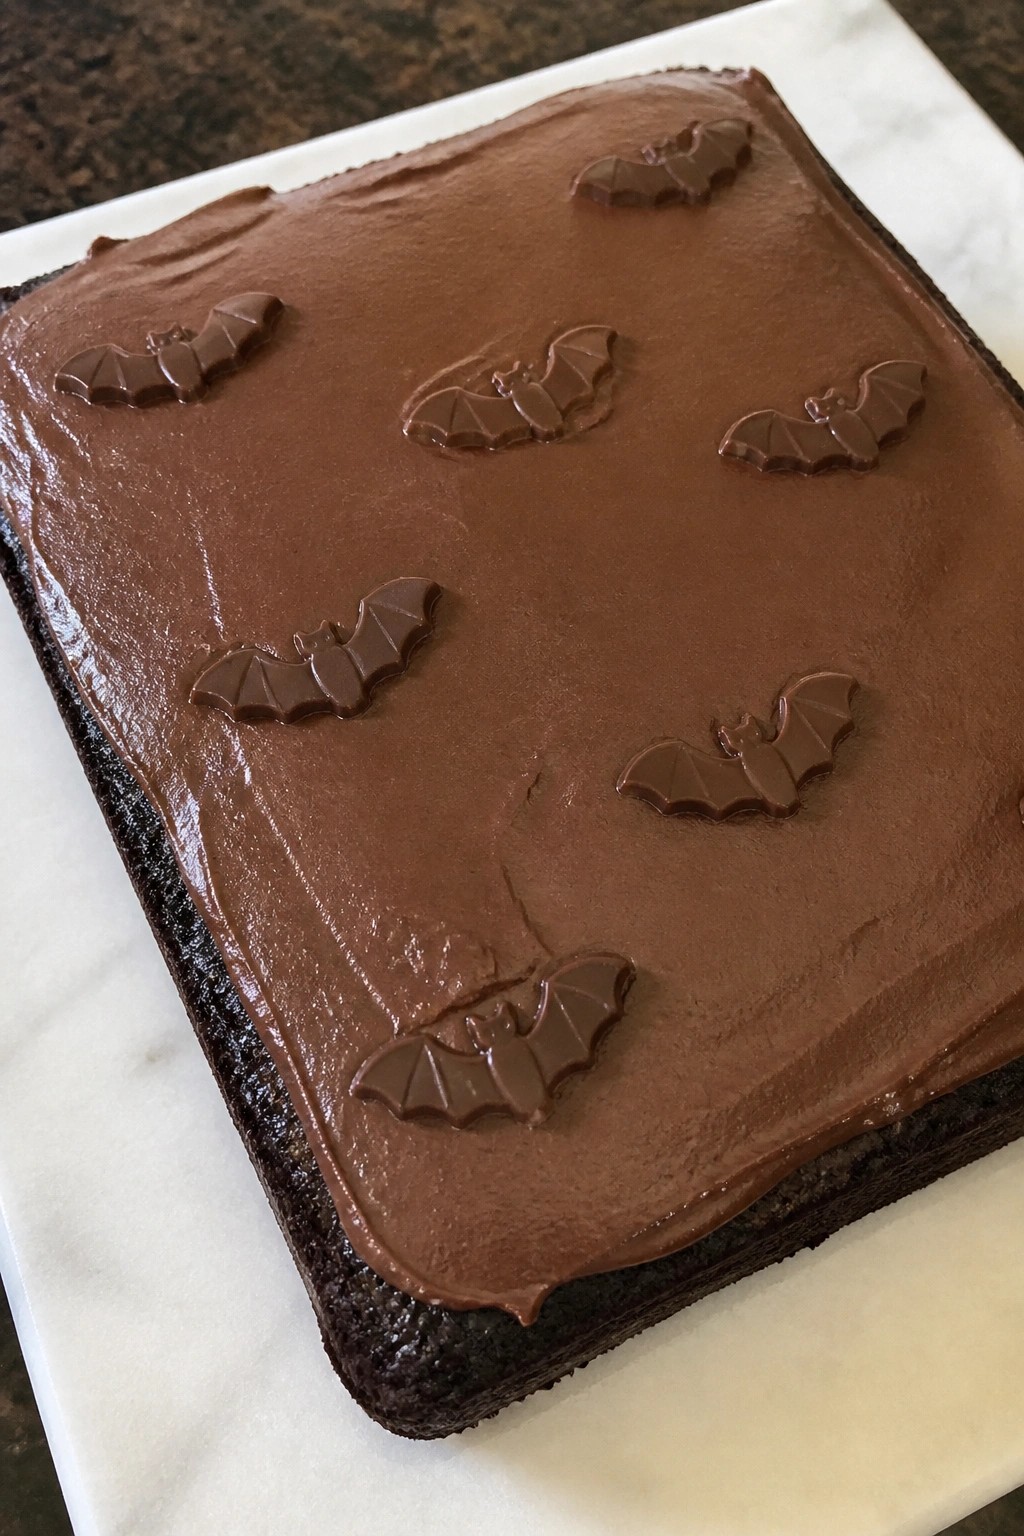
Bat Colony Dark Cocoa Sheet Cake
This dark cocoa sheet cake brings a rich, fudgy crumb to any Halloween spread. The deep chocolate flavor stays balanced and moist, which makes it easy to slice and serve alongside other spooky treats.
It suits small gatherings or a haunted table setup where you want one reliable cake that looks striking with minimal effort. The dark color and simple finish let the bat accents stand out without extra fuss.
Serves 4 people.
Ingredients
- 1 cup all-purpose flour
- ¾ cup dark cocoa powder
- 1 cup sugar
- 1 teaspoon baking soda
- ½ teaspoon salt
- 1 large egg
- ½ cup milk
- ¼ cup vegetable oil
- 1 teaspoon vanilla extract
- ½ cup hot water
- 1 cup chocolate frosting
- 8 small bat-shaped chocolate candies
Instructions
- Preheat the oven to 350°F and line an 8×8-inch pan with parchment paper.
- In a large bowl, whisk together the flour, dark cocoa powder, sugar, baking soda, and salt.
- Add the egg, milk, vegetable oil, and vanilla extract to the dry ingredients and stir until smooth.
- Pour in the hot water and mix gently until the batter thins to a pourable consistency.
- Transfer the batter to the prepared pan and bake for 25 to 28 minutes, until a toothpick inserted in the center comes out with a few moist crumbs.
- Cool the cake completely in the pan before spreading the chocolate frosting evenly over the top.
- Arrange the bat-shaped chocolate candies across the frosted surface to form a small colony.
Extra Tips
The hot water step deepens the cocoa flavor, so do not skip it. For cleaner slices, chill the frosted cake for 15 minutes before cutting. If you need to make the cake ahead, bake and cool it the day before, then frost and add the bats right before serving. Course: Dessert Cuisine: American Equipment: Mixing Bowl, 8×8-inch Pan, Whisk, Oven