Have you ever stared at a room and wondered how to make it look polished and complete? Adding chair rail can transform your space, but cutting those corners can feel tricky. You’re not alone if you’ve struggled with getting those angles just right.
Key Takeaways
- Essential Tools: Gather necessary tools like a miter saw, measuring tape, square, pencil, safety gear, and wood glue or caulk for a successful chair rail installation.
- Accurate Measurements: Take precise measurements for wall length and chair rail height, and always double-check to avoid errors that could lead to wasted materials.
- Understanding Angles: Familiarize yourself with common corner angles (90 degrees) and adjust measurements as needed for non-square corners to ensure proper fitting.
- Cutting Techniques: Choose between miter cuts (for square corners) and coping cuts (for non-square corners) to achieve seamless joints in chair rail installation.
- Test Fit: Always test fit the cut pieces together before permanently securing them to ensure a polished and professional appearance.
- Finishing Touches: Fill any gaps with caulk or wood filler, and sand the joints before painting or staining to create a cohesive look in your space.
Tools Required for Cutting Chair Rail Corners
To cut chair rail corners accurately, gather the right tools. Each tool plays a crucial role in ensuring precision and ease. Here’s a list of essential tools you need:
- Miter Saw: A miter saw provides clean, accurate cuts at various angles. This tool is vital for creating precise miter joints on corners.
- Measuring Tape: Use a measuring tape to get exact lengths for your chair rail. Accurate measurements ensure the pieces fit together seamlessly.
- Square: A square helps verify your angles and ensures your cuts are straight. It’s essential for marking points on your chair rail.
- Pencil: Keep a pencil handy for marking measurements. Use it to indicate where each cut should occur.
- Safety Gear: Safety glasses and ear protection are crucial. These items protect your eyes and ears when using power tools.
- Wood Glue or Caulk: After cutting, use wood glue or caulk to fill in any gaps at the corners. This step helps create a polished look.
Familiarizing yourself with these tools makes the cutting process smoother. Each tool contributes to the success of your project, so keep them close at hand.
Recommended Products
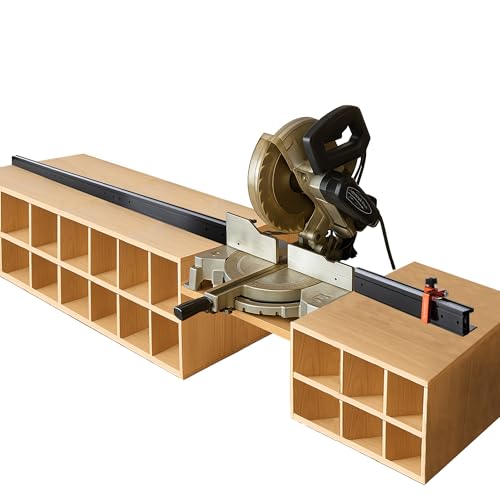
Modular 68" expandable miter saw fence system: Each 17" aluminum rail connects seamlessly to create a 68" total length—configure all on one side or split evenly for long-board support and flexible miter saw fence upgrades

One tool, countless uses: the Bora QuickCut does the work of multiple tools, All with one useful saw guide. The multiple angles on this circular saw accessory eliminate the need for a miter saw or more complex jigs. Cut wood or soft metals with unrivaled precision at four preset angles: 22.5°, 45°, 60°, and 90°.

Ideal for Small Hobby and DIY Crafts - zinc came for stained glass, Carbon and Aluminum arrow shafts, and mini model making
Measuring and Marking Your Chair Rail
Measuring and marking your chair rail accurately is essential for professional-looking results. Start by gathering your tools and preparing your workspace.
Recommended Products

⭕【ACCURATE】:Features easy-to-read precision laser engraved scales, protractor allows direct angle reading to the miter saw. Perfect for crown molding, trim work, and a variety of other carpentry applications.

NO-MATH MITER CUTS: Measure any inside or outside corner and transfer the angle directly to your miter saw; the inner scale automatically divides the angle for you (e.g., a 90° corner reads 45°), eliminating complex mental math and preventing costly material waste
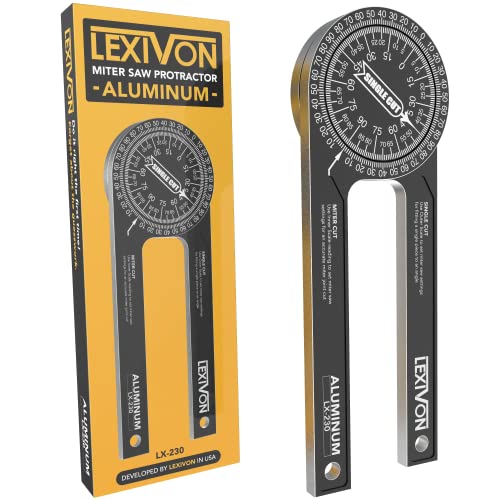
ACCURATE - Crafted from CNC-machined Anodized Aluminum Alloy Steel. Features easy-to-read precision laser engraved scales.
Understanding Corner Angles
Understanding corner angles helps ensure your cuts fit together seamlessly. Most corners in a room form angles of 90 degrees. However, if your walls aren’t perfectly square, you’ll need to adjust your measurements. Use a protractor or combination square to verify angles. For inside corners, you typically cut at a 45-degree angle to create a miter joint. For outside corners, it’s best to measure and cut directly to fit for a clean finish.
Measuring Techniques
Measuring techniques play a crucial role in achieving precise cuts. Follow these steps:
- Measure the Wall Length: Use a measuring tape to determine the length of each wall section where the chair rail will be installed. Note each measurement on paper.
- Mark the Chair Rail Height: Choose your desired height for the chair rail, often around 32 inches from the floor. Mark this height on the wall with a pencil.
- Transfer Marks to the Chair Rail: After measuring, make corresponding marks on the back of the chair rail using a square. This guides accurate cuts and keeps your lines straight.
- Account for Molding Width: If applying a thicker or wider chair rail, ensure to consider its dimensions in your wall length measurements.
- Double-Check Measurements: Always measure twice before cutting. This precaution prevents errors that can lead to wasted materials.
These steps enhance precision, leading to a polished and professional appearance in your final installation.
Cutting Techniques for Chair Rail Corners
Cutting chair rail corners accurately ensures a seamless and professional look in your space. Two primary methods exist for cutting chair rail corners: miter cuts and coping cuts. Each has its advantages and best-use scenarios.
Recommended Products


Simplify Complex Cutting: Streamlines crown cutting by allowing for precise 45° miter cuts (nested method) without needing the saw’s bevel adjustment. This avoids the confusion of complex 31.6°/33.9° geometry, ensuring fast and tight joints with fewer test pieces and less wasted trim

NO MATH REQUIRED FOR PERFECT ANGLES: The aluminum protractor’s inner Miter Cut scale instantly gives the exact setting needed for corner joints, eliminating guesswork, calculations, and the waste of expensive trim material
Miter Cuts vs. Coping Cuts
- Miter Cuts: Miter cuts involve cutting the ends of the chair rail at an angle, typically 45 degrees, to fit two pieces together at a corner. This method works best for corners that are perfectly square. Use a miter saw for precision. Ensure the saw’s angle is set correctly to achieve clean, sharp cuts.
- Coping Cuts: Coping cuts require cutting one piece of chair rail to fit around the profile of another. This technique works well in cases where corners are not perfectly square. For coping, use a jigsaw or coping saw to cut along the profile of the chair rail. This allows the piece to sit snugly against the adjoining piece, producing a seamless joint.
- Measure and Mark: Measure the length of the chair rail needed for each wall. Use a measuring tape and mark the lengths on the chair rail.
- Select the Cutting Technique: Decide between miter cuts or coping cuts based on your corner conditions.
- Set Up the Miter Saw: For miter cuts, adjust the miter saw to 45 degrees. If coping, you’re ready to use a jigsaw or coping saw instead.
- Make the Cuts:
- For miter cuts, cut the end of the chair rail at a 45-degree angle.
- For coping cuts, follow the profile of the chair rail using your saw, creating an edge that fits the adjoining piece perfectly.
- Test Fit: Position the cut pieces together at the corner. Ensure they meet smoothly. Adjust cuts if necessary.
- Attach the Chair Rail: Once satisfied with the fit, use wood glue or finishing nails to secure the chair rail in place.
- Fill Gaps: Use caulk or wood filler to fill any visible gaps for a polished final look.
Following these cutting techniques ensures neat corners that enhance the overall appearance of your chair rail installation.
Installing Chair Rail Corners
Installing chair rail corners successfully requires attention to detail and a proper fitting process. Follow these steps for seamless results.
Fitting the Pieces Together
- Align Your Cuts: Ensure that both pieces of chair rail fit together at the corner. Place the first piece against the wall and mark where the second piece will meet it.
- Check the Fit: Hold the second piece in place to verify that it’s snug against the first. Adjust as necessary. If using coping cuts, ensure the profile curves correctly around the opposing piece.
- Use a Level: After aligning the pieces, check for levelness. A well-fitted chair rail sits straight and uniform across the wall. Adjust the position if required.
- Test and Adjust: Before permanent securing, adjust the pieces multiple times to achieve the best fit. Minor adjustments can make a significant difference in the final appearance.
- Apply Adhesive: Use wood glue or a strong adhesive along the back side of the chair rail. This step minimizes gaps and creates a strong bond.
- Nail the Chair Rail: Use finishing nails or a nail gun to secure the chair rail in place. Drive nails through the chair rail into the wall studs, spacing them about 16 to 24 inches apart for stability.
- Fill the Gaps: After securing, fill any gaps at joints with wood filler or caulk. Use a putty knife for a smooth finish. This step enhances the overall look and hides imperfections.
- Sand and Paint: Once the filler dries, sand the area lightly for a smooth surface. Finish with paint or stain that matches your decor, ensuring a cohesive appearance.
Following these steps ensures a professional look while installing chair rail corners.
Conclusion
Cutting chair rail corners might seem daunting at first but with the right tools and techniques you can achieve a beautiful finish. Remember to take your time measuring and marking to ensure accuracy. Whether you choose miter cuts or coping cuts each method has its advantages for different situations.
Don’t forget to test the fit before securing everything in place. Filling gaps with wood glue or caulk will give your project that polished look you’re aiming for. With a little practice and patience you’ll be able to transform your space with perfectly cut chair rail corners that add character and charm to any room. Happy decorating!
Frequently Asked Questions
What is chair rail and why is it used?
Chair rail is a narrow strip of molding installed horizontally along the walls of a room. It serves both a decorative purpose and practical function, protecting walls from chair damage and enhancing the overall aesthetic.
What tools do I need to install chair rail?
To install chair rail, you will need a miter saw for precise cuts, measuring tape for measuring lengths, a square for checking angles, a pencil for marking, and safety gear for protection during the cutting process.
How do I measure for chair rail installation?
Measure the wall length where the chair rail will go. Mark the desired height on the wall, then transfer these marks to the chair rail. Account for the molding width and double-check your measurements to ensure accuracy.
What are miter cuts and coping cuts?
Miter cuts are made at a 45-degree angle at the ends of the chair rail for square corners. Coping cuts allow one piece of rail to fit around another, ideal for corners that are not perfectly square.
How do I install chair rail accurately?
Align the cut pieces together, check the fit, and use a level for consistency. Secure the pieces in place with adhesive or nails, fill any gaps with wood filler or caulk, and sand and paint to finish for a professional look.