Have you ever found yourself staring at your shower tiles, wishing they could magically disappear? Picture this: You’re standing in your bathroom, contemplating a tile removal project, but you’re not sure where to start. The good news is, with the right guidance, removing tiles from your shower can be a manageable task that yields satisfying results.
Key Takeaways
- Understand the types of tiles commonly used in showers, such as ceramic, porcelain, and natural stone.
- Equip yourself with essential tools like a hammer, chisel, pry bar, grout saw, and putty knife for effective tile removal.
- Prioritize safety by wearing protective gear and preparing the area with proper ventilation before starting the tile removal process.
- Follow a step-by-step guide for assessing tile condition, removing tiles effectively, handling old tiles safely, and repairing the underlying surface for new tile installation.
Understanding the Basics of Tile Removal
When it comes to removing tiles from your shower, understanding the basics is key to a successful outcome. Let’s delve into the types of tiles commonly found in showers and the essential tools you’ll need for this task.
Types of Tiles Commonly Used in Showers
In showers, you’ll typically encounter ceramic, porcelain, or natural stone tiles. Ceramic tiles are popular due to their durability and affordability. Porcelain tiles are known for their water resistance, making them ideal for wet areas like showers. Natural stone tiles such as marble or travertine add a touch of luxury but require extra care during removal to prevent damage.
Tools Needed for Tile Removal
To efficiently remove tiles from your shower, you’ll need a few essential tools:
- Safety Gear: Wear goggles, gloves, and a dust mask to protect yourself.
- Hammer: Use a hammer to break the tiles and grout.
- Chisel: A chisel helps pry off stubborn pieces of tile.
- Pry Bar: This tool assists in lifting larger sections of tile.
- Grout Saw: Use a grout saw to remove grout between tiles.
- Putty Knife: Ideal for scraping off adhesive residue after tile removal.
Equipped with this knowledge and the right tools, you’re ready to tackle your shower tile removal project effectively.
Preparing Your Shower for Tile Removal
Before you begin removing tiles from your shower, it’s crucial to prepare the area properly. This step ensures a smoother process and minimizes potential issues during the tile removal project.
Recommended Products

TILE BRUSH FOR DRILL - You don’t need to strain muscles or ruin your skin and nails in order to have a clean house. Our scrub brush and cleaning pad attachments fit on any household drill. Use drill brushes to remove ugly water stains and hard water spots on shower doors, tile, brick, tubs, and sinks. You can use it to give a makeover to your outdoor furniture and fixtures for the house and yard.
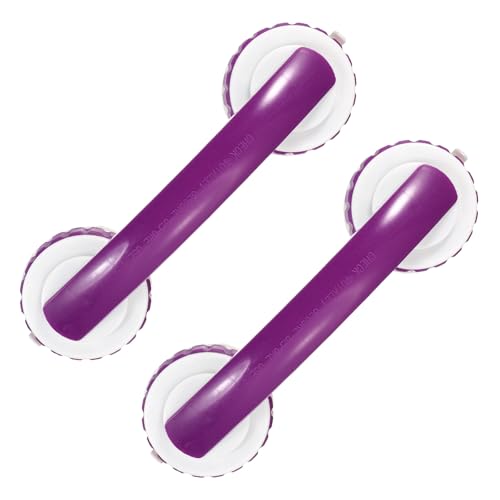
Specifications: Material: PP,TPR; Color: Purple; Total Size: 280 x 80 mm / 11.02 x 3.15 Inch (L x H); Suction Cup Diameter: 80 mm / 3.15 Inch; Grip Handle Thickness: 24 mm / 0.94 Inch; Package Contents: 2 Pcs x Suction Cup Handle.
Safety Precautions to Consider
When preparing to remove tiles from your shower, safety should be your top priority. Here are some essential safety precautions to keep in mind:
- Protective Gear: It’s vital to wear appropriate protective gear such as safety goggles, gloves, a dust mask, and knee pads to safeguard yourself from potential injuries.
- Sturdy Footwear: Ensure you wear sturdy closed-toe shoes with good traction to prevent slips or falls on wet surfaces.
- Ventilation: Proper ventilation is key. Open windows or use fans to ensure good airflow and reduce exposure to dust and fumes generated during the tile removal process.
Protecting Your Surrounding Areas
Taking steps to protect the surrounding areas of your shower can help prevent damage and make cleanup easier once the tile removal is complete. Here’s what you can do:
- Cover Fixtures: Use plastic sheeting or old towels to cover fixtures like faucets, drains, and other hardware near the tiled area. This protects them from debris and damage during the removal process.
- Floor Protection: Lay down drop cloths or cardboard on the bathroom floor around the shower area to catch falling tiles, grout, and dust. This makes cleaning up after tile removal much simpler.
By following these preparation steps diligently, you’ll create a safe working environment for yourself while also safeguarding your bathroom fixtures and floors during the tile removal process.
Step-by-Step Guide to Removing Tiles
To successfully remove tiles from your shower, you need to follow a systematic approach. Here’s a step-by-step guide that will help you navigate the tile removal process effectively.
Recommended Products
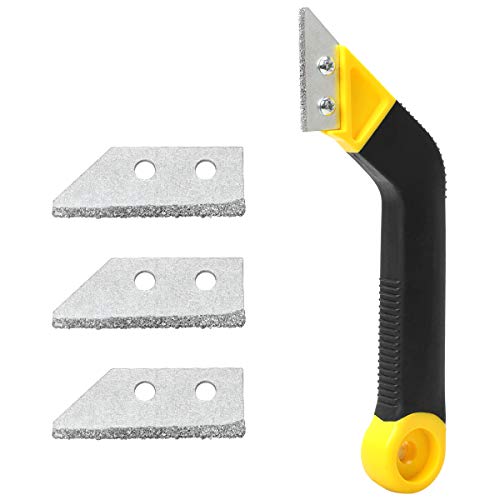
Premium Material: Grout saw is made of high-quality plastic and hard metal, “diamond style” blade helps you remove grout with minimal effort.
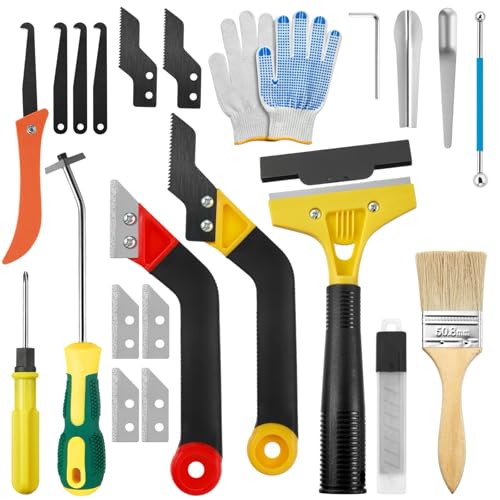
33-Piece All-in-One Grout Removal Tool Kit – This comprehensive set includes 2 Tile Grout Saws, 6 extra replacement blades, 2 Hand Grout Saws, 7 cleaning blades, and a Caulk Remover Tool, covering all your needs as a professional grout tool and caulking tool kit. No need to buy separate grout scraper, grout saw, or caulk remover tool – one kit solves tile grout cleaning, removal, and caulk stripping.

Professional Grade Build: Grout removal tool is built with tungsten carbide blades and reinforced steel for tough grout removal jobs. Resists rust and stays sharp up to 4 times longer than regular tools, making it ideal for ceramic, marble, stone, and concrete surfaces—ideal for grout haze cleanup and long-term maintenance.
Assessing the Condition of Shower Tiles
Before starting the tile removal task, assess the condition of your shower tiles. Look for any cracks, loose tiles, or mold growth. If there are only a few damaged tiles, you might be able to replace them individually instead of removing all the tiles. However, if a significant portion of the tiles is damaged or if they are old and worn out, it’s best to plan for complete tile removal.
Technique to Remove Tiles Effectively
When it comes to removing tiles from your shower, using the right technique is crucial. Start by chiseling out grout lines between the tiles using a grout saw or rotary tool with a grout removal bit. This step helps loosen the tiles and makes them easier to pry off.
Next, use a hammer and chisel to carefully break and remove each tile. Work methodically across the shower wall or floor, ensuring even pressure to avoid damaging surrounding tiles or walls. It’s essential to wear safety goggles and gloves during this process to protect yourself from flying debris.
After removing all the tiles, clean up any remaining adhesive on the surface using an adhesive remover or scraper. Make sure to thoroughly clean the area before installing new tiles for a smooth finish.
By following these steps with precision and care, you can successfully remove old or damaged tiles from your shower without causing unnecessary damage and prepare the surface for new tile installation.
Handling and Disposal of Old Tiles
When it comes to handling and disposing of old tiles from your shower, there are some essential tips to keep in mind for a smooth process. Here’s how you can effectively manage the removal and disposal:
Tips for Handling Broken Tiles
To handle broken tiles safely, make sure you wear appropriate protective gear such as gloves and safety goggles. Start by carefully removing the broken pieces using a putty knife or chisel to prevent any injuries. Place the broken tiles in a sturdy container to avoid accidents.
Environmentally Friendly Disposal Options
For environmentally friendly disposal of old tiles, consider recycling them if they’re in good condition. Some recycling centers accept ceramic tiles for reuse in various projects. Another option is to check with local waste management facilities for guidelines on how to dispose of tiles responsibly without harming the environment.
By following these tips for handling and disposing of old tiles properly, you can ensure a clean and efficient tile removal process while also being mindful of environmental impact.
Repairing the Underlying Surface
When it comes to repairing the underlying surface after removing tiles from your shower, there are essential steps you need to follow to ensure a smooth transition for installing new tiles.
Recommended Products

Waterproof and very firm after curing, Fiberglass Repair Kit can be used to repair chips, scratches, dents, patch, worn, holes ect . Apply to fiberglass bathtub, acrylic bathtub, ceramic bathtub, enamel bathtub, cast iron bathtub, porcelain sink, ceramic tile, toilet, and cultured marble.
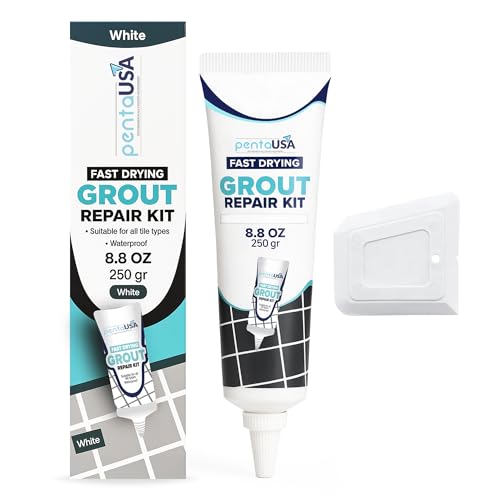
Acrylic Sanded Grout Filler That Cures Into Solid Grout - This premixed tile grout repair contains acrylic sanded grout material in a clean white tone that fills cracks, missing sections, and damaged joints, curing into solid grout-like material that bonds to existing grout and tile for durable structural repair on floors, walls, and countertops. Designed for DIY tile grout repair, suitable for first-time users, homeowners, and handyperson-level work.

Super Strong Adhesion: After many tests and improvements, our porcelain repair kit has super adhesion and abrasion resistance, no matter the cracks or holes in the kitchen or bathroom, it can be easily covered, and it can be waterproof, long-lasting, and non-cracking after it is fully cured
Preparing the Surface for New Tiles
After removing the old tiles, it’s crucial to prepare the surface adequately before installing new ones. Here are some key steps to follow:
- Clean and Smooth: Ensure that the surface is clean and free of any debris or adhesive residue. Use a scraper or sandpaper to smoothen out any rough patches.
- Inspect for Damage: Check the underlying surface for any signs of damage such as cracks or moisture issues. Addressing these problems now will prevent future tile installation issues.
- Apply Primer: Consider applying a primer suitable for your specific surface material. This will help improve adhesion and create a stable base for your new tiles.
Essential Products for Surface Repair
To effectively repair the underlying surface, you’ll need some essential products readily available. Here’s what you may require:
- Patch or Filler: Depending on the extent of damage, you might need a patching compound or filler to repair minor imperfections in the surface.
- Primer: As mentioned earlier, a good quality primer compatible with your surface type is essential for ensuring proper adhesion of the new tiles.
- Leveling Compound: If there are uneven areas on the surface, a leveling compound can help create a flat and smooth base for tile installation.
- Sealant: To protect against moisture and enhance durability, consider using a sealant appropriate for wet areas like showers.
By following these guidelines and using the necessary products, you’ll be well-equipped to repair the underlying surface effectively in preparation for installing new tiles in your shower space.
Conclusion
By following these steps, you’ll be well-equipped to tackle tile removal in your shower efficiently and safely. Remember to prioritize safety, prepare the area properly, and dispose of materials responsibly. Repairing the surface after tile removal is crucial for a successful re-tiling project. With the right tools and products at hand, you can ensure a seamless transition to installing new tiles while maintaining quality throughout the process. Happy renovating!
Frequently Asked Questions
What safety precautions should I take when removing shower tiles?
When removing shower tiles, wear protective gear like gloves, goggles, and a mask to prevent injuries from sharp tile edges and exposure to dust or chemicals.
How should I prepare before starting the shower tile removal process?
Prepare the work area by covering surfaces with protective materials, ensuring proper ventilation, and gathering necessary tools like a hammer, chisel, scraper, and bucket for debris.
How can I dispose of old shower tiles in an eco-conscious manner?
Dispose of old shower tiles responsibly by checking local recycling facilities that accept construction materials or repurpose them for DIY projects to reduce waste.
What steps are involved in repairing the underlying surface after tile removal?
After removing tiles, repair the underlying surface by cleaning it thoroughly, inspecting for damage like cracks or mold growth, and applying a suitable primer for improved adhesion of new tiles.
What essential products are needed for repairing the underlying surface post-tile removal?
Products like patching compound (for filling holes), primer (for better adhesion), leveling compound (for smooth surface), and sealant (for protection) are crucial for effective surface repair.