

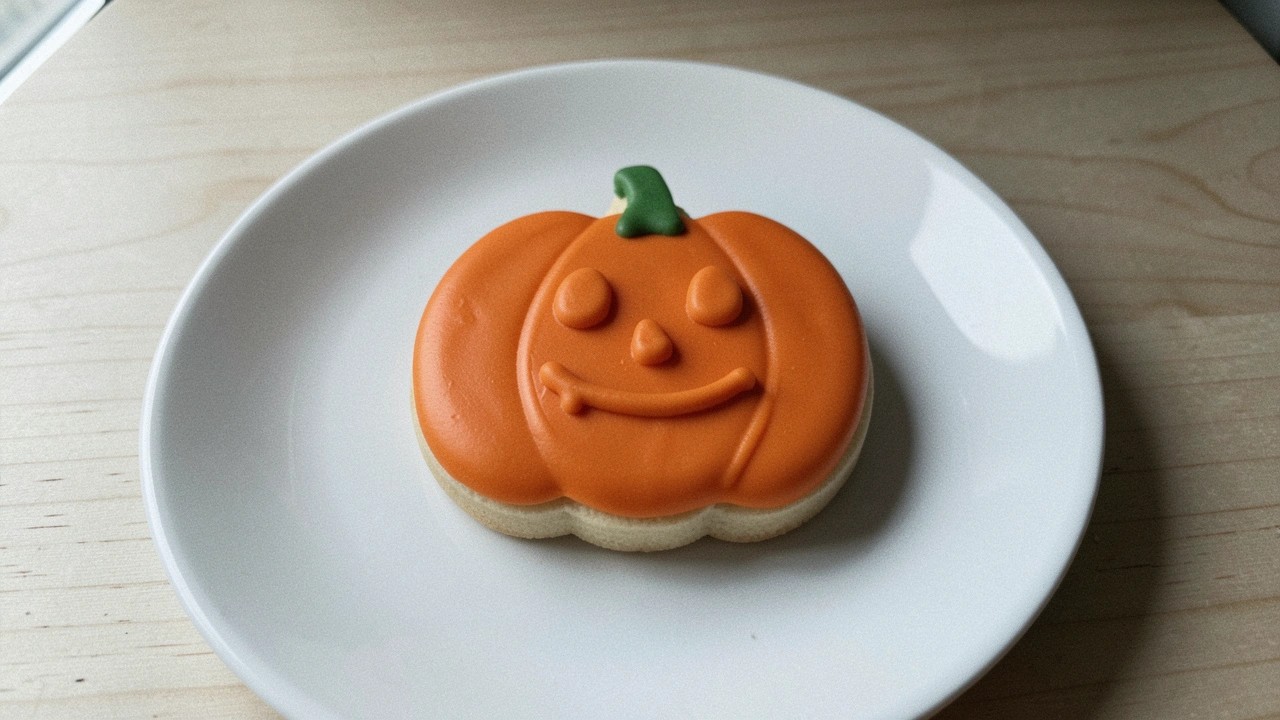
Halloween can sneak up fast when you have a busy schedule. These baking ideas focus on simple steps and common ingredients. You can make most of them in under an hour with what you probably have at home. They work well for kids and adults without needing fancy tools. Here are 11 options to try this year.
Helpful Tips Before You Start
These quick checks will help your last-minute Halloween baking go smoothly.
Recommended Products

Halloween Cupcake Toppers Set: Includes 48 cupcake toppers with 48 different ghost, pumpkin, bat, cat, skull, and Halloween-inspired designs for decorating cupcakes, cakes, desserts, and treats

Halloween Cupcake Decorations: The set has pumpkin cupcake toppers*4, ghost cake decorations*8, edible knife cake toppers*12, and witch hats cupcake toppers*15. It's perfect for your Halloween party

Variety of Designs: Includes 64 paper cupcake wrappers and 100 cupcake toppers, featuring 8 wrapper designs and 10 unique Halloween-themed topper designs
Check Your Pantry First
See what you already have like cake mix, chocolate chips, or sprinkles before you shop. This cuts down on extra trips.
Stick with Box Mixes
They bake fast and give consistent results. Add a few drops of food coloring or simple candy pieces for a Halloween twist.
Prep Your Workspace
Clear the counter and set out bowls and spoons ahead of time. It keeps the process quick when you are short on time.
Focus on One or Two Treats
Pick recipes that share similar ingredients or bake times. This avoids running multiple steps at once.
Use Store-Bought Bases
Cookies, brownies, or cupcakes from the store work well. Top them with melted chocolate and candy eyes for easy spooky effects.
Spiderweb Fudge Brownies
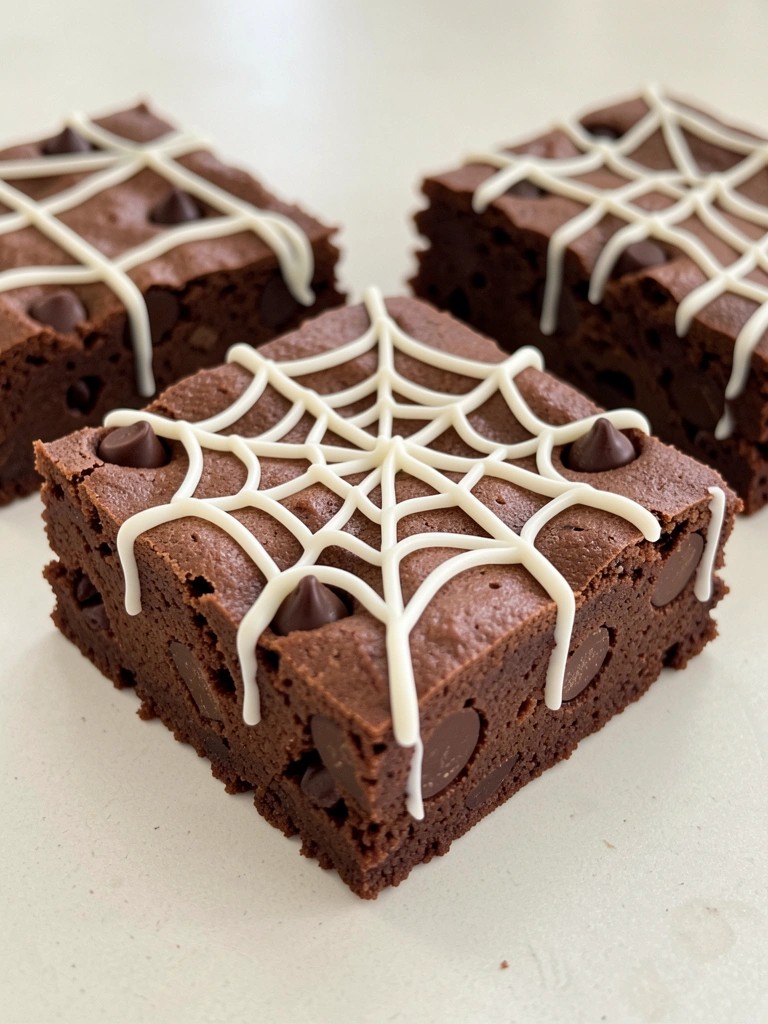
These Spiderweb Fudge Brownies add a quick Halloween detail to a basic chocolate treat. They come together fast with pantry staples and work well for last-minute gatherings or after-school snacks. The brownies bake up dense and fudgy with a rich cocoa flavor, while the white chocolate lines on top create a simple web pattern.
Serves 4 people.
Recommended Products

Small Halloween Gingerbread Cookie House Kit- Finished product measures approximately 2.75 L x 2.75 W x 3 H inches

10 cookies to a kit

COMPLETE HALLOWEEN DECORATING KIT – Everything you need to create spooky Halloween treats in one convenient set! Includes 3 tubes of decorating frosting, 4 frosting tips, 3 Halloween-shaped cookie cutters and 1 bag of colorful Halloween sprinkles.
Ingredients
- 4 tablespoons unsalted butter
- 1/2 cup granulated sugar
- 1 large egg
- 1/4 cup unsweetened cocoa powder
- 1/4 cup all-purpose flour
- 1/8 teaspoon salt
- 1/4 cup semisweet chocolate chips
- 3 tablespoons white chocolate chips
Instructions
- Preheat the oven to 350 degrees and line a small 8×8 baking pan with parchment paper.
- Melt the butter in a microwave-safe bowl, then stir in the sugar until combined.
- Add the egg and mix well until the batter looks smooth.
- Stir in the cocoa powder, flour, and salt until no dry streaks remain.
- Fold in the semisweet chocolate chips.
- Spread the batter evenly in the prepared pan and bake for 18 to 20 minutes until the center is set.
- Let the brownies cool completely in the pan.
- Melt the white chocolate chips in the microwave in short bursts, stirring until smooth.
- Spoon the melted white chocolate into a small zip-top bag, snip a tiny corner, and pipe four or five concentric circles on the cooled brownies.
- Use a toothpick to drag lines from the center outward to form the web pattern, then slice into squares.
Extra Tips
Cool the brownies fully before adding the white chocolate so the lines stay neat and do not sink. If the white chocolate thickens while piping, warm it for a few seconds to loosen it again. Store leftovers in an airtight container at room temperature for up to two days. Course: Dessert Cuisine: American Equipment: Mixing Bowl, 8×8 Baking Pan, Microwave, Oven
Ghost Cutout Sugar Cookies
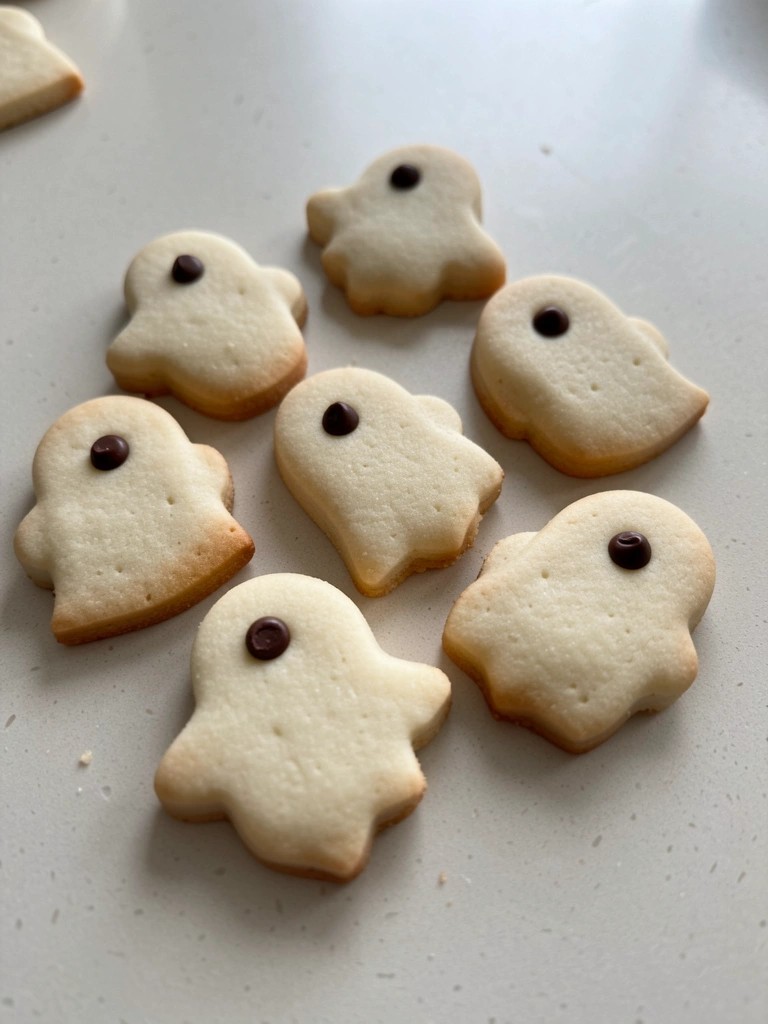
These ghost cutout sugar cookies offer a simple way to create Halloween treats with everyday ingredients. They suit last-minute baking when you want something festive but do not have hours to spare. The cookies turn out soft in the center with light, crisp edges and a gentle vanilla flavor.
The dough comes together quickly and rolls out smoothly for easy cutting. Pressing mini chocolate chips into the dough before baking creates eyes that stay in place.
Serves 4 people.
Recommended Products

Eerie Ghost Finger Details: Craft 8 realistic Halloween treats per batch with bone-chilling ghost finger cavities—perfect for chocolates, resin jewelry, or spooky ice cubes! Finger textures ensure professional-grade horror effects.

PREMIUM MATERIAL : Finger molds are made of high quality and food grade silicone, BPA free, soft, flexible and reusable, they can contact food directly.
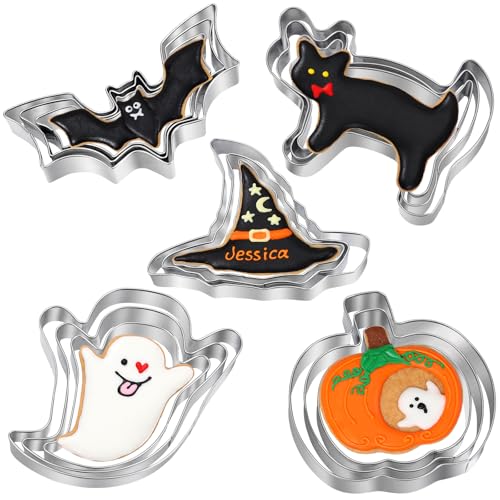
15-Piece Halloween Cookie Cutter Set (Baking & Decorating Kit): If you are looking for some Halloween cookie cutters, and this set of cookie molds basically meets all your needs, their size and details are good, you can make delicious Halloween cookies and then have a great holiday with your family.
Ingredients
- 1 1/4 cups all-purpose flour
- 1/2 cup granulated sugar
- 1/4 cup unsalted butter, softened
- 1 large egg
- 1 teaspoon vanilla extract
- 1/2 teaspoon baking powder
- 1/4 teaspoon salt
- 2 tablespoons mini chocolate chips
Instructions
- Preheat the oven to 350 degrees Fahrenheit and line a baking sheet with parchment paper.
- In a mixing bowl, cream the softened butter and granulated sugar until light and fluffy.
- Beat in the egg and vanilla extract until fully combined.
- In a separate bowl, whisk together the flour, baking powder, and salt.
- Gradually mix the dry ingredients into the wet ingredients to form a soft dough.
- Roll the dough out on a lightly floured surface to about 1/4 inch thick.
- Cut out ghost shapes using a cookie cutter and place them on the prepared baking sheet.
- Gently press two mini chocolate chips into each cookie to form eyes.
- Bake for 8 to 10 minutes until the edges turn lightly golden.
- Cool the cookies on the baking sheet for 5 minutes before transferring to a wire rack.
Extra Tips
If the dough feels sticky, chill it for 15 minutes before rolling. Press the chocolate chips in firmly so they stay put during baking. These cookies store well in an airtight container at room temperature for up to three days. Course: Dessert Cuisine: American Equipment: Mixing Bowl, Baking Sheet, Rolling Pin, Ghost-shaped Cookie Cutter
Pumpkin Streusel Muffins
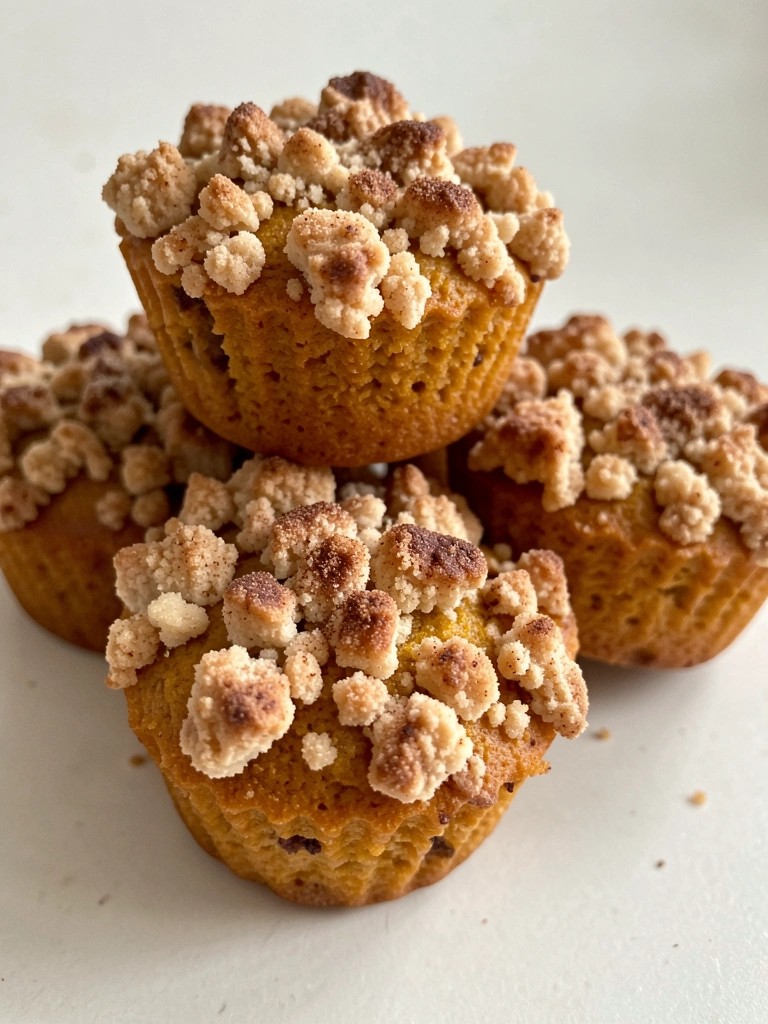
These pumpkin streusel muffins make a quick treat for Halloween gatherings. They use basic pantry items and bake in one pan. The base stays soft and moist while the crumbly topping adds a bit of sweetness and crunch.
They suit last-minute baking when you need something festive without much fuss. Warm spices pair with the pumpkin for a familiar fall flavor that feels right for the season.
Serves 4 people.
Ingredients
- ¾ cup all-purpose flour
- ½ teaspoon baking powder
- ½ teaspoon ground cinnamon
- ¼ teaspoon ground nutmeg
- ¼ cup pumpkin puree
- ¼ cup granulated sugar
- 1 large egg
- 2 tablespoons unsalted butter, melted
- 2 tablespoons milk
- ¼ cup all-purpose flour
- 2 tablespoons brown sugar
- 1 tablespoon cold unsalted butter
- ½ teaspoon ground cinnamon
Instructions
- Heat the oven to 375°F and place 4 paper liners in a muffin tin.
- In a bowl, stir together ¾ cup flour, baking powder, ½ teaspoon cinnamon, and nutmeg.
- In a second bowl, mix the pumpkin puree, granulated sugar, egg, melted butter, and milk until smooth.
- Pour the wet mixture into the dry mixture and stir just until combined.
- In a small bowl, combine the remaining ¼ cup flour, brown sugar, and ½ teaspoon cinnamon.
- Cut in the cold butter with a fork until the mixture forms coarse crumbs.
- Spoon the batter evenly into the 4 liners.
- Sprinkle the crumb mixture over each muffin.
- Bake for 18 to 20 minutes until a toothpick comes out clean and the tops look golden.
Extra Tips
Let the muffins cool in the tin for five minutes before moving them to a rack so the streusel sets. If you want a stronger pumpkin taste, add an extra pinch of nutmeg to the batter. Store leftovers in a sealed container at room temperature for up to two days to keep the topping crisp. Course: Snack Cuisine: American Equipment: Mixing Bowls, Muffin Tin, Whisk, Oven
Witch Hat Chocolate Cupcakes
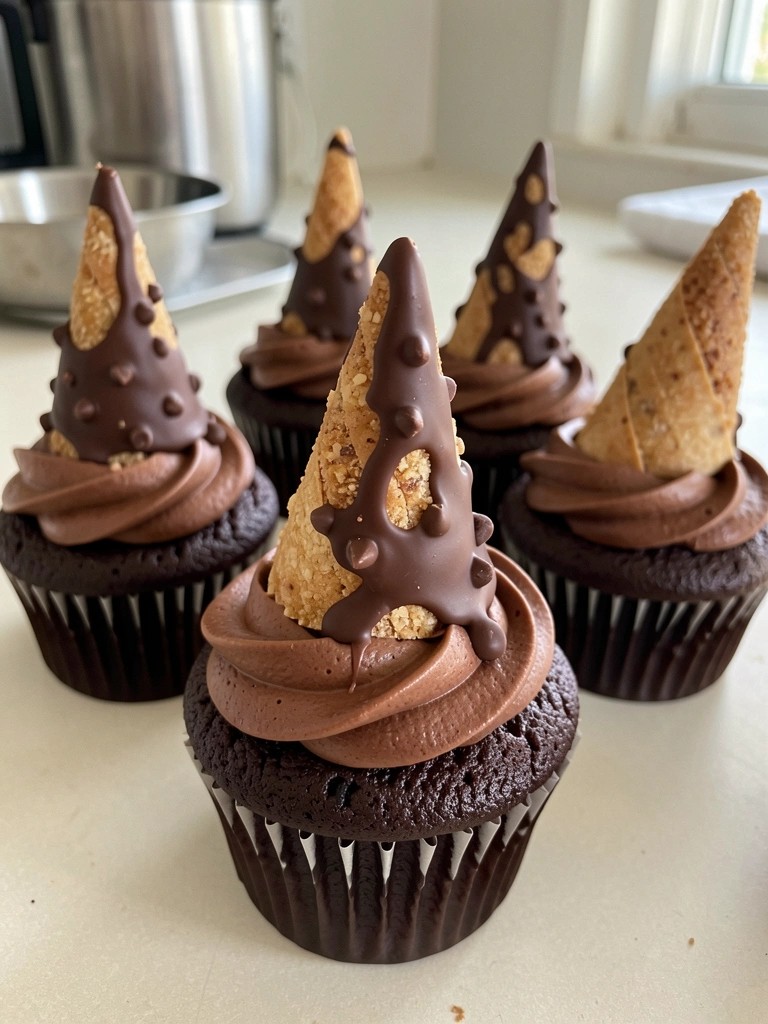
These Witch Hat Chocolate Cupcakes deliver a quick Halloween treat that feels festive without extra fuss. They rely on basic pantry items, so you can pull them together even when time is short. The moist chocolate base pairs with smooth frosting and a crisp cone topper for a balanced bite.
The cupcakes bake up tender and rich, while the chocolate-dipped cones add a playful shape and light crunch that kids and adults both enjoy. Serve them at a small gathering or pack them for a school event.
Serves 4 people.
Ingredients
- 1/2 cup all-purpose flour
- 1/4 cup cocoa powder
- 1/2 cup sugar
- 1/4 teaspoon baking powder
- 1/4 teaspoon baking soda
- 1/4 cup milk
- 1 egg
- 2 tablespoons vegetable oil
- 1/2 teaspoon vanilla extract
- 1 cup chocolate frosting
- 4 sugar cones
- 1/4 cup chocolate chips
Instructions
- Preheat the oven to 350 degrees and line a muffin tin with four paper liners.
- In a mixing bowl, stir together the flour, cocoa powder, sugar, baking powder, and baking soda.
- Add the milk, egg, vegetable oil, and vanilla extract to the dry ingredients. Mix until the batter is smooth and no dry streaks remain.
- Divide the batter evenly among the four liners. Bake for 18 to 20 minutes, or until a toothpick inserted in the center comes out clean. Let the cupcakes cool completely.
- Spread a layer of chocolate frosting on each cooled cupcake.
- Place the chocolate chips in a microwave-safe bowl and heat in 20-second bursts, stirring between each, until fully melted. Dip the open end of each sugar cone into the melted chocolate, then set the cone point-up on top of a frosted cupcake to form the hat. Repeat with the remaining cones and cupcakes.
Extra Tips
Let the chocolate on the cones set for a few minutes before placing them on the frosting so the hats stay upright. If the frosting feels too stiff, stir in a teaspoon of milk to loosen it for easier spreading. Store any leftovers in an airtight container at room temperature for up to two days. Course: Dessert Cuisine: American Equipment: Mixing Bowl, Muffin Tin, Oven
Candy Corn Blondies
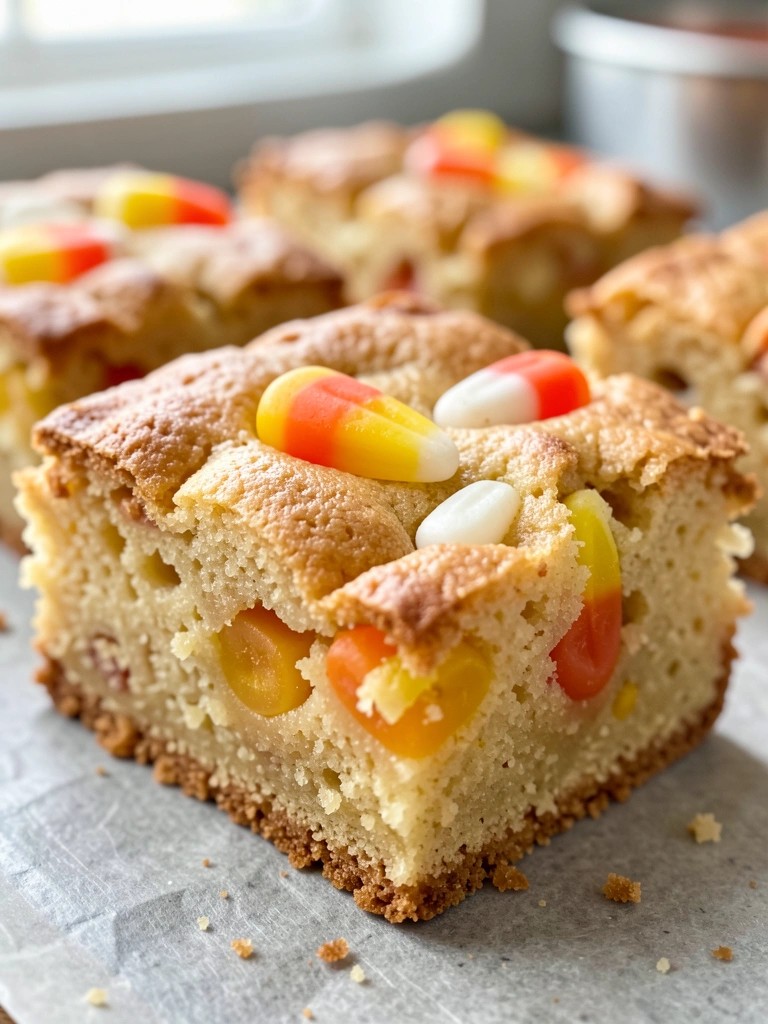
These Candy Corn Blondies offer a quick way to add a festive touch to any Halloween spread. They come together fast with pantry staples and a handful of candy corn, making them a solid choice when time is short but you still want something homemade.
The result is a chewy blondie with crisp edges and pockets of sweet, chewy candy corn baked right in. A few extra pieces on top give a bright pop of color that fits the season.
Serves 4 people.
Ingredients
- 1/2 cup unsalted butter, melted
- 1 cup light brown sugar
- 1 large egg
- 1 teaspoon vanilla extract
- 1 cup all-purpose flour
- 1/2 teaspoon baking powder
- 1/4 teaspoon salt
- 3/4 cup candy corn, divided
Instructions
- Preheat the oven to 350 degrees F and line an 8×8 baking pan with parchment paper.
- In a mixing bowl, stir together the melted butter and brown sugar until smooth.
- Add the egg and vanilla extract, then mix until fully combined.
- Stir in the flour, baking powder, and salt until no dry streaks remain.
- Fold in 1/2 cup of the candy corn.
- Spread the batter evenly in the prepared pan and scatter the remaining 1/4 cup candy corn over the top.
- Bake for 22 to 25 minutes, until the edges are golden and the center is set.
- Let the blondies cool in the pan before cutting into squares.
Extra Tips
Press a few extra candy corn pieces onto the surface right after baking while the blondies are still warm so they stick without sinking. Store cooled squares in an airtight container at room temperature for up to three days. If the candy corn starts to harden, warm individual pieces for 10 seconds in the microwave to soften them again. Course: Dessert Cuisine: American Equipment: Mixing Bowl, Baking Pan, Oven
Caramel Apple Hand Pies
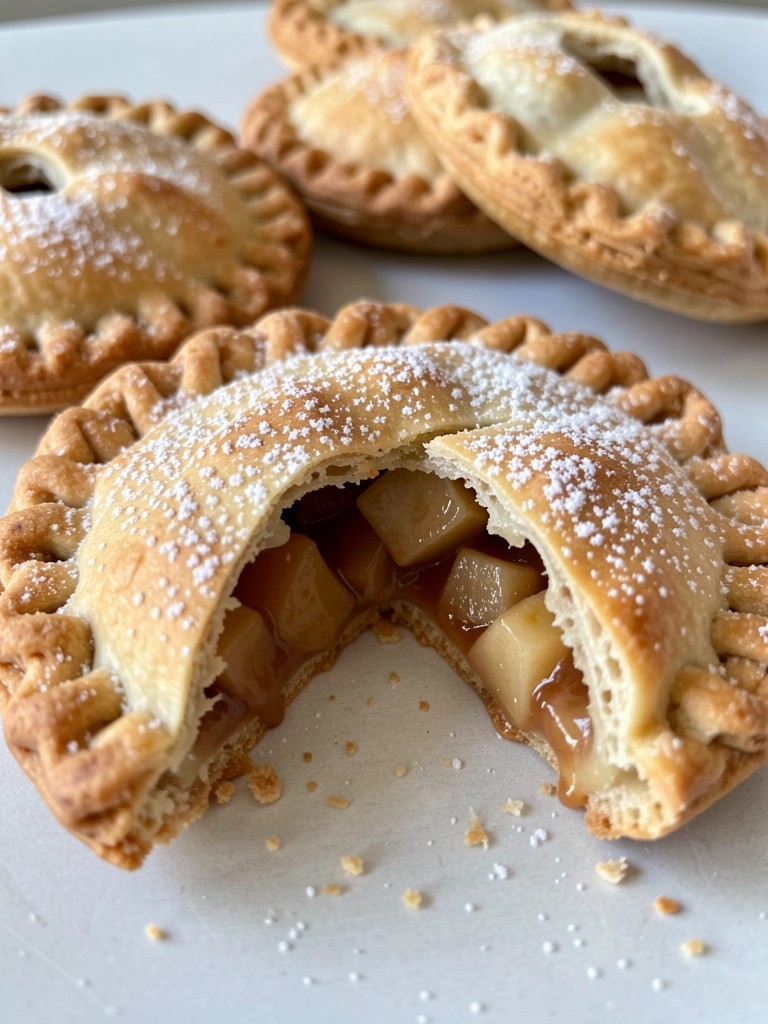
These caramel apple hand pies bring together crisp apples and gooey caramel in a flaky crust. They are simple to make with store-bought dough, so they fit well for quick Halloween baking when time is short.
The result is a warm, handheld treat with sweet apple pieces and rich caramel flavor in every bite. The crust stays crisp while the filling stays soft and comforting.
Serves 4 people.
Ingredients
- 1 package refrigerated pie crusts (2 crusts)
- 2 medium apples, peeled and diced
- 1/3 cup caramel sauce
- 1 teaspoon ground cinnamon
- 2 tablespoons granulated sugar
- 1 egg, beaten
Instructions
- Preheat the oven to 400 degrees F and line a baking sheet with parchment paper.
- In a mixing bowl, stir together the diced apples, cinnamon, sugar, and 3 tablespoons of the caramel sauce until the apples are coated.
- Unroll the pie crusts on a lightly floured surface. Cut each crust into 4 equal squares or circles.
- Place a spoonful of the apple mixture in the center of half the dough pieces. Top with a small drizzle of the remaining caramel sauce.
- Cover each filled piece with a second piece of dough. Press the edges together with a fork to seal.
- Brush the tops with the beaten egg and cut a small slit in each pie for steam to escape.
- Bake for 15 to 18 minutes until the crusts are golden brown. Cool on the baking sheet for a few minutes before serving.
Extra Tips
Use a firm apple variety like Granny Smith so the pieces hold their shape after baking. If the caramel is very thick, warm it slightly before drizzling so it spreads evenly inside the pies. These taste best the same day but can be reheated briefly in a 350 degree F oven to restore crispness. Course: Dessert Cuisine: American Equipment: Baking Sheet, Mixing Bowl, Fork
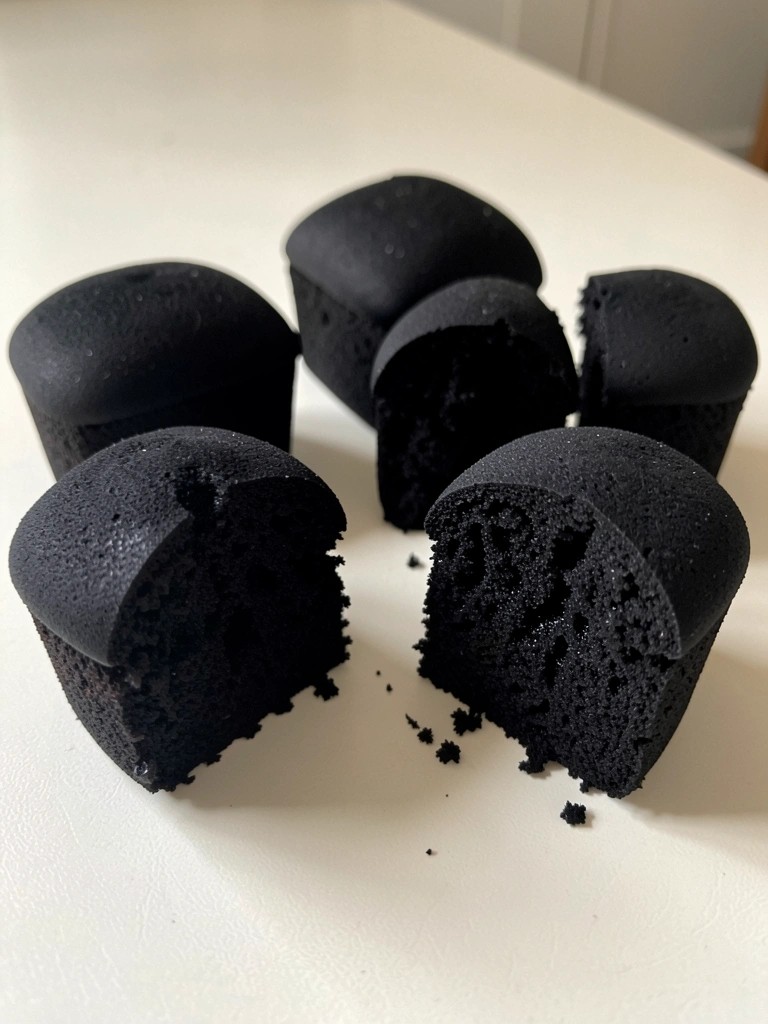
Mini Black Velvet Loaf Cakes
These mini black velvet loaf cakes bring a dark, rich chocolate flavor with a moist crumb that feels special enough for a Halloween gathering. They come together quickly with pantry staples, making them ideal when you need a last-minute treat that still looks thoughtful. The deep black color from the cocoa gives them a striking appearance without any extra fuss.
The texture stays tender thanks to the buttermilk and oil, while the flavor leans into bold cocoa notes that pair well with the spooky season. Bake a batch in the afternoon and have them ready by evening for parties or casual get-togethers.
Serves 4 people.
Ingredients
- 1 cup all-purpose flour
- ¾ cup granulated sugar
- ½ cup black cocoa powder
- ½ teaspoon baking soda
- ¼ teaspoon salt
- ½ cup buttermilk
- ¼ cup vegetable oil
- 1 large egg
- 1 teaspoon vanilla extract
- ½ cup hot water
Instructions
- Preheat the oven to 350°F and lightly grease four mini loaf pans.
- In a medium bowl, whisk together the flour, sugar, black cocoa powder, baking soda, and salt until evenly combined.
- In a separate bowl, whisk the buttermilk, vegetable oil, egg, and vanilla extract until smooth.
- Pour the wet mixture into the dry ingredients and stir until just combined.
- Slowly add the hot water while stirring gently until the batter becomes smooth and thin.
- Divide the batter evenly among the four prepared mini loaf pans.
- Bake for 22 to 25 minutes, or until a toothpick inserted in the center comes out clean.
- Let the loaves cool in the pans for 10 minutes before turning them out onto a wire rack to cool completely.
Extra Tips
Black cocoa powder creates the signature dark color and smooth flavor, so avoid swapping it for regular cocoa if you want the full effect. These loaves store well in an airtight container at room temperature for up to three days. For a make-ahead option, bake them the night before and warm each slice briefly in the microwave before serving. Course: Dessert Cuisine: American Equipment: Mixing bowls, Mini loaf pans, Whisk, Oven
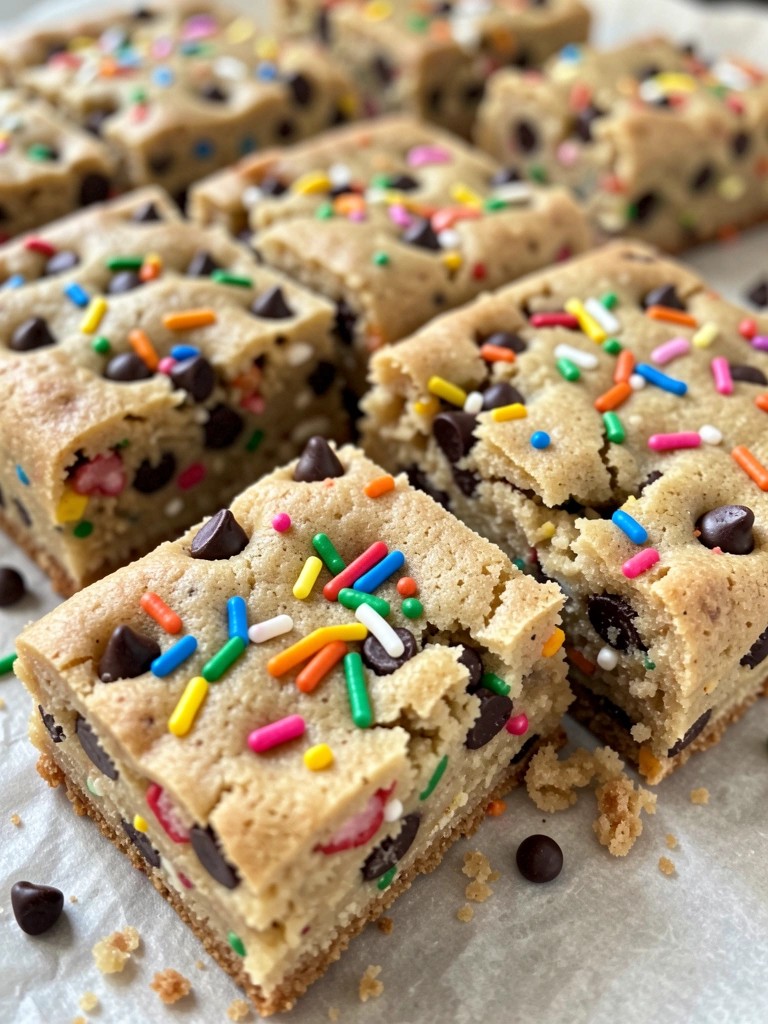
Monster Sprinkle Cookie Bars
These bars come together fast with basic pantry items and a generous mix of bright sprinkles. They suit last-minute Halloween baking because the dough goes straight into the pan without any chilling step. The finished bars bake up chewy with a light crunch from the sprinkles and a mild sweet flavor that appeals to both kids and adults.
Serves 4 people.
Ingredients
- 1/2 cup butter, softened
- 1/2 cup packed brown sugar
- 1 large egg
- 1 teaspoon vanilla extract
- 1 1/4 cups all-purpose flour
- 1/2 teaspoon baking soda
- 1/4 teaspoon salt
- 1/2 cup Halloween sprinkles
- 1/4 cup mini chocolate chips
Instructions
- Heat the oven to 350 degrees and line an 8×8 inch pan with parchment paper.
- In a mixing bowl, beat the softened butter and brown sugar until smooth and creamy.
- Add the egg and vanilla extract, then mix until fully combined.
- Stir in the flour, baking soda, and salt until a soft dough forms.
- Fold the Halloween sprinkles and mini chocolate chips into the dough.
- Press the dough evenly into the prepared pan.
- Bake for 18 to 20 minutes until the edges turn light golden.
- Let the bars cool in the pan before cutting into squares.
Extra Tips
Press a few extra sprinkles on top right after baking while the surface is still soft so they stick without sinking. Store cooled bars in an airtight container at room temperature for up to three days to keep the chewy texture. If the dough feels too dry after mixing, add one teaspoon of milk before pressing it into the pan. Course: Dessert Cuisine: American Equipment: Mixing Bowl, Baking Pan, Oven
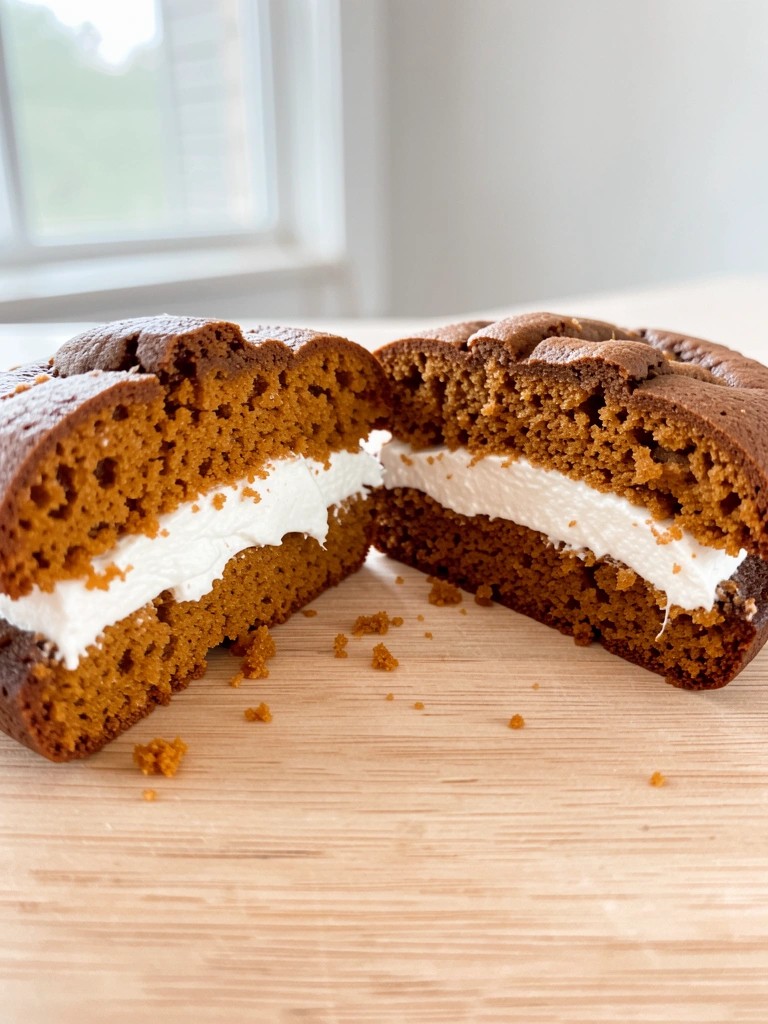
Pumpkin Spice Whoopie Pies
These whoopie pies bring pumpkin spice flavor to your Halloween table without much effort. They come together quickly with basic pantry items and make a fun handheld treat for parties or movie nights.
The soft, cakey layers sandwich a light cream cheese filling. Each bite gives you warm spices and a touch of sweetness that feels festive yet simple.
Serves 4 people.
Ingredients
- 1 cup all-purpose flour
- 1/2 teaspoon baking soda
- 1 teaspoon pumpkin pie spice
- 1/2 cup pumpkin puree
- 1/4 cup brown sugar
- 2 tablespoons unsalted butter, softened
- 1 large egg
- 1/2 teaspoon vanilla extract
- 4 ounces cream cheese, softened
- 1/4 cup powdered sugar
Instructions
- Preheat the oven to 350 degrees and line a baking sheet with parchment paper.
- In a mixing bowl, stir together the flour, baking soda, and pumpkin pie spice.
- In a second bowl, mix the pumpkin puree, brown sugar, 2 tablespoons butter, egg, and vanilla until smooth.
- Combine the wet and dry mixtures until a thick batter forms.
- Drop 8 rounded tablespoons of batter onto the baking sheet, spacing them apart. Bake for 10 to 12 minutes until the edges look set.
- Let the cookies cool completely on the sheet.
- In a clean bowl, beat the cream cheese, powdered sugar, and remaining 2 tablespoons butter until creamy.
- Spread the filling on the flat side of 4 cookies and top with the remaining cookies to form the whoopie pies.
Extra Tips
Chill the assembled whoopie pies for 15 minutes before serving so the filling firms up. If the batter seems too thick, add a teaspoon of milk. Store leftovers in an airtight container in the fridge for up to two days and let them sit at room temperature for a few minutes before eating. Course: Dessert Cuisine: American Equipment: Mixing Bowl, Baking Sheet, Oven
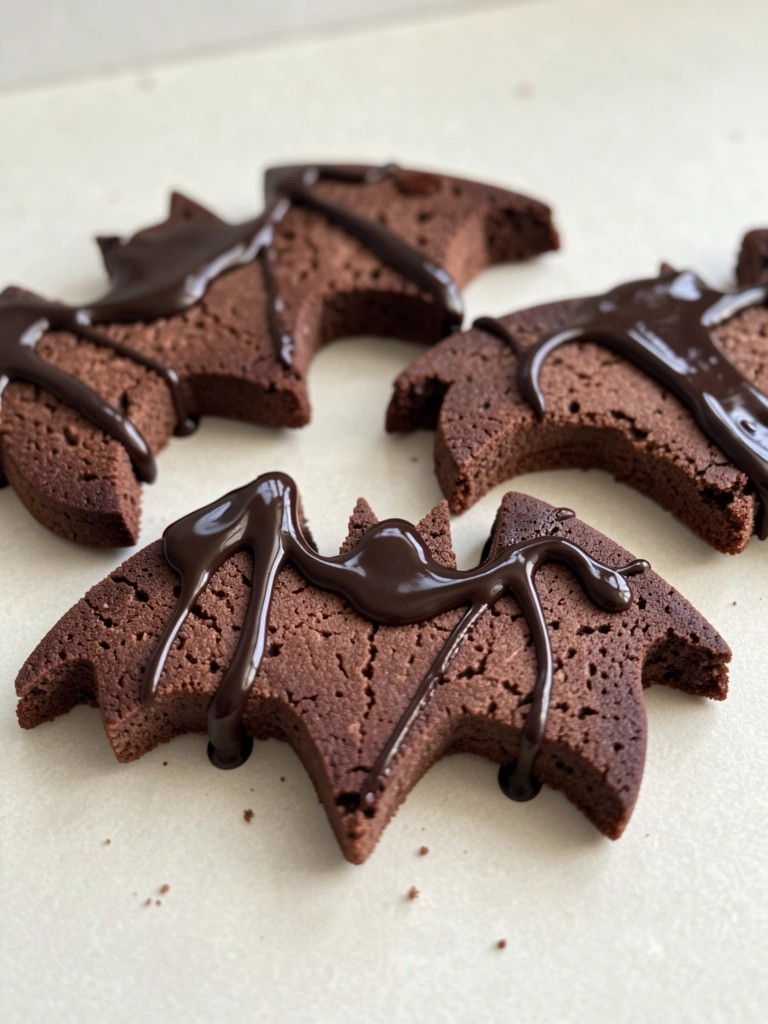
Bat Wing Shortbread Cookies
These Bat Wing Shortbread Cookies bring a simple Halloween touch to any last-minute gathering. The cocoa gives them a dark color that fits the theme, while the buttery shortbread stays crisp on the edges and tender in the center. They come together quickly with pantry staples and need no special equipment beyond a rolling pin and knife.
They work well for after-school snacks, office parties, or a quick dessert when you want something festive without much fuss. The chocolate drizzle adds a little extra richness that pairs nicely with the cocoa dough.
Serves 4 people.
Ingredients
- 1 cup unsalted butter, softened
- 1/2 cup powdered sugar
- 2 cups all-purpose flour
- 1/4 cup unsweetened cocoa powder
- 1 teaspoon vanilla extract
- 1/4 teaspoon salt
- 1/2 cup dark chocolate chips
Instructions
- Heat the oven to 350 degrees and line a baking sheet with parchment paper.
- In a mixing bowl, beat the softened butter and powdered sugar until smooth and creamy.
- Stir in the vanilla extract until combined.
- Add the flour, cocoa powder, and salt to the bowl. Mix until a soft dough forms.
- Place the dough on a lightly floured surface and roll it to about 1/4 inch thick.
- Use a knife to cut the dough into simple bat wing shapes, roughly 3 inches wide.
- Transfer the shapes to the prepared baking sheet and bake for 12 to 14 minutes until the edges look set.
- Let the cookies cool on the sheet for 5 minutes, then move them to a wire rack.
- Melt the dark chocolate chips in a small bowl in the microwave, stirring every 20 seconds until smooth.
- Drizzle the melted chocolate over the cooled cookies in thin lines to suggest wing details.
Extra Tips
Roll the dough between two sheets of parchment if it sticks to the rolling pin. Store leftovers in an airtight container at room temperature for up to four days. If the chocolate drizzle sets too firmly, warm it slightly before serving so it stays glossy on the cookies. Course: Dessert Cuisine: American Equipment: Mixing Bowl, Baking Sheet, Rolling Pin, Wire Rack
Orange Creamsicle Cupcakes
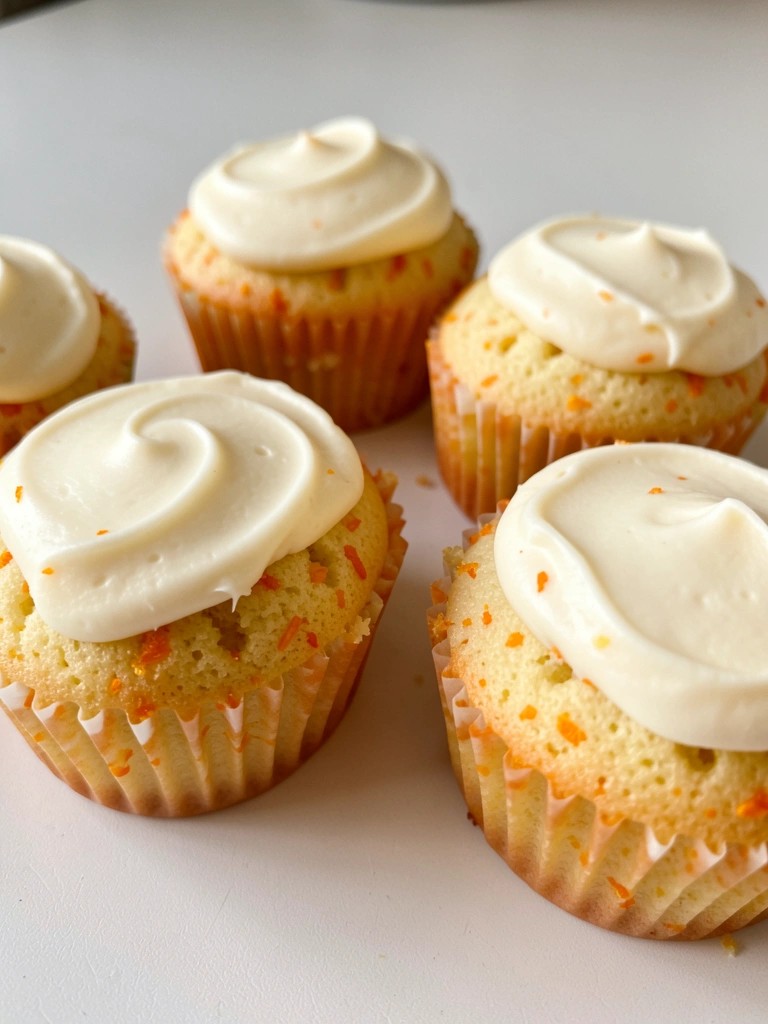
These Orange Creamsicle Cupcakes deliver a bright citrus taste paired with a mild vanilla cream note. They work well for last-minute Halloween baking when you want something colorful and simple to share.
The cupcakes bake up light and tender with a smooth cream cheese frosting on top. The orange zest keeps the flavor fresh while the frosting adds a creamy finish that feels like a classic treat.
Serves 4 people.
Ingredients
- ½ cup all-purpose flour
- ¼ cup granulated sugar
- ½ teaspoon baking powder
- ⅛ teaspoon salt
- ¼ cup unsalted butter, softened
- 1 large egg
- 2 tablespoons fresh orange juice
- 1 teaspoon grated orange zest
- ½ teaspoon vanilla extract
- ½ cup powdered sugar
- 2 ounces cream cheese, softened
- 1 tablespoon milk
Instructions
- Preheat the oven to 350°F and line four cups of a muffin tin with paper liners.
- In a mixing bowl, stir together the flour, granulated sugar, baking powder, and salt.
- Add the softened butter, egg, orange juice, orange zest, and vanilla extract to the dry ingredients. Mix until the batter is smooth and no dry streaks remain.
- Divide the batter evenly among the four prepared cups.
- Bake for 15 to 18 minutes, until a toothpick inserted in the center comes out clean. Let the cupcakes cool completely on a wire rack.
- In a clean bowl, beat the cream cheese until smooth. Add the powdered sugar and milk, then mix until the frosting is creamy and spreadable.
- Spread the frosting over the cooled cupcakes and serve.
Extra Tips
If the frosting feels too thick, add a few extra drops of milk to loosen it. These cupcakes taste best the day they are made, but you can store leftovers in an airtight container in the fridge for up to two days. For a stronger orange flavor, grate a little extra zest directly into the frosting before spreading. Course: Dessert Cuisine: American Equipment: Mixing Bowl, Muffin Tin, Oven, Wire Rack