
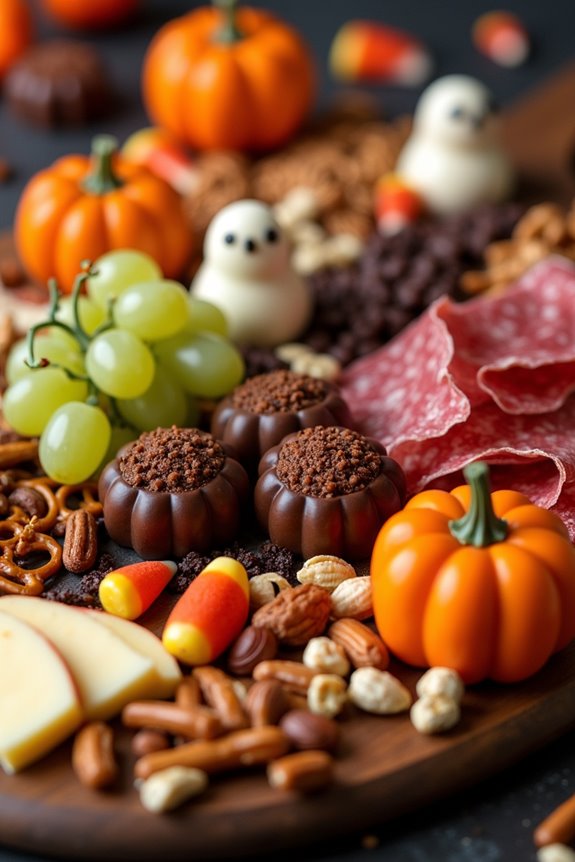
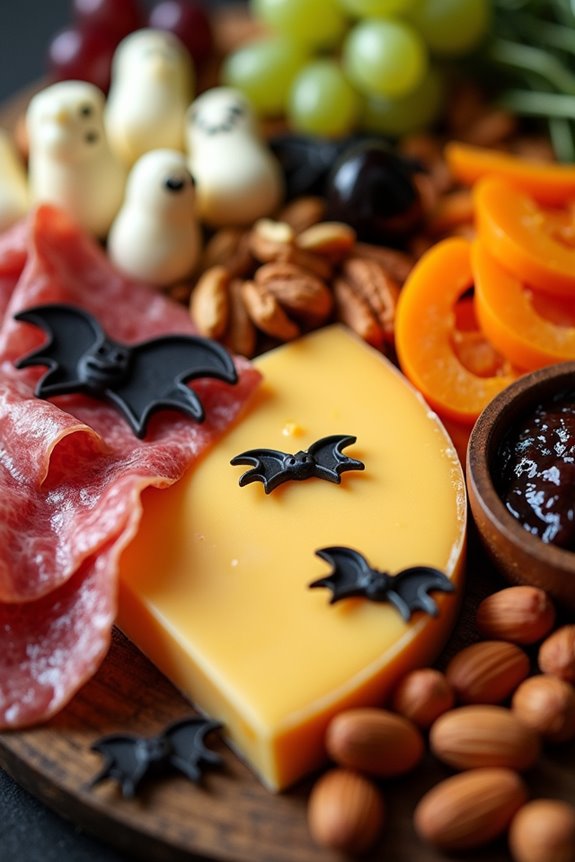
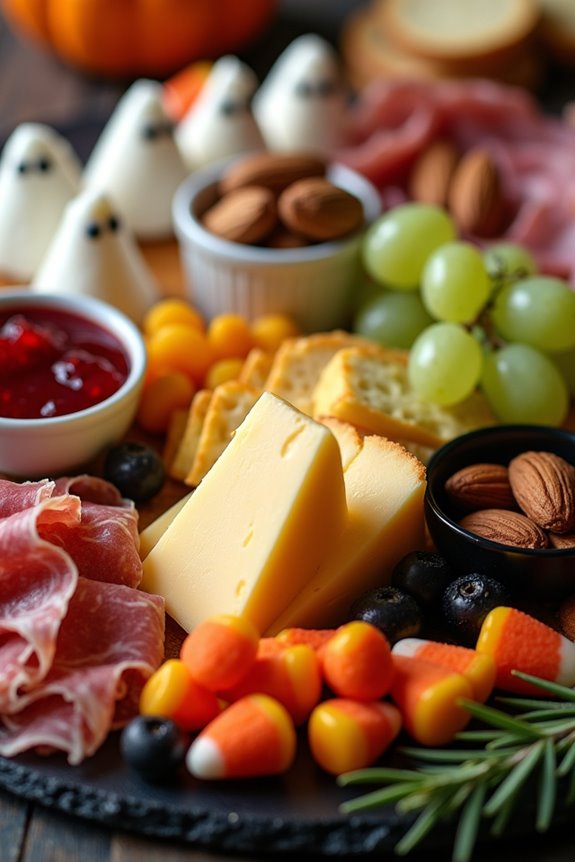
Creating a Halloween charcuterie board is such a fun and festive way to celebrate the spooky season. Whether you’re a kitchen newbie or a seasoned pro, these 11 easy ideas will inspire your next culinary creation. Picture a spread filled with spooky cheeses, delectable meats, and vibrant fruits and veggies. Playful decorations and seasonal flavors will make your gathering not just memorable, but absolutely delicious. Are you ready to craft your Halloween masterpiece?
Spooky Cheese and Meat Platter
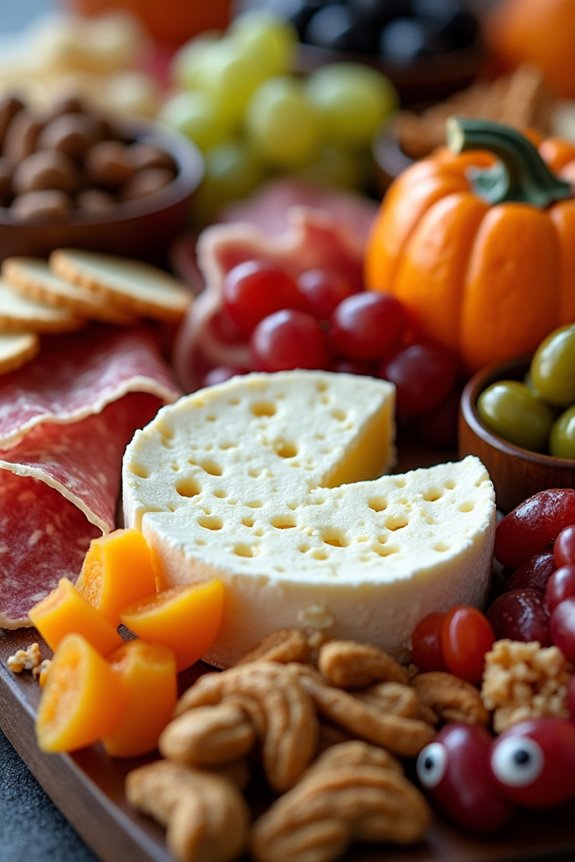
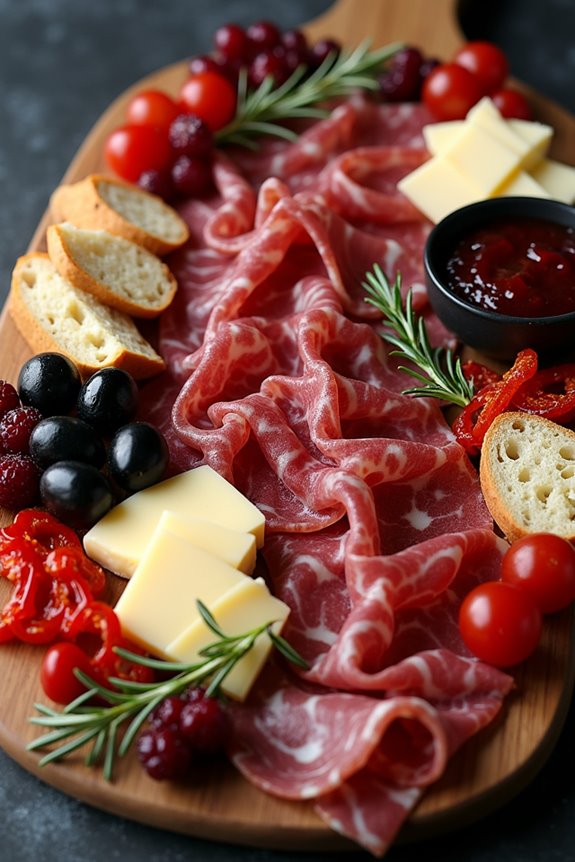
Halloween is the perfect time to get creative with your culinary skills, and a Spooky Cheese and Meat Platter is a fantastic way to impress your guests. This festive charcuterie board combines the savory flavors of assorted cheeses and meats with a touch of Halloween whimsy. By arranging these delicious components in a spooky and artistic manner, you can create a centerpiece that’s both appetizing and visually enchanting.
The key to a successful Spooky Cheese and Meat Platter lies in the selection of ingredients and the clever use of Halloween-themed garnishes. Think of this as an edible art project, where a variety of textures, colors, and flavors come together to create a ghoulishly delightful spread. This recipe is designed to serve 4-6 people, making it perfect for a small Halloween gathering or a cozy night in with the family.
Ingredients for 4-6 people:
- 8 oz. Brie cheese
- 8 oz. cheddar cheese
- 8 oz. gouda cheese
- 8 oz. salami
- 8 oz. prosciutto
- 8 oz. smoked turkey breast
- 1 cup green olives
- 1 cup black olives
- 1 cup assorted nuts (almonds, pecans, walnuts)
- 1 cup dried apricots
- 1 cup fresh grapes
- 1 small pumpkin or gourd (for decoration)
- 4-6 pieces of Halloween-themed candy, optional (e.g., candy eyeballs or gummy worms)
- Crackers or breadsticks for serving
Cooking Instructions:
- Prepare the Cheeses and Meats: Begin by slicing the cheddar and gouda cheeses into thin slices or cubes. For the Brie, leave it whole or cut into wedges. Arrange the cheeses on a large serving board, spacing them out to allow room for the other ingredients.
- Arrange the Meats: Fold the salami, prosciutto, and smoked turkey breast into small, bite-sized pieces. Place these around the cheeses on the board, creating a balanced and appealing layout.
- Add the Olives and Nuts: Fill small bowls with green and black olives and place them on the board. Scatter the assorted nuts around the cheese and meat, filling in any gaps and adding texture.
- Incorporate Fruits: Add clusters of fresh grapes and a pile of dried apricots to the board. These will add sweetness and color, complementing the savory flavors.
- Decorate with Halloween Elements: Place a small pumpkin or gourd in the center or as a focal point on the board. If desired, add Halloween-themed candies like candy eyeballs or gummy worms for a playful touch.
- Serve with Crackers: Arrange crackers or breadsticks around the edges of the board for easy access. They provide the perfect vessel for enjoying the meats and cheeses.
Extra Tips:
To make your Spooky Cheese and Meat Platter even more festive, consider using shaped cookie cutters to cut some of the cheese slices into Halloween shapes like ghosts or bats. Additionally, you can use edible food coloring to draw spooky faces on the Brie or other soft cheeses.
When selecting meats and cheeses, opt for a variety of flavors and textures to keep your guests engaged. Finally, remember to leave some space between the items on the board to make it easier for guests to pick up their selections. Enjoy your hauntingly delicious creation!
Ghoulish Fruit and Veggie Spread
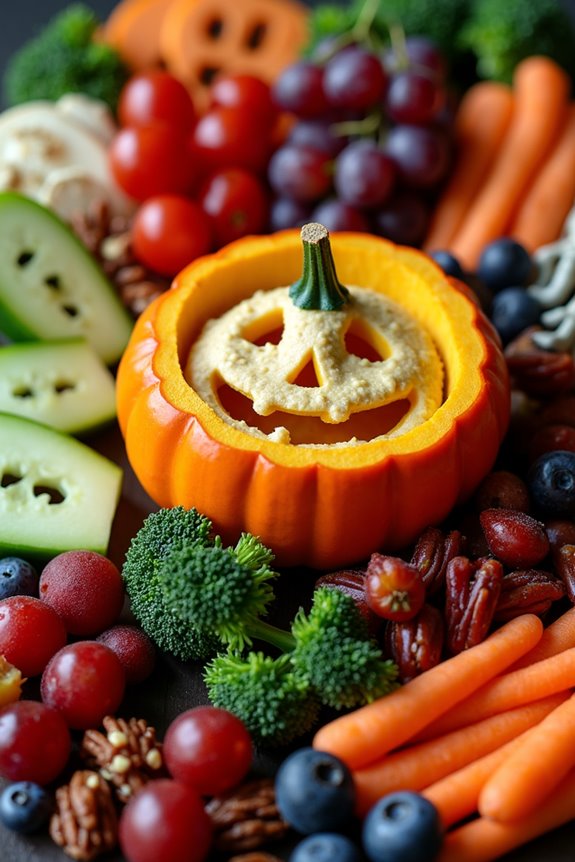
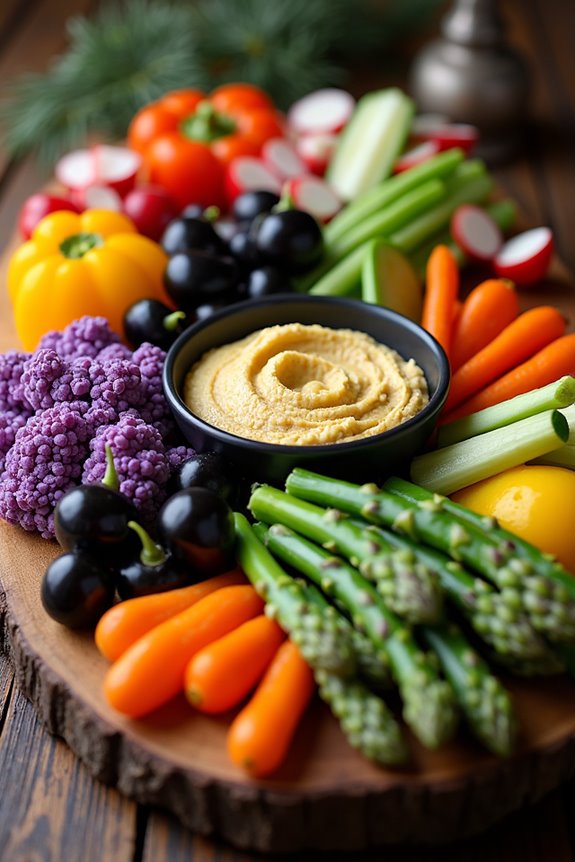
Transform your Halloween party with a spook-tacular Ghoulish Fruit and Veggie Spread, designed to intrigue and delight your guests. This Halloween-themed charcuterie board combines an array of colorful fruits and vegetables arranged in creative, festive designs that capture the eerie spirit of the holiday.
Whether you’re hosting a haunted house or a cozy gathering, this deliciously healthy spread is perfect for guests of all ages, offering a balance of sweet and savory flavors that are as fun to look at as they’re to eat.
Creating a Ghoulish Fruit and Veggie Spread is all about presentation and creativity. You’ll want to focus on incorporating a variety of textures, colors, and shapes to make your board as eye-catching as possible. From using cookie cutters to carve spooky shapes into fruits and vegetables, to arranging them in a way that suggests a ghostly scene, this dish is a true art form.
Perfect for a serving size of 4-6 people, this recipe will help you craft an unforgettable Halloween centerpiece.
Ingredients:
- 1 small pumpkin or squash
- 1 cup baby carrots
- 1 cup cherry tomatoes
- 1 cucumber
- 1 red bell pepper
- 1 yellow bell pepper
- 1 cup broccoli florets
- 1 cup purple grapes
- 1 apple
- 1 pear
- 1 cup strawberries
- 1/2 cup blueberries
- 1/2 cup dried apricots
- 1/2 cup mixed nuts
- 1/2 cup black olives
- 1/2 cup hummus
- 1/2 cup ranch dressing
Instructions:
- Prepare the Base: Begin by selecting a large, flat platter or cutting board as your base. This will serve as the canvas for your Halloween-themed masterpiece.
- Carve the Pumpkin: Hollow out the small pumpkin or squash to create a festive bowl for the dip. You can carve a simple jack-o’-lantern face for added Halloween flair. Place the pumpkin at the center of your board and fill it with hummus or ranch dressing.
- Slice and Shape: Use cookie cutters to cut the cucumber, red, and yellow bell peppers into spooky shapes such as ghosts, bats, and pumpkins. Thinly slice the apple and pear, and keep them in a mixture of lemon juice and water to prevent browning.
- Assemble the Spread: Arrange the fruits and vegetables around the pumpkin bowl. Place the baby carrots, cherry tomatoes, and broccoli florets in clusters to create a colorful and balanced appearance. Add the sliced cucumber and bell pepper shapes for visual interest.
- Add Sweet Elements: Alternate between placing purple grapes, strawberries, and blueberries to provide bursts of color. Add the dried apricots and mixed nuts in small piles to introduce different textures.
- Finish with Details: Scatter black olives around the board to mimic eerie eyes watching your guests. Consider using small skeleton hand decorations or fake spider webs for an extra ghoulish touch.
- Serve: Your Ghoulish Fruit and Veggie Spread is ready to serve. Pair it with small plates and utensils for easy serving and enjoying.
Extra Tips:
For an added Halloween effect, consider using string lights or candles around the charcuterie board to cast spooky shadows. To maintain the freshness of the fruits and veggies, prepare the spread no more than a few hours before serving.
You can also customize the board by incorporating seasonal fruits and vegetables available in your area. Making the spread interactive by adding a few hidden surprises, such as chocolate eyeballs or gummy worms, can also enhance the Halloween theme and delight your guests.
Sweet and Salty Monster Mix
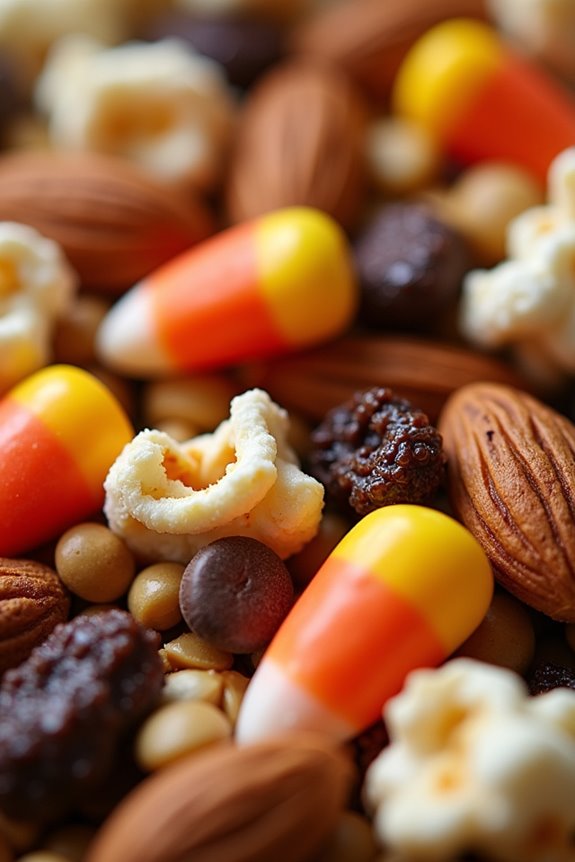
Sweet and Salty Monster Mix is a delightful twist on traditional charcuterie boards, combining both sweet and salty elements to create a festive Halloween treat. This delicious mix is perfect for a spooky gathering or a fun snack for the family. The vibrant colors and mix of flavors make it visually appealing and tantalizing to the taste buds, offering something for everyone.
With a combination of candy, nuts, and pretzels, this board is sure to be a hit at your Halloween party. Creating a Sweet and Salty Monster Mix is simple and allows for creativity and personalization. The idea is to mix together a variety of your favorite snacks, both sweet and salty, and present them in an artful manner.
The key is balance; too much sweet or too much salty can overwhelm the palate, but when combined properly, they can create an irresistible treat. This recipe offers a base to get you started, with room for customization to suit your preferences or dietary needs.
Ingredients for Sweet and Salty Monster Mix (serving size: 4-6 people):
- 1 cup candy corn
- 1 cup mini pretzels
- 1 cup dried cranberries
- 1 cup roasted almonds
- 1/2 cup mini chocolate chips
- 1/2 cup candy-coated chocolates (like M&M’s)
- 1/2 cup yogurt-covered raisins
- 1/2 cup pumpkin seeds
- 1/2 cup caramel popcorn
Instructions:
- Prepare the Ingredients:
- Gather all the ingredients and verify they’re fresh and ready to use. Measure each ingredient carefully to maintain the balance of flavors.
- In a large mixing bowl, combine the candy corn, mini pretzels, dried cranberries, and roasted almonds. Stir gently to combine, verifying that the ingredients are evenly distributed.
- Add the mini chocolate chips, candy-coated chocolates, and yogurt-covered raisins to the mixture. Stir gently to avoid crushing any of the components.
- Mix in the pumpkin seeds and caramel popcorn. These will add a delightful crunch and unique flavor to the mix. Stir carefully to integrate them without breaking the popcorn.
- Pour the mixture onto a large serving platter or board. Arrange it creatively, forming small piles or sections of each ingredient to enhance visual appeal.
- Allow guests to serve themselves with small bowls or cups, verifying everyone gets a taste of each component.
- 1 cup of assorted Halloween-themed candies (e.g., candy corn, gummy worms)
- 12 Halloween-themed cookies (e.g., spider web cookies, pumpkin-shaped cookies)
- 1 cup of chocolate-covered pretzels
- 1 cup of mixed nuts (optional)
- 1 cup of fresh fruit (e.g., blackberries, grapes)
- 1 cup of assorted mini cupcakes or brownies
- 1 block of dark chocolate, broken into pieces
- 1 bag of popcorn or caramel corn
- 1 jar of marshmallow fluff or chocolate spread for dipping
Extra Tips:
For added visual appeal, consider using themed bowls or containers with Halloween designs. You can substitute or add other ingredients like dried apricots, walnuts, or sunflower seeds based on your guests’ preferences.
Verify the nuts are unsalted if you want a less salty mix. If you prefer a healthier option, replace candy-coated chocolates with dark chocolate chunks. To keep the mix fresh, prepare it the same day you plan to serve it.
Haunted Dessert Board
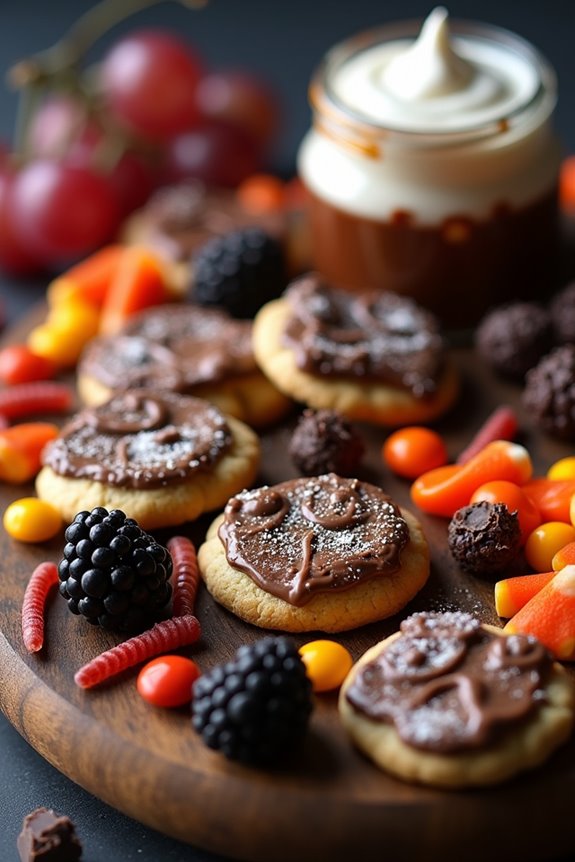
A Haunted Dessert Board is a spooktacular treat for Halloween festivities, designed to delight both the eyes and taste buds of your guests. This board is a creative and fun way to serve a variety of sweet treats, with each component being chosen to reflect the eerie theme of the holiday.
It’s a perfect blend of flavors and textures, from crunchy to creamy, and is visually appealing with its array of Halloween-themed candies and desserts. This dessert board is perfect for a party serving 4-6 people, guaranteeing everyone gets to indulge in the ghoulish goodness.
The Haunted Dessert Board is easy to assemble and provides a playful experience for both adults and children. It’s a versatile dish, allowing you to include your favorite candies, cookies, and fruits, all with a macabre twist.
With the right selection of items, you can create a board that not only looks like a haunted masterpiece but tastes like one too. The key is to balance the spooky elements with delicious flavors that will keep everyone coming back for more.
Ingredients (serving size: 4-6 people):
Cooking Instructions:
- Prepare the Surface: Start by selecting a large wooden board or platter as the base for your dessert board. Confirm it’s clean and dry before beginning to assemble your treats.
- Arrange the Large Items: Place the Halloween-themed cookies and mini cupcakes or brownies on the board first. Position them at different spots to create a balanced look.
- Add the Candies: Sprinkle an assortment of Halloween-themed candies around the cookies and cupcakes. Use candy corn and gummy worms for a festive touch.
- Incorporate the Fruits and Nuts: Add fresh fruits like blackberries and grapes around the board for a splash of color and fresh flavor. If desired, sprinkle mixed nuts in small clusters for added texture.
- Include the Crunchy Elements: Break the dark chocolate into pieces and scatter them around the board. Add the chocolate-covered pretzels and popcorn or caramel corn in small piles to fill any gaps.
- Finish with the Spread: Place the jar of marshmallow fluff or chocolate spread on the board with a small spoon or knife for easy serving. This serves as a dip for fruits, cookies, or pretzels.
- Final Touches: Rearrange any items as needed to guarantee the board looks visually appealing and balanced. Make sure each item is easily accessible for guests.
Extra Tips:
When creating your Haunted Dessert Board, consider using small decorative elements like plastic spiders or ghost figurines to enhance the spooky theme.
If you’re including nuts, always check for any allergies among your guests before serving. You can also customize the board based on dietary preferences—opt for gluten-free cookies or vegan candies if necessary.
The key to a successful dessert board is variety, so don’t hesitate to mix and match different elements to cater to all taste preferences. Enjoy the process and have fun with the presentation to make your Halloween gathering truly unforgettable!
Eerie Seafood Selection
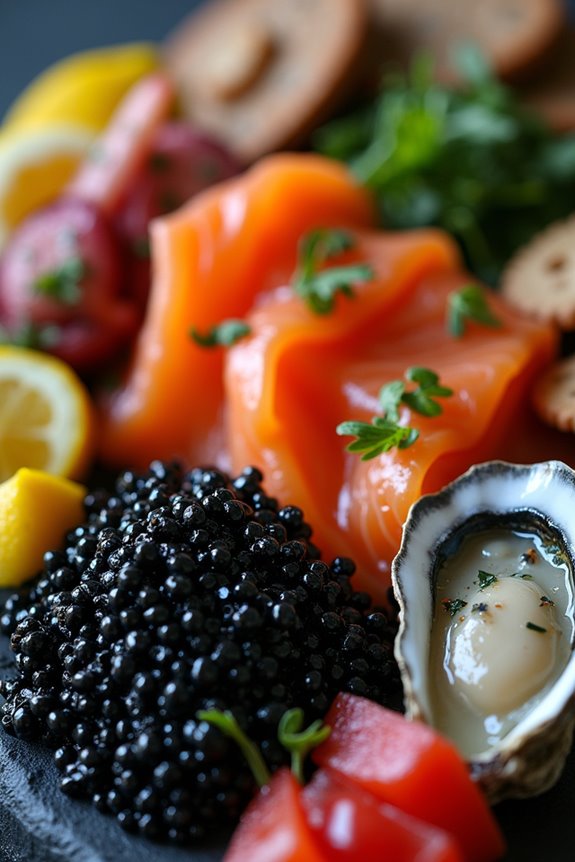
Delight your guests this Halloween with an Eerie Seafood Selection, a chilling charcuterie board that combines the briny flavors of the ocean with a festive, spooky twist. This dish is perfect for a Halloween gathering, offering a sophisticated yet frightful array of seafood delights that are as delicious as they’re visually stunning.
The key to crafting an outstanding Halloween-themed charcuterie board is to play with colors, textures, and creative presentation to evoke the eerie ambiance of the holiday. By using dark and smoky flavors, coupled with the fresh taste of the sea, you create a memorable experience that will haunt your guests long after the final bite.
Designed to serve 4-6 people, this Eerie Seafood Selection includes a variety of seafood such as smoked salmon, black squid ink pasta, and oysters, all artfully arranged on a board with themed garnishes like edible seaweed and black caviar. The combination of flavors and textures will provide a balanced taste profile, while the use of dramatic colors like deep reds and inky blacks will enhance the Halloween atmosphere.
Whether you’re hosting a formal dinner or a casual get-together, this seafood charcuterie board will be the centerpiece of your celebration.
Ingredients:
- 200g smoked salmon
- 200g black squid ink pasta
- 12 fresh oysters
- 100g black caviar
- 150g shrimp cocktail
- 1 small jar of pickled octopus
- 100g edible seaweed salad
- 1 lemon, sliced into wedges
- 1 small jar of capers
- 1 loaf of black bread or activated charcoal bread
- Assorted crackers
- Fresh dill for garnish
Cooking Instructions:
- Prepare the Squid Ink Pasta: Cook the black squid ink pasta according to the package instructions. Once cooked, drain and rinse with cold water to stop the cooking process. Toss with a small amount of olive oil to prevent sticking and set aside.
- Prepare the Oysters: Carefully shuck the oysters, making sure to keep the juice inside. Arrange them on a bed of crushed ice on your charcuterie board for both presentation and to keep them cold.
- Assemble the Seafood: Lay out the smoked salmon, shrimp cocktail, and pickled octopus in separate sections on the board. This will create an organized yet intriguing visual appeal.
- Add the Pasta and Caviar: Twirl small nests of the squid ink pasta and place them on the board. Top with a generous spoonful of black caviar for a luxe touch.
- Garnish and Decorate: Add the edible seaweed salad in small clusters around the board. Place lemon wedges and capers strategically to add pops of color and flavor. Finally, add sprigs of fresh dill for an aromatic garnish.
- Include Accompaniments: Slice the black bread into thin pieces and arrange along with an assortment of crackers on the board. These will provide a crunchy contrast to the soft textures of the seafood.
- Final Touches: Verify all items are well-placed and visually appealing, with a balance of colors and textures to maintain the eerie theme. Serve immediately, ensuring the oysters and seafood are kept as fresh as possible.
Extra Tips:
When preparing the Eerie Seafood Selection, it’s important to use the freshest seafood possible to guarantee safety and the best flavor. If fresh oysters aren’t available, consider using high-quality canned or jarred alternatives.
Additionally, the black squid ink pasta can be replaced with regular pasta if desired, though the dramatic color adds to the Halloween theme. For those who are new to shucking oysters, consider watching a tutorial to guarantee safe and efficient handling.
Finally, feel free to adjust the ingredients based on availability or personal preference to create a board that suits your taste and style.
Creepy Candy and Chocolate Assortment
Get ready to spook your taste buds with a Halloween Charcuterie Board featuring a Creepy Candy and Chocolate Assortment! This festive board is perfect for a Halloween party or a cozy night in with family and friends. It’s an eye-catching spread that combines a mix of traditional charcuterie elements with a thrilling twist of Halloween-themed sweets.
With its perfect balance of savory and sweet, this board offers a unique experience that delights both the eyes and the palate. Creating this Halloween Charcuterie Board is a fun and interactive way to celebrate the spookiest night of the year. It’s all about mixing and matching your favorite candies and chocolates with other delicious treats to create a balance of flavors and textures.
The key is to incorporate a variety of candies, chocolates, and other elements to guarantee there’s something for everyone. Whether you’re hosting a large gathering or a small get-together, this board is sure to be a hit among both kids and adults.
Ingredients for 4-6 people:
- Assorted Halloween-themed chocolates (e.g., chocolate pumpkins, ghost-shaped chocolates)
- Gummy candies (e.g., gummy worms, gummy eyeballs)
- Candy corn
- Mini caramel apples
- Chocolate-covered pretzels
- Assorted nuts (e.g., almonds, pecans)
- Cheese wedges (e.g., cheddar, gouda)
- Cured meats (e.g., salami, prosciutto)
- Crackers or breadsticks
- Fresh fruit (e.g., grapes, apple slices)
- Small decorative pumpkins or Halloween decorations
Instructions:
- Prepare the Base: Start by selecting a large serving board or platter as the base for your charcuterie board. Make sure it’s clean and dry.
- Arrange the Cheeses and Meats: Place the cheese wedges and cured meats around the board. Consider rolling or folding the meats for a visually appealing presentation.
- Add the Chocolates: Strategically place the Halloween-themed chocolates on the board. Use a variety of shapes and sizes to create visual interest.
- Incorporate the Gummies and Candy Corn: Scatter gummy candies and candy corn around the board. Try to distribute them evenly to avoid clustering.
- Include Nuts and Pretzels: Fill in any gaps with assorted nuts and chocolate-covered pretzels. These add a nice crunchy texture to the board.
- Add Fresh Elements: Arrange the fresh fruit such as grapes and apple slices on the board. This adds a revitalizing contrast to the sweets.
- Place the Mini Caramel Apples: If using, position the mini caramel apples around the board. They not only look appealing but also offer a sweet, tangy flavor.
- Finish with Decorations: Ultimately, add small decorative pumpkins or Halloween-themed decorations to complete the spooky look.
- Serve and Enjoy: Once your board is fully assembled, serve immediately. Encourage guests to mix and match different elements to discover their favorite combinations.
Extra Tips:
When creating your Halloween Charcuterie Board, feel free to get creative with the presentation. Use small bowls or ramekins to separate different candies and chocolates if you want a more organized look.
Additionally, consider the dietary preferences of your guests and provide a variety of options, including gluten-free or nut-free items if necessary. Finally, if you’re preparing the board in advance, cover it with plastic wrap to keep everything fresh until serving time.
Ghostly Gourmet Cheese Tray
Transform your Halloween gathering into a hauntingly delicious affair with a Ghostly Gourmet Cheese Tray. This charcuterie board combines a variety of cheeses, meats, and snacks artfully arranged to delight both the eyes and the taste buds. With a balance of savory, sweet, and crunchy elements, this cheese tray isn’t only a feast for the palate but also a spooky centerpiece that will captivate your guests.
Designed to serve 4-6 people, this Ghostly Gourmet Cheese Tray is perfect for an intimate gathering or a small party. By carefully selecting cheeses that range in texture and flavor, and combining them with themed accompaniments, you can create a board that’s as beautiful as it’s delicious. From ghost-shaped crackers to dark chocolate treats, each element is chosen to enhance the Halloween theme and provide a delightful variety for your guests to savor.
Ingredients:
- 8 oz sharp cheddar cheese
- 8 oz brie cheese
- 8 oz gouda cheese
- 8 oz pepper jack cheese
- 6 oz prosciutto
- 6 oz salami
- 1 cup green grapes
- 1 cup dried apricots
- 1/2 cup mixed nuts (almonds and walnuts)
- 1/2 cup black olives
- 1/2 cup fig jam
- 1/2 cup dark chocolate-covered almonds
- Assorted Halloween-themed crackers (such as ghost and bat shapes)
- Fresh rosemary sprigs for garnish
Instructions:
- Prepare the Cheeses: Begin by cutting the cheddar and gouda cheese into thick slices or cubes. Slice the brie into wedges, and cut the pepper jack cheese into bat shapes using a Halloween cookie cutter for a festive touch.
- Arrange the Meats: Fold the prosciutto and salami into small rosettes or bundles and place them on the board, leaving space between each type of meat for visual appeal.
- Add Fruits and Nuts: Scatter the green grapes and dried apricots around the cheese and meats, ensuring a balance of color and texture. Add the mixed nuts in small piles around the board for a crunchy element.
- Incorporate Additional Elements: Place the black olives in a small dish or directly on the board in clusters. Add a small bowl of fig jam with a small spoon for easy serving. Scatter the dark chocolate-covered almonds for a sweet surprise.
- Finish with Crackers and Garnish: Arrange the Halloween-themed crackers around the board, using them to fill any empty spaces. Finally, tuck fresh rosemary sprigs around the board for a fragrant and decorative touch.
Extra Tips:
When creating your Ghostly Gourmet Cheese Tray, consider the flow and balance of flavors and textures. Opt for a mix of soft, hard, and creamy cheeses to offer variety. Make sure to have a mix of sweet and savory accompaniments to cater to different palates.
To maintain freshness, refrigerate the cheese and meats until just before serving, and allow them to come to room temperature for the best flavor. Use the garnishes not only for decoration but also to add aroma and enhance the overall presentation of the board.
With a little creativity and attention to detail, your Halloween charcuterie board will be a spooktacular success.
Frightful Finger Food Feast
Create a Halloween charcuterie board that’s both eerie and appetizing with this Frightful Finger Food Feast. A perfect blend of savory and sweet elements, this charcuterie board is designed to delight guests with its spooky presentation and delicious flavors. Ideal for a party of 4-6 people, this board combines traditional charcuterie favorites with Halloween-themed treats to create a memorable centerpiece for any Halloween gathering.
The board features a selection of cheeses, meats, fruits, and sweets, all arranged to resemble spooky Halloween symbols. From ghost-shaped cheeses to blood-red jams, this dish is sure to be a hit. Assemble your board with a variety of textures and flavors to keep your guests intrigued. This recipe is designed to be flexible, allowing you to substitute ingredients based on personal preferences or dietary restrictions.
Ingredients for 4-6 People:
- 200g sharp cheddar cheese, cut into ghost shapes
- 200g brie, cut into wedges
- 150g salami, thinly sliced
- 150g prosciutto
- 1 cup black olives
- 1 cup green grapes
- 1 cup dried apricots
- 1/2 cup roasted almonds
- 1/2 cup candy corn
- 1/2 cup gummy worms
- 1/2 cup strawberry jam
- 1 French baguette, sliced
- Crackers (assorted)
- Rosemary sprigs for garnish
Cooking Instructions:
- Prepare the Cheeses: Begin by cutting the cheddar cheese into ghost shapes using a ghost-shaped cookie cutter. Slice the brie into small wedges. Arrange these on your board, leaving space for other ingredients.
- Arrange Meats: Roll the salami slices into small cones and gently place them next to the cheeses. Drape the prosciutto in loose, flowing folds to resemble eerie drapery.
- Add Fruits and Nuts: Place clusters of green grapes and a handful of black olives on the board to add color and a touch of freshness. Scatter dried apricots and roasted almonds around the board to balance the savory items with sweet and crunchy textures.
- Incorporate Sweets: To add a whimsical Halloween touch, sprinkle candy corn and gummy worms around the board. These not only bring a pop of color but also add a fun, festive element.
- Finish with Jams and Bread: Fill a small bowl with strawberry jam and place it on the board as a “blood-red” dip. Surround the board with slices of baguette and assorted crackers, ensuring there are enough dippers for the cheeses and jam.
- Garnish and Serve: Finish by adding rosemary sprigs as a garnish. This adds an aromatic element and a touch of green. Serve the board immediately to keep everything fresh.
Extra Tips:
To make your Frightful Finger Food Feast even more visually striking, consider using a black or dark-colored board to contrast with the vibrant ingredients.
You can also add small Halloween decorations, like plastic spiders or mini pumpkins, around the board for an extra spooky effect.
Be sure to vary the heights and layers of the ingredients to create a more dynamic and appealing display. If you want to keep the theme consistent, consider using themed napkins or plates for serving.
Vampire-Themed Antipasto Plate
Halloween is the perfect time to release your creativity in the kitchen, and what better way to do so than with a Vampire-Themed Antipasto Plate? This spooky charcuterie board combines a variety of flavors and textures, from salty cured meats to sharp cheeses and sweet fruits, all with a blood-curdling twist. Designed to serve 4-6 people, this antipasto plate is perfect for a Halloween gathering, ensuring your guests are both terrified and satisfied.
The key to an outstanding vampire-themed charcuterie is in the presentation and choice of ingredients. Think blood-red hues, dark tones, and a touch of the macabre. With a selection of crimson-colored fruits, eerie black olives, and sharp, fang-like cheeses, your platter will look as though it’s been plucked right out of a Transylvanian castle. This dish is both a feast for the eyes and the palate, offering a delightful array of flavors that are sure to enchant your guests.
Ingredients for 4-6 people:
- 8 ounces of prosciutto
- 8 ounces of salami
- 8 ounces of soppressata
- 8 ounces of aged cheddar cheese
- 8 ounces of brie cheese
- 1 cup of black olives
- 1 cup of cherry tomatoes
- 1 cup of dried cranberries
- 1 cup of red grapes
- 1 cup of roasted red peppers
- 1 small jar of blood orange marmalade
- 1 baguette, sliced
- Fresh rosemary sprigs for garnish
Instructions:
- Prepare the Base: Begin by laying down a large wooden board or platter as the base for your antipasto plate. This will serve as the canvas for your culinary masterpiece.
- Arrange the Meats: Fold the prosciutto, salami, and soppressata into neat piles or rolls and place them strategically around the board. Try to separate them evenly across different sections to create balance.
- Slice the Cheeses: Cut the aged cheddar into thin slices or cubes, and the brie into small wedges. Arrange these near the meats but in separate sections to allow guests to mix and match flavors as they please.
- Add the Fruits and Vegetables: Place the black olives, cherry tomatoes, dried cranberries, and red grapes in small clusters around the board, using them as colorful accents. The red grapes and dried cranberries mimic the color of blood, enhancing the vampire theme.
- Include the Roasted Red Peppers: Cut the roasted red peppers into strips and fan them out in a corner of the board for a splash of intense color and flavor.
- Fill in with Marmalade and Bread: Place the blood orange marmalade in a small bowl or ramekin and position it on the board. Scatter the sliced baguette around the board, ensuring there’s enough for guests to pair with the meats and cheeses.
- Garnish and Final Touches: Finish by tucking fresh rosemary sprigs between the ingredients for a hint of green and a fragrant touch. This also adds an eerie, forest-like element to the presentation.
Extra Tips:
When assembling your Vampire-Themed Antipasto Plate, consider varying the heights and levels of your ingredients for added visual interest. Use small bowls or ramekins for the marmalade and olives to create dimension.
If you want to enhance the spooky aesthetic, consider using a dark-colored board, such as slate, to contrast with the vibrant reds and blacks. Additionally, if you’re serving this outdoors or in dim lighting, consider adding a few small candles or LED lights to illuminate your board, making it even more inviting and atmospheric.
Witchy Crudité Arrangement
Halloween isn’t just about candy and sweets; it’s a fantastic opportunity to impress your guests with a spooky yet healthy treat like the Witchy Crudité Arrangement. This visually engaging dish combines a variety of fresh vegetables arranged in a way that captures the enchanting essence of Halloween. Perfect for your Halloween charcuterie board, this arrangement isn’t only a feast for the eyes but also a nutritious option that will delight both adults and children alike.
Creating a Witchy Crudité Arrangement allows you to release your creativity while guaranteeing that your party guests have a balanced option amidst all the sugary treats. By incorporating an array of colorful veggies, you can craft a centerpiece that resembles a witch’s hat, broom, or even a cauldron, depending on your preference. The key is to select vegetables that are vibrant and maintain their shape well, making sure that your arrangement stays fresh and appealing throughout the party.
Ingredients (serves 4-6 people):
- 1 bunch of asparagus
- 1 small bunch of purple cauliflower
- 1 small bunch of orange cauliflower
- 1 medium cucumber
- 1 medium zucchini
- 1 red bell pepper
- 1 yellow bell pepper
- 1 bunch of radishes
- 1 small bunch of rainbow carrots
- 1 cup cherry tomatoes
- 1 cup snap peas
- 1 cup black olives
- 1 cup of hummus or your favorite dip
Instructions:
- Prepare the Vegetables: Wash all the vegetables thoroughly under cold water. Pat them dry with a clean kitchen towel to make sure they’re completely dry, which helps maintain their crispness.
- Cut the Vegetables: Slice the cucumbers and zucchinis into thin rounds. Cut the bell peppers into strips. Trim the ends of the asparagus. Halve the cherry tomatoes, and slice the radishes into thin rounds. For the carrots, peel and slice them into sticks.
- Blanch the Vegetables: Bring a pot of water to a boil. Quickly blanch the asparagus, snap peas, and cauliflower by submerging them in the boiling water for 1-2 minutes, then immediately transferring them to an ice bath to stop the cooking process. This step enhances their vibrant colors and keeps them crisp.
- Arrange the Crudité: On a large serving platter, start by placing the hummus or dip in a small bowl at the center. Arrange the vegetables around the dip, using the different colors and shapes to create a visually appealing design. For a witchy effect, try to form a witch hat shape with the vegetables or mimic the look of a broom by arranging the asparagus like bristles.
- Add Finishing Touches: Scatter black olives around the platter for a touch of darkness. You can also add edible decorations like small plastic spiders or bats for an extra spooky touch.
Extra Tips:
To keep your Witchy Crudité Arrangement looking fresh throughout your Halloween gathering, consider assembling it just before your guests arrive. If you need to prepare it in advance, keep the platter covered with plastic wrap and refrigerated until serving time. This will help maintain the crispness and vibrant colors of the vegetables.
Additionally, feel free to substitute or add any vegetables you prefer or that are in season, and remember to have fun with the arrangement—your creativity is the key to this enchanting dish!
Skeleton Snack Medley
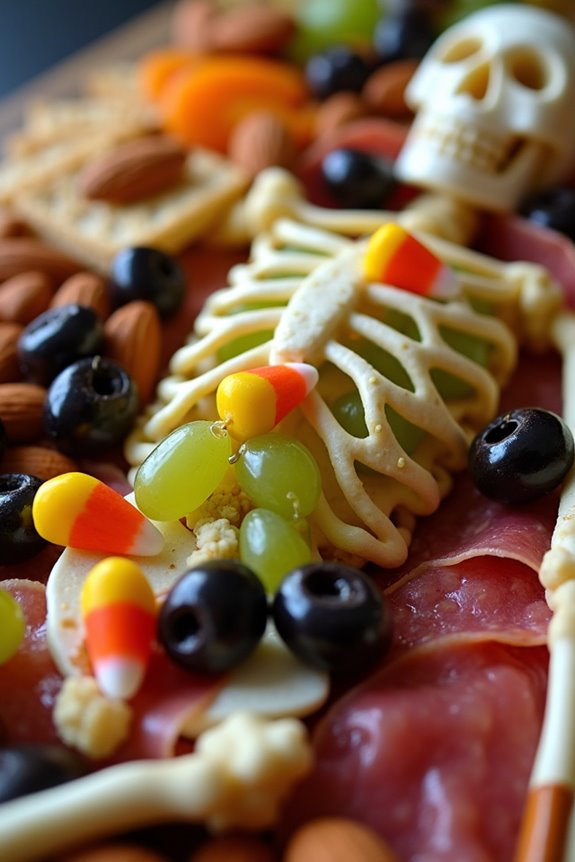
Halloween is the perfect time to get creative in the kitchen, and a Skeleton Snack Medley is sure to be a hit at any spooky gathering. This charcuterie board combines a delightful mix of sweet and savory elements, artfully arranged to resemble a skeleton. Not only is it a feast for the eyes, but it also offers a variety of flavors and textures that will please any palate. Perfect for sharing, this dish serves 4-6 people, making it an ideal centerpiece for a small party or family gathering.
Creating a Skeleton Snack Medley is as fun as it’s delicious. The key is to thoughtfully select a variety of ingredients that not only taste great together but also add to the skeleton aesthetic. The base of the skeleton is typically made from cured meats and cheeses, while fruits, nuts, and sweets are used to fill in the details. This blend of flavors guarantees that there’s something for everyone on the board, from the savory lover to the sweet tooth.
Let’s plunge into the ingredients you’ll need and the steps to bring this creepy creation to life.
Ingredients (serves 4-6):
- 8 slices of prosciutto
- 8 slices of salami
- 6 ounces of assorted cheeses (cheddar, gouda, brie)
- 1 cup of green grapes
- 1/2 cup of black olives
- 1/2 cup of dried apricots
- 1/2 cup of almonds
- 1/4 cup of dark chocolate covered pretzels
- 1/4 cup of candy corn
- 1 small baguette, sliced
- 1 cup of assorted crackers
Cooking Instructions:
- Prepare the Base: On a large serving board, begin by laying out the slices of prosciutto and salami to form the skeleton’s arms and legs. Arrange them in a way that mimics the bones, leaving space in the center for the body.
- Create the Skeleton Body: Cut the assorted cheeses into thin slices or small cubes. Arrange the cheese in the center of the board in a spine-like pattern. Use larger pieces for the torso and smaller pieces for the lower body.
- Add the Head: Use a small round brie as the skeleton’s head. For extra detail, gently cut out eye and nose holes using a small knife or cookie cutter.
- Fill in the Details: Place green grapes as the shoulders and thighs. Use black olives to create joints at the elbows and knees.
- Add Sweet Elements: Scatter dried apricots and candy corn around the board to add color and sweetness. Position dark chocolate covered pretzels as “ribs” on either side of the cheese spine.
- Finish with Accents: Sprinkle almonds around the board for an added crunch. Arrange sliced baguette and crackers around the edges for easy access.
Extra Tips:
When assembling your Skeleton Snack Medley, try to balance the colors and textures throughout the board. This won’t only enhance the visual appeal but also guarantee that every bite offers a delightful mix of flavors.
Feel free to get creative with the ingredients; for example, you can substitute with your preferred fruits, nuts, or sweets to cater to different tastes. Remember to have fun with the presentation, as the unique arrangement is what makes this Halloween charcuterie board stand out.