
As Halloween approaches, I’ve been on the hunt for something more than just candy corn and caramel apples. This spooky season, let’s treat our taste buds to desserts that truly speak to the adult palate. Picture yourself indulging in Dark Chocolate and Red Wine Truffles or savoring the intricate flavors of Absinthe Macarons. These treats promise sophistication with a hint of mystery. Who’s ready to uncover more delightful surprises for this hauntingly delicious Halloween?
Dark Chocolate and Red Wine Truffles
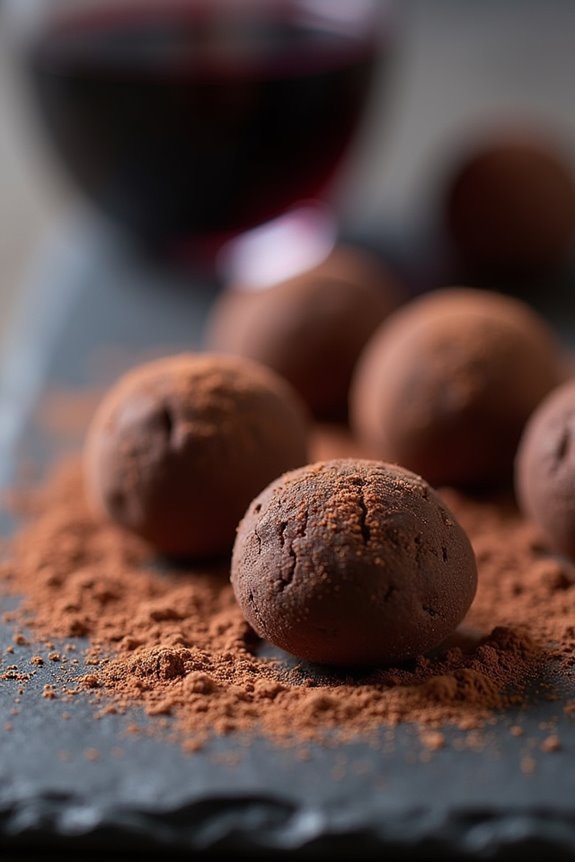
Indulge in a sophisticated Halloween treat with these Dark Chocolate and Red Wine Truffles. Perfectly balanced with the richness of dark chocolate and the depth of red wine, these truffles are designed to delight adult palates. Their luxurious texture and complex flavors make them an ideal dessert for an elegant Halloween gathering or a cozy night in.
These truffles aren’t only a feast for the taste buds but also a wonderful conversation starter, adding a touch of class to your spooky celebrations.
The process of making these truffles is both simple and rewarding. The key is to use high-quality ingredients, as they play an essential role in the final taste. Dark chocolate provides a rich, intense flavor, while the red wine adds fruity notes that complement the chocolate perfectly. Together, they create a sophisticated dessert that feels indulgent yet easy to prepare.
The following recipe serves 4-6 people, providing plenty of truffles to share with your guests.
Ingredients:
- 10 ounces of high-quality dark chocolate (at least 70% cocoa)
- 1/2 cup heavy cream
- 1/4 cup red wine (preferably a fruity variety like Merlot or Pinot Noir)
- 1 tablespoon unsalted butter
- 1/4 teaspoon sea salt
- Cocoa powder, for dusting
Instructions:
- Prepare the Chocolate: Begin by finely chopping the dark chocolate and placing it in a heatproof bowl. The smaller the pieces, the more evenly the chocolate will melt.
- Heat the Cream and Wine: In a small saucepan, combine the heavy cream and red wine. Heat the mixture over medium heat until it just begins to simmer. Avoid boiling, as this can scorch the cream.
- Combine with Chocolate: Pour the hot cream and wine mixture over the chopped chocolate. Let it sit for about 2 minutes to allow the chocolate to begin melting.
- Stir the Mixture: Gently stir the mixture with a spatula until the chocolate is completely melted and smooth. Stir in the unsalted butter and sea salt until fully incorporated.
- Chill the Ganache: Cover the bowl with plastic wrap and refrigerate for about 1-2 hours, or until the ganache is firm enough to scoop.
- Shape the Truffles: Once the ganache is firm, use a small scoop or spoon to portion out the mixture. Roll each portion between your palms to form a smooth ball.
- Dust with Cocoa Powder: Roll each truffle in cocoa powder until fully coated. This not only enhances the flavor but also prevents them from being sticky.
- Serve or Store: Serve the truffles immediately, or store them in an airtight container in the refrigerator for up to a week. Allow them to sit at room temperature for a few minutes before serving to enhance their flavor.
Extra Tips:
For a more intense flavor, consider using a wine reduction. Simply reduce the red wine on the stove until it thickens and concentrates in flavor, then add it to the ganache mixture.
Additionally, experiment with different coatings like finely chopped nuts or a dusting of powdered sugar for varied textures. Remember, the quality of your chocolate and wine directly impacts the final product, so choose the best you can find to guarantee a truly delightful treat.
Spiced Pumpkin Rum Cake
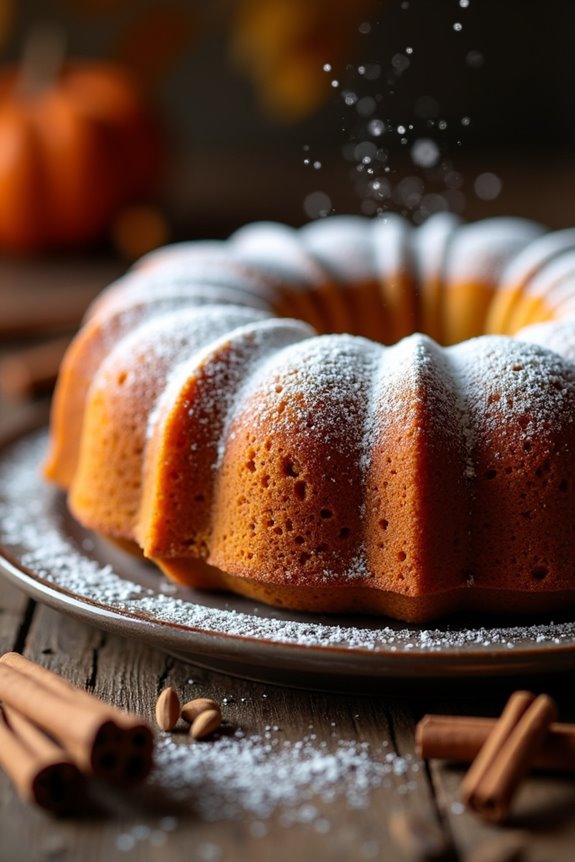
Indulge your Halloween festivities with a delectable Spiced Pumpkin Rum Cake, perfect for adults looking to enjoy a sophisticated twist on a classic dessert. This cake is a harmonious blend of warm spices, rich pumpkin, and the unmistakable depth of rum, creating a moist and flavorful treat that will surely be the centerpiece of your Halloween celebrations.
The combination of aromatic spices and the subtle kick from the rum makes it an ideal dessert for those chilly autumn evenings. Crafting this cake is a delightful process, where the scents of cinnamon, nutmeg, and cloves fill your kitchen, creating an inviting atmosphere that hints at the deliciousness to come.
The use of pumpkin not only adds a seasonal flair but also keeps the cake incredibly moist. This recipe yields a cake that serves 4-6 people, making it perfect for a small gathering or as a special treat for yourself and loved ones. Whether you’re hosting a Halloween party or simply wanting to enjoy a slice of autumn, this Spiced Pumpkin Rum Cake is sure to impress.
Ingredients:
- 1 1/2 cups all-purpose flour
- 1 cup granulated sugar
- 1/2 cup unsalted butter, softened
- 2 large eggs
- 1 cup canned pumpkin puree
- 1/4 cup dark rum
- 1 tsp vanilla extract
- 1 tsp baking soda
- 1/2 tsp baking powder
- 1 tsp ground cinnamon
- 1/2 tsp ground nutmeg
- 1/4 tsp ground cloves
- 1/4 tsp salt
- Optional: powdered sugar for dusting or whipped cream for serving
Cooking Instructions:
- Preheat the Oven: Begin by preheating your oven to 350°F (175°C). Grease and flour a 9-inch cake pan to guarantee the cake doesn’t stick.
- Mix Dry Ingredients: In a medium-sized bowl, whisk together the flour, baking soda, baking powder, cinnamon, nutmeg, cloves, and salt. This will guarantee the spices are evenly distributed throughout the cake.
- Cream Butter and Sugar: In a large mixing bowl, cream the softened butter and granulated sugar together using a hand mixer or stand mixer until light and fluffy. This should take about 3-4 minutes.
- Add Eggs and Pumpkin: Add the eggs one at a time to the butter-sugar mixture, beating well after each addition. Then, mix in the pumpkin puree, rum, and vanilla extract until well incorporated.
- Combine Wet and Dry Mixtures: Gradually add the dry ingredients to the wet mixture, stirring gently until just combined. Be careful not to overmix, as this can make the cake dense.
- Bake the Cake: Pour the batter into the prepared cake pan and smooth the top with a spatula. Bake for 35-40 minutes, or until a toothpick inserted into the center comes out clean.
- Cool and Serve: Allow the cake to cool in the pan for about 10 minutes, then transfer it to a wire rack to cool completely. Once cooled, dust with powdered sugar or serve with a dollop of whipped cream if desired.
Extra Tips:
For a deeper rum flavor, consider soaking the cake in a rum syrup. Simply mix equal parts rum and sugar in a saucepan, heat until the sugar dissolves, and brush over the cooled cake.
You can also add chopped nuts or raisins to the batter for added texture and flavor. To make the cake even more festive, decorate with Halloween-themed sprinkles or edible decorations.
Black Velvet Cupcakes With Bourbon Frosting
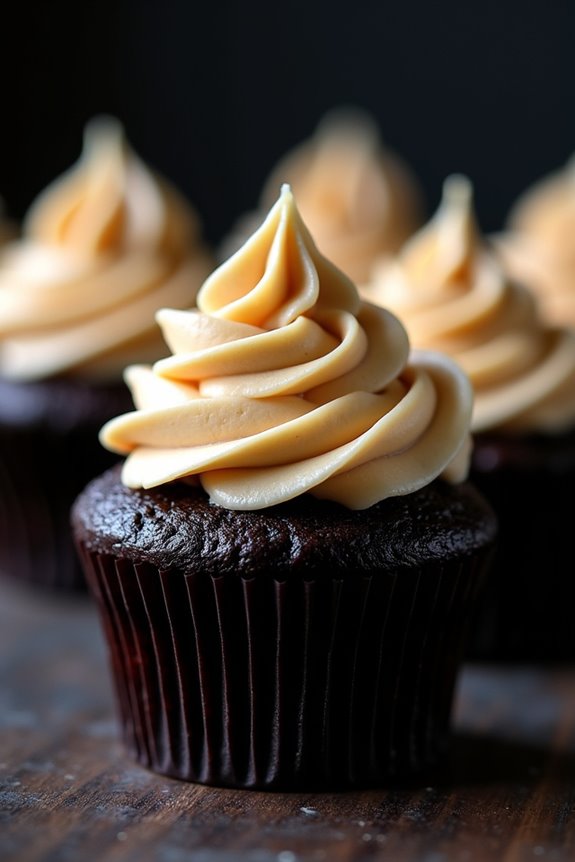
Indulge in the rich and decadent flavors of Black Velvet Cupcakes with Bourbon Frosting, a sophisticated dessert perfect for your Halloween festivities. These cupcakes are a luxurious twist on the classic red velvet, boasting a deep, dark color that adds an air of mystery and allure to your dessert table.
The bourbon frosting adds a touch of adult sophistication, with its smooth and slightly smoky flavor complementing the moist, chocolatey cupcakes beautifully. Perfect for a Halloween gathering, this recipe serves 4-6 people, offering just the right amount of sweet pleasure for an intimate get-together.
The cupcakes are easy to make and come together quickly, making it an ideal choice for busy hosts who still want to impress their guests. The combination of black cocoa powder and bourbon creates a unique flavor profile that’s sure to delight and surprise your adult guests.
Ingredients:
- 1 cup all-purpose flour
- 1/4 cup black cocoa powder
- 1 cup granulated sugar
- 1/2 teaspoon baking soda
- 1/4 teaspoon salt
- 1/2 cup buttermilk
- 1/2 cup unsalted butter, melted
- 1 large egg
- 1 teaspoon vanilla extract
- 1 tablespoon distilled white vinegar
- 1/4 cup strong brewed coffee, cooled
- For the frosting:
- 1/2 cup unsalted butter, softened
- 2 cups powdered sugar
- 2 tablespoons bourbon
- 1 teaspoon vanilla extract
Instructions:
- Preheat the Oven: Begin by preheating your oven to 350°F (175°C). Line a 12-cup muffin tin with cupcake liners to prepare for baking.
- Mix Dry Ingredients: In a large mixing bowl, whisk together the flour, black cocoa powder, granulated sugar, baking soda, and salt until well combined.
- Combine Wet Ingredients: In another bowl, mix the buttermilk, melted butter, egg, and vanilla extract. Stir until all the components are thoroughly blended.
- Create Batter: Gradually add the wet ingredients to the dry ingredients, stirring until just combined. Add the vinegar and coffee, mixing gently until you have a smooth batter. Be careful not to over-mix.
- Fill Cupcake Liners: Divide the batter evenly among the cupcake liners, filling each about 2/3 full.
- Bake: Place the muffin tin in the preheated oven and bake for 18-20 minutes, or until a toothpick inserted into the center of a cupcake comes out clean.
- Prepare the Frosting: While the cupcakes cool, beat the softened butter in a medium bowl until creamy. Gradually add powdered sugar, beating until smooth. Mix in the bourbon and vanilla extract, continuing to beat until the frosting is light and fluffy.
- Frost the Cupcakes: Once the cupcakes are completely cooled, use a piping bag or a spatula to frost the tops with the bourbon frosting.
Extra Tips:
For the best results, use high-quality black cocoa powder, as it provides a deeper, more intense flavor and color. If you don’t have black cocoa powder, you can substitute it with regular cocoa powder, though the color and taste will differ slightly.
When making the frosting, adjust the amount of bourbon to taste – a little extra can enhance the flavor if desired. Confirm the cupcakes are completely cooled before frosting to prevent the butter in the frosting from melting.
These cupcakes pair well with a glass of bourbon or your favorite Halloween cocktail, making them a delightful adult treat.
Espresso Martini Tiramisu
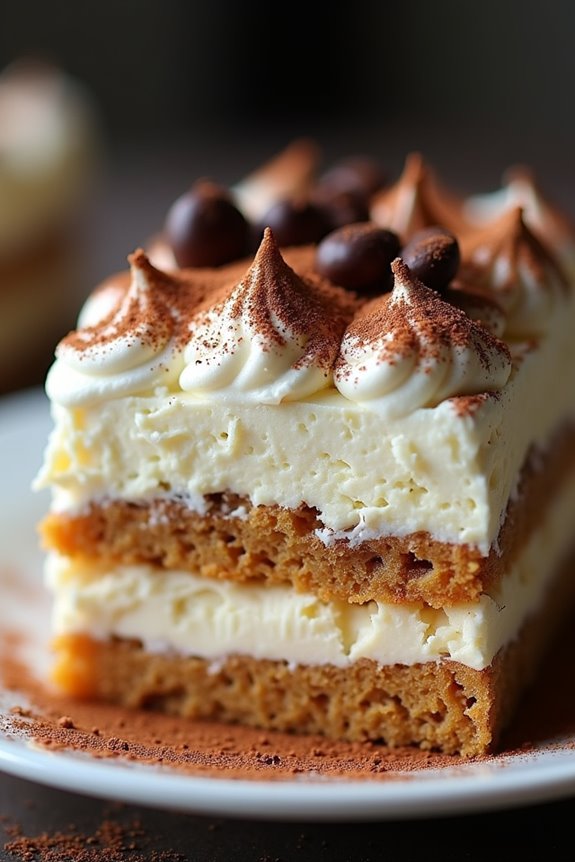
Espresso Martini Tiramisu is a sophisticated twist on the classic Italian dessert, perfect for an adult Halloween gathering. This decadent treat combines the rich flavors of espresso, the creamy texture of mascarpone, and the smooth finish of vodka, all layered with ladyfingers soaked in a coffee-inspired cocktail.
The addition of dark cocoa powder as a garnish adds an extra layer of depth and a touch of elegance, making it an ideal dessert for those who enjoy a little kick in their sweets.
The preparation of Espresso Martini Tiramisu is an engaging process that brings together the art of mixology and the finesse of dessert making. This recipe serves 4-6 people, making it a fantastic choice for a small party or a cozy evening with friends.
The key to this dessert is to balance the flavors of coffee and alcohol with the sweetness of mascarpone and the delicate texture of the ladyfingers. It’s a delightful way to celebrate Halloween with a bit of sophistication and flair.
Ingredients for 4-6 servings:
- 1 cup freshly brewed espresso, cooled
- 1/2 cup vodka
- 1/4 cup coffee liqueur (such as Kahlúa)
- 3/4 cup granulated sugar
- 4 large egg yolks
- 1 pound mascarpone cheese
- 1 cup heavy cream
- 2 teaspoons vanilla extract
- 24-30 ladyfingers
- Unsweetened cocoa powder, for dusting
- Dark chocolate shavings or chocolate-covered espresso beans for garnish (optional)
Cooking Instructions:
- Prepare the Espresso Mixture: In a shallow dish, combine the cooled espresso, vodka, and coffee liqueur. Stir well and set aside. This mixture will be used to soak the ladyfingers.
- Make the Mascarpone Mixture: In a large mixing bowl, whisk together the egg yolks and granulated sugar until the mixture is pale and thick. This should take about 3-5 minutes. Add the mascarpone cheese and continue to whisk until smooth.
- Whip the Cream: In a separate bowl, whip the heavy cream and vanilla extract until soft peaks form. Gently fold the whipped cream into the mascarpone mixture, being careful not to deflate the cream.
- Assemble the Tiramisu: Quickly dip each ladyfinger into the espresso mixture, making certain they’re soaked but not soggy, and arrange a layer at the bottom of your serving dish. Spread half of the mascarpone mixture over the ladyfingers. Repeat with a second layer of dipped ladyfingers and the remaining mascarpone mixture.
- Chill: Cover the dish with plastic wrap and refrigerate for at least 4 hours, or overnight. This allows the flavors to meld together beautifully.
- Serve: Before serving, dust the top with unsweetened cocoa powder. Optionally, add dark chocolate shavings or chocolate-covered espresso beans for garnish.
Extra Tips:
For the best flavor, use freshly brewed espresso rather than instant coffee. If you prefer a stronger coffee flavor, you can increase the amount of espresso in the soaking mixture.
For a non-alcoholic version, replace the vodka and coffee liqueur with additional espresso or coffee syrup. Make sure your mascarpone and cream are cold before starting to guarantee the best texture in your mascarpone mixture.
Enjoy this adult twist on tiramisu responsibly, and savor each layer of refined taste in every bite.
Blood Orange and Champagne Sorbet
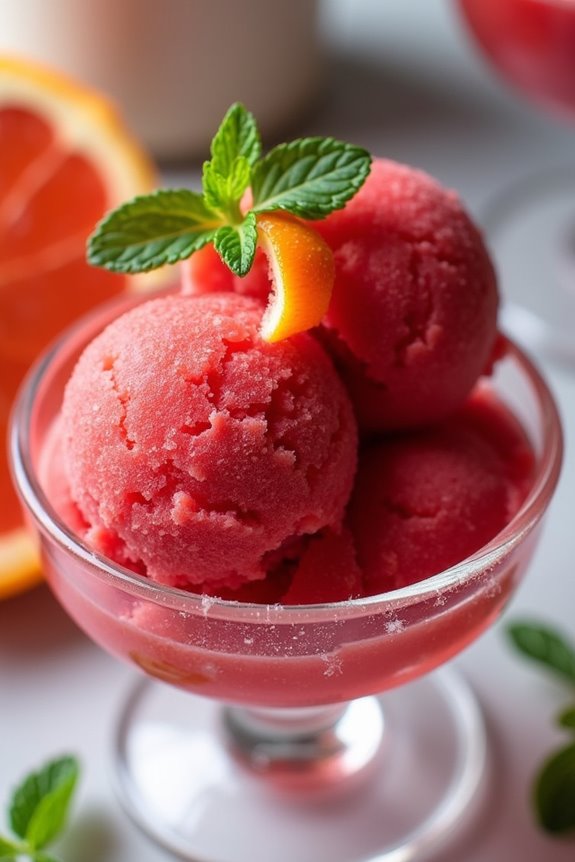
Indulge in a sophisticated Halloween treat with this Blood Orange and Champagne Sorbet, perfect for adults looking to add a touch of elegance to their festivities. This delightful dessert combines the tangy sweetness of blood oranges with the effervescent sparkle of champagne, resulting in a revitalizing and vibrant sorbet that captures the essence of a spooky celebration.
Whether you’re hosting a Halloween dinner party or simply want to enjoy a unique dessert, this sorbet is sure to impress your guests with its striking color and exquisite flavor. Crafted to serve 4-6 people, this sorbet isn’t only a delight to taste but also a visual feast, showcasing the deep red hue of blood oranges.
The addition of champagne not only enhances the flavor but also gives it a luxurious twist that elevates the entire experience. Easy to prepare, this recipe allows you to make a sophisticated dessert without spending hours in the kitchen, leaving you more time to enjoy the festivities with your friends and family.
Ingredients:
- 1 cup freshly squeezed blood orange juice (from about 4-5 blood oranges)
- 1 cup champagne
- 1/2 cup granulated sugar
- 1 tablespoon lemon juice
- Zest of 1 blood orange
- Pinch of salt
Instructions:
- Juice the Blood Oranges: Begin by juicing the blood oranges until you have 1 cup of juice. Confirm there are no seeds or pulp in the juice by straining it through a fine mesh sieve.
- Combine Ingredients: In a medium-sized mixing bowl, combine the blood orange juice, champagne, granulated sugar, lemon juice, blood orange zest, and a pinch of salt. Stir well until the sugar is fully dissolved.
- Chill the Mixture: Cover the bowl with plastic wrap and refrigerate the mixture for at least 2 hours, or until it’s completely chilled. This step is essential as it helps the sorbet freeze properly.
- Freeze the Sorbet: Once chilled, pour the mixture into an ice cream maker and churn according to the manufacturer’s instructions, typically about 20-30 minutes, until it reaches a soft-serve consistency.
- Firm Up the Sorbet: Transfer the churned sorbet into an airtight container and freeze for an additional 2-3 hours, or until it becomes firm enough to scoop.
- Serve: Scoop the sorbet into chilled bowls or glasses and serve immediately. Optionally, you can garnish with a twist of blood orange peel or a sprig of fresh mint for added flair.
Extra Tips:
To guarantee the best texture for your sorbet, it’s important to use freshly squeezed blood orange juice for its vibrant flavor and color. If blood oranges are out of season, substitute with regular oranges but note that the color will differ.
If you don’t own an ice cream maker, pour the mixture into a shallow dish and freeze, stirring every 30 minutes until it reaches the desired consistency. This sorbet is best enjoyed on the day it’s made, as the champagne flavor diminishes over time.
Adjust the sweetness to your liking by varying the sugar content, especially if your blood oranges are exceptionally sweet or tart.
Boozy Caramel Apple Tart
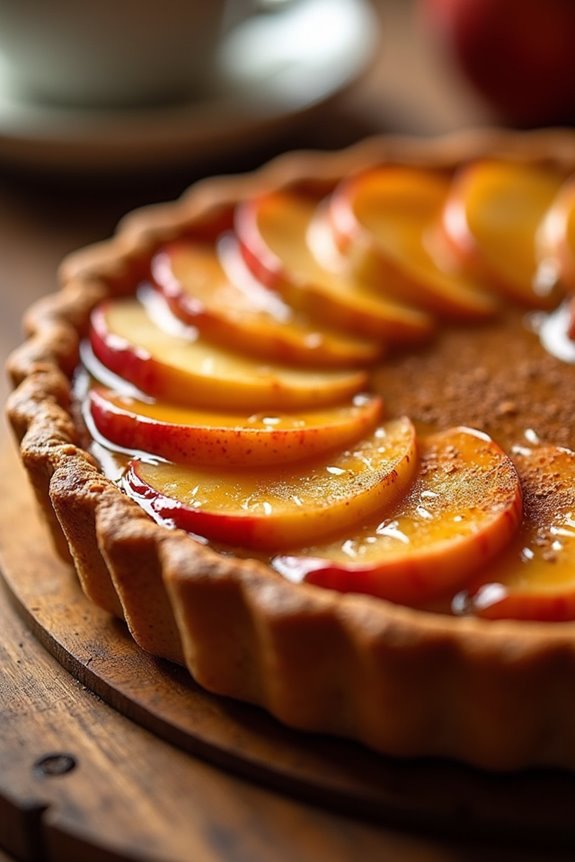
Indulge in a sophisticated Halloween treat with this Boozy Caramel Apple Tart, a delightful adult twist on the classic autumn dessert. This tart combines the rich flavors of caramel and apple with a subtle touch of whiskey or bourbon, making it an ideal dessert for an adult Halloween gathering. The buttery, flaky crust perfectly complements the sweet and slightly tangy apple filling, while the hint of alcohol adds a warming depth that elevates the entire experience.
Crafting this tart involves a few steps, from preparing the crust to cooking the apples in a luscious caramel sauce before baking everything to perfection. However, the end result is well worth the effort, and your guests will surely appreciate the sophisticated flavors and presentation. This recipe serves 4-6 people, making it perfect for an intimate gathering or a small festive soirée.
Ingredients:
- 1 ½ cups all-purpose flour
- ½ cup unsalted butter, chilled and cubed
- ¼ cup granulated sugar
- ¼ teaspoon salt
- 3 tablespoons ice water
- 4 medium apples, peeled, cored, and thinly sliced
- ½ cup brown sugar
- ¼ cup unsalted butter
- ¼ cup heavy cream
- ¼ cup whiskey or bourbon
- 1 teaspoon vanilla extract
- 1 teaspoon cinnamon
- ¼ teaspoon nutmeg
- Pinch of salt
- 1 egg (for egg wash)
- 1 tablespoon granulated sugar (for sprinkling)
Instructions:
1. Prepare the Crust: In a large mixing bowl, combine 1 ½ cups of flour, ¼ cup granulated sugar, and ¼ teaspoon salt. Add the cubed ½ cup chilled butter and use a pastry cutter or your fingers to blend until the mixture resembles coarse crumbs. Gradually add 3 tablespoons of ice water, mixing until the dough just comes together.
Form the dough into a disk, wrap in plastic wrap, and refrigerate for at least 30 minutes.
2. Make Caramel Sauce: In a medium saucepan, melt ¼ cup of butter over medium heat. Stir in ½ cup brown sugar, ¼ cup whiskey or bourbon, and a pinch of salt. Cook while stirring until the sugar dissolves.
Add ¼ cup heavy cream and bring the mixture to a gentle boil. Reduce heat and simmer for 3-4 minutes until sauce thickens slightly. Remove from heat and stir in 1 teaspoon vanilla extract.
3. Prepare the Filling: In a large bowl, toss the sliced apples with 1 teaspoon cinnamon and ¼ teaspoon nutmeg. Pour the caramel sauce over the apples and stir to coat evenly.
4. Assemble the Tart: Preheat oven to 375°F (190°C). Roll out the chilled dough on a floured surface to fit a 9-inch tart pan. Carefully transfer the dough to the tart pan, pressing it into the edges.
Trim excess dough. Arrange the caramel-coated apple slices in a circular pattern over the crust.
5. Bake the Tart: Beat 1 egg and use it as an egg wash by brushing along the edges of the tart. Sprinkle 1 tablespoon of granulated sugar over the apples.
Bake for 40-45 minutes until the crust is golden brown and the apples are tender.
6. Cool and Serve: Allow the tart to cool slightly before removing it from the tart pan. Serve warm or at room temperature, optionally with a dollop of whipped cream or a scoop of vanilla ice cream.
Extra Tips:
When preparing the crust, confirm your butter is very cold, as this helps create a flaky texture. If you find the dough difficult to work with, briefly returning it to the fridge can make it easier to handle.
For the filling, choose a mix of apple varieties for a balance of sweetness and tartness; Granny Smith and Honeycrisp make a great combination. Finally, if you prefer a non-alcoholic version, you can substitute the whiskey with apple cider for a similar flavor profile without the booze.
Ghostly White Russian Panna Cotta
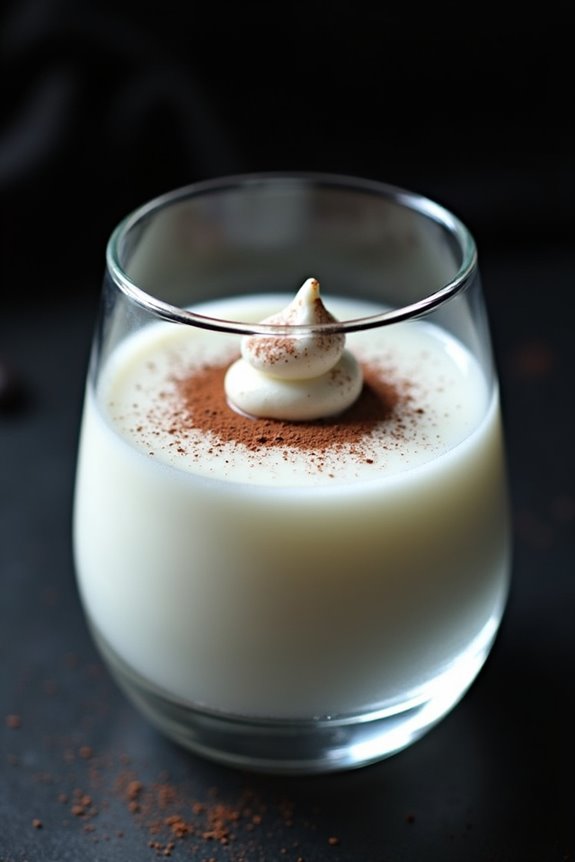
Ghostly White Russian Panna Cotta is a sophisticated and spooky dessert perfect for an adult Halloween gathering. This recipe combines the classic flavors of a White Russian cocktail with the creamy texture of panna cotta, resulting in a delightfully eerie treat. The smooth and rich panna cotta is infused with coffee liqueur and vodka, giving it an elegant twist that’s sure to impress your guests.
The ghostly appearance of this dessert makes it a perfect fit for Halloween. With its stark white color and a hint of ghostly translucence, it captures the haunting essence of the holiday. Topped with a sprinkle of cocoa powder or a dollop of whipped cream, this dessert not only tastes divine but also looks stunning when presented. Serve it in clear glasses or ramekins to showcase its alluring appearance and to let your guests savor the full experience of this grown-up Halloween treat.
Ingredients for Ghostly White Russian Panna Cotta (Serves 4-6):
- 2 cups heavy cream
- 1 cup whole milk
- 1/2 cup granulated sugar
- 2 1/2 teaspoons unflavored gelatin
- 1/4 cup coffee liqueur
- 2 tablespoons vodka
- 1 teaspoon vanilla extract
- Cocoa powder or whipped cream for garnish (optional)
Cooking Instructions:
- Bloom the Gelatin: Pour the whole milk into a small bowl and sprinkle the gelatin evenly over the surface. Let it sit for about 5 minutes until the gelatin softens and blooms.
- Heat the Cream: In a medium saucepan, combine the heavy cream and sugar. Heat over medium heat, stirring occasionally, until the sugar is completely dissolved and the mixture is hot, but not boiling.
- Incorporate Gelatin: Reduce the heat to low and add the bloomed gelatin to the hot cream mixture. Stir continuously until the gelatin is completely dissolved and the mixture is smooth.
- Add Flavors: Remove the saucepan from heat. Stir in the coffee liqueur, vodka, and vanilla extract. Mix well to guarantee all flavors are evenly distributed.
- Pour and Set: Carefully pour the mixture into 4-6 individual serving glasses or ramekins. Allow the panna cotta to cool at room temperature for about 10-15 minutes.
- Refrigerate: Cover the glasses with plastic wrap and refrigerate for at least 4 hours, or until the panna cotta is fully set and firm.
- Garnish and Serve: Before serving, you can garnish each panna cotta with a light dusting of cocoa powder or a dollop of whipped cream to enhance its ghostly appearance.
Extra Tips:
To guarantee a perfectly set panna cotta, make sure the gelatin is fully dissolved before adding to the cream mixture. If you prefer a stronger coffee flavor, you can slightly increase the amount of coffee liqueur, but be cautious not to overpower the balance of flavors.
For a creative presentation, consider using Halloween-themed molds or serving dishes to add an extra touch of festivity. Finally, remember that the panna cotta can be made a day in advance, which can help ease the preparation of your Halloween festivities.
Spooky Black Forest Gateau
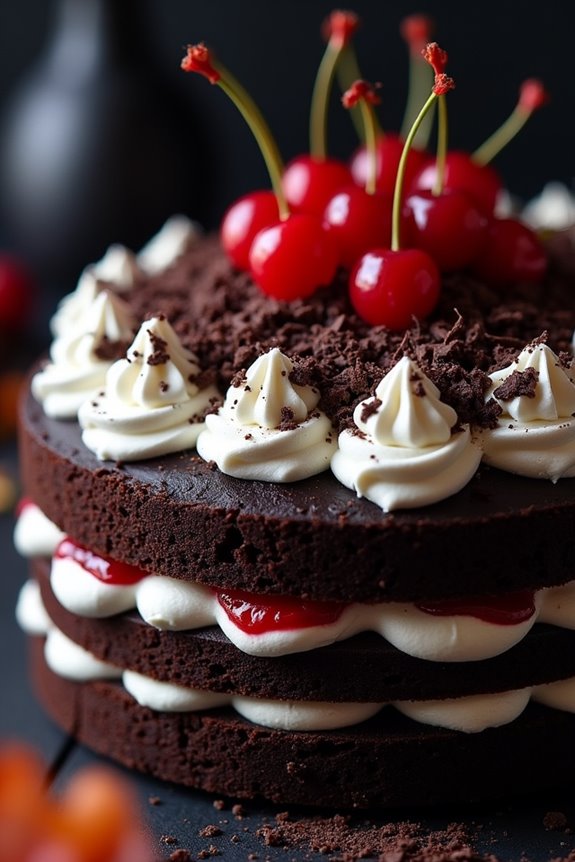
Spooky Black Forest Gateau is a hauntingly delicious dessert perfect for an adult Halloween celebration. This rich and decadent cake features layers of moist chocolate sponge, luscious whipped cream, and a tantalizing cherry filling that’s sure to set the mood for a night of fright.
To add a spooky twist, this version incorporates dark chocolate and a hint of black food coloring to give the cake a mysterious and eerie appearance. It’s an indulgent treat that plays on the classic flavors of the Black Forest while adding a ghoulish flair.
Crafting a Spooky Black Forest Gateau requires a bit of patience and precision, but the results are well worth the effort. Each layer of the cake is infused with kirsch, a cherry brandy, to enhance the cherry flavor and add a sophisticated touch that adults will appreciate.
The cake is topped with dark chocolate shavings and garnished with fresh or maraschino cherries, making it not only a feast for the taste buds but also a striking centerpiece for your Halloween table.
Ingredients (Serves 4-6):
- 1 cup all-purpose flour
- 1/3 cup unsweetened cocoa powder
- 1 teaspoon baking powder
- 1/2 teaspoon baking soda
- Pinch of salt
- 4 large eggs
- 3/4 cup granulated sugar
- 1/2 cup unsalted butter, melted
- 1 teaspoon vanilla extract
- 1/4 cup kirsch (cherry brandy)
- 1 cup heavy whipping cream
- 2 tablespoons powdered sugar
- 1 cup canned or fresh cherries, pitted
- 1/2 cup cherry preserves
- Black food coloring (optional)
- Dark chocolate shavings, for garnish
- Extra cherries, for garnish
Instructions:
1. Prepare the Cake Batter: Preheat your oven to 350°F (175°C). Grease and line two 8-inch round cake pans with parchment paper. In a bowl, sift together the flour, cocoa powder, baking powder, baking soda, and salt.
In a separate bowl, beat the eggs and sugar until light and fluffy. Slowly add the melted butter and vanilla extract, mixing until well combined.
2. Combine Ingredients: Gradually fold the dry ingredients into the egg mixture until the batter is smooth. If desired, add black food coloring to achieve a spooky dark hue. Divide the batter evenly between the prepared cake pans and smooth the tops with a spatula.
3. Bake the Cakes: Place the pans in the preheated oven and bake for 25-30 minutes, or until a toothpick inserted into the center comes out clean. Allow the cakes to cool in the pans for 10 minutes before transferring them to a wire rack to cool completely.
4. Prepare the Cherry Filling: In a small saucepan, combine the cherries and cherry preserves. Cook over medium heat until the mixture thickens slightly. Stir in the kirsch and let it cool to room temperature.
5. Whip the Cream: In a chilled mixing bowl, whip the heavy cream and powdered sugar until stiff peaks form. Be careful not to over-whip.
6. Assemble the Cake: Place one cake layer on a serving platter. Spread half of the cherry filling evenly over the top. Add a layer of whipped cream on top of the cherries. Place the second cake layer on top, and repeat with the remaining cherry filling and whipped cream.
7. Garnish and Serve: Decorate the top of the cake with dark chocolate shavings and extra cherries. Chill the cake for at least an hour before serving to allow the flavors to meld.
Extra Tips:
To achieve a perfect Spooky Black Forest Gateau, make sure your cake layers are completely cool before assembling to prevent the whipped cream from melting.
If you prefer a more intense cherry flavor, you can soak the cherries in kirsch overnight. Additionally, using a serrated knife to slice the cake will help maintain the neatness of each layer.
Be creative with your decorations—adding edible glitter or small Halloween-themed decorations can enhance the spooky presentation.
Salted Caramel Whiskey Brownies
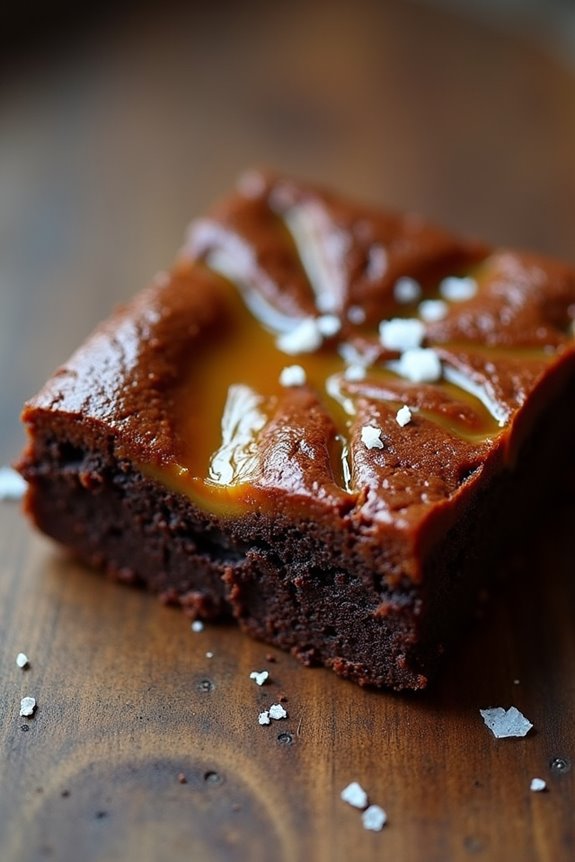
Salted Caramel Whiskey Brownies are the perfect Halloween dessert for adults looking to indulge in a sweet treat with a boozy twist. These brownies combine rich chocolate flavor with the smooth, warming notes of whiskey and a touch of salted caramel to create a decadent dessert that’s certain to impress.
Whether you’re hosting a Halloween party or simply want to treat yourself, these brownies offer a sophisticated and flavorful alternative to traditional Halloween sweets. The combination of dark chocolate and whiskey creates a complex, deep flavor, while the salted caramel adds a hint of sweetness and a touch of saltiness that balances the richness of the brownies.
These brownies are easy to make and are guaranteed to be a hit with anyone who enjoys a sophisticated dessert with a hint of indulgence. Perfect for a gathering of 4-6 people, this recipe guarantees everyone gets a generous serving of this delightful treat.
Ingredients (serving size: 4-6 people):
- 1 cup (2 sticks) unsalted butter
- 8 oz dark chocolate, chopped
- 1 1/2 cups granulated sugar
- 4 large eggs
- 1 teaspoon vanilla extract
- 1/4 cup whiskey
- 1 cup all-purpose flour
- 1/4 cup unsweetened cocoa powder
- 1/2 teaspoon salt
- 1 cup salted caramel sauce
- Flaky sea salt, for garnish
Cooking Instructions:
- Preheat and Prepare the Pan: Preheat your oven to 350°F (175°C). Line a 9×13 inch baking pan with parchment paper, allowing some overhang on the sides for easy removal later.
- Melt Chocolate and Butter: In a heatproof bowl set over a pot of simmering water, melt the butter and chopped dark chocolate together. Stir occasionally until fully melted and smooth. Remove from heat and let it cool slightly.
- Mix Wet Ingredients: In a large mixing bowl, combine the granulated sugar, eggs, and vanilla extract. Whisk until the mixture is pale and slightly thickened. Gradually add in the cooled chocolate mixture, whisking continuously until fully incorporated. Stir in the whiskey until combined.
- Combine Dry Ingredients: In a separate bowl, sift together the all-purpose flour, cocoa powder, and salt. Gradually fold the dry ingredients into the wet ingredients, mixing until just combined and no streaks of flour remain.
- Assemble the Brownies: Pour half of the brownie batter into the prepared pan and spread evenly. Drizzle half of the salted caramel sauce over the batter. Pour the remaining brownie batter on top and smooth out the surface. Drizzle the remaining caramel sauce over the top and gently swirl it using a knife or skewer to create a marbled effect.
- Bake: Bake in the preheated oven for 30-35 minutes, or until a toothpick inserted into the center comes out with a few moist crumbs attached. Avoid overbaking to keep the brownies fudgy.
- Cool and Serve: Let the brownies cool completely in the pan on a wire rack. Once cool, sprinkle with flaky sea salt. Use the parchment paper overhang to lift the brownies out of the pan and cut into squares.
Extra Tips: For an extra layer of flavor, consider making your own salted caramel sauce from scratch using sugar, butter, cream, and sea salt.
Be sure to let the brownies cool completely before cutting to guarantee clean slices, as they’ll continue to set as they cool. If you prefer a stronger whiskey flavor, you can slightly increase the amount of whiskey in the batter, but be cautious not to alter the texture too much.
These brownies pair beautifully with a scoop of vanilla ice cream for an indulgent treat.
Absinthe Macarons With Dark Chocolate Ganache
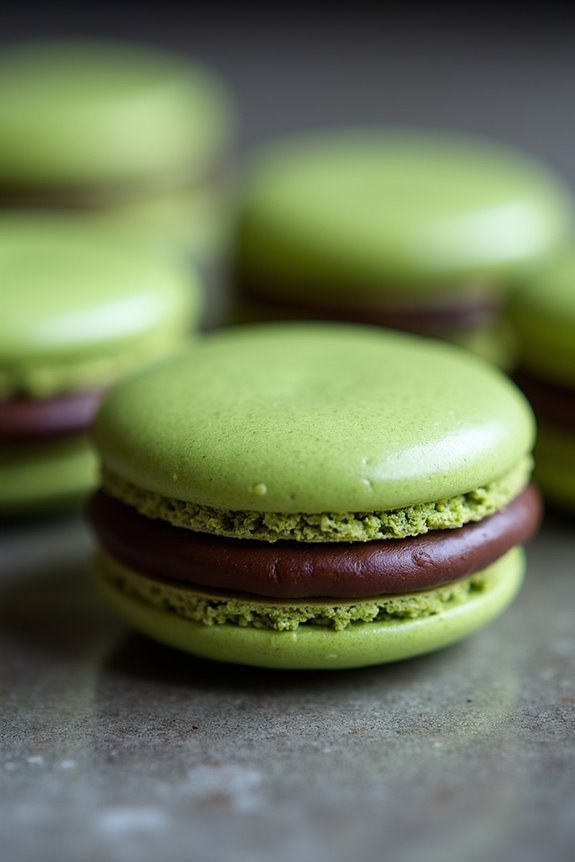
Absinthe Macarons With Dark Chocolate Ganache are a sophisticated and slightly spooky treat perfect for an adult Halloween gathering. These elegant French cookies, with their delicate shells and luxurious filling, are infused with the herbal flavors of absinthe, offering a unique twist to the traditional macaron. The dark chocolate ganache complements the licorice notes of the absinthe, creating a delightful balance of flavors that both impresses and intrigues.
This recipe yields approximately 24 macarons, making it an ideal choice for a small party of 4-6 people. While macarons are known for being a bit challenging, following these detailed instructions will help you achieve a professional result. The key is to be patient and precise, guaranteeing each step is completed with care.
Ingredients
For the Macaron Shells:
- 200g powdered sugar
- 110g almond flour
- 90g egg whites (about 3 large eggs), aged overnight
- 30g granulated sugar
- A pinch of cream of tartar
- A few drops of green food coloring
- 1 teaspoon absinthe
For the Dark Chocolate Ganache:
- 100g dark chocolate, chopped
- 100ml heavy cream
- 1 tablespoon unsalted butter
Cooking Instructions
- Prepare the Macaron Shells:
- Sift the powdered sugar and almond flour together into a large bowl to remove any lumps and guarantee a smooth batter.
- In a separate bowl, whip the egg whites with cream of tartar until soft peaks form. Gradually add the granulated sugar while continuing to beat until stiff, glossy peaks form.
- Carefully fold the almond flour mixture into the meringue in batches, being careful not to deflate the egg whites. Add the food coloring and absinthe, and continue folding until the mixture flows like lava, forming a thick ribbon when lifted with a spatula.
- Transfer the batter to a piping bag fitted with a round tip. Pipe small circles (about 1.5 inches in diameter) onto a baking sheet lined with parchment paper. Tap the baking sheet firmly against the counter to release any air bubbles.
- Let the piped shells sit at room temperature for 30-60 minutes, or until a skin forms on the surface.
- Preheat the oven to 300°F (150°C). Bake the macarons for 15-18 minutes, until they’re set and easily lift off the parchment paper. Allow them to cool completely on the baking sheet.
- In a small saucepan, heat the heavy cream until it begins to simmer. Pour the hot cream over the chopped dark chocolate in a heatproof bowl. Let it sit for a minute, then stir until the chocolate is fully melted and smooth.
- Stir in the butter until the ganache is glossy. Allow it to cool slightly and thicken before transferring it to a piping bag.
- Pair the macaron shells by size. Pipe a small amount of ganache onto the flat side of one shell and gently press another shell on top to create a sandwich.
- Once filled, refrigerate the macarons for at least 24 hours to allow the flavors to meld and the texture to improve. Bring to room temperature before serving.
- 4-6 firm ripe pears, peeled and cored
- 1 bottle (750ml) of red wine
- 1 cup of granulated sugar
- 2 cinnamon sticks
- 4 whole cloves
- 2 star anise
- 1 vanilla bean, split and seeds scraped
- Zest of 1 orange
- Optional: whipped cream or vanilla ice cream for serving
Extra Tips
Achieving the perfect macaron requires practice and precision, but a few tips can help guarantee success. Make sure to age the egg whites overnight to reduce their moisture content, which aids in achieving the desired macaron texture.
Additionally, patience during the drying stage is vital; if the shells aren’t properly dried, they may crack during baking. Finally, don’t be discouraged by imperfections on your first try, as even the most experienced bakers face challenges with macarons.
Mulled Wine Poached Pears
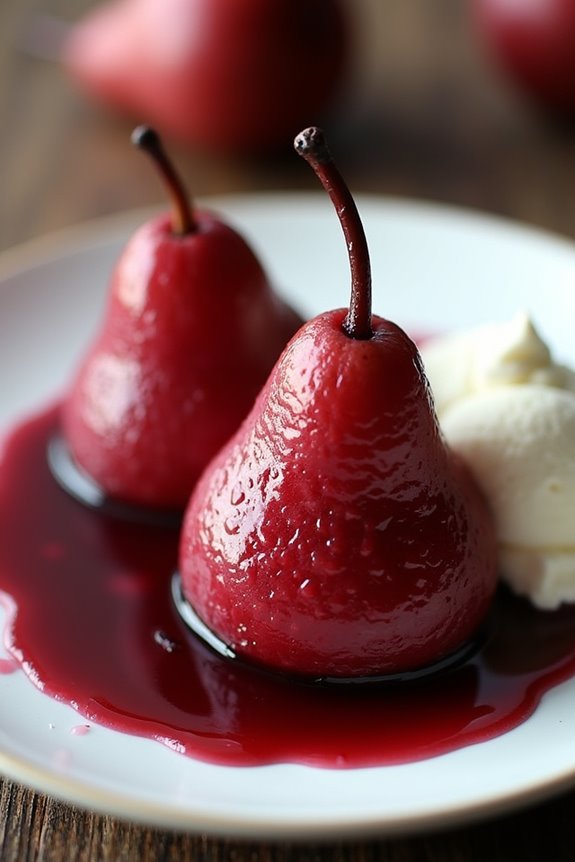
Mulled Wine Poached Pears are an elegant and sophisticated dessert, perfect for serving at an adult Halloween gathering. The rich aroma of spices mingling with the fruity notes of red wine creates an intoxicating scent that fills the kitchen as the pears gently poach. This dish isn’t only delicious but also visually stunning, with the deep red hue of the wine beautifully staining the tender pears.
It’s a dessert that embodies the warm, cozy essence of fall while adding a touch of elegance to your Halloween festivities.
Poaching pears in mulled wine not only makes for a delectable treat, but it also allows for creativity in presentation. You can serve these pears whole or sliced, drizzled with the spiced wine reduction, and paired with a dollop of whipped cream or a scoop of vanilla ice cream. The contrast between the warm, spiced pears and the cool, creamy accompaniments makes for a delightful experience.
Whether you’re hosting a dinner party or simply want to indulge in a special treat, Mulled Wine Poached Pears are sure to impress.
Ingredients for 4-6 servings:
Cooking Instructions:
- Prepare the Wine Base: In a large saucepan, combine the red wine, sugar, cinnamon sticks, cloves, star anise, vanilla bean and seeds, and orange zest. Stir the mixture over medium heat until the sugar is completely dissolved. Bring it to a gentle simmer.
- Poach the Pears: Carefully place the peeled and cored pears into the simmering wine mixture. Make certain that they’re fully submerged. If necessary, use a small plate to weigh them down. Allow the pears to poach for about 20-30 minutes until they’re tender but still hold their shape. Turn the pears occasionally for even coloring.
- Reduce the Poaching Liquid: Once the pears are cooked, remove them from the saucepan using a slotted spoon and set them aside. Increase the heat to medium-high and let the poaching liquid reduce by half until it becomes syrupy, which should take about 10-15 minutes.
- Serve: Plate the pears individually or sliced, then drizzle with the reduced wine syrup. Serve warm or at room temperature with a dollop of whipped cream or a scoop of vanilla ice cream for added richness.
Tips:
When selecting pears for poaching, choose varieties like Bosc or Anjou, which retain their shape well during cooking. To guarantee even poaching, try to select pears of similar size.
If the pears aren’t fully submerged in the wine, turn them gently during cooking to ensure an even color and flavor throughout. For a more intense flavor, consider preparing the pears a day in advance and allowing them to soak in the poaching liquid overnight in the refrigerator.
Cinnamon-Spiced Rum Cheesecake
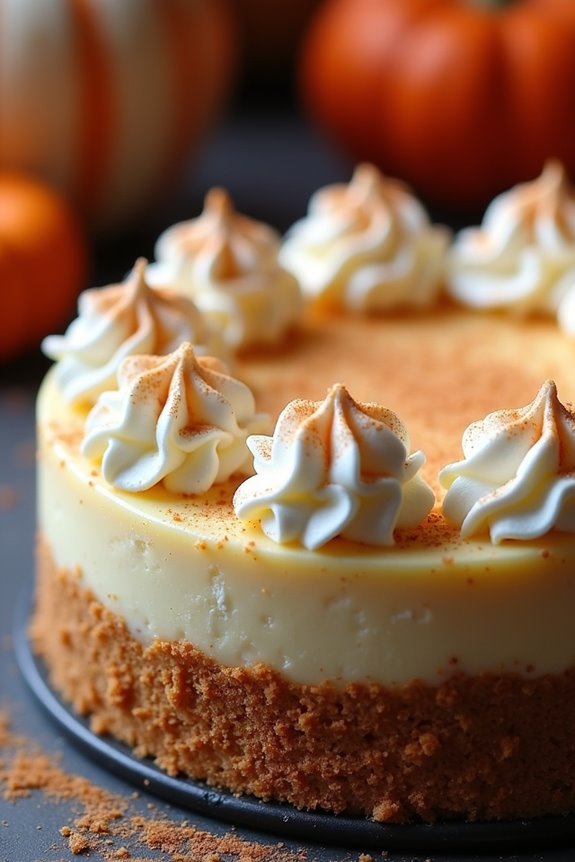
Cinnamon-Spiced Rum Cheesecake is a delightful dessert that adds a touch of sophistication to any Halloween gathering. This decadent treat is perfect for adults who appreciate the warm, aromatic notes of cinnamon combined with the rich, velvety texture of cheesecake, all enhanced by a subtle hint of rum. Ideal for serving 4-6 people, this dessert promises to be a showstopper at your Halloween party, offering a unique twist on a classic favorite.
The magic of this cheesecake lies in its harmonious blend of flavors. The smooth cream cheese filling is infused with spiced rum and a generous amount of cinnamon, creating a perfect balance of sweet and spicy. The buttery graham cracker crust complements the creamy filling, providing a delightful contrast in textures. Topped with a dollop of whipped cream or a sprinkle of cinnamon sugar, this cheesecake will surely impress your guests and leave them craving for more.
Ingredients:
- 1 1/2 cups graham cracker crumbs
- 1/4 cup unsalted butter, melted
- 24 oz cream cheese, softened
- 1 cup granulated sugar
- 1/4 cup brown sugar
- 3 large eggs
- 1/4 cup spiced rum
- 1 tablespoon vanilla extract
- 2 teaspoons ground cinnamon
- 1/4 teaspoon ground nutmeg
- 1/4 teaspoon salt
- Whipped cream or cinnamon sugar for garnish
Instructions:
- Preheat and Prepare the Pan: Preheat your oven to 325°F (163°C). Grease a 9-inch springform pan and line the bottom with parchment paper for easy removal.
- Make the Crust: In a medium bowl, combine the graham cracker crumbs and melted butter. Mix until the crumbs are evenly coated. Press the mixture firmly into the bottom of the prepared pan, creating an even layer. Set aside.
- Prepare the Filling: In a large mixing bowl, beat the softened cream cheese until smooth and creamy. Gradually add granulated sugar and brown sugar, and continue to mix until well combined.
- Add Eggs and Flavorings: Beat in the eggs one at a time, guaranteeing each is fully incorporated before adding the next. Stir in the spiced rum, vanilla extract, ground cinnamon, ground nutmeg, and salt. Mix until the filling is smooth and well blended.
- Assemble and Bake: Pour the cream cheese mixture over the prepared crust, spreading it evenly. Tap the pan gently on the counter to remove any air bubbles. Place the cheesecake in the preheated oven and bake for 50-60 minutes, or until the center is set but slightly jiggly.
- Cool and Chill: Remove the cheesecake from the oven and let it cool in the pan for about 15 minutes. Run a knife around the edge to loosen the cake, then carefully remove the springform ring. Allow the cheesecake to cool to room temperature, then refrigerate for at least 4 hours or overnight.
- Serve and Garnish: Before serving, garnish the cheesecake with whipped cream or a light dusting of cinnamon sugar. Slice and enjoy this luscious treat with your guests.
Extra Tips:
For the best results, make certain all your ingredients are at room temperature before you begin. This helps achieve a smooth, creamy filling without lumps.
When baking, avoid opening the oven door frequently, as this can cause the cheesecake to crack. If you notice any cracks, don’t fret—whipped cream or garnish can easily cover them.
If you’re short on time, consider making the cheesecake a day in advance to allow the flavors to meld together beautifully.
Gothic Black Licorice Éclairs
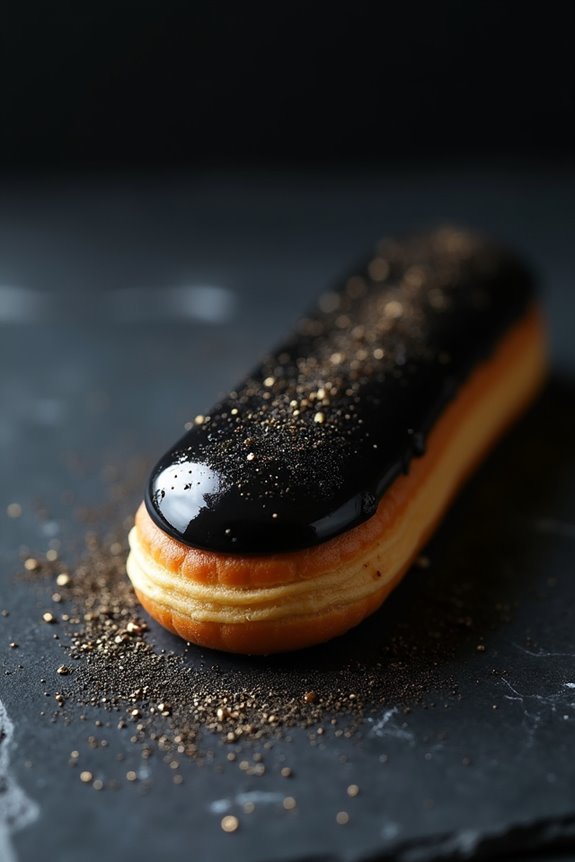
Gothic Black Licorice Éclairs are a mysterious and decadent treat perfect for an adult Halloween celebration. These éclairs combine the classic French pastry with a unique licorice flavor, dressed up in an elegant and spooky black hue. The dark and glossy éclairs, filled with a rich licorice-flavored pastry cream, make for a stunning centerpiece to your Halloween dessert table.
The delicate choux pastry provides a light and airy contrast to the intense and bold licorice filling, making these éclairs both sophisticated and indulgent. The subtle sweetness and distinct taste of licorice create a complex flavor profile that will intrigue your guests. The addition of black food coloring transforms these éclairs into a gothic masterpiece, perfect for those who appreciate a little drama in their desserts.
Whether you’re hosting a Halloween party or simply indulging in some festive treats, these Gothic Black Licorice Éclairs offer a deliciously dark twist on a classic pastry. Prepare to surprise and delight your guests with this sophisticated and eerie dessert.
Ingredients (Serves 4-6):
- 1 cup water
- 1/2 cup unsalted butter
- 1 cup all-purpose flour
- 4 large eggs
- 1/4 teaspoon salt
- 1 teaspoon black food coloring
- 1/2 cup granulated sugar
- 2 cups whole milk
- 1/4 cup cornstarch
- 3 tablespoons black licorice syrup
- 1 teaspoon vanilla extract
- 1 cup heavy cream
- 1/4 cup powdered sugar
- Black gel food coloring for decoration
Instructions:
- Prepare the Choux Pastry:
- Preheat the oven to 400°F (200°C) and line a baking sheet with parchment paper.
- In a medium saucepan, combine the water, unsalted butter, and salt over medium heat. Bring to a boil.
- Remove from heat and add the flour all at once, stirring quickly with a wooden spoon until it forms a smooth ball.
- Return to low heat and cook for 1-2 minutes, stirring constantly, to dry out the dough.
- Transfer the dough to a mixing bowl, let cool for 5 minutes, then beat in the eggs one at a time until fully incorporated. Add the black food coloring and mix until the dough is uniformly colored.
- Transfer the dough to a piping bag fitted with a large round tip. Pipe 4-inch long strips onto the prepared baking sheet, spacing them about 2 inches apart.
- Bake for 20-25 minutes, until golden brown and puffed. Turn off the oven, crack the door open, and let the éclairs cool inside for 10 minutes before removing them to cool completely on a wire rack.
- In a medium saucepan, heat the milk over medium heat until just simmering.
- In a separate bowl, whisk together the granulated sugar, cornstarch, and black licorice syrup until smooth.
- Gradually whisk the hot milk into the sugar mixture, then return the mixture to the saucepan.
- Cook over medium heat, stirring constantly, until thickened. Remove from heat and stir in the vanilla extract.
- Pour the pastry cream into a bowl, cover with plastic wrap directly on the surface, and refrigerate until completely chilled.
- In a large bowl, beat the heavy cream and powdered sugar until stiff peaks form.
- Gently fold the whipped cream into the chilled licorice pastry cream until well combined.
- Using a small star tip, pipe the licorice cream into the cooled éclairs from both ends.
- Decorate the tops with black gel food coloring as desired.
Extra Tips:
When making choux pastry, it’s essential not to rush the process of incorporating the eggs. Confirm each egg is fully mixed in before adding the next, as this helps achieve the perfect texture.
Additionally, keep an eye on the pastry while it bakes; avoid opening the oven door too soon, as this can cause the éclairs to collapse. If you find the licorice syrup too intense, adjust the amount to suit your personal taste.
Finally, for an extra decorative touch, consider dusting the éclairs with edible silver or gold dust to enhance their gothic appearance.