Oh, hello there, my fellow Halloween enthusiasts! 🎃 As the leaves turn and the air gets crisp, it’s the perfect time to bring some spooky sweetness into your kitchen. From charming spider web cupcakes to eerie monster eyeball cake pops, these treats are all about fun and flair. Each recipe is a delightful twist on the classics, making your baking session feel like a little magical adventure. Ready to get inspired? Let’s bake up some Halloween magic together!
Spooky Spider Web Cupcakes
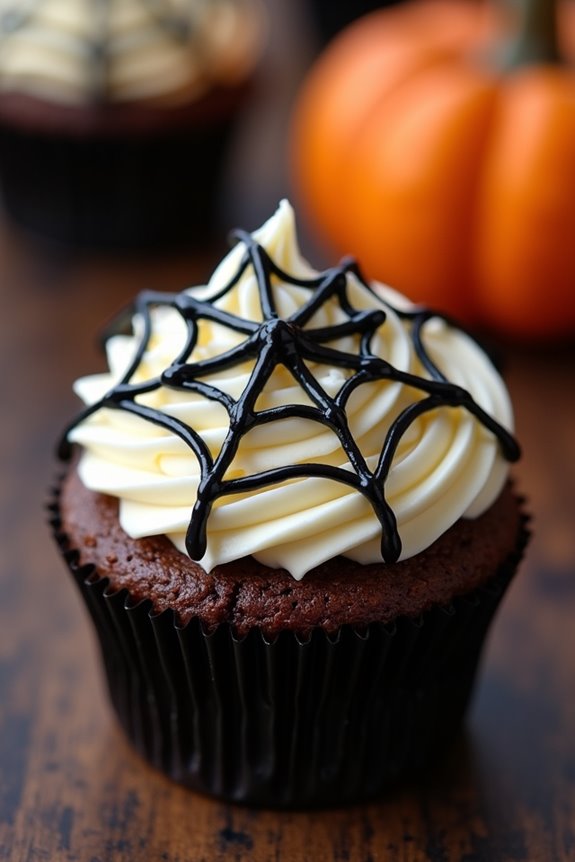
Spooky Spider Web Cupcakes are the perfect treat to add a touch of ghoulish delight to your Halloween festivities. These cupcakes aren’t only delicious but also visually enchanting with their intricate spider web designs. Imagine serving these eerie delights at your party, where each guest is met with a perfect mix of rich chocolate cake topped with a creamy, sweet frosting that embodies the spirit of Halloween.
These cupcakes won’t only satisfy your taste buds but also serve as a centerpiece that will leave your guests in awe.
Creating these Spooky Spider Web Cupcakes involves a delightful process of baking chocolate cupcakes and decorating them with a spider web pattern using simple techniques. The combination of moist chocolate cake and smooth vanilla frosting makes for a classic flavor that’s loved by many.
The spider web design is achieved using a contrasting color in the frosting, which gives these cupcakes their signature spooky look. Whether you’re a novice or an experienced baker, these cupcakes are sure to be a hit at any Halloween gathering.
Ingredients (Serving Size: 4-6 people):
- 1 cup all-purpose flour
- 1 cup granulated sugar
- 1/3 cup unsweetened cocoa powder
- 1 tsp baking powder
- 1/2 tsp baking soda
- 1/4 tsp salt
- 1/2 cup milk
- 1/4 cup vegetable oil
- 1 large egg
- 1 tsp vanilla extract
- 1/2 cup boiling water
- 1 cup butter, softened
- 3 cups powdered sugar
- 2 tsp vanilla extract
- 2-3 tbsp milk
- Black food coloring
Cooking Instructions:
- Preheat and Prepare: Preheat your oven to 350°F (175°C). Line a cupcake pan with paper liners to prepare for the batter.
- Mix Dry Ingredients: In a large bowl, sift together the flour, sugar, cocoa powder, baking powder, baking soda, and salt. This guarantees the dry ingredients are well combined and free of lumps.
- Combine Wet Ingredients: In a separate bowl, mix the milk, vegetable oil, egg, and vanilla extract. Blend until the mixture is smooth and uniform.
- Combine Wet and Dry: Gradually add the wet ingredients to the dry ingredients, mixing well. Slowly pour in the boiling water while stirring. The batter will be thin, but this is normal.
- Fill the Cupcake Liners: Carefully pour the batter into the prepared cupcake liners, filling each about two-thirds full.
- Bake: Place the pan in the preheated oven and bake for 18-20 minutes, or until a toothpick inserted into the center of a cupcake comes out clean. Let them cool completely on a wire rack.
- Prepare Frosting: In another bowl, beat the softened butter until creamy. Gradually add powdered sugar, vanilla extract, and milk, beating until the frosting is smooth and fluffy.
- Color and Decorate: Set aside a small portion of the frosting and mix in black food coloring to achieve a deep black hue. Frost the cooled cupcakes with the uncolored frosting. Using a piping bag, create concentric circles on top of each cupcake with the black frosting. Drag a toothpick from the center of the cupcake to the edges, creating a spider web effect.
Extra Tips: When creating the spider web design, make sure your frosting is the right consistency – not too runny, so it holds its shape, and not too thick, so it’s easy to pipe and drag. If the black frosting is too thick, add a drop of milk to thin it out slightly.
Additionally, for a more dramatic effect, consider adding small plastic spider decorations on top of each cupcake. These cupcakes can be made a day in advance and stored in an airtight container to keep them fresh for your Halloween celebration.
Monster Eyeball Cake Pops

Monster Eyeball Cake Pops are a spooktacular treat that will delight both kids and adults at any Halloween party. These creepy yet delicious cake pops are designed to resemble monster eyeballs, complete with vivid colors and gory details. Perfect for a festive occasion, these cake pops aren’t only fun to make but also a great way to get creative in the kitchen.
With a moist cake center and a colorful candy coating, these treats are as tasty as they’re visually appealing. Creating Monster Eyeball Cake Pops involves a few simple steps that even beginner bakers can master. First, you’ll need to bake a cake, crumble it, and combine it with frosting to form a dough-like mixture. This mixture is then rolled into balls, which are chilled and coated in candy melts.
Finally, each pop is decorated with candy eyes and gels to create an eerie, eye-catching effect. The following recipe will yield enough Monster Eyeball Cake Pops for a serving size of 4-6 people, making it perfect for a small gathering or a family treat.
Ingredients:
- 1 box of cake mix (any flavor of your choice)
- Ingredients as per cake mix instructions (e.g., eggs, oil, water)
- 1 cup of frosting (store-bought or homemade)
- 2 cups of white candy melts
- Food coloring (green, red, and blue)
- Candy eyeballs
- Red and black gel icing
- 20-25 lollipop sticks
Cooking Instructions:
- Bake the Cake: Prepare the cake mix according to the package instructions and bake it in a suitable pan. Once baked, allow the cake to cool completely.
- Prepare Cake Mixture: Crumble the cooled cake into a large mixing bowl. Add 1 cup of frosting to the crumbled cake and mix thoroughly until it reaches a dough-like consistency.
- Form Cake Balls: Roll the cake mixture into small balls, roughly the size of a golf ball. Place them on a baking sheet lined with parchment paper.
- Chill the Cake Balls: Refrigerate the cake balls for at least 2 hours, or until they’re firm to the touch.
- Melt the Candy Coating: In a microwave-safe bowl, melt the white candy melts according to the package instructions. Divide the melted candy into three bowls and add different food coloring to each to create green, red, and blue coatings.
- Coat the Cake Balls: Insert a lollipop stick into each cake ball, then dip the balls into the colored candy melts until fully coated. Allow any excess coating to drip off before placing them back on the parchment paper.
- Decorate the Pops: While the coating is still wet, press a candy eyeball into the center of each pop. Use red and black gel icing to draw veins and other details to mimic a monster’s eyeball.
- Set the Pops: Allow the decorated cake pops to set completely by placing them in the fridge for about 30 minutes.
Extra Tips:
For the best results, verify that the cake balls are thoroughly chilled before dipping them into the candy coating. This helps the coating to adhere better and prevents the cake balls from falling apart.
If your candy coating becomes too thick during the dipping process, add a teaspoon of vegetable oil or shortening to thin it out. Additionally, you can get creative with the decorations by using different candy or gel colors to customize the look of your monster eyeballs.
These cake pops can be stored in an airtight container in the refrigerator for up to a week, making them a convenient make-ahead treat for your Halloween festivities.
Creepy Witch Finger Cookies
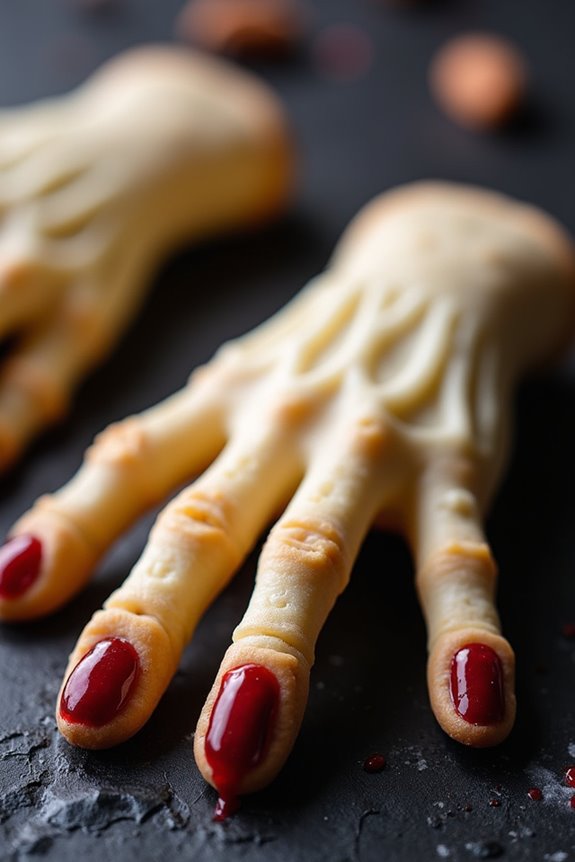
Creepy Witch Finger Cookies are a delightful treat to add a spooky twist to your Halloween festivities. These eerie cookies resemble witch fingers, complete with knuckles and fingernails, and are sure to give your guests a delightful fright! Perfectly crispy with a hint of almond flavor, these cookies aren’t only fun to look at but also delicious to eat. They make a great addition to any Halloween party or as a fun baking project with the kids.
The key to perfect Creepy Witch Finger Cookies is in the details – from the almond “fingernails” to the wrinkles of the fingers. With just a few simple ingredients and some creative shaping, you can bring these spooky fingers to life. This recipe serves 4-6 people, making it ideal for a small gathering or as a fun treat to share with friends and family.
Let’s plunge into the ingredients and steps required to create this ghoulishly delightful dessert.
Ingredients:
- 1 cup unsalted butter, softened
- 1 cup powdered sugar
- 1 large egg
- 1 teaspoon vanilla extract
- 1 teaspoon almond extract
- 2 2/3 cups all-purpose flour
- 1 teaspoon baking powder
- 1 teaspoon salt
- 3/4 cup whole almonds
- Red gel icing or strawberry jam
Instructions:
- Preheat and Prep: Preheat your oven to 325°F (160°C). Line two baking sheets with parchment paper to prevent the cookies from sticking and for easy cleanup.
- Cream Butter and Sugar: In a large mixing bowl, beat the softened butter and powdered sugar together until light and fluffy. This should take about 2-3 minutes. The mixture should be smooth and well-combined.
- Add Liquid Ingredients: Add the egg, vanilla extract, and almond extract to the butter-sugar mixture. Beat well until all the ingredients are fully incorporated.
- Combine Dry Ingredients: In another bowl, whisk together the flour, baking powder, and salt. Gradually add this dry mixture to the wet ingredients, stirring until a soft dough forms.
- Shape the Fingers: Scoop out a tablespoon of dough and roll it into a finger-like shape. Press an almond firmly into one end of each finger to create a fingernail. Use a knife to make three slashes in the middle of each finger to create knuckles.
- Bake the Cookies: Place the shaped fingers onto the prepared baking sheets, ensuring there’s enough space between each cookie. Bake for 18-20 minutes or until lightly golden around the edges.
- Add the Bloody Effect: Once the cookies are cool, remove the almonds and squeeze a small amount of red gel icing or strawberry jam into the indentation. Press the almond back into place, allowing the red to ooze out slightly for a bloody effect.
Extra Tips:
For extra realism, you can lightly dust the cookies with cocoa powder before baking to give them an aged, dirty appearance. If the dough becomes too soft while shaping, chill it in the refrigerator for 15-20 minutes to make it easier to handle.
Also, feel free to adjust the almond extract according to taste, or substitute with another flavor if desired. These cookies can be stored in an airtight container for up to a week, making them a convenient make-ahead treat.
Ghostly Meringue Treats
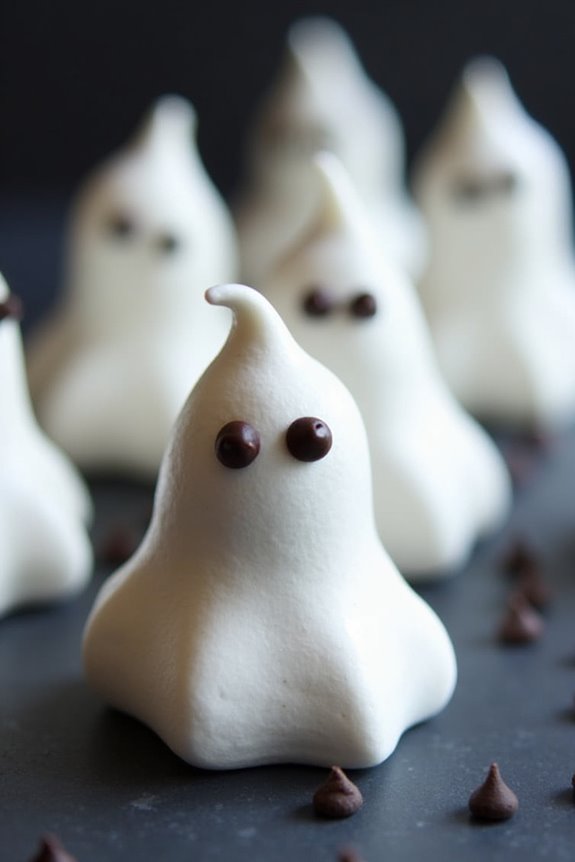
Get into the spooky spirit of Halloween with these delightful Ghostly Meringue Treats! These light and airy meringues are shaped into playful ghost figures, making them a fun and festive addition to your Halloween festivities. Perfect for parties or spooky gatherings, these treats aren’t only scrumptious but also an entertaining project for the whole family.
With just a few simple ingredients, you can whip up these delightful ghostly figures that are sure to impress both kids and adults alike. The ghostly meringues are crisp on the outside and slightly chewy on the inside, making them a perfect sweet treat that melts in your mouth. The addition of a little bit of cream of tartar helps stabilize the egg whites, making certain that your meringues hold their shape, while a dash of vanilla extract adds a delicious flavor.
Decorate each meringue ghost with chocolate chip eyes to give them a spooky personality. Now, let’s plunge into the recipe!
Ingredients (Serves 4-6 people):
- 4 large egg whites
- 1 cup granulated sugar
- 1/4 teaspoon cream of tartar
- 1 teaspoon vanilla extract
- Mini chocolate chips (for eyes)
Cooking Instructions:
- Preheat the Oven: Start by preheating your oven to 225°F (110°C). Line two baking sheets with parchment paper, making sure they’re ready for your meringue ghosts.
- Prepare the Meringue: In a large, clean mixing bowl, add the egg whites and cream of tartar. Using an electric mixer, beat the egg whites on medium speed until soft peaks form. This process usually takes about 3-4 minutes.
- Add Sugar Gradually: Once soft peaks have formed, increase the speed to high and gradually add the granulated sugar, about a tablespoon at a time. Continue beating until the mixture is glossy and stiff peaks form. This should take approximately 5-7 minutes. Make sure the sugar is completely dissolved by rubbing a small amount of meringue between your fingers.
- Incorporate Vanilla: Gently fold in the vanilla extract using a spatula, ensuring it’s evenly distributed throughout the meringue mixture.
- Pipe the Meringue: Transfer the meringue to a piping bag fitted with a large round tip. Pipe ghost shapes onto the prepared baking sheets, leaving some space between each one. The ghosts should be about 3 inches tall.
- Add Eyes: Press two mini chocolate chips into each ghost to create eyes, giving them a spooky appearance.
- Bake: Place the baking sheets in the preheated oven and bake for 1 hour. After 1 hour, turn off the oven and allow the meringues to cool in the oven for another 1 hour. This will help them dry out completely without cracking.
- Serve and Enjoy: Once completely cool, carefully remove the meringue ghosts from the parchment paper and serve them as a festive Halloween treat!
Extra Tips:
To make certain your meringues turn out perfectly, make sure the mixing bowl and beaters are completely clean and free of any grease before starting. Even a small amount of grease can prevent the egg whites from whipping properly.
Additionally, avoid making meringues on a humid day as moisture in the air can affect the texture and drying process. If you’re planning a party, these meringue treats can be made a day ahead and stored in an airtight container at room temperature, making them a convenient option for busy hosts.
Pumpkin Patch Brownies

Get into the Halloween spirit with these delightful Pumpkin Patch Brownies, a fun and festive treat that combines rich, fudgy chocolate brownies with the warm flavors of pumpkin.
These brownies aren’t only delicious but also a creative way to bring a touch of whimsy to your holiday celebrations. Perfect for serving at Halloween parties or as a sweet treat for your family, these brownies are easy to make and will certainly be a hit with both kids and adults alike.
The concept is simple: bake a batch of decadent brownies, top them with a creamy pumpkin frosting, and decorate them with colorful candy pumpkins to resemble a pumpkin patch.
The contrast between the dark chocolate and the vibrant orange frosting creates an eye-catching presentation that captures the essence of fall. The following recipe yields enough to serve 4-6 people, making it an ideal option for small gatherings or family dinners.
Ingredients:
- 1 cup unsalted butter
- 1 cup granulated sugar
- 1 cup brown sugar
- 4 large eggs
- 1 teaspoon vanilla extract
- 1 cup all-purpose flour
- 1 cup cocoa powder
- 1/2 teaspoon salt
- 1 teaspoon baking powder
- 1/2 cup semi-sweet chocolate chips
- 1 cup canned pumpkin puree
- 2 cups powdered sugar
- 1 teaspoon ground cinnamon
- 1/2 teaspoon ground nutmeg
- 1/4 teaspoon ground ginger
- Candy pumpkins for decoration
Instructions:
1. Preheat and Prepare: Preheat your oven to 350°F (175°C). Grease a 9×13 inch baking pan with butter or line it with parchment paper to prevent sticking.
2. Make the Brownie Batter: In a large bowl, melt the butter in the microwave or on the stovetop. Stir in the granulated sugar and brown sugar until well combined.
Add the eggs one at a time, mixing well after each addition. Stir in the vanilla extract.
3. Combine Dry Ingredients: In a separate bowl, whisk together the flour, cocoa powder, salt, and baking powder. Gradually add the dry ingredients to the wet ingredients, stirring until just combined.
Fold in the chocolate chips.
4. Bake the Brownies: Pour the brownie batter into the prepared baking pan, spreading it evenly. Bake in the preheated oven for 25-30 minutes, or until a toothpick inserted into the center comes out with just a few moist crumbs.
Allow the brownies to cool completely in the pan.
5. Prepare the Pumpkin Frosting: In a medium bowl, combine the pumpkin puree, powdered sugar, cinnamon, nutmeg, and ginger. Mix until smooth and creamy.
6. Assemble the Brownies: Once the brownies have cooled, spread the pumpkin frosting evenly over the top. Decorate with candy pumpkins to resemble a pumpkin patch.
7. Serve: Cut into squares and serve your Pumpkin Patch Brownies, enjoying the blend of chocolate and pumpkin flavors.
Extra Tips:
For the best results, confirm that the brownies are completely cooled before applying the pumpkin frosting, as this will prevent the frosting from melting and running off.
If you’re short on time, you can use a boxed brownie mix as a base and focus on the homemade pumpkin frosting and decorations.
Feel free to get creative with the decorations by adding edible grass or chocolate cookie crumbs for a more realistic pumpkin patch effect.
Store any leftovers in an airtight container in the refrigerator for up to three days.
Bloody Red Velvet Brain Cake

Looking to create a spooky centerpiece for your Halloween gathering? The Bloody Red Velvet Brain Cake is the perfect eerie yet delicious treat. This cake combines the classic flavors of red velvet with a macabre twist, making it an ideal addition to any Halloween dessert spread. The moist, deep red cake paired with creamy frosting and topped with a realistic brain-like design will surely impress (and maybe even scare) your guests.
The cake is visually stunning, with layers of red velvet cake that resemble bloodied tissue and a brain-shaped frosting design on top. The rich, velvety texture and the slightly tangy cream cheese frosting make for a delicious combination. The addition of raspberry jam gives a gory, bloody effect that’s perfect for an unsettling Halloween vibe. This recipe serves 4-6 people, making it ideal for a small Halloween gathering.
Ingredients:
- 2 1/2 cups all-purpose flour
- 1 1/2 cups granulated sugar
- 1 teaspoon baking powder
- 1 teaspoon baking soda
- 1 teaspoon salt
- 1 teaspoon cocoa powder
- 1 1/2 cups vegetable oil
- 1 cup buttermilk, room temperature
- 2 large eggs, room temperature
- 2 tablespoons red food coloring
- 1 teaspoon vanilla extract
- 1 teaspoon white vinegar
- 1 cup unsalted butter, softened
- 4 cups powdered sugar
- 16 ounces cream cheese, softened
- 1 teaspoon vanilla extract
- 1 cup raspberry jam
Cooking Instructions:
- Preheat and Prepare: Preheat your oven to 350°F (175°C). Grease and flour two 8-inch round cake pans to prevent sticking.
- Mix Dry Ingredients: In a medium bowl, sift together the flour, sugar, baking powder, baking soda, salt, and cocoa powder. Set aside.
- Combine Wet Ingredients: In a large bowl, whisk together the vegetable oil, buttermilk, eggs, food coloring, vanilla extract, and vinegar until well combined.
- Create the Batter: Gradually add the dry ingredients to the wet ingredients, mixing until just combined. Be careful not to overmix, as this can make the cake dense.
- Bake the Cake: Divide the batter evenly between the prepared cake pans. Bake for 25-30 minutes, or until a toothpick inserted into the center comes out clean. Allow the cakes to cool in the pans for 10 minutes before transferring to a wire rack to cool completely.
- Prepare Frosting: In a large bowl, beat the butter and cream cheese together until creamy. Gradually add powdered sugar and vanilla extract, mixing until smooth.
- Assemble the Cake: Place one cake layer on a serving plate. Spread a thin layer of raspberry jam over the top, then cover with a layer of cream cheese frosting. Place the second cake layer on top and coat the entire cake with a thin layer of frosting to create a crumb coat. Refrigerate for 30 minutes.
- Design the Brain: Use the remaining frosting to pipe brain-like squiggles on top of the cake, creating a realistic brain appearance. To enhance the effect, drizzle additional raspberry jam over the top to mimic blood.
Extra Tips:
For the most vibrant red color in your cake, use gel food coloring instead of liquid for a more concentrated hue. If you’re short on time, you can bake the cake layers a day in advance and store them in the refrigerator.
When applying the brain design with frosting, practice on a plate first to perfect your piping technique. Remember, imperfections add to the creepiness of the brain look, so have fun and let your creativity run wild!
Frankenstein Rice Krispie Treats

Frankenstein Rice Krispie Treats are a fun and spooky treat perfect for Halloween festivities. They’re a creative twist on the classic Rice Krispie Treats, transformed into mini Frankenstein monsters that are sure to delight both kids and adults. These treats aren’t only delicious but also a fun activity to make with family and friends during the Halloween season.
With just a few additional ingredients and a little creativity, you can turn a simple dessert into a festive and eye-catching centerpiece for your Halloween party. The recipe is straightforward, requiring basic ingredients that you might already have in your pantry. The treats are dyed green to mimic Frankenstein’s iconic skin tone, and with the addition of some chocolate and candy decorations, you can bring these little monsters to life.
This recipe makes enough for 4-6 people, perfect for a small gathering or to keep at home for a Halloween-themed treat.
Ingredients:
- 6 cups Rice Krispies cereal
- 4 cups mini marshmallows
- 3 tablespoons unsalted butter
- Green food coloring
- 1 cup semi-sweet chocolate chips
- Candy eyes
- Black decorating gel
- 12 pretzel sticks
Instructions:
- Prepare the Base: In a large saucepan, melt the butter over low heat. Once the butter is melted, add the mini marshmallows and stir continuously until they’re completely melted and smooth. Add a few drops of green food coloring to the marshmallow mixture and stir until the color is evenly distributed.
- Mix Cereal: Remove the saucepan from the heat and immediately add the Rice Krispies cereal. Stir the mixture until the cereal is fully coated with the green marshmallow mixture.
- Shape the Treats: Pour the mixture into a greased 9×13-inch baking dish. Use a greased spatula or wax paper to press the mixture evenly into the dish. Allow it to cool and set for about 30 minutes.
- Cut and Decorate: Once the Rice Krispie mixture has set, cut it into rectangles to form the base of Frankenstein’s head. Melt the semi-sweet chocolate chips in a microwave-safe bowl, stirring every 30 seconds until smooth. Dip the top of each rectangle into the melted chocolate to create Frankenstein’s hair.
- Add Features: While the chocolate is still soft, attach the candy eyes. Use the black decorating gel to draw a mouth and stitches on Frankenstein’s face. Break the pretzel sticks in half and insert one on each side of the rectangle to create bolts.
- Set and Serve: Allow the decorated treats to set for about 15 minutes or until the chocolate is firm. Serve immediately or store in an airtight container for up to 3 days.
When making Frankenstein Rice Krispie Treats, it’s important to have all your decorations ready before you begin melting the chocolate. This guarantees that you can attach the eyes and create the face while the chocolate is still soft and sticky.
If the chocolate hardens before you finish decorating, you can reheat it slightly to soften it again. Additionally, using wax paper or a greased spatula to press the mixture into the dish will prevent sticking and make the process smoother.
Bat Wing Sugar Cookies
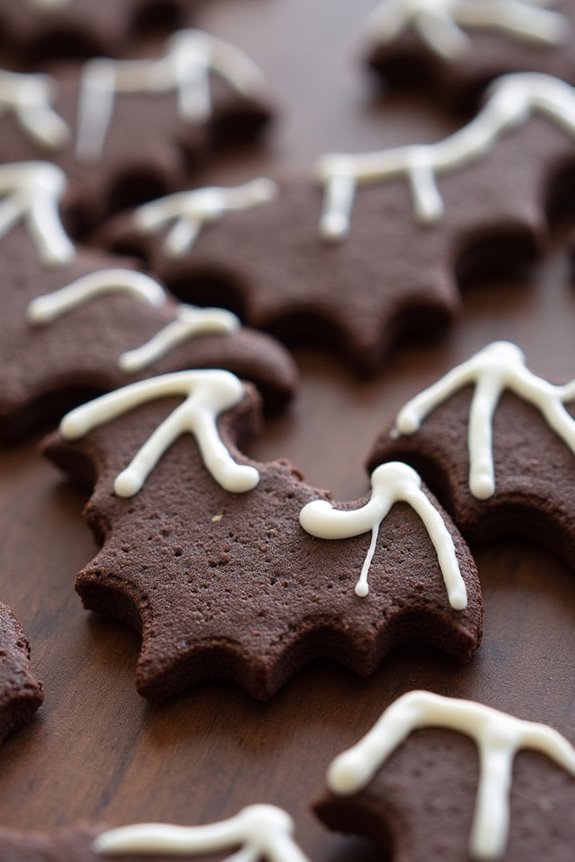
Bat Wing Sugar Cookies are a spooky and delightful treat, perfect for any Halloween gathering. These cookies aren’t only visually striking with their bat wing shape, but they also deliver a deliciously sweet and buttery flavor that will have everyone reaching for more. The dark cocoa powder used in the dough gives the cookies their characteristic deep color, while a touch of vanilla extract enhances the overall taste, making them a hit with kids and adults alike.
Ideal for a serving size of 4-6 people, this recipe is simple to follow, even for novice bakers. The process involves creating a basic sugar cookie dough, tinting it to achieve the desired bat wing appearance, and shaping it to perfection before baking. With a few basic kitchen tools and some creativity, these Bat Wing Sugar Cookies will surely become a Halloween tradition in your home.
Ingredients:
- 2 1/2 cups all-purpose flour
- 1/2 cup unsweetened dark cocoa powder
- 1/2 teaspoon baking soda
- 1/4 teaspoon salt
- 1 cup unsalted butter, softened
- 1 cup granulated sugar
- 1 large egg
- 1 teaspoon vanilla extract
- Black gel food coloring (optional)
- White icing for decoration (optional)
Cooking Instructions:
- Preheat and Prepare: Begin by preheating your oven to 350°F (175°C). Line two baking sheets with parchment paper and set them aside.
- Mix Dry Ingredients: In a medium-sized bowl, whisk together the all-purpose flour, dark cocoa powder, baking soda, and salt until well combined. This mixture will form the base of your cookie dough.
- Cream Butter and Sugar: In a large mixing bowl, beat the softened butter and granulated sugar together using an electric mixer on medium speed until light and fluffy, about 2-3 minutes.
- Add Egg and Vanilla: Add the egg and vanilla extract to the creamed butter mixture and continue to mix until fully incorporated.
- Combine Wet and Dry Ingredients: Gradually add the dry ingredients to the wet mixture, mixing on low speed until a dough forms. If desired, add a few drops of black gel food coloring to achieve a darker hue.
- Shape the Cookies: Roll out the dough on a lightly floured surface to about 1/4-inch thickness. Use a bat-shaped cookie cutter to cut out bat wing shapes and place them on the prepared baking sheets.
- Bake: Place the baking sheets in the preheated oven and bake the cookies for 8-10 minutes, or until the edges are set. Remove from the oven and allow them to cool on the baking sheets for a few minutes before transferring to a wire rack to cool completely.
- Decorate: Once cooled, use white icing to add details to the bat wings if desired, such as outlining the wings or adding spooky features.
Extra Tips:
For best results, chill the cookie dough in the refrigerator for at least 30 minutes before rolling it out. This will make the dough easier to handle and help the cookies maintain their shape during baking.
If you don’t have a bat-shaped cookie cutter, you can easily create a template out of cardboard and use a sharp knife to cut out the shapes.
Store cookies in an airtight container to keep them fresh, and consider adding a drop of almond extract for an extra layer of flavor.
Gory Vampire Bite Cupcakes
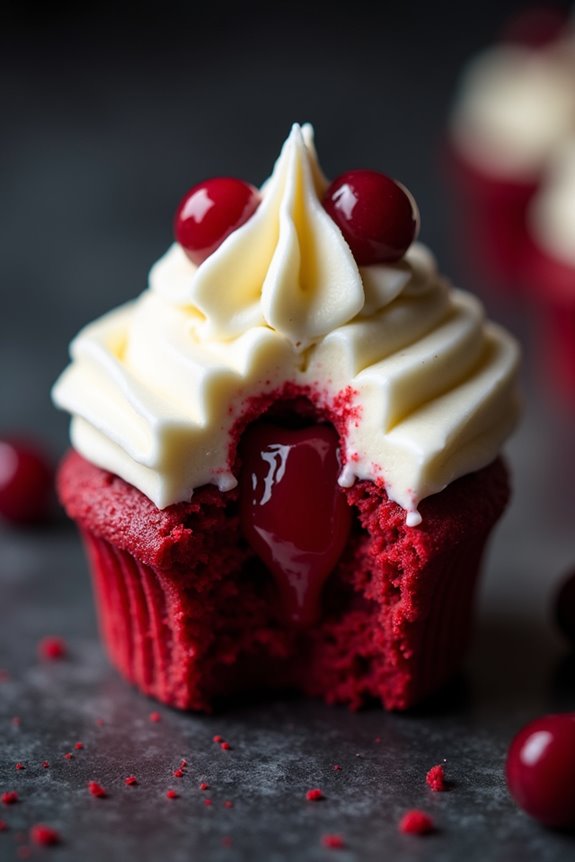
Gory Vampire Bite Cupcakes are perfect for adding a touch of spookiness to your Halloween festivities. These delightful cupcakes aren’t only delicious but also offer a fun and eerie presentation that will surely impress your guests. The combination of rich red velvet cupcakes, creamy frosting, and a surprise “bite” of cherry filling makes these treats as exciting to eat as they’re to look at.
Whether you’re hosting a Halloween party or just want to treat your family to a festive dessert, these cupcakes are a must-try.
The key to nailing the perfect Gory Vampire Bite Cupcakes lies in the details. The cupcakes are made with a moist and flavorful red velvet batter, which is then topped with a smooth cream cheese frosting. The pièce de résistance, however, is the cherry filling hidden inside, which mimics the look of blood to create a dramatic effect.
To finish, a small decorative touch of vampire fangs is added on top, giving the illusion that the cupcakes have been freshly bitten. With these cupcakes, you’re sure to add a little thrill and a lot of delight to your Halloween celebrations.
Ingredients (Serves 4-6 people)
For the Red Velvet Cupcakes:
- 1 ¼ cups all-purpose flour
- 1 cup granulated sugar
- 1 tablespoon unsweetened cocoa powder
- ½ teaspoon baking soda
- ½ teaspoon salt
- ½ cup vegetable oil
- ½ cup buttermilk
- 1 large egg
- 1 tablespoon red food coloring
- 1 teaspoon vanilla extract
- ½ teaspoon white vinegar
For the Cream Cheese Frosting:
- 8 oz cream cheese, softened
- ½ cup unsalted butter, softened
- 4 cups powdered sugar
- 1 teaspoon vanilla extract
For the Cherry Filling:
– 1 can (21 oz) cherry pie filling
For Decoration:
– Plastic vampire teeth (optional but recommended)
Cooking Instructions
1. Prepare the Oven and Cupcake Pan:
Preheat your oven to 350°F (175°C). Line a 12-cup muffin tin with cupcake liners.
2. Mix the Dry Ingredients:
In a medium-sized bowl, whisk together the flour, sugar, cocoa powder, baking soda, and salt until well combined.
3. Combine Wet Ingredients:
In a separate large bowl, mix together the vegetable oil, buttermilk, egg, red food coloring, vanilla extract, and vinegar until smooth and evenly colored.
4. Create the Cupcake Batter:
Gradually add the dry ingredients to the wet ingredients, stirring gently until just combined. Be careful not to overmix.
5. Bake the Cupcakes:
Divide the batter evenly among the prepared cupcake liners, filling each about ⅔ full. Bake for 18-20 minutes, or until a toothpick inserted into the center comes out clean. Allow the cupcakes to cool completely on a wire rack.
6. Prepare the Cream Cheese Frosting:
In a large bowl, beat the softened cream cheese and butter together until creamy. Gradually add the powdered sugar and vanilla extract, beating until smooth and fluffy.
7. Fill the Cupcakes:
Once the cupcakes are cool, use a small paring knife to cut a small circle in the center of each cupcake. Remove the cut-out portion and fill the hole with a spoonful of cherry pie filling.
8. Frost and Decorate:
Frost the filled cupcakes with the cream cheese frosting. If desired, insert a pair of plastic vampire teeth into the top of each cupcake for a spooky finishing touch.
Extra Tips
When making Gory Vampire Bite Cupcakes, make certain that the cupcakes are completely cooled before you begin filling and frosting them to prevent the frosting from melting.
If you’re short on time, consider using a store-bought red velvet cake mix to speed up the process, but don’t skip the homemade cream cheese frosting – it’s what makes these cupcakes truly decadent.
For an extra spooky effect, drizzle a bit of the cherry filling on top of the frosting to resemble dripping blood. Enjoy the fun and fright these cupcakes bring to your Halloween festivities!
Eerie Graveyard Pudding Cups
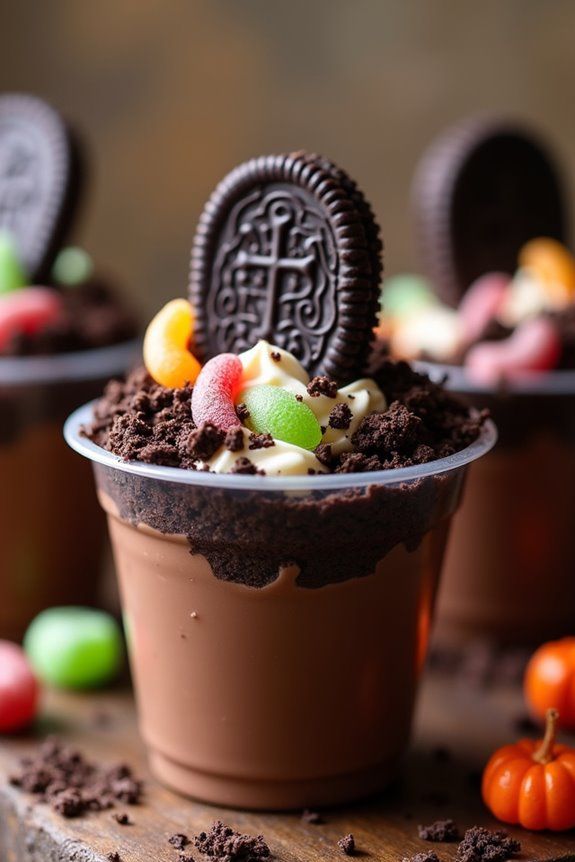
Eerie Graveyard Pudding Cups are a spooky and delicious treat perfect for any Halloween gathering. This fun and easy dessert will delight both kids and adults alike with its creative presentation and rich flavors. The combination of creamy chocolate pudding, crunchy cookie “dirt,” and decorative tombstones will bring a ghoulish charm to your dessert table.
These pudding cups aren’t only fun to make but also provide an interactive experience for guests, who can enjoy assembling their own graveyard scene.
These Eerie Graveyard Pudding Cups are designed to serve 4-6 people, making them perfect for a small party or family gathering. The recipe involves a few simple steps using store-bought ingredients, which makes it a convenient option for busy hosts. With a little creativity and a few basic ingredients, you can create a memorable Halloween dessert that will impress your guests and leave them wanting more.
Ingredients:
- 2 cups of chocolate pudding (store-bought or homemade)
- 8-10 chocolate sandwich cookies (like Oreos)
- 6 Milano cookies (or similar oval-shaped cookies)
- Black decorating gel or edible marker
- 1 cup of whipped cream or whipped topping
- Gummy worms or candy pumpkins for decoration
- 4-6 clear plastic cups
Instructions:
- Prepare the Pudding: If you’re using store-bought pudding, simply open the container. If you prefer homemade, prepare the pudding according to your favorite recipe and let it cool completely.
- Create the “Dirt”: Place the chocolate sandwich cookies in a resealable plastic bag. Use a rolling pin or a heavy object to crush them into fine crumbs. The crumbs will resemble soil and create the “dirt” layer.
- Decorate the Tombstones: Take the Milano cookies and use black decorating gel or an edible marker to write spooky phrases like “RIP” or draw small crosses. Set them aside to dry.
- Assemble the Cups: In each clear plastic cup, start by adding a generous layer of chocolate pudding at the bottom. Next, sprinkle a layer of cookie crumbs over the pudding to create the dirt effect.
- Insert the Tombstones: Gently insert one decorated Milano cookie into each cup, standing it upright to resemble a tombstone emerging from the ground.
- Add Decorations: Place a few gummy worms crawling out of the dirt or add candy pumpkins around the tombstone to enhance the graveyard theme.
- Final Touches: Optionally, add a dollop of whipped cream on top of the dirt for a creepy fog effect.
Extra Tips:
When preparing the Eerie Graveyard Pudding Cups, remember to assemble them shortly before serving to maintain the freshness and crunchiness of the cookie crumbs.
If you need to prepare them in advance, store the components separately and assemble right before the party. For added fun, consider using colored pudding or adding food coloring to the whipped topping to create different eerie effects, like green or orange slime.
Encourage guests to get creative with their toppings and decorations, making each cup unique and personalized.
Black Cat Chocolate Truffles
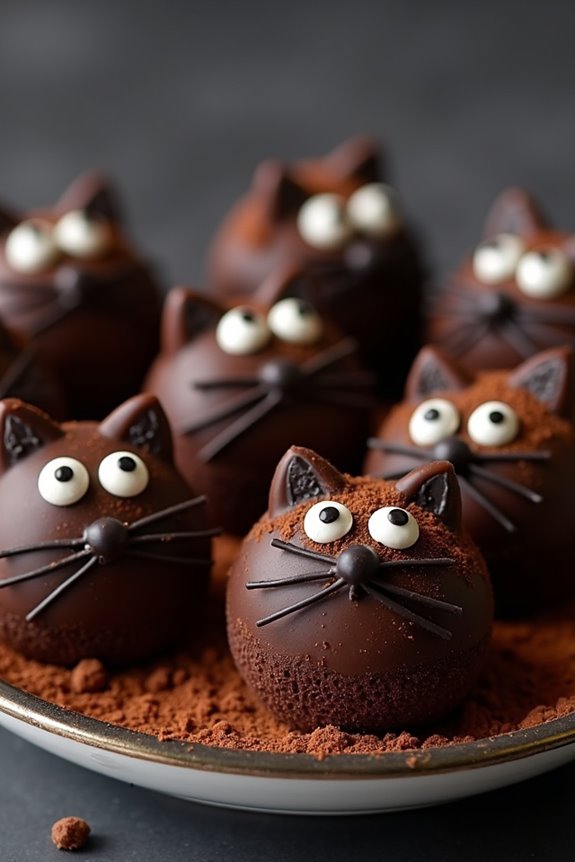
Halloween is the perfect time to release your creativity in the kitchen and whip up some spooky treats. One delightful and eerie treat you can make is Black Cat Chocolate Truffles. These truffles aren’t only indulgently rich and chocolatey, but they also have a whimsical appearance that’s sure to be a hit at any Halloween gathering.
With their cute cat-like features, these truffles are as much fun to make as they’re to eat. Perfect for a serving size of 4-6 people, Black Cat Chocolate Truffles combine the decadent flavors of dark chocolate with a light creaminess, finished off with a playful decoration that transforms them into adorable little black cats.
Whether you’re hosting a Halloween party or simply looking to delight your family with a themed treat, these truffles are sure to impress with both their taste and presentation.
Ingredients:
- 1 cup heavy cream
- 12 oz high-quality dark chocolate, finely chopped
- 1 tablespoon unsalted butter
- 1 teaspoon vanilla extract
- 1/4 teaspoon salt
- Cocoa powder, for dusting
- Black sanding sugar or black edible glitter
- Candy eyes or white chocolate chips
- Black licorice strings, cut into small pieces for whiskers
- Small chocolate chips for ears
Instructions:
- Prepare the Ganache: Begin by heating the heavy cream in a small saucepan over medium heat until it just begins to simmer. Remove it from the heat and pour it over the finely chopped dark chocolate in a heatproof bowl. Let it sit for a minute to allow the chocolate to melt, then whisk until smooth and glossy. Stir in the butter, vanilla extract, and salt until fully incorporated.
- Chill the Mixture: Cover the bowl with plastic wrap and refrigerate the chocolate mixture for about 2 hours, or until it’s firm enough to shape into balls.
- Form the Truffles: Using a small cookie scoop or a teaspoon, scoop out portions of the chilled chocolate ganache and roll them between your palms to form small, even balls.
- Decorate the Truffles: Roll each truffle in cocoa powder until evenly coated. Then roll them in black sanding sugar or black edible glitter to give them a shiny, spooky appearance.
- Create the Cat Faces: Press two small chocolate chips into the top of each truffle to form the cat’s ears. Use candy eyes or small dots of melted white chocolate for the eyes. Cut black licorice strings into small pieces and gently press them into the truffles to create whiskers.
- Serve: Arrange the finished Black Cat Chocolate Truffles on a serving platter, and enjoy!
Extra Tips:
For the best results, confirm that your chocolate is of high quality, as this will greatly affect the flavor and texture of your truffles.
When rolling the truffles, if the mixture becomes too sticky, lightly dust your hands with cocoa powder. If you prefer a different flavor, feel free to add a splash of your favorite liqueur to the ganache for an adult twist.
These truffles can be made ahead of time and stored in the refrigerator, but allow them to come to room temperature before serving to enjoy their full flavor and creamy texture.
Haunted House Gingerbread
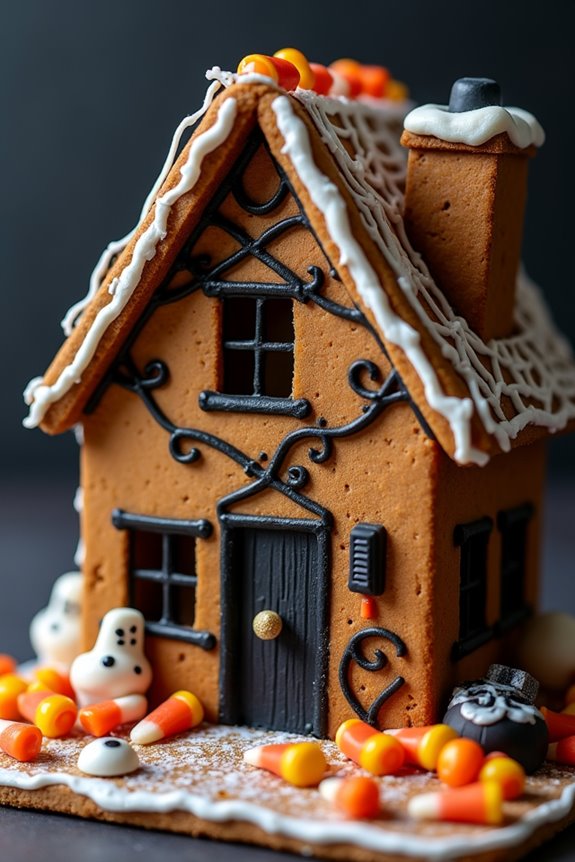
Creating a Haunted House Gingerbread is a fun and festive way to celebrate Halloween. This spooky take on the traditional holiday gingerbread house is perfect for a family activity or a themed party centerpiece. The rich aroma of ginger and spices will fill your kitchen, adding to the Halloween spirit. With a little creativity, you can transform simple ingredients into a haunted masterpiece, complete with eerie decorations and ghostly touches.
Making a Haunted House Gingerbread requires a bit of time and patience, but the end result is both delicious and visually stunning. This recipe yields enough components to construct a haunted gingerbread house for 4-6 people, with plenty of room for individual creativity and customization. Gather your ingredients, roll up your sleeves, and prepare to bring your spooky edible architecture to life.
Ingredients (Serves 4-6):
- 3 cups all-purpose flour
- 1 teaspoon baking soda
- 1/2 teaspoon baking powder
- 1 tablespoon ground ginger
- 1 tablespoon ground cinnamon
- 1/2 teaspoon ground cloves
- 1/2 teaspoon salt
- 3/4 cup unsalted butter, softened
- 1 cup packed dark brown sugar
- 1 large egg
- 1/2 cup molasses
- 2 teaspoons pure vanilla extract
- Black licorice for decoration
- Candy corn and assorted Halloween candies for decoration
- Royal icing (for assembly and decoration)
Cooking Instructions:
- Preheat the Oven: Start by preheating your oven to 350°F (175°C). Line two large baking sheets with parchment paper to prevent the gingerbread from sticking.
- Mix Dry Ingredients: In a large bowl, whisk together the flour, baking soda, baking powder, ginger, cinnamon, cloves, and salt. This mixture will form the base of your gingerbread dough.
- Cream Butter and Sugar: In a separate large bowl, use an electric mixer to cream the softened butter and dark brown sugar until light and fluffy, about 3 minutes. Beat in the egg, then add the molasses and vanilla extract, mixing until fully incorporated.
- Combine Ingredients: Gradually add the dry ingredients to the wet mixture, mixing on low speed until a dough forms. The dough should be slightly sticky but manageable.
- Chill the Dough: Divide the dough into two portions, wrap each in plastic wrap, and refrigerate for at least 1 hour. This will make it easier to roll out and cut.
- Roll Out the Dough: On a lightly floured surface, roll out each portion of dough to about 1/4-inch thickness. Use a template to cut out the shapes for your haunted house: walls, roof, doors, and any other desired details.
- Bake: Transfer the cut-out shapes to the prepared baking sheets, leaving a bit of space between each piece. Bake for 10-12 minutes, or until the edges are firm and slightly darker. Allow the gingerbread pieces to cool completely on a wire rack.
- Assemble the House: Using royal icing as the glue, carefully assemble the gingerbread house. Start with the walls and let them dry and set before adding the roof. Use cans or jars to help hold pieces in place while drying.
- Decorate: Once assembled, use royal icing to attach black licorice, candy corn, and other assorted candies to decorate your haunted house. Let your imagination run wild to create a spooky design.
Extra Tips:
When building your Haunted House Gingerbread, verify that the royal icing is thick enough to act as a strong adhesive. If it’s too runny, adjust by adding more powdered sugar.
Be patient during the assembly process; allowing each section to dry before moving on to the next will secure a sturdy structure.
If you’re working with kids, consider preparing the gingerbread pieces in advance to focus on the fun decoration part together.
And remember, imperfections add character to your haunted house, so embrace the spooky and have fun!
Poison Apple Caramel Apples
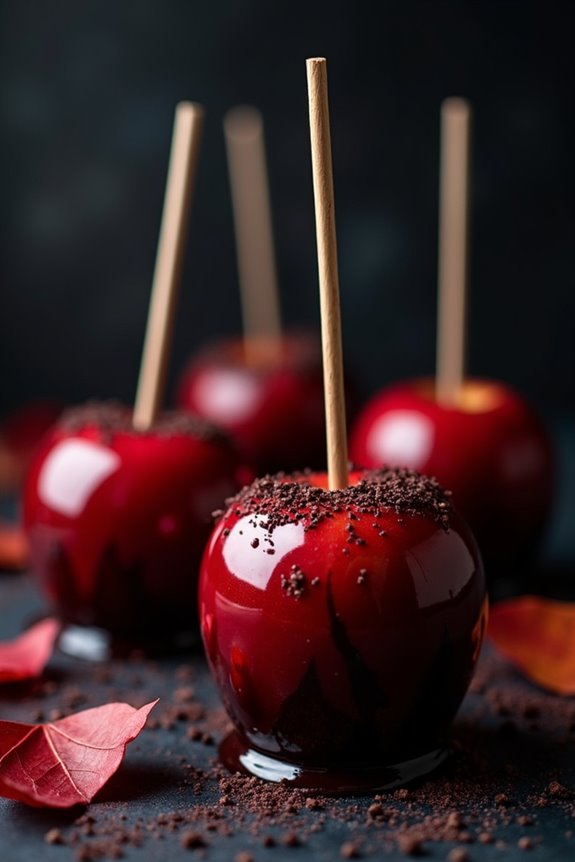
Indulge in a spooky treat this Halloween with these irresistible Poison Apple Caramel Apples. Perfect for a festive gathering or a creepy addition to your Halloween dessert table, these caramel apples aren’t only delicious but also visually striking.
With their shiny, deep red hue reminiscent of the iconic poison apple from fairy tales, they’re sure to captivate anyone who dares to take a bite. This recipe is designed to serve 4-6 people, making it ideal for a small Halloween party or family gathering.
The combination of crisp apples, rich caramel, and a touch of food coloring creates an enchanting treat that’s both fun to make and delightful to eat. Whether you’re hosting a Halloween bash or simply want to enjoy a themed dessert, these Poison Apple Caramel Apples are sure to be a hit.
Ingredients (for 4-6 servings):
- 4-6 medium-sized apples (Granny Smith or Honeycrisp work well)
- 1 cup granulated sugar
- 1/2 cup light corn syrup
- 1/2 cup water
- 1/4 cup heavy cream
- 1 tablespoon unsalted butter
- 1 teaspoon vanilla extract
- Red food coloring
- Black food coloring
- Wooden sticks or skewers
- Optional toppings: crushed nuts, sprinkles, or edible glitter
Cooking Instructions:
- Prepare the Apples: Wash and thoroughly dry the apples to remove any waxy coating. Insert a wooden stick or skewer into the top of each apple, making sure it’s secure enough to hold while dipping.
- Make the Caramel Base: In a medium saucepan, combine the sugar, corn syrup, and water. Stir over medium heat until the sugar dissolves, then stop stirring and let it boil. Allow the mixture to reach a temperature of 300°F on a candy thermometer.
- Add Cream and Butter: Once the sugar mixture reaches the desired temperature, remove it from heat and carefully stir in the heavy cream and butter. Be cautious as the mixture will bubble up.
- Color the Caramel: Add a few drops of red food coloring to achieve a deep, blood-red shade. For a more sinister look, add a drop or two of black food coloring to darken the red. Stir until the color is evenly distributed.
- Dip the Apples: Working quickly, dip each apple into the caramel, tilting the pan as necessary to coat evenly. Allow any excess caramel to drip off, then place the apples on a parchment-lined baking sheet to cool and harden.
- Add Optional Toppings: If desired, immediately sprinkle the apples with crushed nuts, sprinkles, or edible glitter before the caramel hardens completely.
- Allow to Set: Let the caramel apples sit at room temperature until fully set, about 30 minutes.
Extra Tips:
When making these Poison Apple Caramel Apples, be sure to use a candy thermometer to verify that the caramel reaches the proper temperature. This will help achieve the perfect consistency for dipping.
Additionally, if the caramel starts to harden while you’re still dipping apples, gently reheat it on low heat to soften. Remember to work quickly when dipping and decorating, as the caramel will begin to set almost immediately. Enjoy your hauntingly delicious creation!
Mummy Wrapped Pretzel Rods

Mummy Wrapped Pretzel Rods are a spooktacular treat that’s sure to delight kids and adults alike at your Halloween gathering. These whimsical snacks take classic pretzel rods and transform them into adorably eerie mummies, perfect for adding a festive touch to your holiday spread.
With a combination of sweet and salty flavors, these treats aren’t only fun to make but also delicious to eat.
Begin by melting creamy white chocolate and using it to wrap around the pretzel rods, creating a mummy-like appearance. Add candy eyes to complete the look, and you’ve got a Halloween snack that’s as fun to create as it’s to devour. This recipe is simple enough to be a family-friendly activity and makes for an excellent addition to any Halloween party menu.
Ingredients (Serves 4-6)
- 12 pretzel rods
- 1 cup white chocolate chips or white candy melts
- 24 candy eyes
- 1 tablespoon coconut oil or vegetable shortening (optional)
Instructions
- Prepare the Workspace: Line a baking sheet with parchment paper or a silicone baking mat. This will prevent the pretzel rods from sticking as they cool.
- Melt the Chocolate: In a microwave-safe bowl, combine the white chocolate chips with the coconut oil or shortening. Microwave on medium power in 30-second intervals, stirring between each, until the chocolate is fully melted and smooth.
- Dip the Pretzels: Hold a pretzel rod over the bowl of melted chocolate. Using a spoon, coat about three-quarters of the pretzel with the chocolate, allowing the excess to drip back into the bowl. Place the coated pretzel on the prepared baking sheet. Repeat with all pretzel rods.
- Create the Mummy Wraps: Transfer the remaining melted chocolate to a piping bag or a zip-top bag with a small corner snipped off. Drizzle the chocolate over the coated part of the pretzel rods in a zigzag pattern to create the look of mummy bandages.
- Add the Eyes: While the chocolate is still soft, press two candy eyes onto each pretzel rod where you’d like the mummy’s face to be. This should be near the top of the chocolate-coated area.
- Chill and Set: Place the baking sheet in the refrigerator for about 15-20 minutes or until the chocolate is completely set.
- Serve: Once the chocolate has hardened, transfer the mummy pretzel rods to a serving platter for your Halloween party guests to enjoy.
Extra Tips
For an extra spooky touch, consider using colored candy melts, such as green or purple, to create different mummy designs.
If you don’t have a piping bag, use a fork to drizzle the chocolate for a similar effect. Be sure to work quickly when adding the candy eyes, as the chocolate can set up fast.
If you’re making these treats in advance, store them in an airtight container in a cool, dry place to keep them fresh and ready for your Halloween celebration.
Zombie Hand Pies

Zombie Hand Pies are the perfect Halloween treat that combines spooky fun with delicious flavors. These hand pies aren’t only a visual delight, mimicking the eerie look of zombie hands, but they’re also filled with a savory and slightly sweet filling that will leave your guests craving more. The flaky crust and the rich, gooey filling create a delightful combination that will be a hit at any Halloween gathering.
The key to making these Zombie Hand Pies is the attention to detail in their presentation. Shaping the dough to resemble a creepy hand can be as fun as it’s challenging, and it’s a great opportunity to involve family or friends in the kitchen. Once baked, these hand pies are the perfect way to add a touch of horror to your Halloween spread, while still delivering a mouthwatering taste.
Ingredients (serving size: 4-6 people):
- 1 package of pre-made pie crusts (2 crusts)
- 1 cup cooked and shredded chicken
- 1/2 cup barbecue sauce
- 1/4 cup shredded cheddar cheese
- 1/4 cup chopped onions
- 1 tbsp olive oil
- 1 egg (for egg wash)
- Black sesame seeds or black olives (for decoration)
Instructions:
- Preheat the Oven: Start by preheating your oven to 375°F (190°C) to guarantee it’s hot and ready for baking the hand pies.
- Prepare the Filling: In a medium-sized bowl, combine the cooked shredded chicken, barbecue sauce, shredded cheddar cheese, and chopped onions. Mix well until all the ingredients are evenly coated with the sauce.
- Roll Out the Dough: Unroll the pre-made pie crusts onto a clean, flat surface. If necessary, use a rolling pin to flatten the dough to guarantee it’s even.
- Shape the Dough: Using a sharp knife or kitchen scissors, cut each crust into hand shapes. You may need to trace a hand shape or use a template for accuracy. Guarantee that you have pairs of hand shapes, as you’ll need a top and bottom for each pie.
- Fill the Hand Pies: Spoon a generous amount of the chicken mixture onto the palm area of half of the hand-shaped dough pieces, leaving a border around the edges for sealing.
- Seal the Edges: Place the remaining hand-shaped dough pieces over the filling, and press the edges together. Use a fork to crimp the edges, guaranteeing the filling is sealed inside.
- Decorate the Zombie Hands: Brush a light coating of beaten egg over the surface of each hand pie for a golden finish. For added creepiness, press black sesame seeds or small pieces of black olives onto the dough to resemble fingernails.
- Bake the Hand Pies: Transfer the hand pies to a baking sheet lined with parchment paper. Bake in the preheated oven for approximately 20-25 minutes or until the crust is golden brown and crispy.
- Cool and Serve: Allow the hand pies to cool slightly on a wire rack before serving. Serve warm for the best flavor.
Extra Tips:
For an extra spooky effect, you can add a drop of food coloring to the egg wash to give the hand pies a ghoulish hue. If you prefer a vegetarian option, substitute the chicken with cooked and seasoned mushrooms or lentils.
When shaping the dough, be creative with the fingers and make them look twisted or bent for an authentic zombie appearance. These hand pies can also be prepared a day in advance and stored in the refrigerator until you’re ready to bake them, making them a convenient option for busy Halloween party preparations.

