
As we welcome the Halloween season, there’s something magical about crafting a batch of spooky treats that captivate both our taste buds and imaginations. Think ghostly cupcakes topped with fluffy marshmallow frosting or eerie eyeball truffles that appear hauntingly real. These creative confections are a feast for the eyes and a delight for the palate. Are you ready to explore more of these festive delights? Let’s stir up some Halloween magic together.
Ghostly Cupcakes
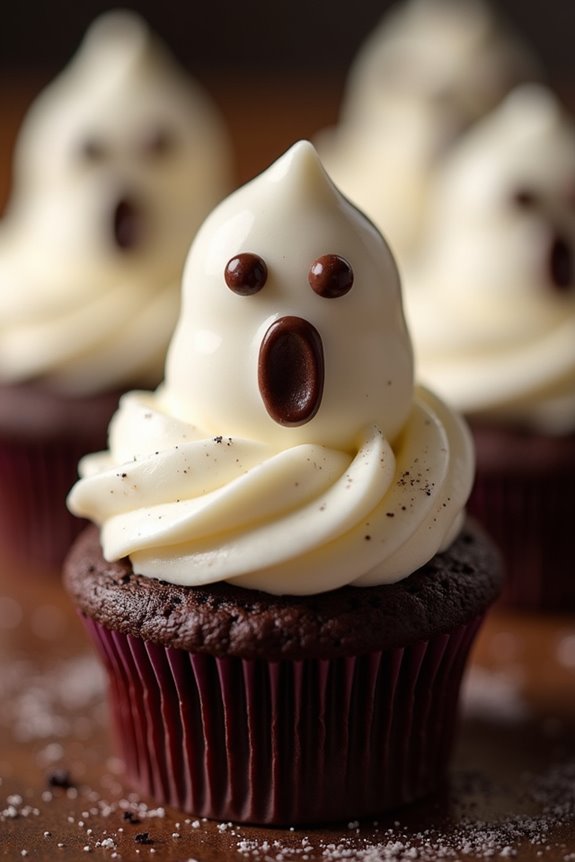
Celebrate Halloween in a deliciously spooky fashion with these enchanting Ghostly Cupcakes. Perfect for parties or a fun family treat, these cupcakes combine the rich flavors of chocolate or vanilla cake with a fluffy marshmallow frosting that’s bound to delight and spook. Topped with adorable ghost shapes, these cupcakes are as much fun to make as they’re to eat, creating a whimsical, eerie dessert that’s perfect for the season.
Whether you’re a skilled baker or a novice in the kitchen, preparing these Ghostly Cupcakes is a simple and rewarding experience. The recipe yields 12 cupcakes, perfect for serving 4-6 people, and can be easily adapted to suit your taste preferences. With a mix of basic pantry staples and a few special ingredients, you’ll have a frightfully festive dessert ready to enjoy in no time.
Ingredients (Serves 4-6):
- 1 ½ cups all-purpose flour
- 1 cup granulated sugar
- ½ cup unsweetened cocoa powder (optional, for chocolate cupcakes)
- 1 teaspoon baking soda
- ½ teaspoon salt
- 1 cup water
- 1/3 cup vegetable oil
- 1 tablespoon white vinegar
- 1 teaspoon vanilla extract
- 1 cup marshmallow cream
- 1 cup powdered sugar
- 2 tablespoons butter, softened
- 1 teaspoon vanilla extract (for frosting)
- Black food coloring or mini chocolate chips (for ghost faces)
Cooking Instructions:
- Preheat and Prepare: Preheat your oven to 350°F (175°C). Line a 12-cup muffin tin with cupcake liners.
- Mix Dry Ingredients: In a large mixing bowl, sift together the flour, sugar, cocoa powder (if using), baking soda, and salt.
- Combine Wet Ingredients: In a separate bowl, whisk together the water, vegetable oil, vinegar, and vanilla extract until well combined.
- Create Batter: Gradually add the wet ingredients to the dry ingredients, stirring until just combined. Be careful not to overmix to keep the cupcakes light and fluffy.
- Fill and Bake: Divide the batter evenly among the prepared cupcake liners, filling each about two-thirds full. Bake in the preheated oven for 18-20 minutes, or until a toothpick inserted into the center of a cupcake comes out clean.
- Cool Completely: Remove the cupcakes from the oven and let them cool in the pan for 5 minutes. Transfer to a wire rack to cool completely before frosting.
- Prepare Frosting: In a medium bowl, beat together the marshmallow cream, powdered sugar, butter, and vanilla extract until smooth and fluffy.
- Frost and Decorate: Pipe or spread the frosting onto cooled cupcakes, creating a ghost shape. Use black food coloring or mini chocolate chips to add eyes and a mouth to each ghost.
Extra Tips:
To guarantee your Ghostly Cupcakes have the perfect spooky look, consider using a piping bag with a large round tip for the frosting to achieve a smooth, ghost-like finish.
If you’re short on time, store-bought cupcakes can be used as a base, allowing you to focus on creating the ghostly decorations.
For added flair, use colored cupcake liners or sprinkle edible glitter on the ghosts for a shimmering effect.
Finally, remember to let the cupcakes cool completely before frosting to prevent the icing from melting, making sure your ghosts keep their shape.
Eerie Eyeball Truffles
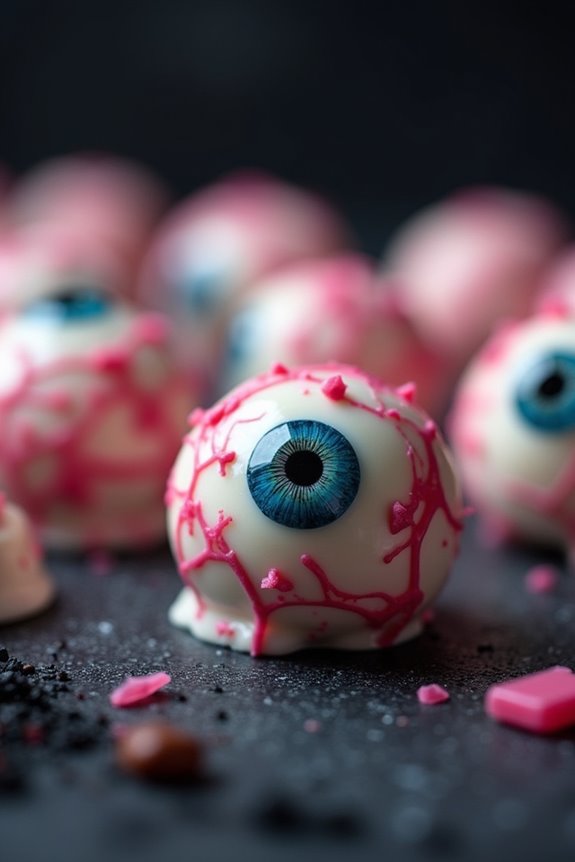
Eerie Eyeball Truffles are a spine-chilling treat perfect for Halloween festivities. These deliciously spooky confections resemble eerie eyeballs, complete with a creamy, chocolatey center and a ghoulishly realistic appearance. They’re an excellent addition to any Halloween party, offering guests a chance to enjoy something sweet while delighting in the creepy holiday ambiance. The combination of white chocolate, dark chocolate, and a hint of raspberry makes these truffles both visually engaging and irresistibly tasty.
Creating Eerie Eyeball Truffles is a fun activity that you can enjoy with family and friends. The recipe is simple enough to involve kids in the kitchen, making it a delightful way to spend time together. With a few basic ingredients and a touch of creativity, you can transform ordinary truffles into something spectacularly spooky. The process involves crafting the truffles, decorating them to look like eyeballs, and adding special touches to make them come alive. The result is a delicious treat that will surely be the centerpiece of your Halloween table.
Ingredients (serves 4-6 people):
- 1 cup dark chocolate chips
- 1/2 cup heavy cream
- 1/4 cup raspberry jam
- 1/2 teaspoon vanilla extract
- 1/4 teaspoon salt
- 1 cup white chocolate chips
- Red and black food coloring
- Edible candy eyeballs
- Red decorating gel
Cooking Instructions:
- Prepare the Ganache: In a heatproof bowl, combine the dark chocolate chips and heavy cream. Place the bowl over a pot of simmering water, stirring occasionally until the chocolate is melted and smooth. Remove from heat and stir in the raspberry jam, vanilla extract, and salt. Mix well to combine.
- Chill the Mixture: Cover the bowl with plastic wrap and refrigerate for at least 2 hours or until the mixture is firm enough to scoop.
- Form the Truffles: Using a small scoop or spoon, form the chilled chocolate mixture into 1-inch balls. Place them on a baking sheet lined with parchment paper. Return the truffles to the refrigerator to firm up for about 30 minutes.
- Melt the White Chocolate: In a separate bowl, melt the white chocolate chips using the double boiler method or in a microwave, stirring until smooth. Divide the melted chocolate into two bowls. Add a few drops of red food coloring to one bowl and mix to create a pink hue. Keep the other bowl white.
- Coat the Truffles: Dip each truffle into the white chocolate, coating it completely. Allow any excess chocolate to drip off before placing the truffle back on the parchment paper.
- Decorate the Eyeballs: Once the white chocolate has set, use the pink-tinted chocolate to add veins to the eyeballs. Dip a toothpick in the pink chocolate and draw squiggly lines across each truffle to mimic blood vessels.
- Add the Candy Eyes: Press a candy eyeball into the center of each truffle while the chocolate is still slightly tacky. Use the black food coloring to add pupils if needed.
- Final Touches: Use the red decorating gel to add any additional details, like bloodshot lines or drips around the eyeball.
Extra Tips: For a more intense flavor, consider adding a few drops of raspberry extract to the ganache. If you prefer a less sweet truffle, opt for semi-sweet chocolate instead of dark chocolate. When melting chocolate, be sure not to overheat it as it may seize and become grainy. If your truffle mixture is too soft to handle, pop it back into the refrigerator for a bit longer. Finally, verify that the white chocolate coating is set properly before adding the edible candy eyeballs to prevent them from slipping off.
Witch’s Brew Brownies
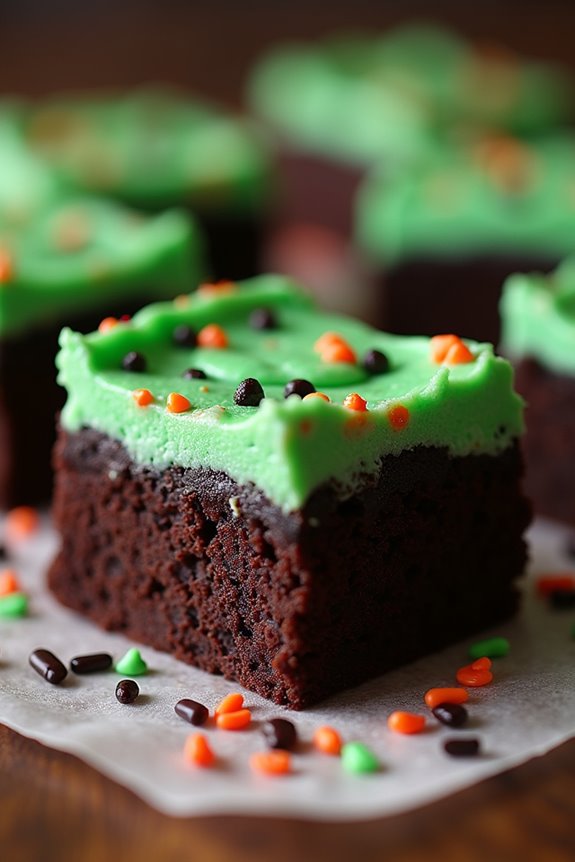
Indulge in the deliciously spooky world of Halloween treats with our Witch’s Brew Brownies. These eerie delights are perfect for adding a touch of magic to your Halloween gathering. With a rich, chocolatey base and a whimsical green swirl reminiscent of a bubbling witch’s cauldron, these brownies are sure to captivate both children and adults alike.
Whether you’re hosting a Halloween party or simply looking for a fun way to celebrate the season, these Witch’s Brew Brownies are a must-try.
These brownies feature a fudgy chocolate base and a bewitching green swirl created by a simple cream cheese mixture tinted with food coloring. The contrasting colors make for an eye-catching treat that’s as fun to make as it’s to eat. This recipe serves 4-6 people, making it perfect for a small gathering or a family Halloween dessert. Gather your ingredients and let the magic begin!
Ingredients:
- 1 cup unsalted butter
- 2 cups granulated sugar
- 4 large eggs
- 1 teaspoon vanilla extract
- 1 cup all-purpose flour
- 1 cup unsweetened cocoa powder
- 1/2 teaspoon baking powder
- 1/4 teaspoon salt
- 8 oz cream cheese, softened
- 1/2 cup powdered sugar
- Green food coloring
- Halloween-themed sprinkles (optional)
Cooking Instructions:
1. Preheat the Oven: Begin by preheating your oven to 350°F (175°C) and line a 9×13 inch baking pan with parchment paper or lightly grease it to prevent sticking.
2. Prepare the Brownie Batter: In a large microwave-safe bowl, melt the butter. Stir in the granulated sugar until smooth. Add the eggs one at a time, beating well after each addition. Mix in the vanilla extract.
In a separate bowl, combine the flour, cocoa powder, baking powder, and salt. Gradually add the dry ingredients to the wet ingredients, stirring until just combined.
3. Prepare the Cream Cheese Swirl: In another bowl, beat the softened cream cheese and powdered sugar until smooth. Add a few drops of green food coloring until you achieve the desired shade of green.
4. Assemble the Brownies: Pour the brownie batter into the prepared baking pan, spreading it evenly. Dollop spoonfuls of the cream cheese mixture on top of the brownie batter. Using a knife or a skewer, gently swirl the cream cheese into the brownie batter to create a marbled effect.
5. Add Sprinkles: If desired, sprinkle Halloween-themed sprinkles over the top for an extra festive touch.
6. Bake: Place the pan in the preheated oven and bake for 25-30 minutes, or until a toothpick inserted into the center comes out with a few moist crumbs. Don’t overbake, as you want the brownies to remain fudgy.
7. Cool and Serve: Allow the brownies to cool completely in the pan before cutting them into squares. Serve them on a festive Halloween platter and enjoy the spooky treat!
Extra Tips:
For the best results, make sure that the cream cheese is well softened before mixing to avoid lumps in the swirl. If you prefer a more vibrant green color, feel free to adjust the amount of food coloring.
Additionally, you can customize these brownies by adding your favorite mix-ins, such as chocolate chips or nuts, to the batter. Remember, the swirling technique is what gives these brownies their magical appearance, so have fun with it and get creative!
Mummy Pretzel Rods
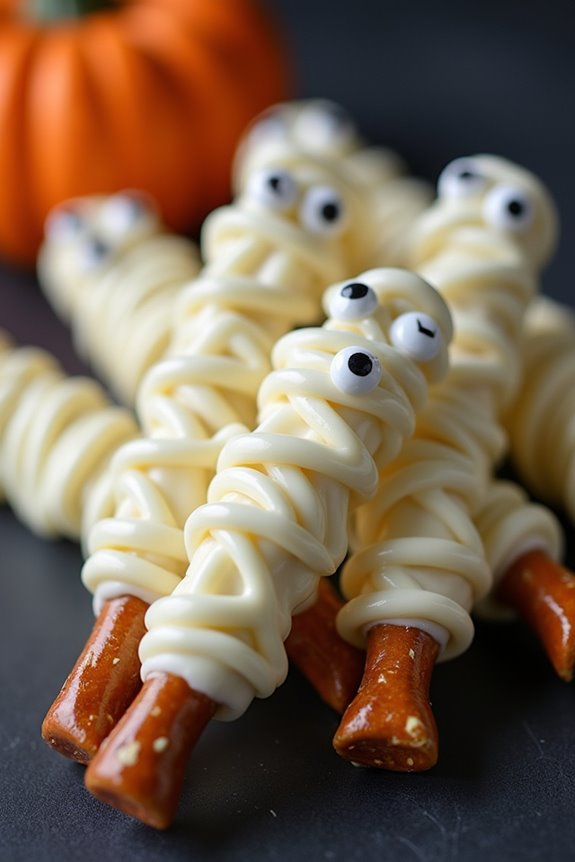
Mummy Pretzel Rods are a fun and easy Halloween treat that can be whipped up in no time, making them perfect for parties or a spooky snack at home. These delightful creations combine the salty crunch of pretzels with the sweet, creamy goodness of white chocolate, all wrapped up in a whimsical mummy design. Not only are they delicious, but they also add a festive touch to any Halloween gathering, delighting both kids and adults alike.
The process of making Mummy Pretzel Rods is simple and involves only a few ingredients, but the result is a visually striking treat that will surely impress your guests. Perfect for a serving size of 4-6 people, this recipe guarantees that there are plenty of mummies to go around. Whether you’re a seasoned chef or a kitchen novice, these Mummy Pretzel Rods are a fun project that requires minimal skill and offers maximum enjoyment.
Ingredients
- 12 pretzel rods
- 2 cups white chocolate chips
- 1 tablespoon coconut oil (optional)
- 24-30 candy eyes
- Black gel icing (optional for decoration)
Cooking Instructions
- Prepare the Work Area: Line a baking sheet with parchment paper. This will be where you place the pretzel rods after they’re coated in chocolate.
- Melt the Chocolate: In a microwave-safe bowl, combine the white chocolate chips and coconut oil. Microwave in 30-second intervals, stirring in between, until the chocolate is completely melted and smooth.
- Coat the Pretzel Rods: Dip each pretzel rod into the melted white chocolate, using a spoon to help cover about 3/4 of the rod. Gently shake off any excess chocolate and place the coated rod onto the prepared baking sheet. Repeat with the remaining pretzels.
- Create the Mummy Wraps: Transfer the remaining white chocolate to a small piping bag or a zip-top bag with a tiny corner snipped off. Drizzle the chocolate over each coated pretzel rod in a back-and-forth motion to create the appearance of mummy bandages.
- Add the Eyes: While the chocolate is still wet, press two candy eyes onto each pretzel rod near the top. Adjust the eyes as necessary to give each mummy a cute or spooky look.
- Set the Chocolate: Allow the chocolate to set completely. You can speed up this process by placing the tray in the refrigerator for about 10 minutes.
- Decorate (Optional): If desired, use black gel icing to add additional details to the mummies, such as mouths or stitches.
Extra Tips
For an extra touch of flavor, consider using flavored white chocolate chips, such as vanilla or almond, to give your Mummy Pretzel Rods a unique twist.
If you don’t have a piping bag, a spoon can also be used to drizzle the chocolate over the rods. Just be sure to work quickly, as the chocolate will set fast.
If you’re making these treats with kids, let them have fun personalizing each mummy with different candy eyes or extra decorations.
These Mummy Pretzel Rods can be stored in an airtight container at room temperature for up to a week, making them a great make-ahead option for Halloween events.
Spider Web Cookies
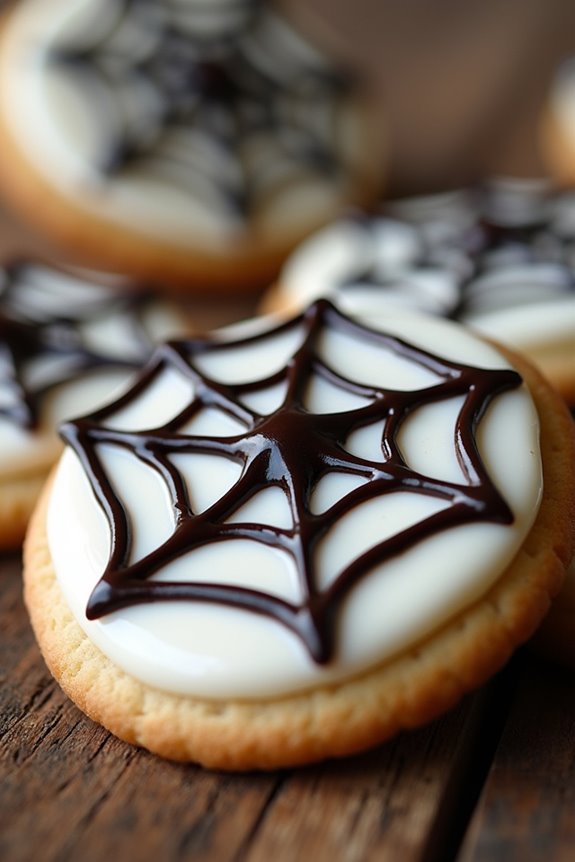
Spider Web Cookies are the perfect spooky treat to celebrate Halloween with a touch of whimsy and deliciousness. These cookies aren’t only delightful to eat but also fun to make, offering a creative outlet for both kids and adults alike. The visual appeal of the spider web design makes them a great addition to any Halloween party, guaranteeing they’re as much a feast for the eyes as they’re for the taste buds.
Creating these cookies involves a simple sugar cookie base, topped with a sweet icing that sets into a smooth canvas for the spider web design. The design itself is achieved using melted chocolate or a contrasting icing, which is then skillfully manipulated into the iconic web pattern. This recipe serves 4-6 people, making it ideal for a small gathering or as part of a larger array of Halloween-themed treats.
Ingredients:
- 1 cup unsalted butter, softened
- 1 cup granulated sugar
- 1 large egg
- 1 teaspoon vanilla extract
- 2 ½ cups all-purpose flour
- ½ teaspoon baking powder
- ¼ teaspoon salt
- 2 cups powdered sugar
- 3-4 tablespoons milk
- 1 teaspoon vanilla extract (for icing)
- Black food coloring or chocolate melts
Instructions:
- Prepare the Dough: In a large mixing bowl, cream together the softened butter and granulated sugar until the mixture is light and fluffy. This should take about 2-3 minutes using an electric mixer.
- Add Wet Ingredients: Beat in the egg and vanilla extract until well combined. Confirm the mixture is smooth and uniform.
- Mix Dry Ingredients: In a separate bowl, whisk together the flour, baking powder, and salt. Gradually add this dry mixture to the wet ingredients, mixing slowly until the dough forms.
- Chill the Dough: Wrap the dough in plastic wrap and refrigerate for at least 1 hour. This step is essential for rolling out the dough easily.
- Roll and Cut Cookies: Preheat your oven to 350°F (175°C). Roll out the chilled dough on a lightly floured surface to about ¼ inch thickness. Use a round cookie cutter to cut out the cookies.
- Bake the Cookies: Place the cut-out cookies on a baking sheet lined with parchment paper, leaving a little space between each cookie. Bake for 10-12 minutes or until the edges are lightly golden. Allow them to cool completely on a wire rack.
- Make the Icing: In a medium bowl, whisk together the powdered sugar, milk, and vanilla extract until smooth. Adjust the consistency with more milk if needed to achieve a spreadable icing.
- Decorate with Spider Webs: Once the cookies are cool, spread a thin layer of white icing over each cookie. Using black food coloring or melted chocolate, pipe small circles starting from the center of each cookie outward. Drag a toothpick from the center to the edges through the circles to create a web effect.
Extra Tips:
For best results, confirm the cookies are completely cool before icing, as any residual warmth can cause the icing to run. If you’re using chocolate melts for the spider web, make sure it’s not too thick; thinning with a little vegetable oil can help achieve a smoother design.
Experiment with different food coloring to create variations in your web colors. These cookies can be stored in an airtight container for up to a week, making them a convenient make-ahead option for your Halloween festivities.
Pumpkin Patch Popcorn Balls
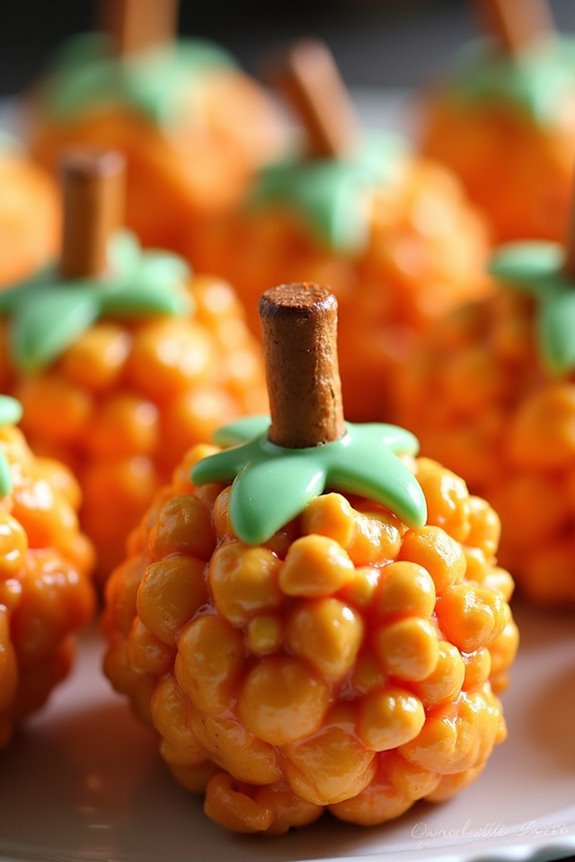
Pumpkin Patch Popcorn Balls are a delightful and festive treat perfect for Halloween parties or fall gatherings. These sweet and savory snacks combine the classic taste of popcorn with the warm flavors of pumpkin spice, bound together in a sticky, caramel-like coating.
Shaped to resemble small pumpkins, they not only taste delicious but also add a whimsical touch to your holiday spread, making them a hit among both kids and adults alike.
Crafting these popcorn balls is a fun and interactive activity that can be enjoyed with family and friends. The process involves popping fresh popcorn and mixing it with a buttery, spiced syrup, then shaping it into balls with your hands.
To complete the pumpkin patch theme, you can decorate each ball with pretzel stick stems and green icing leaves. This recipe serves 4-6 people, ensuring everyone at your event gets a taste of this seasonal delight.
Ingredients (serves 4-6):
- 10 cups popped popcorn
- 1 cup granulated sugar
- 1 cup light corn syrup
- 1/4 cup unsalted butter
- 1 teaspoon vanilla extract
- 1 teaspoon pumpkin pie spice
- Orange food coloring
- Pretzel sticks (for stems)
- Green icing or candy (for leaves)
Cooking Instructions:
- Prepare the Popcorn: Pop 10 cups of popcorn using your preferred method, ensuring all kernels are popped. Transfer the popcorn to a large mixing bowl, removing any unpopped kernels.
- Make the Syrup: In a medium saucepan, combine the granulated sugar, corn syrup, and butter over medium heat. Stir the mixture continuously until the butter melts and the sugar dissolves completely.
- Add Flavor and Color: Once the syrup is smooth, remove it from the heat and stir in the vanilla extract, pumpkin pie spice, and a few drops of orange food coloring. Mix until the color is evenly distributed.
- Coat the Popcorn: Pour the syrup over the popcorn in the mixing bowl. Use a heat-resistant spatula to gently toss the popcorn until all pieces are evenly coated with the syrup.
- Shape the Balls: Allow the mixture to cool slightly until it’s safe to handle. Grease your hands with a little butter to prevent sticking, then form the popcorn into balls about the size of a small apple. Place the balls on a sheet of wax paper to set.
- Decorate: Insert a pretzel stick into the top of each popcorn ball to create a stem. Use green icing or candy to add leaves around the stem for a festive touch.
- Set: Let the decorated popcorn balls set at room temperature for about 30 minutes to an hour, or until they’re firm and hold their shape.
Extra Tips:
When making Pumpkin Patch Popcorn Balls, be sure to work quickly when shaping the balls, as the syrup can harden fast. If the mixture becomes too stiff to shape, you can briefly warm it in the oven to soften it slightly.
To add variety, consider incorporating mini marshmallows or candy corn into the popcorn before shaping. Additionally, wearing food-safe gloves can make the shaping process easier and cleaner.
Enjoy these treats as soon as possible for the best texture, but they can be stored in an airtight container for a couple of days if needed.
Vampire Bite Doughnuts
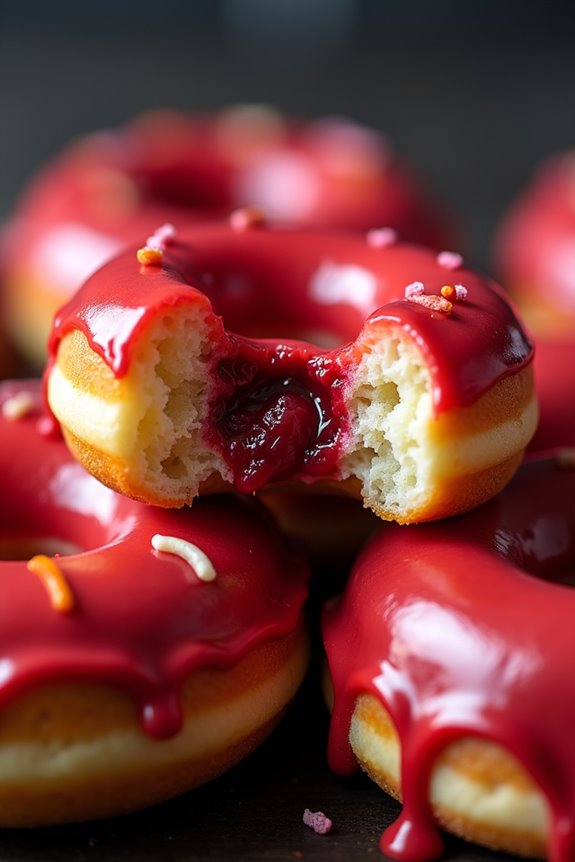
Celebrate Halloween with a spooky twist by making Vampire Bite Doughnuts. These delightful treats aren’t only delicious but also add a touch of eerie fun to your Halloween gathering. The doughnuts are soft and fluffy, filled with a sweet and tangy raspberry jam that mimics the appearance of blood, guaranteeing that every bite is a thrilling experience. Topped with a creamy glaze and decorated with edible fangs, these doughnuts are sure to be the highlight of your spooky spread.
Whether you’re hosting a Halloween party or simply indulging in some festive fun, this recipe is perfect for getting into the Halloween spirit. Making Vampire Bite Doughnuts is a great activity to enjoy with family and friends, allowing everyone to get creative with their decorations. Follow the recipe below to create these hauntingly delicious treats for 4-6 people.
Ingredients:
- 2 cups all-purpose flour
- 1/2 cup granulated sugar
- 2 teaspoons baking powder
- 1/2 teaspoon salt
- 1/2 teaspoon ground cinnamon
- 1/2 cup milk
- 1/4 cup unsalted butter, melted
- 2 large eggs
- 1 teaspoon vanilla extract
- 1 cup raspberry jam
- 2 cups powdered sugar
- 3 tablespoons milk (for glaze)
- Red food coloring
- Edible candy fangs (optional)
Instructions:
- Preheat and Prepare: Preheat your oven to 350°F (175°C) and lightly grease a doughnut pan with non-stick spray or butter.
- Mix Dry Ingredients: In a large mixing bowl, combine the flour, granulated sugar, baking powder, salt, and cinnamon. Whisk together to guarantee even distribution of ingredients.
- Combine Wet Ingredients: In a separate bowl, whisk together the milk, melted butter, eggs, and vanilla extract until well combined.
- Create the Batter: Gradually add the wet ingredients to the dry ingredients, stirring gently until just combined. Be careful not to overmix the batter, as this can result in dense doughnuts.
- Fill the Doughnut Pan: Spoon the batter into the prepared doughnut pan, filling each mold about 3/4 full to allow for rising.
- Bake: Place the doughnut pan in the preheated oven and bake for 10-12 minutes, or until the doughnuts are lightly golden and spring back when touched.
- Cool and Fill: Allow the doughnuts to cool in the pan for a few minutes before transferring them to a wire rack. Once cooled, use a piping bag with a small tip to inject raspberry jam into each doughnut, mimicking a vampire bite.
- Make the Glaze: In a small bowl, mix together the powdered sugar and milk until smooth. Add a few drops of red food coloring to achieve a blood-red glaze.
- Glaze the Doughnuts: Dip the top of each doughnut into the glaze, allowing any excess to drip off. For an extra spooky touch, add edible candy fangs to the glaze before it sets.
- Serve: Allow the glaze to set for a few minutes before serving the doughnuts on a festive Halloween platter.
Extra Tips: When making the batter, confirm all ingredients are at room temperature to help the doughnuts rise evenly. If you don’t have a doughnut pan, you can use a muffin tin and shape the doughnuts by hand. Feel free to experiment with different jams or food coloring to personalize your Vampire Bite Doughnuts further.
For an added touch of Halloween fun, you can sprinkle crushed Oreos or Halloween-themed sprinkles onto the wet glaze before it sets.
Creepy Crawly Candy Apples
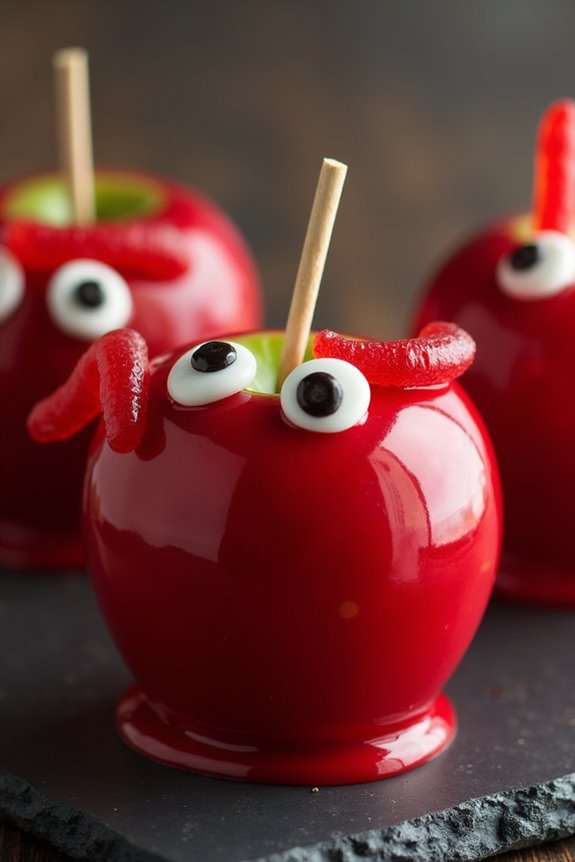
Creepy Crawly Candy Apples are a delightful and haunting treat perfect for Halloween festivities. These spooky delights combine the classic candy apple with a touch of creepy flair. Imagine a glossy candy shell encasing a juicy apple, with the added surprise of gummy worms and candy eyes peeking out.
It’s a fun twist on a traditional favorite, sure to be a hit with kids and adults alike at your Halloween party. Not only do these treats look terrifyingly tasty, but they also deliver a satisfying crunch and a sweet, gooey bite that everyone will enjoy.
Preparing Creepy Crawly Candy Apples is a fun and engaging process, perfect for involving family members or friends in the Halloween spirit. This recipe will guide you through each step, guaranteeing you achieve that perfect balance between spooky and delicious.
The combination of tart apples, sweet candy coating, and creepy decorations makes for a treat that isn’t only visually appealing but also tantalizing to the taste buds. With just a few ingredients and some creativity, you can whip up a batch of these hauntingly delicious candy apples to serve 4-6 people.
Ingredients:
- 6 medium-sized apples (preferably Granny Smith or Honeycrisp)
- 2 cups granulated sugar
- 1/2 cup light corn syrup
- 1/2 cup water
- 1/2 teaspoon red food coloring
- 1/2 teaspoon black food coloring (optional, for a darker shade)
- 12 gummy worms
- 12 candy eyes
- 6 wooden sticks or skewers
- Non-stick cooking spray or parchment paper
Cooking Instructions:
- Prepare the Apples: Wash and dry the apples thoroughly to remove any waxy coating. Insert a wooden stick or skewer into the top of each apple, making sure it’s secure. Set them aside on a lined baking sheet.
- Make the Candy Coating: In a medium saucepan, combine the sugar, corn syrup, and water. Stir the mixture over medium heat until the sugar dissolves. Attach a candy thermometer to the side of the pan and bring the mixture to a boil. Don’t stir once it starts boiling.
- Color the Candy: When the candy thermometer reads 300°F (hard crack stage), remove the pan from heat. Quickly stir in the red food coloring and the optional black food coloring to achieve the desired shade.
- Coat the Apples: Dip each apple into the candy mixture, twirling to coat the entire surface evenly. Allow excess candy to drip off before placing the apple back on the lined baking sheet.
- Decorate with Creepy Crawlies: Before the candy coating sets, press two gummy worms onto each apple, allowing them to hang off as if crawling. Add two candy eyes to complete the creepy effect.
- Set the Coating: Let the apples cool and the candy coating harden completely, which should take about 30 minutes.
Extra Tips:
When making Creepy Crawly Candy Apples, make sure that the apples are completely dry before dipping them in the candy mixture, as moisture can prevent the coating from sticking properly.
If your candy starts to harden before you’ve finished coating the apples, gently reheat it over low heat until it becomes fluid again. Additionally, use caution when working with hot sugar to avoid burns, and always have adult supervision if children are helping with the preparation.
Enjoy these spooky treats as part of your Halloween celebration!
Haunted House Gingerbread
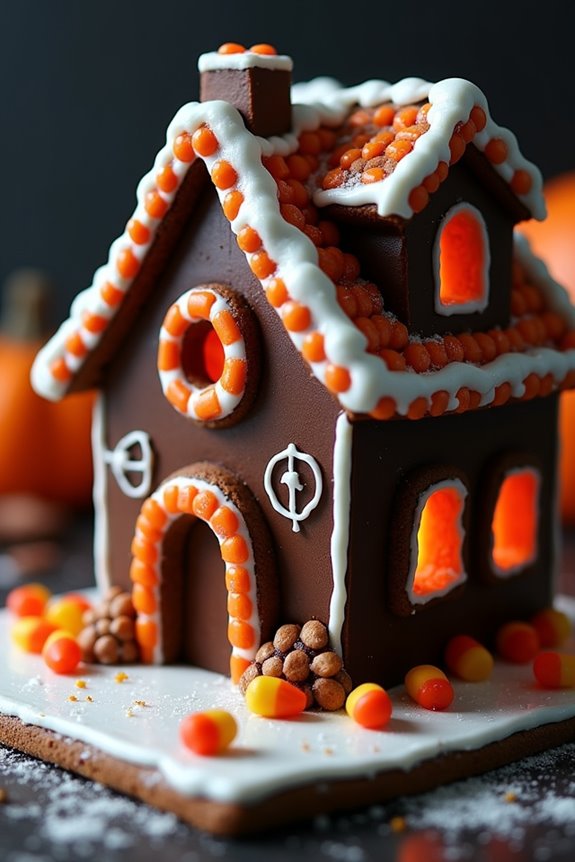
If you’re looking to add a touch of spooky charm to your Halloween festivities, nothing beats crafting your own Haunted House Gingerbread. This delicious and eerie confection isn’t only a treat for the taste buds but also a visually engaging centerpiece for any Halloween gathering.
With dark chocolate walls, licorice rooftops, and candy corn accents, your Haunted House Gingerbread will be both a creative endeavor and a festive delight. Creating this masterpiece requires some planning and patience, as well as a few hours dedicated to construction. However, the result is well worth the effort.
The gingerbread serves as a sturdy base, while the royal icing works as both an adhesive and a decorative element. You’ll also have the fun opportunity to personalize your haunted house with edible decorations that capture the essence of Halloween.
Ingredients for 4-6 servings:
- 3 cups all-purpose flour
- 1 teaspoon baking soda
- 1 tablespoon ground ginger
- 1 tablespoon ground cinnamon
- 1/2 teaspoon ground cloves
- 1/2 teaspoon salt
- 3/4 cup unsalted butter, softened
- 1 cup dark brown sugar
- 1 large egg
- 1/2 cup molasses
- 2 cups powdered sugar
- 2 tablespoons meringue powder
- 4 tablespoons water
- Black food coloring (optional)
- Assorted candies (candy corn, licorice, gummy worms, etc.)
Cooking Instructions:
1. Prepare the Dough: In a large bowl, whisk together the flour, baking soda, ginger, cinnamon, cloves, and salt. In a separate bowl, cream the softened butter and dark brown sugar until light and fluffy. Beat in the egg and molasses until well combined. Gradually add the dry ingredients to the wet ingredients, mixing until a dough forms.
Divide the dough in half, wrap in plastic wrap, and chill for at least 1 hour.
2. Roll and Cut the Dough: Preheat your oven to 350°F (175°C). Roll out one portion of the dough on a floured surface to about 1/4 inch thick. Using templates or freehand, cut out the shapes for the walls and roof of your gingerbread house.
Transfer the pieces to a baking sheet lined with parchment paper.
3. Bake the Gingerbread: Bake the gingerbread pieces in the preheated oven for 10-12 minutes, or until they’re firm and lightly browned. Remove from the oven and allow them to cool completely on a wire rack.
4. Make the Royal Icing: To make the icing, beat the powdered sugar, meringue powder, and water together in a bowl on high speed until stiff peaks form, about 7-10 minutes.
Add black food coloring if desired for a spooky effect.
5. Assemble the House: Use the royal icing to “glue” the walls and roof pieces together. Start by assembling the four walls, allowing the icing to dry and harden for about 15 minutes before attaching the roof.
6. Decorate: Once the house structure is stable, use the remaining icing to attach candies and create spooky designs.
Let your imagination run wild with candy corn pathways, licorice shingles, and gummy worm gardens.
Extra Tips:
When constructing your Haunted House Gingerbread, verify that all pieces are completely cooled before assembly to prevent them from bending or breaking.
If time allows, consider making your gingerbread pieces a day in advance to verify they’re firm and ready for construction. Use small cans or jars inside the house to support the walls while they dry, and be patient with the icing as it sets.
Zombie Brain Cupcakes
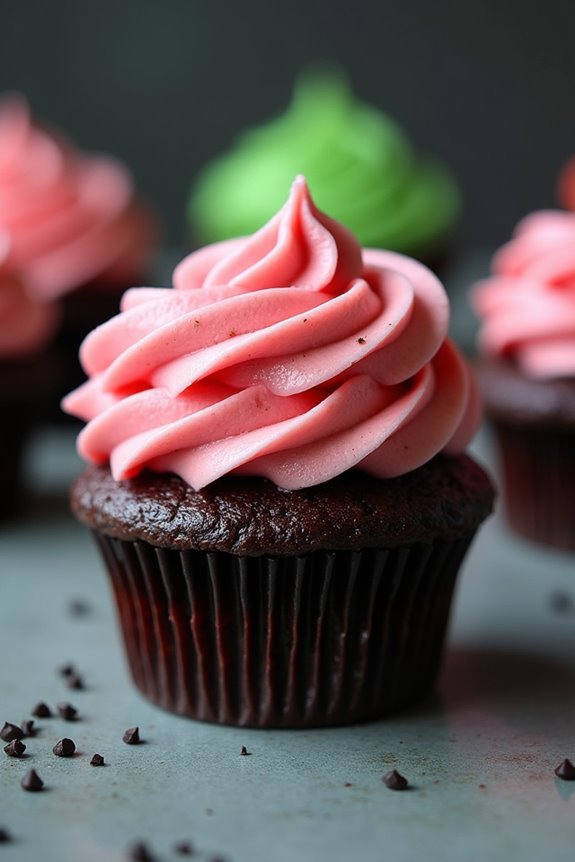
Get ready to thrill your guests with these ghoulishly delightful Zombie Brain Cupcakes, perfect for your Halloween party spread. These spooky treats aren’t only visually striking but also deliciously moist and flavorful. The cupcakes themselves are chocolatey with a hint of coffee, and they’re topped with eerie, brain-like frosting that will surely impress—or spook—your guests.
With a little creativity, these cupcakes will be the highlight of your Halloween festivities, leaving both kids and adults excited to take a bite. The process involves creating a rich and moist chocolate cupcake base, which is then topped with a unique brain-shaped frosting made from a combination of buttercream and food coloring for that authentic zombie look.
The key to achieving the brain effect is in the piping technique, which is easier than it looks. Follow this step-by-step recipe to make 12-16 cupcakes, perfect for serving 4-6 people, ensuring everyone at your Halloween haunt gets a taste of the undead.
Ingredients:
- 1 cup all-purpose flour
- 1 cup granulated sugar
- 1/2 cup unsweetened cocoa powder
- 1 teaspoon baking powder
- 1/2 teaspoon baking soda
- 1/4 teaspoon salt
- 1 large egg
- 1/2 cup buttermilk
- 1/2 cup brewed coffee, cooled
- 1/4 cup vegetable oil
- 1 teaspoon vanilla extract
For the Frosting:
- 1 cup unsalted butter, softened
- 4 cups powdered sugar
- 1/4 cup heavy cream
- 1 teaspoon vanilla extract
- Red and green food coloring
Cooking Instructions:
- Preheat and Prepare: Preheat your oven to 350°F (175°C). Line a 12-cup muffin tin with cupcake liners.
- Mix Dry Ingredients: In a large bowl, whisk together the flour, sugar, cocoa powder, baking powder, baking soda, and salt until evenly combined.
- Combine Wet Ingredients: In another bowl, whisk the egg, buttermilk, coffee, vegetable oil, and vanilla extract until well combined.
- Combine and Mix: Gradually add the wet ingredients to the dry ingredients, stirring until just combined. Be careful not to overmix to keep the cupcakes light and fluffy.
- Bake: Divide the batter evenly among the prepared cupcake liners, filling each about two-thirds full. Bake for 18-20 minutes or until a toothpick inserted into the center comes out clean. Let them cool completely on a wire rack.
- Prepare Frosting: In a large bowl, beat the softened butter until creamy. Gradually add the powdered sugar, alternating with the heavy cream and vanilla extract. Beat until the frosting is smooth and fluffy.
- Color and Pipe: Divide the frosting into two bowls. Add red food coloring to one bowl to create a pink color and a few drops of green to the other bowl for a moldy hue. Spoon the pink frosting into a piping bag with a round tip and pipe brain-like squiggles on top of each cupcake. Add a few green frosting touches to enhance the zombie effect.
Extra Tips:
For an extra spooky touch, consider adding a bit of strawberry jam in the center of the cupcakes for a “bloody” surprise when bitten into. If you find the frosting too soft to hold its shape, chill it briefly in the refrigerator before piping.
Additionally, practice your piping on parchment paper first to get comfortable with creating the brain pattern. These cupcakes are best served on the day they’re made for peak taste and presentation, but they can be stored in an airtight container at room temperature for up to two days. Enjoy your eerily delicious Zombie Brain Cupcakes!
Monster Mash Marshmallow Pops
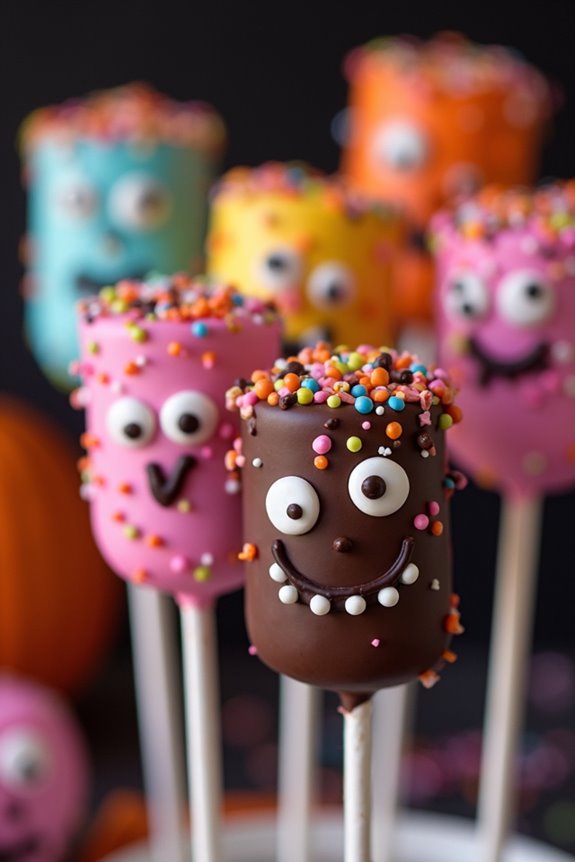
Monster Mash Marshmallow Pops are the perfect Halloween treat to delight guests of all ages. These spooky marshmallow pops aren’t only fun to make but also a joyful addition to any Halloween party spread. They combine gooey marshmallows, colorful candy coatings, and spooky decorations to create a whimsical and delicious treat.
Whether you’re hosting a Halloween bash or simply looking for a creative activity to do with the kids, these Monster Mash Marshmallow Pops will definitely bring out the festive spirit.
The beauty of these pops lies in their versatility and the limitless options for decoration. You can let your imagination run wild by creating little monster faces using candy eyes, colored sprinkles, and edible markers. The marshmallow pops are easy to assemble, making them an ideal project for little chefs to participate in.
With just a few ingredients and some creativity, you’ll have a batch of these adorable and tasty treats ready to be devoured in no time.
Ingredients (Serves 4-6 people):
- 12 large marshmallows
- 12 lollipop sticks
- 1 cup white chocolate chips or candy melts (various colors)
- Assorted food coloring (if using white chocolate chips)
- Candy eyes
- Edible markers
- Assorted sprinkles and decorations (e.g., colored sugar, mini chocolate chips)
- Wax paper
Cooking Instructions:
- Prepare the Marshmallows: Insert a lollipop stick into each marshmallow, making sure it’s secure but not piercing through the other end. Set them aside on a piece of wax paper.
- Melt the Coating: In a microwave-safe bowl, melt the white chocolate chips or candy melts in 30-second intervals, stirring in between, until smooth. If using white chocolate chips, divide the melted chocolate into separate bowls and add a few drops of different food coloring to each to create a variety of colors.
- Dip the Marshmallows: Dip each marshmallow into the melted chocolate, turning to coat it evenly. Let any excess chocolate drip off before placing the coated marshmallow onto wax paper.
- Decorate the Pops: While the coating is still wet, decorate the marshmallows with candy eyes, sprinkles, and any other decorations you desire. Use edible markers to draw additional features like mouths or scars for a monster effect.
- Allow to Set: Let the decorated marshmallow pops sit at room temperature until the chocolate coating has fully set. This usually takes about 15-20 minutes, but you can speed up the process by placing them in the refrigerator for a few minutes if needed.
- Serve and Enjoy: Once set, your Monster Mash Marshmallow Pops are ready to be served. Arrange them on a festive platter or stick them into a foam block for a fun presentation.
Extra Tips:
When making Monster Mash Marshmallow Pops, make sure the chocolate isn’t too hot, as this can cause the marshmallows to melt. If you’re using different colors, keep the bowls separate to prevent mixing.
Be creative with the decorations; there’s no right or wrong way to make your monster faces. Additionally, you can prepare these pops a day in advance and store them in an airtight container to keep them fresh for your Halloween celebration.
Enjoy experimenting with different designs, and have fun bringing your spooky monsters to life!
Skeleton Bone Breadsticks
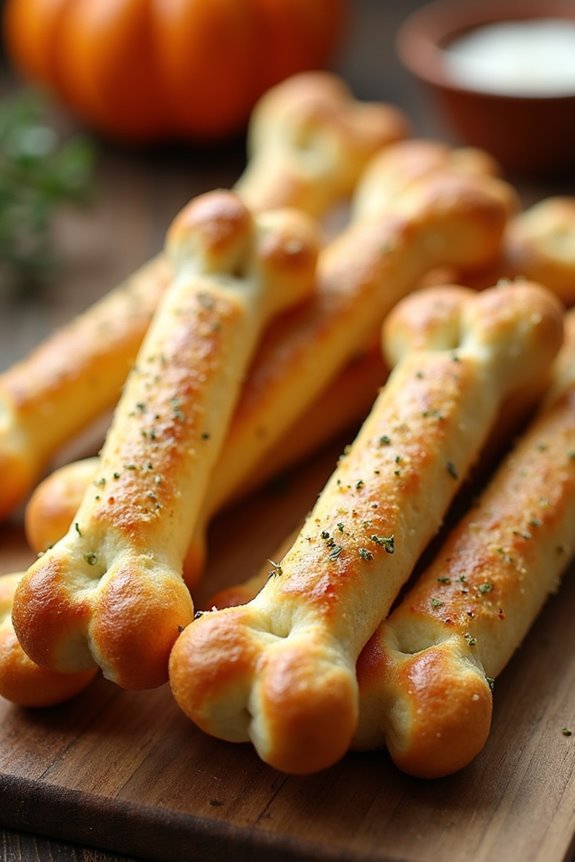
Skeleton Bone Breadsticks are a spooktacular addition to any Halloween feast, bringing a delightfully eerie touch to your table. These bone-shaped breadsticks aren’t only fun to make but also deliciously crisp on the outside and soft on the inside. Perfect for dipping into marinara sauce or serving alongside your favorite Halloween-themed dishes, these breadsticks are sure to impress both kids and adults alike.
Their unique shape makes them an exciting centerpiece for your Halloween spread, turning a simple breadstick into a conversation starter. Creating Skeleton Bone Breadsticks is a great activity for the whole family, as you can easily involve kids in the shaping process. The dough is straightforward to prepare and requires just a few ingredients.
Once baked to golden brown perfection, these breadsticks can be seasoned with herbs and spices to suit your taste or left plain for a classic appeal. With this recipe, you’ll have a batch of bone-chilling breadsticks ready to haunt your Halloween party or dinner table.
Ingredients (Serving size: 4-6 people):
- 2 cups all-purpose flour
- 1 tablespoon sugar
- 1 pack (2 1/4 teaspoons) active dry yeast
- 3/4 cup warm water (about 110°F)
- 1 tablespoon olive oil
- 1 teaspoon salt
- 2 tablespoons melted butter
- 1 tablespoon garlic powder
- 1 tablespoon grated Parmesan cheese
- Optional: 1 teaspoon dried oregano
Cooking Instructions:
- Prepare the Dough: In a large mixing bowl, combine the warm water and sugar, then sprinkle the yeast over the top. Let it sit for about 5 minutes until it becomes frothy. This indicates that the yeast is active.
- Mix Ingredients: Add the olive oil, salt, and 1 cup of flour to the yeast mixture. Stir to combine, then gradually add the remaining cup of flour. Mix until a dough begins to form.
- Knead the Dough: Transfer the dough to a floured surface and knead for about 5-7 minutes, until it’s smooth and elastic. If the dough is too sticky, add a little more flour as needed.
- First Rise: Place the dough in a lightly oiled bowl, cover it with a damp cloth, and allow it to rise in a warm place for about 1 hour or until doubled in size.
- Shape the Breadsticks: Punch down the risen dough to release air. Divide it into 12 equal pieces. Roll each piece into a rope about 8 inches long and shape them into bone-like structures by forming knobs at each end.
- Second Rise: Arrange the shaped breadsticks on a baking sheet lined with parchment paper. Cover them with a cloth and let them rise for another 15-20 minutes.
- Bake: Preheat your oven to 375°F (190°C). Brush the breadsticks with melted butter and sprinkle with garlic powder, Parmesan cheese, and oregano if using. Bake for 15-20 minutes or until golden brown.
- Cool and Serve: Allow the breadsticks to cool slightly on a wire rack before serving. Enjoy them warm with your choice of dipping sauce.
Extra Tips:
For a more pronounced bone shape, pinch the dough tightly at the “joints” to create a distinctive appearance. If you’re running short on time, you can use store-bought pizza dough as a substitute, which will save on preparation time but maintain that homemade feel.
Additionally, feel free to experiment with different seasonings like rosemary or chili flakes to customize the flavor profile to your liking. If you prefer a softer breadstick, reduce the baking time by a couple of minutes. Remember to keep an eye on the breadsticks during the last few minutes of baking to prevent them from becoming too dark.