
As Halloween approaches, the excitement for festive treats fills the air. I understand how daunting it can be to prepare delightful snacks when you’re short on time. But don’t worry, I’ve got some frightfully easy ideas that will keep your kitchen time minimal while wowing your guests. From charming Ghostly Marshmallow Pops to delightful Mummy Hot Dogs, these recipes cater to every spooky craving. Ready to sprinkle some Halloween magic into your snack table?
Ghostly Marshmallow Pops
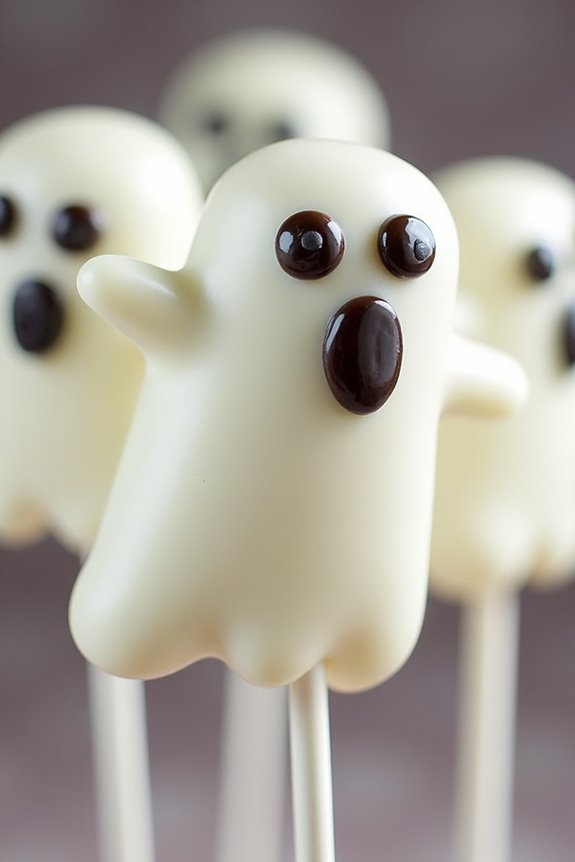
Ghostly Marshmallow Pops are a spooky and delicious treat that’s perfect for your Halloween festivities. These delightful pops aren’t only fun to make but also a hit with kids and adults alike. With their ghostly white chocolate coating and candy eyes, they add a touch of whimsy to any Halloween-themed party.
Best of all, they require minimal ingredients and are quick to prepare, making them an ideal last-minute snack option.
The process of making Ghostly Marshmallow Pops is as enjoyable as eating them. You’ll start by inserting lollipop sticks into large marshmallows, dip them in melted white chocolate, and decorate them with candy eyes and spooky faces. As the chocolate sets, the marshmallows transform into adorable little ghosts that are almost too cute to eat.
Serve them at your Halloween party or package them individually as festive treats for trick-or-treaters.
Ingredients (serves 4-6 people):
- 12 large marshmallows
- 12 lollipop sticks
- 2 cups white chocolate chips
- 24 candy eyes
- Black gel icing or edible ink pen
Cooking Instructions:
- Prepare the Marshmallows: Start by inserting a lollipop stick into each marshmallow, pushing it about halfway through. This will serve as the handle for your marshmallow pops.
- Melt the Chocolate: In a microwave-safe bowl, melt the white chocolate chips. Heat in 30-second intervals, stirring in between, until the chocolate is completely smooth and melted.
- Dip the Marshmallows: Carefully dip each marshmallow into the melted white chocolate, ensuring it’s evenly coated. Allow any excess chocolate to drip off before placing the marshmallow upright on a piece of parchment paper.
- Decorate the Ghosts: While the chocolate is still wet, press two candy eyes into the top third of each marshmallow to form the ghost’s eyes. Use the black gel icing or edible ink pen to draw a spooky mouth below the eyes.
- Let Them Set: Allow the marshmallow pops to sit at room temperature until the chocolate has completely set. This should take about 15-20 minutes.
- Serve or Store: Once set, your Ghostly Marshmallow Pops are ready to serve. If not serving immediately, store them in an airtight container to keep them fresh.
Extra Tips: To make the process smoother, you can prepare all your decorations in advance, so they’re ready to go once the marshmallows are dipped.
If you find the chocolate begins to harden while decorating, simply reheat it for a few seconds to regain the right consistency. Additionally, if you’re feeling creative, try using different colored gel icing to give your ghosts unique expressions or add extra embellishments for more character.
Mummy Hot Dogs
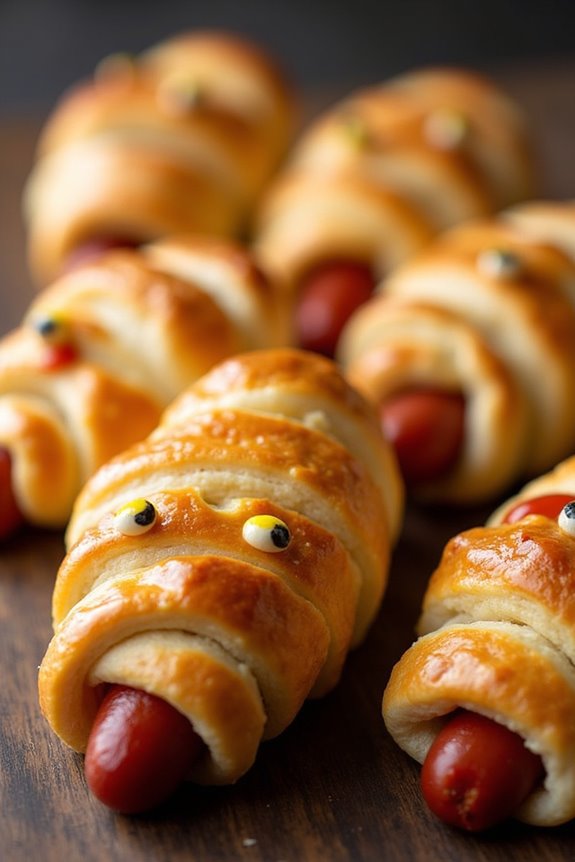
Mummy Hot Dogs are a fun and spooky treat perfect for any Halloween gathering. These delightful snacks aren’t only easy to make but also a hit with both kids and adults. By wrapping hot dogs in crescent roll dough to resemble mummies, you create a visually appealing dish that’s both tasty and festive.
Whether you’re hosting a Halloween party or simply looking for a themed snack, Mummy Hot Dogs are bound to please.
Creating Mummy Hot Dogs is a straightforward process that requires minimal preparation and cooking time. This recipe is designed to serve 4-6 people, making it ideal for small gatherings or family dinners. The combination of savory hot dogs and buttery, flaky crescent rolls guarantees these mummies will disappear quickly from your snack table.
Add a touch of fun by decorating them with mustard or ketchup for eyes, and watch your guests enjoy these creative Halloween snacks.
Ingredients for 4-6 servings:
- 8 hot dogs
- 1 package of crescent roll dough (refrigerated)
- Cooking spray or parchment paper
- Mustard or ketchup for decorating
Cooking Instructions:
- Preheat the Oven: Preheat your oven to 375°F (190°C). This guarantees that the crescent roll dough will cook evenly and become golden brown.
- Prepare the Baking Sheet: Line a baking sheet with parchment paper or lightly coat it with cooking spray. This will prevent the Mummy Hot Dogs from sticking to the pan.
- Cut the Dough: Unroll the crescent roll dough and separate it into individual triangles. Using a sharp knife or a pizza cutter, slice each triangle into thin strips (about ¼ inch wide). These strips will be used to wrap the hot dogs.
- Wrap the Hot Dogs: Take each hot dog and wrap it with a few strips of dough, leaving a small gap at one end for the “face”. Overlapping the dough strips slightly will create the appearance of a mummy’s bandages.
- Bake the Mummies: Place the wrapped hot dogs on the prepared baking sheet and bake in the preheated oven for 12-15 minutes, or until the dough is golden brown and fully cooked.
- Decorate: Remove the Mummy Hot Dogs from the oven and allow them to cool for a few minutes. Use a small amount of mustard or ketchup to dot eyes onto the exposed area of each hot dog to complete the mummy look.
- Serve and Enjoy: Arrange the Mummy Hot Dogs on a serving platter and watch as they quickly become a Halloween favorite.
Extra Tips:
For an even spookier presentation, serve the Mummy Hot Dogs with a variety of dipping sauces like barbecue sauce, spicy mustard, or cheese dip.
If you want to add some extra flavor, consider using flavored hot dogs, such as smoked or cheese-filled varieties. When wrapping the dough, try to create different patterns for each hot dog to give each mummy a unique look.
If you’re preparing these in advance, you can assemble the mummies and store them in the refrigerator for a few hours before baking, making them an excellent choice for busy party prep.
Witch Finger Pretzels
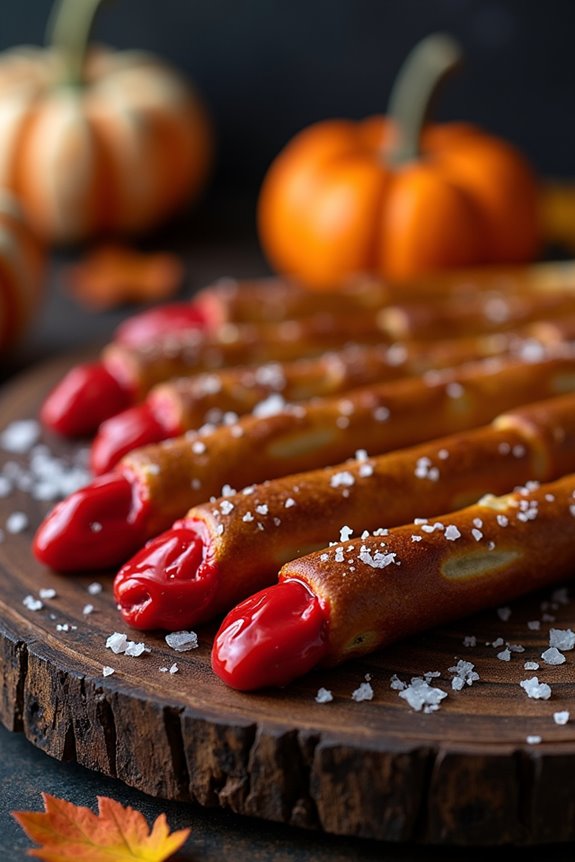
Witch Finger Pretzels are a fun and spooky addition to any Halloween party spread. These creepy treats are perfect for both kids and adults who enjoy a bit of fright with their bite. Made with simple ingredients, these pretzel snacks not only look the part but are also deliciously crunchy and flavorful. Shaped to resemble eerily realistic witch fingers, they’re sure to be a conversation starter at your festive gathering.
These Witch Finger Pretzels are easy to prepare, making them an ideal choice for a quick Halloween snack. You can customize them with your favorite pretzel recipe or even use store-bought pretzel dough to save time. The secret lies in the detailed shaping and the addition of an almond “fingernail,” which adds to the chilling appearance. With just a few steps, you’ll have a platter of spooky snacks ready to delight and horrify your guests!
Ingredients (Serving size: 4-6 people)
- 1 pack of store-bought pretzel dough or homemade pretzel dough (enough for about 12 pretzels)
- 12 whole blanched almonds
- 1 egg (beaten, for egg wash)
- Coarse sea salt for sprinkling
- Red food coloring or red gel icing
Cooking Instructions
- Prepare the Dough: If you’re using store-bought pretzel dough, take it out of the packaging and let it come to room temperature. If you’re making your own dough, prepare it according to your recipe and let it rise until it’s doubled in size.
- Preheat the Oven: Set your oven to 400°F (200°C) and line a baking sheet with parchment paper.
- Shape the Fingers: Divide the dough into 12 equal pieces. Roll each piece into a log shape, approximately 5 inches long, and taper one end to form a pointed tip, resembling a finger.
- Add the Fingernails: Gently press a blanched almond into the pointy end of each pretzel to create the “fingernail.” Use a sharp knife to make small, horizontal slits along the finger to mimic knuckles.
- Apply Egg Wash: Brush each pretzel finger with the beaten egg, guaranteeing an even coating. This will give your witch fingers a nice golden brown color when baked.
- Sprinkle with Salt: Lightly sprinkle coarse sea salt over the pretzels for flavor and texture.
- Bake the Pretzels: Place the pretzels on the prepared baking sheet and bake in the preheated oven for 12-15 minutes, or until golden brown and cooked through.
- Add Bloody Details: Once the pretzels have cooled slightly, use red food coloring or red gel icing to add a touch of “blood” around the almond fingernails for an extra spooky effect.
Extra Tips
When making Witch Finger Pretzels, verify the dough logs aren’t too thick to avoid overly puffy fingers after baking.
If you’re using homemade dough, let it proof sufficiently for the best texture. If you prefer a more savory flavor, consider adding herbs like rosemary or garlic powder to the dough before shaping.
For a gluten-free version, use gluten-free pretzel dough. Finally, be creative with your presentation; serve these with a marinara “blood” dip for an extra frightful touch!
Spooky Spider Deviled Eggs
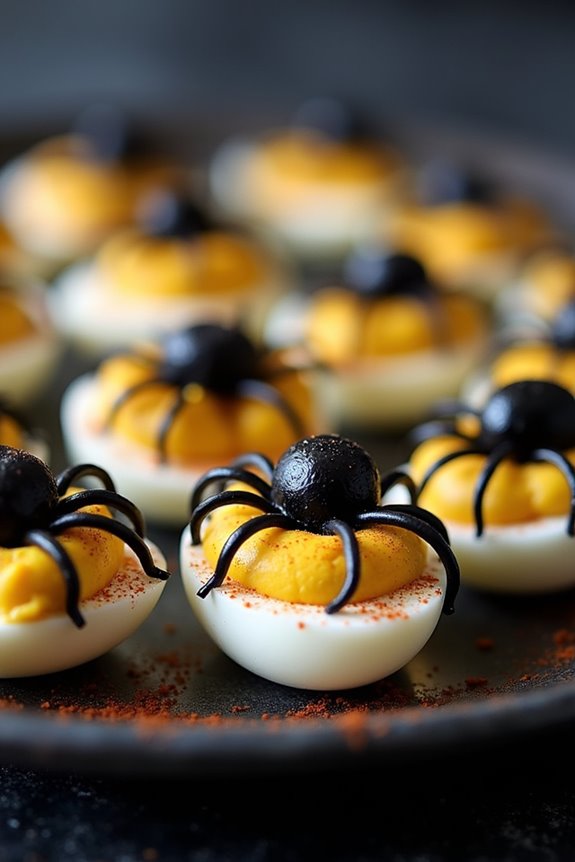
Spooky Spider Deviled Eggs are a ghoulishly fun treat to whip up for your Halloween festivities. These eerie appetizers not only look the part with their creepy-crawly design but also delight with their classic deviled egg taste. Perfect for a crowd and simple to prepare, they’re bound to be a hit with both kids and adults at your Halloween gathering.
The balance of creamy yolk filling with the subtle saltiness of olives makes these deviled eggs a savory addition to your spooky spread. Crafted with just a few ingredients, these Spooky Spider Deviled Eggs can be assembled quickly, allowing you to focus on other party preparations.
With a serving size of 4-6 people, this recipe guarantees everyone at the party gets a taste of these frightful yet delicious bites. Let’s dig into the ingredients you’ll need and the steps required to bring these spooky snacks to life.
Ingredients (Serving Size: 4-6 people):
- 6 large eggs
- 3 tablespoons mayonnaise
- 1 teaspoon yellow mustard
- Salt to taste
- Black pepper to taste
- Paprika for garnish
- 12 black olives
Cooking Instructions:
- Boil the Eggs: Place the eggs in a saucepan and cover them with water. Bring the water to a rolling boil over medium-high heat. Once boiling, cover the pan with a lid, turn off the heat, and let the eggs sit in the hot water for about 10-12 minutes.
- Cool and Peel: After the eggs have cooked, transfer them to a bowl of ice water to cool for about 5 minutes. Once cooled, gently crack and peel the eggs.
- Prepare the Egg Halves: Slice each egg in half lengthwise. Carefully remove the yolks and place them in a separate bowl. Arrange the egg whites on a serving platter.
- Make the Filling: Mash the yolks with a fork until they’re crumbly. Add mayonnaise, yellow mustard, salt, and black pepper to taste. Mix until smooth and creamy.
- Fill the Egg Whites: Spoon or pipe the yolk mixture back into the hollows of the egg whites.
- Create the Spider Topping: Slice the black olives in half lengthwise for the spider bodies. Use the remaining halves to cut thin slices for the spider legs. Place one olive half on top of each deviled egg, and then arrange 8 olive slices around it to form the legs.
- Garnish and Serve: Lightly sprinkle paprika over the eggs for extra color and flavor. Serve immediately or refrigerate until ready to serve.
Extra Tips:
To guarantee beautifully smooth deviled eggs, make sure your mayonnaise is at room temperature when mixing it with the yolks. This prevents the filling from becoming lumpy.
If you prefer a tangier filling, consider adding a teaspoon of vinegar or a dash of hot sauce to the yolk mixture. Additionally, when cutting olives for the spider legs, using a small, sharp knife can help create precise, thin slices for a more realistic look.
If you’re short on time, the deviled eggs can be prepared a day in advance, allowing you more time to enjoy the Halloween festivities.
Pumpkin Patch Brownies
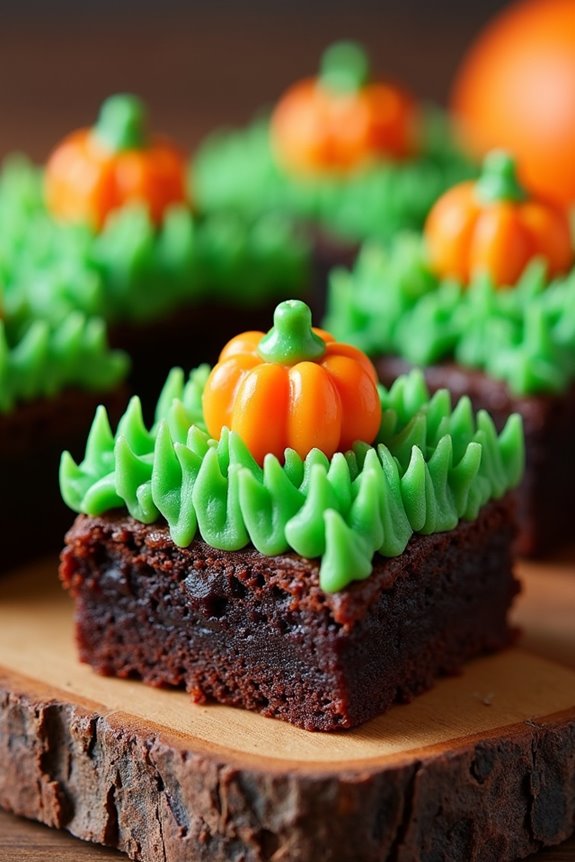
Get ready to transform your Halloween party with delicious Pumpkin Patch Brownies! This creative and festive dessert combines rich, fudgy brownies with the charming appearance of a pumpkin patch. Perfect for a fun and spooky gathering, these brownies are sure to be a hit among both kids and adults alike.
The base is a classic chocolate brownie made from scratch, topped with vibrant green frosting to mimic the grass, and finished with adorable pumpkin candies for an authentic pumpkin patch look.
These Pumpkin Patch Brownies aren’t only visually appealing but also incredibly easy to make. They provide a delightful mix of textures and flavors, from the moist and chewy brownie base to the sweet, creamy frosting and the candy pumpkins that deliver a burst of seasonal flavor.
Whether you’re hosting a Halloween bash or simply looking to enjoy a festive treat, these brownies will add a touch of whimsy and a delicious twist to your holiday spread.
Ingredients (Serves 4-6)
- 1 cup unsalted butter
- 1 cup granulated sugar
- 1 cup light brown sugar, packed
- 4 large eggs
- 1 teaspoon vanilla extract
- 1 cup all-purpose flour
- 1 cup cocoa powder
- 1/2 teaspoon salt
- 1/2 teaspoon baking powder
- 1 cup semi-sweet chocolate chips
- 1 cup green frosting
- 12-18 candy pumpkins
Instructions
- Preheat the Oven: Start by preheating your oven to 350°F (175°C). Grease and line a 9×13-inch baking pan with parchment paper, leaving some overhang to easily lift the brownies out later.
- Prepare the Brownie Batter: In a medium saucepan, melt the butter over low heat. Once melted, remove from heat and whisk in both sugars until combined. Let it cool slightly, then add the eggs one at a time, whisking after each addition. Stir in the vanilla extract.
- Mix Dry Ingredients: In a separate bowl, sift together the flour, cocoa powder, salt, and baking powder. Gradually add these dry ingredients to the wet mixture, stirring until just combined. Fold in the chocolate chips.
- Bake the Brownies: Pour the brownie batter into the prepared pan, spreading it evenly. Bake in the preheated oven for 25-30 minutes, or until a toothpick inserted in the center comes out with a few moist crumbs. Avoid over-baking to keep them fudgy.
- Cool and Frost: Allow the brownies to cool completely in the pan set on a wire rack. Once cooled, lift them out using the parchment paper overhang.
- Decorate with Frosting and Candy: Spread the green frosting over the cooled brownies to create the grass effect. Arrange the candy pumpkins on top, pressing them gently into the frosting to secure them.
- Serve and Enjoy: Cut the brownies into squares, ensuring each piece has at least one candy pumpkin. Serve them on a festive tray and enjoy!
Extra Tips
For an even more vibrant presentation, consider adding green food coloring to homemade frosting to achieve the perfect grass shade.
If you prefer a thicker layer of frosting, double the frosting ingredients. You can also experiment with adding edible candy stones or crushed chocolate cookies as dirt to enhance the pumpkin patch ambiance.
Store any leftovers in an airtight container at room temperature for up to three days to maintain freshness.
Creepy Crawly Cupcakes
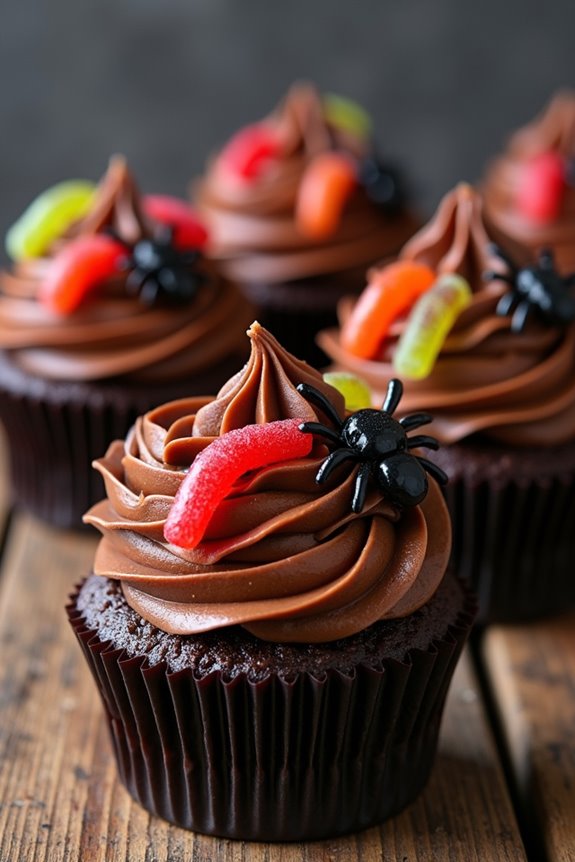
Halloween is the perfect time to let your creativity soar in the kitchen, and what better way to do that than with some delightfully spooky Creepy Crawly Cupcakes? These cupcakes aren’t only fun to make but also a treat for the eyes and taste buds. They’re decorated with gummy worms and candy spiders, making them an exciting addition to any Halloween party spread. Kids and adults alike will enjoy the combination of rich chocolate flavor and playful decorations.
These cupcakes aren’t only visually enchanting but also deliciously moist and chocolatey. The base is a decadent chocolate cupcake topped with rich chocolate frosting. To give them that eerie Halloween flair, edible creepy crawly creatures are added on top. Whether you’re hosting a Halloween bash or simply want to surprise your family with a themed treat, these Creepy Crawly Cupcakes are sure to be a hit. This recipe serves 4-6 people, making it ideal for a small gathering or family dessert.
Ingredients:
- 1 cup all-purpose flour
- 1/2 cup unsweetened cocoa powder
- 1 cup granulated sugar
- 1 teaspoon baking powder
- 1/2 teaspoon baking soda
- 1/4 teaspoon salt
- 1/2 cup unsalted butter, melted
- 2 large eggs
- 1 teaspoon vanilla extract
- 1/2 cup whole milk
- 1/2 cup boiling water
- 1 cup chocolate frosting (store-bought or homemade)
- Gummy worms and candy spiders for decoration
Instructions:
- Preheat Oven and Prepare Muffin Tin: Preheat your oven to 350°F (175°C). Line a muffin tin with cupcake liners to prevent sticking and make removal easier.
- Mix Dry Ingredients: In a large mixing bowl, combine the flour, cocoa powder, sugar, baking powder, baking soda, and salt. Stir them together until they’re well mixed.
- Combine Wet Ingredients: In a separate bowl, beat together the melted butter, eggs, and vanilla extract until smooth. Gradually add the milk, mixing until all the wet ingredients are well combined.
- Mix Batter: Slowly add the wet ingredients to the dry ingredients, mixing until just combined. Pour in the boiling water and stir until the batter is smooth and runny.
- Fill and Bake: Fill each cupcake liner about two-thirds full with the batter. Bake in the preheated oven for 18-20 minutes, or until a toothpick inserted into the center comes out clean. Allow the cupcakes to cool in the tin for 5 minutes before transferring them to a wire rack to cool completely.
- Frost and Decorate: Once the cupcakes are completely cooled, spread or pipe chocolate frosting onto each one. Place gummy worms and candy spiders on top of the frosting to create the creepy crawly effect.
Extra Tips:
When decorating the cupcakes, feel free to get creative with your candy placements to create different creepy effects. You can also use edible glitter or colored sprinkles to add an extra spooky touch.
If you want to enhance the chocolate flavor, consider adding a teaspoon of espresso powder to the dry ingredients. Remember, the boiling water helps to intensify the cocoa, so don’t skip this step for the best flavor profile.
Enjoy these deliciously spooky treats and the Halloween spirit they bring!
Frankenstein Rice Krispie Treats
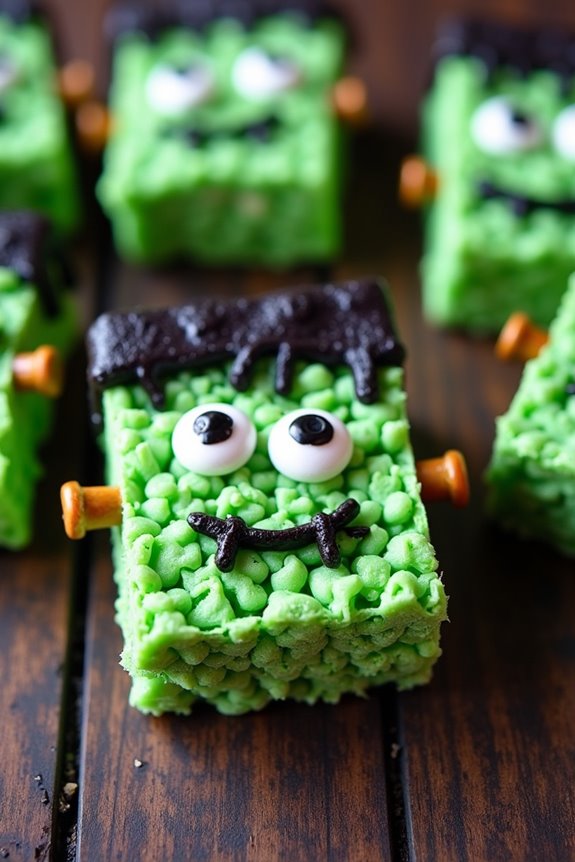
Frankenstein Rice Krispie Treats are a fun and spooky twist on the classic snack, perfect for any Halloween gathering. These treats aren’t only delicious but also offer a creative opportunity for kids and adults to join in the kitchen fun. The combination of gooey marshmallows and crispy rice cereal, paired with some clever decorating, results in a treat that’s both eye-catching and delicious.
With their vibrant green color and playful faces, these adorable treats are sure to be a hit at any Halloween party. Crafting these Frankenstein Rice Krispie Treats is a delightfully simple process that requires just a few ingredients and some imagination. The vibrant green hue is achieved with food coloring, and the facial features are made using a few easy-to-find candies.
Ideal for a serving size of 4-6 people, this recipe will produce a batch of approximately 12-16 treats, depending on how large you decide to cut them.
Ingredients:
- 4 tablespoons unsalted butter
- 1 package (10 oz) mini marshmallows
- 6 cups crispy rice cereal
- Green food coloring
- 1 cup mini chocolate chips
- Black icing or gel for decorating
- Candy eyes
- Pretzel sticks, broken in half
Cooking Instructions:
- Melt the Butter: In a large saucepan over medium heat, melt the butter. Stir frequently to guarantee it doesn’t burn.
- Add Marshmallows: Once the butter is melted, add the mini marshmallows to the saucepan. Stir continuously until they’re completely melted and smooth.
- Add Food Coloring: Remove the saucepan from heat and quickly stir in green food coloring until the marshmallow mixture reaches your desired shade of green.
- Mix in Cereal: Add the crispy rice cereal to the green marshmallow mixture, stirring until the cereal is evenly coated.
- Press into Pan: Prepare a 9×13-inch pan by lining it with parchment paper. Pour the mixture into the pan and press it down gently with a spatula or your hands (buttered or oiled to prevent sticking) to form an even layer.
- Cool and Cut: Allow the mixture to cool completely in the pan. Once set, lift the parchment paper to remove the treats and cut them into rectangles or squares.
- Decorate: Use the black icing or gel to draw a mouth and hair on each piece. Place candy eyes on each treat to bring your Frankenstein to life. Insert half a pretzel stick on each side of the treat to mimic bolts.
Extra Tips:
For a more detailed Frankenstein face, you can use different colored icing for additional features like scars or stitches. If you have a nut allergy concern, be sure to use pretzel sticks that are nut-free.
To prevent your hands from sticking while shaping the treats, keep them slightly damp or use a bit of butter. Finally, if you want to make these treats ahead of time, store them in an airtight container to keep them fresh for up to two days. Enjoy your monstrously delightful creation!
Bloody Popcorn Mix
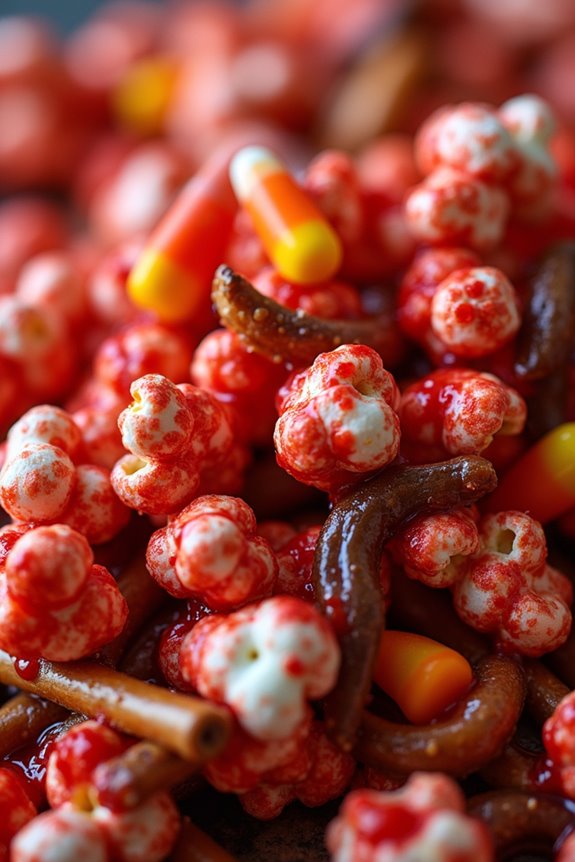
Looking for a spooktacular treat to serve at your Halloween bash? This Bloody Popcorn Mix is the perfect combination of sweet, salty, and spooky. It’s easy to make and is sure to be a hit with ghosts and ghouls of all ages.
The mix features traditional popcorn tossed with a sweet and sticky red syrup to mimic blood, along with a few extra Halloween-themed surprises for added fun. This recipe serves 4-6 people and is ideal for a Halloween movie night or party.
The vibrant red color of the syrup gives the popcorn a creepy, blood-soaked appearance, while the sweet taste balances out the savory popcorn perfectly. Let’s plunge into the ingredients and steps needed to create this eerie yet delicious snack.
Ingredients (serving size: 4-6 people):
- 8 cups popped popcorn (preferably plain or lightly salted)
- 1 cup sugar
- 1/4 cup light corn syrup
- 1/4 cup water
- 1/4 teaspoon cream of tartar
- Red food coloring
- 1 cup pretzel sticks
- 1 cup candy corn
- 1 cup gummy worms
Instructions:
- Prepare the Popcorn: Begin by popping 8 cups of plain or lightly salted popcorn. Spread the popcorn out on a large baking sheet lined with parchment paper. Confirm the popcorn is evenly spread out and remove any unpopped kernels to avoid unpleasant surprises.
- Make the Syrup: In a medium saucepan, combine the sugar, corn syrup, water, and cream of tartar. Stir the mixture over medium heat until the sugar has dissolved.
- Increase the heat to medium-high and bring the mixture to a boil without stirring.
- Add the Color: Once the syrup reaches a boil, add several drops of red food coloring until you achieve your desired shade of blood red. Continue boiling the syrup until it reaches the “soft crack” stage, approximately 290°F (use a candy thermometer for accuracy).
- Coat the Popcorn: Carefully drizzle the hot syrup over the popcorn, using a spatula to gently toss and coat the popcorn evenly. Work quickly as the syrup will harden as it cools.
- Add Extra Goodies: Before the syrup fully sets, sprinkle the pretzel sticks, candy corn, and gummy worms over the popcorn. Toss gently again to incorporate these elements into the mix.
- Cool and Serve: Allow the Bloody Popcorn Mix to cool completely on the baking sheet. Once cooled, break it into clusters and serve in a large bowl for everyone to enjoy.
Extra Tips: For an even spookier effect, consider adding other Halloween-themed candies like eyeball gumballs or chocolate spiders.
When making the syrup, be cautious of the hot sugar mixture, as it can cause burns. If you prefer a less sweet version, reduce the amount of sugar in the syrup or opt for a mix of savory and sweet popcorn.
Store any leftovers in an airtight container to keep the popcorn fresh and crunchy.
Monster Mouth Apple Slices
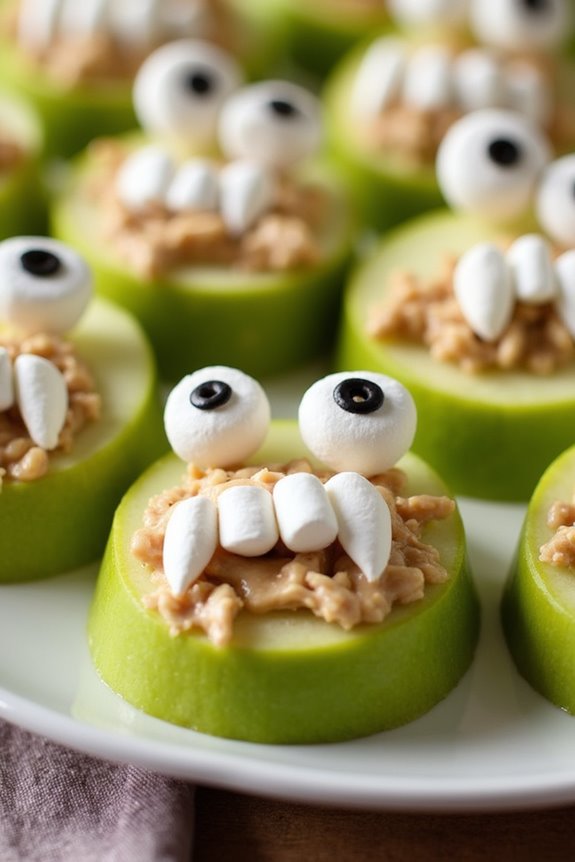
Monster Mouth Apple Slices are a fun and healthy treat that’s perfect for Halloween parties or any spooky gathering. These creative snacks aren’t only visually appealing but also provide a nutritious option amidst the candy-laden festivities. The combination of sweet apples, creamy peanut butter, and chewy marshmallows makes for a delightful mix of textures and flavors that both kids and adults will enjoy.
This recipe is simple enough for children to participate in, making it a great family activity. Plus, it’s versatile, allowing for substitutions to accommodate dietary restrictions or personal preferences. Whether you’re hosting a Halloween party or just looking for a themed snack to enjoy at home, Monster Mouth Apple Slices are sure to be a hit.
Ingredients for Monster Mouth Apple Slices (Serving Size: 4-6 people):
- 4 medium apples (preferably green, like Granny Smith)
- 1 cup creamy peanut butter
- 1 cup mini marshmallows
- 1/2 cup slivered almonds or sunflower seeds
- 1 tablespoon lemon juice
Cooking Instructions:
- Prepare the Apples: Begin by washing and drying the apples thoroughly. Cut each apple into quarters and remove the core. Then, slice each quarter into halves to create ‘lips’ for the monster mouths.
- Prevent Browning: To keep the apple slices from browning, lightly brush each slice with lemon juice. This will also add a slight tang to balance the sweetness.
- Assemble the Monster Mouths: Spread a generous layer of peanut butter onto one side of an apple slice. This will act as the ‘glue’ to hold the mouth together.
- Add the Teeth: Press mini marshmallows into the peanut butter on one slice to form the ‘teeth’. Use four to five marshmallows for each mouth, spacing them evenly.
- Complete the Sandwich: Take another apple slice and place it on top of the marshmallow layer, peanut butter side down, creating a sandwich. Slightly offset the top slice to give the mouth an open appearance.
- Create the Monster Look: For additional texture and a more monstrous look, stick slivered almonds or sunflower seeds around the marshmallow ‘teeth’ to add some ‘fangs’ or texture.
- Serve: Arrange the Monster Mouth Apple Slices on a platter and serve them immediately, or store them in an airtight container in the refrigerator until ready to serve.
Extra Tips:
For those with peanut allergies, consider using sunflower seed butter or almond butter as a substitute. If you want to add a bit more sweetness or color, try using colored mini marshmallows or even small bits of dried cranberries as ‘gums’.
To make the preparation process even faster, you can pre-slice the apples and store them in lemon water until you’re ready to assemble the snacks. Remember, the key is to have fun and let your creativity shine while making these Monster Mouth Apple Slices!
Vampire Bat Cheese Balls
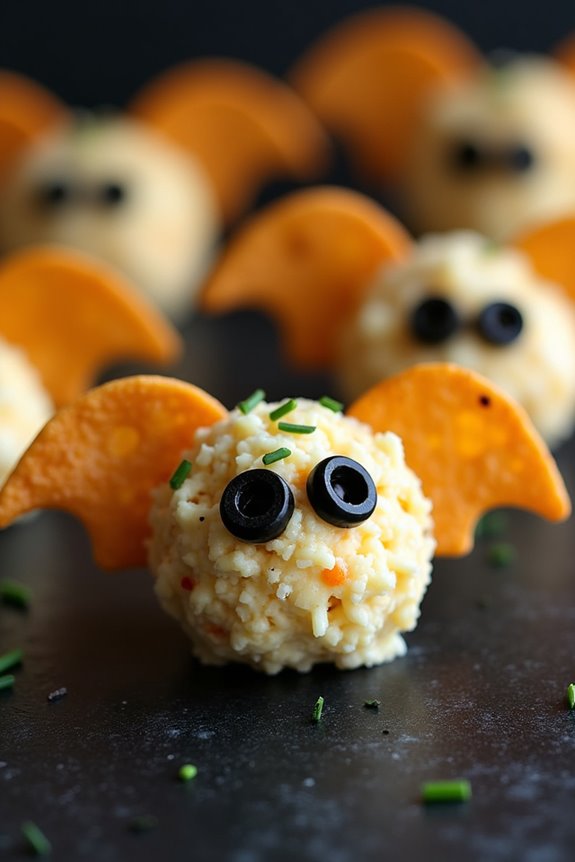
Vampire Bat Cheese Balls are a spooky and delicious addition to any Halloween party spread. These delightful snacks aren’t only visually appealing but also packed with creamy and savory flavors that are bound to be a hit among both kids and adults.
Shaped like little bats, they offer a fun and festive twist to the traditional cheese ball appetizer. Perfect for serving at a Halloween gathering, these cheese balls are both easy to make and certain to impress your guests.
The recipe involves forming a creamy cheese mixture into small balls, then adding creative decorations to transform them into mini vampire bats. The combination of cream cheese, sharp cheddar, and a hint of garlic creates a rich and flavorful base, while the decorations made from olives and tortilla chips add both texture and a playful Halloween theme.
This recipe makes enough for a serving size of 4-6 people, guaranteeing that everyone gets a taste of these spooky treats.
Ingredients for 4-6 servings:
- 8 oz cream cheese, softened
- 1 cup shredded sharp cheddar cheese
- 1 teaspoon garlic powder
- 1 teaspoon Worcestershire sauce
- Salt and pepper to taste
- Black olives (for eyes)
- Tortilla chips (for wings)
- 1/4 cup finely chopped chives (optional, for rolling)
Cooking Instructions:
1. Prepare the Cheese Mixture:
In a large mixing bowl, combine the softened cream cheese, sharp cheddar cheese, garlic powder, Worcestershire sauce, salt, and pepper. Mix thoroughly until all ingredients are well combined and the mixture is smooth.
2. Shape the Cheese Balls:
Using your hands, form the cheese mixture into small balls, about 1 to 1.5 inches in diameter. Place the balls on a lined baking tray or platter.
3. Add the Bat Features:
For the eyes, slice black olives into small pieces and gently press two pieces into each cheese ball. For the wings, break tortilla chips into bat wing shapes and insert one on each side of the cheese ball.
4. Chill the Cheese Balls:
Once the cheese balls are fully decorated, refrigerate them for at least 1 hour to allow them to firm up and for the flavors to meld together.
5. Optional Chive Coating:
If desired, roll each cheese ball in finely chopped chives before adding the decorations for an extra burst of flavor and color.
Extra Tips:
To make certain your Vampire Bat Cheese Balls maintain their spooky shape, confirm that the cream cheese is well softened before mixing, which will help the ingredients blend smoothly.
If the cheese balls are too sticky to handle, try chilling the mixture for about 15 minutes before forming the balls. For added convenience, these can be prepared a day in advance and stored in the refrigerator until serving time.
Just make sure to reserve adding the tortilla chip wings until shortly before serving to guarantee they remain crisp.