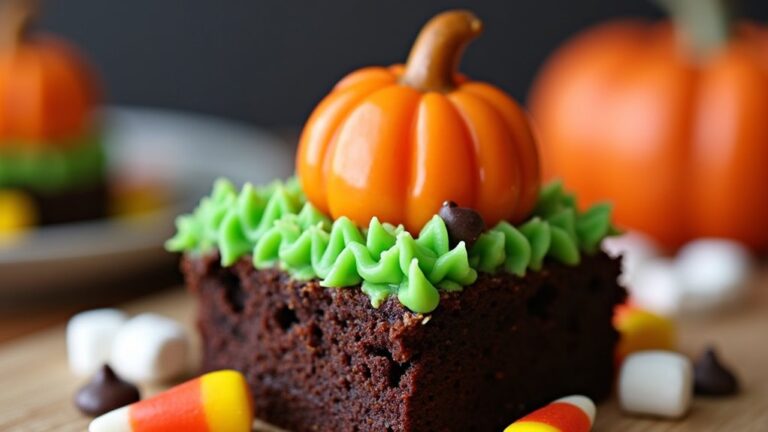
As Halloween creeps closer, I find myself bubbling with excitement over fun and festive finger foods to share with friends and family. Last year, my spooky spider deviled eggs were the talk of the party, and this time, I’m thrilled to unveil whimsical bites like witch’s broomstick pretzels and mummified mini hot dogs. Each treat offers a delightful twist on familiar flavors, perfect for adding a touch of magic to any gathering. I can’t wait to see which one will be the star of the show this year. Are you as curious as I am?
Spooky Spider Deviled Eggs
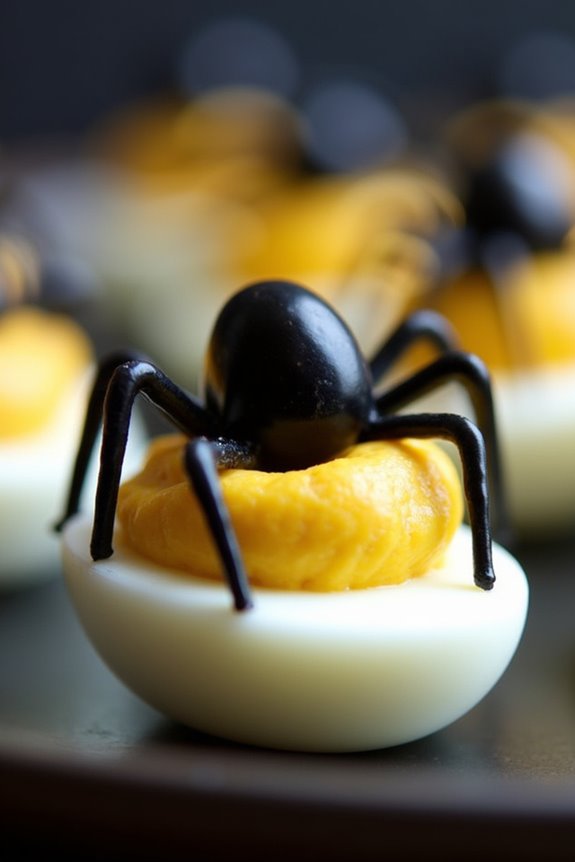
Spooky Spider Deviled Eggs are the perfect Halloween finger food to add a creepy touch to your festive spread. These devilish delights not only taste amazing but also bring a fun, eerie vibe to your serving table. With their unique twist on the classic deviled eggs, they’re sure to grab everyone’s attention and become a conversation starter.
Whether you’re hosting a Halloween party or just looking to add some spooky flair to your family meal, these deviled eggs won’t disappoint.
The essence of Spooky Spider Deviled Eggs lies in their creative presentation and rich, tangy flavor. The creamy yolk mixture is infused with a hint of spice and a touch of mustard, giving each bite a burst of flavor. The spider decoration is made using black olives, which adds an extra layer of taste and a visually striking element to the dish.
Perfect for serving 4-6 people, these eggs are easy to prepare, and the ingredients are simple yet effective in creating a memorable Halloween experience.
Ingredients (Serves 4-6):
- 6 large eggs
- 3 tablespoons mayonnaise
- 1 teaspoon Dijon mustard
- 1/2 teaspoon white vinegar
- Salt and pepper to taste
- 1 can (6 oz) black olives
Cooking Instructions:
- Boil the Eggs: Place the eggs in a single layer in a saucepan and cover them with water. Bring the water to a boil over medium-high heat. Once boiling, turn off the heat, cover the pan, and let the eggs sit for 10-12 minutes. This method guarantees perfectly hard-boiled eggs.
- Cool and Peel: After boiling, transfer the eggs to a bowl of ice water to cool for about 5 minutes. Once cooled, peel the eggs carefully to avoid damaging the whites.
- Prepare the Filling: Slice each egg in half lengthwise and gently remove the yolks. Place the yolks in a mixing bowl and set the whites aside on a serving platter.
- Mix the Yolk Filling: Add mayonnaise, Dijon mustard, white vinegar, salt, and pepper to the yolks. Mash and mix until smooth and creamy. Adjust seasoning if necessary.
- Fill the Egg Whites: Using a spoon or a piping bag, fill each egg white half with the yolk mixture, creating a small mound.
- Create the Olive Spiders: Cut black olives in half lengthwise. Use one half as the spider body and slice the other half into thin strips to form the legs. Arrange the olive pieces on the yolk filling to resemble spiders, ensuring each egg has a complete spider.
- Serve: Once all the eggs have their spider decorations, place the platter in the refrigerator to chill before serving. This allows the flavors to meld together.
Extra Tips:
When making Spooky Spider Deviled Eggs, be sure to use fresh eggs for easy peeling. Older eggs tend to be difficult to peel and may break when removing the shell.
If you’re not a fan of Dijon mustard, you can substitute it with regular mustard for a milder flavor. For a more dramatic presentation, consider using a pastry bag with a star tip to pipe the yolk mixture into the egg whites. This not only creates an appealing texture but also makes the dish look more polished and festive.
Creepy Crawly Cheese Balls
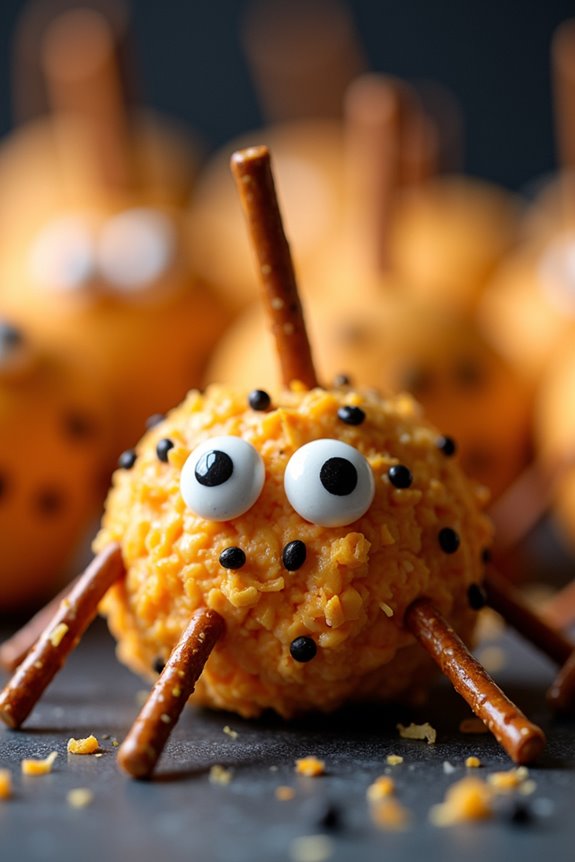
Get ready to spook your guests with these deliciously eerie Creepy Crawly Cheese Balls, perfect for your Halloween festivities. These bite-sized morsels aren’t only visually enchanting but also packed with creamy, tangy flavors that will leave your party-goers craving more.
Whether you’re hosting a haunted house party or a cozy family gathering, these cheese balls are a surefire way to add a touch of whimsy and fright to your Halloween spread.
The beauty of Creepy Crawly Cheese Balls lies not only in their taste but also in their versatility. Customize them with your favorite mix-ins and decorations to suit your theme, making them a versatile centerpiece for your snack table.
Each cheese ball is crafted to resemble a creepy crawly creature, complete with edible legs and eyes, making them as fun to look at as they’re to eat. So, gather your ingredients, don your chef’s hat, and let’s plunge into this ghoulishly delicious recipe perfect for serving 4-6 people.
Ingredients:
- 8 oz cream cheese, softened
- 1 cup sharp cheddar cheese, shredded
- 1/2 cup blue cheese, crumbled
- 1/4 cup finely chopped chives
- 1/2 teaspoon garlic powder
- 1/2 teaspoon onion powder
- 1/4 teaspoon cayenne pepper
- Salt and pepper, to taste
- 1/2 cup crushed pretzels
- 1/4 cup black sesame seeds
- 1/2 cup mini pretzel sticks
- 12-16 candy eyes or small edible eyeball decorations
Cooking Instructions:
- Prepare the Cheese Mixture: In a large mixing bowl, combine the softened cream cheese, shredded cheddar cheese, and crumbled blue cheese. Use a hand mixer or a sturdy spatula to blend the cheeses until smooth and well-combined.
- Add Seasonings: Mix in the chopped chives, garlic powder, onion powder, cayenne pepper, and a pinch of salt and pepper. Stir until the seasonings are evenly distributed throughout the cheese mixture.
- Shape and Chill: Using a tablespoon, scoop out portions of the cheese mixture and roll them into small balls with your hands. Place each ball on a baking sheet lined with parchment paper. Once all balls are formed, refrigerate them for at least 30 minutes to firm up.
- Coat the Cheese Balls: In separate shallow dishes, place the crushed pretzels and black sesame seeds. Roll half of the cheese balls in the crushed pretzels and the other half in the sesame seeds, making sure each ball is thoroughly coated.
- Decorate: Insert mini pretzel sticks into the sides of each cheese ball to create “legs.” Use candy eyes or edible eyeball decorations to give your creepy crawly cheese balls a face. Press the eyes gently into the cheese balls so they stay in place.
- Serve: Arrange the decorated cheese balls on a platter, and serve them to your guests. These spooky snacks are best enjoyed chilled, so keep them in the fridge until ready to serve.
Extra Tips:
For an extra twist, consider adding different flavor elements to your cheese mixture, such as finely chopped jalapeños for a spicy kick or dried cranberries for a touch of sweetness.
If you prefer a less salty option, opt for unsalted pretzels. Additionally, make sure your cheese is thoroughly softened before mixing to avoid lumps and achieve a smooth consistency.
Finally, get creative with your decorations—use different types of edible eyes or add a drop of food coloring to your cheese mix for an even more dramatic effect.
Ghostly Guacamole Cups
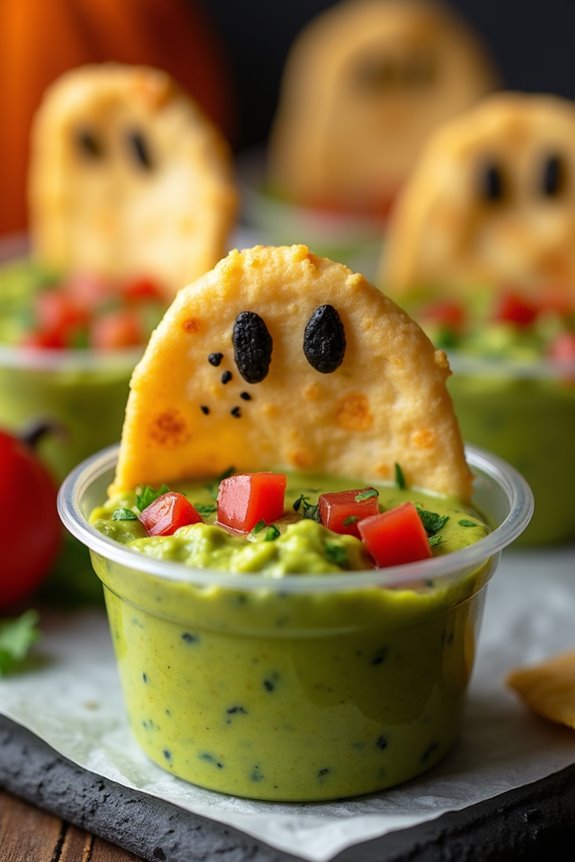
As Halloween approaches, it’s time to add a spooky twist to your party menu with these Ghostly Guacamole Cups. Perfect for a gathering of 4-6 people, these fun and delicious treats are sure to be a hit with both kids and adults. The creamy guacamole, served in individual cups and topped with ghost-shaped tortilla chips, makes for a visually appealing and tasty appetizer. The combination of fresh avocados, zesty lime, and a hint of spice creates a flavorful base that pairs perfectly with the crisp and whimsical ghost chips.
These Ghostly Guacamole Cups aren’t only festive but also easy to prepare, making them a great choice for any Halloween celebration. Whether you’re planning a small get-together or a larger Halloween bash, this recipe will add a touch of creativity and flavor to your menu. The individual servings make it convenient for guests to enjoy, and the presentation is sure to add to the fun Halloween ambiance.
Ingredients (Serves 4-6):
- 3 ripe avocados
- 1 lime, juiced
- 1 small red onion, finely chopped
- 1 medium tomato, diced
- 1 jalapeño, seeded and finely chopped
- 2 tablespoons fresh cilantro, chopped
- Salt and pepper, to taste
- 6-8 small corn tortillas
- Olive oil spray
- Black sesame seeds (for ghost eyes and mouth)
- 6 small clear plastic cups
Instructions:
- Prepare the Tortilla Ghosts: Preheat your oven to 350°F (175°C). Use a ghost-shaped cookie cutter to cut ghost shapes out of the corn tortillas. Lightly spray both sides of the tortilla ghosts with olive oil and place them on a baking sheet. Bake for 8-10 minutes or until golden brown and crispy. Remove from the oven and let them cool.
- Make the Guacamole: Cut the avocados in half, remove the pits, and scoop the flesh into a mixing bowl. Mash the avocados with a fork or potato masher until smooth but still a bit chunky. Add lime juice, red onion, tomato, jalapeño, and cilantro to the bowl. Mix until combined. Season with salt and pepper to taste.
- Assemble the Cups: Divide the guacamole evenly among the small clear plastic cups. Insert a tortilla ghost into the guacamole in each cup, making sure they stand upright.
- Decorate the Ghosts: Use black sesame seeds to create eyes and mouths on the tortilla ghosts. The seeds should stick easily to the tortillas when gently pressed.
- Serve Immediately: Arrange the Ghostly Guacamole Cups on a serving platter and serve immediately to guarantee the tortilla ghosts remain crispy.
Extra Tips:
To guarantee the best flavor, use ripe avocados that give slightly when pressed gently. If you prefer a mild guacamole, you can omit the jalapeño or reduce the amount used. To prevent the guacamole from browning, cover it tightly with plastic wrap until ready to serve.
Finally, you can prepare the tortilla ghosts a day in advance and store them in an airtight container to save time on the day of your event.
Witch’s Broomstick Pretzels
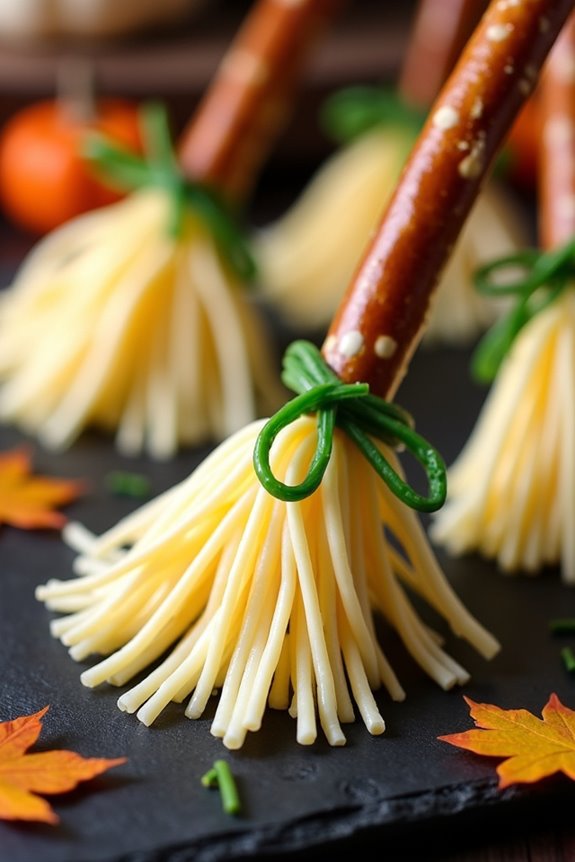
Witch’s Broomstick Pretzels are a fun and festive addition to any Halloween gathering. These savory snacks aren’t only easy to prepare but are also certain to impress your guests with their creative presentation. The combination of salty pretzels and creamy cheese creates a delightful taste that will have everyone reaching for more.
Perfect for setting the spooky atmosphere, these broomstick appetizers provide a whimsical touch to your Halloween finger food spread. Crafting these Witch’s Broomstick Pretzels is a straightforward process that requires only a few ingredients and minimal preparation time. The key to this recipe is the visual appeal, as each broomstick is carefully assembled to resemble the classic witch’s cleaning tool.
With a serving size that caters to 4-6 people, this dish is ideal for smaller Halloween parties or family gatherings. Let your creativity fly as you assemble these broomsticks, making your Halloween celebration both tasty and memorable.
Ingredients (Serving Size: 4-6 people):
- 12 thick pretzel sticks
- 6 string cheese sticks
- Fresh chives or green onions
Cooking Instructions:
- Prepare the Cheese: Begin by unwrapping the string cheese sticks. Cut each stick in half to create two shorter pieces. Carefully, use a knife to make several vertical cuts on one end of the cheese, about halfway up, to create the appearance of broom bristles.
- Assemble the Broomsticks: Take a pretzel stick and gently insert the uncut end into the top of each piece of string cheese. Guarantee the pretzel stick is secured and doesn’t split the cheese.
- Tie the Brooms: Carefully wrap a small piece of chive or green onion around the top part of the cheese where it meets the pretzel stick. This will give the broomstick a more realistic appearance. Secure the chive by tying it into a small knot or tucking the ends under.
- Repeat and Serve: Continue assembling the broomsticks until all the pretzel sticks and cheese pieces are used. Arrange the completed broomsticks on a platter for serving, ensuring they’re spaced out to showcase their unique design.
Extra Tips:
For an added touch of flavor, consider using flavored string cheese such as cheddar or jalapeño to give the Witch’s Broomstick Pretzels an extra kick. If you find that the chives or green onions are difficult to tie, you can blanch them quickly in hot water to make them more pliable.
Remember that presentation is key, so take your time in assembling each broomstick to guarantee they look as enchanting as they taste.
Mummified Mini Hot Dogs
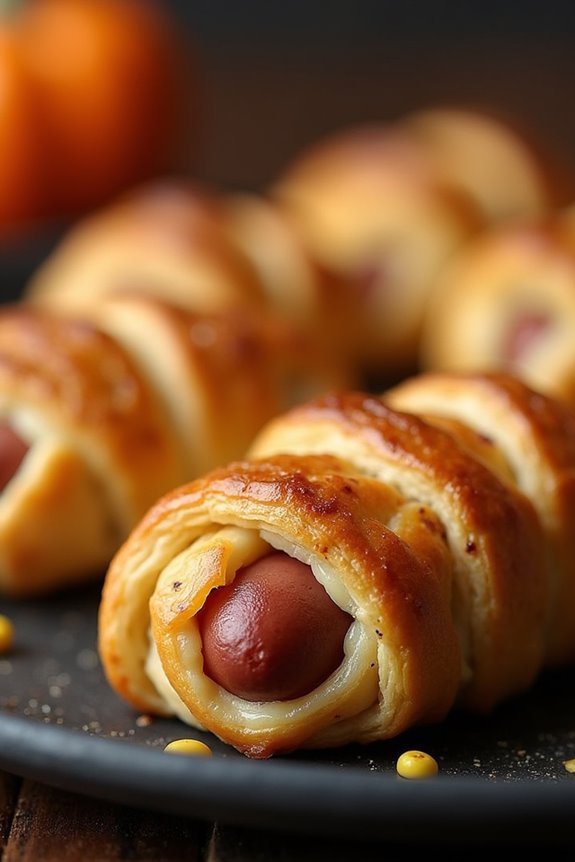
Transform your Halloween party into a spooky feast with these delightful Mummified Mini Hot Dogs. Perfect for a serving size of 4-6 people, these bite-sized treats aren’t only easy and quick to make but also a fun addition to your Halloween spread. Wrapped in a golden, flaky crescent roll dough, these mini hot dogs resemble tiny mummies, adding a playful touch to your party table. Serve them with various dipping sauces to satisfy both kids and adults alike.
This recipe is a crowd-pleaser and takes minimal effort, allowing you to spend more time enjoying the party rather than being stuck in the kitchen. They can be prepared ahead of time and simply popped into the oven right before your guests arrive. With a few simple ingredients and some creativity, you can whip up these Mummified Mini Hot Dogs and guarantee your Halloween gathering is unforgettable.
Ingredients for a Serving Size of 4-6 People:
- 1 package of mini hot dogs or cocktail sausages (about 24 pieces)
- 1 can of refrigerated crescent roll dough
- 1 egg
- 1 tablespoon of water
- Mustard or ketchup for eyes (optional)
- Cooking spray or parchment paper
Cooking Instructions:
- Preheat the Oven: Begin by preheating your oven to 375°F (190°C). This will guarantee that it reaches the right temperature by the time you’re ready to bake the mini hot dogs.
- Prepare the Baking Sheet: Line a baking sheet with parchment paper or lightly coat it with cooking spray to prevent the mini mummies from sticking.
- Unroll the Dough: Open the can of crescent roll dough and unroll it onto a clean surface. Separate the dough into its pre-cut triangular sections.
- Slice the Dough: Using a sharp knife or a pizza cutter, slice each triangular section into thin strips about 1/4 inch wide. These strips will be used to wrap around the mini hot dogs, creating the mummy effect.
- Wrap the Mini Hot Dogs: Take each mini hot dog and wrap it with 2-3 strips of dough, leaving a small gap unwrapped to create a face area. Overlap the dough slightly and press gently to secure it.
- Prepare the Egg Wash: In a small bowl, whisk together the egg and water to create an egg wash. This will give the dough a nice golden color when baked.
- Brush with Egg Wash: Using a pastry brush, lightly coat each wrapped mini hot dog with the egg wash. This step is optional but recommended for a shiny, golden finish.
- Bake: Place the wrapped mini hot dogs onto the prepared baking sheet and bake in the preheated oven for 12-15 minutes, or until the dough is golden brown and cooked through.
- Add Eyes: If desired, use a small dab of mustard or ketchup to create eyes on each mummy after they’ve cooled slightly. A toothpick can help with precision.
- Serve: Arrange the Mummified Mini Hot Dogs on a platter and serve with your choice of dipping sauces.
Extra Tips:
When making Mummified Mini Hot Dogs, feel free to get creative with the wrapping for a more authentic mummy appearance. The dough strips don’t have to be perfectly even; in fact, uneven strips add to the fun, rustic look.
If you’re serving these to children, consider using food-safe markers to draw on eyes instead of using mustard or ketchup. Additionally, these mini hot dogs can be prepared a few hours in advance and stored in the refrigerator until you’re ready to bake them. Just be sure to cover them with plastic wrap to prevent the dough from drying out.
Bat Wing Chicken Bites
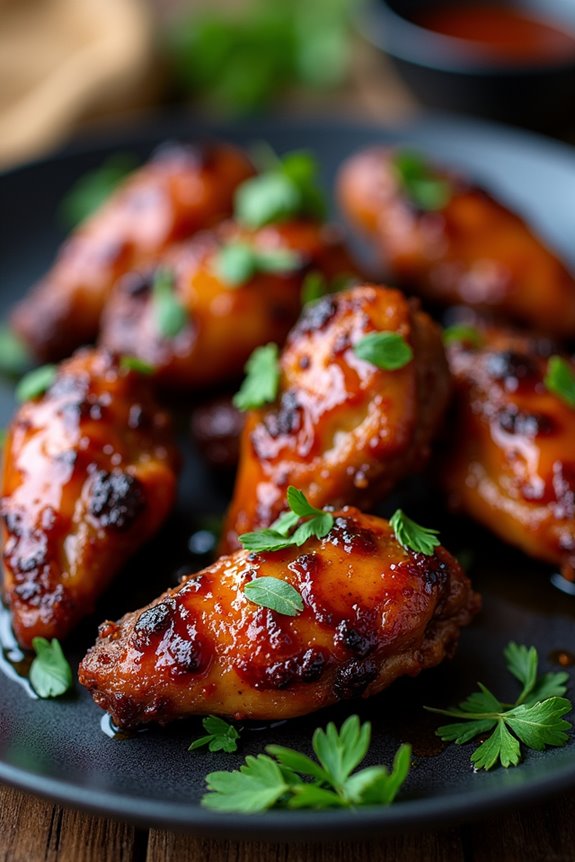
Transform your Halloween party into an eerie culinary experience with Bat Wing Chicken Bites. This spooky dish features succulent chicken wings coated in a rich, dark marinade that mimics the appearance of bat wings, making it a perfect appetizer for the occasion. The flavors are a tantalizing blend of savory, spicy, and sweet, guaranteeing that your guests will come back for more.
These Bat Wing Chicken Bites are as delicious as they’re visually impressive, creating a memorable addition to your Halloween spread. Designed to serve 4-6 people, this recipe is easy to prepare and cook, making it ideal for both experienced home cooks and those who are just starting out. With just a few steps, you can bring these ghoulish treats to life and delight your friends and family with your culinary creativity.
Ingredients (Serves 4-6):
- 2 pounds of chicken wings
- 1/4 cup soy sauce
- 1/4 cup balsamic vinegar
- 2 tablespoons honey
- 2 tablespoons olive oil
- 1 tablespoon Worcestershire sauce
- 2 teaspoons garlic powder
- 1 teaspoon onion powder
- 1 teaspoon smoked paprika
- 1/2 teaspoon black pepper
- 1/2 teaspoon cayenne pepper
- Black food coloring (optional)
- Fresh parsley for garnish
Instructions:
- Prepare the Chicken Wings: Rinse and pat dry the chicken wings with paper towels. If needed, cut the wings into drumettes and wingettes, discarding the tips.
- Make the Marinade: In a large mixing bowl, combine soy sauce, balsamic vinegar, honey, olive oil, Worcestershire sauce, garlic powder, onion powder, smoked paprika, black pepper, and cayenne pepper. Mix until well combined.
- Add Color: If you’re aiming for a more dramatic presentation, add a few drops of black food coloring to the marinade and stir until evenly distributed. This will give the chicken wings a dark, bat-like appearance.
- Marinate the Wings: Place the chicken wings in the marinade, guaranteeing all pieces are thoroughly coated. Cover the bowl with plastic wrap or transfer the wings and marinade to a zip-lock bag. Refrigerate for at least 2 hours, or overnight for best results.
- Preheat the Oven: Preheat your oven to 400°F (200°C). Line a baking sheet with aluminum foil and place a wire rack on top. This will help guarantee even cooking.
- Arrange and Bake: Remove the wings from the marinade, shaking off any excess liquid. Arrange them on the wire rack in a single layer. Bake in the preheated oven for 30-35 minutes, turning halfway through, until the wings are fully cooked and slightly crispy.
- Serve: Once done, remove the wings from the oven. Arrange them on a serving platter and garnish with fresh parsley for a pop of color. Serve hot and enjoy the spooky delight!
Extra Tips:
For an even crispier texture, you can broil the wings for an additional 2-3 minutes after baking. Keep a close eye to prevent burning.
If you prefer a milder flavor, adjust the cayenne pepper to your taste. Black food coloring is optional but recommended for the full Halloween effect.
Make sure to use gloves when handling the food coloring to avoid staining your hands. Enjoy your Halloween feast with these visually striking and delicious Bat Wing Chicken Bites!
Monster Mouth Apple Slices
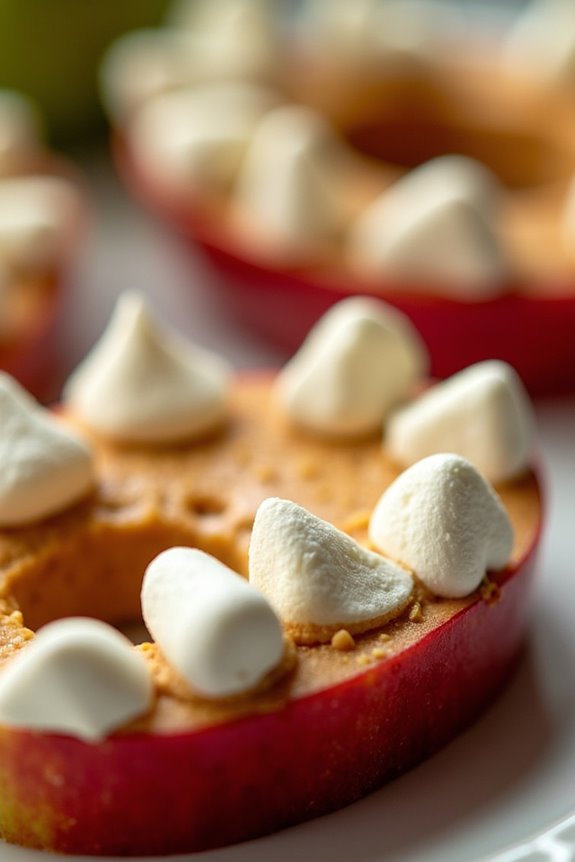
Monster Mouth Apple Slices are a delightful and spooky treat perfect for Halloween gatherings. These fun and healthy snacks aren’t only easy to make but are guaranteed to be a hit with both kids and adults. The combination of sweet apples, creamy peanut butter, and crunchy almonds creates a deliciously creepy snack that resembles a monster’s mouth, complete with jagged teeth.
These apple slices are great for serving at parties, as they can be made quickly and require minimal ingredients. The recipe also allows for some creativity, as you can adjust the ingredients to accommodate dietary preferences or restrictions. Whether you’re hosting a Halloween bash or just looking for a fun way to celebrate the season, these Monster Mouth Apple Slices are bound to impress.
Ingredients for 4-6 people:
- 3 large apples (Granny Smith or Red Delicious)
- 1 cup creamy peanut butter (or almond butter for allergies)
- 1 cup mini marshmallows
- 1/2 cup slivered almonds
- Lemon juice (optional, for preventing apple browning)
Instructions:
- Prepare the Apples: Begin by washing the apples thoroughly under running water. Slice each apple into quarters and remove the core. For each quarter, carefully cut a wedge out of the skin side to create the “mouth” opening. You should end up with 24 apple wedges.
- Prevent Browning: If you want to keep the apple slices from browning too quickly, lightly brush the cut sides with lemon juice. This step is optional but can help maintain the apples’ fresh appearance.
- Assemble the Mouths: Spread a generous amount of peanut butter inside each apple wedge’s mouth opening. This will act as the “glue” for the other ingredients.
- Add the Teeth: Insert mini marshmallows into the peanut butter along the top and bottom of the apple wedge to mimic teeth. Confirm they’re placed evenly for a balanced look.
- Create the Monster Effect: To add a more monstrous appearance, press slivered almonds into the peanut butter between the marshmallows to create sharp, fang-like teeth.
- Serve and Enjoy: Arrange the Monster Mouth Apple Slices on a platter, and serve them immediately for a fresh and fun Halloween treat.
Extra Tips:
When selecting apples for this recipe, choose ones that are firm and crisp to guarantee they hold their shape. If you’re accommodating nut allergies, sunflower seed butter can be a great alternative to peanut butter.
You can also get creative by using other types of nuts for the teeth or adding a bit of red food coloring to the peanut butter to make the mouths look extra spooky. Remember to prepare these snacks close to serving time to keep the apples fresh and vibrant.
Eyeball Caprese Bites
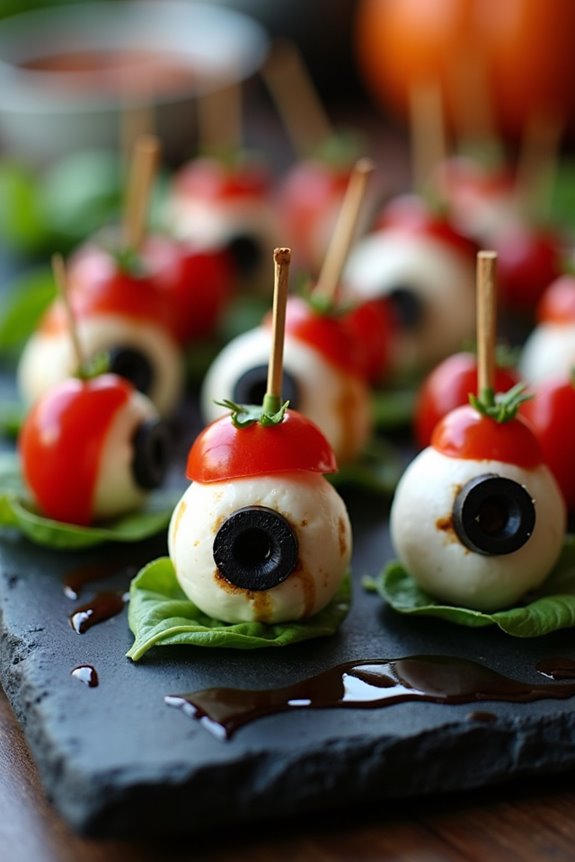
Eyeball Caprese Bites are a spooky and delicious addition to any Halloween party. These appetizers put a fun twist on the classic Caprese salad, turning them into eerie eyeballs that are bound to impress your guests. Not only are they visually appealing, but they also offer the fresh flavors of mozzarella, tomato, and basil with a hint of balsamic glaze.
Perfect for those who love a mix of creativity and taste, these bites are easy to prepare and make for a great conversation starter. This dish is ideal for serving 4-6 people and is both quick to assemble and filled with flavor. The combination of creamy mozzarella and ripe cherry tomatoes is complemented by the aromatic basil, creating a delightful balance that’s enhanced by the tangy balsamic glaze.
The addition of black olives gives the bites their signature “eyeball” look, making them a perfect fit for Halloween festivities. Whether you’re hosting a spooky gathering or just looking to add some fun to your dinner table, these Eyeball Caprese Bites are bound to be a hit.
Ingredients:
- 12 cherry tomatoes
- 12 small fresh mozzarella balls (bocconcini)
- 12 black olives
- 12 fresh basil leaves
- Salt and pepper to taste
- Balsamic glaze
- Toothpicks or small skewers
Cooking Instructions:
- Prepare the Ingredients: Begin by washing the cherry tomatoes and basil leaves. Once clean, pat them dry with a paper towel to remove any excess moisture.
- Assemble the Eyeballs: Take a toothpick or small skewer and start by placing a cherry tomato on it. Follow this by adding a fresh basil leaf, then a mozzarella ball.
- Create the Eyeball Effect: Slice the black olives into small pieces that can fit on the mozzarella balls. Place one slice of black olive on top of each mozzarella ball to create the “pupil” of the eyeball.
- Season and Finish: Once all the skewers are assembled, arrange them on a serving platter. Lightly season the bites with salt and pepper to enhance the flavors. Drizzle balsamic glaze over the top for added taste and visual appeal.
Extra Tips:
When preparing Eyeball Caprese Bites, choose fresh and firm cherry tomatoes for the best texture. If balsamic glaze isn’t available, you can make your own by reducing balsamic vinegar over low heat until thickened.
Ascertain the mozzarella balls are well drained before assembling to prevent sogginess. Feel free to get creative with the presentation by arranging the bites in a fun pattern or using decorative platters to enhance the Halloween theme.
Skeleton Bone Breadsticks
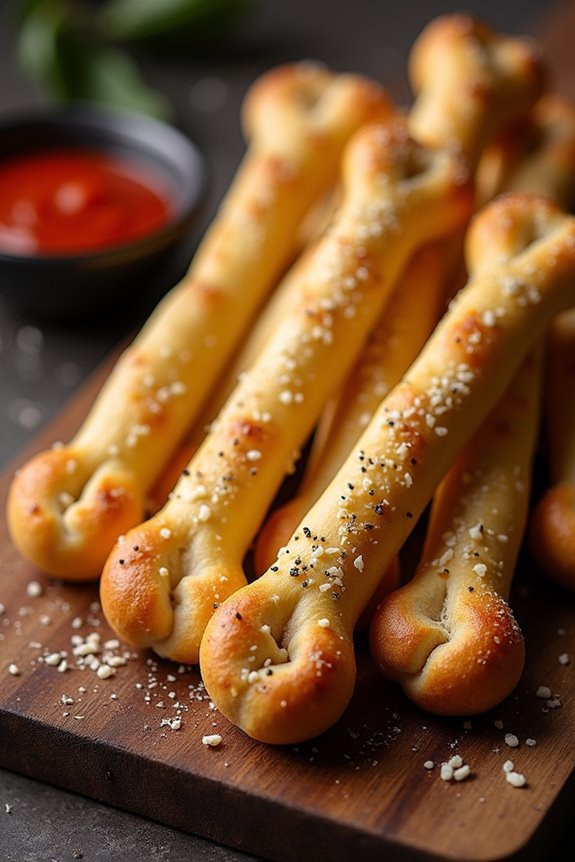
If you’re looking to add a spooky touch to your Halloween finger food spread, Skeleton Bone Breadsticks are a fun and delicious option. These bone-shaped breadsticks aren’t only visually striking but also incredibly tasty, making them perfect for a Halloween party. Whether you’re hosting a gathering or just looking to enjoy a themed snack with your family, these breadsticks are sure to be a hit.
The beauty of Skeleton Bone Breadsticks lies in their simplicity and versatility. Made from basic bread dough and shaped into eerie bones, they can be seasoned with a variety of toppings to suit your taste. Serve them alongside a marinara or cheesy dip to enhance their flavor and create a complete dish. With just a few ingredients and steps, you’ll have a batch of these spooky breadsticks ready to delight your guests.
Ingredients (serving size: 4-6 people):
- 1 package (about 1 pound) of refrigerated pizza dough
- 2 tablespoons olive oil
- 1/2 cup grated Parmesan cheese
- 1 teaspoon garlic powder
- 1 teaspoon Italian seasoning
- Salt to taste
- Marinara sauce for dipping
Cooking Instructions:
- Preheat the Oven: Start by preheating your oven to 375°F (190°C). This guarantees that your breadsticks will bake evenly and develop a nice golden color.
- Prepare the Dough: On a lightly floured surface, roll out the pizza dough into a rectangle approximately 12×10 inches. Use a knife or pizza cutter to divide the dough into strips about 1 inch wide.
- Shape the Bones: To create the bone shape, take each strip and gently tie a knot at both ends, leaving the middle straight. This forms the appearance of the bone with two knots representing the rounded ends.
- Season the Breadsticks: Place the shaped dough strips onto a baking sheet lined with parchment paper. Brush each breadstick with olive oil, making sure they’re well-coated.
- Add Toppings: Sprinkle grated Parmesan cheese, garlic powder, Italian seasoning, and a pinch of salt evenly over the breadsticks. These toppings will give the breadsticks a deliciously savory flavor.
- Bake: Put the baking sheet in the preheated oven and bake for 10-15 minutes or until the breadsticks are golden brown and crispy.
- Serve: Once baked, remove the breadsticks from the oven and let them cool slightly. Serve warm with a side of marinara sauce for dipping.
Extra Tips:
For an extra spooky effect, consider using food-safe black food coloring to lightly brush certain areas of the bones before baking, giving them an aged look. If you want to add a touch of sweetness, sprinkle a little sugar along with the cheese and seasoning.
Make sure not to over-knead the dough when shaping, as this can make the breadsticks tough. Finally, these breadsticks taste best fresh out of the oven, but they can be reheated in a toaster oven to regain their crispiness if made in advance.
Bloody Finger Cheese Sticks

Looking to add a spooky twist to your Halloween party spread? Bloody Finger Cheese Sticks are the perfect eerie appetizer to thrill your guests. These cheese sticks resemble severed fingers complete with nails and blood, making them a creepy yet tasty treat. The combination of gooey cheese, savory dough, and a touch of tomato sauce will satisfy both young and old goblins alike. Easy to prepare, this recipe will make your Halloween gathering both fun and frightful.
These Bloody Finger Cheese Sticks aren’t only delicious but also visually impressive, adding a festive touch to your Halloween table. With just a few simple ingredients, you can create these gory snacks that will definitely be a conversation starter. Whether you’re hosting a Halloween party or simply looking to enjoy a macabre snack, these cheese sticks are sure to delight. Follow the recipe below to make a serving size of 4-6 people.
Ingredients:
- 1 package (8 sticks) of string cheese
- 1 tube of refrigerated crescent roll dough
- 8 whole almonds, blanched
- 1/4 cup marinara sauce or tomato sauce
- 1 tablespoon butter, melted
- Red food coloring (optional)
Instructions:
- Preheat the Oven: Preheat your oven to 375°F (190°C). This guarantees that the cheese sticks bake evenly and achieve a golden brown color.
- Prepare the Dough: Unroll the crescent roll dough and separate it into triangles. Cut each triangle in half lengthwise to create two smaller triangles per crescent.
- Wrap the Cheese: Place a string cheese stick at the base of each dough triangle. Roll the dough around the cheese, making sure it’s fully enclosed, but leave a small portion of cheese exposed at one end to resemble a fingertip.
- Shape the Fingers: Gently mold the dough around the cheese to create a finger shape. Pinch the dough slightly at the joint areas to mimic knuckles for a more realistic look.
- Add the Nails: Press a blanched almond onto the exposed end of each cheese stick to create the appearance of a fingernail. Make sure it’s securely attached.
- Bake the Fingers: Place the assembled fingers on a baking sheet lined with parchment paper. Brush each one with melted butter to promote browning.
- Bake: Bake in the preheated oven for 10-12 minutes, or until the dough is golden brown and the cheese is melted.
- Add the Blood: Once baked, let the fingers cool slightly. Use a small brush or spoon to apply marinara sauce or tomato sauce around the almond (nail area) and the knuckles to give the appearance of blood. For extra effect, you can add a drop or two of red food coloring to the sauce.
Extra Tips: To make your Bloody Finger Cheese Sticks even more realistic, use a knife to score lines on the dough before baking to mimic the wrinkles and texture of a finger. If you don’t have string cheese, you can use mozzarella sticks cut into appropriate lengths. For a spicier variation, add a pinch of cayenne pepper to the marinara sauce for an extra kick. Serve these with a side of extra marinara sauce for dipping to keep the spooky theme alive.
Pumpkin Patch Brownie Bites
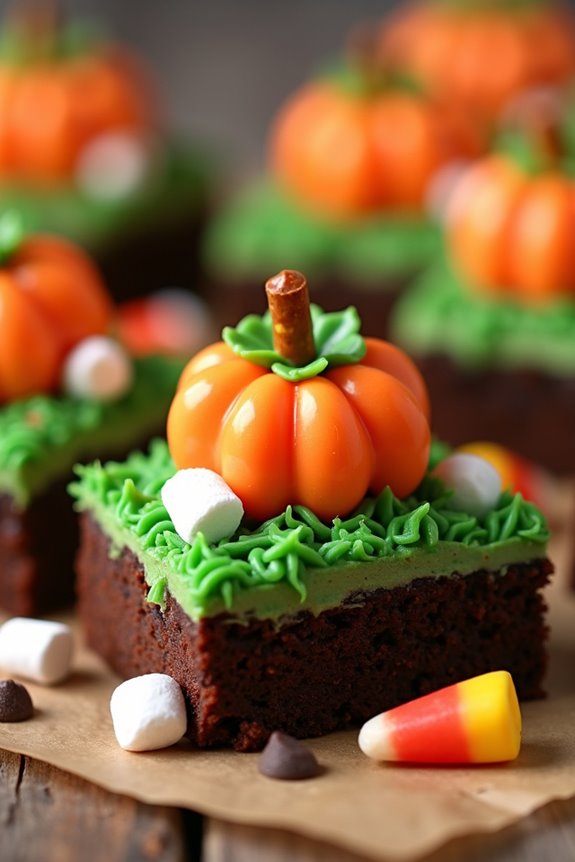
Pumpkin Patch Brownie Bites are the perfect Halloween finger food, combining the rich, fudgy goodness of brownies with a festive pumpkin patch theme. These adorable treats aren’t only delicious but also visually appealing, making them a hit at any Halloween party.
The brownie base provides a decadent foundation, while the decorative pumpkin patch on top, made from colorful frosting and candy, adds a whimsical touch that captures the spirit of the season.
These brownie bites are easy to make and require minimal ingredients, which means you can whip them up quickly for any last-minute gatherings. The recipe is designed to serve 4-6 people, making it ideal for small parties or family get-togethers.
Whether you’re hosting a Halloween bash or just want to surprise your family with a spooky treat, these Pumpkin Patch Brownie Bites are sure to delight both kids and adults alike.
Ingredients for 4-6 servings:
- 1 box of brownie mix (plus ingredients required on the box, typically water, vegetable oil, and eggs)
- 1 cup of green icing
- 1/2 cup of orange icing
- 1/2 cup of mini pretzel sticks
- 1/4 cup of candy corn
- 1/4 cup of mini marshmallows
- 1/4 cup of chocolate chips
Cooking Instructions:
- Prepare the Brownie Mix: Preheat your oven according to the instructions on the brownie mix box. Prepare the brownie batter as per the package directions. This typically involves mixing the brownie mix with water, vegetable oil, and eggs until smooth.
- Bake the Brownies: Pour the brownie batter into a greased or lined mini muffin tin, filling each cup about two-thirds full. Bake in the preheated oven for the time suggested on the box, usually around 20-25 minutes, or until a toothpick inserted into the center comes out clean. Allow them to cool completely before proceeding to the next step.
- Decorate the Brownies: Once the brownies are cool, remove them from the muffin tin. Use a small dollop of green icing on top of each brownie to create a grassy patch. Then, pipe or spread a small amount of orange icing on top of the green icing to form the pumpkin shape.
- Add the Finishing Touches: Break the mini pretzel sticks into small pieces and insert them into the orange icing to resemble pumpkin stems. Place a piece of candy corn next to each pumpkin to enhance the Halloween theme. Sprinkle chocolate chips and mini marshmallows around the pumpkin to add texture and flavor.
- Serve and Enjoy: Arrange the decorated brownie bites on a serving platter, and they’re ready to be served at your Halloween party!
Extra Tips: To make the Pumpkin Patch Brownie Bites even more festive, consider using a variety of colored icing to create pumpkins of different colors, such as white or yellow.
If desired, you can make your own homemade brownie batter for a more personalized touch. Additionally, if you don’t have mini muffin tins, you can bake a regular brownie tray and use a round cookie cutter to cut out circular brownie bites.
Remember to store any leftovers in an airtight container to maintain freshness.

